¶ 01 Before You Start
Before starting the assembly and operation of Ray, please read the following content carefully.
- Disclaimer
- General safety
- Laser safety
- Fire safety
- Warnings & Labels of Ray
- Warnings & Labels of the Laser Module
- Precautions & Emergency measures
- Environment requirements of Ray
- Tips and notes for assembly
- Used_symbols
¶ O2 Assembly & Installation
To complete the assembly, you can either read the Assembly Guide in PDF format, or follow the online instructions below.
If you have purchased the Ray bundle with the 20W/40W Laser Module and Enclosure, please assemble in the following order. If you have purchased other bundles, skip the steps that include items you do not have.
- 2.1 Assembling the machine body
- 2.2 Installing the toolhead
- 2.3 Assembling the Enclosure
- 2.4 Installing the air assist pump
¶ 03 Setup & Preparation
¶ 3.1 Turning on the machine
For safety reasons, you need to go through several steps to turn on the machine.
¶ 3.2 Placing the laser engraving and cutting platform
¶ 3.3 Preparing the software
We recommend that you install Snapmaker Luban to generate G-codes for laser engraving and cutting, as it is a tailor-made software for Snapmaker products.
If you have already installed Luban, make sure to update it to at least v4.9.
Snapmaker Ray also supports LightBurn. For detailed tutorials, refer to Using Ray/Artisan/2.0 with LightBurn.
¶ 3.4 Connecting the machine to Luban
You can connect Ray to Luban through either a serial port or Wi-Fi and perform a variety of operations, including file transfer, pause, resume, and stop.
For Snapmaker Ray, the Wi-Fi connection can only be established upon the serial-port connection.
To achieve optimal file transfer performance, we recommend using the Wi-Fi connection.
¶ 3.5 Updating the firmware (recommended)
Due to possible differences between the factory version and the latest version in terms of functionality experience and indicator light meanings, we strongly recommend updating the firmware of Ray before the first-time use and keeping the firmware up to date during subsequent use to obtain the best user experience.
¶ 04 First Work
In order to help you quickly become familiar with the workflow for using Ray with Luban and completing your first laser creation, this section will guide you through Luban's Beginner's Guide. You will have fun with the provided laser material and the example project tailored for your first creative experience.
¶ 4.1 Preparing the G-code File
-
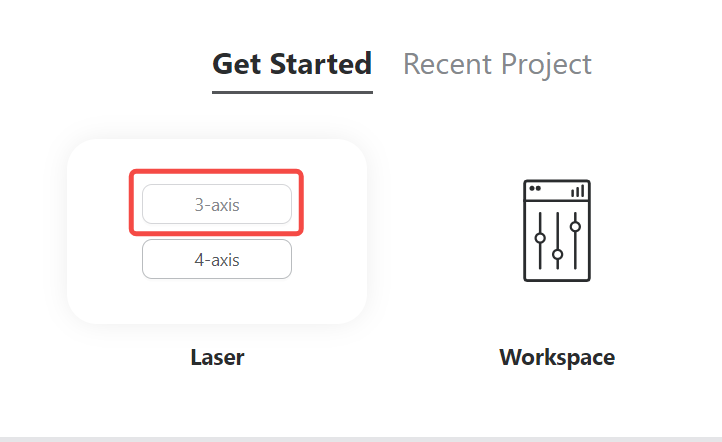
At the top-left corner of Workspace, click Back to return to the Home page of Luban. Then, select Laser > 3-axis to enter the Laser G-code Generator.
-
Familiarize yourself with the basic operations by following the Beginner's Guide. During this process, Luban will automatically load the example project and generate the G-code file.
If the Beginner's Guide does not pop up or unexpectedly closes, you can access it by clicking Help > Beginner's Guide in the menu bar.
You can also import your own files and configure the parameters.
- After the G-code file is generated, click Export > Load G-code to Workspace at the bottom-right corner. The interface will automatically redirect to Workspace.
¶ 4.2 Preparing the Material
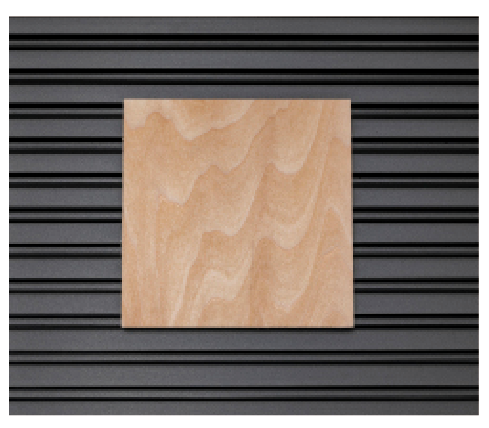
Take out the basswood plywood sheet from the material bundle, then place it on the laser engraving and cutting platform.
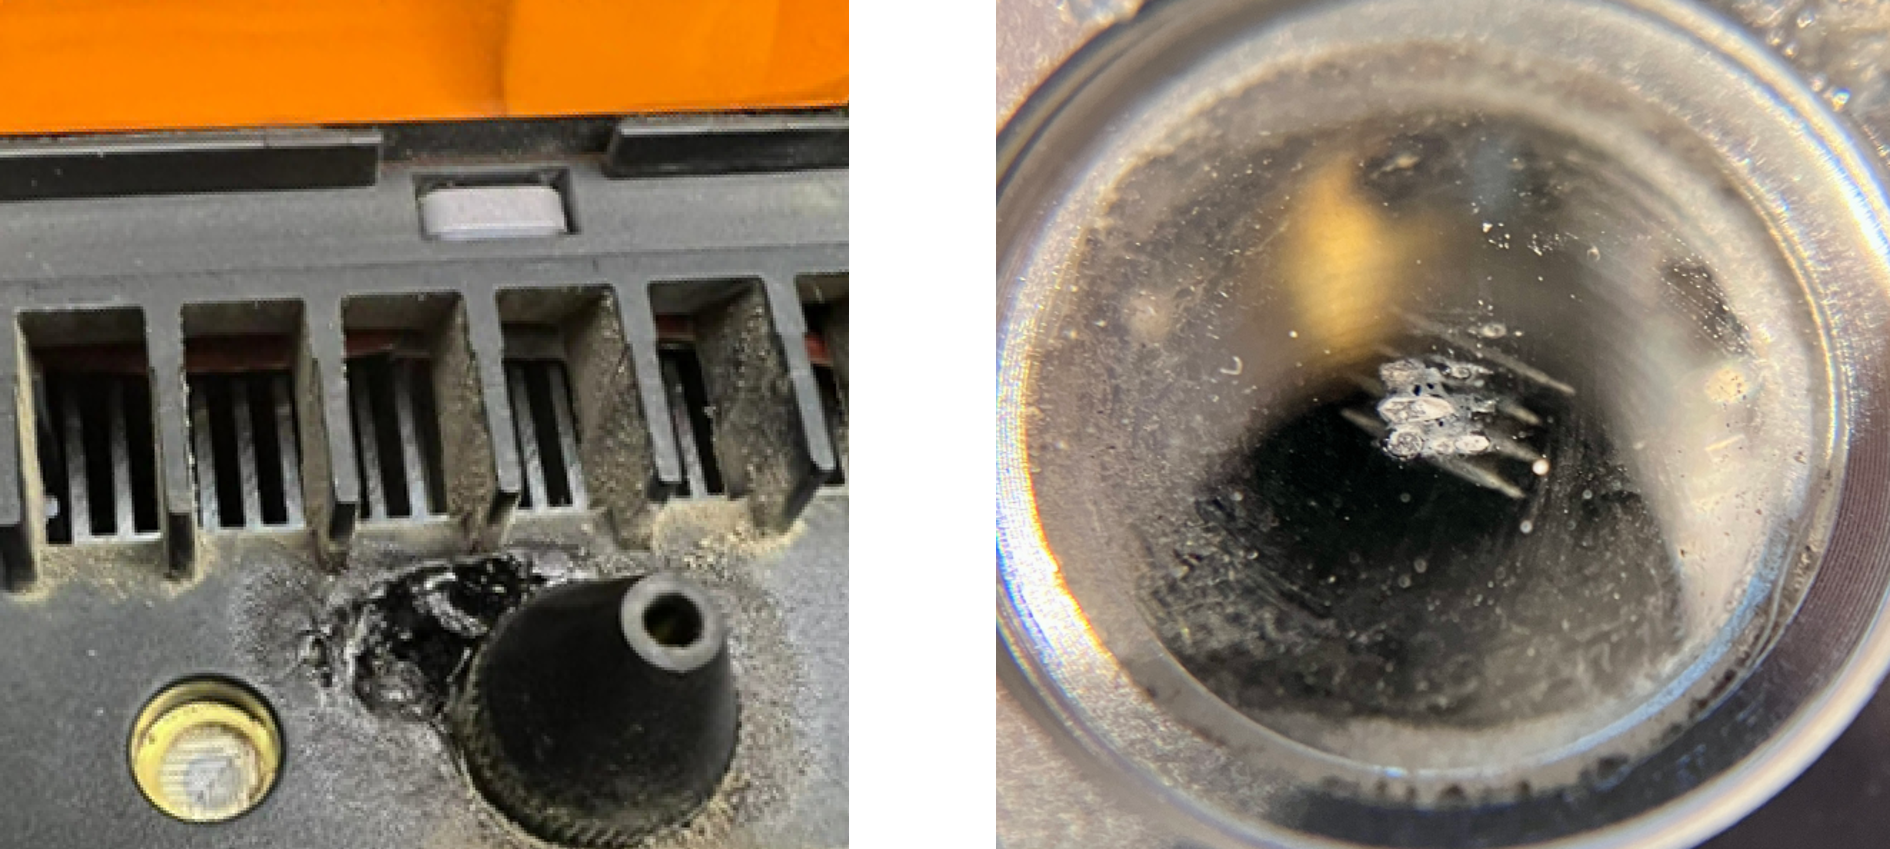
Do not use highly reflective materials (except for 304 stainless steel and anodized aluminium), as they can reflect blue light, which may cause burning on the bottom cover of the laser module, and increase the safety risk of burning nearby objects or even causing fires.
Should you need to use reflective materials, apply laser marking paper or a coating of paint to the surfaces of the reflective materials. Laser absorbing coatings are materials designed to absorb laser light and convert it into heat, rather than reflecting or transmitting it. Before making a purchase of laser marking paper or materials for coating, thoroughly understand the precautions for use.
Ensure that the tools do not obstruct the machining areas or collide with the toolhead or any part of the machine.
If you are worried that the material might move during machining, you can use additional securing tools to fasten the material to the platform, such as the mask tape.
¶ 4.3 Adjusting the laser height
Adjusting the laser height to focus the laser can ensure optimal engraving and cutting outcomes.
¶ 4.4 Setting the XY work origin
The XY work origin for the example project should be set at the left-bottom corner of the workpiece.
¶ 4.5 Transferring the G-code file to the machine
If you have connected the machine to Luban, we recommend transferring the G-code file through Luban.
¶ 4.6 Starting laser engraving and cutting
- Check the state of the Enclosure.
- IF you have installed the Enclosure, make sure the Enclosure door is closed and will stay closed throughout the task.
- IF the Enclosure is not installed or purchased, be sure to turn off Door Detection in Luban's Workspace > Settings in the top menu bar. Otherwise, the machine will not start the task.

- Press and hold the work switch on the integrated controller until the machine starts the task.
Keep the machine attended throughout the task!
During laser machining, you can control the task using the following methods:
-Work switch: Press to pause/resume; Press and hold to stop.
-Luban: Click Pause/Resume/Stop to perform the corresponding operation.
The Ray Enclosure supports Door Detection, which can detect the real-time opening and closing status of the Enclosure door. When the sensor detects that the Enclosure door is opened:
-If the machine is on standby, new tasks can not be started until the Enclosure door is closed.
-If the machine is performing tasks, it will immediately pause the ongoing task. To resume, you need to first close the Enclosure door, then press the work switch or click the Resume button on Luban.
¶ 05 Maintenance
To ensure the engraving and cutting effects, please perform the following maintenance operations once a week.
- Cleaning the laser engraving and cutting platform
- Cleaning the laser lens protector
- Cleaning the bottom cover
For more maintenance operations, refer to Maintenance for Ray.