¶ 💡Compatibility
This guide applies to the following device. Verify before proceeding:
- Device Model: U1
¶ ⏰ When to Use This Guide
-
The automatic loading function is completely unresponsive. The indicator light on the filament feeder does not illuminate during the loading process.
-
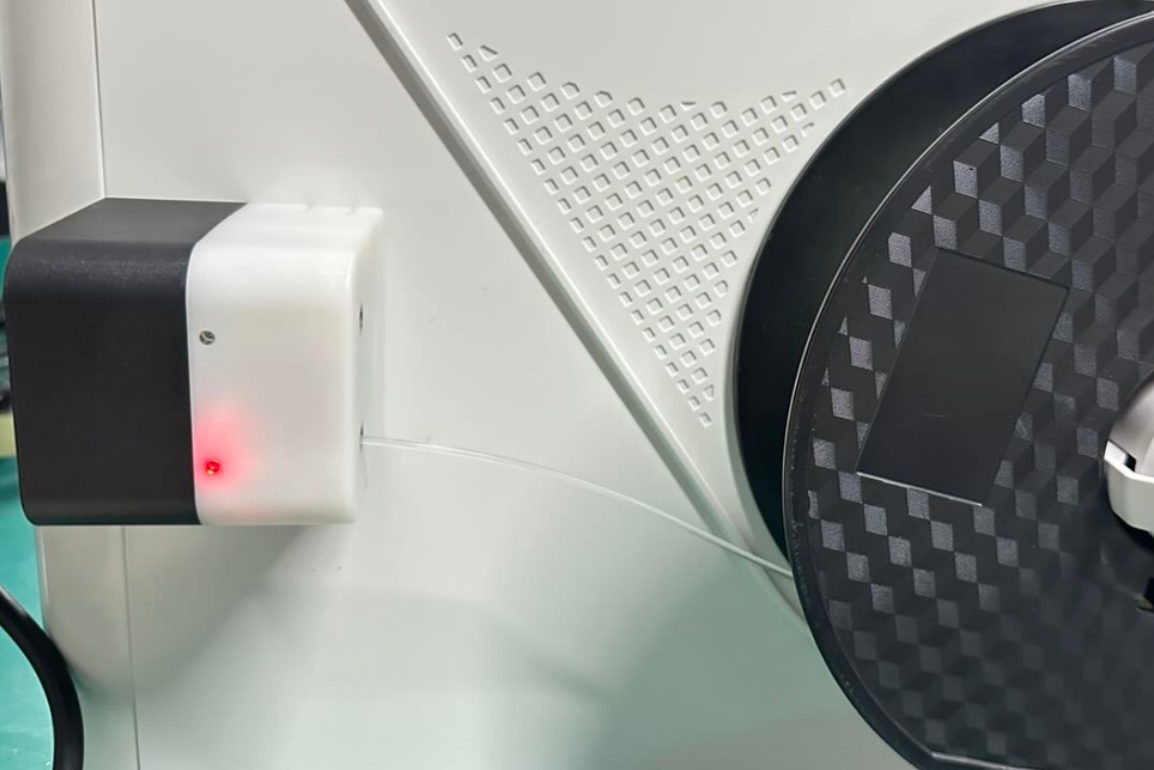
The indicator light on the filament feeder turns red during the loading process.
The touchscreen displays an error code where the second and third groups of numbers are05250003, for example,0002-0525-0003-0051.
¶ 📋 Quick Info Card
- Difficulty: ⭐⭐⭐☆☆ (Intermediate)
- Estimated Time: 20-30 minutes
- Required Skills: Accessing the printer via Fluidd
¶ 🔍 Quick Diagnosis
Which scenario matches your situation?
-
The indicator light on the filament feeder does not illuminate > Go to Scenario 1
-
The indicator light on the filament feeder is red > Go to Scenario 2
¶ 🔧 Preparations
¶ Required Tools
- A device with a web browser (computer/phone/tablet)
¶ ⚠️ Important Notes
¶ Safety Notes
Do not plug or unplug any connectors while the machine is powered on, unless instructed otherwise.
¶ Before You Star
If you need to access the printer via Fluidd, ensure your device (computer/phone/tablet) and the printer are connected to the same network.
¶ 🛠️ Troubleshooting Steps
¶ Scenario 1: Filament Feeder Indicator Light Does Not Illuminate
¶ Step 1. Check If Automatic Loading Is Disabled
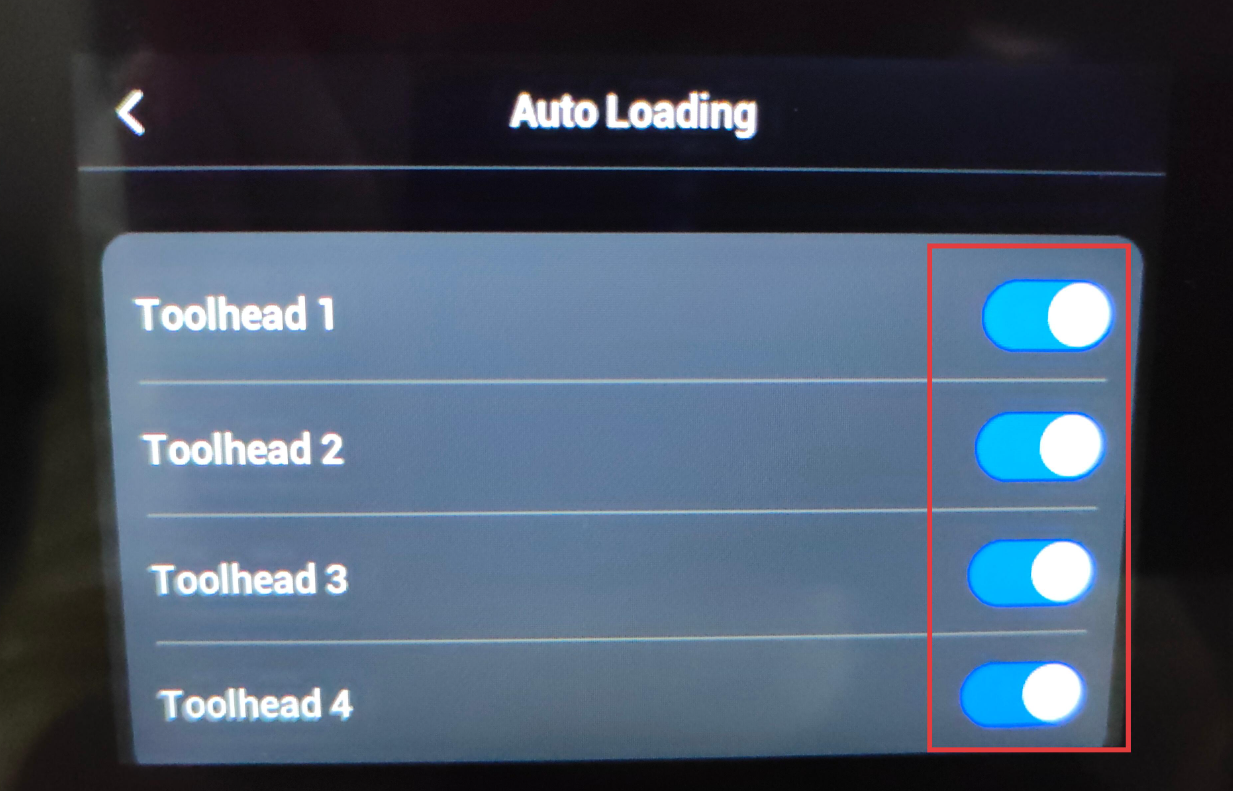
(1) On the touchscreen home screen, navigate to Settings. Select Print Preferences and then Auto Loading. Enable the Automatic Loading function.
(2) Attempt to load filament again.
If Automatic Loading is confirmed to be enabled, but the indicator light still does not illuminate during loading, proceed to Step 2.
¶ Step 2. Check If the Filament Runout Sensor Is Disabled
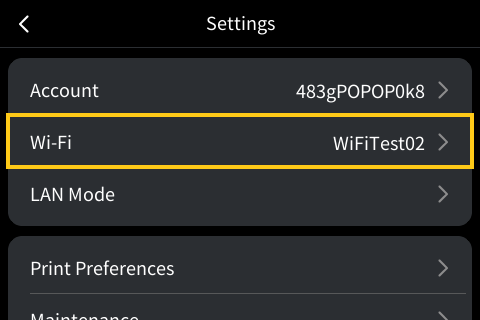
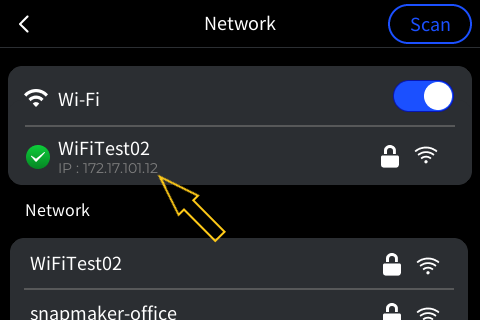
(1) On the touchscreen home screen, navigate to Settings, select Wi-Fi, and then check the printer's IP address.
(2) Enter the printer's IP address into the browser on your device (computer/phone/tablet) to access the printer via Fluidd.
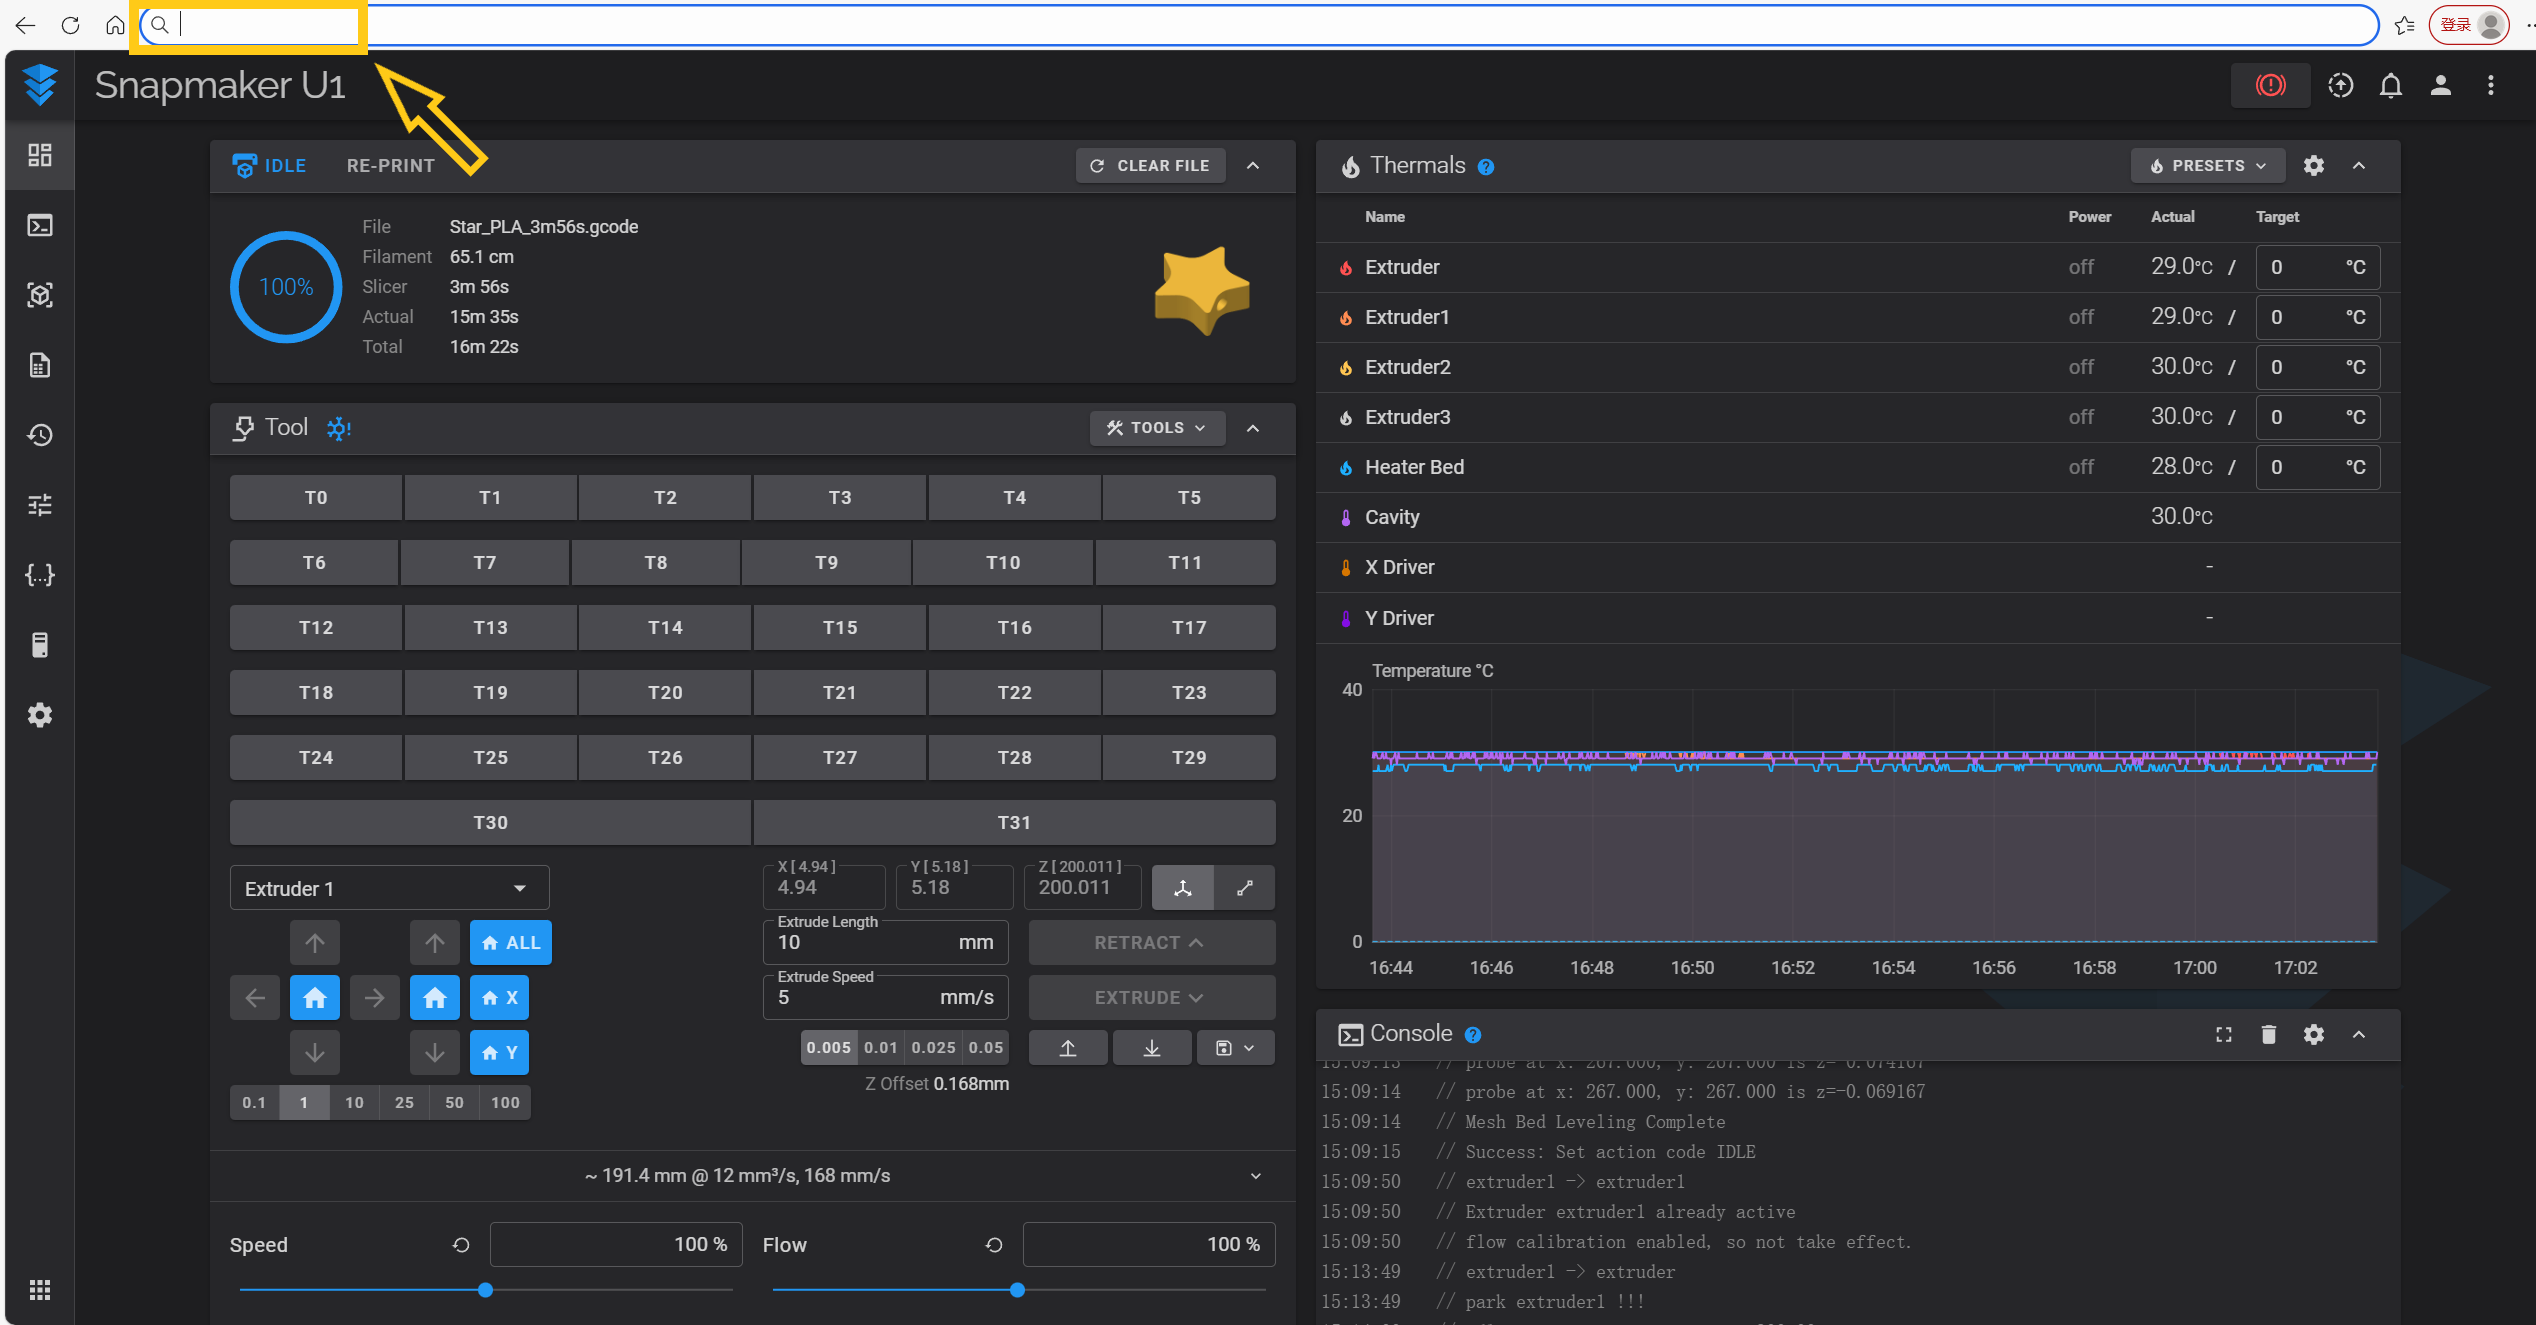
Fluidd is a tool that allows you to operate and control 3D printers running Klipper firmware via a web browser.
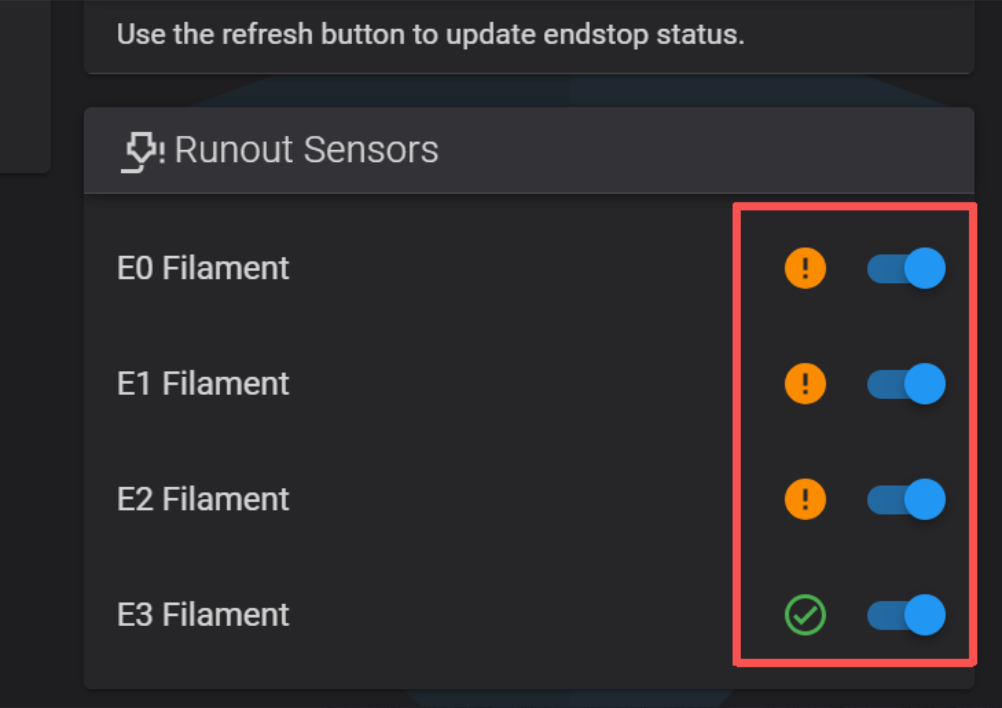
(3) Enable the filament runout sensor for each toolhead.

(4) Attempt to load filament again.
If the filament runout sensor is confirmed to be enabled, but the indicator light still does not illuminate during loading, proceed to Step 3.
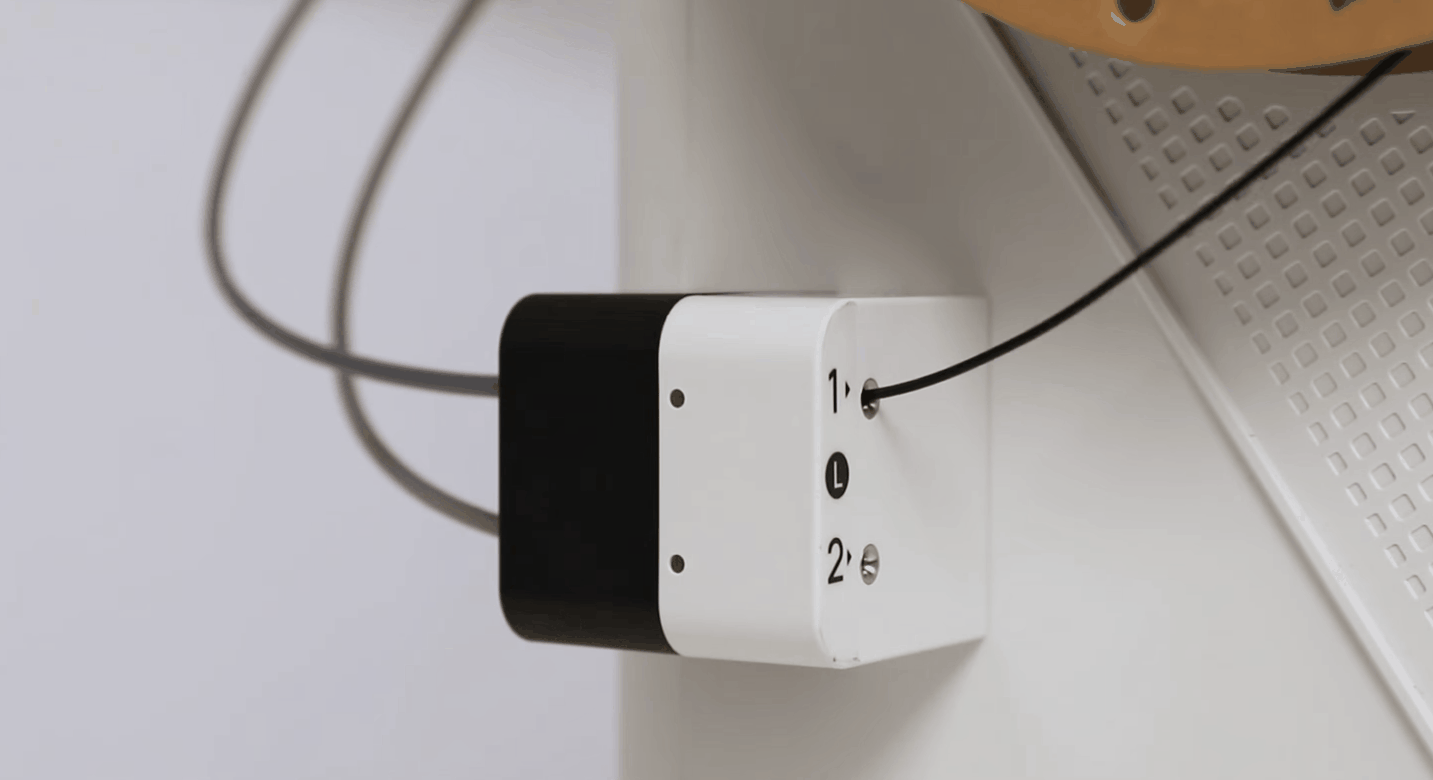
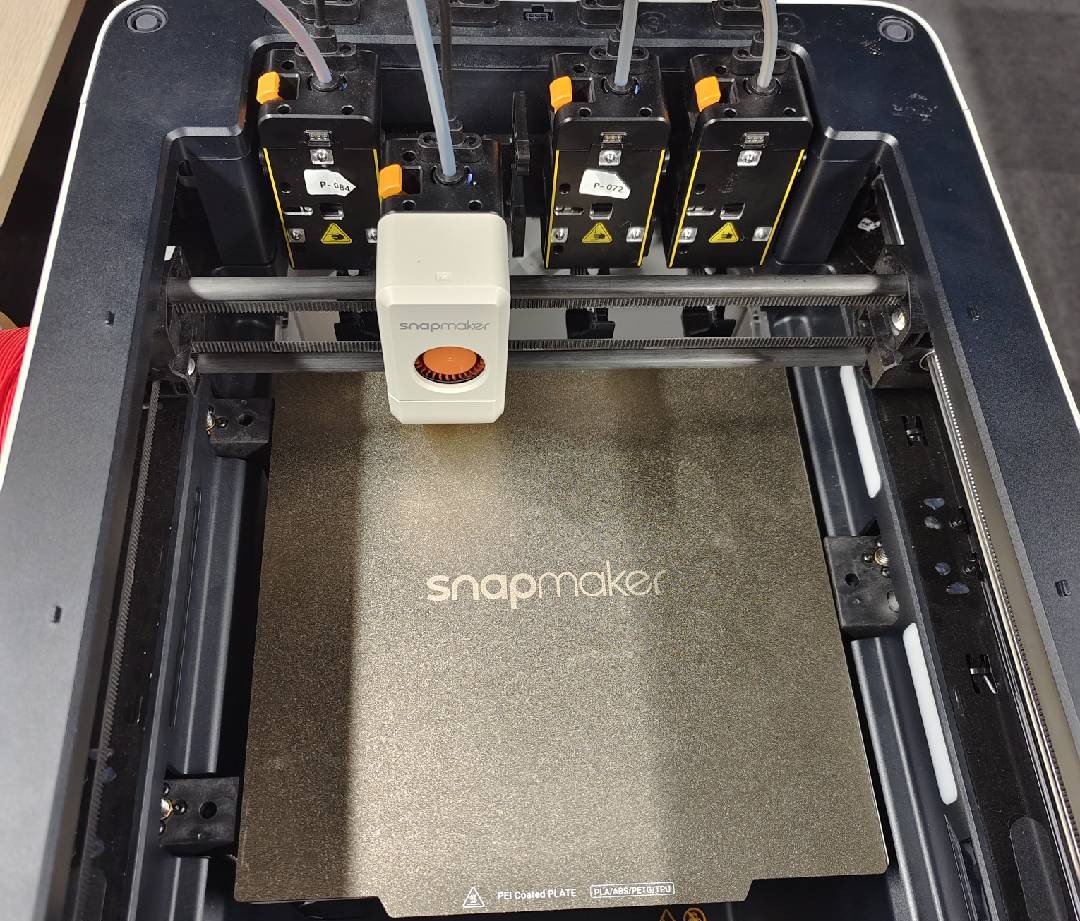
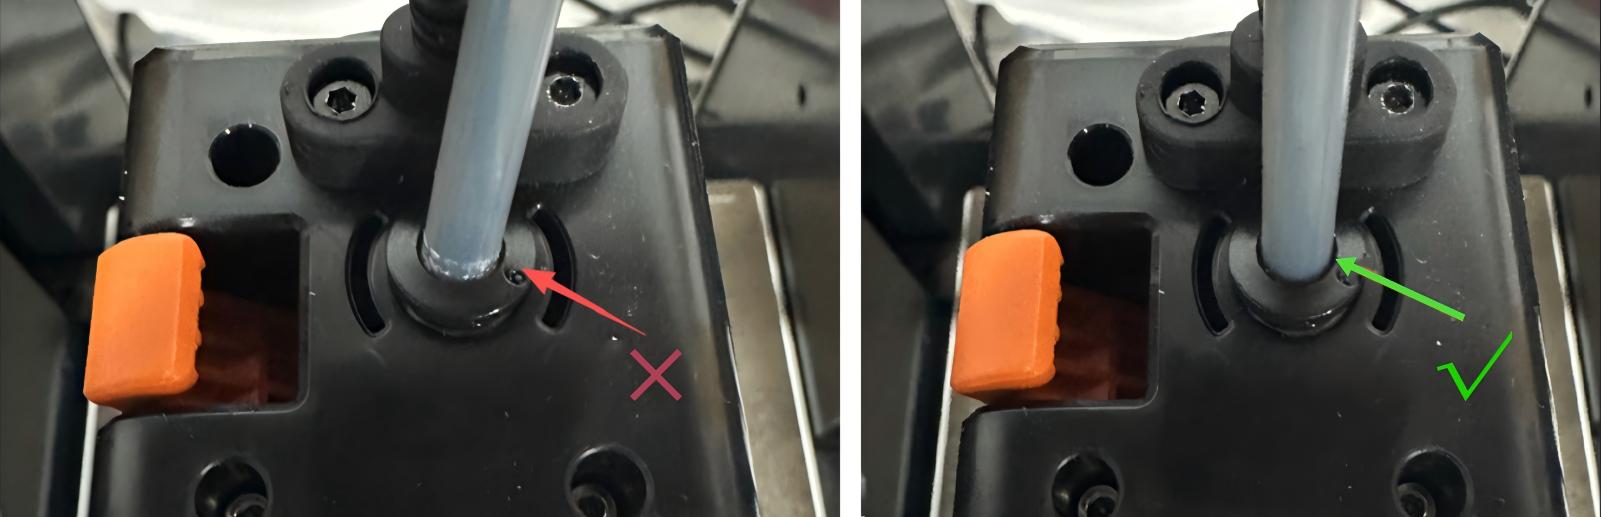
¶ Step 3. Check Filament Feeder Wiring
(1) Power off the machine.
(2) Using the left feeder as an example: First, press down at the indicated location (for the right feeder, the press location is at the bottom). Slide the feeder towards the front of the machine, then detach it from the slots.

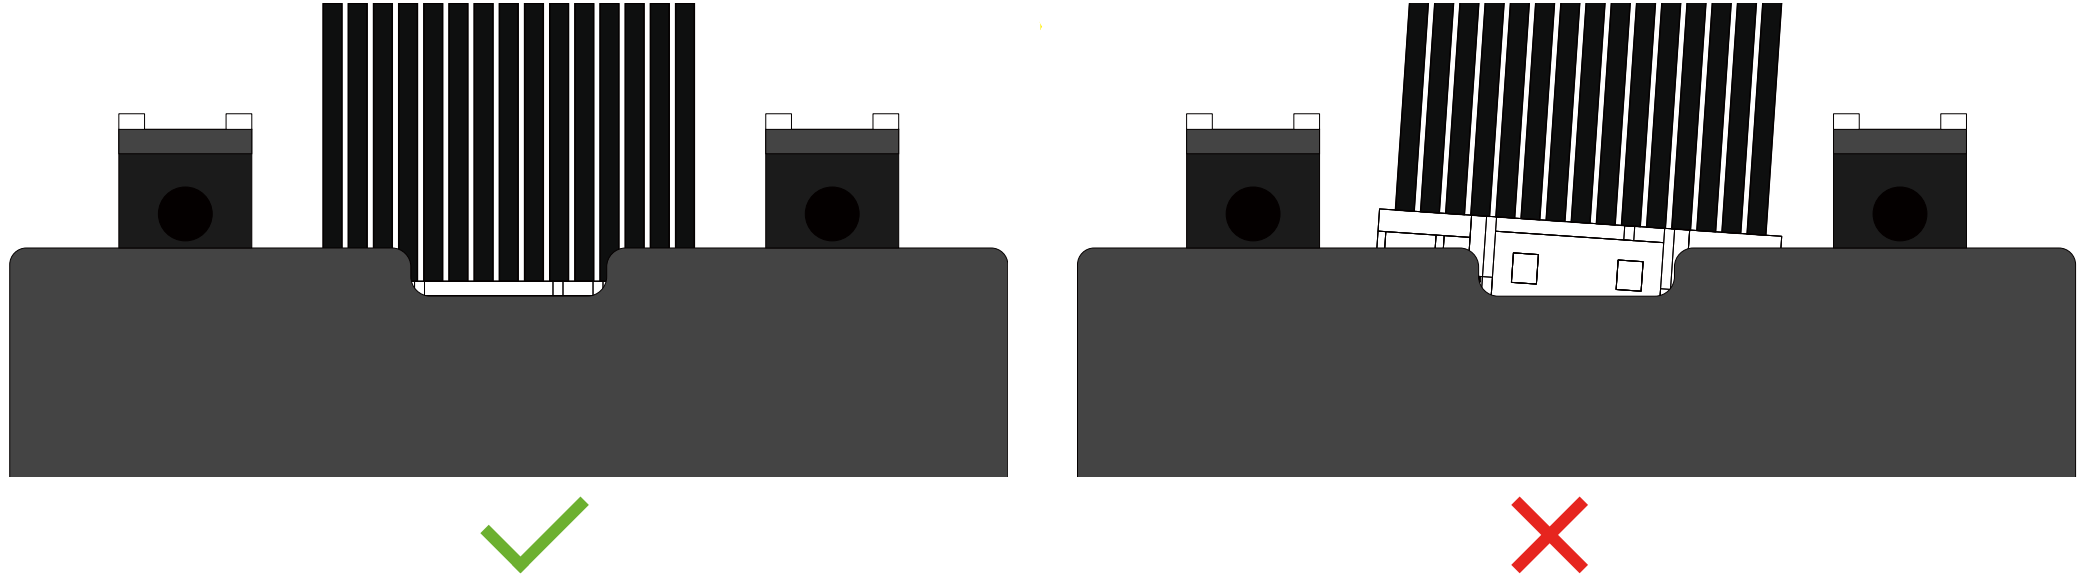
(3) Ensure the connector is fully inserted into the receptacle without tilting.
(4) Reinstall the feeder.
(5) Power on the machine and attempt to load filament again.
If the indicator light still does not illuminate during loading, you can try swapping the positions of the left and right feeders to rule out a potential fault with the feeder itself.
¶ Scenario 2: Filament Feeder Indicator Light Is Red
¶ Before You Star
Understand and distinguish the three stages of automatic loading: Pre-loading > Feeding > Extruding.
Stage 1: Pre-loading
After filament enters the feeder, it is transported to a point near the toolhead (but does not enter the toolhead).
Stage 2: Feeding
The typical sign is the toolhead positioning itself in front of the build plate, waiting for the filament to enter the toolhead so it can be detected by the filament runout sensor.
Stage 3: Extruding
The typical sign is the toolhead positioning itself near the parking location. The filament has now entered the extruder gears. The printer determines if extrusion is successful based on signals from the feeder's mileage wheel and eddy current sensor.
¶ Troubleshooting
Click on the error code displayed on your touchscreen below to expand and read the specific troubleshooting steps.
¶ Errors During the Pre-loading Stage
Error Code: 0001-0525-0003-0015
(1) Check if there is residual filament in the toolhead. If the filament status bar shows "?", residual filament is present. 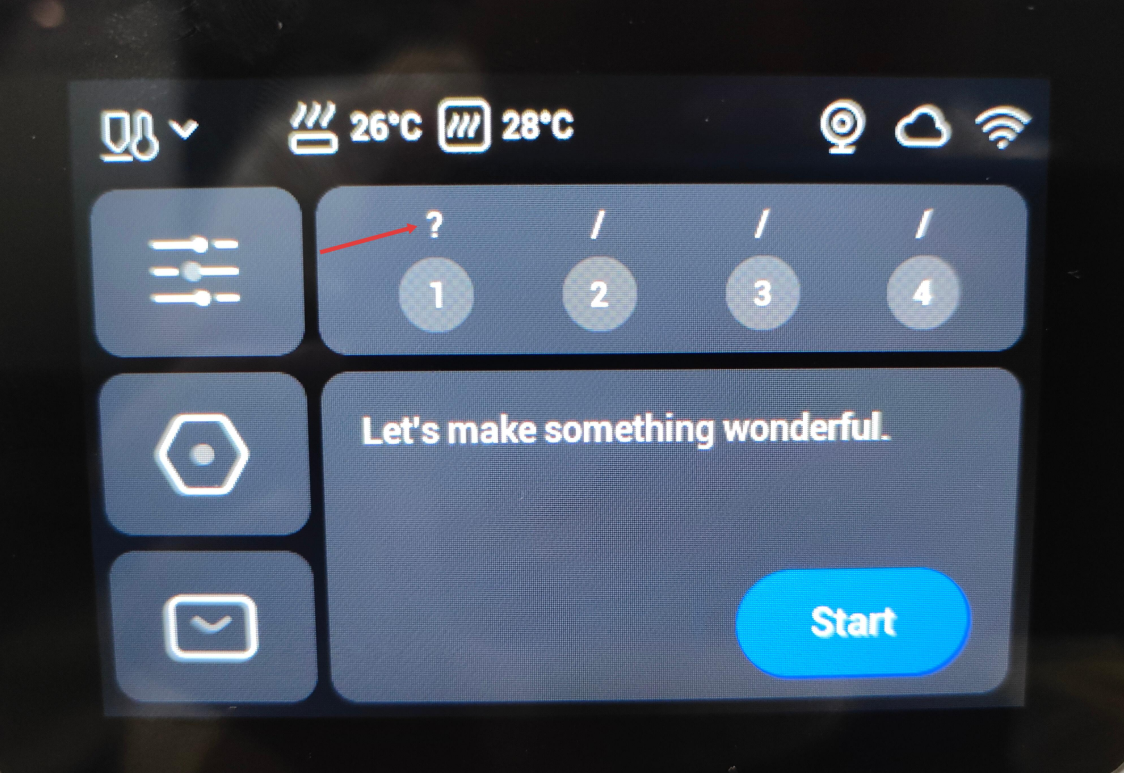
(2) Refer to Rigid Filament Unloading or Flexible Filament Unloading to complete the unloading process.
(3) Attempt to load filament again.
Error Code: 0001-0525-0003-0011
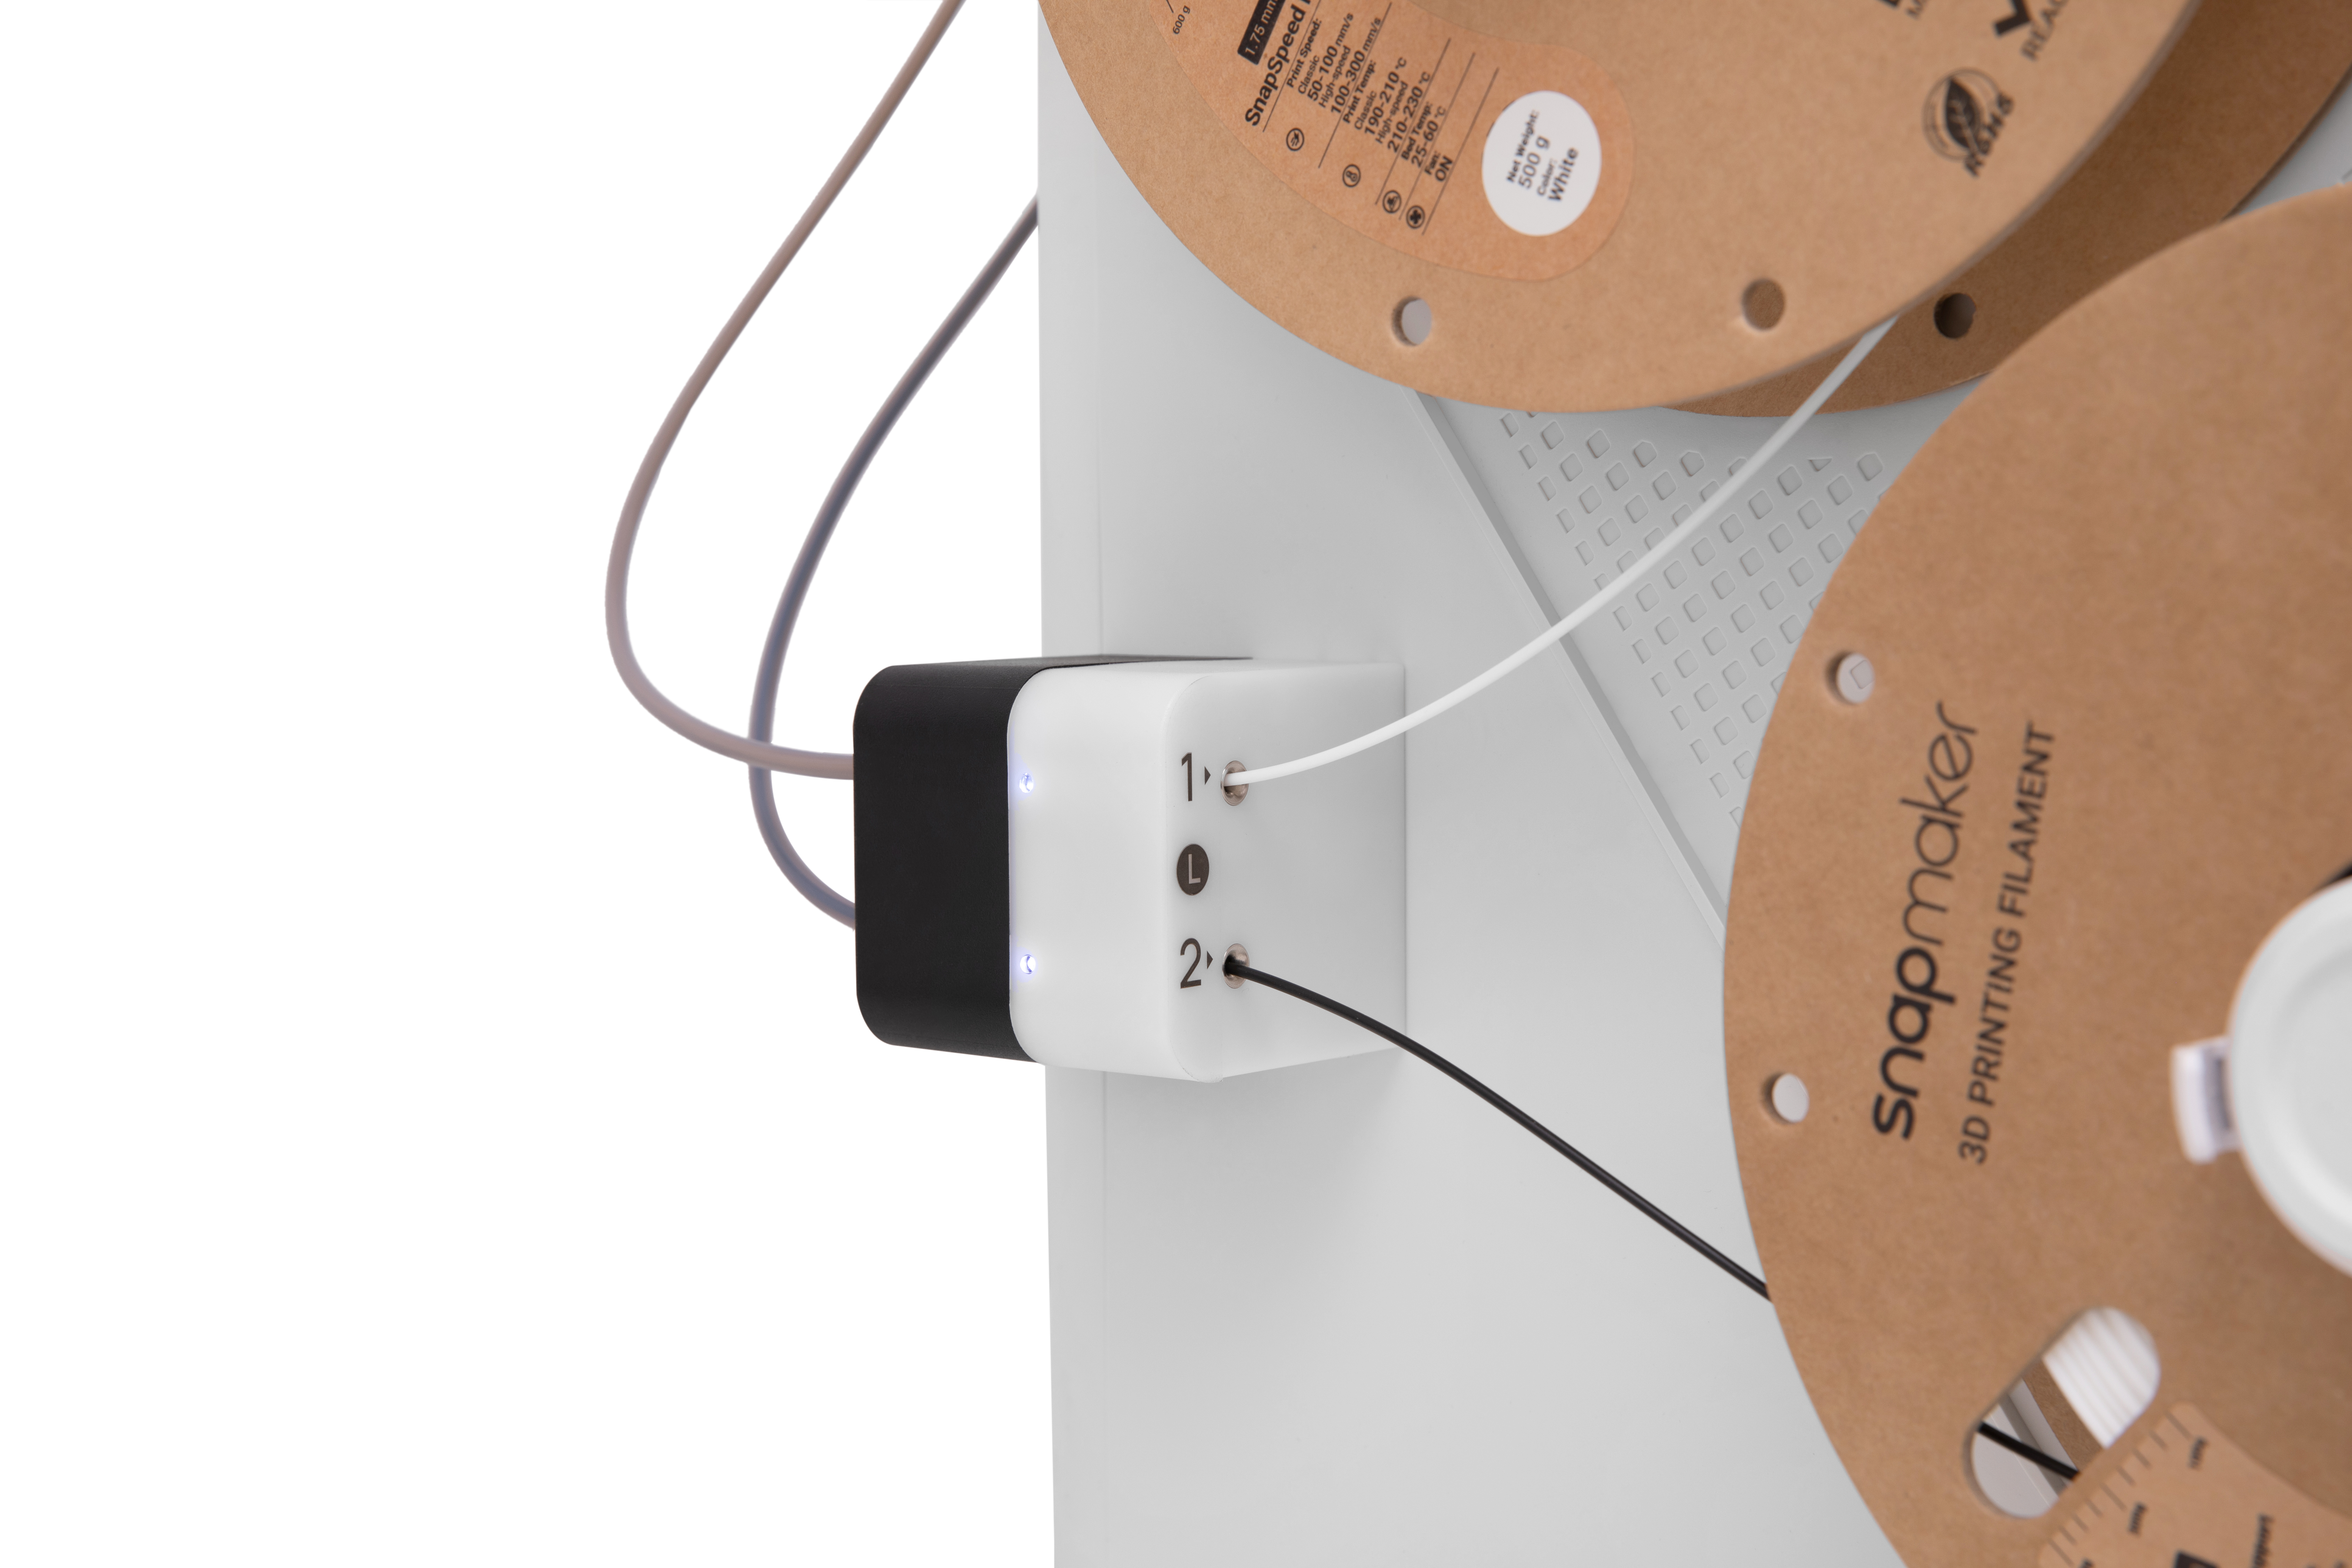
(1) To reduce loading resistance, ensure the filament spool is not tangled. 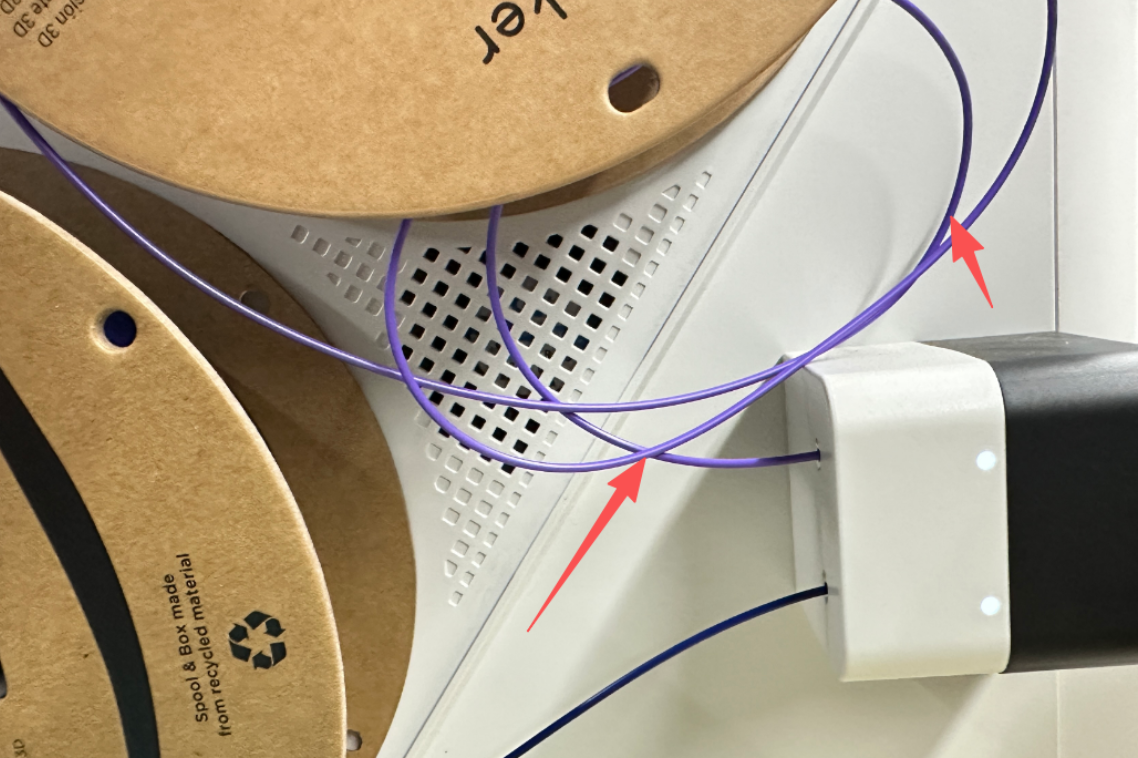
If you are using the SnapDryer, to minimize tube bending and reduce loading resistance, it's recommended to install only one dryer on the side.
(2) Ensure the filament spool weight is 1kg or less.
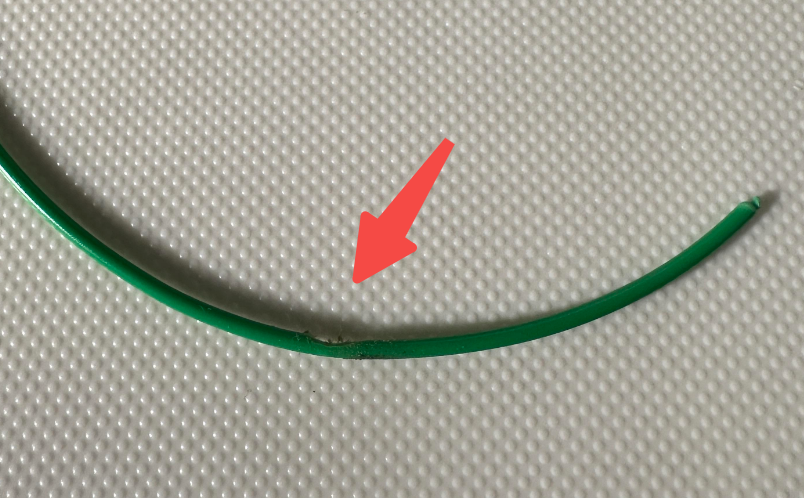
(3) Ensure the filament is not stuck inside the feeder or the filament tube.
- If filament is stuck inside the feeder, remove it and check for signs of "grinding" or "biting." Trim off the damaged section.
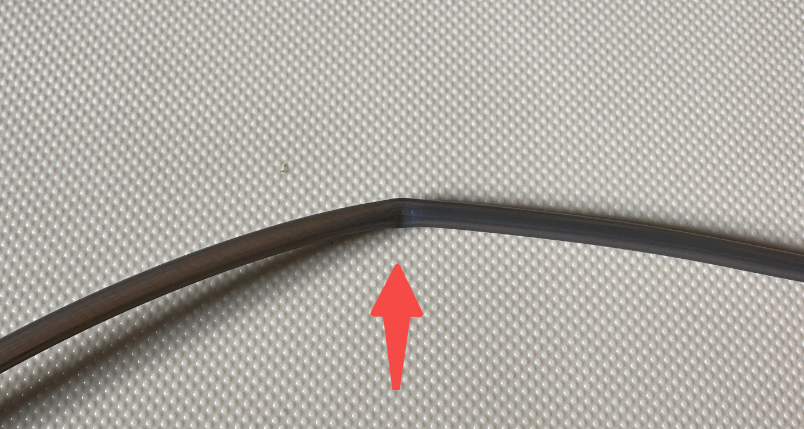
- If filament is stuck in the filament tube, ensure the tube is not deformed, e.g., kinked.
(4) Attempt to load filament again.
¶ Errors During the Feeding Stage
Error Code: 0002-0525-0003-0032
(1) If this issue occurs right after initial machine assembly, refer to "U1 filament loading anomaly" under "Related Resources" below for troubleshooting.(2) If the filament has not reached the toolhead's filament runout sensor, ensure the filament tube is fully inserted.
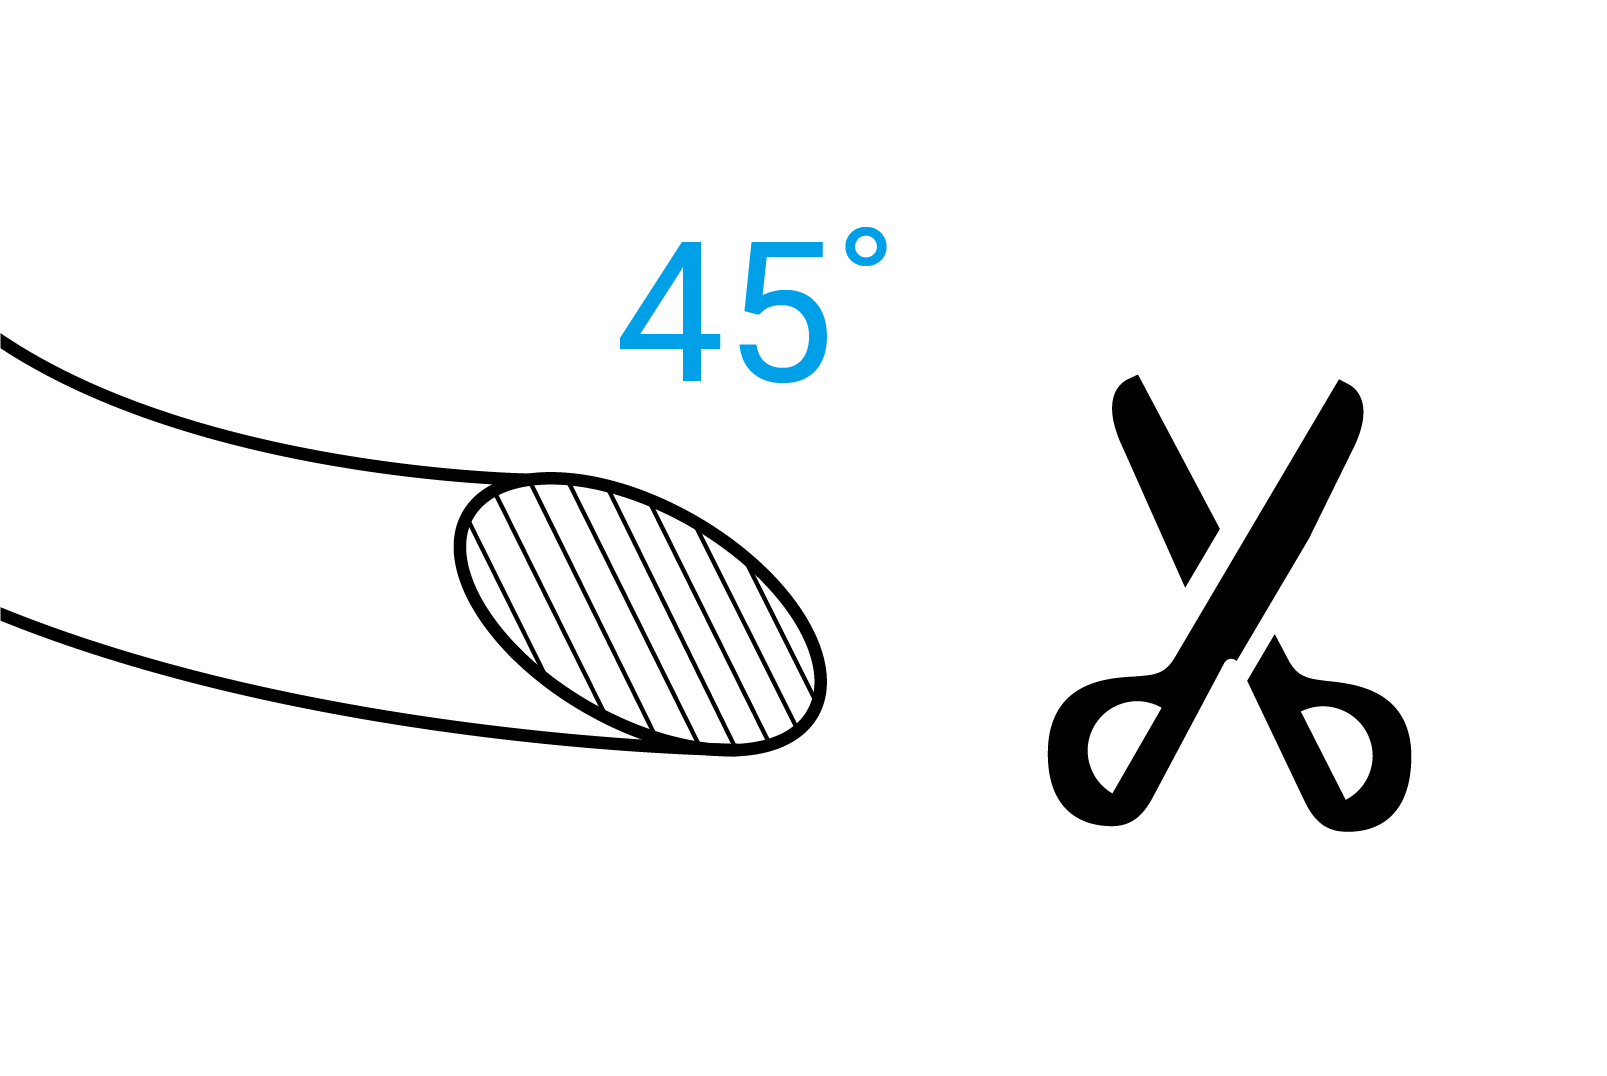
(3) Ensure the end of the filament is properly prepared (e.g., an approximately 45° angle).
(4) Attempt to load filament again.
¶ Errors During the Extruding Stage
Error Code: 0002-0525-0003-0051
(1) If the filament has reached the nozzle but cannot complete the pre-extrusion, refer to "Nozzle clogging" under "Related Resources" below for troubleshooting.(2) Attempt to load filament again.
If the issue persists, you can refer to the U1 error code reference table for further analysis.
¶ ✅ Function Verification
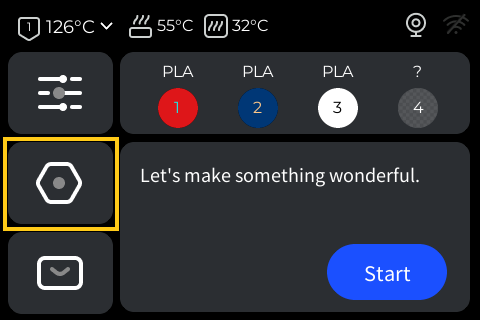
- Insert filament into the feeder. The machine can complete the pre-loading stage, and the feeder indicator light is white.
- After starting a print, the toolhead feeds and extrudes filament normally.
¶ 📚 Related Resources
¶ 💬 Contacting Support
If the issue remains unresolved after following the steps above, please submit a support ticket via the Snapmaker App. Attach your troubleshooting results along with relevant pictures or videos for our technical support team. We are here to help.