¶ 💡 Compatibility
This guide applies to the following machine. Please note when referencing:
- Machine model: U1
¶ ⏰ When to Use This Guide
Z-axis step loss refers to a condition where the Z-axis stepper motor fails to execute all drive commands due to excessive mechanical resistance, insufficient motor drive current, excessive movement speed or acceleration, or a load exceeding the motor's capability, resulting in the Z-axis not accurately reaching its target position.
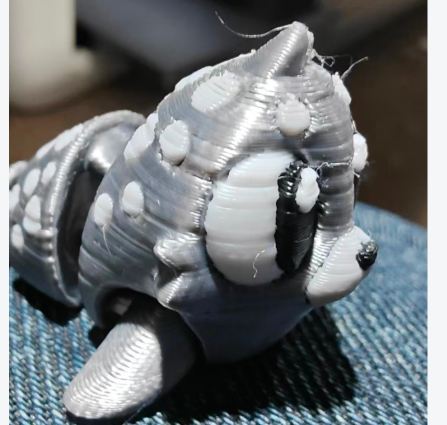
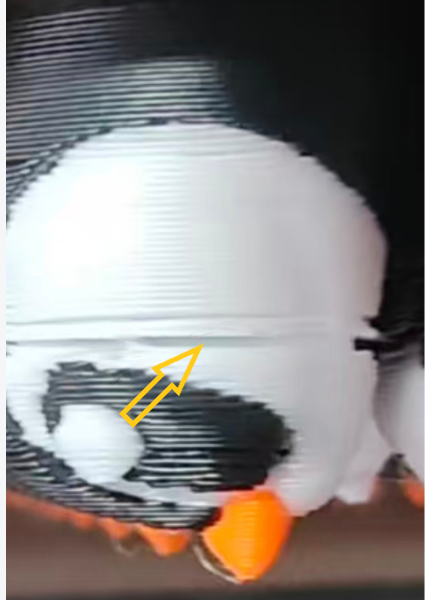
Typical symptoms mainly fall into two categories. The first is random missing layers (left image below), where the print exhibits irregular missing layers at various heights, causing the final part height to be inaccurate. The second is sudden missing layers (right image below), where a layer is suddenly missing at a specific height while the layers directly above and below it print normally. Both phenomena indicate that the Z-axis failed to reach the intended height during lifting.
¶ 📋 Quick Info Card
- Difficulty: ⭐⭐⭐☆☆
- Estimated Time: 20-40 minutes
¶ 🔁 Troubleshooting Flowchart

¶ 🔍 Quick Diagnosis
Accurately identifying Z-axis step loss is the first step to resolving it. This failure has distinct characteristics that differentiate it from other printing issues.
¶ ✅ Typical Z‑axis Step Loss Characteristics
- Overall print height anomaly (increased)
- Possible minor layer shifting
- More likely to occur during multi-color printing
- Irregular horizontal "missing bands" on the model surface
- Random missing layers, or missing layers at a specific height/layer
¶ ❌ Characteristics of Non‑Z‑axis Step Loss Issues
- Under‑extrusion: All layers uniformly thin or with gaps
- Temperature issues: Poor interlayer adhesion, layers easily separate
- Slicing issues: Structural problems in specific areas of the model
- Bed adhesion issues: Only the first layer or bottom layers are abnormal
- Filament issues: Inconsistent diameter or moisture causing extrusion variability
Follow a systematic troubleshooting process from simple to complex, external to internal. The recommended steps are as follows:
- Physical Environment & Installation Check > Go to Step One
- Firmware & Parameter Settings > Go to Step Two
- Mechanical System Check > Go to Step Three
- Hardware Solution > Go to Step Four
¶ ⚠️ Important Notes
- When the machine is powered on, do not connect or disconnect any cables unless otherwise specified.
- For machines still under warranty, do not perform deep disassembly to avoid voiding the warranty.
¶ 🪄 Preparation
¶ Tools Required
- H2.0 Hex Key
- New Z-axis motor (purchase separately if required)
¶ 🛠️ Troubleshooting Steps
¶ Step One: Physical Environment & Installation Check
¶ 1. Check the Machine Feet
Check if any machine feet are missing and if they are correctly installed.
¶ 2. Check for Foreign Objects Obstructing the Heated Bed Platform Travel Path
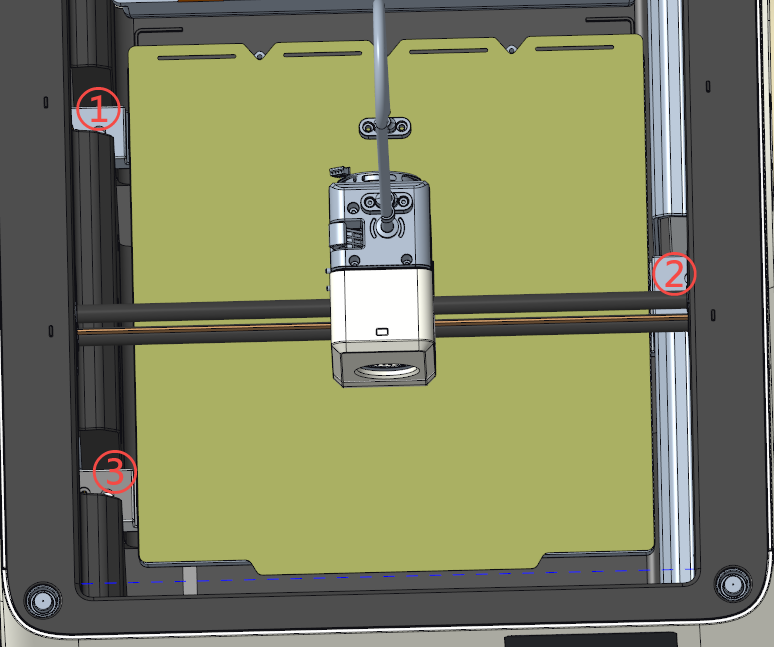
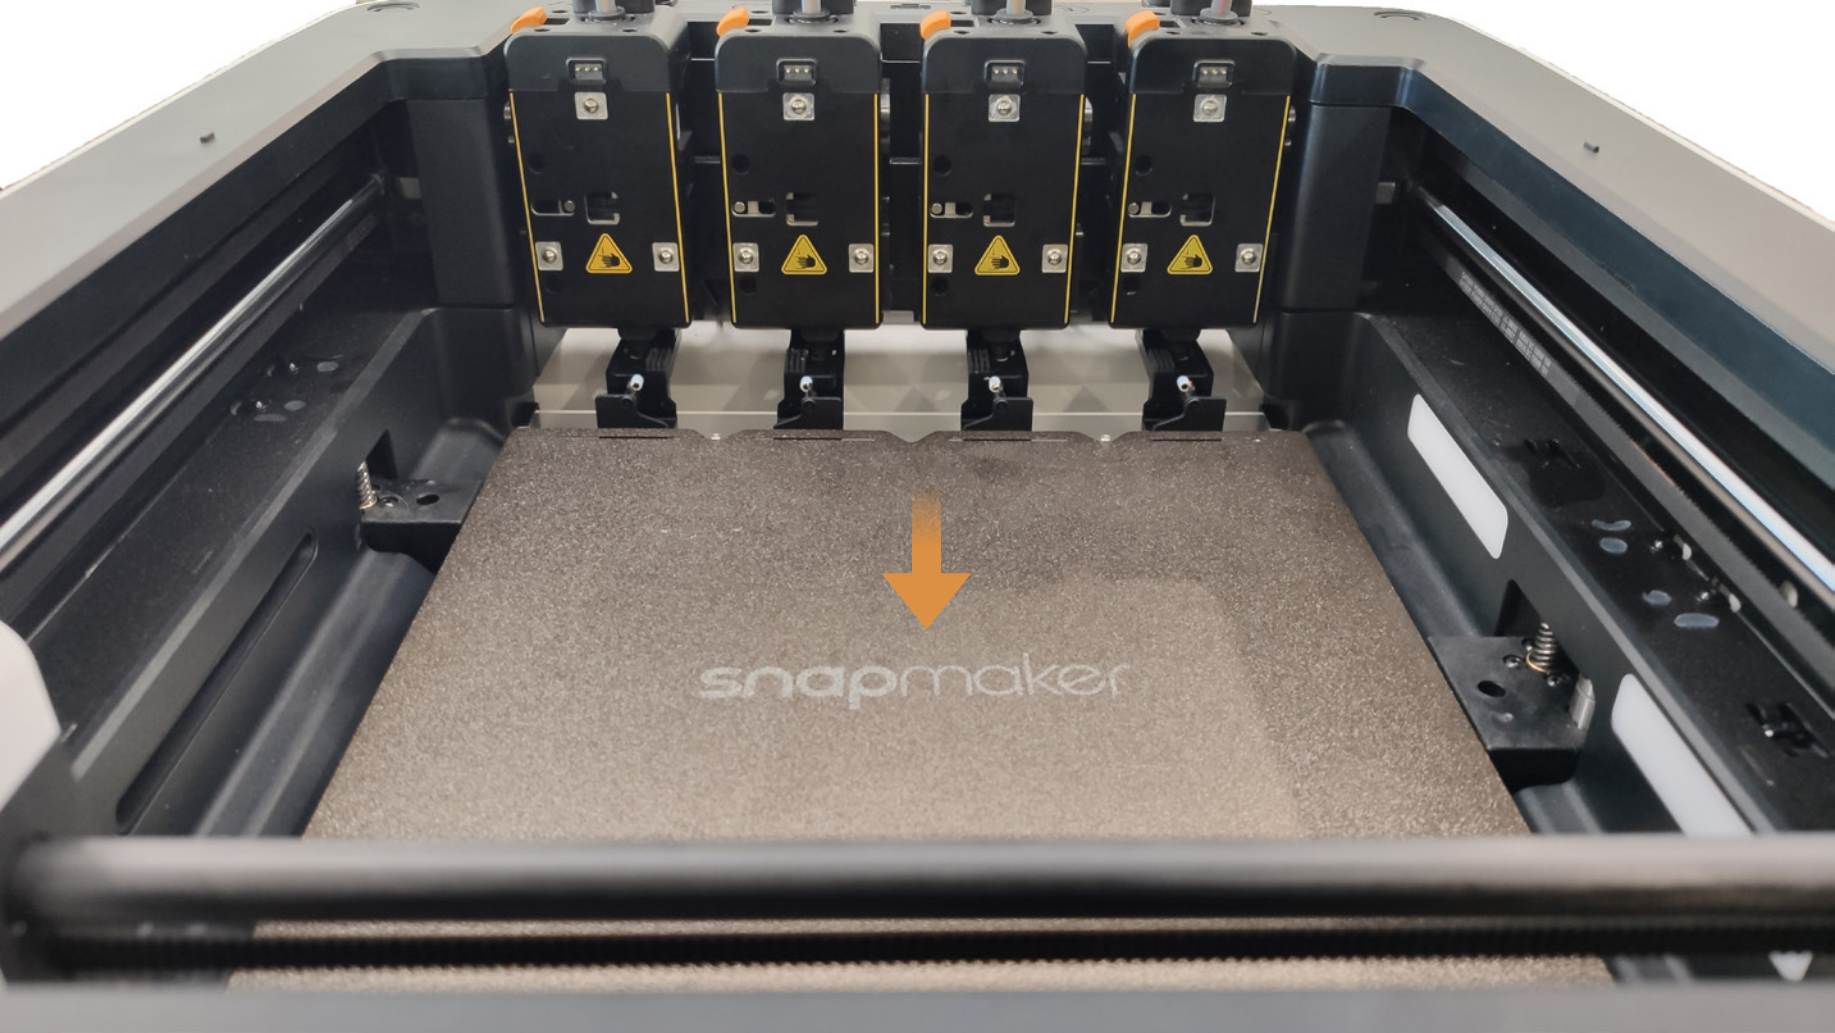
(1)Ensure there are no foreign objects blocking the three sliders or the area above their lead screws, as indicated.
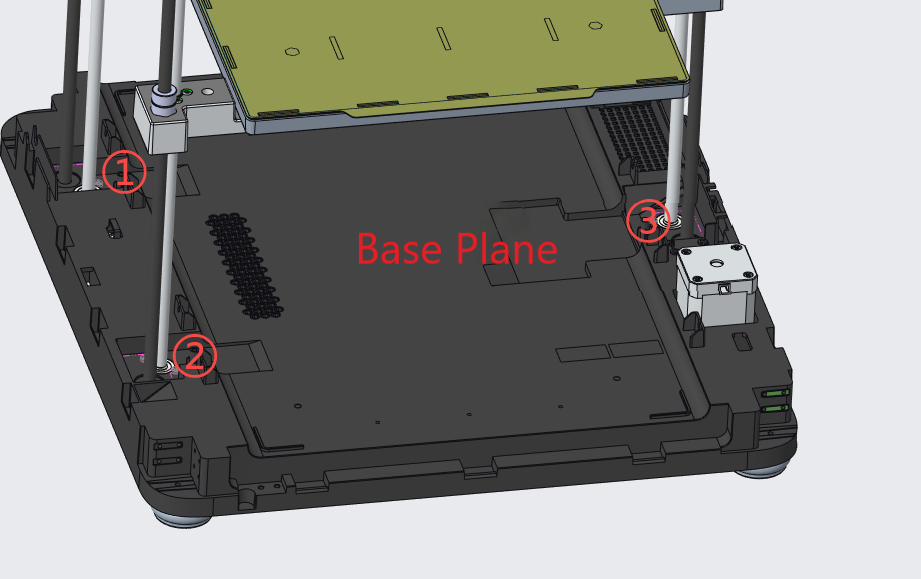
(2)Ensure there are no foreign objects blocking the three indicated areas at the bottom or the base plane.
¶ 3. Check for Foreign Objects Under the Machine
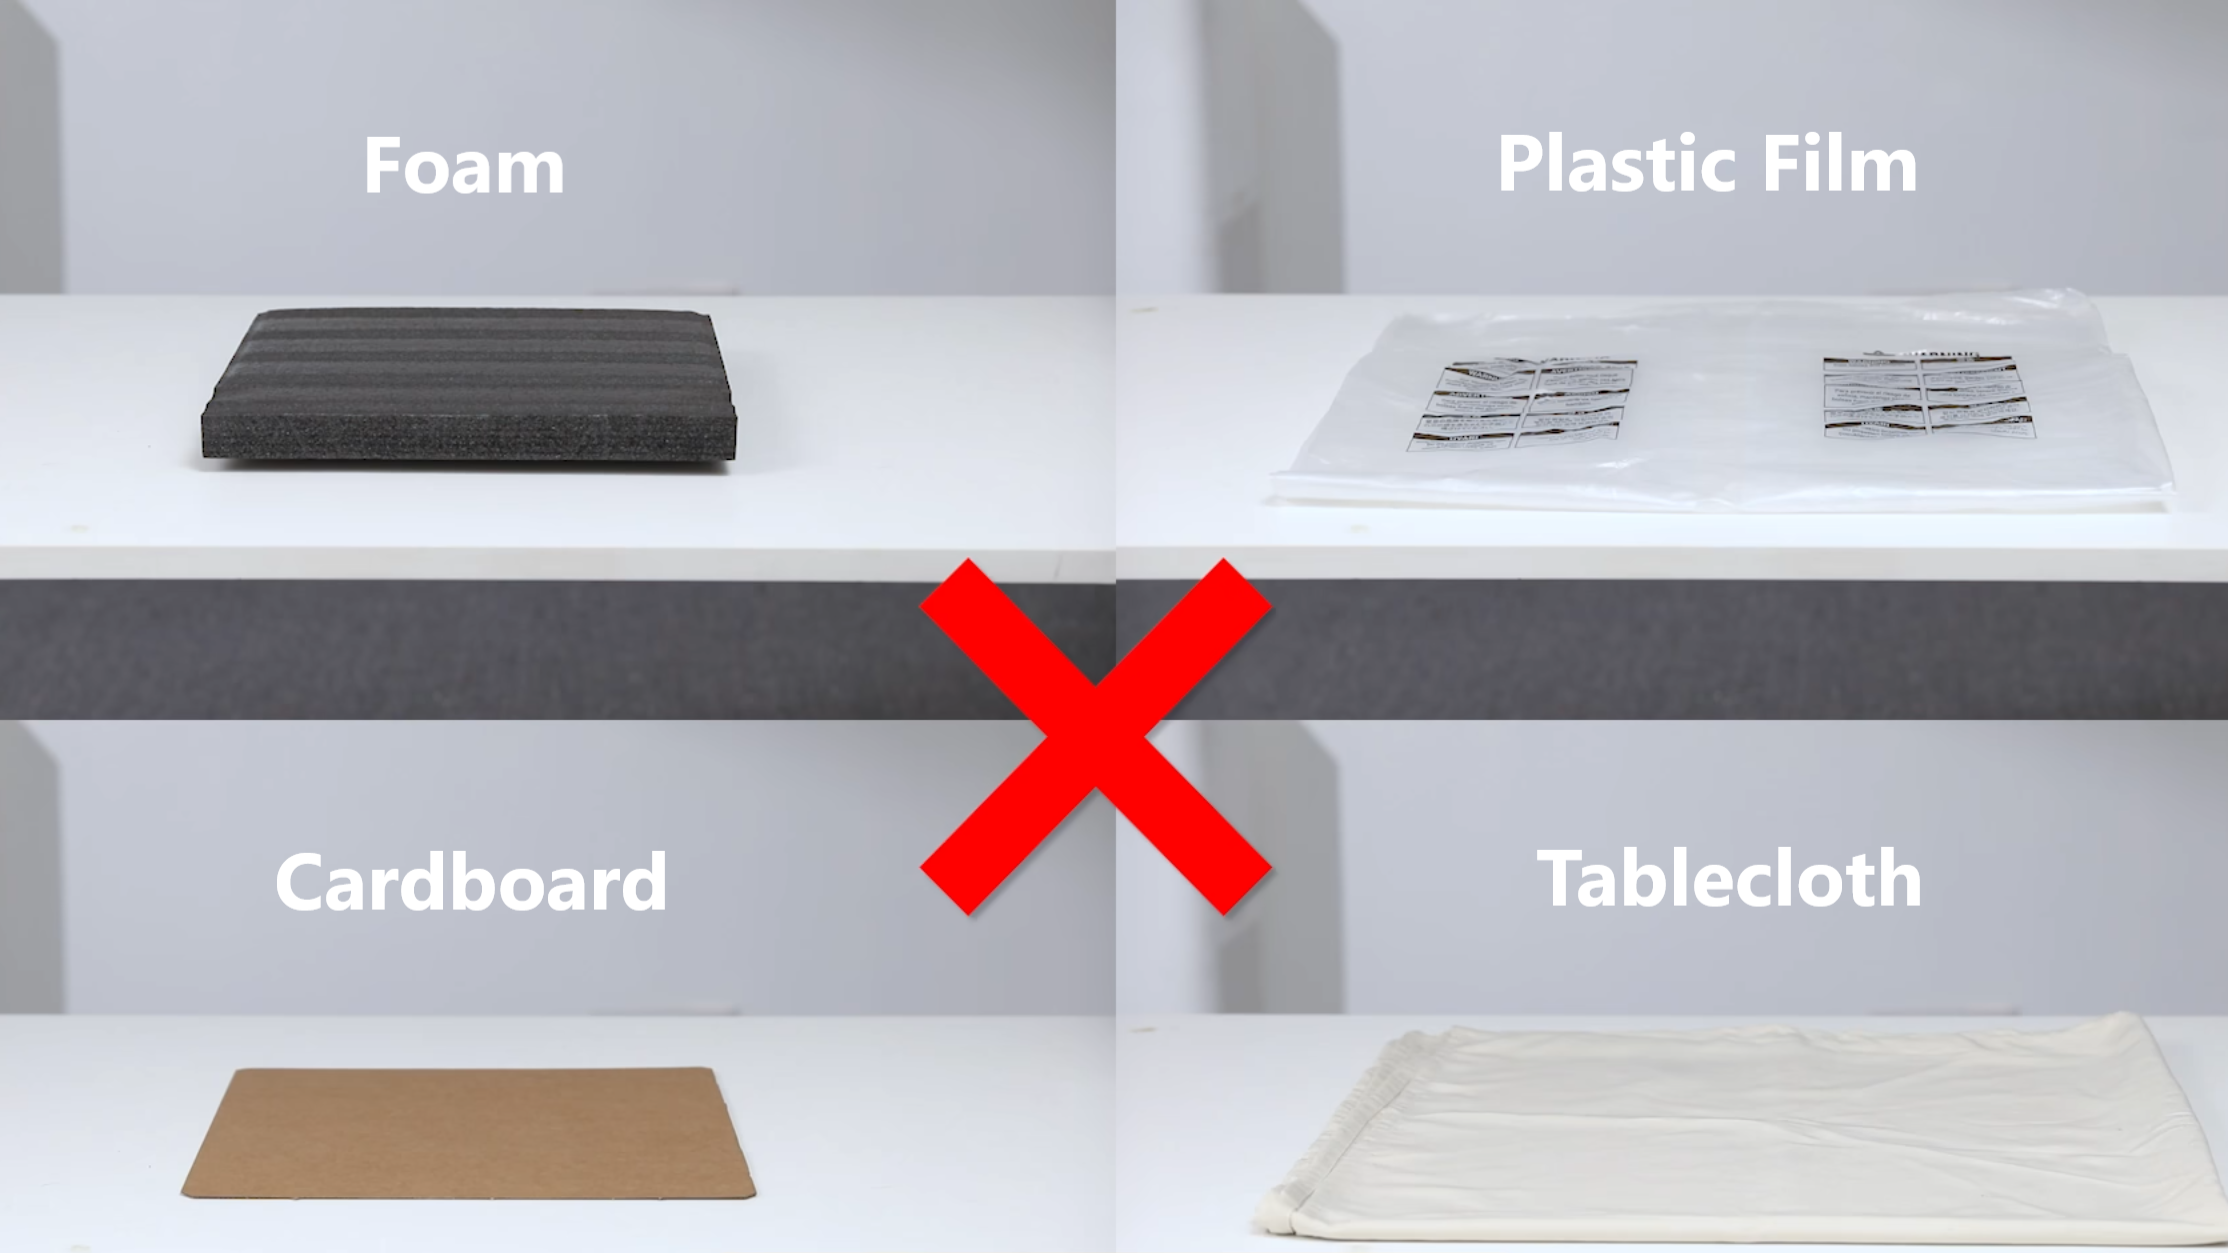
To ensure proper belt operation, do not place any foreign objects under the printer or in areas where they may contact moving parts, including but not limited to:
- Loose packaging materials (e.g., foam, plastic film);
- Temporary shims or pads (e.g., cardboard, soft pads);
- Flexible underlays (e.g., tablecloths, carpets).
Such objects may deform under load or wrinkle due to printer vibration, potentially interfering with belt movement, affecting print quality, or even damaging the product.
¶ 4. Check Cables / harnesses for Interference with Z-axis Movement
If both of the following conditions occur, refer to the U1 Video Guide: How to Remove the Side Panels to remove the machine's right side panel and inspect if any harnesses are interfering with Z-axis movement.
- The print consistently shows missing layers at a specific height.
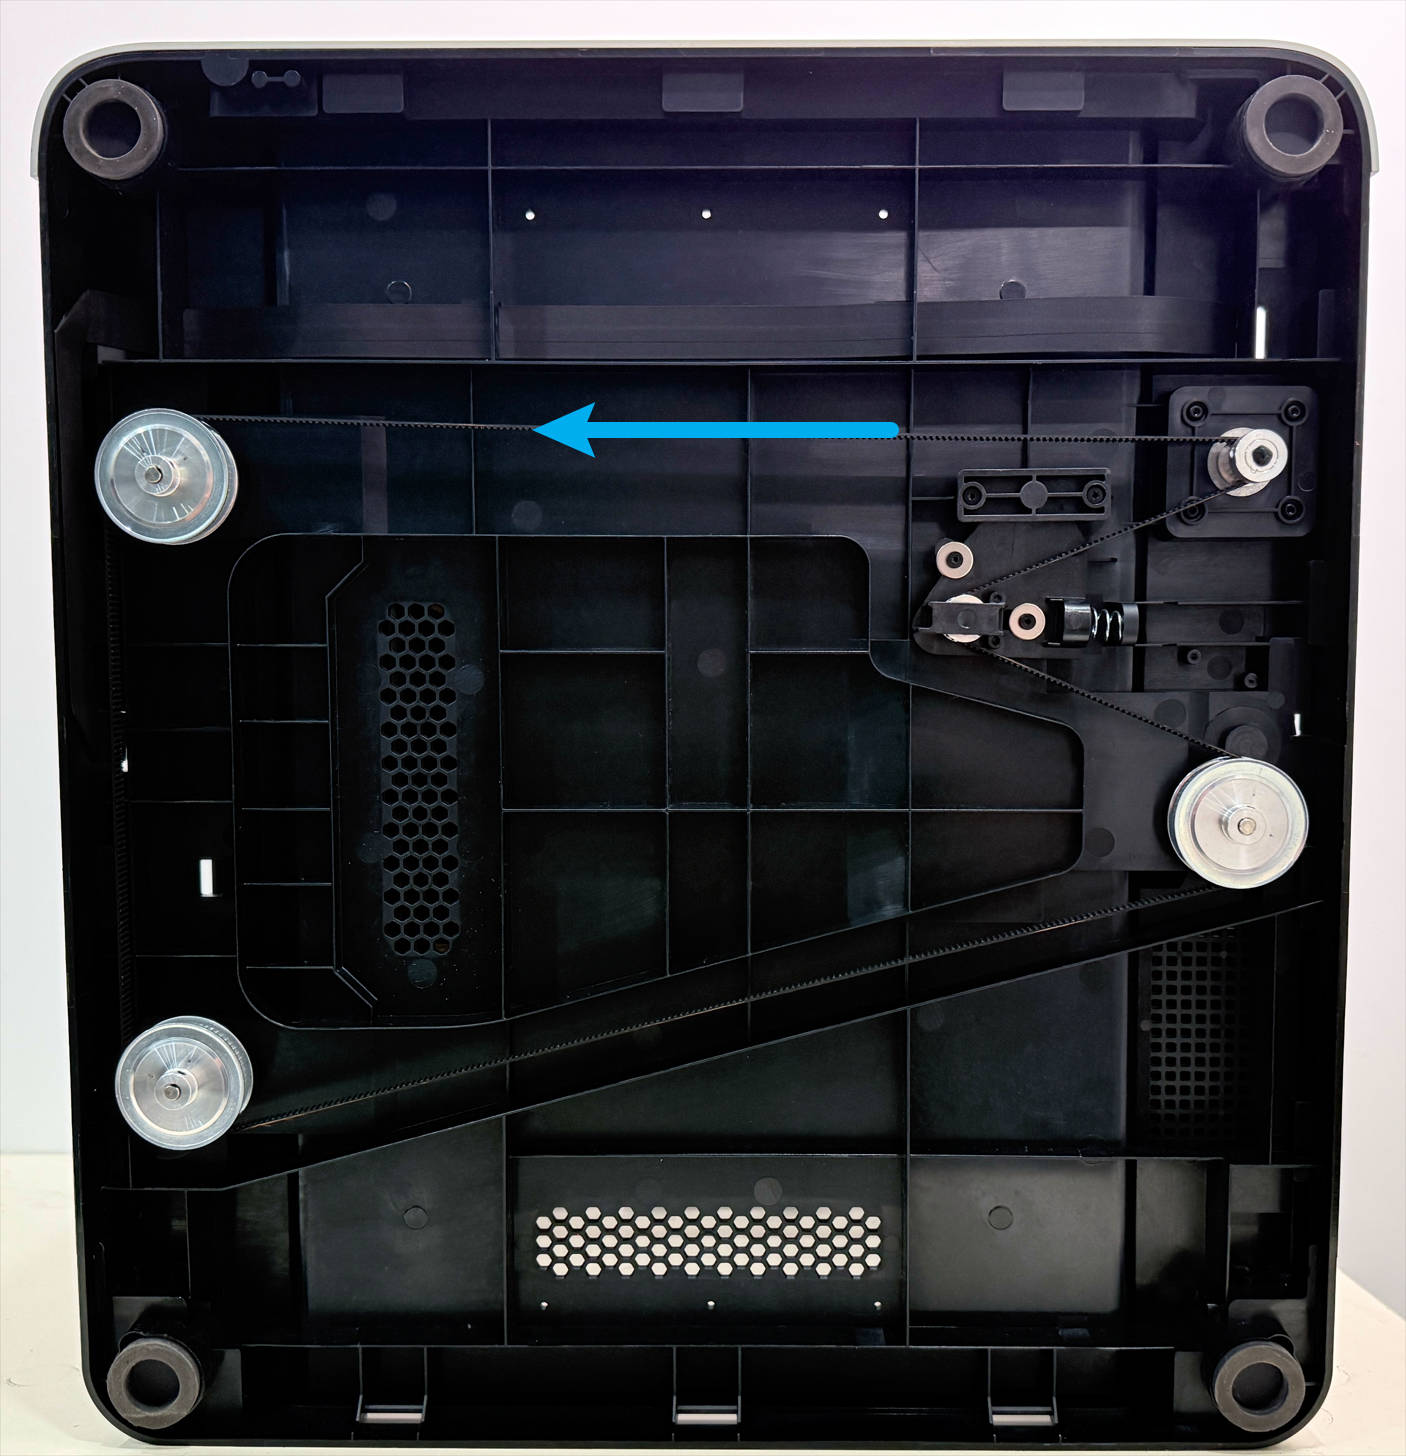
- With the printer powered off, when manually pulling the Z-axis timing belt under the printer to raise / lower the heated bed, you feel a physical catch or hesitation at a specific height.
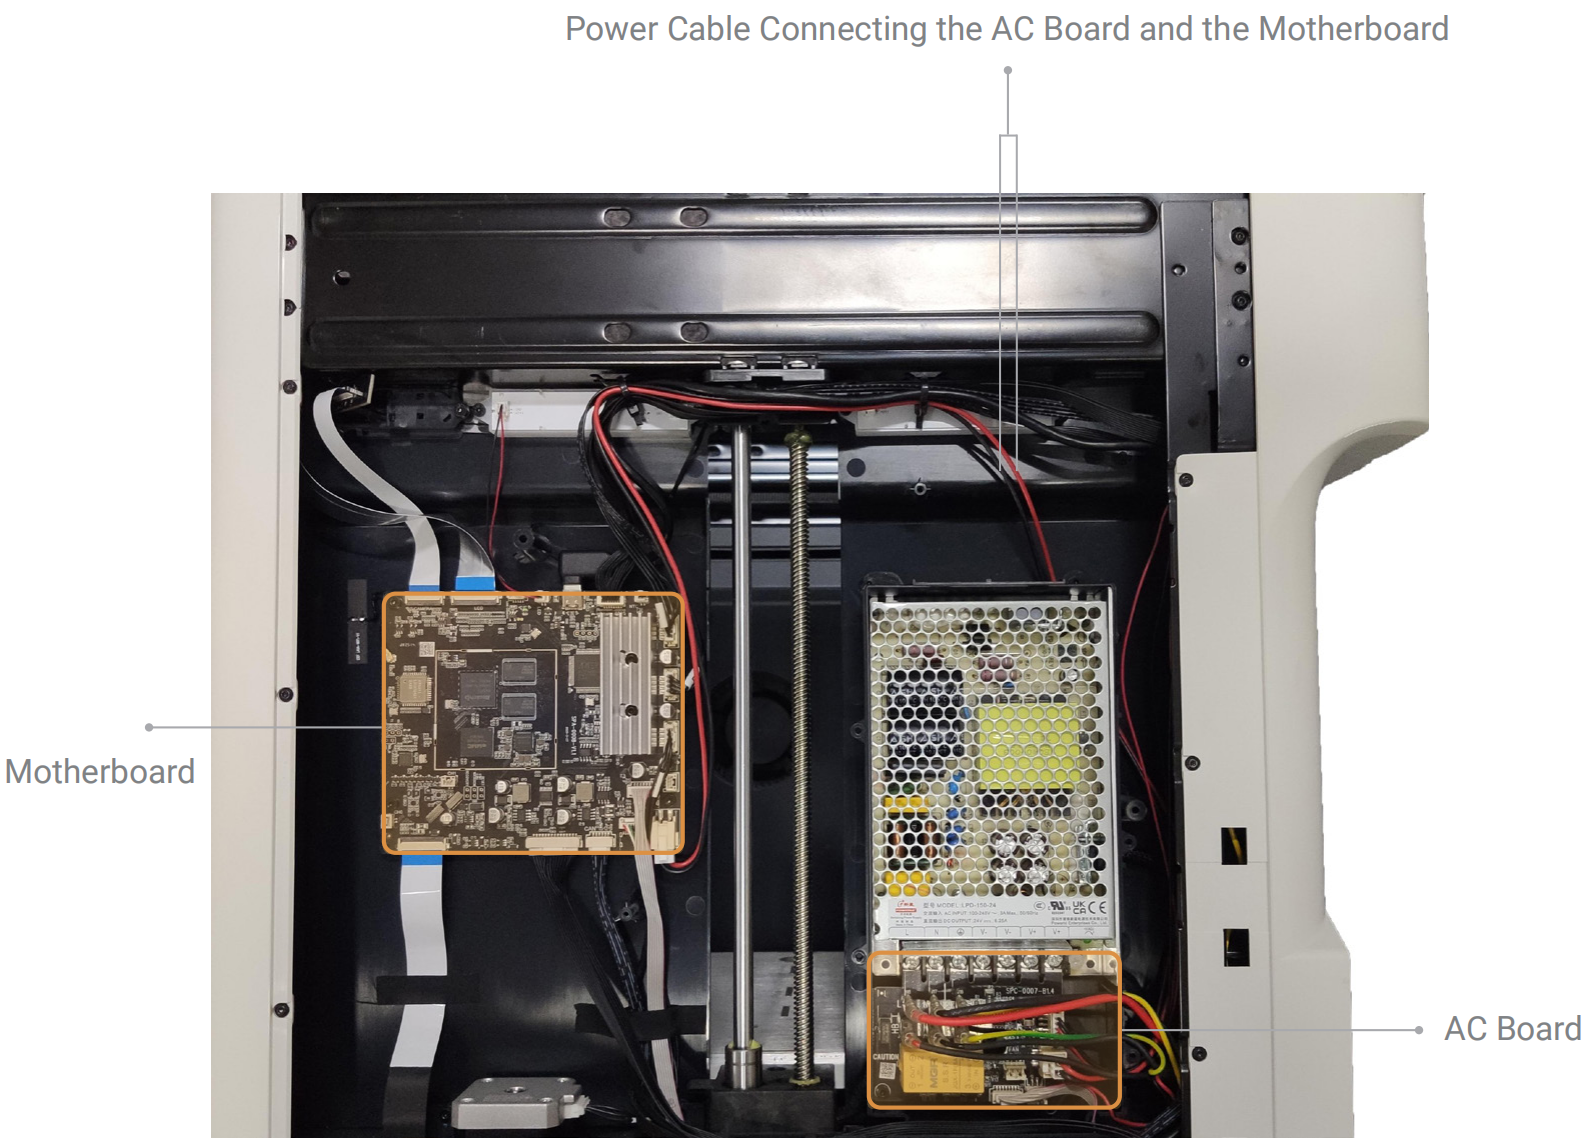
(1)Check if the power cable connecting the AC board and the mainboard interferes with Z-axis movement.
(2)Check if the feeder cable interferes with Z-axis movement.
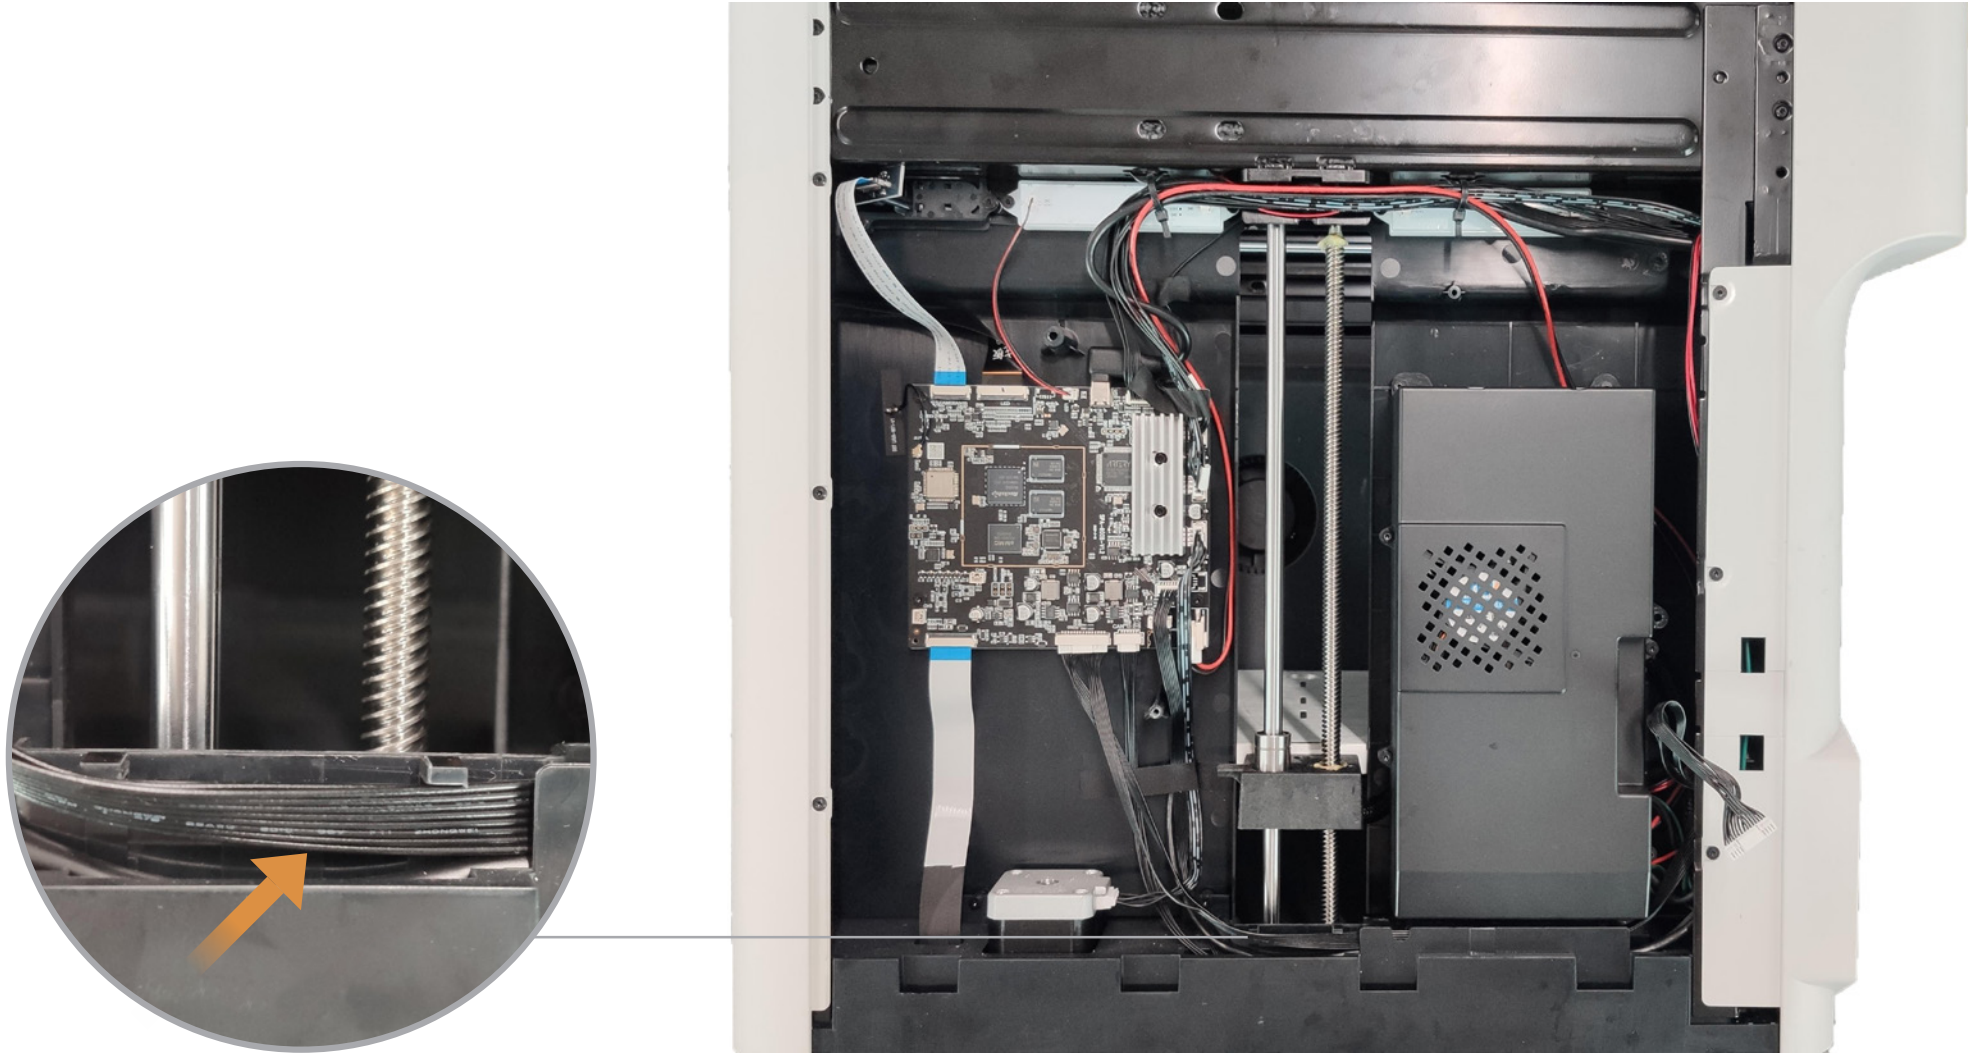
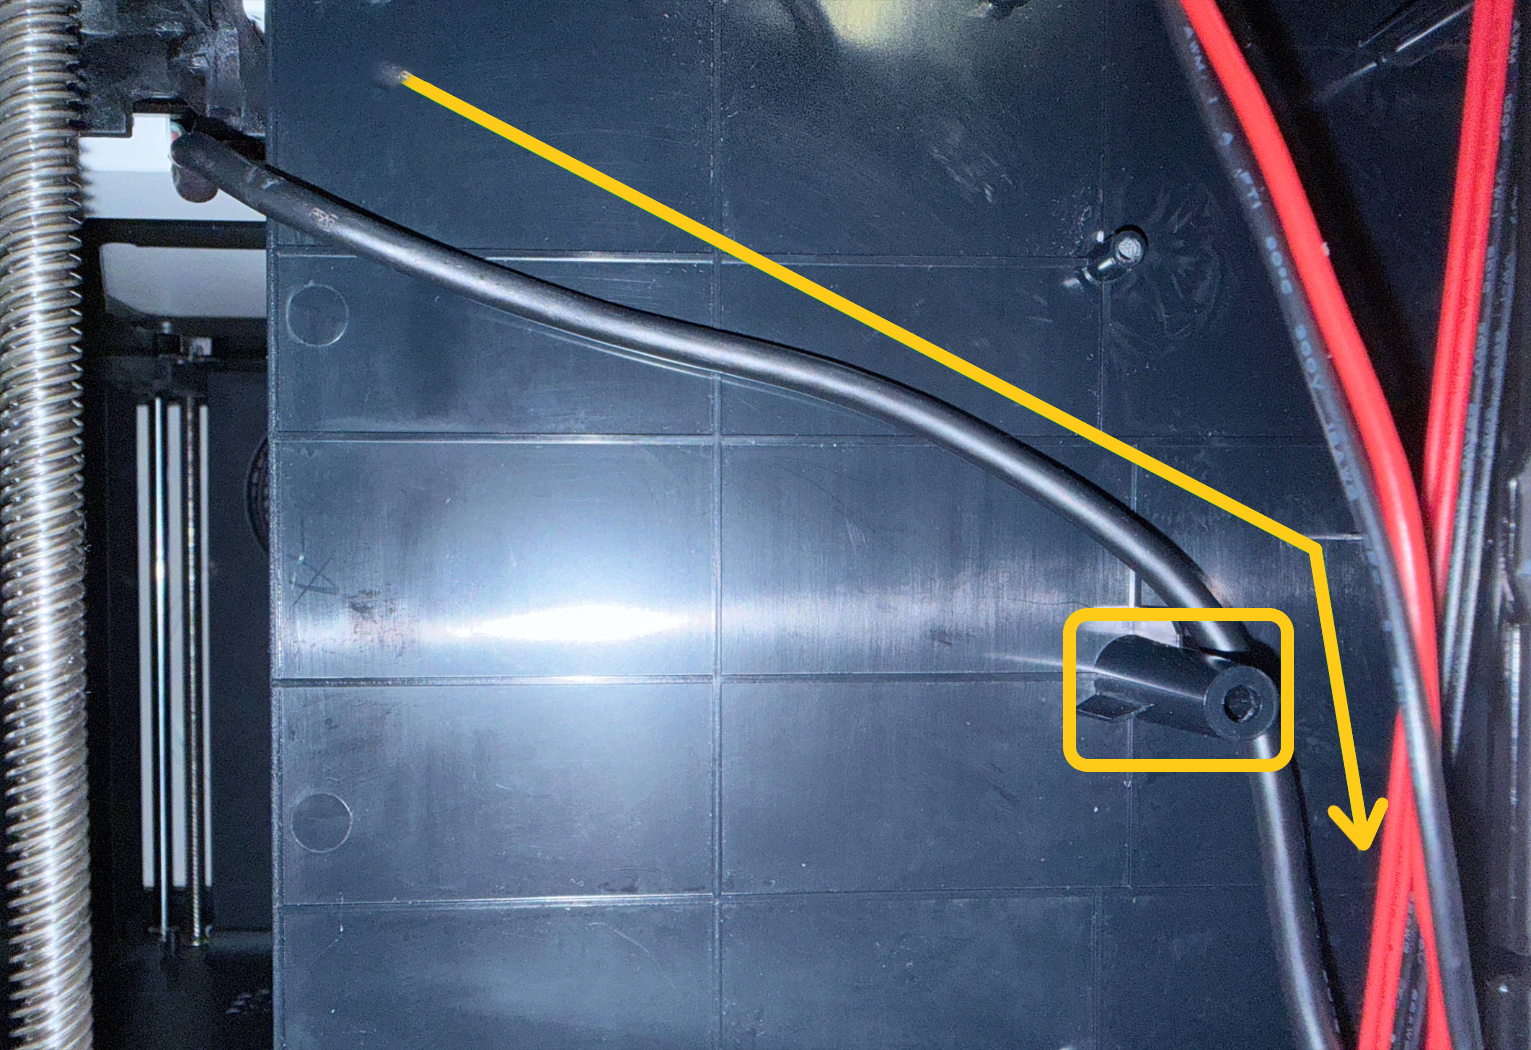
(3)Manually move the heated bed by pulling the Z-axis timing belt under the printer and check for abnormal twisting of the heated bed cable. If the heated bed cable is abnormally twisted (as shown in the video below), refer to the U1 heated bed replacement guide to re-route the cable.
The heated bed cable should be routed over the screw boss in the direction shown. This prevents the cable from being pinched when the bed moves to its lowest position, which would increase mechanical resistance and potentially cause step loss. The image below shows the power supply removed to better illustrate the positional relationship between the heated bed cable and the screw boss.
¶ Step Two: Firmware & Parameter Settings
¶ 1. Ensure the Machine Is Running on the Latest Firmware
Firmware Version Requirement: V1.1.0 or higher (default Z-axis motor current is 0.85 A). Update locally via the touchscreen or download the required version from the U1 Firmware Release Notes.
Current determines the motor's output torque. In older firmware versions, the Z-axis motor current setting (0.7 A) may be too low.
It is not recommended to set the Z-axis motor current above 0.85 A. If the printer is operated with the top cover and prints for extended periods, or if the ambient temperature is too high, the motor's magnetic performance may degrade, potentially leading to step loss.
¶ 2. Appropriately Reduce Z-axis Acceleration
If the issue persists after updating the firmware, refer to Reduce Z-axis Acceleration to appropriately reduce Z-axis acceleration. This can effectively lessen the inertial load on the motor during high-speed starts and stops.
You can print a test model to find the optimal balance between print quality and speed.
¶ Step Three: Mechanical System Check
¶ 1. Manually Test for Mechanical Resistance
(1)With the printer powered off, manually pull the Z-axis timing belt at the bottom to raise the heated bed to its highest position.
(2)Using one hand, press down on the heated bed to feel if it can move downwards smoothly and continuously.
If you feel significant stuttering, step-wise resistance, or hear abnormal noises, the mechanical system has a friction issue. Refer to the U1 core components maintenance guide to clean the lead screws and apply additional grease / lubricant.
Over time, dust accumulation or dried-up lubricant can increase frictional resistance. Step loss occurs when this resistance exceeds the motor's holding torque.
¶ 2. Adjust Belt Tension
(1)Loosen the two indicated screws until the belt tensioning arm can move left and right. The compression spring will then automatically adjust the belt tension.

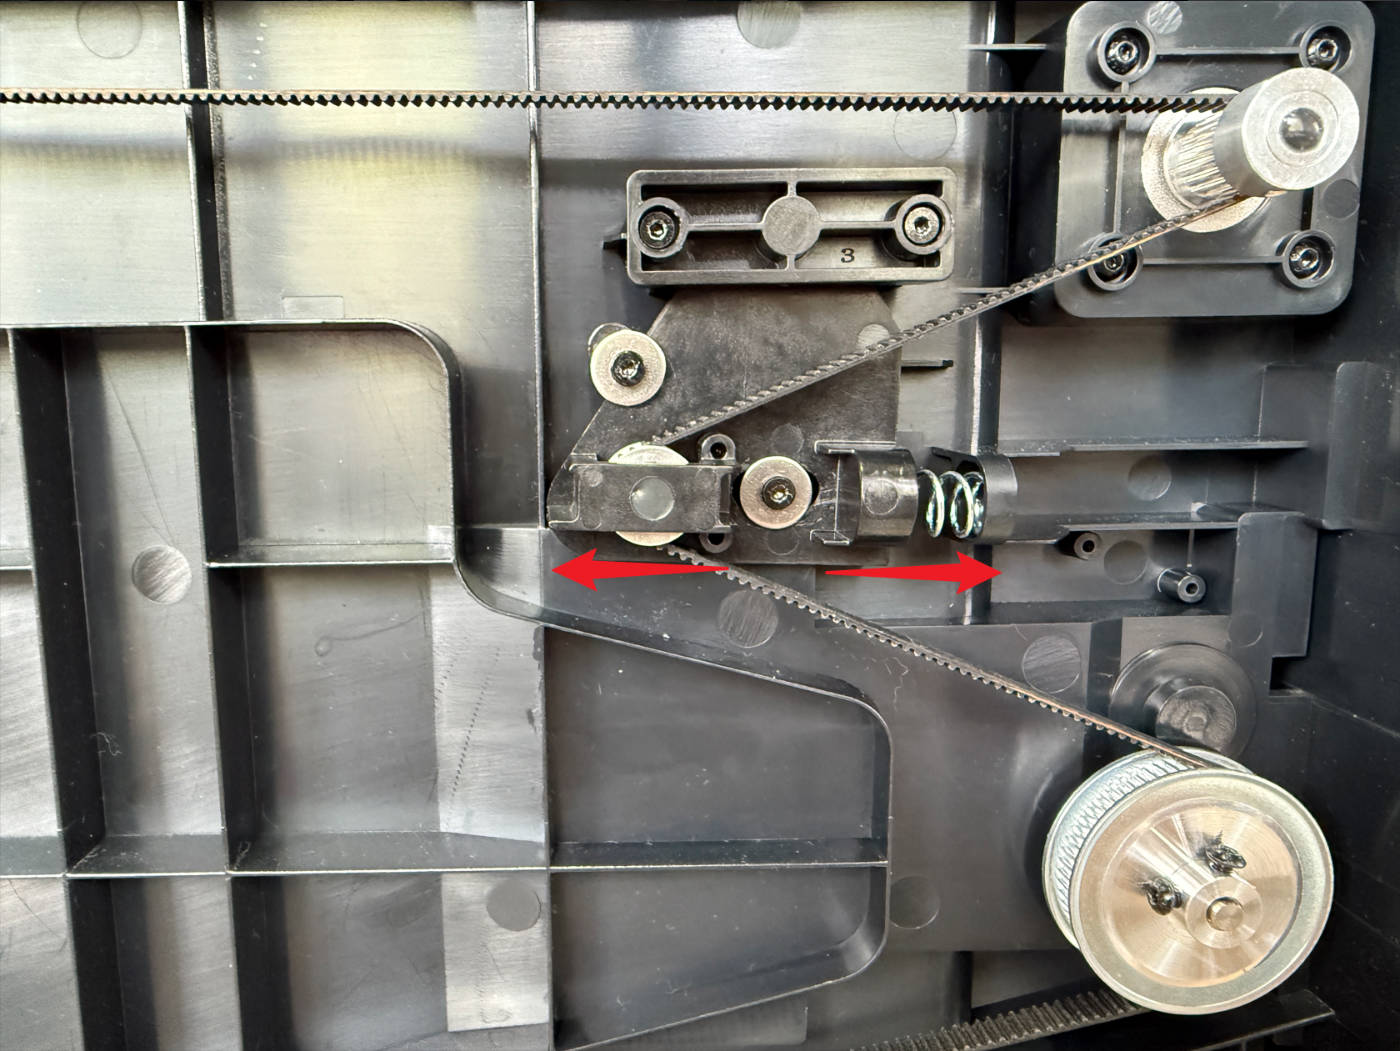
A belt that is too loose can cause transmission slipping, while a belt that is too tight increases the motor's load.
(2)Re-tighten the two indicated screws.
¶ Step Four: Hardware Solution
If all the above firmware adjustments and basic mechanical checks prove ineffective, the issue may stem from a degraded or faulty motor. In this case, try replacing the motor by following the U1 Z motor replacement guide. This requires contacting Technical Support for replacement.
After replacing the Z-axis motor, it is recommended to re-level the heated bed.
¶ ✅ Verification
If the heated bed moves up and down smoothly, the final print height is accurate, and there are no missing layers, you have successfully identified the root cause and resolved the issue.
¶ 📚 Related Resources
- U1 Video Guide: How to Remove the Side Panels
- U1 heated bed replacement guide
- U1 Firmware Release Notes
- Reduce Z-axis Acceleration
- U1 core components maintenance guide
- U1 Z motor replacement guide
¶ 💬 Reach out to Snapmaker Support
After following the troubleshooting steps, if you find it difficult to resolve your issue, kindly submit a support ticket through https://snapmaker.formcrafts.com/u1-troubleshooting-request and share your troubleshooting results with pictures or videos. Our dedicated support team will be more than willing to assist you in resolving the issue.