¶ 💡 Compatibility
This guide applies to the following machine. Please note when referencing:
- Machine model: U1
¶ ⏰ When to Use This Guide
Use this guide for troubleshooting when the following situations occur before or during printing with the U1:
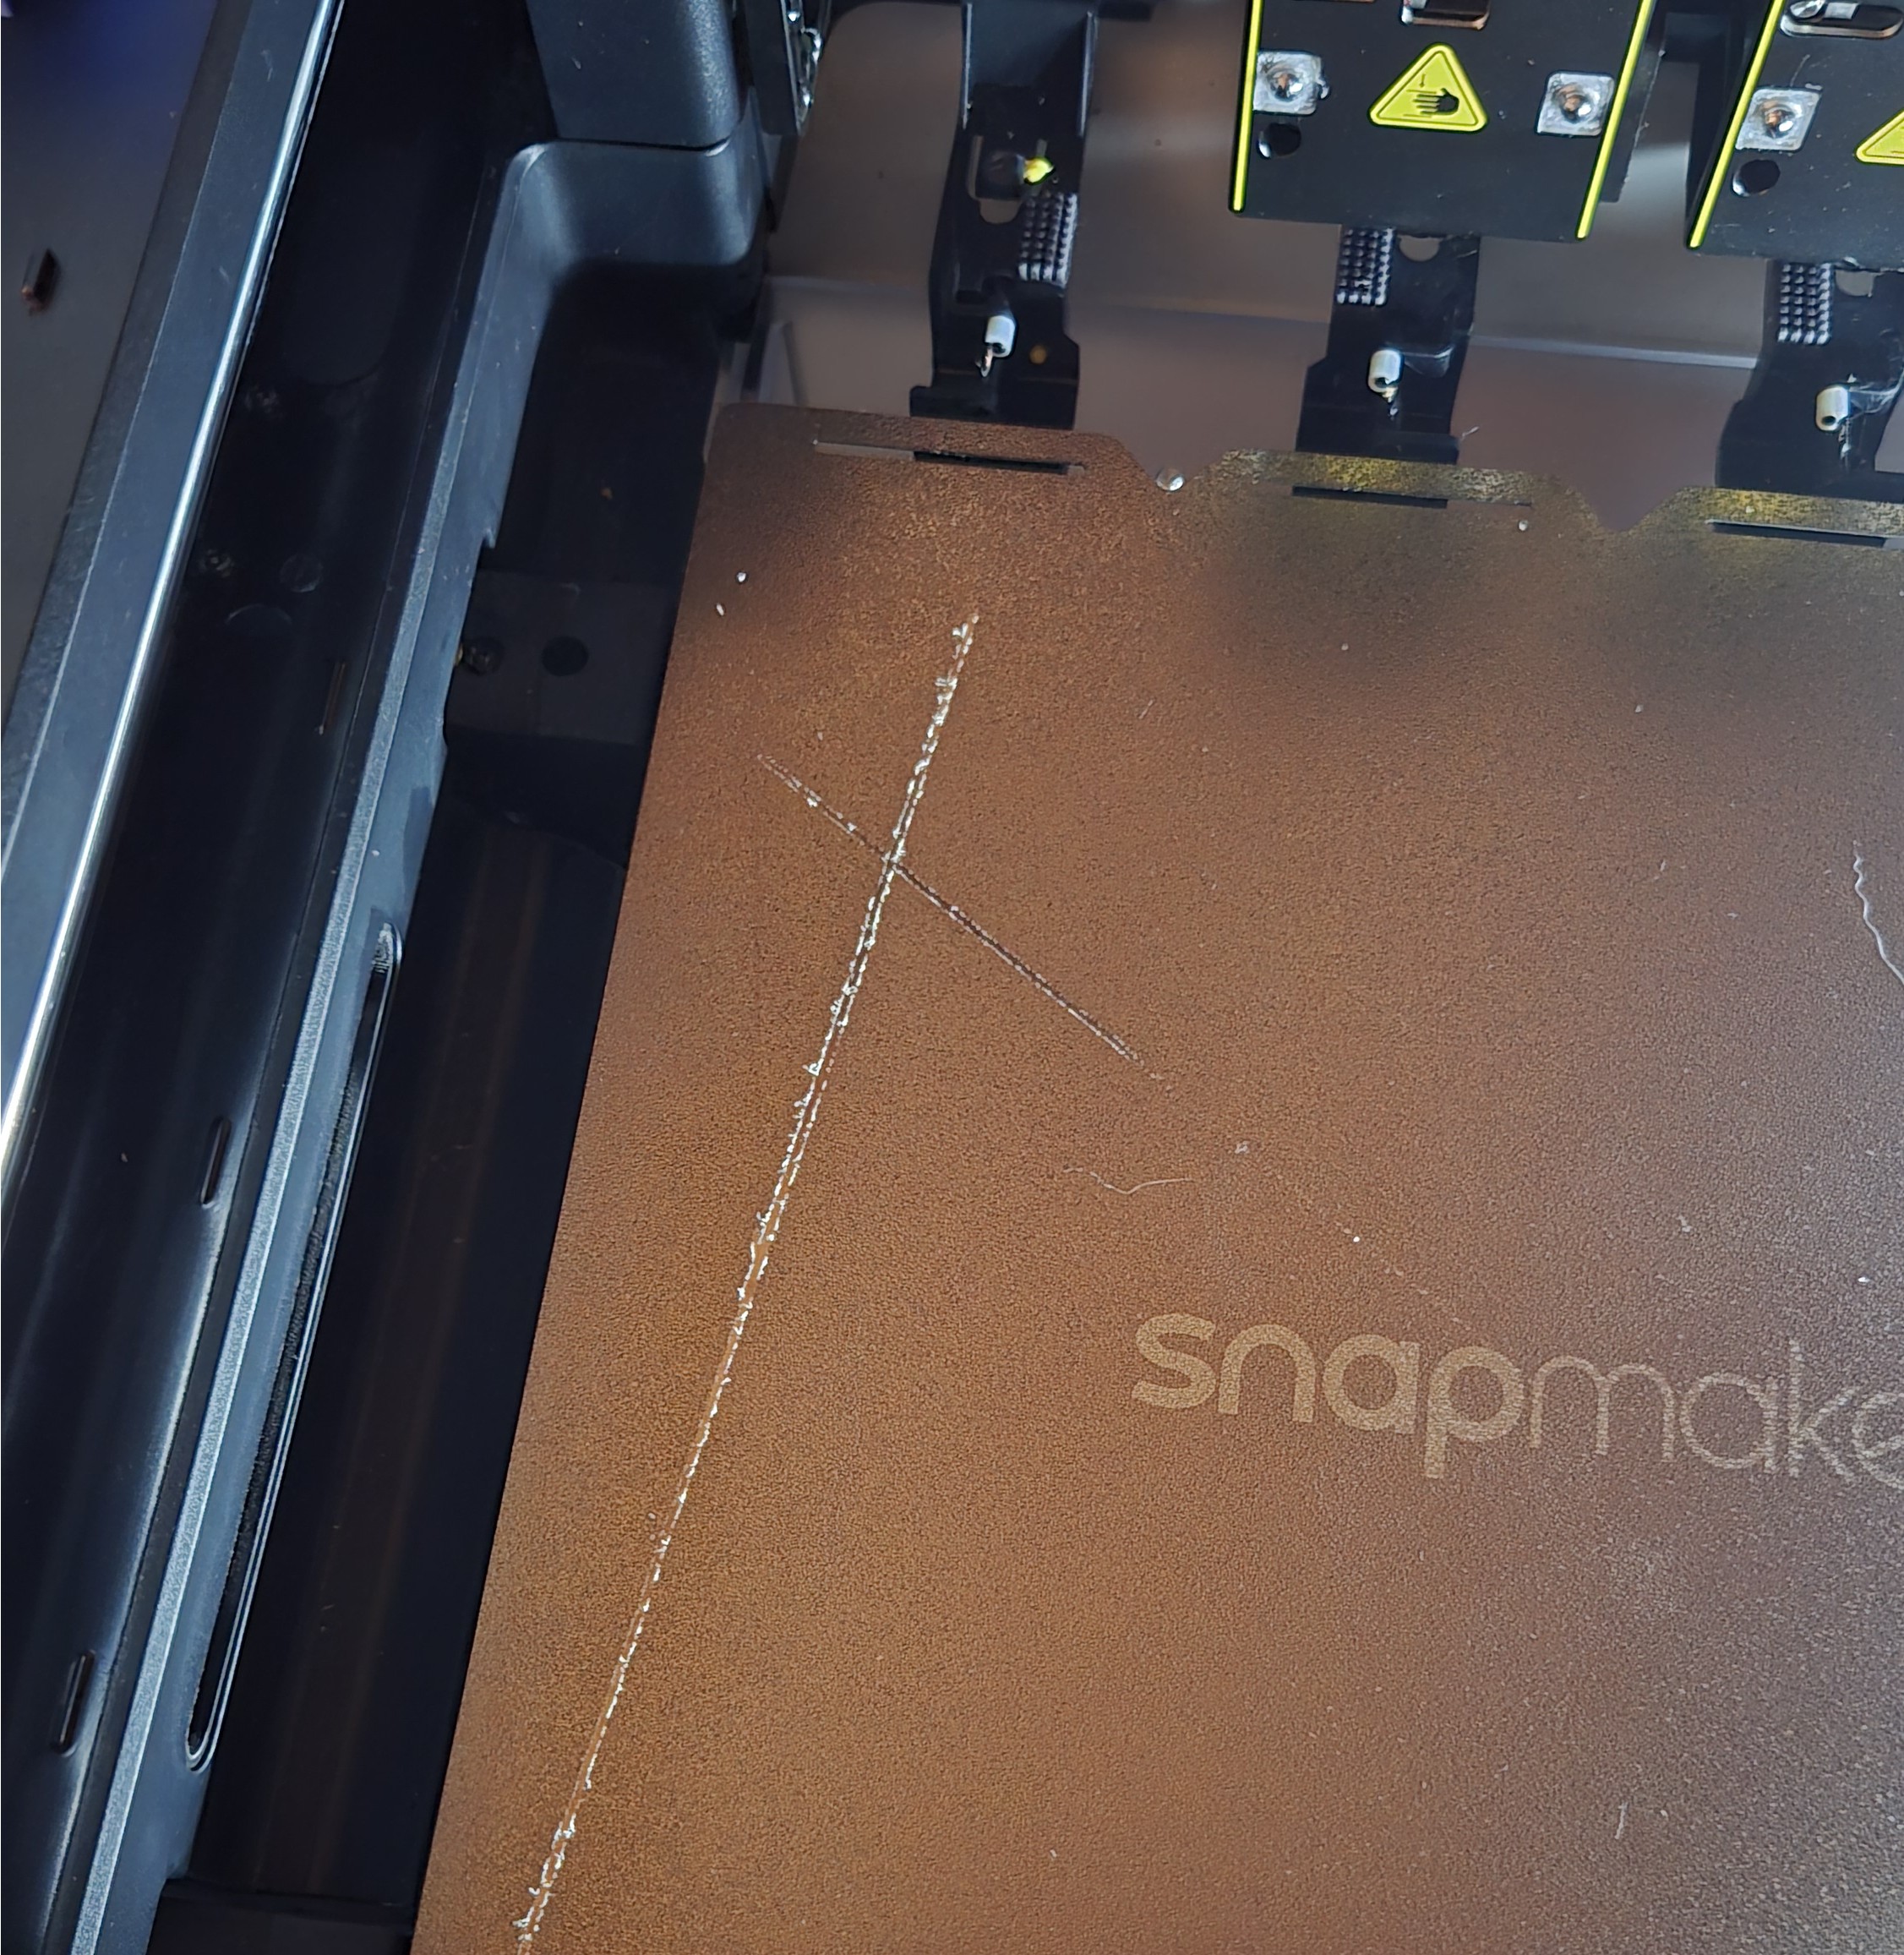
- The nozzle scratches or collides with the heated bed while moving.
- The toolhead produces unusual friction or impact noises during movement.
- The heated bed surface shows scratches, coating damage, or localized wear.
¶ 📋 Quick Info Card
- Difficulty: ⭐⭐⭐☆☆ (Normal)
- Estimated Time: 20 minutes
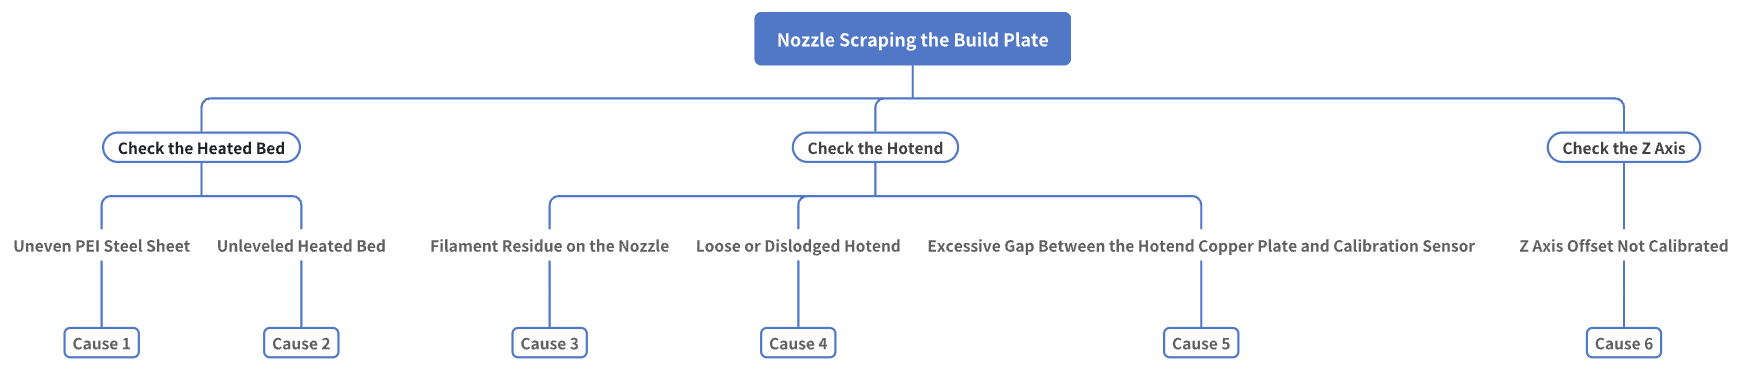
¶ 🔁 Troubleshooting Flowchart
¶ 🔍 Quick Diagnosis
Which situation are you experiencing?
- Uneven build plate or unleveled heated bed → Go to Step 1
- Abnormalities in the hotend assembly → Go to Step 2
- Hotend and heated bed are in good condition → Go to Step 3
¶ ⚠️ Important Notes
When troubleshooting hardware, always make sure to turn off the power before proceeding with any operations.
¶ 🛠️ Troubleshooting Steps
¶ Step 1: Check the Heated Bed
¶ Cause 1: Uneven PEI Steel Sheet
If the nozzle scrapes the bed differently at various positions, it is likely a heated bed leveling issue. We recommend checking the following:
- Whether there is any filament residue on the PEI steel sheet; if so, use a scraper or other tools to remove debris.
- Whether there are any bulges, warping, or other deformations on the heated bed surface; if so, it is advisable to replace the heated bed.
¶ Cause 2: Unleveled Heated Bed
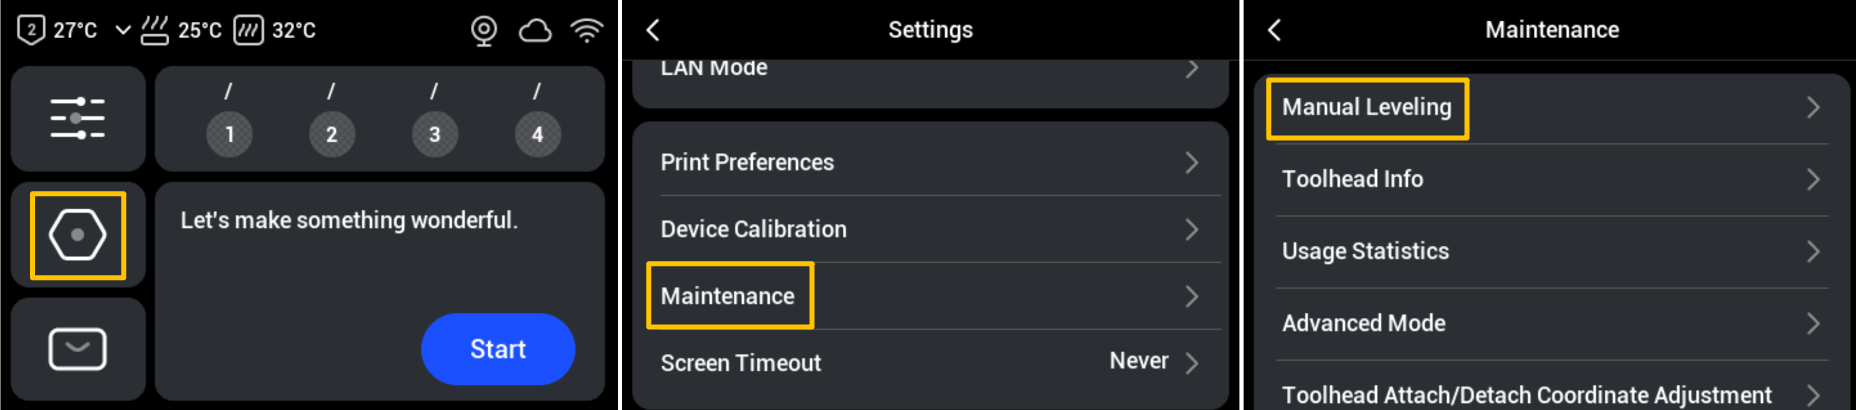
- On the touchscreen main interface, go to Settings > Maintenance > Manual Leveling, and follow the on-screen instructions to complete the leveling process.
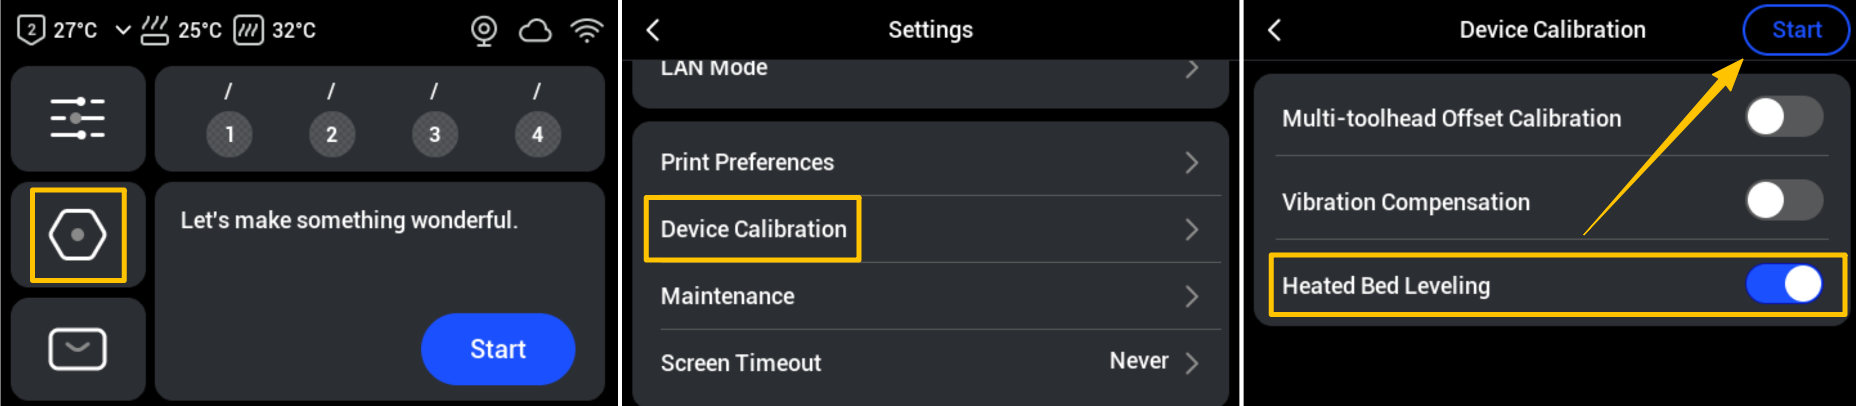
- After completing the manual leveling, please run the automatic bed leveling: return to the Settings page > Click Device Calibration > Enable Heated Bed Leveling > Start.
¶ Step 2: Check the Hotend
Before starting the following troubleshooting steps, please unload the filament for the corresponding toolhead. Depending on the material type, please refer to Rigid Filament Unloading or Flexible Filament Unloading.
¶ Cause 3: Filament Residue on the Nozzle
Filament residue on the nozzle can shorten the distance between the nozzle and the build plate, causing scraping. You can heat the nozzle to the recommended filament temperature, then use tweezers, a wire brush, or similar tools to clean the residual filament.
¶ Cause 4: Loose or Dislodged Hotend
- After turning off the power, please refer to U1 Filament not extruding ("Scenario 2: Debris at the heatbreak") to remove the toolhead and disassemble the hotend.
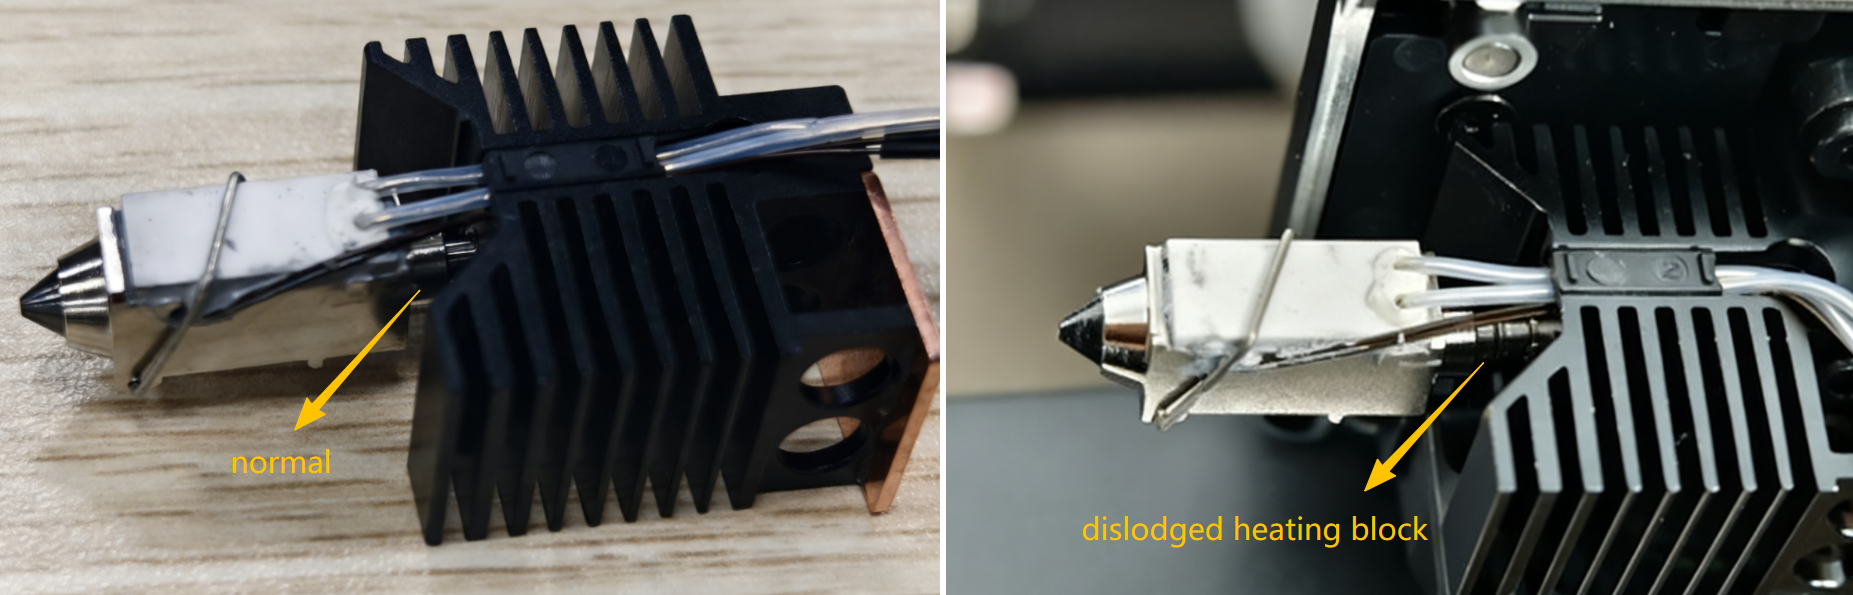
- Gently shake the hotend assembly by hand. A properly secured hotend should not wobble; if the hotend moves up and down, it indicates that the hotend assembly may be loose.
- Remove the black silicone sock from the nozzle and check if the heating block has become dislodged.
- Take the spare hotend from the tool kit included with the machine, and follow U1 Video Guide: Ceramic Heater & NTC Thermistor Replacement to transfer the ceramic heater and thermistor from the original hotend, then reassemble and secure the components.
¶ Cause 5: Excessive Gap Between the Hotend Copper Plate and Calibration Sensor
- Check the gap between the hotend copper plate and the calibration sensor. The normal range is 0.1-0.4mm, and you can measure it using a standard A4 sheet of paper.
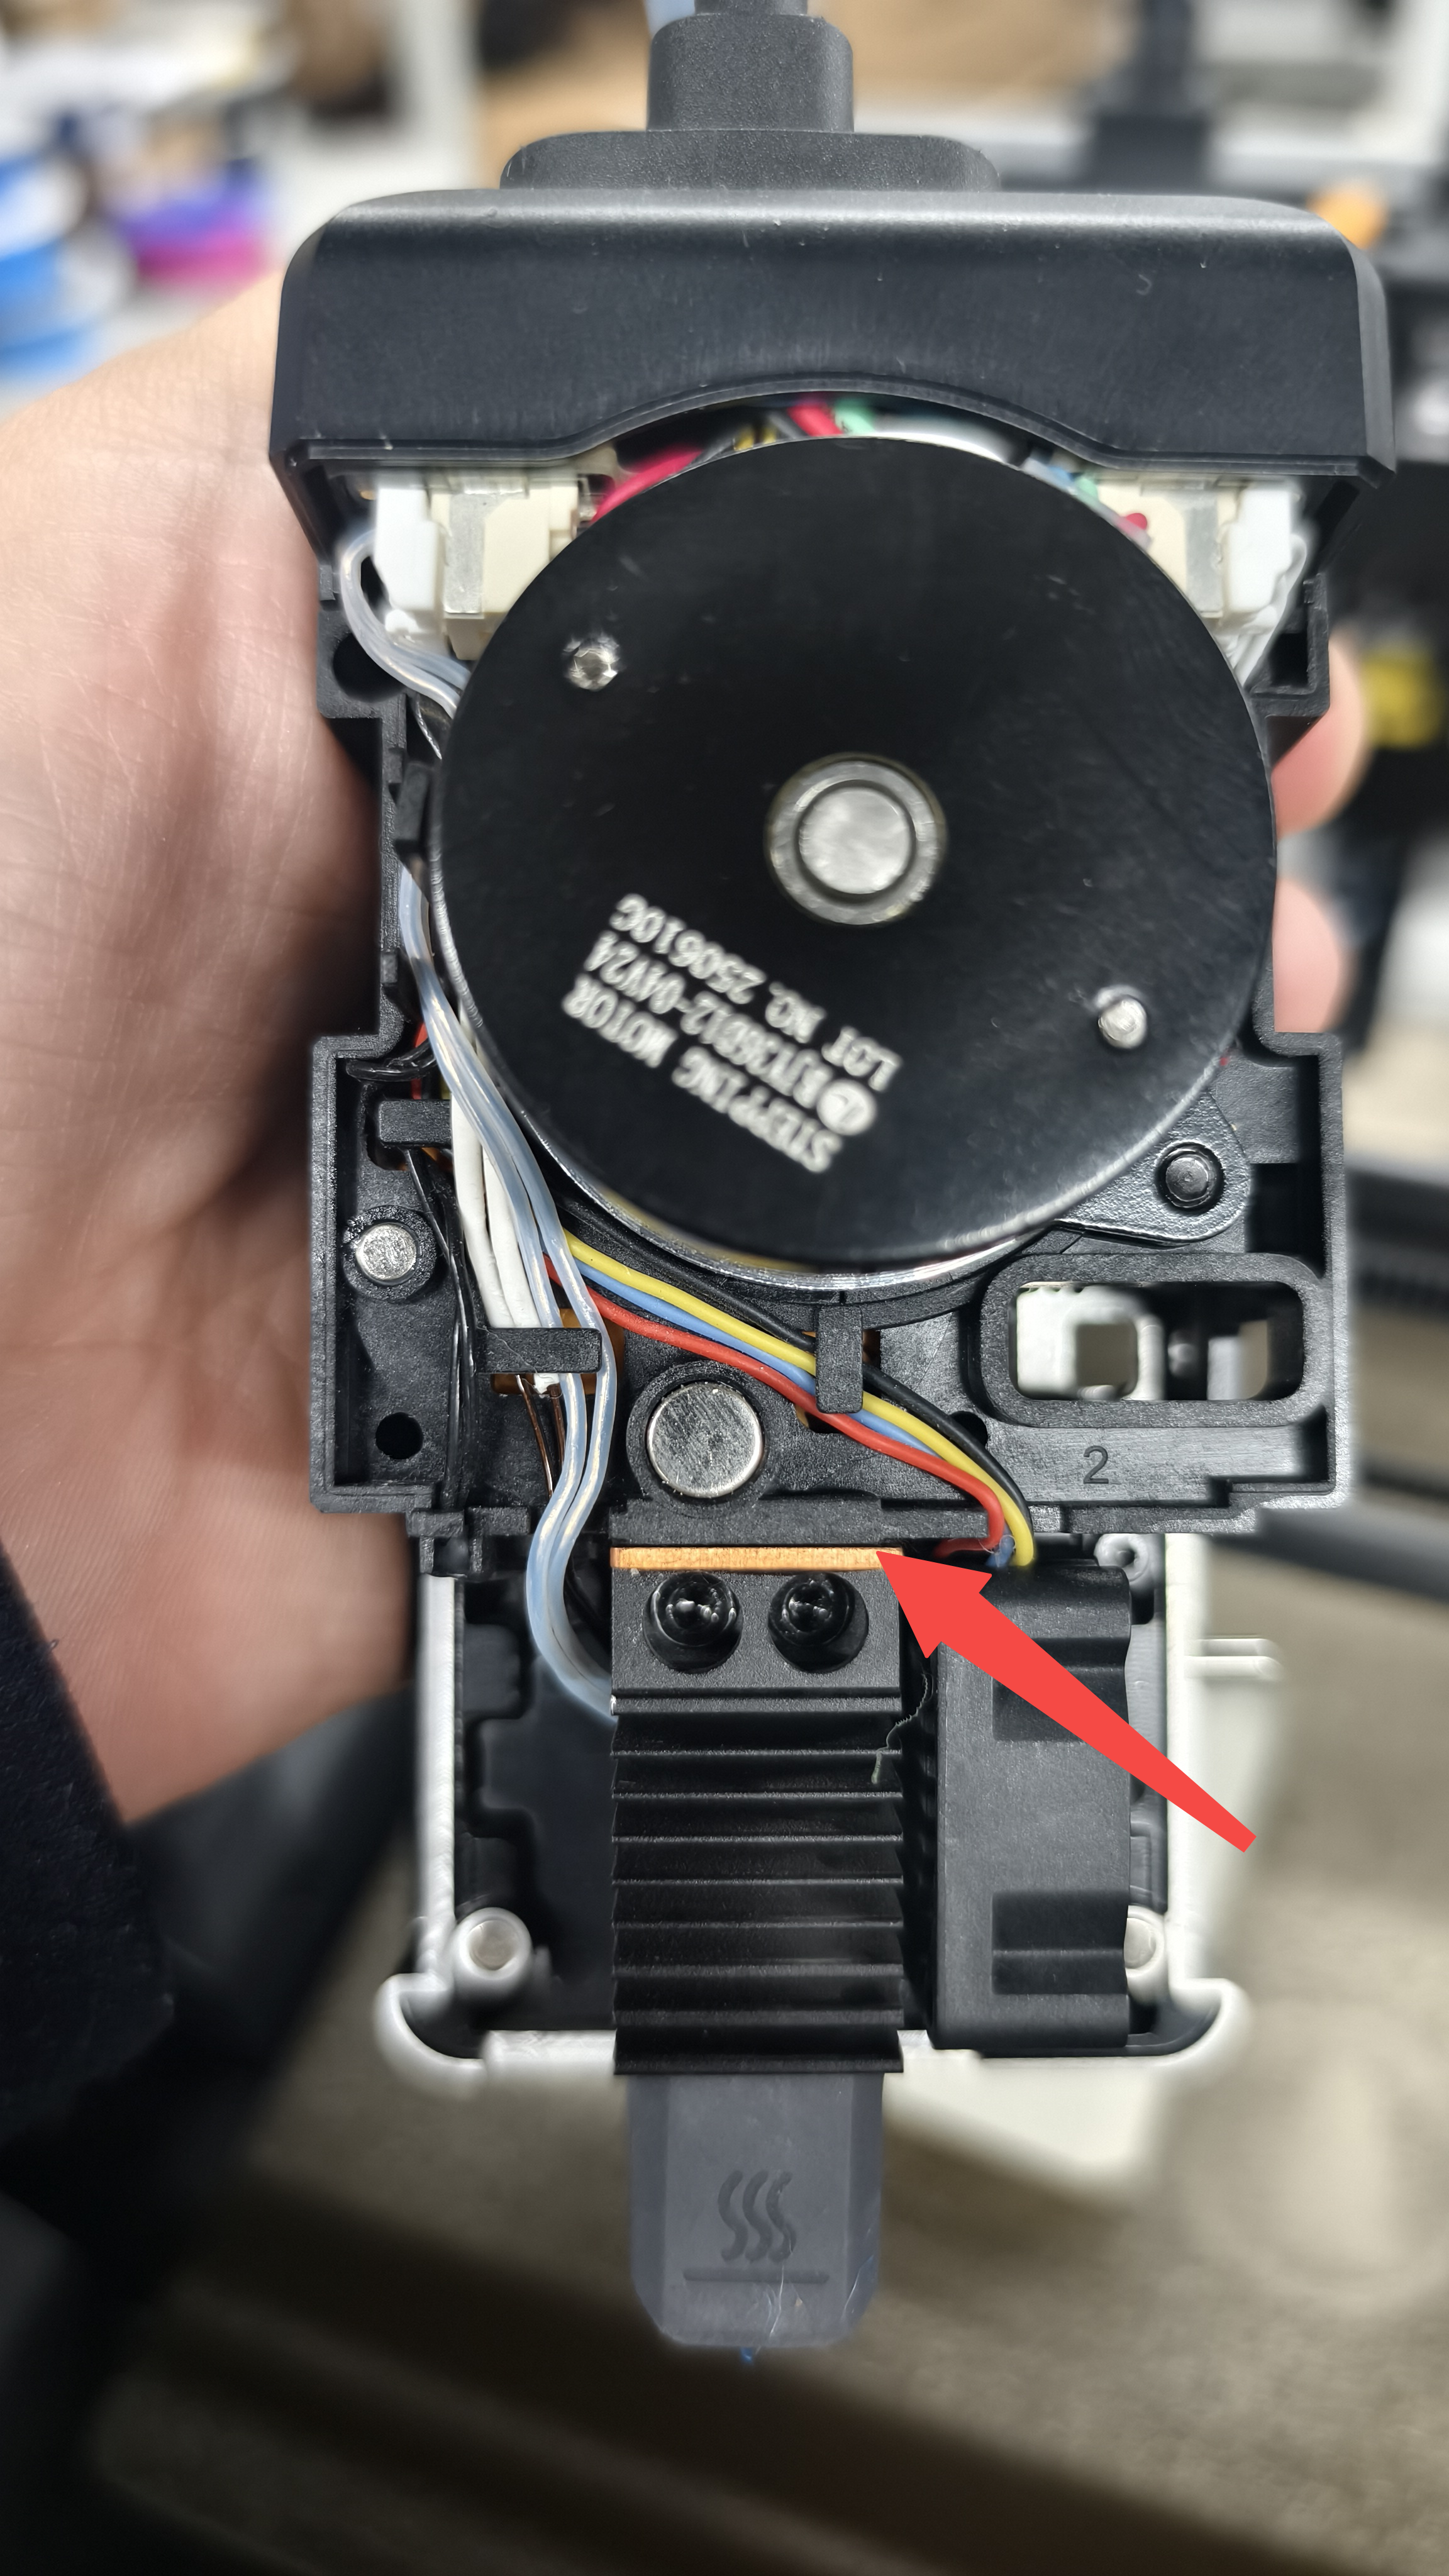
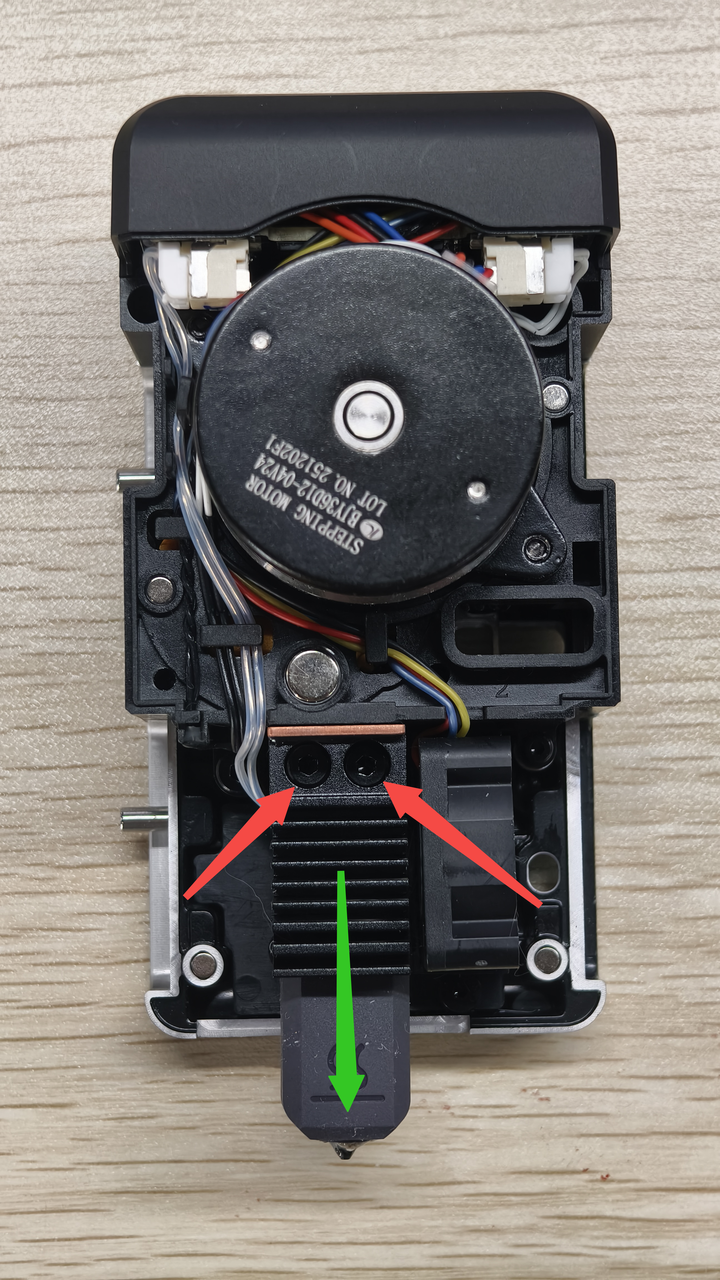
- If the gap is too large, use a hex key to loosen the two screws securing the hotend, push the hotend upwards, and then re-tighten the screws.
¶ Step 3: Check the Z Axis
¶ Cause 6: Z Offset Not Calibrated
Abnormal Z offset can cause the nozzle to start too low, resulting in scraping even after automatic leveling. In this case, the Z offset needs to be calibrated again:
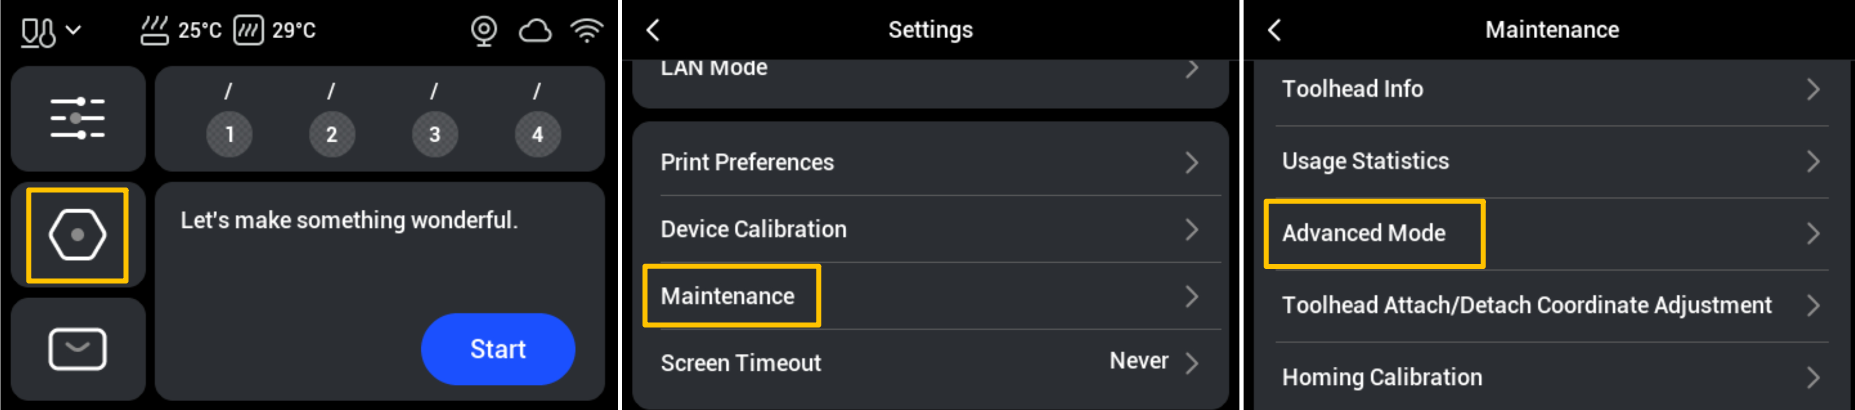
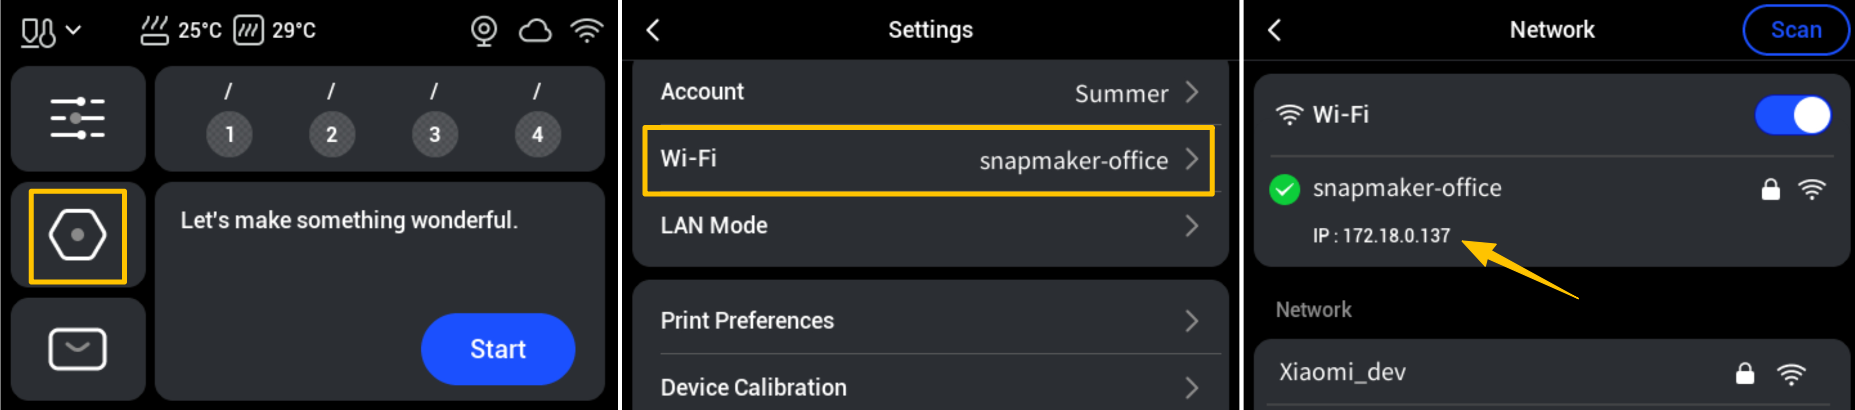
- On the touchscreen main interface, go to Settings > Maintenance > Advanced Mode > Click the Agree button in the lower left corner to enable this feature.
- Obtain the printer’s IP address. Return to the Settings page > Wi-Fi, for example, the IP address in the screenshot is 172.18.0.137.
- Enter the printer’s IP address into a browser to access the Fluidd interface.
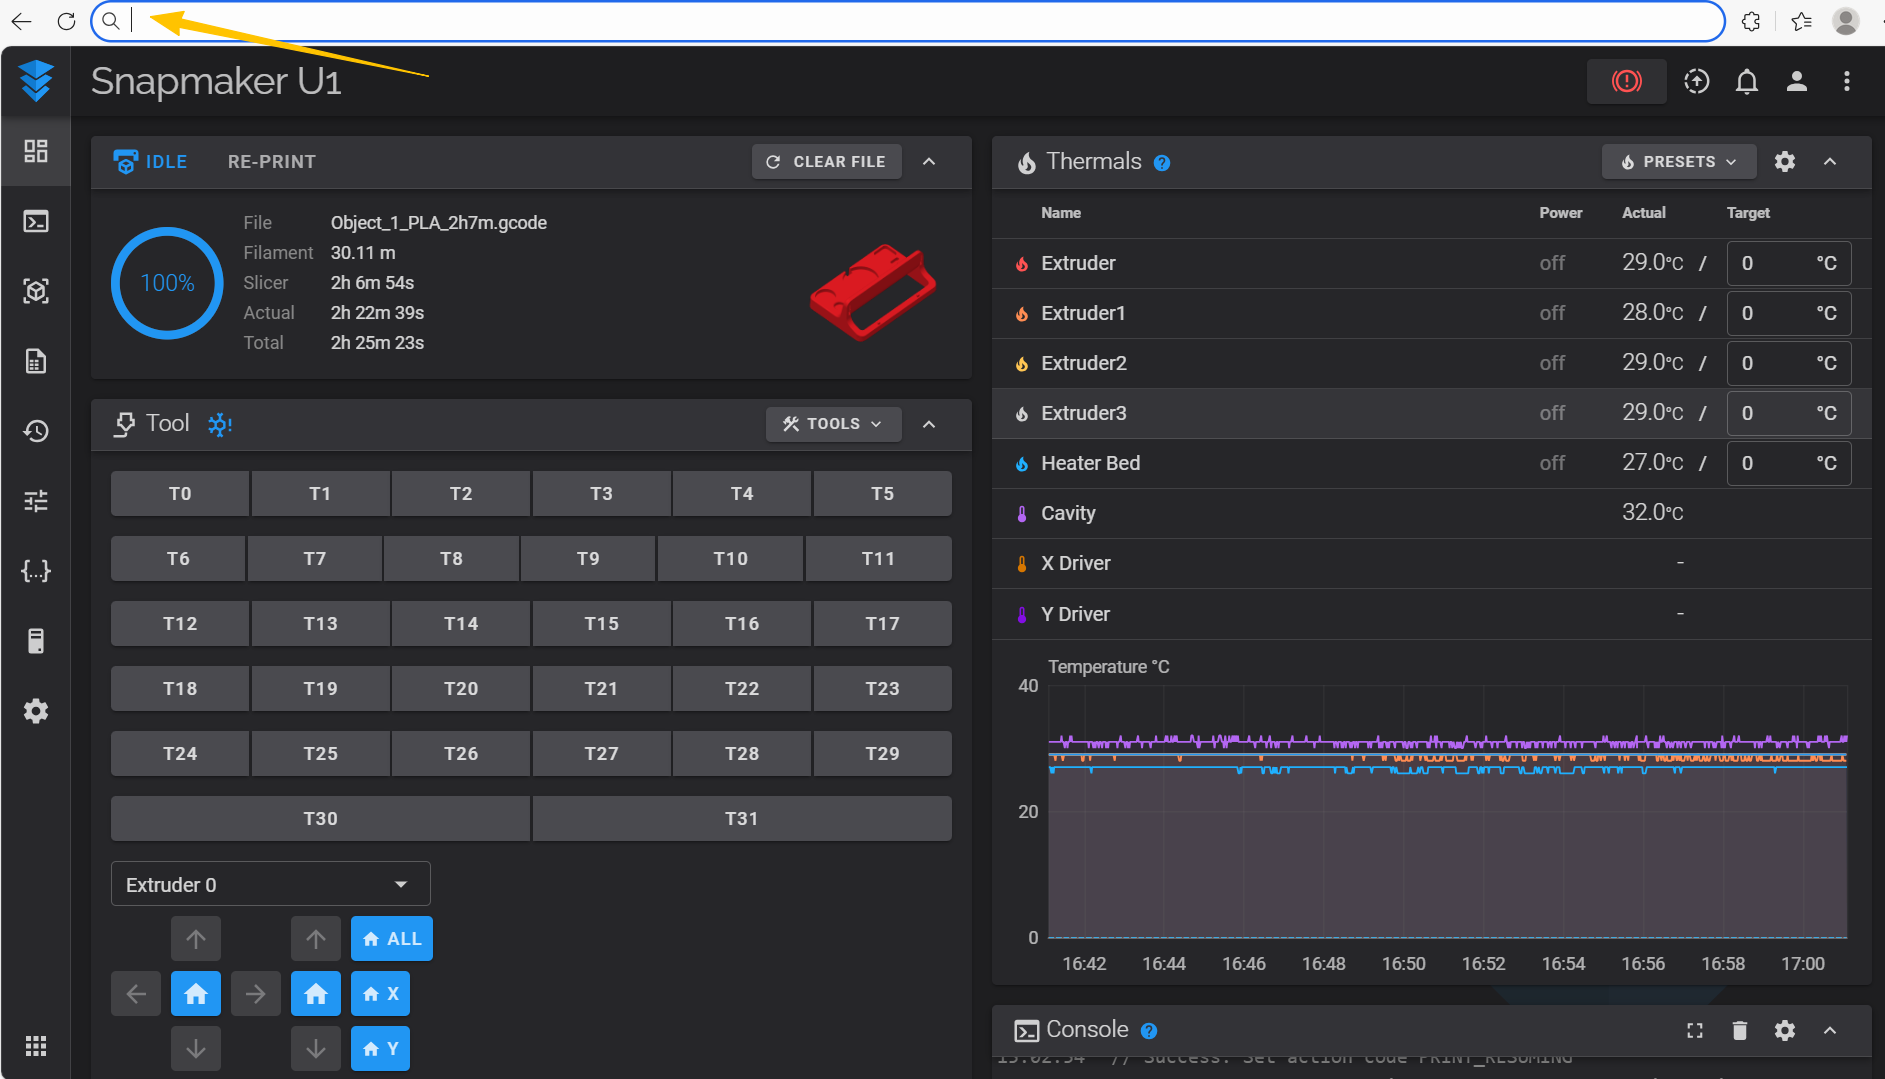
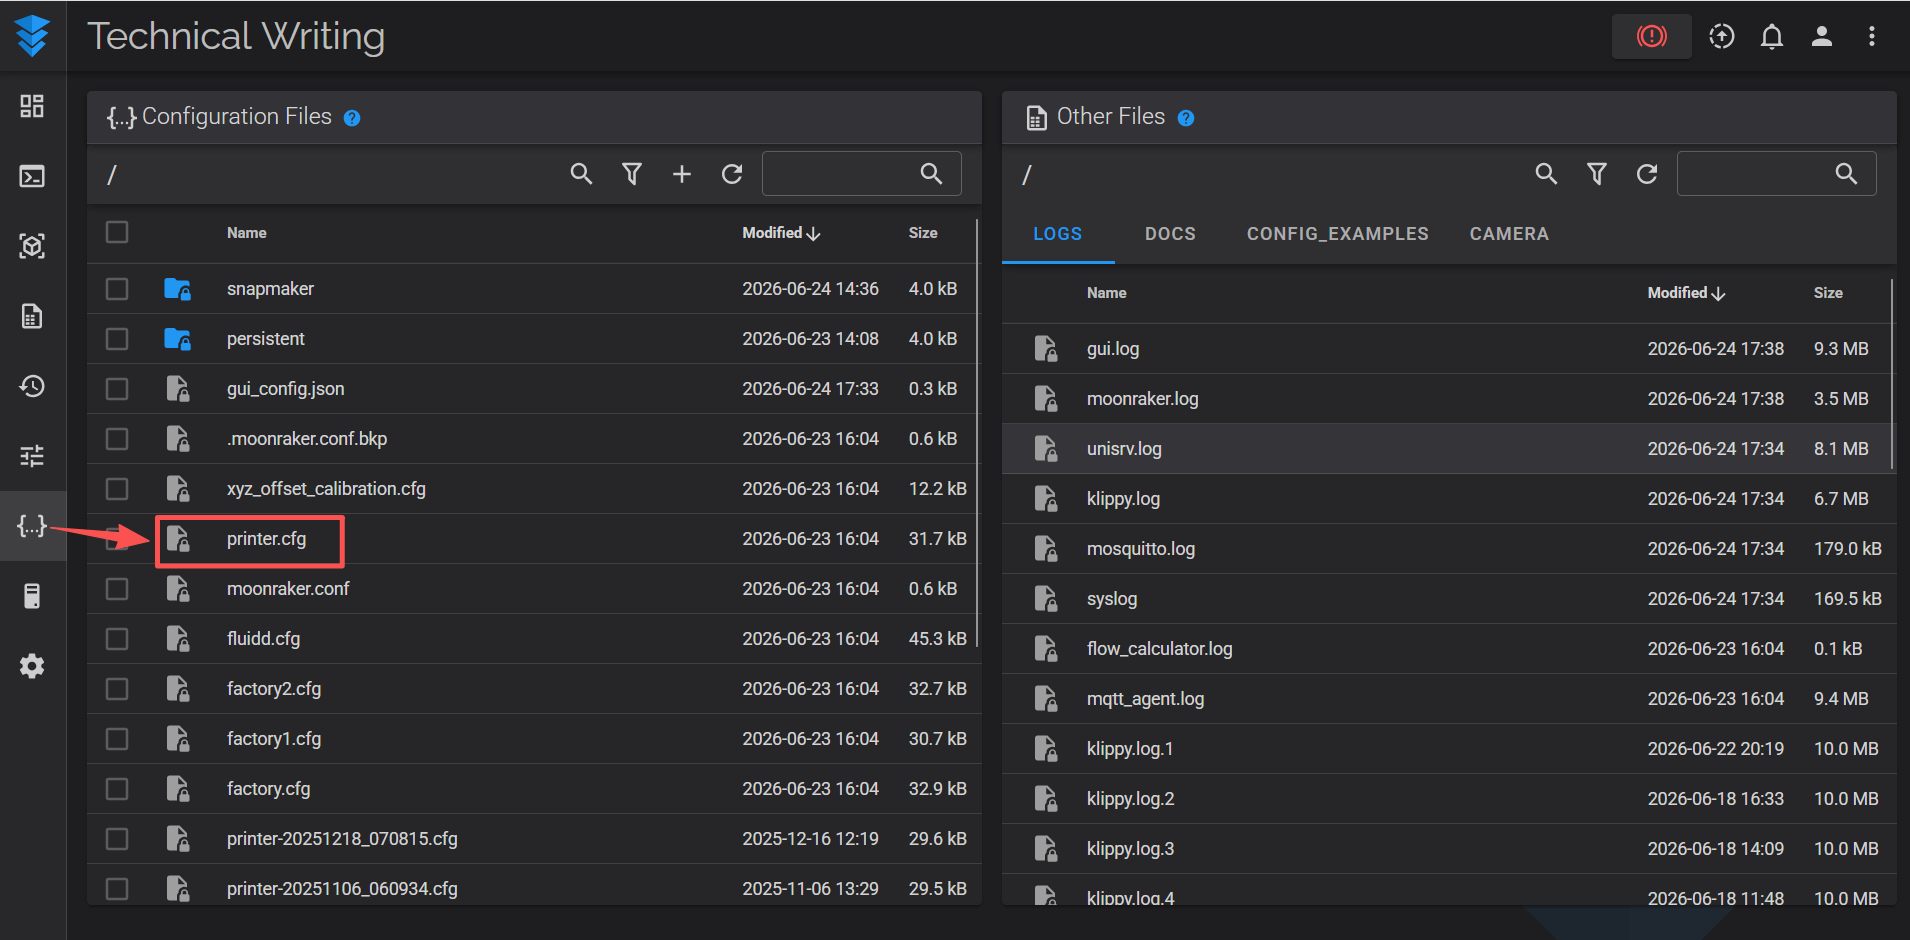
- In the left sidebar, click Configuration. The left panel will display a list of files, find and open the file named printer.cfg.
- In the file, locate the z_offset parameter, and adjust it in increments of 0.02 mm.
A larger Z offset value moves the nozzle closer to the heated bed, while a smaller value moves it farther away. For example, if the nozzle is scraping the build plate, you can adjust the value from -0.05 to -0.07, then -0.09, and so on.
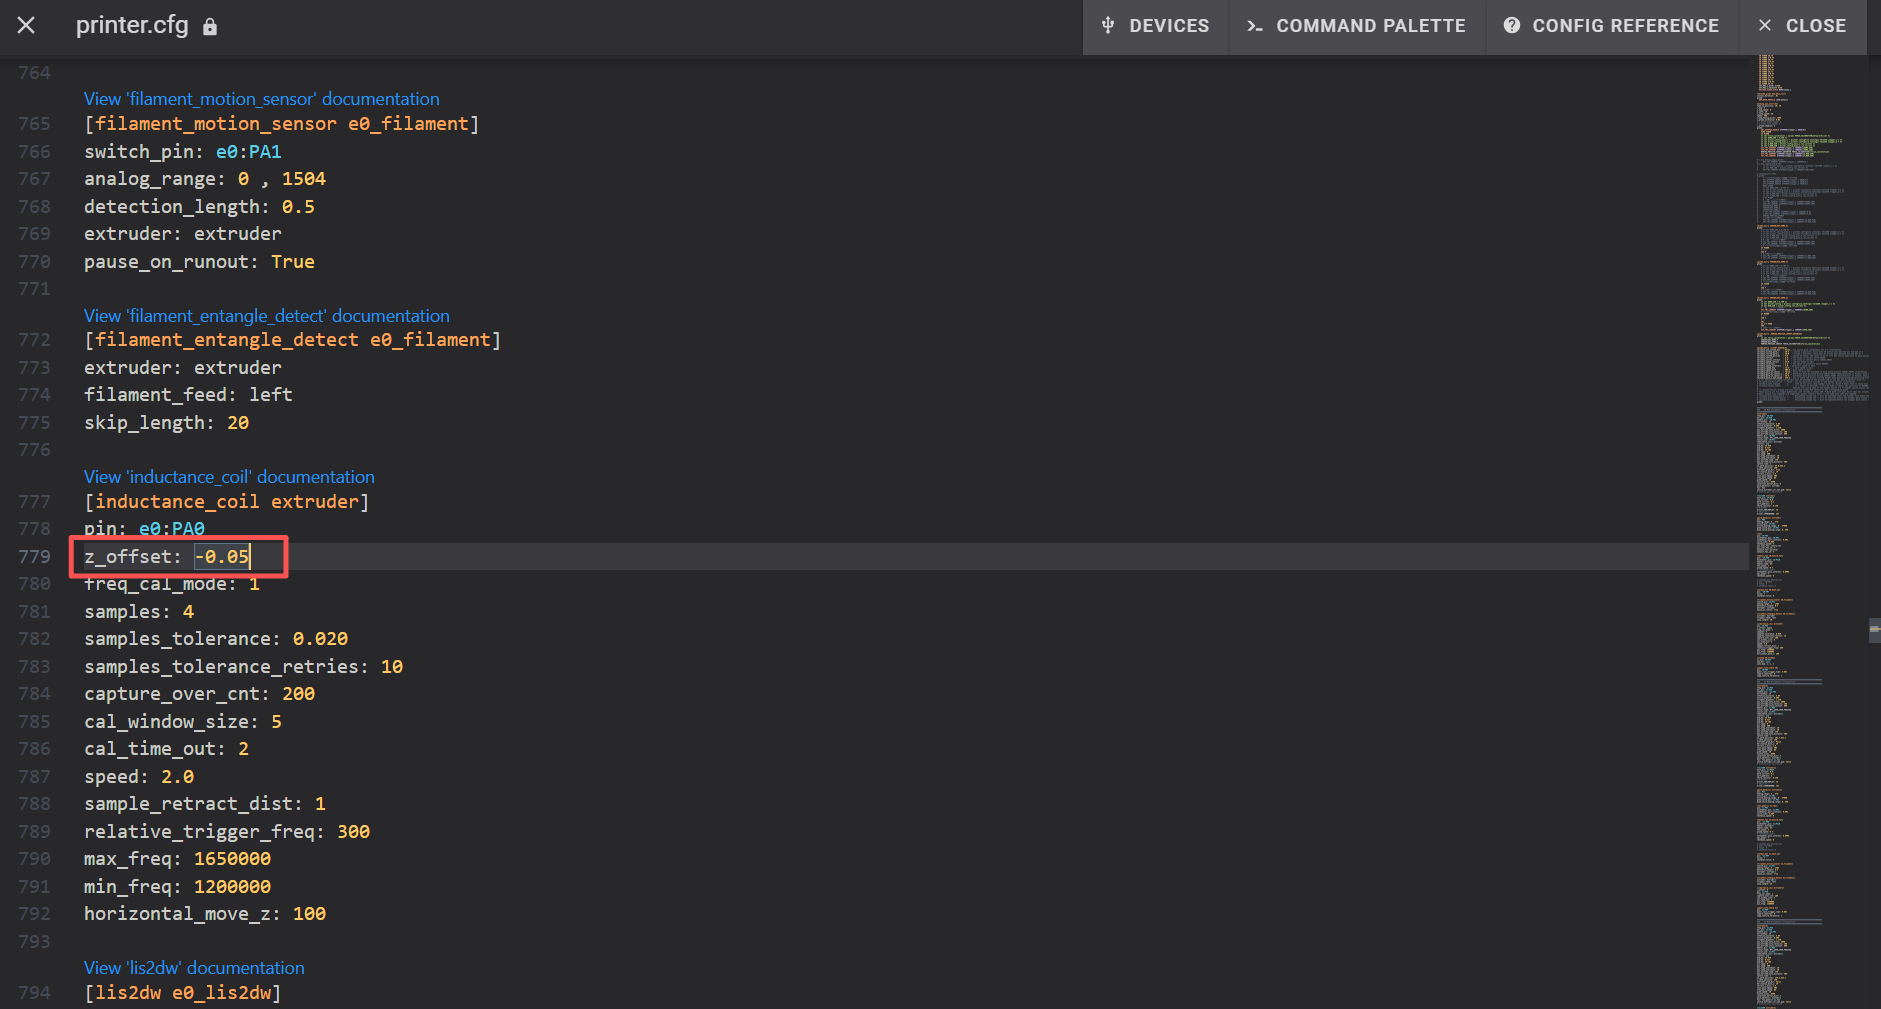
- Save the changes, restart the printer, and observe the first layer. If the scraping issue is reduced, continue fine-tuning the Z offset as needed, or keep the current value if the print quality is satisfactory.
¶ ✅ Verification
Print a single-layer test model and observe if the nozzle still collides with the build plate. At the same time, listen for any abnormal noises during printing and check if the nozzle maintains a consistent distance from the bed. If none of these issues occur, the problem has been successfully resolved; otherwise, it is recommended to return to troubleshooting or reach out to Snapmaker Support for further assistance.
¶ 📚 Related Resources
- Rigid Filament Unloading
- Flexible Filament Unloading
- U1 Filament not extruding
- U1 Video Guide: Ceramic Heater & NTC Thermistor Replacement
¶ 💬 Reach out to Snapmaker Support
After following the troubleshooting steps, if you find it difficult to resolve your issue, kindly submit a support ticket through https://snapmaker.formcrafts.com/u1-troubleshooting-request and share your troubleshooting results with pictures or videos. Our dedicated support team will be more than willing to assist you in resolving the issue.