¶ Before You Start
- Download the latest version of LightBurn from its official website and install it on your computer.
There is a 30-day free trial available for new users of LightBurn.
- Optional: It is necessary to restart the Snapmaker machine when switching from Luban to Lightburn due to the difference in connection protocols between the two software. Restarting the machine allows for the switching of the G-code protocol.
¶ Procedures
¶ Step 1: Add your machine to LightBurn.
- Download the profile for your machine.
- snapmaker-2.0-2w-v1.lbdev
- snapmaker-2.0-20w-v1.lbdev
- snapmaker-2.0-40w-v1.lbdev
- snapmaker-artisan-2w-v1.lbdev
- snapmaker-artisan-20w-v1.lbdev
- snapmaker-artisan-40w-v1.lbdev
- snapmaker-ray-2w-v1.lbdev
- snapmaker-ray-20w-v1.lbdev
- snapmaker-ray-40w-v1.lbdev
When using Lightburn configuration on Artisan, you need to use the Artisan Touchscreen to control the movement of the machine and the setting of the work origin.
If you are using a 1.6W or 10W laser module, refer to Adding a 1.6W or 10W laser module in LightBurn to complete the device addition.
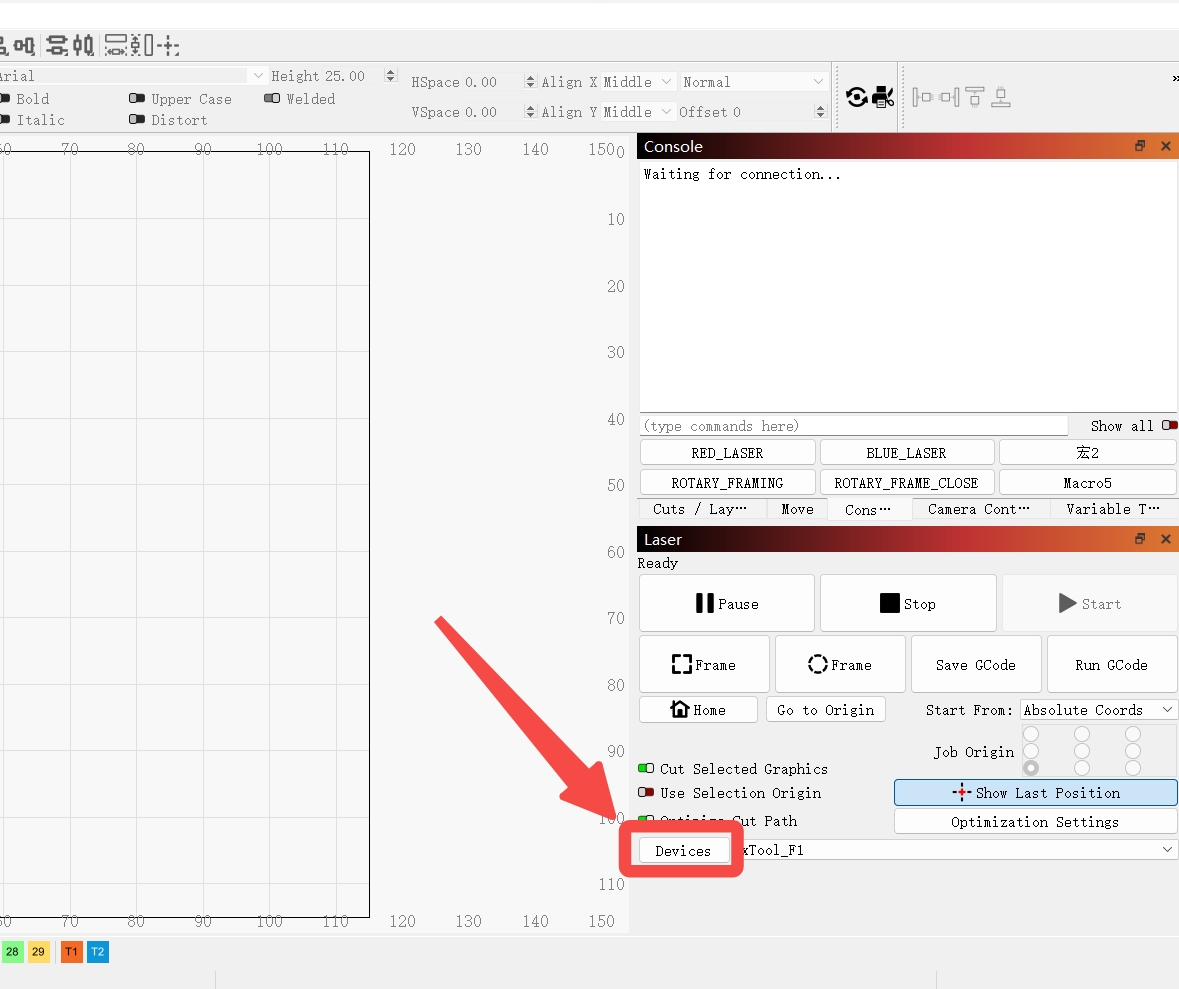
- Launch LightBurn, then click Devices in the Laser panel.
If LightBurn automatically pops up the Your Device List window after launching, please skip to the next step directly.
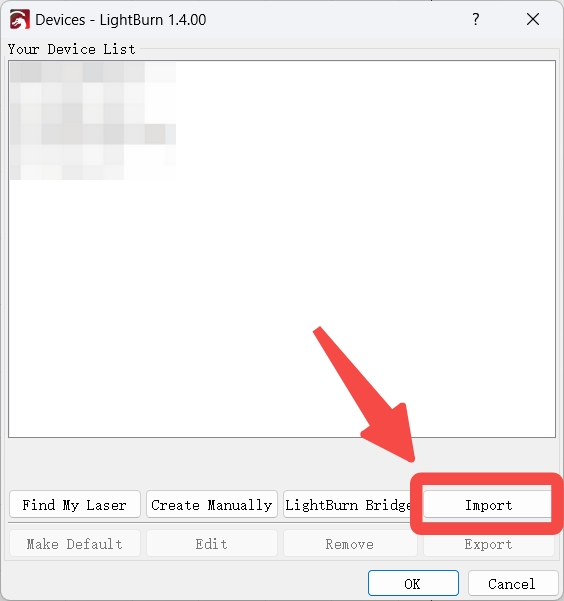
- Click Import to import the profile downloaded in Step 1.
- After your machine appears in the Your Device List, which indicates that the import was successful, click OK to close the window.
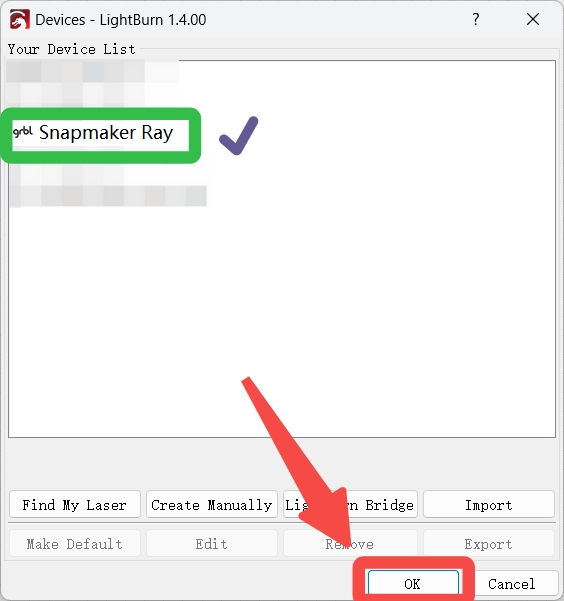
The illustration takes Snapmaker Ray as a demonstration.
- Select your machine from the drop-down list beside Devices in the Laser Panel.
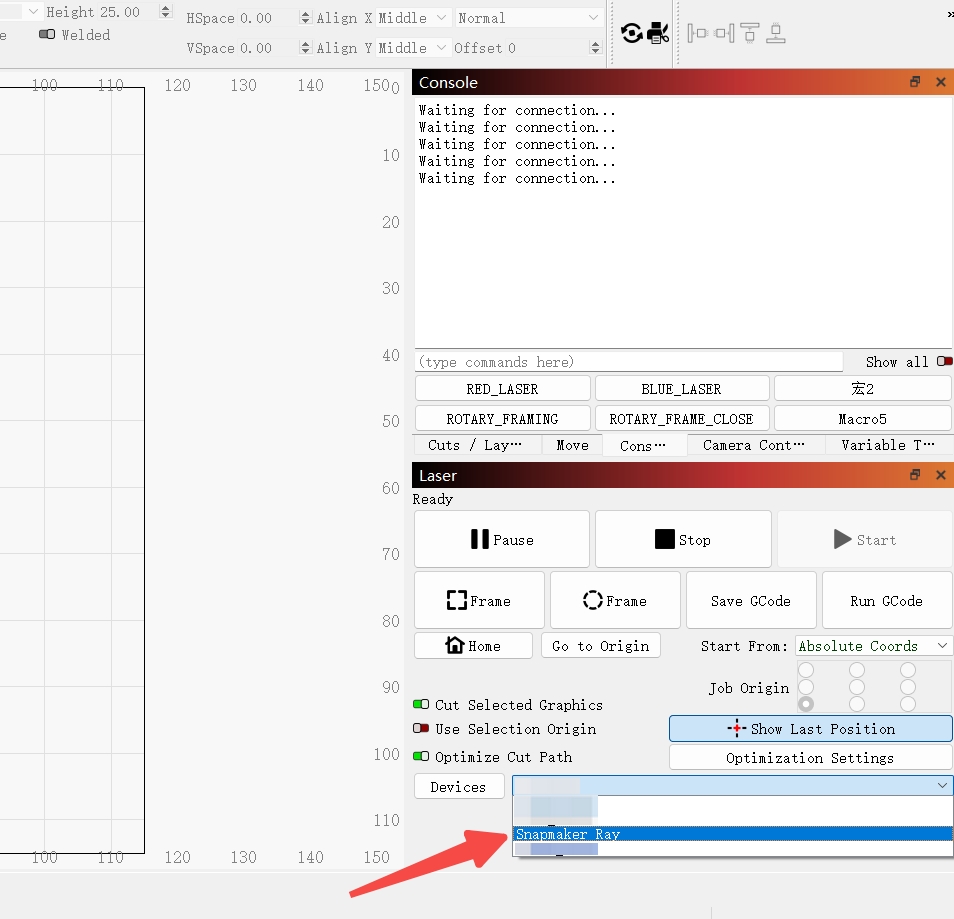
The illustration takes Snapmaker Ray as a demonstration.
¶ Step 2: Connect your machine to LightBurn via the serial port.
Although LightBurn supports device connection over a network, our products cannot connect to LightBurn due to the different network protocols used by our products. Currently, our products can only be connected through the serial port.
-
Make sure you have installed the CH340 driver on your computer. If you haven't, please click the appropriate link below based on the operating system of the computer.
-
Connect the machine and your computer using the provided USB cable, then turn on the machine.
-
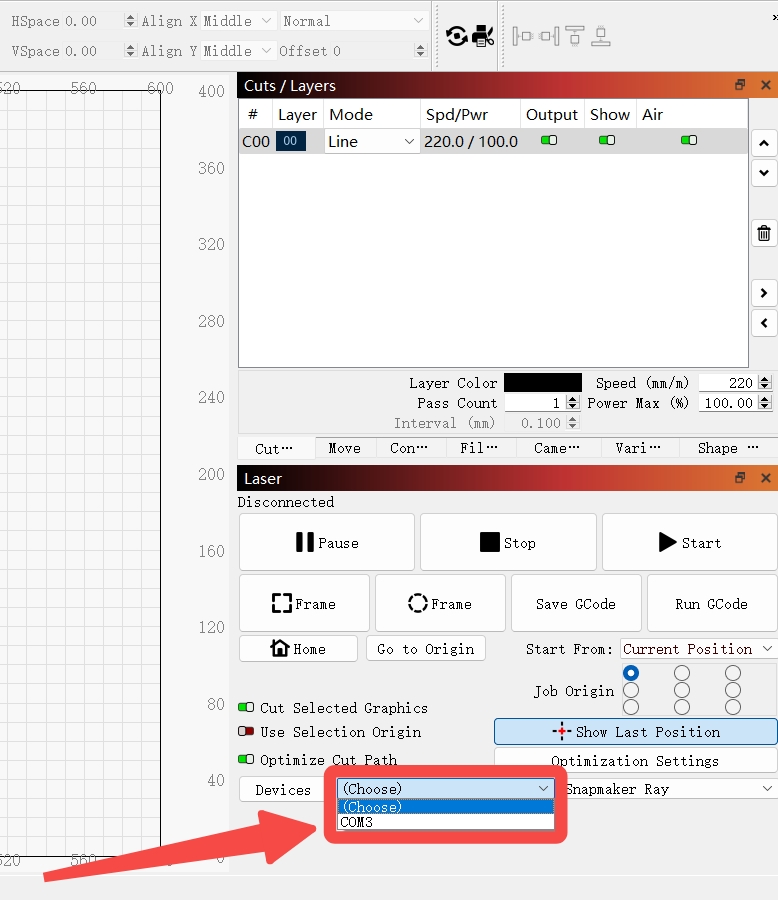
Select the displayed serial port from the drop-down list beside Devices in the Laser Panel.
¶ Step 3: Configure parameters.
-
Import the design file into LightBurn, or direcly draw on the canvas.
-
Configure the parameters for laser engraving and cutting in the Cut/Layers panel.
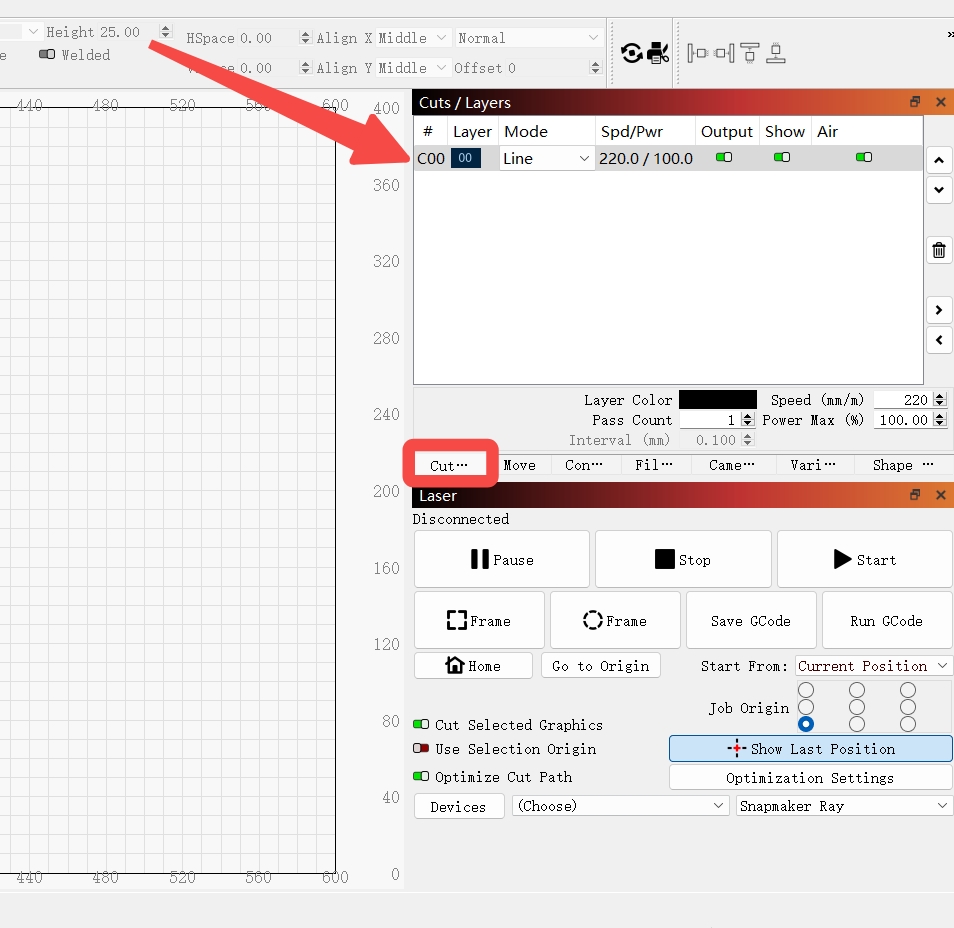
For detailed guides about how to configure parameters in LightBurn, you can refer to LightBurn's official documentation.
¶ Step 4: Adjust the laser height and set the work origin.
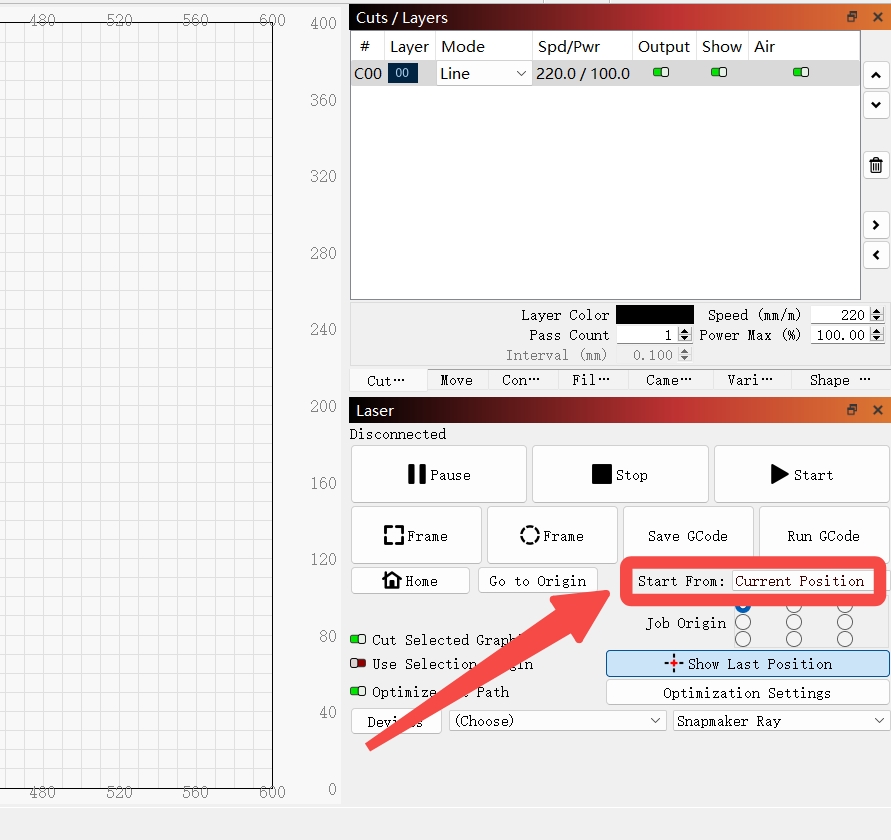
- In LightBurn's Laser panel, select Current Position from the Start From drop-down option.
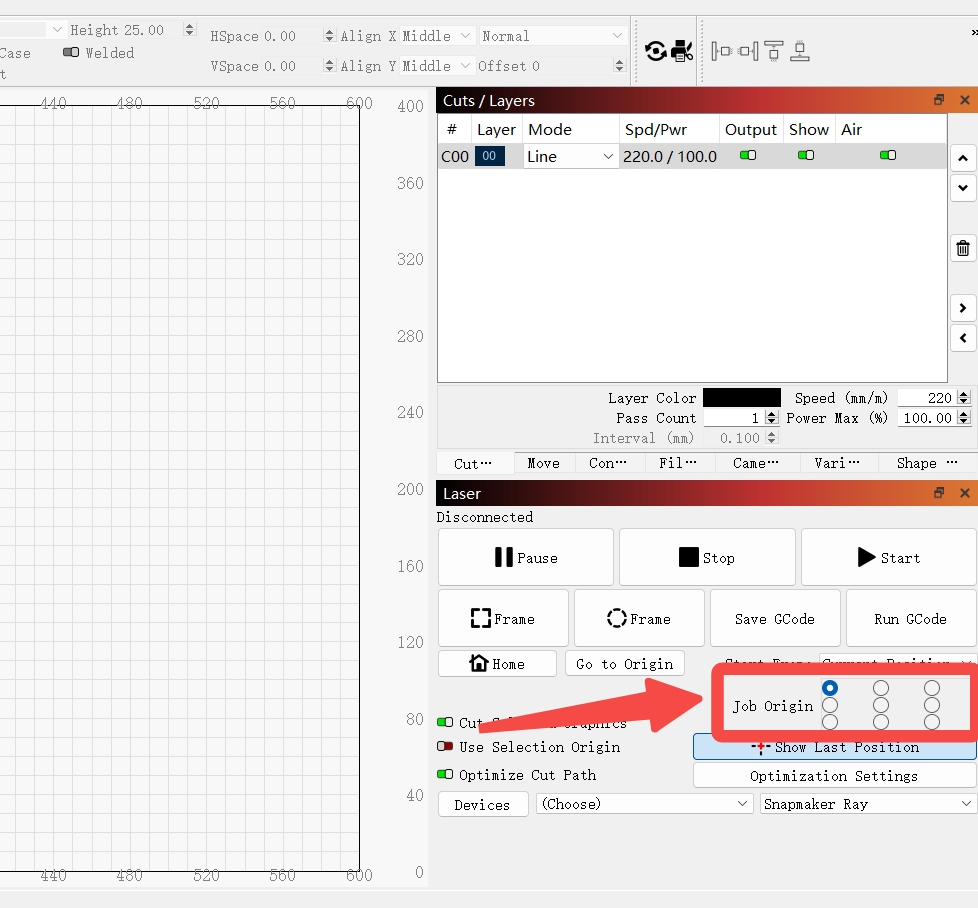
- Determine the position of the job origin.
-
Place the material on the laser platform.
-
To continue adjusting the laser height, select to read the corresponding content in accordance with your machine models.
- To continue setting the work origin, select to read the corresponding content in accordance with your machine models.
¶ Step 5: Start the task.
The data transfer rate of the serial port is limited. Therefore, if image engraving is required, to avoid possible lag of the linear module during machining, it is recommended to click the Save GCode in the Laser panel to export the G code.
-For Ray, export the G code to the microSD card, and then manually press the work switch to start the task.
-For Artisan and 2.0, export the G code to the USB flash drive, and then start the task through the touchscreen.
-
Select the design object on the canvas.
-
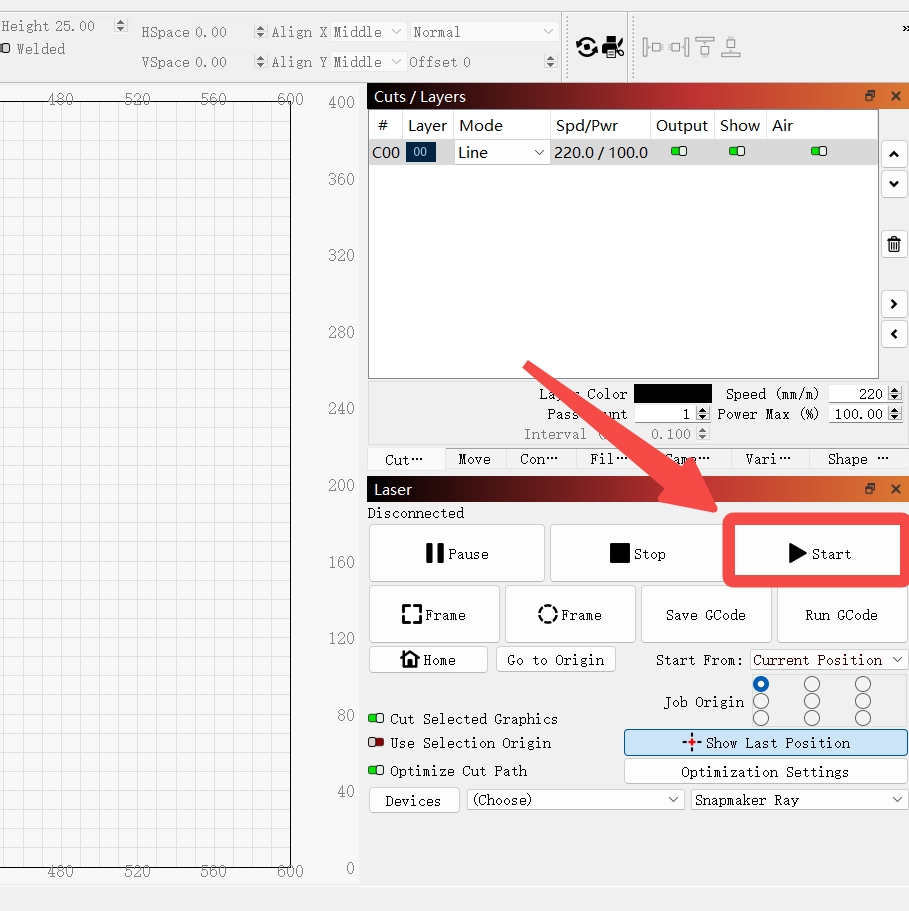
In LightBurn's Laser panel, click Start to start the laser machining.
If the Enclosure is installed, make sure that the Enclosure door has been closed before clicking Start and will stay closed throughout the task.
Before starting, you can view the process stimulation of the machining by clicking Window > Preview > Play.
Keep the machine attended throughout the task!
The red crosshair will remain on, not affecting the machining though, throughout the task when initiated with LightBurn via the serial port.
To pause or stop the task, you can click Pause or Stop in LightBurn.
Related Resources