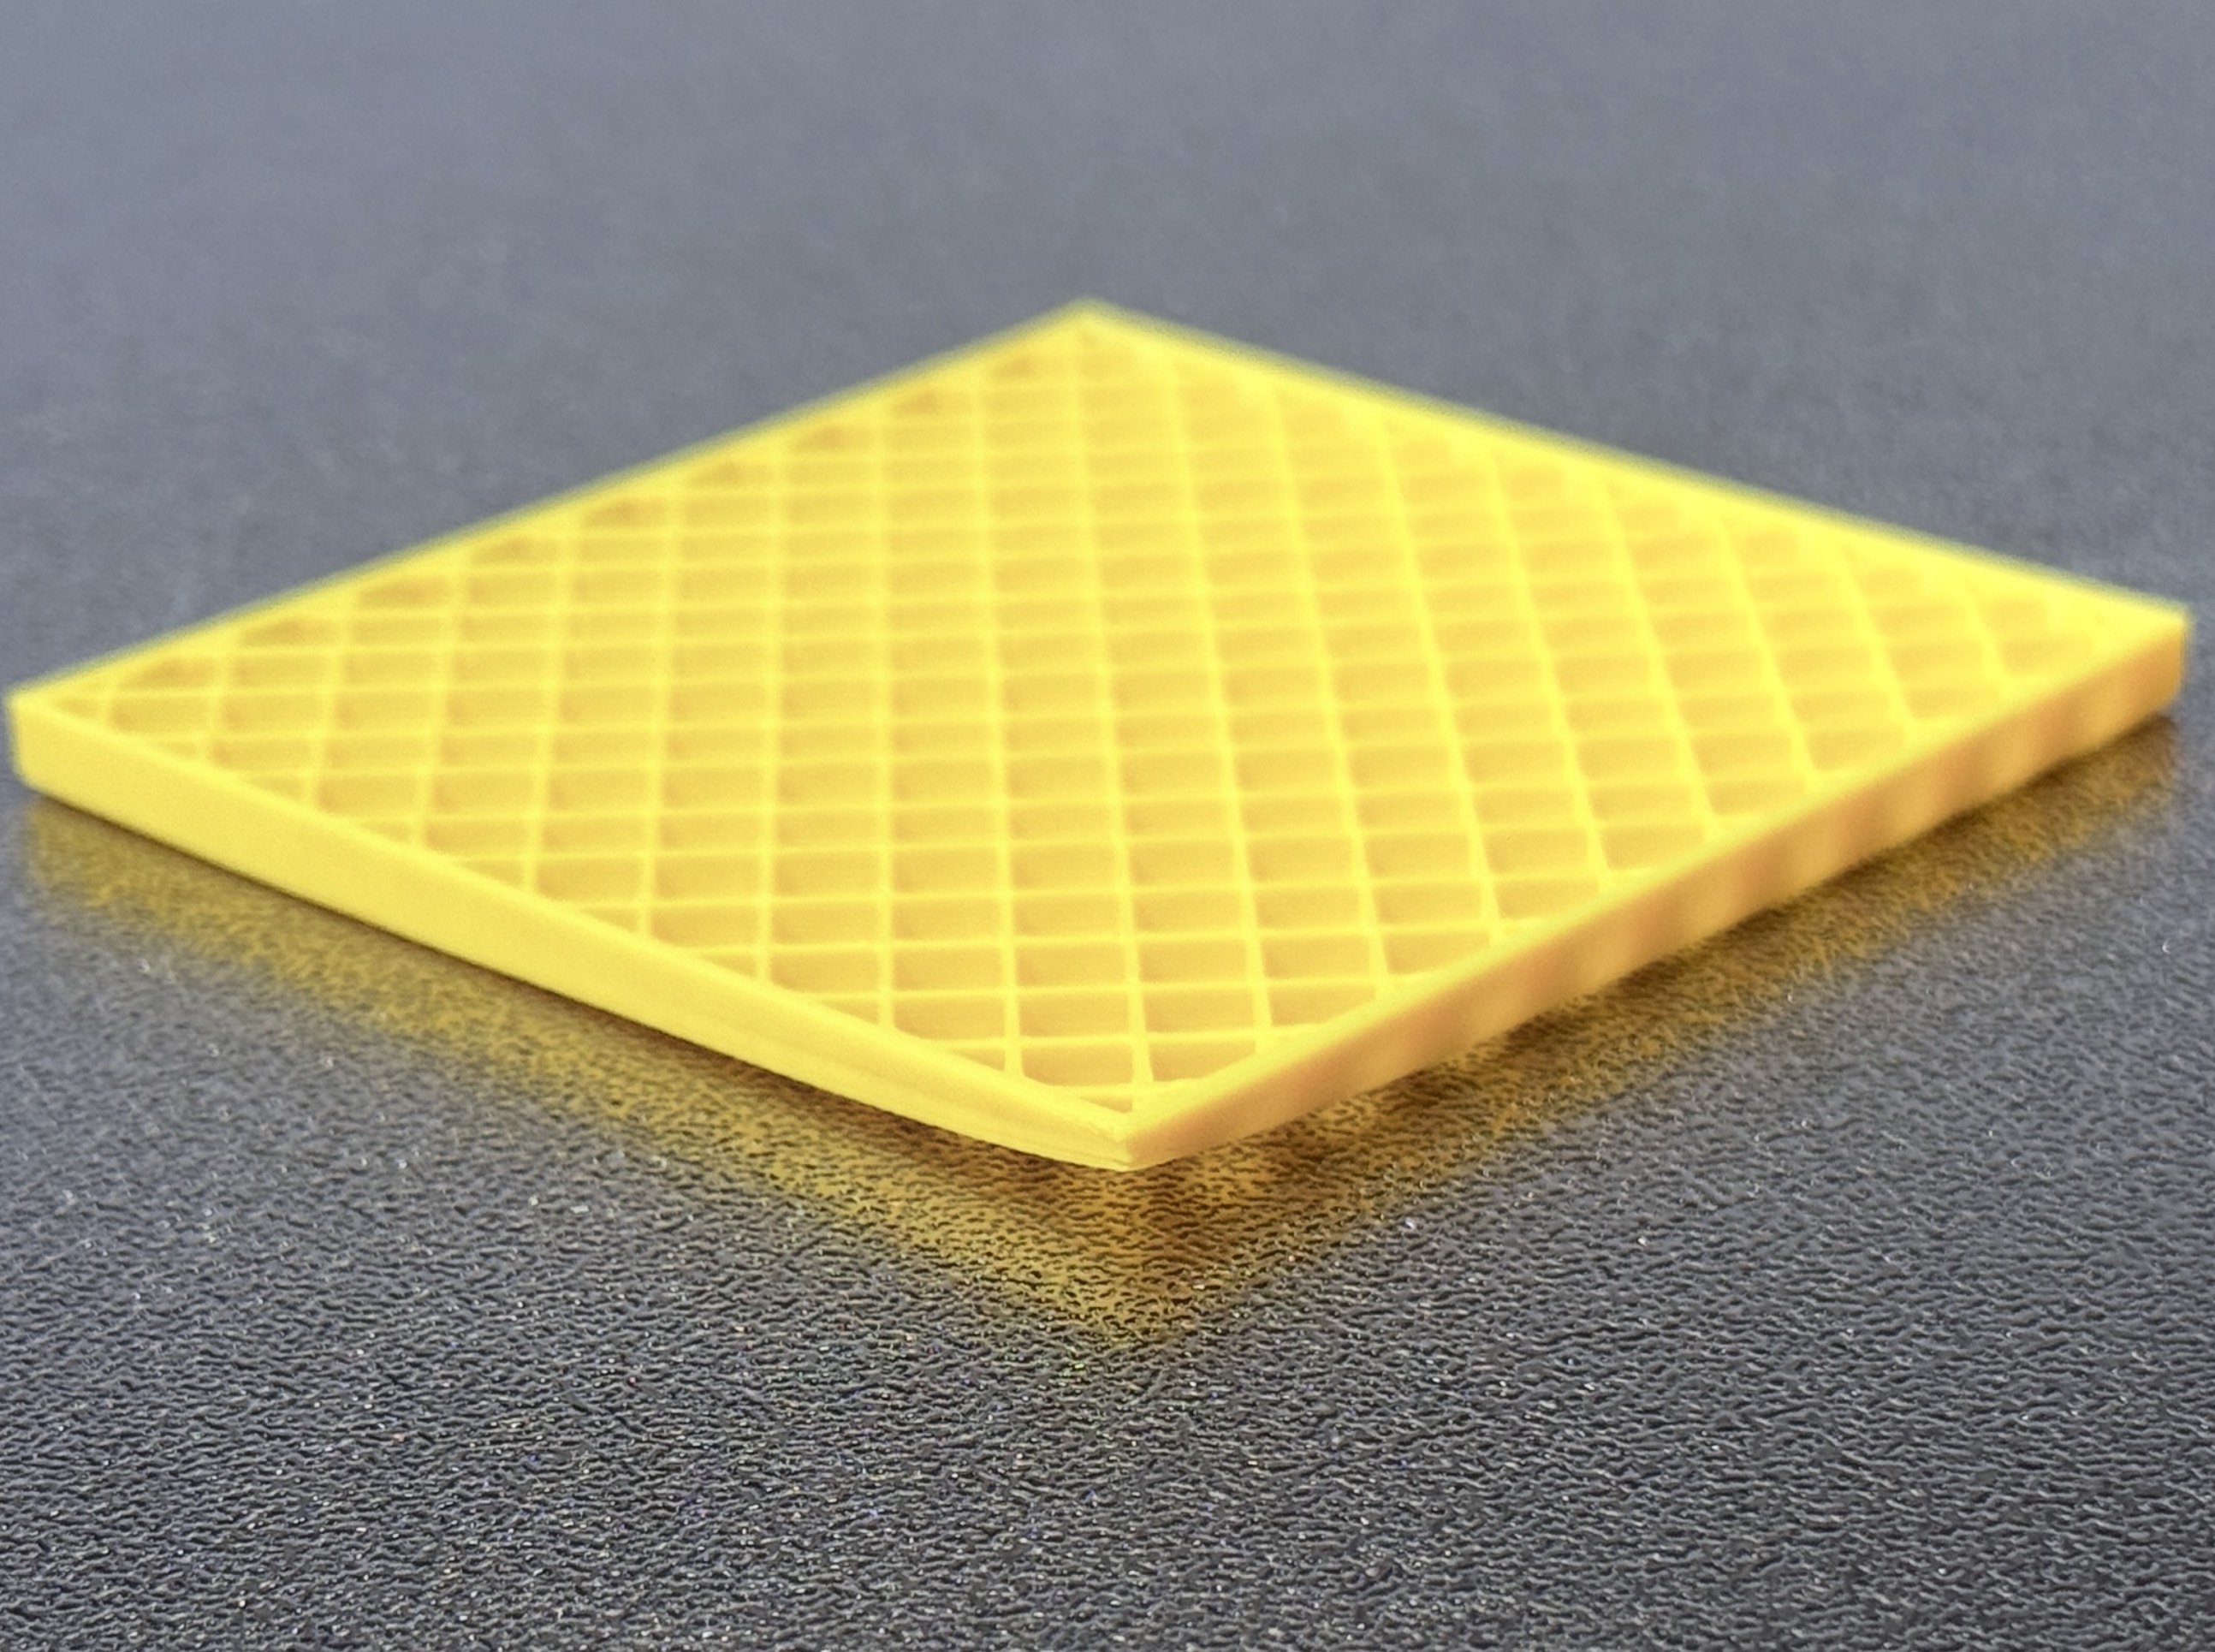
Model warps, detaches, or collapses refers to a situation during printing where the corners or edges of a model's base unintentionally separate from the build plate and curl upward due to shrinkage stress. In severe cases, the model may collapse.
When using ethanol for cleaning, carefully read and follow the manufacturer's instructions. Keep away from heat and open flames, ensure adequate ventilation, and avoid inhalation, ingestion, and direct skin contact.
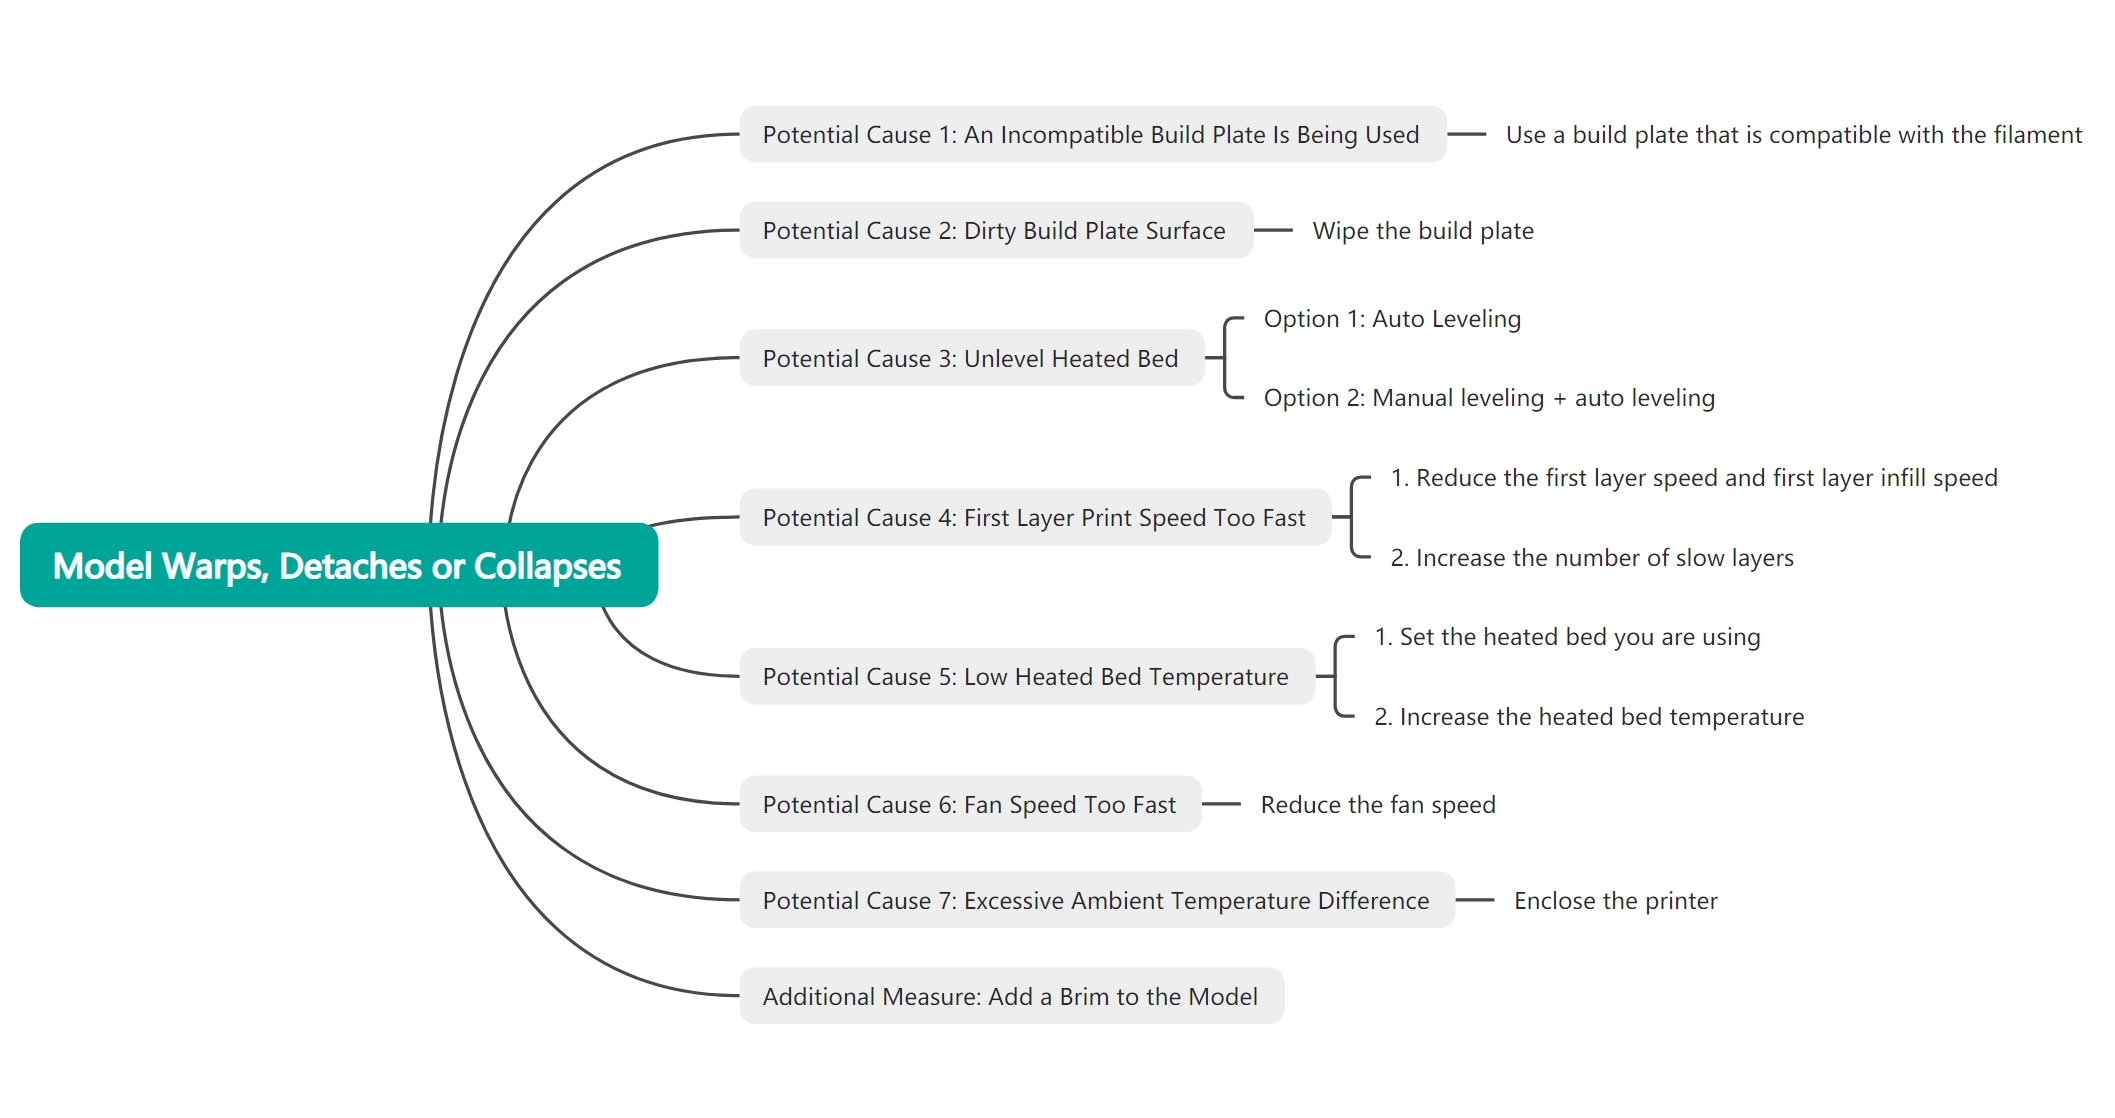
¶ Potential Cause 1: An Incompatible Build Plate Is Being Used
Using a build plate that is not compatible with the filament may result in insufficient adhesion between the model and the build plate. As the model cools and shrinks, stress can cause the bottom of the model to detach from the build plate or warp upward.
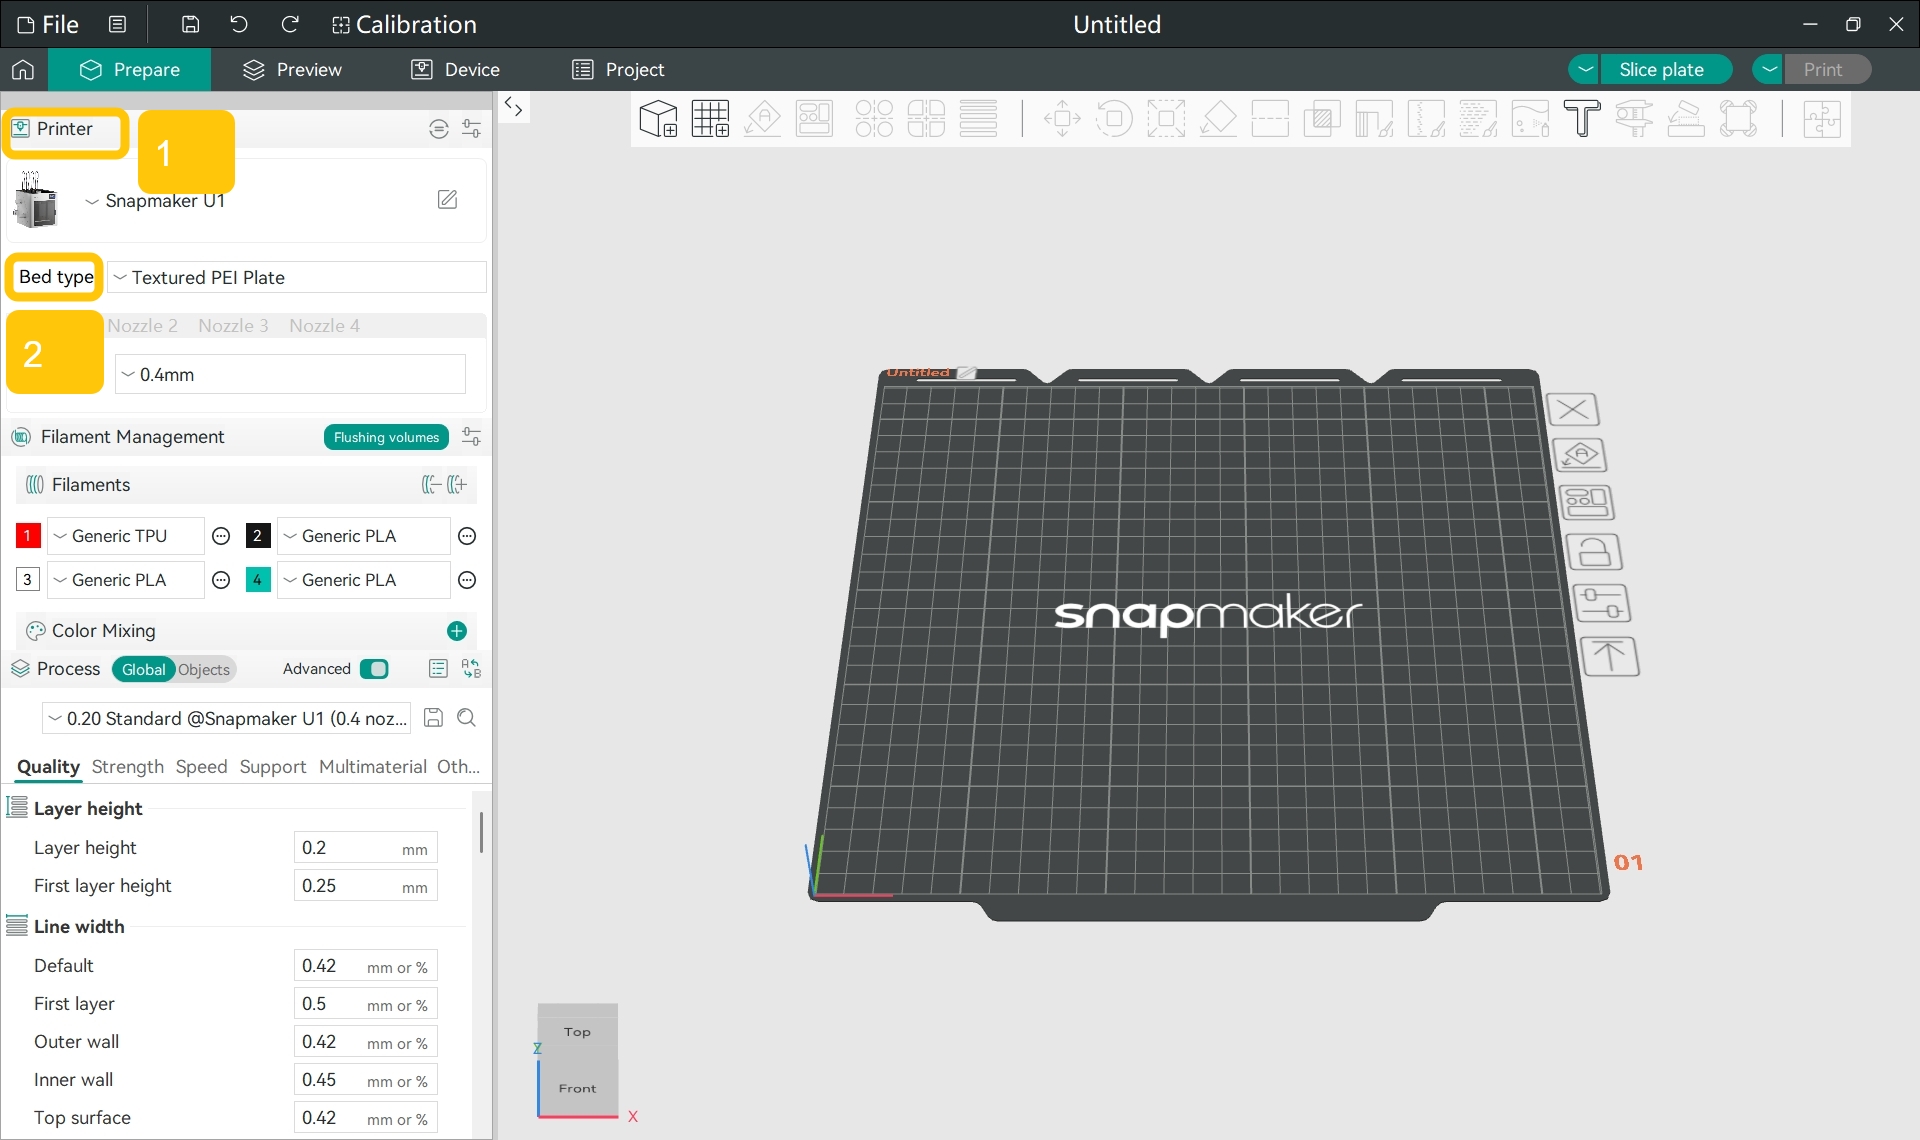
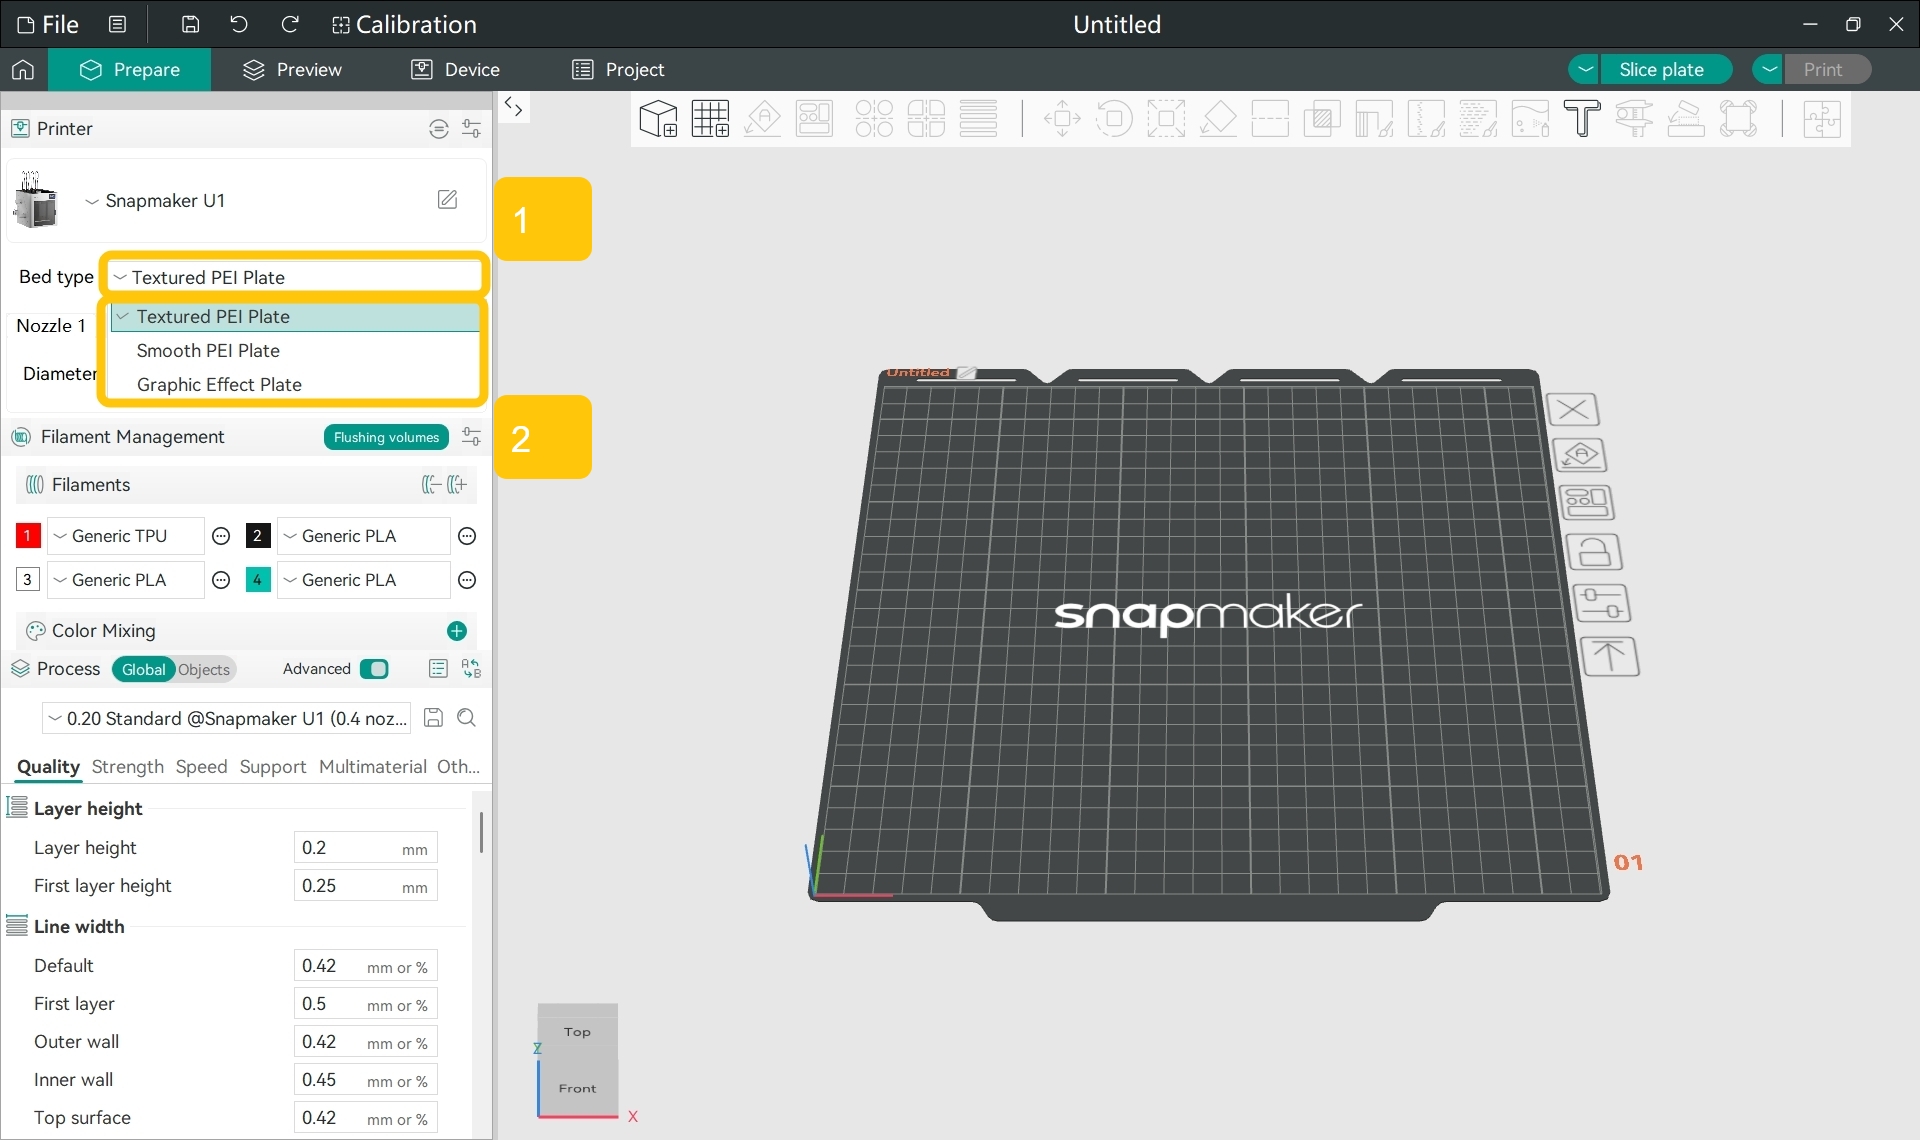
Use a build plate that is compatible with the filament. For example, use a Smooth PEI Plate when printing PEPA, and a Textured PEI Plate when printing ABS.
Refer to the Build Plate Guide to learn about the compatibility of common filaments with Smooth PEI Plates and Carbon-fiber Textured Steel Plates, as well as whether glue is recommended.
You can also refer to the filament's technical data sheet or user guide to determine the recommended build plate type.
Snapmaker official filament technical data sheets and user guides provide "Bed Type" recommendations to help you choose a compatible build plate for each filament type.
Dust, dirt, fingerprints, grease, and other contaminants on the build plate surface can reduce adhesion between the filament and the build plate, making the model's corners more likely to warp or detach from the build plate under stress.
Remove the build plate from the heated bed.
Please cool the build plate to room temperature for removal to prevent burns.
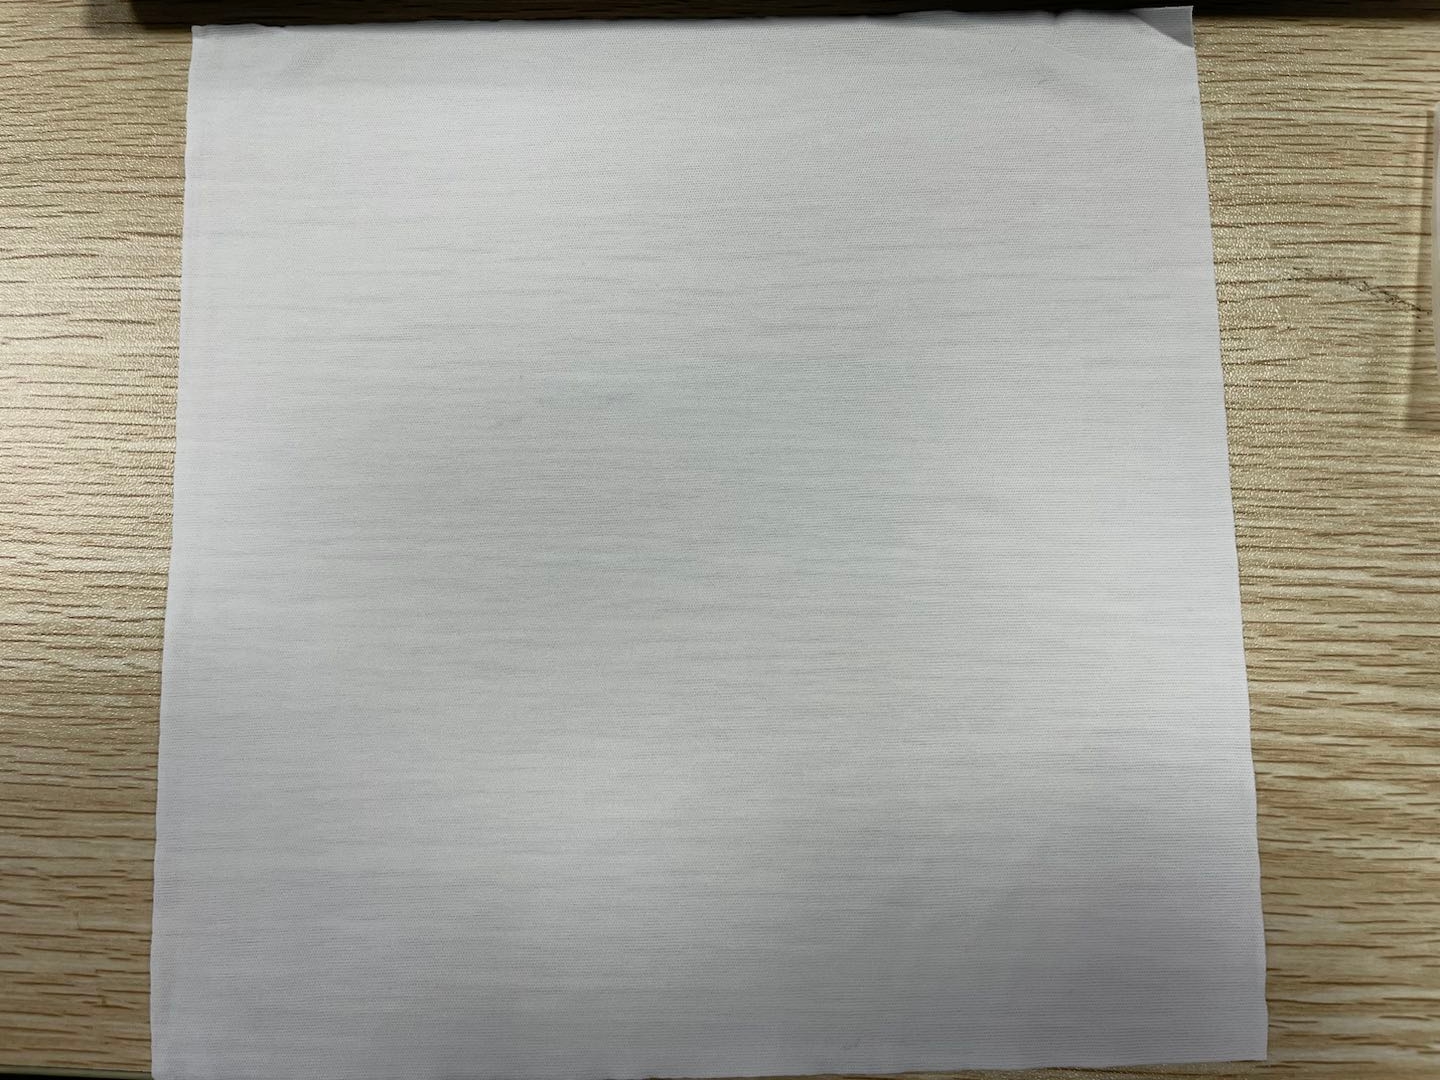
Use the wiping cloth from the U1 accessory toolbox (or other lint-free cloth), dampened with a small amount of ethanol, to gently wipe the build plate until no contaminants or residue remain.
Wiping cloth from the U1 accessory toolbox
Wipe the build plate gently and slowly. Avoid scraping the surface with hard tools, as this may cause irreversible damage to the coating.
When using a PEI steel sheet as the build plate, if you need to perform a thorough cleaning, you can refer to How to Clean your PEI Steel Sheet.
An unleveled heated bed can result in inconsistent nozzle-to-build-plate distances across different areas of the build plate. This prevents the filament from being deposited evenly on the printing surface, reducing first-layer adhesion and making the model's bottom corners more likely to warp or detach from the build plate under stress.
Normally, you can level the heated bed using Auto Leveling. If the heated bed is significantly out of level, or if Auto Leveling does not resolve the issue, you can choose Manual Leveling + Auto Leveling.
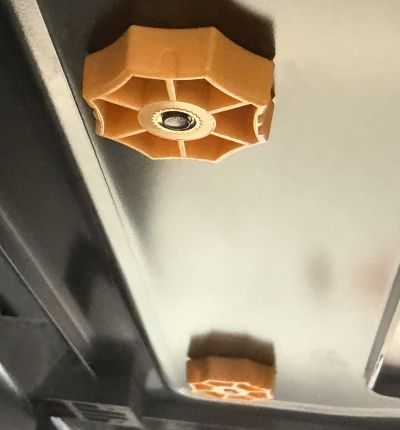
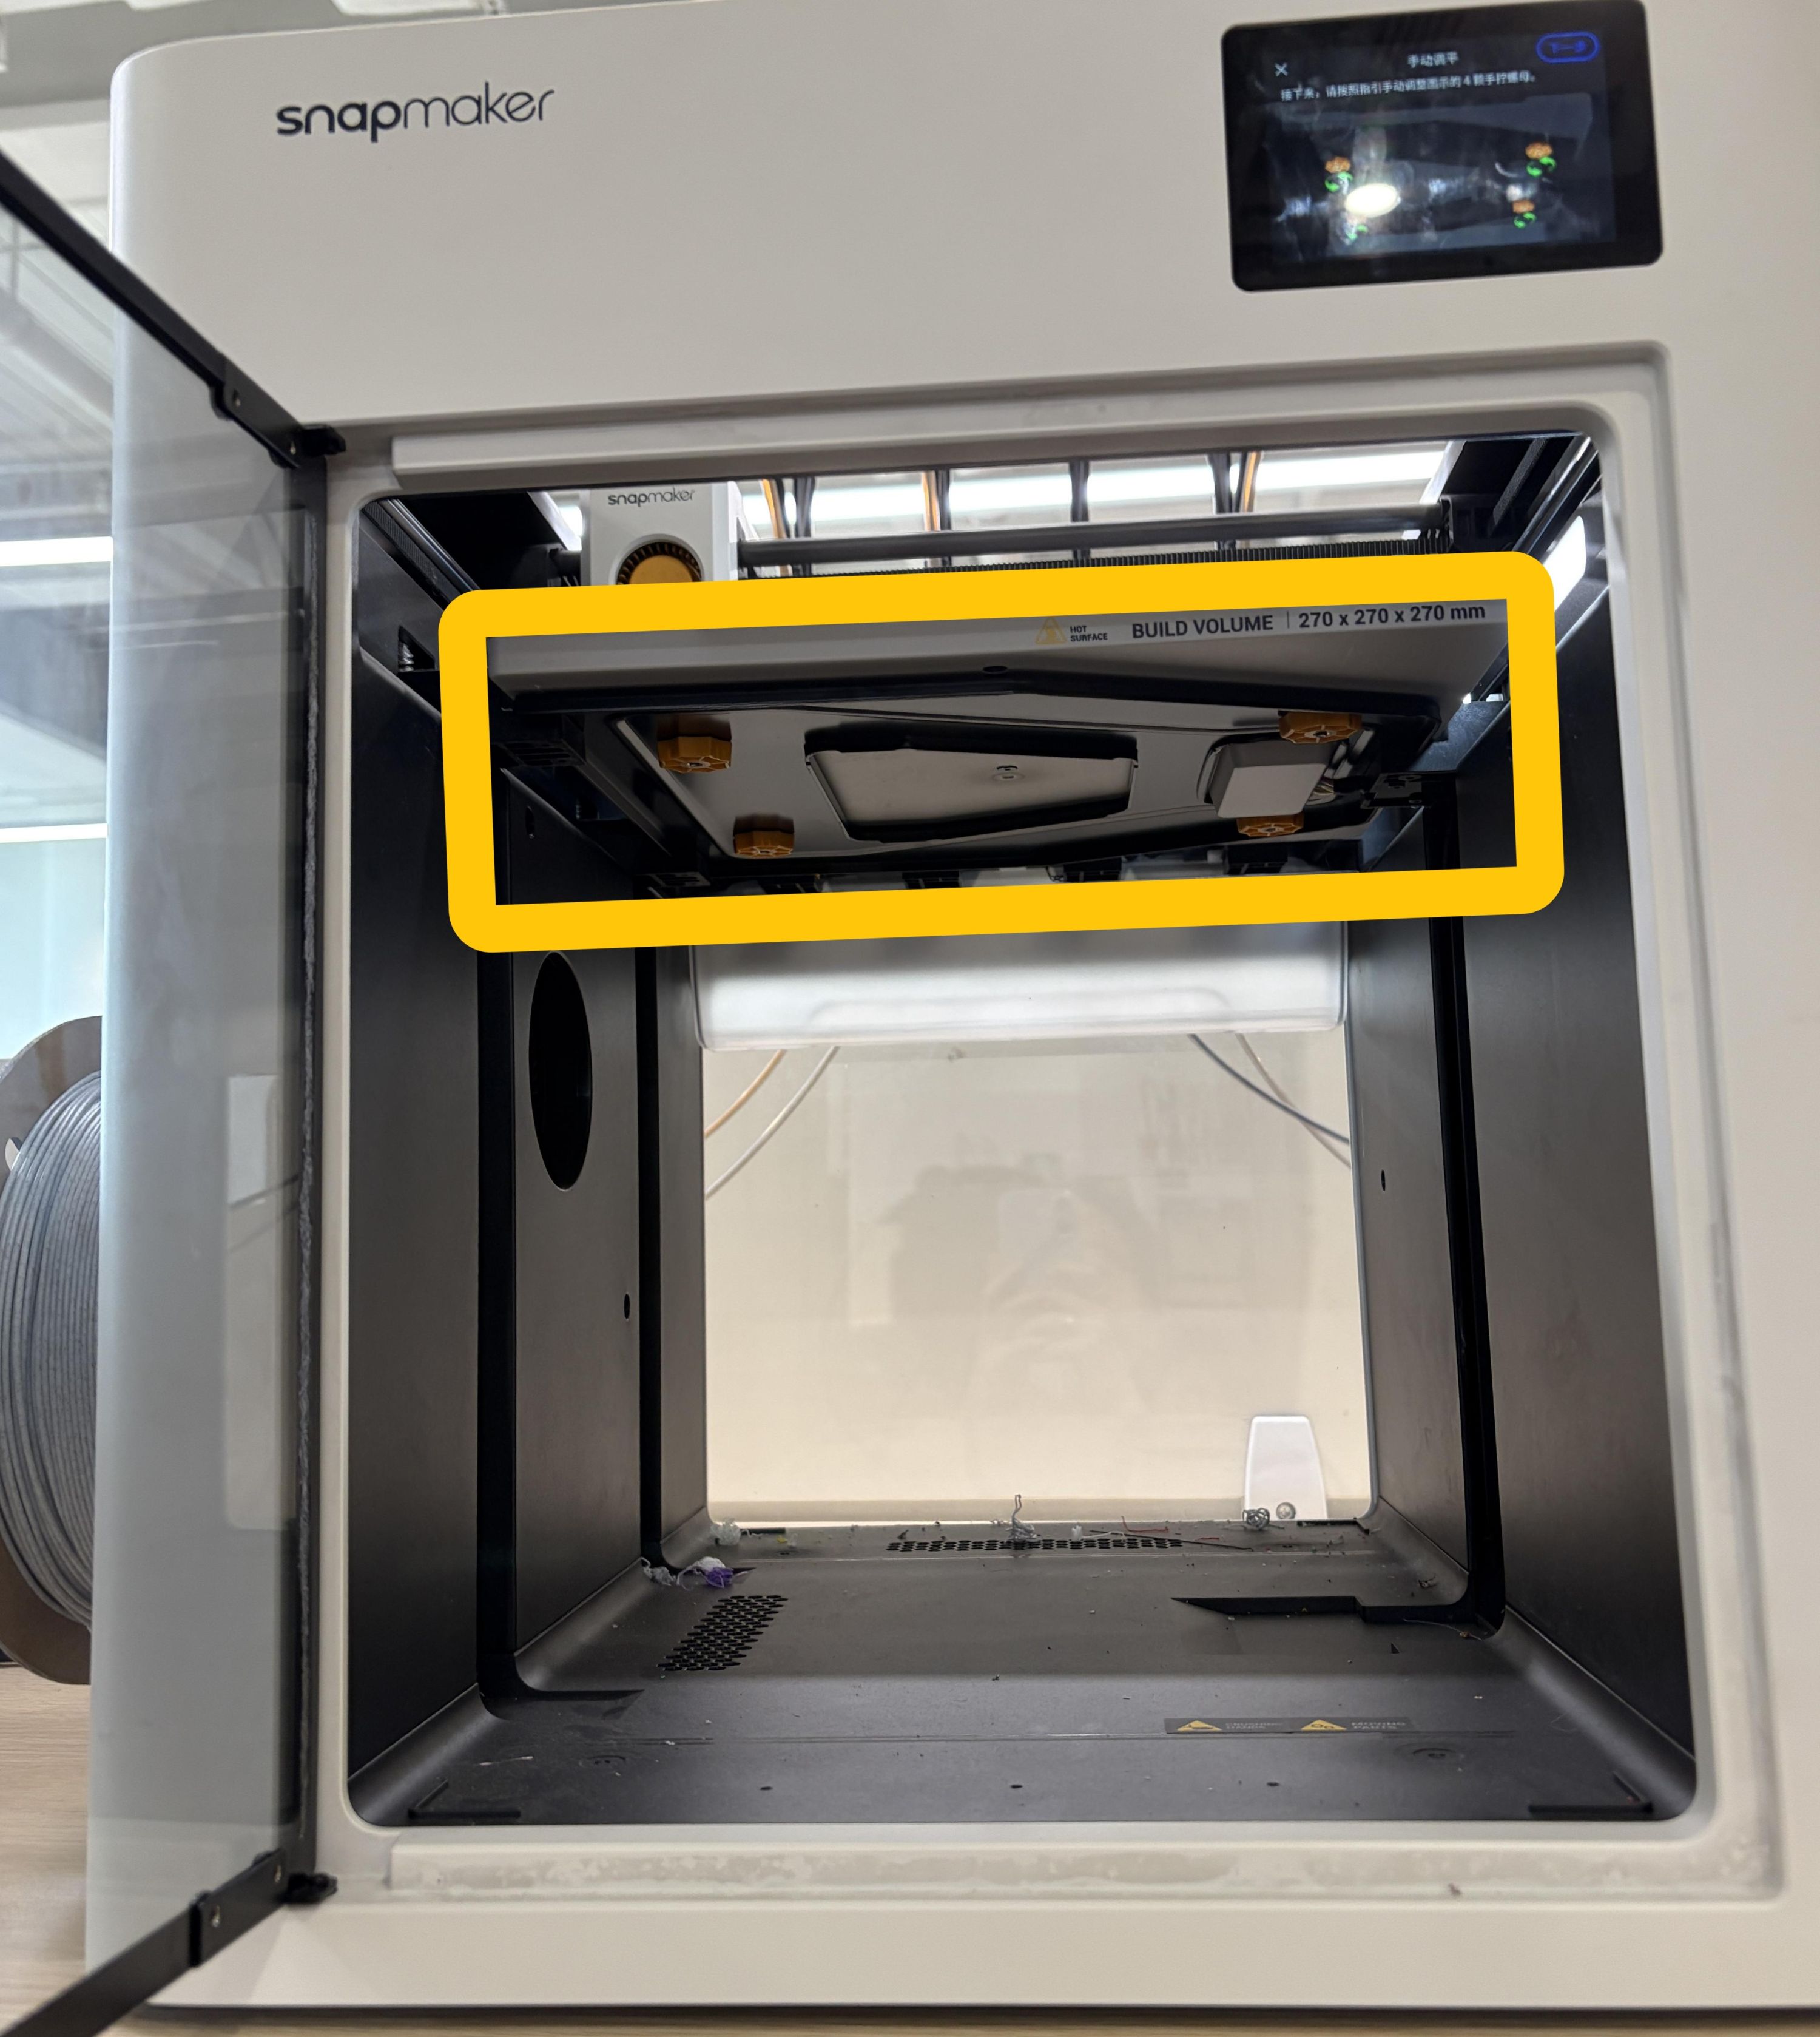
You can perform manual leveling directly by hand. Snapmaker U1 features yellow handwheels on the heated bed leveling screws, allowing routine adjustments without any additional tools.
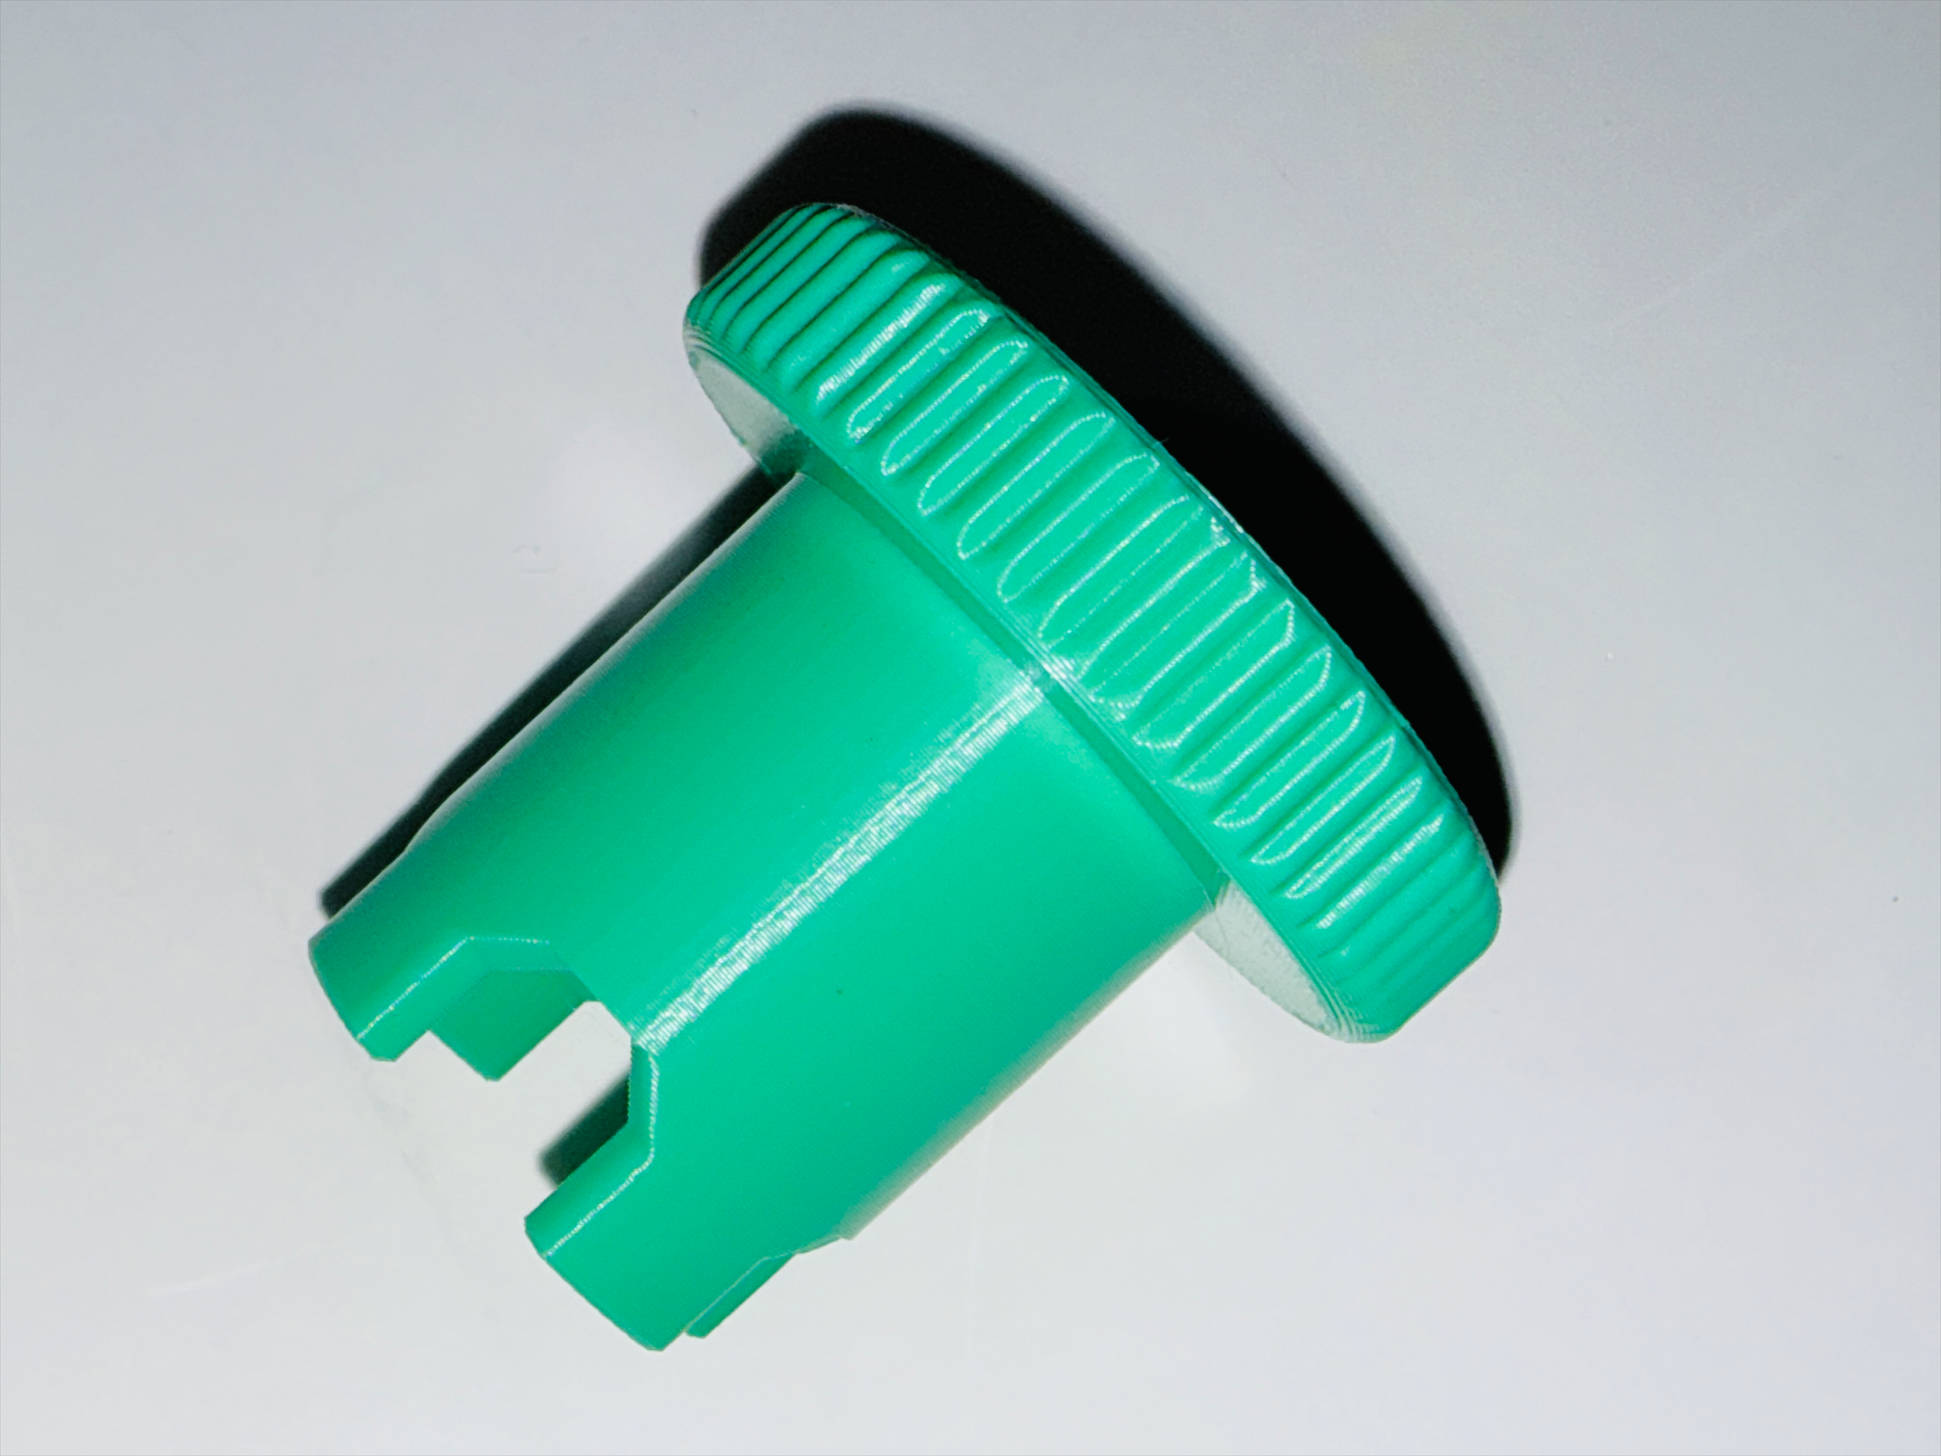
If desired, you can also download and print an auxiliary tool (see Table 1) and fit it over the handwheel. This provides additional leverage and makes manual leveling easier.
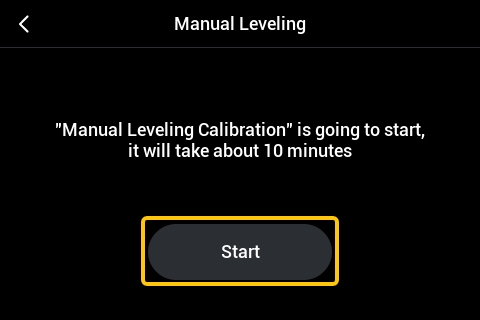
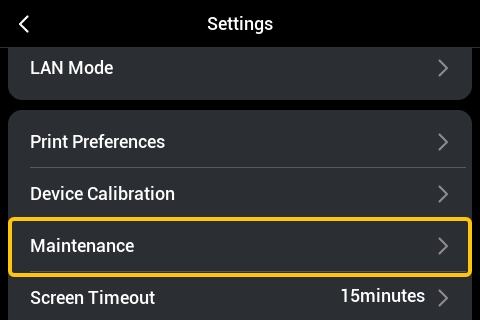
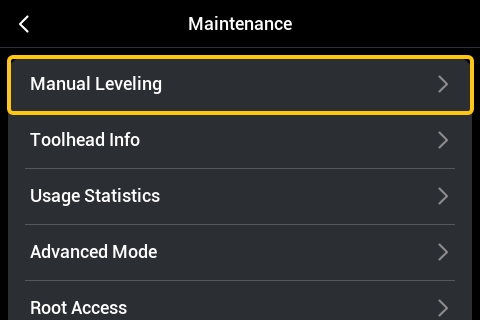
On the touchscreen Home Screen, go to the Settings page, then tap Maintenance > Manual Leveling, and follow the on-screen prompts to complete the leveling operation.
The leveling screws are located underneath the heated bed.
After the heated bed rises automatically, follow the on-screen instructions to turn the screws and level the bed.
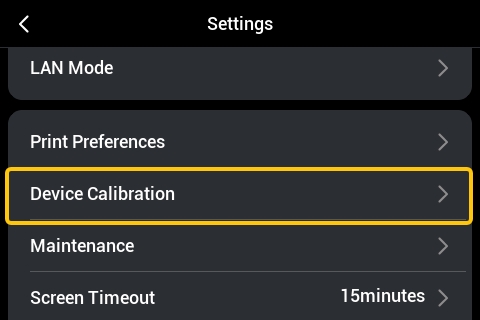
After manual leveling is complete, on the touchscreen Home Screen, tap to enter the Settings page, then tap Device Calibration.
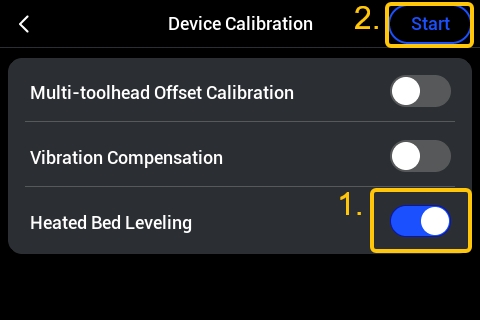
On the Device Calibration page, enable Heated Bed Leveling, and tap the Start button in the upper right corner.
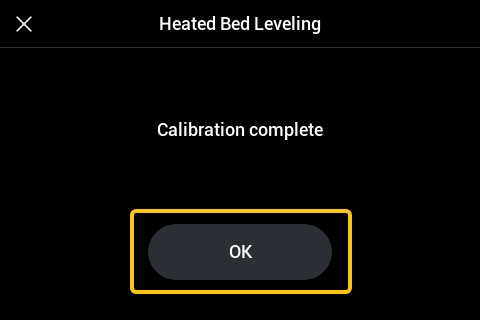
After starting, the machine will run the auto leveling program. Please wait for it to complete.
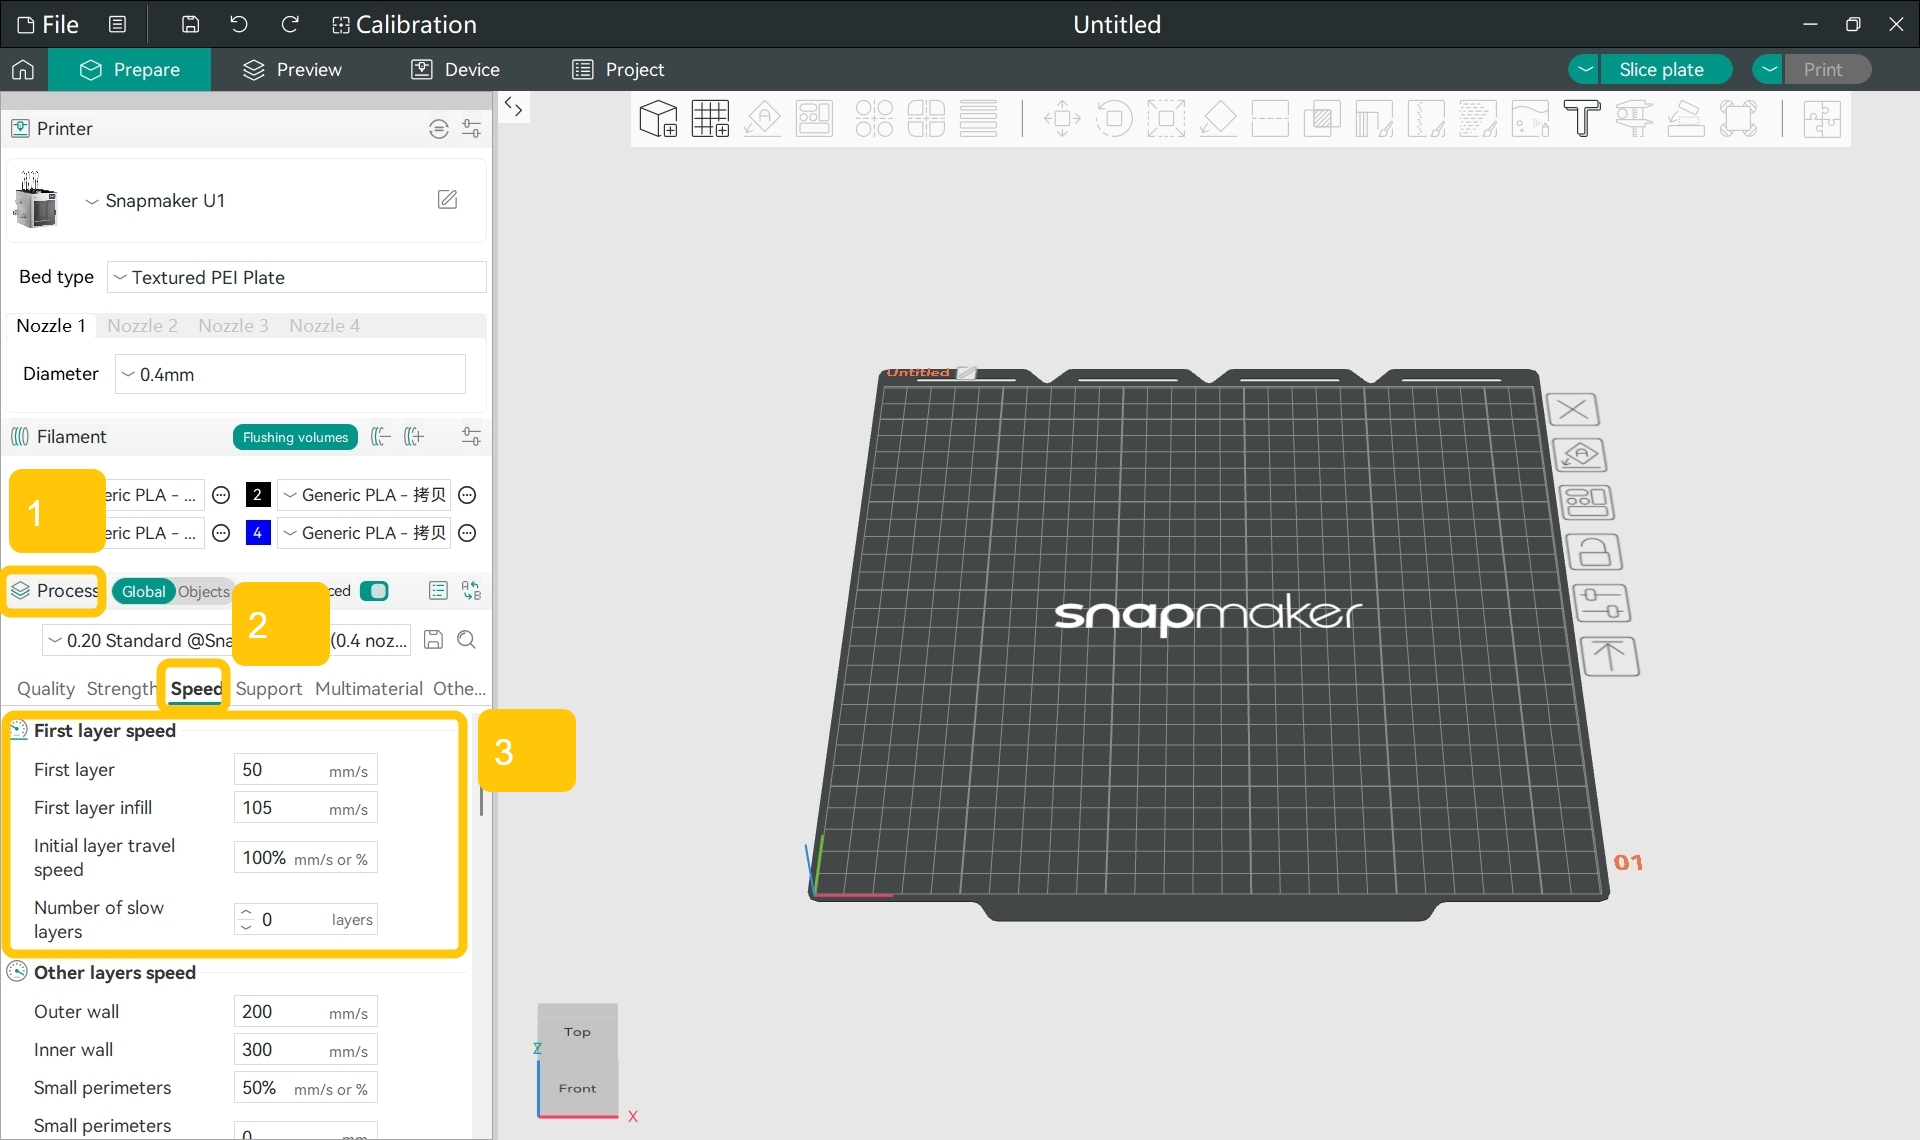
¶ Potential Cause 4: First Layer Print Speed Too Fast
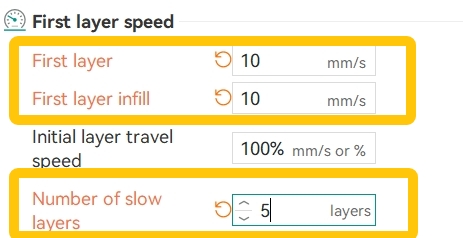
Printing the first layer too quickly may prevent the extruded filament from being properly compressed against the build plate. The filament may also cool too rapidly, reducing its ability to bond to the build plate and resulting in poor first-layer adhesion.
Ideally, after the first-layer filament is deposited onto the build plate, it should spread slightly and solidify after forming a sufficiently large contact area with the heated bed, creating strong adhesion to the build plate. If the heated bed temperature is too low, the material may cool and shrink too quickly, causing the bottom layer to warp under internal stress.
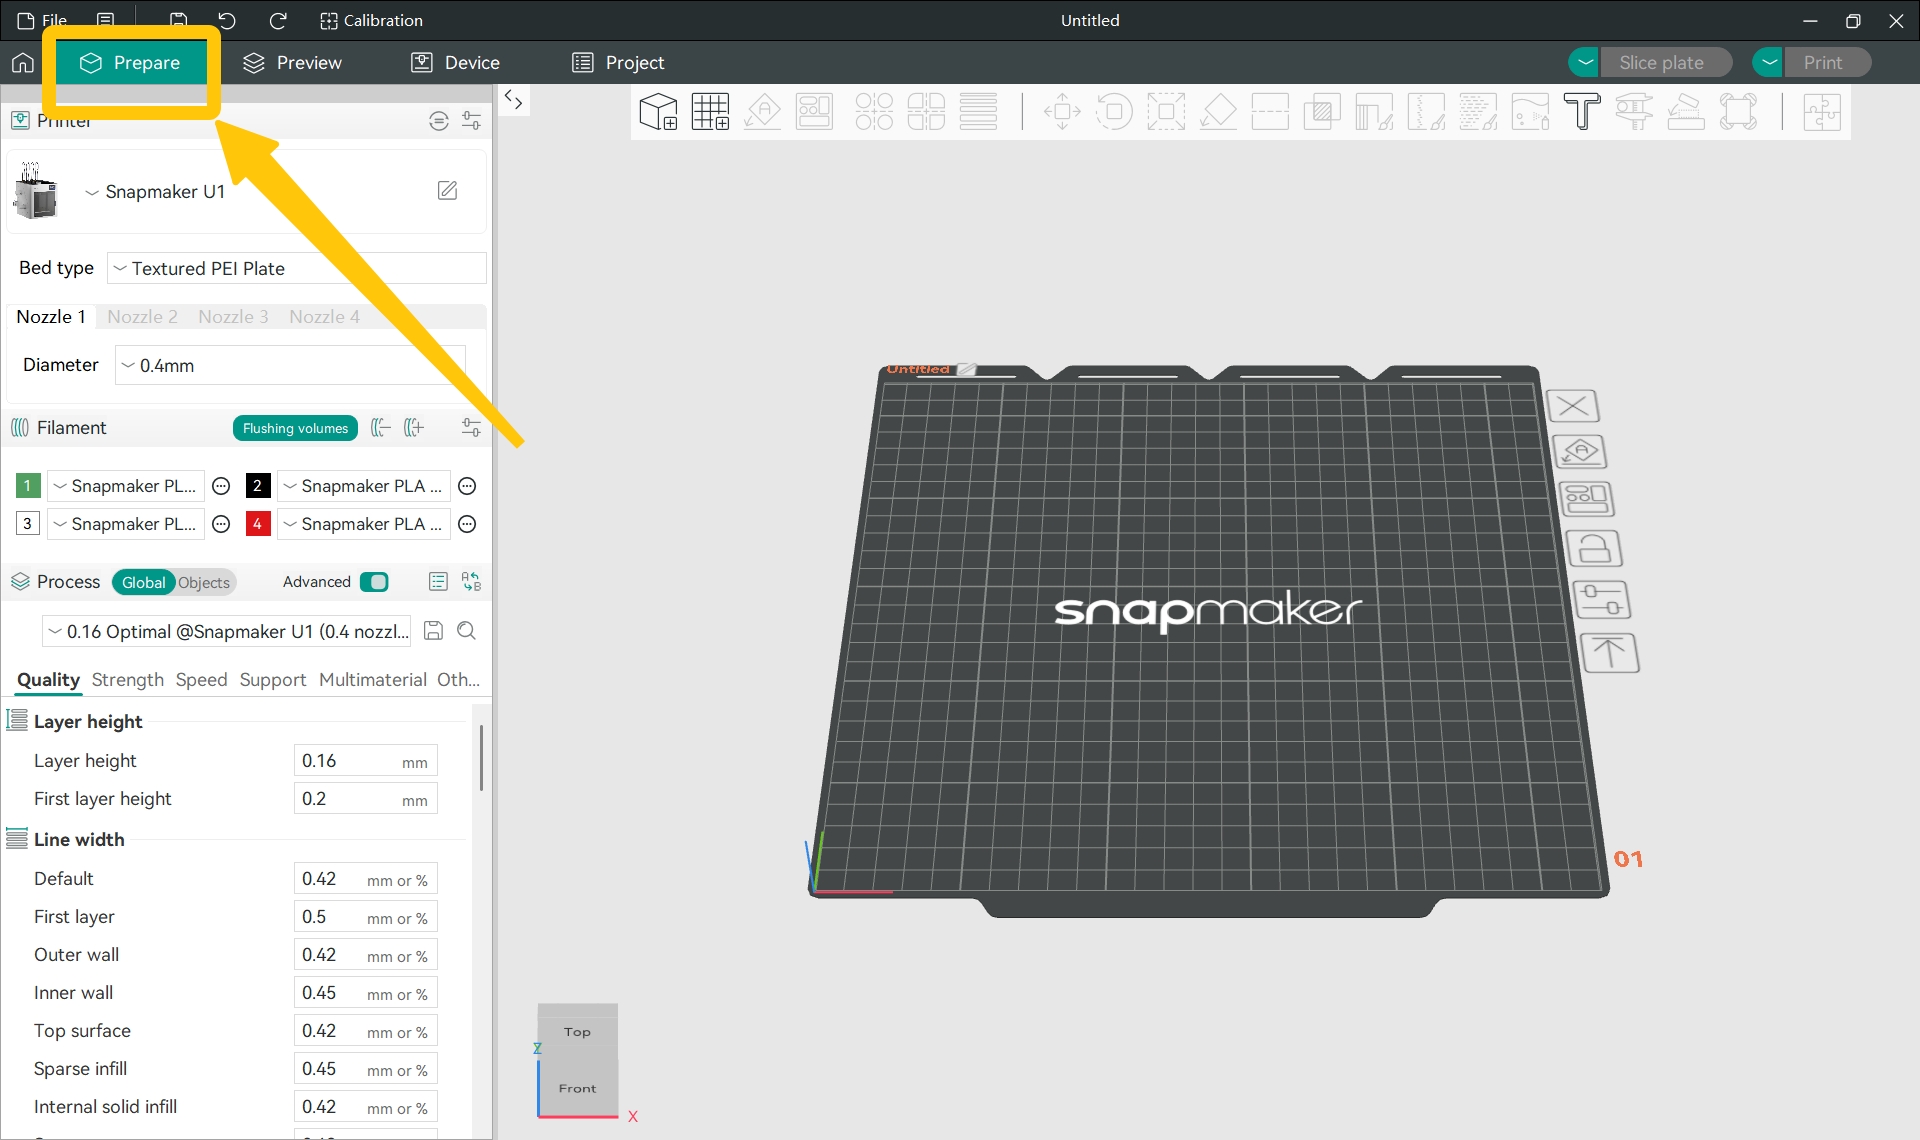
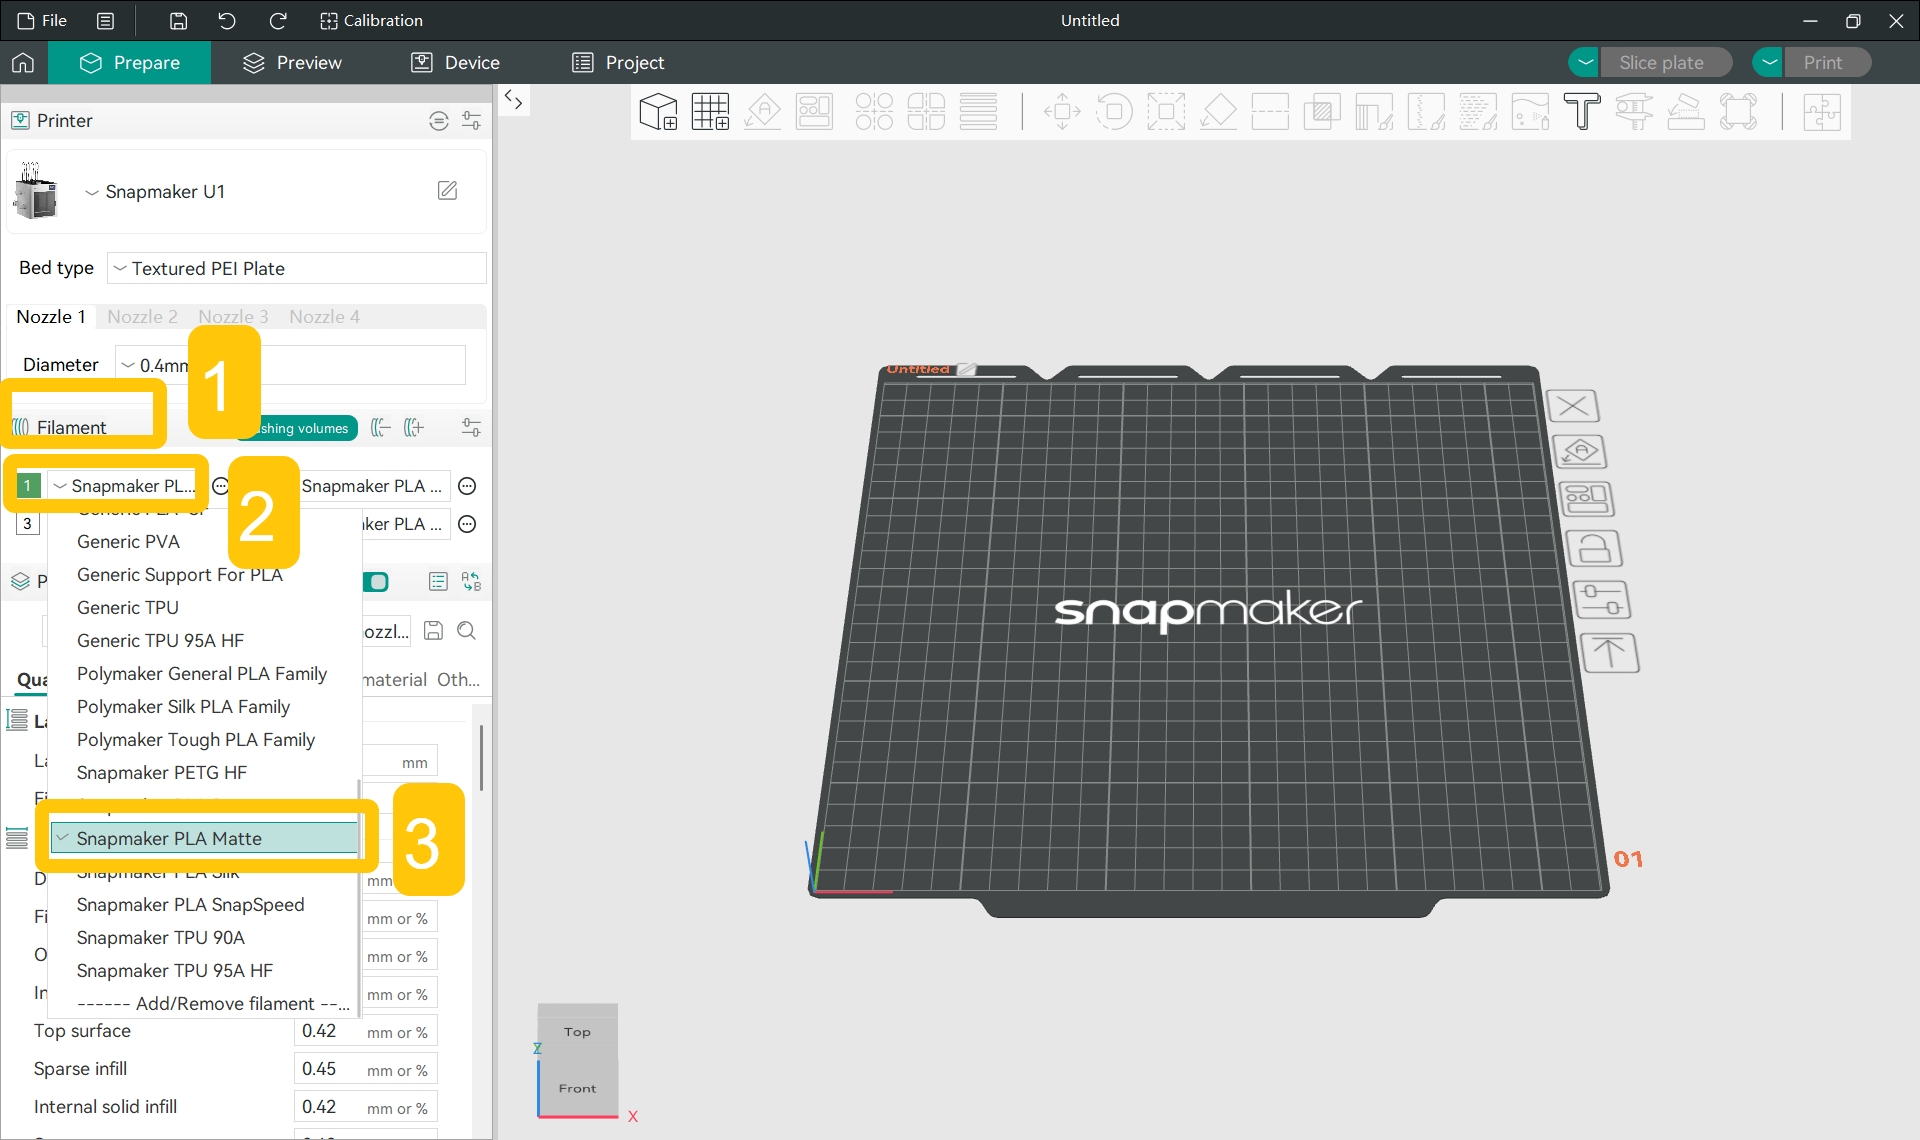
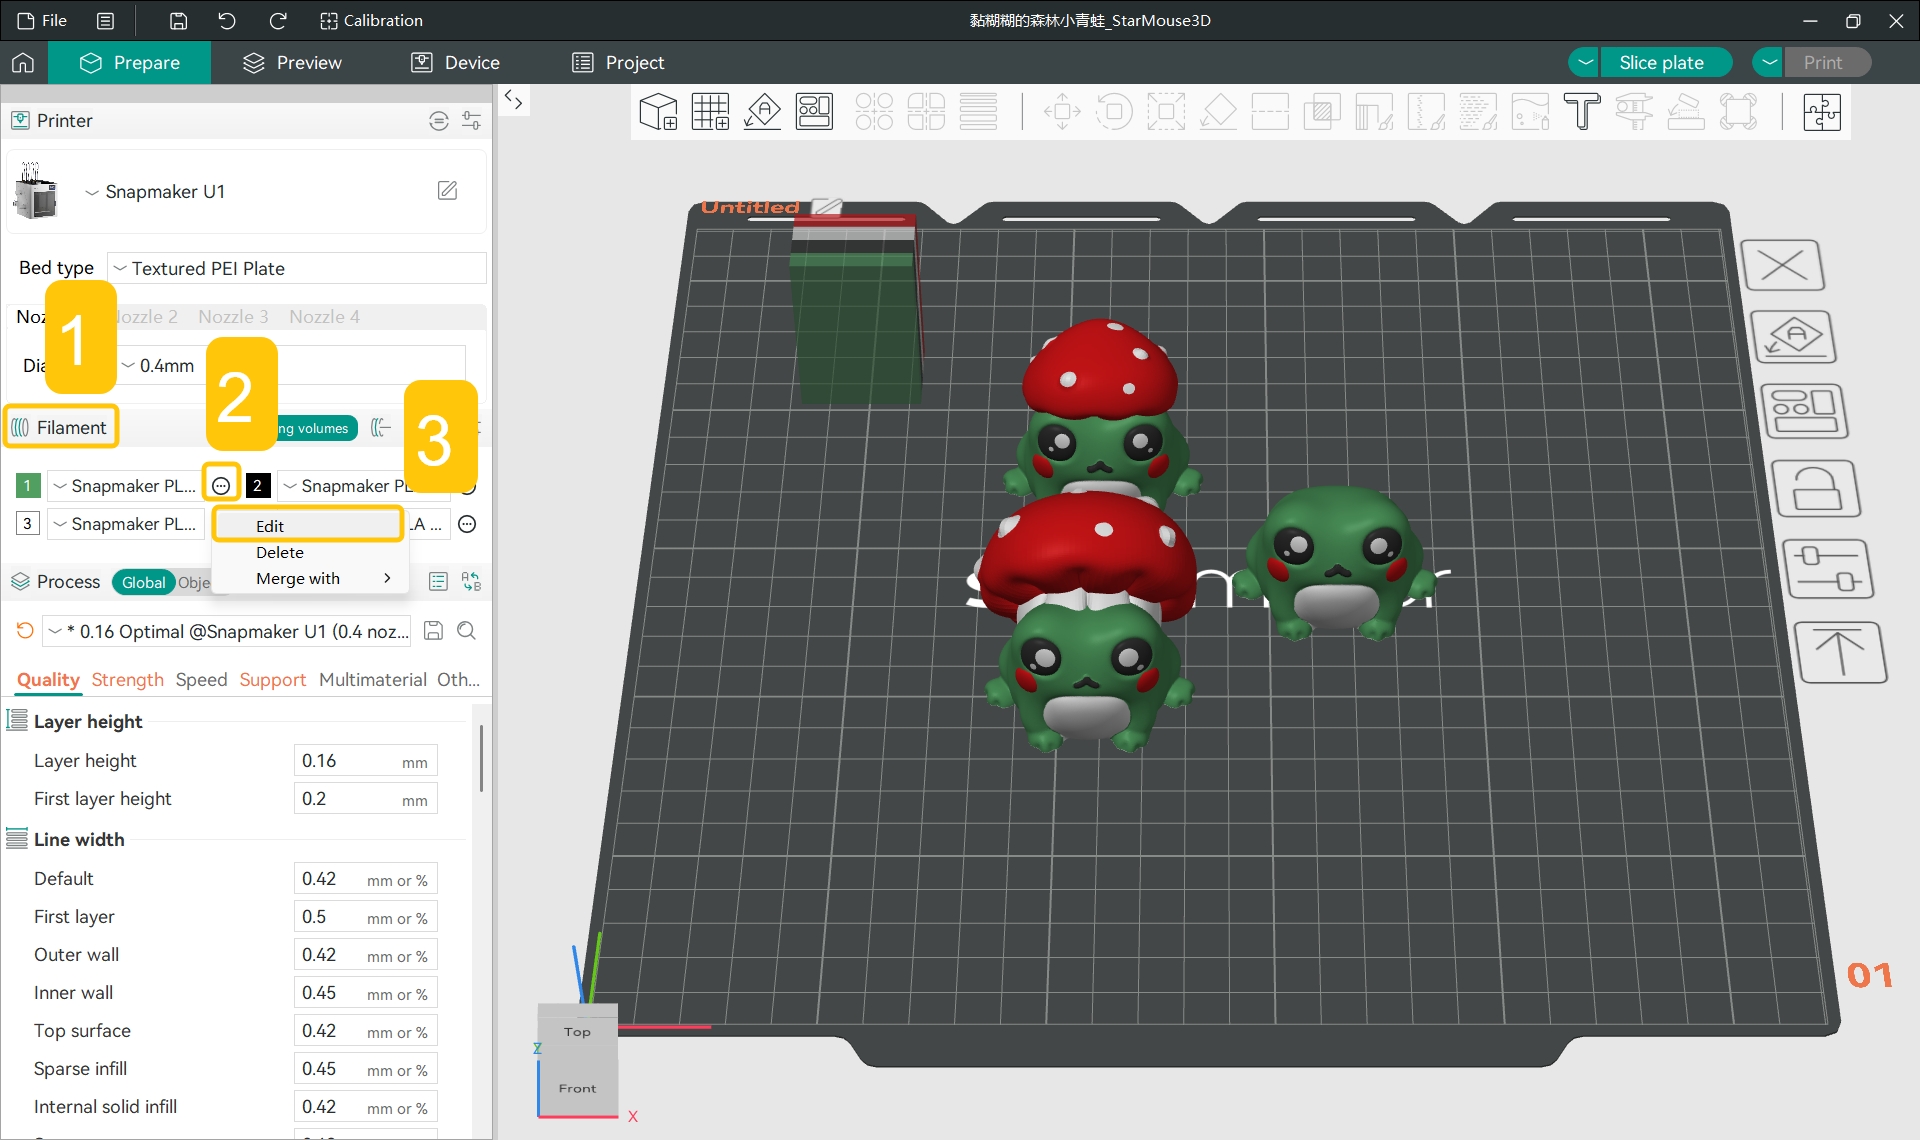
In the Filament section of the left sidebar, click the specific filament name and select the filament type you used for printing from the drop-down menu.
In the Filament section of the left sidebar, click the ... > Edit next to the specific filament.
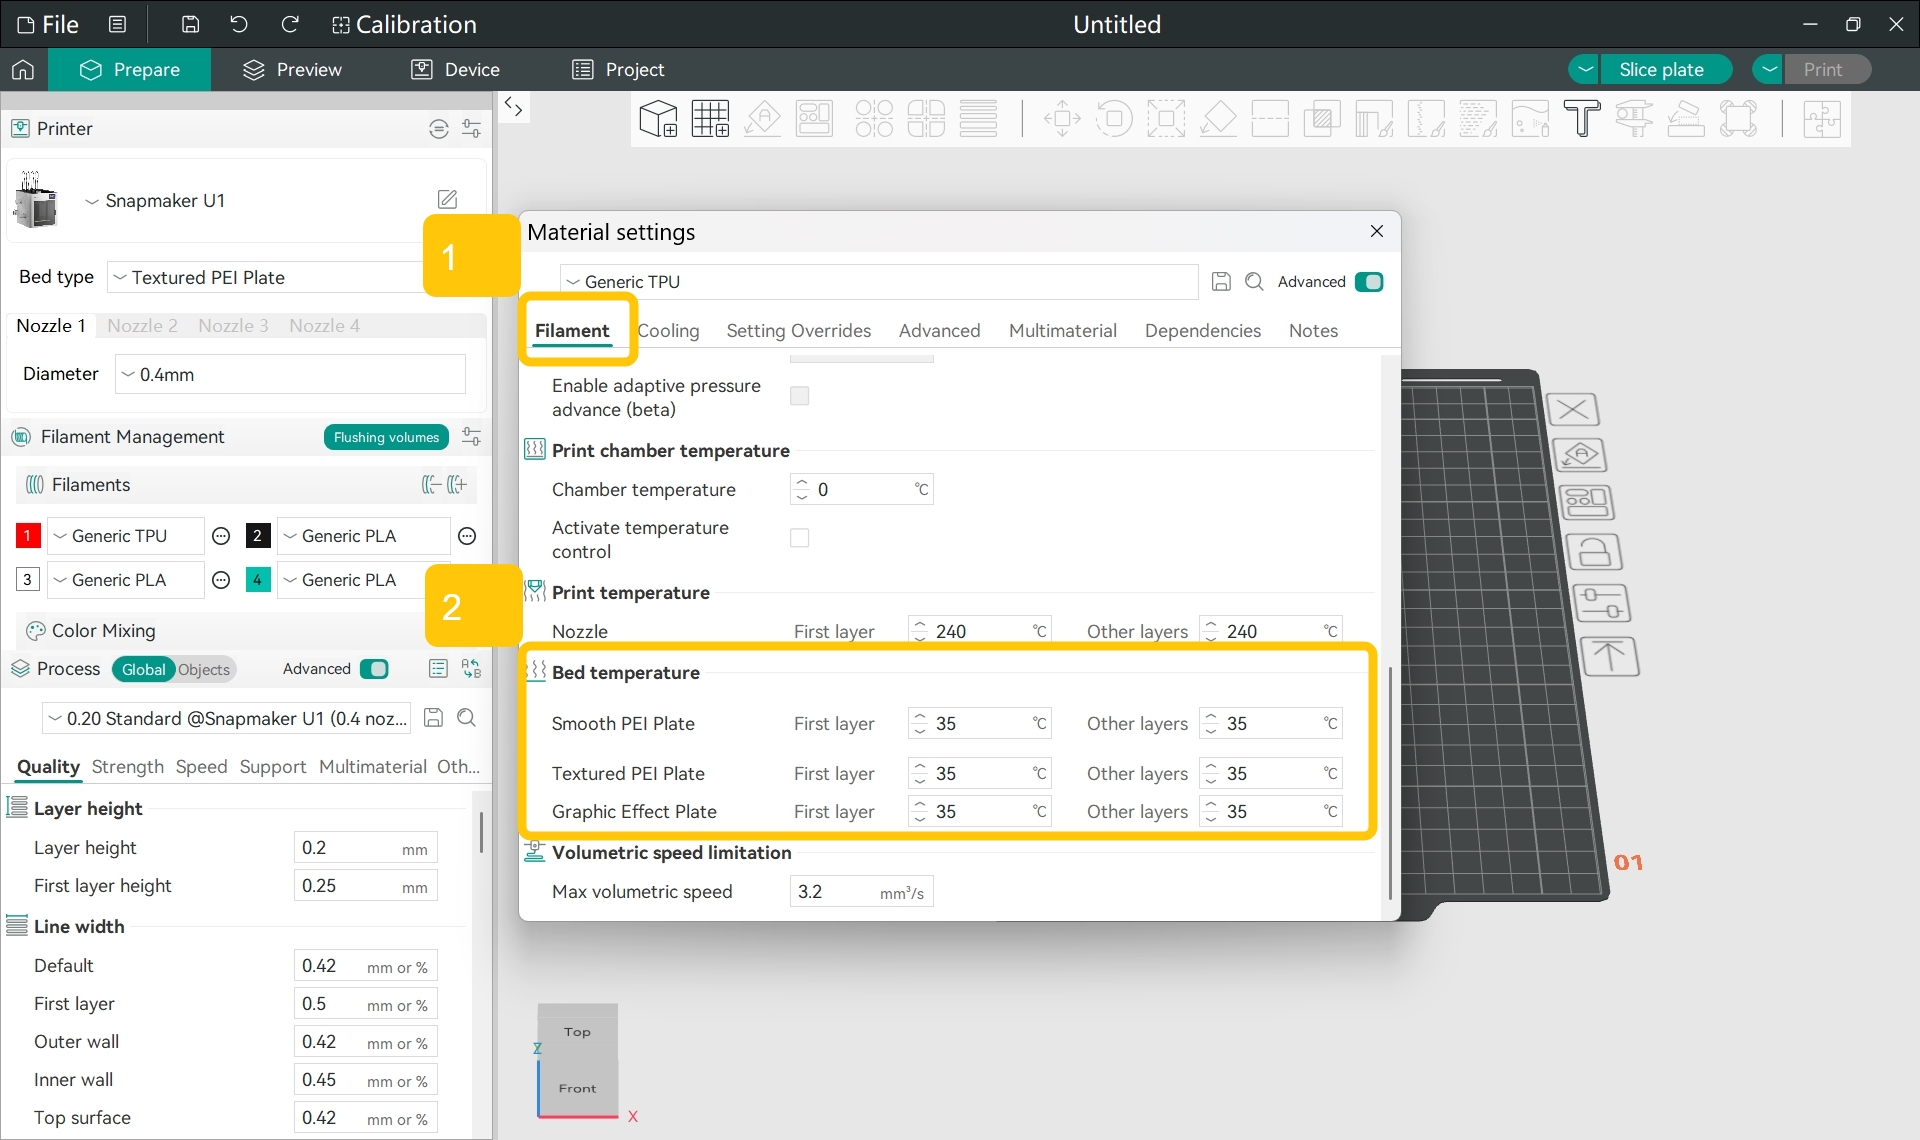
In the pop-up window, find Filament > Bed temperature.
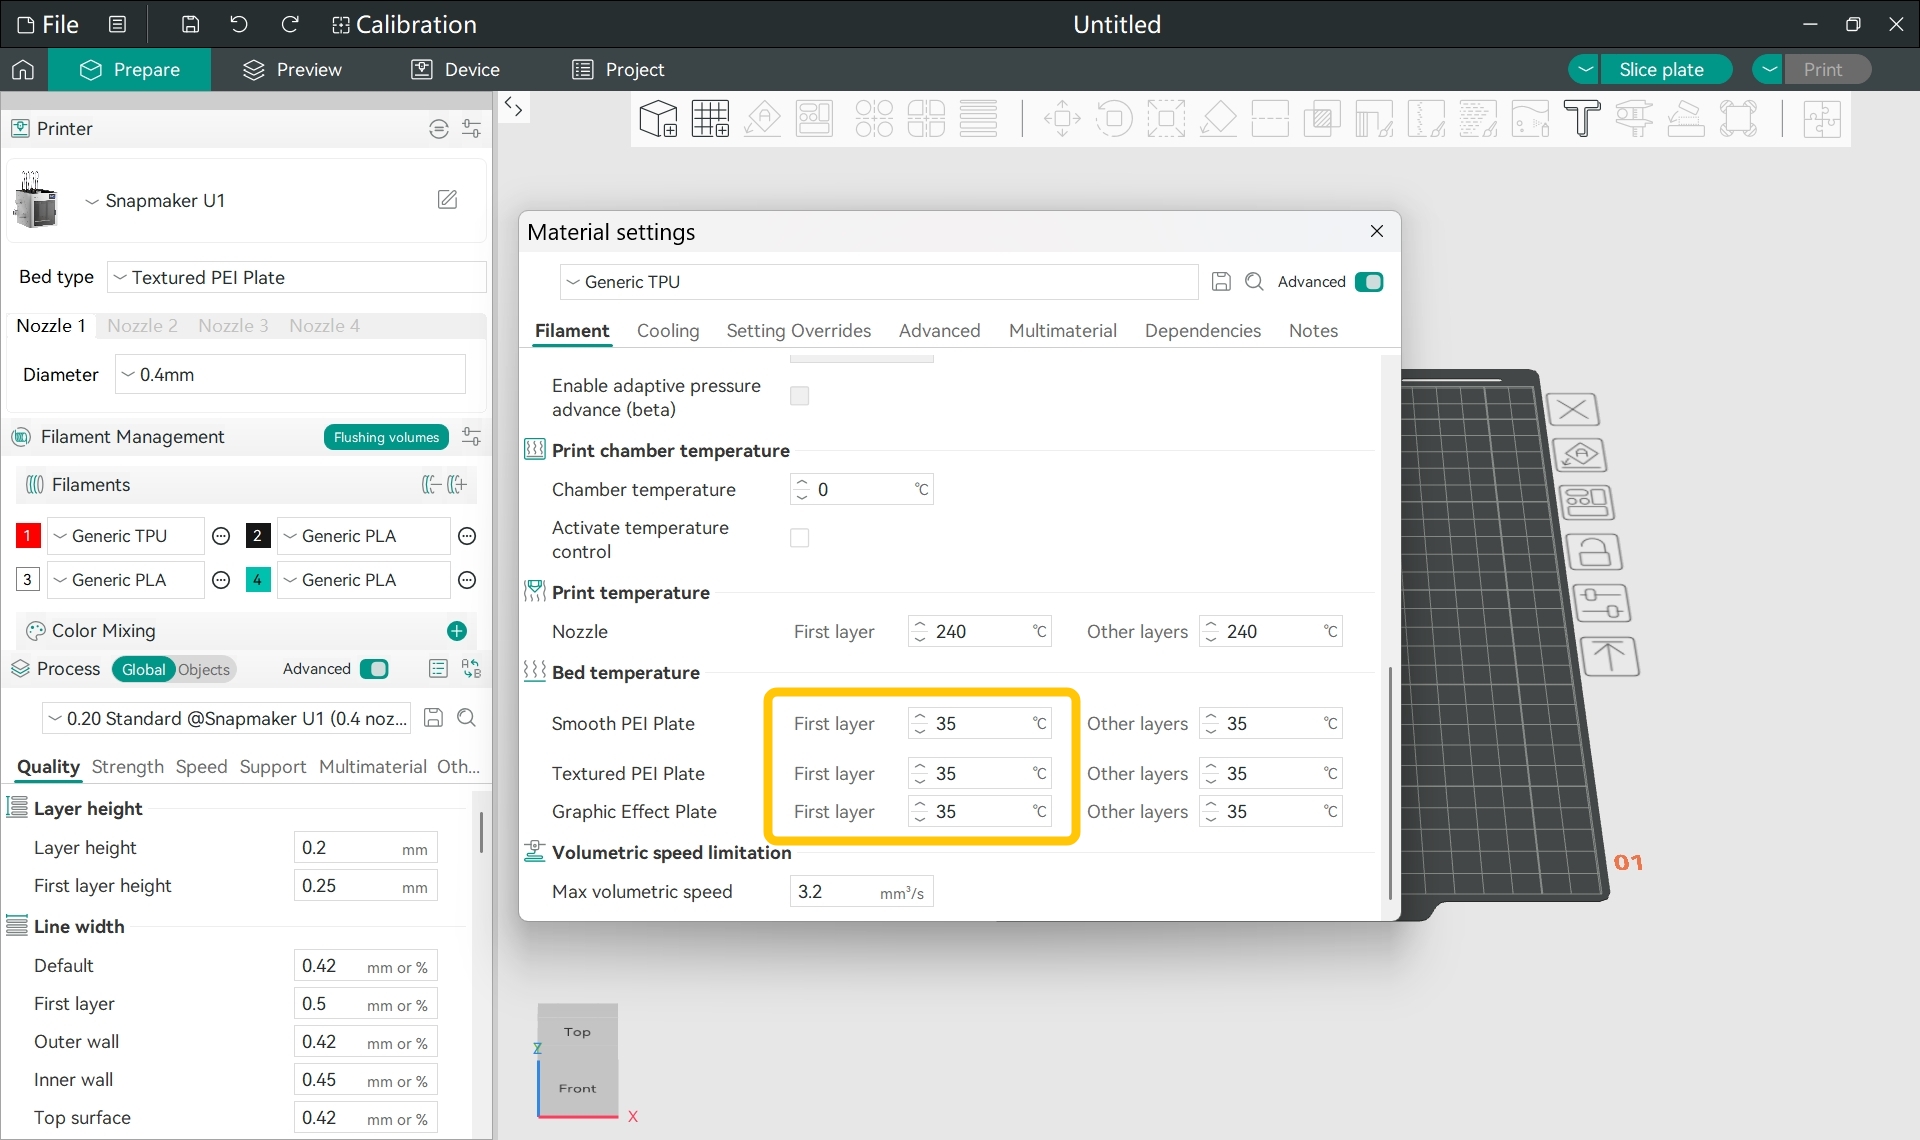
For the heated bed type you are currently using, appropriately increase the First layer bed temperature.
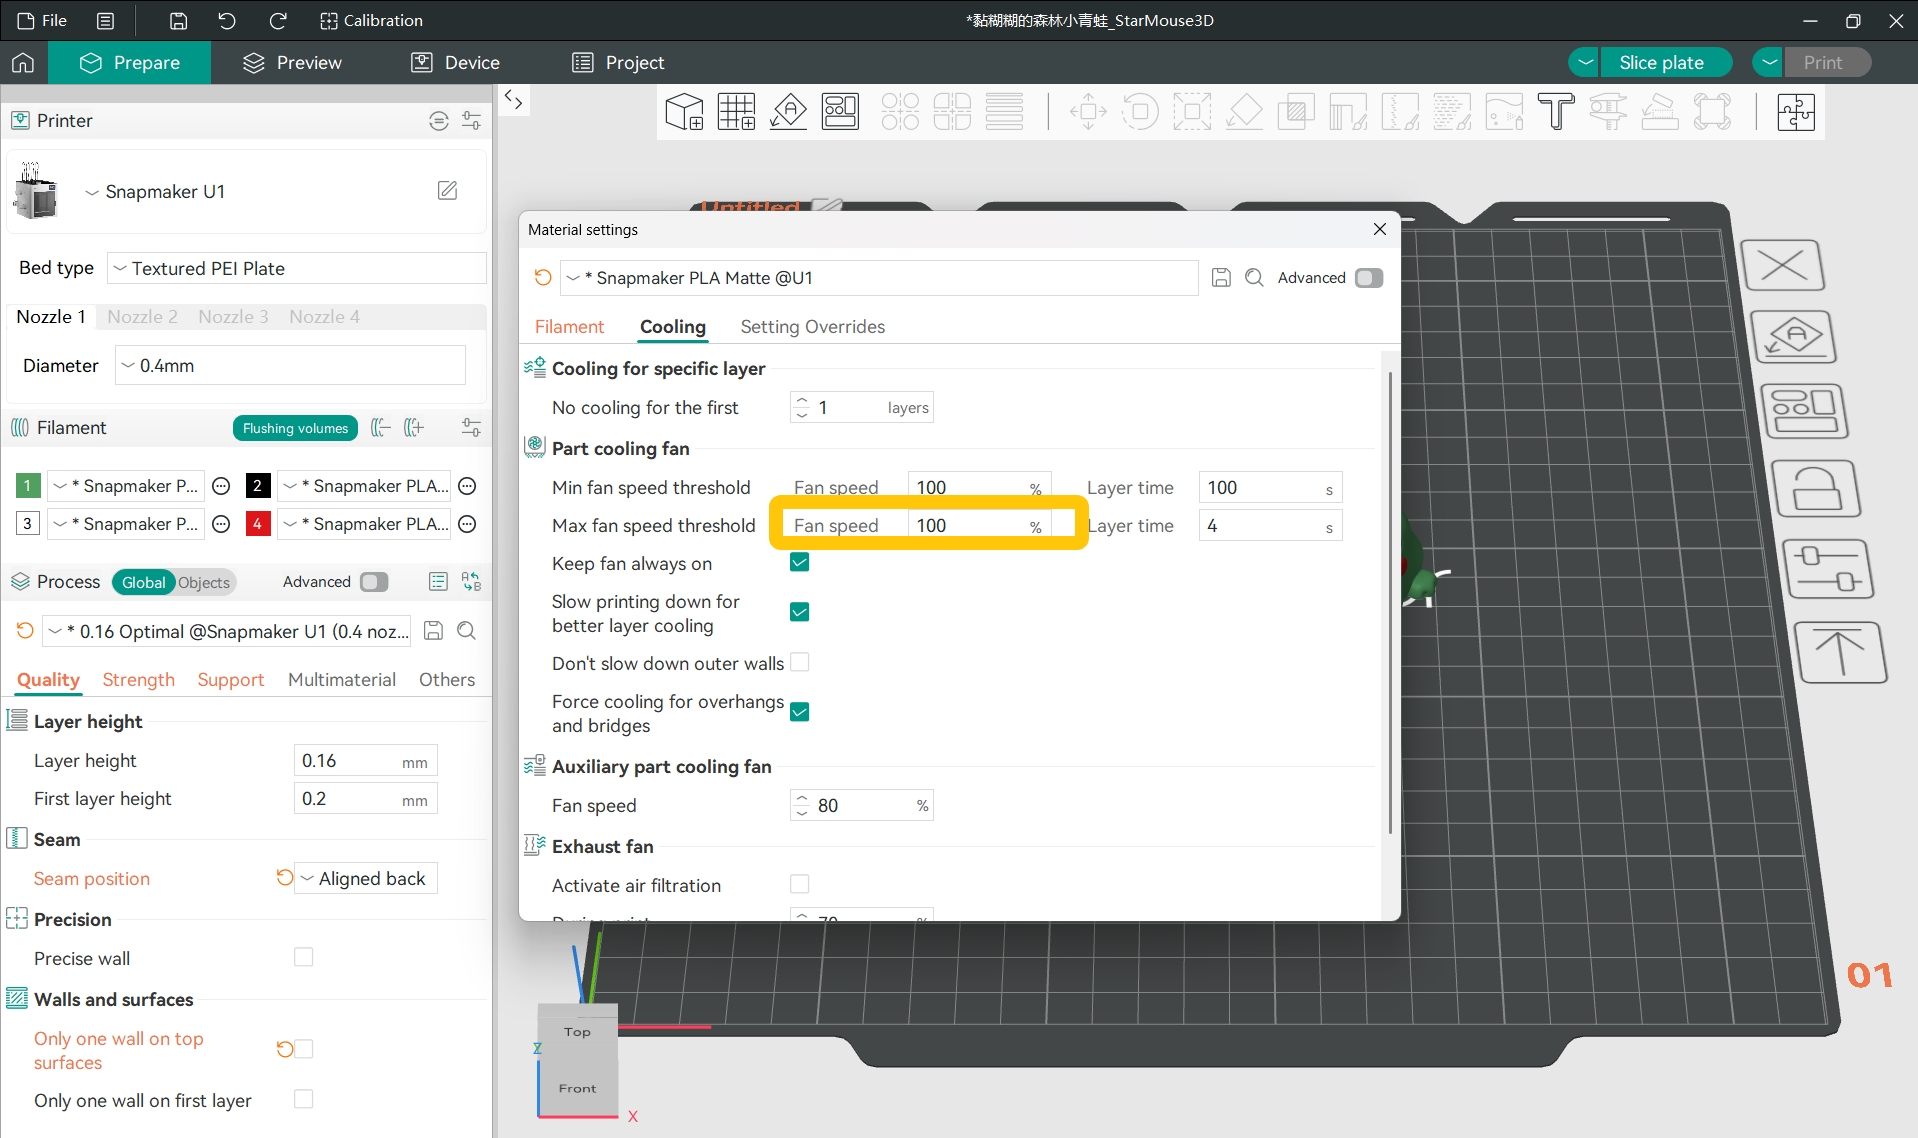
If the fan speed is too high, the filament may cool too quickly, increasing the likelihood of warping caused by internal stress. Therefore, consider reducing the fan speed appropriately before slicing the model.
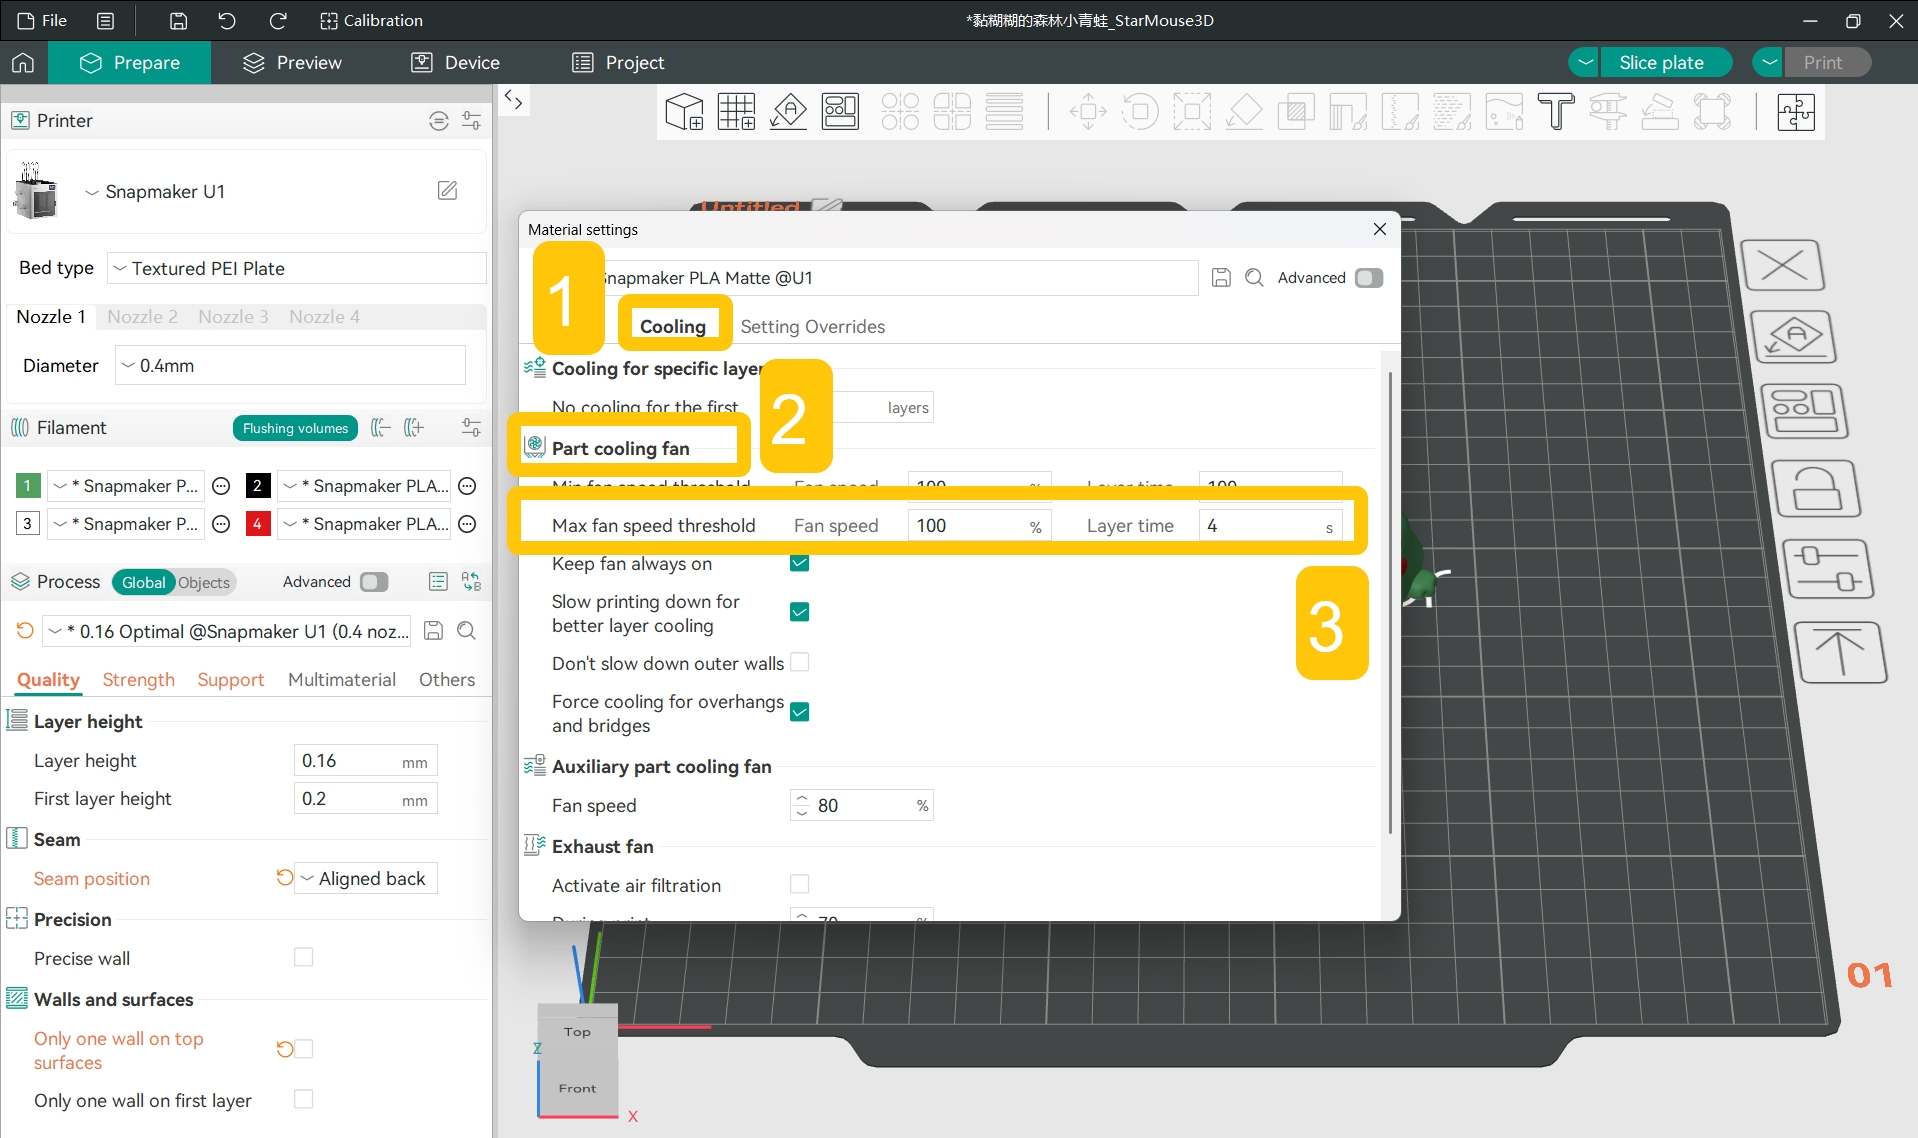
In the Filament section of the left side list, click the ... > Edit next to the specific filament.
In the pop-up window, find Cooling > Part cooling fan > Max fan speed threshold.
Appropriately reduce the Fan speed.
¶ Potential Cause 7: Excessive Ambient Temperature Difference
An excessive ambient temperature difference can also cause the layers to cool before bonding, leading to interlayer cracking. Therefore, consider enclosing the printer to maintain enough heat for proper bonding.
If you have already explored the above potential causes but the model still warps, consider adding a brim to the model.
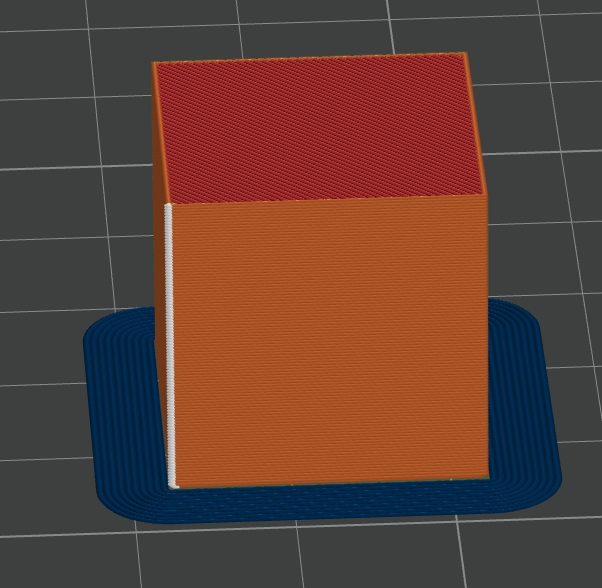
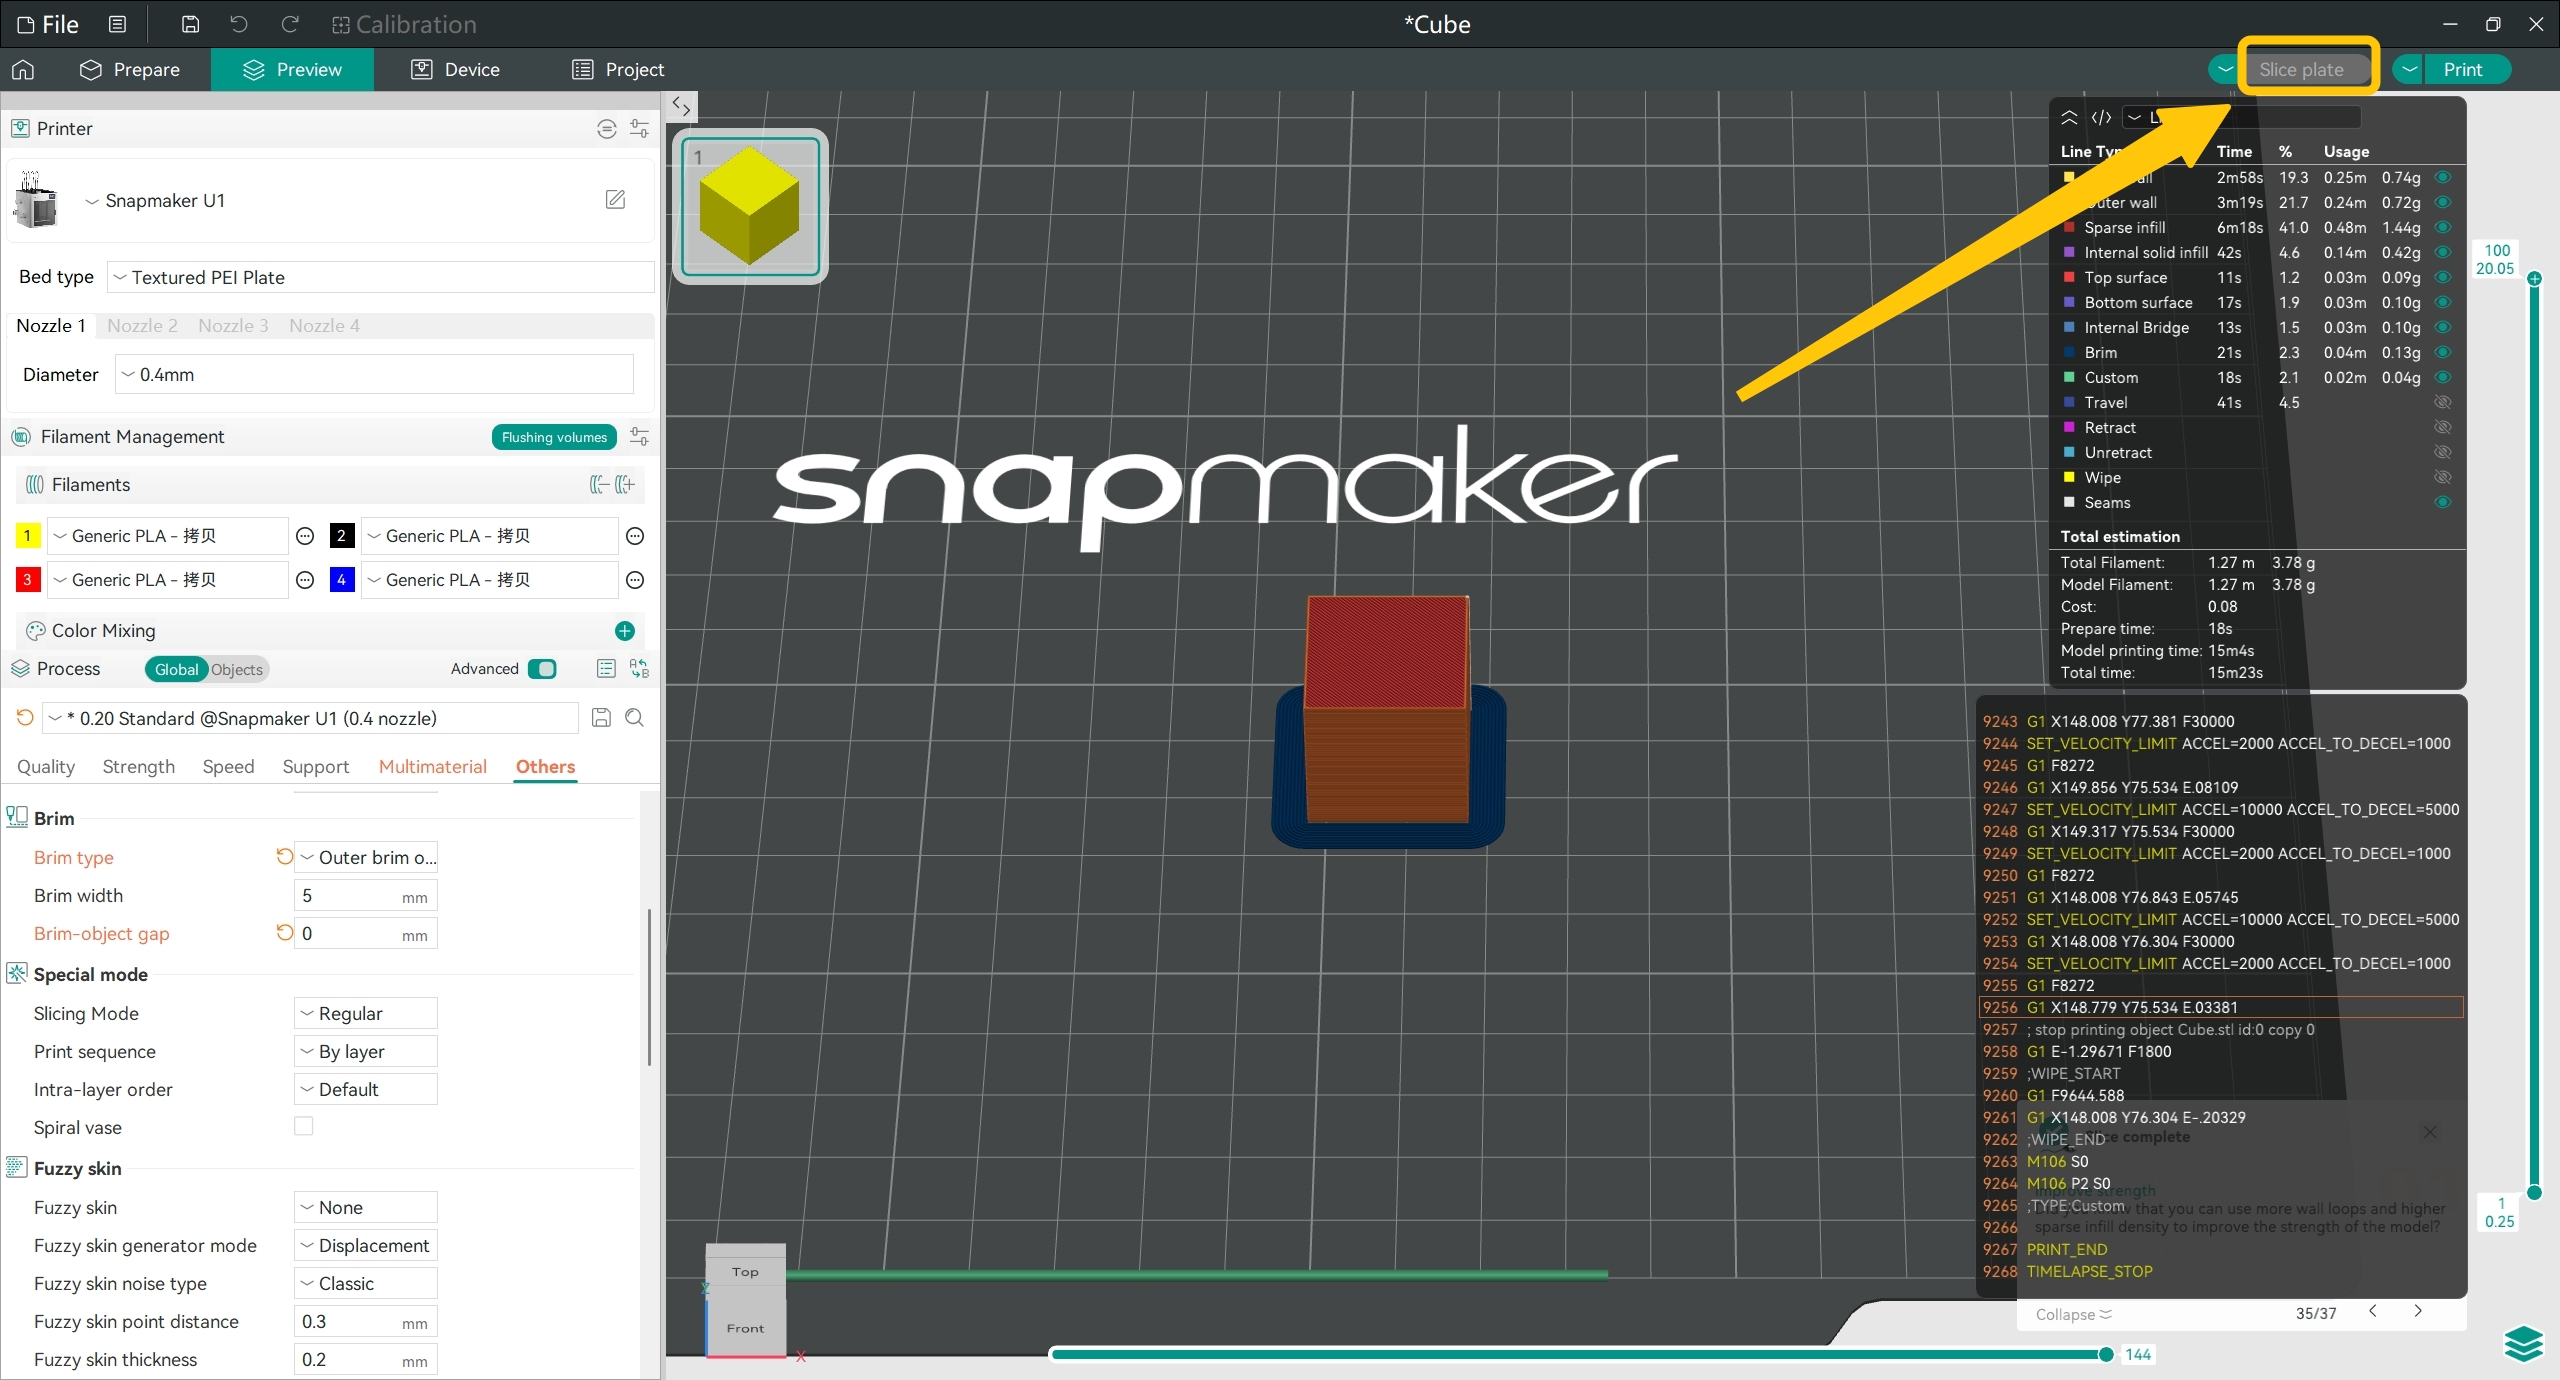
A brim increases the contact area between the model's edges and the build plate, helping to prevent the model's corners from warping. The image below shows a cube model with a brim added to its base. You can see the brim-like structure extending around the bottom of the cube.
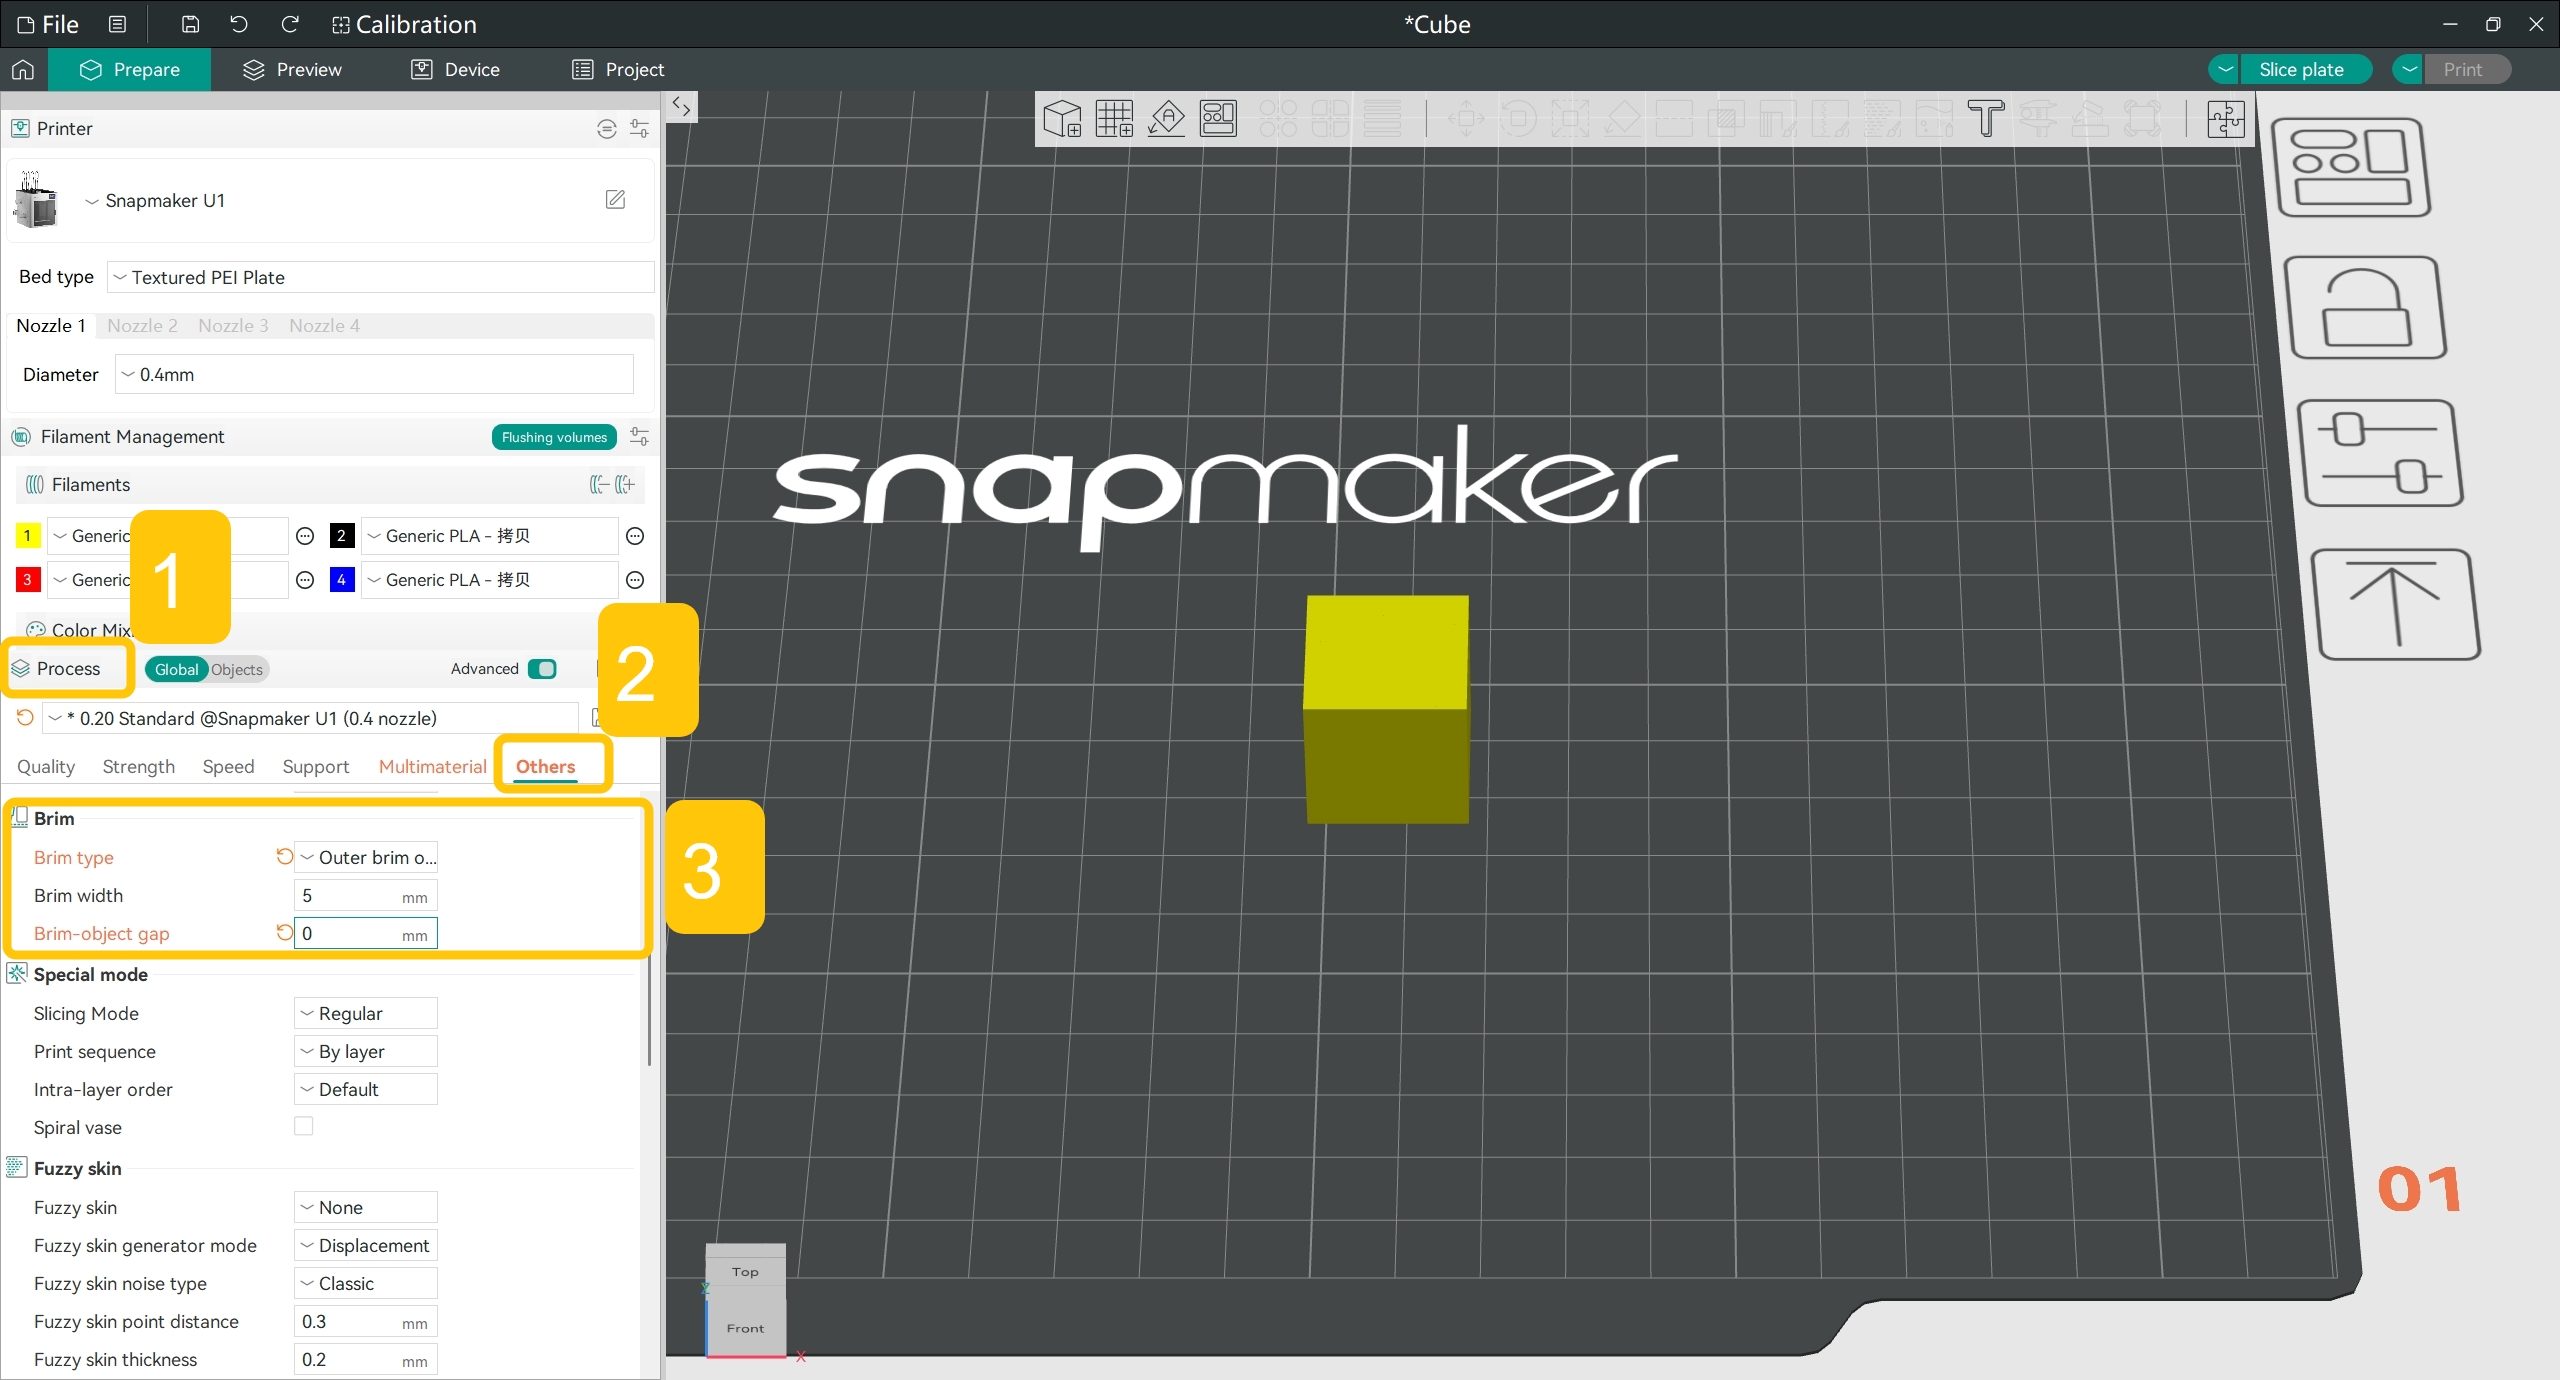
Import your model.
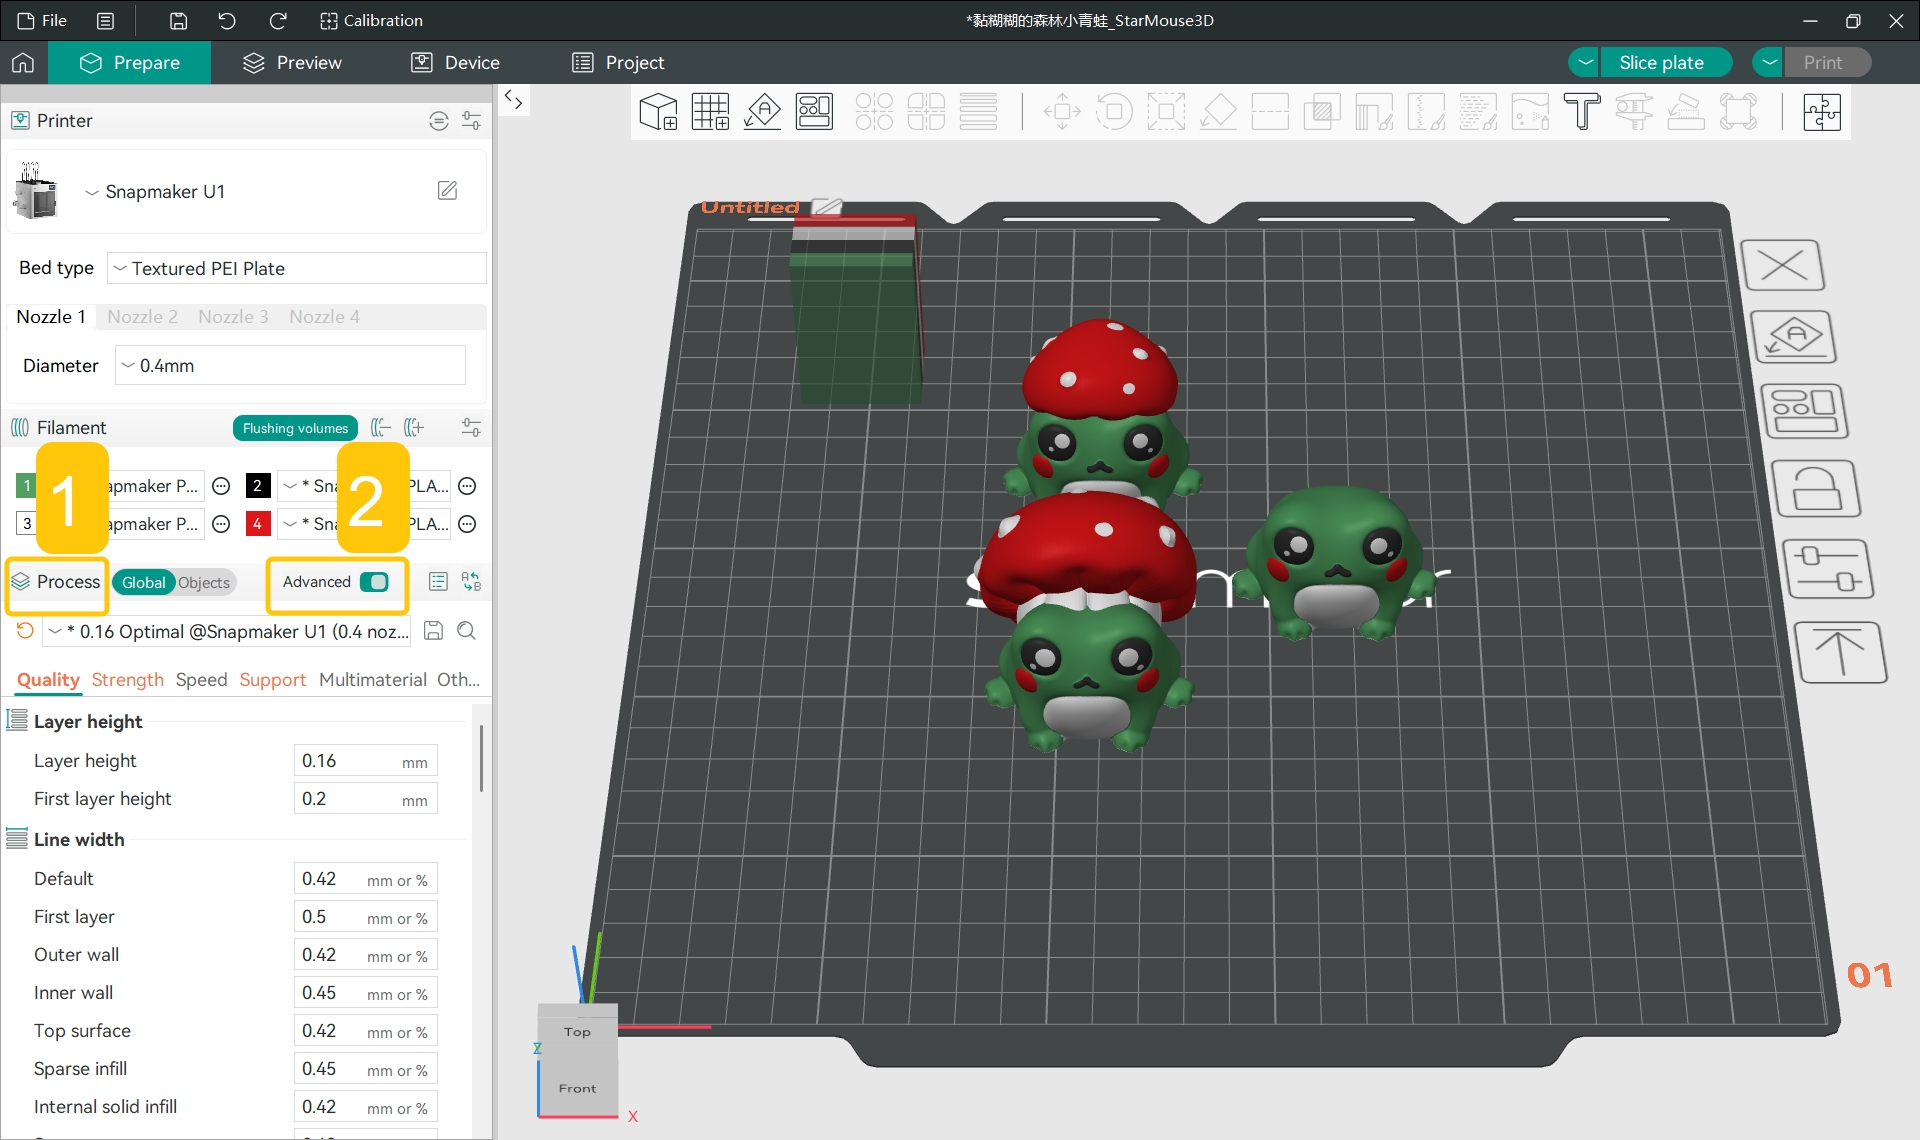
In the left side bar, locate Process. Enable both Global and Advanced.
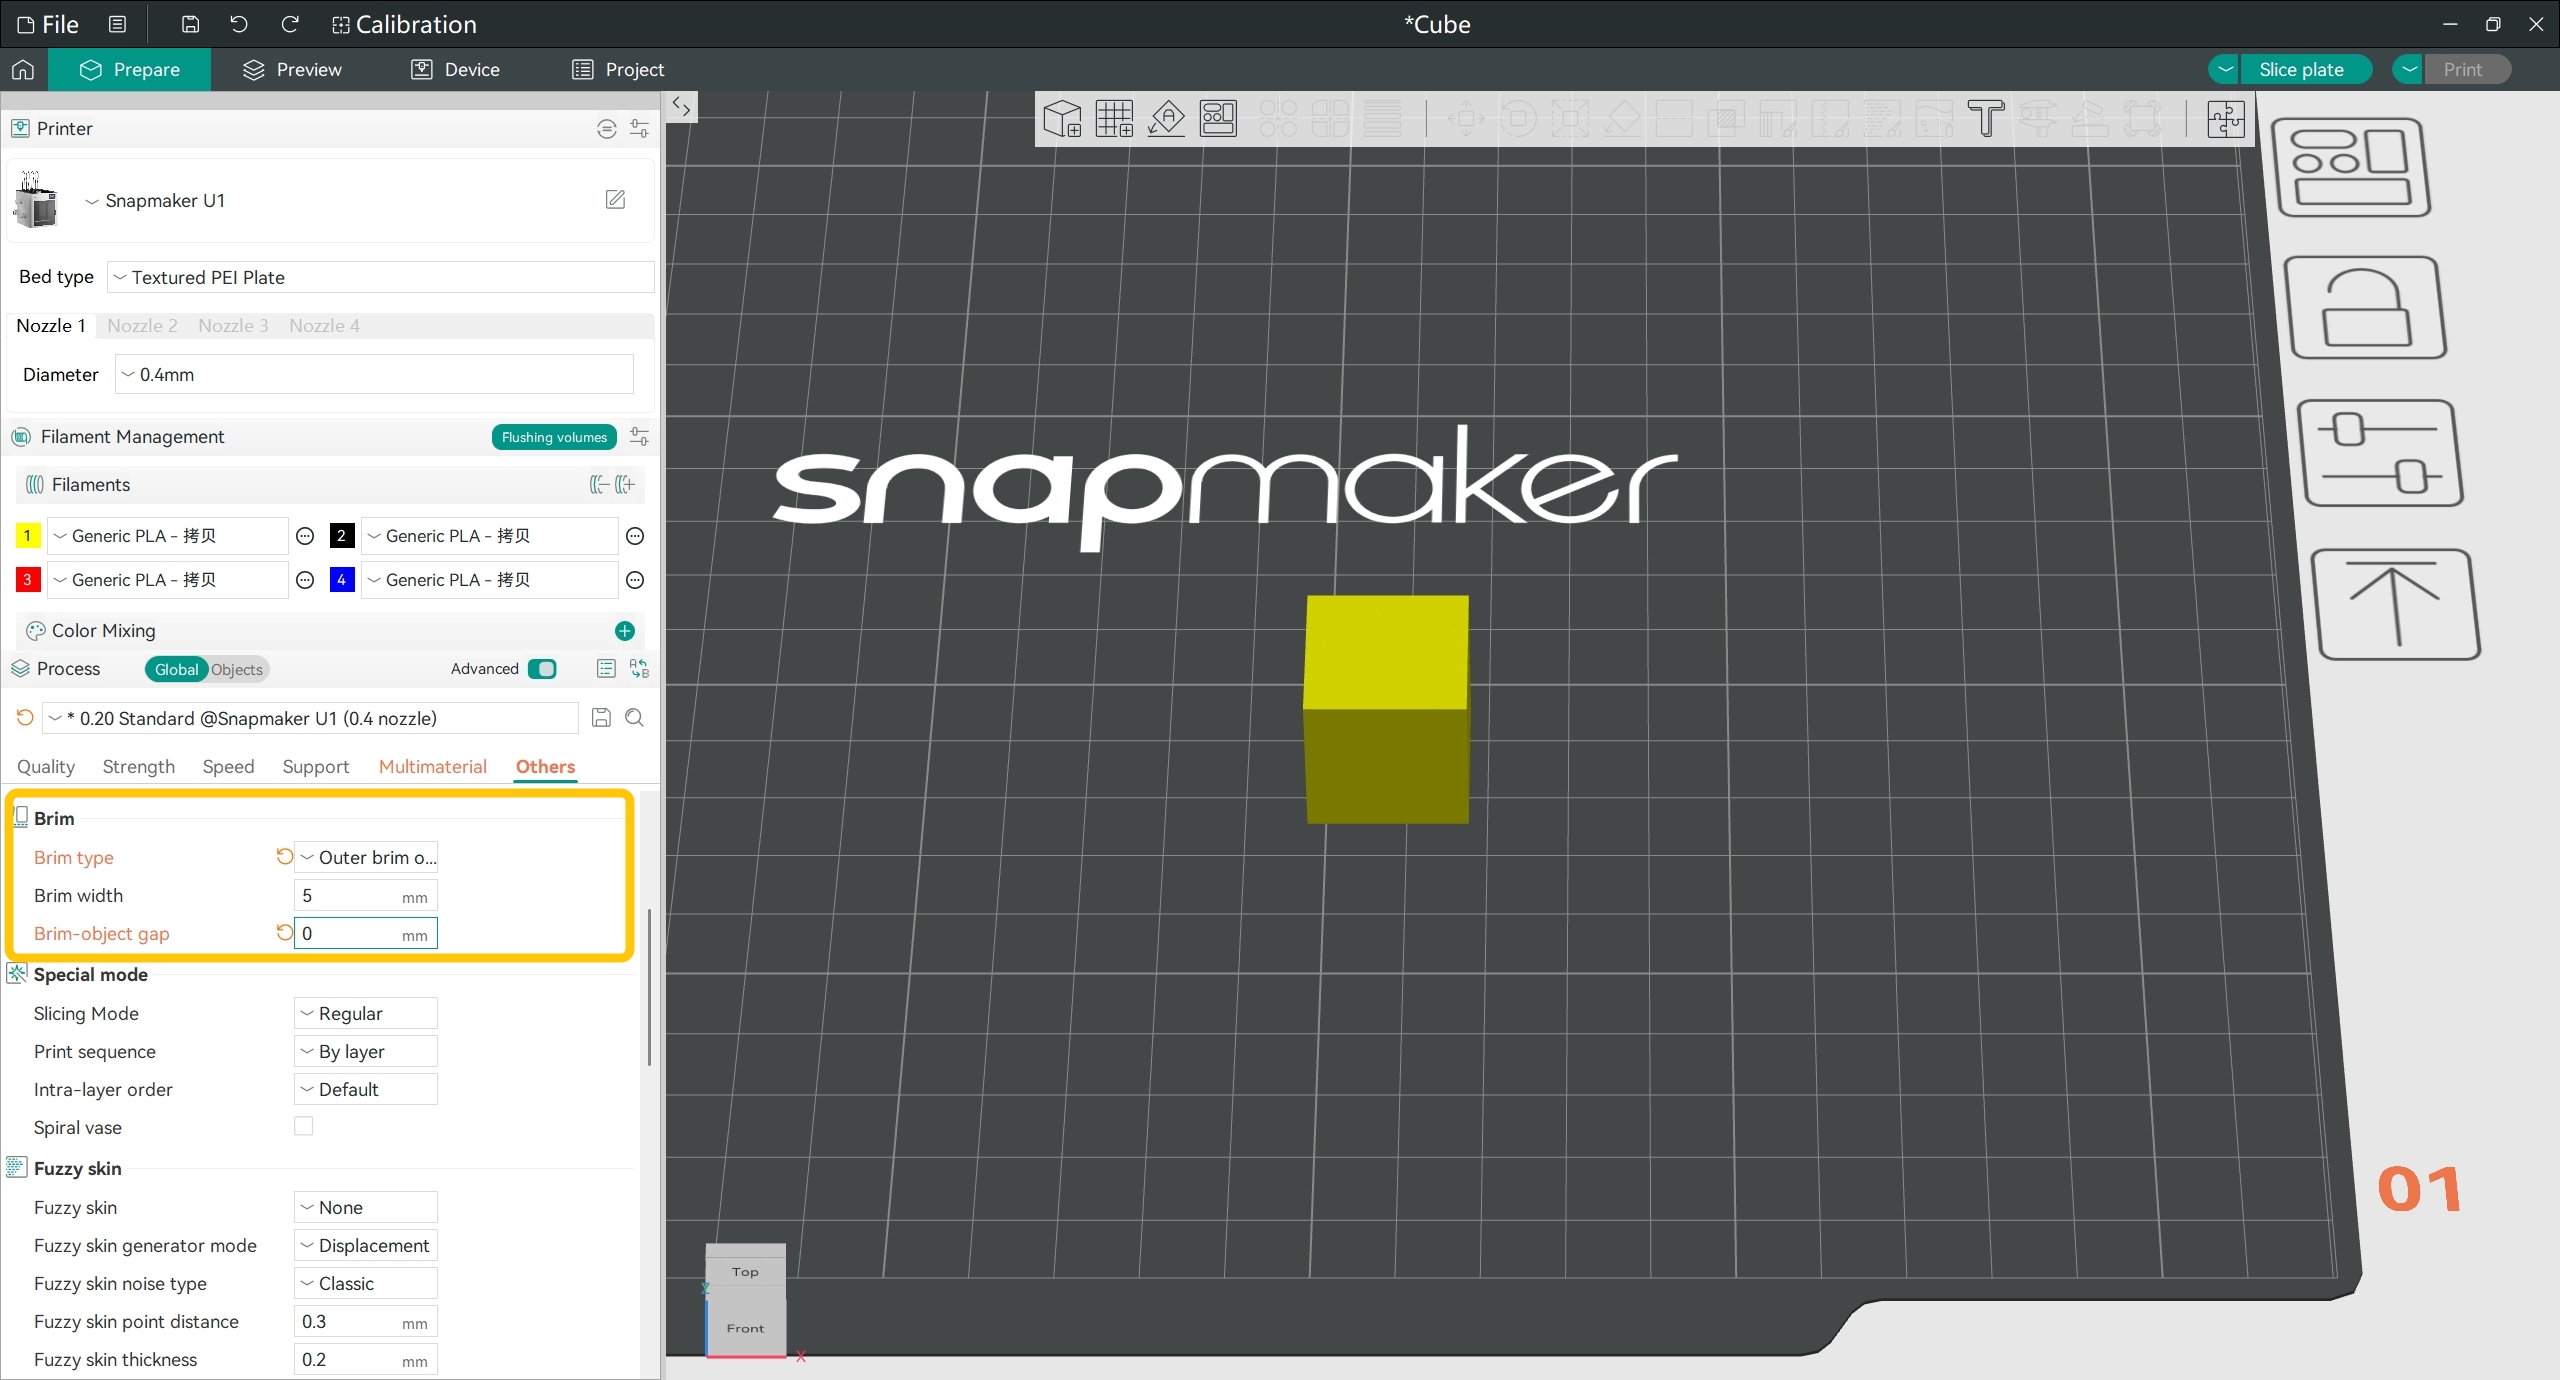
In Process > Others, locate Brim.
Set Brim type to Outer Brim Only.
Set an appropriate Brim width based on the size of your model, such as 5–10 mm.
Re-slice the model and start a new print. If the model's first-layer corners adhere firmly to the build plate without warping, lifting, or shifting, the issue has been successfully resolved.
After following the troubleshooting steps, if you find it difficult to resolve your issue, kindly submit a support ticket through https://snapmaker.formcrafts.com/u1-troubleshooting-request and share your troubleshooting results with some pictures/videos.
Our dedicated support team will be more than willing to assist you in resolving the issue.