¶ 1. Product Introduction

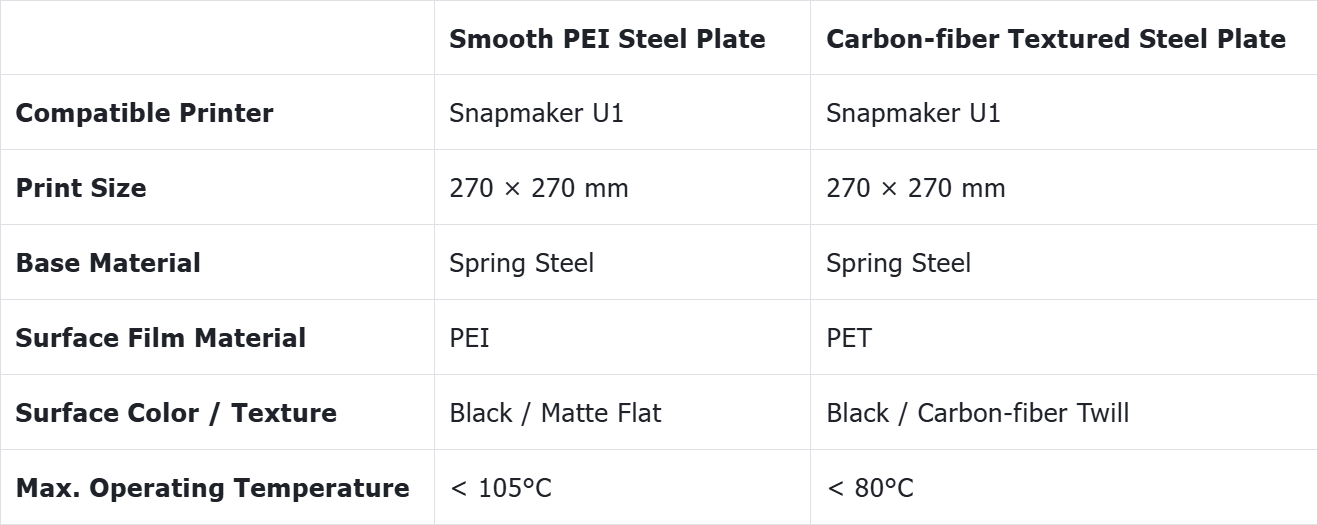
¶ 2. Specifications
¶ 3. Filament Compatibility
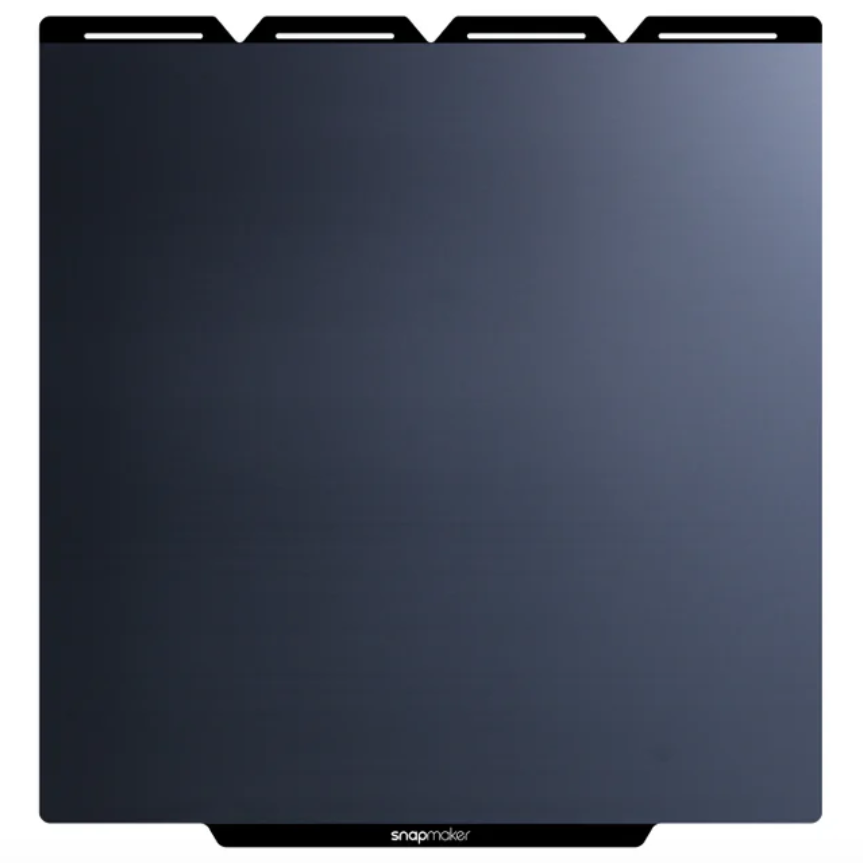
Smooth PEI Steel Plate
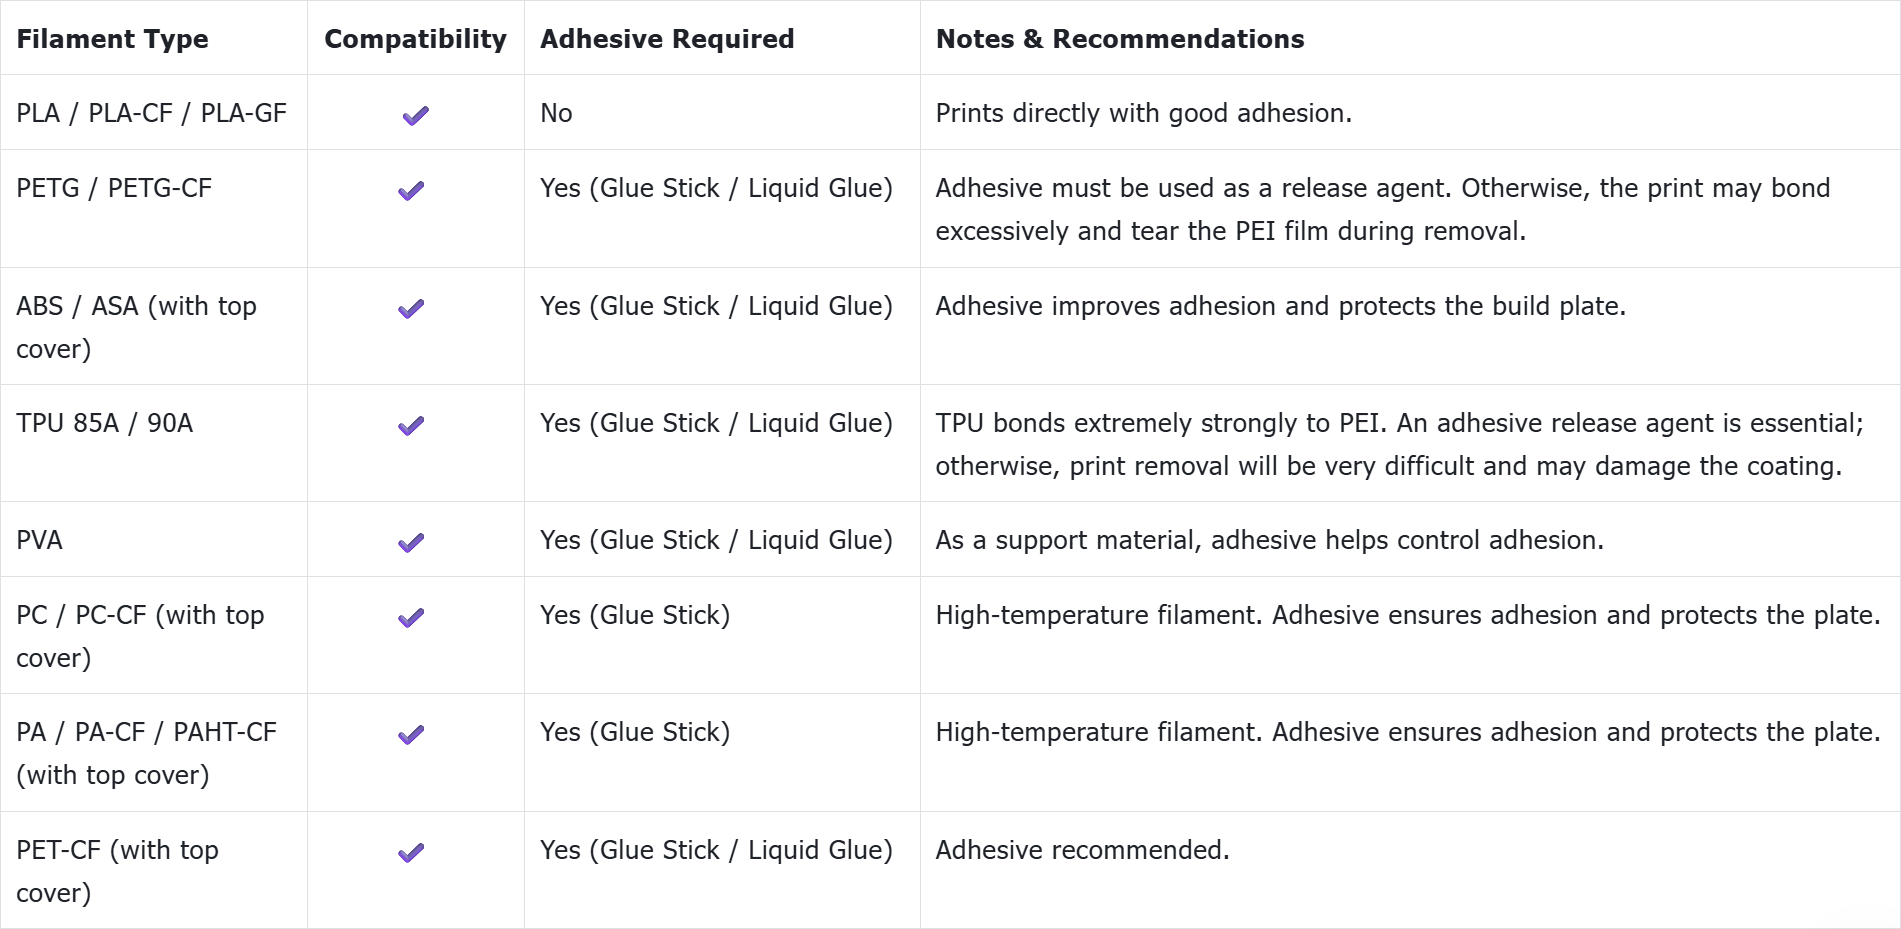
The smooth PEI steel plate allows various materials to be printed on its surface. With the exception of PLA, using an adhesive (glue stick or liquid glue) is strongly recommended for all other materials to prevent excessive adhesion that could damage the PEI film during print removal.
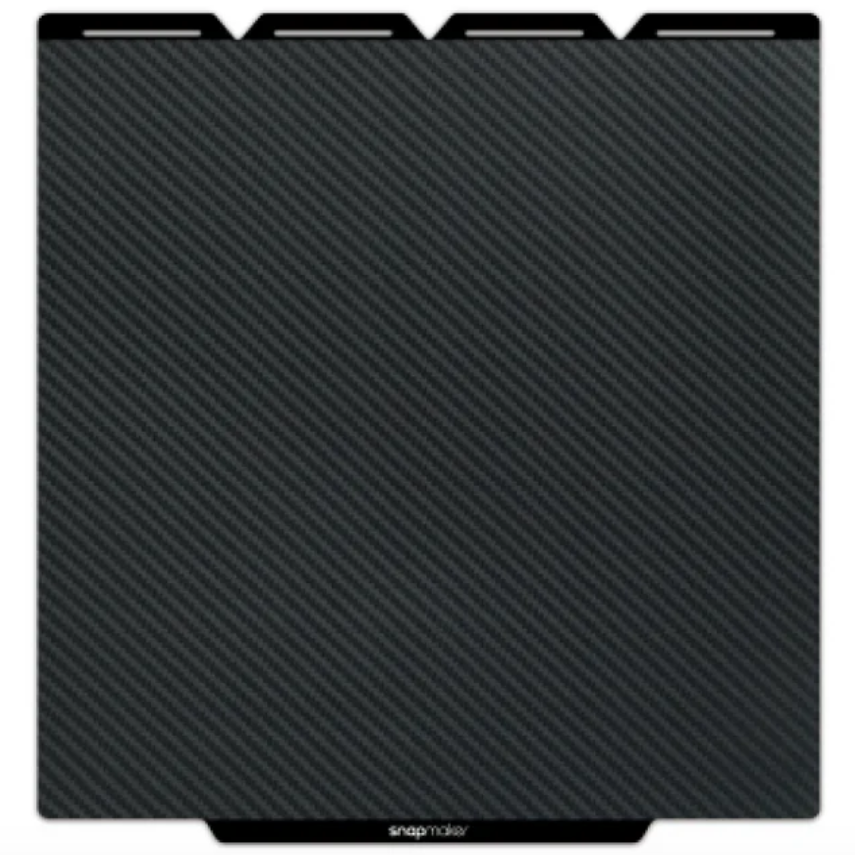
Carbon-fiber Textured Steel Plate

The surface texture of the carbon-fiber textured steel plate is its core value. Using adhesive will fill the texture, smoothing it out and ultimately ruining the transfer effect on the print's bottom surface.
¶ 4. Usage Guide
-
Preparation: Before use, ensure the build plate surface is clean. Refer to How to clean your PEI steel sheet for instructions.
-
Installation: Place the build plate directly onto the U1 heated bed, ensuring it aligns with the edges of the magnetic platform and is securely attached.
-
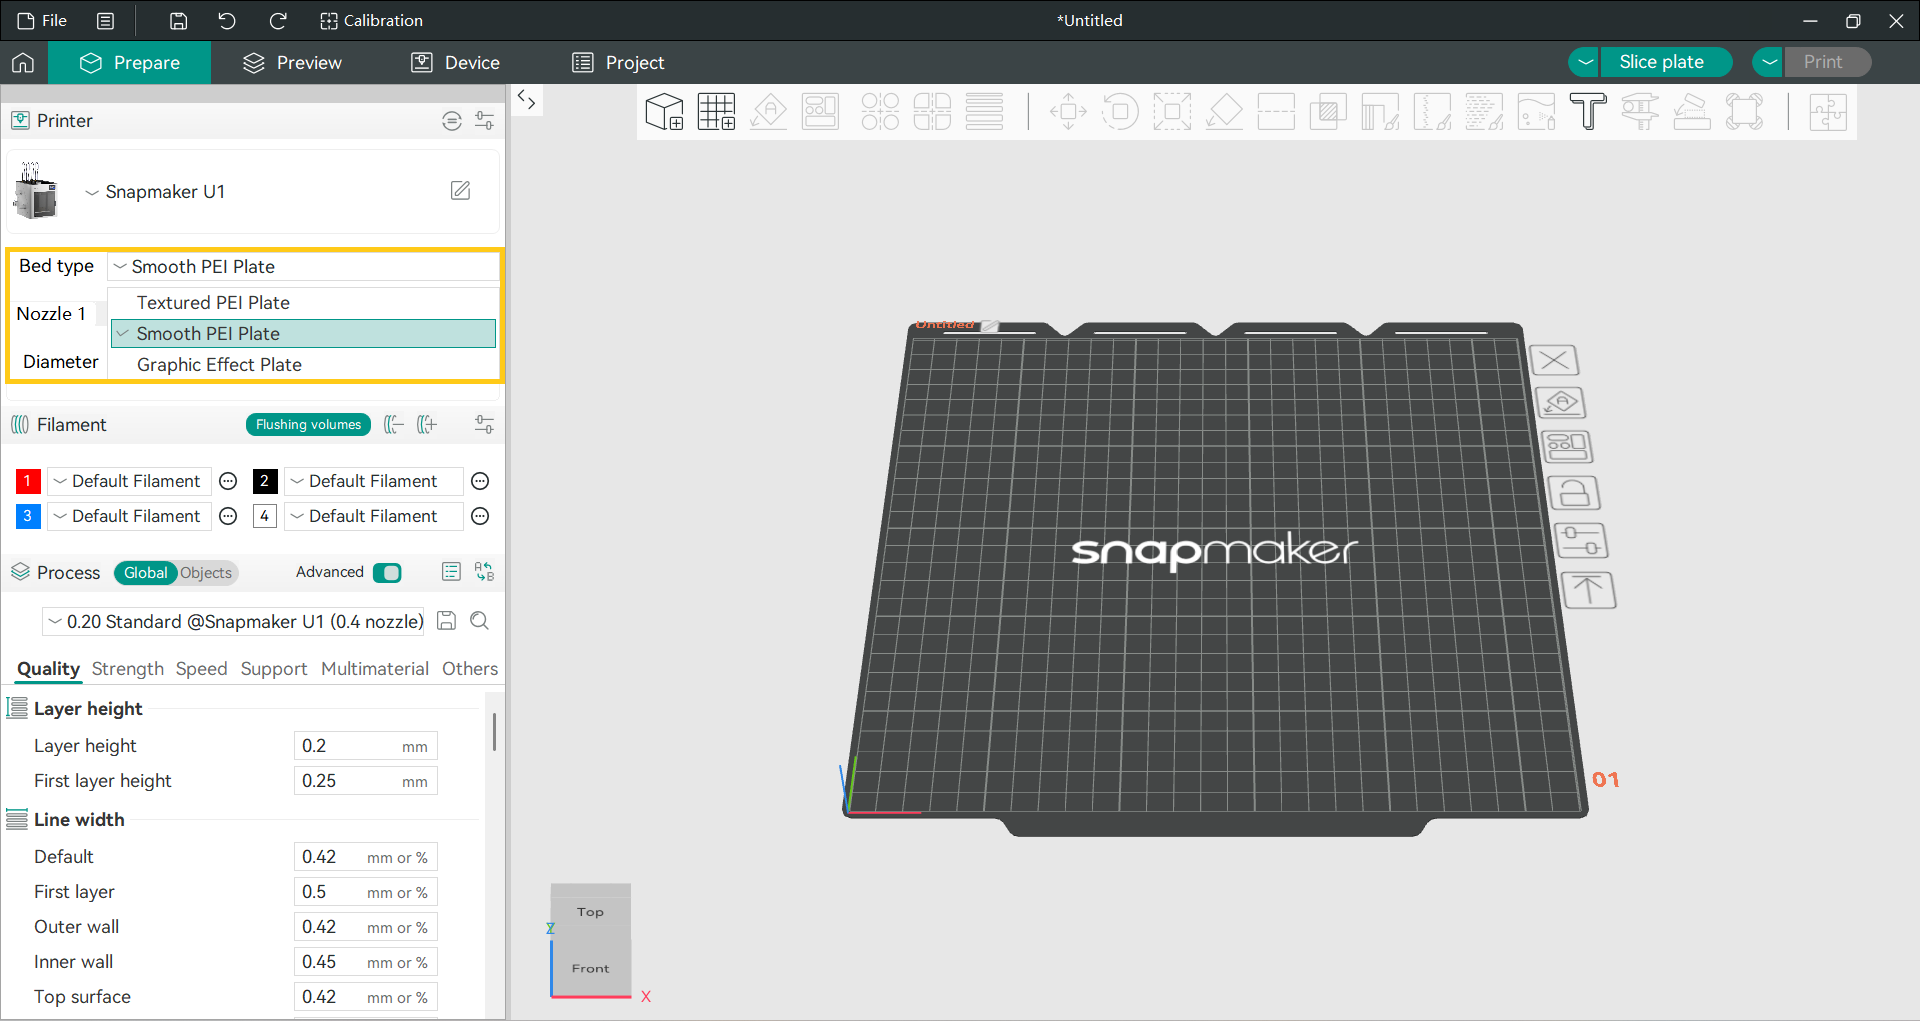
Software & Firmware Settings:
- In Snapmaker Orca: Ensure software version is V2.3.1 or higher. In printer settings, select your build plate type ("Smooth PEI Plate" or "Graphic Effect Plate"). The software will provide default heated bed temperatures, Z-offset references, and filament compatibility prompts accordingly.
Check for updates using the software's built-in update function, visit the official Snapmaker website, or download the required version from the Snapmaker Orca Release Notes.
- In Printer Firmware: Ensure firmware version is V1.3.0 or higher. The printer automatically detects the build plate type from the sliced file and applies the matching Z-offset (-0.07 mm for both smooth PEI and carbon-fiber textured plates) to optimize the first layer.
Update locally via the touchscreen or download the required version from the U1 Firmware Release Notes.
- Print Settings:
-
Heated Bed Temperature: Follow filament recommendations. Do not exceed the max operating temperature of the plate (smooth PEI < 105 °C; carbon-fiber textured < 80 °C).
-
First Layer: Maintain moderate first layer speed. Apply adhesive as prompted by the software for specific filaments.
- Print Removal:
-
Critical Step: Allow the build plate to cool completely to room temperature.
-
Action: After cooling, remove the build plate from the printer. Hold it by both ends and gently flex it to release the print.
If using a scraper, hold it at a low angle of 15°–30° to the steel plate, keeping the blade as close to the surface as possible. Start from the edge of the print and slide the tip between the print and the plate. Push forward evenly along the horizontal direction. Do not pry upward.
If you are using a smooth PEI steel plate, do not use a scraper to clean the plate or remove the finished print, as this may damage the PEI film.
- Cleaning & Maintenance:
- Clean regularly after each print to remove dust, debris, and fingerprints.
- Clean promptly when residue is visible to ensure surface flatness.
- Clean when adhesion decreases to restore grip.
- Perform preventive cleaning before important or large prints to increase success rate.
- Perform periodic deep cleaning to maintain long-term performance.
- Avoid using acetone or acetone-based cleaners.
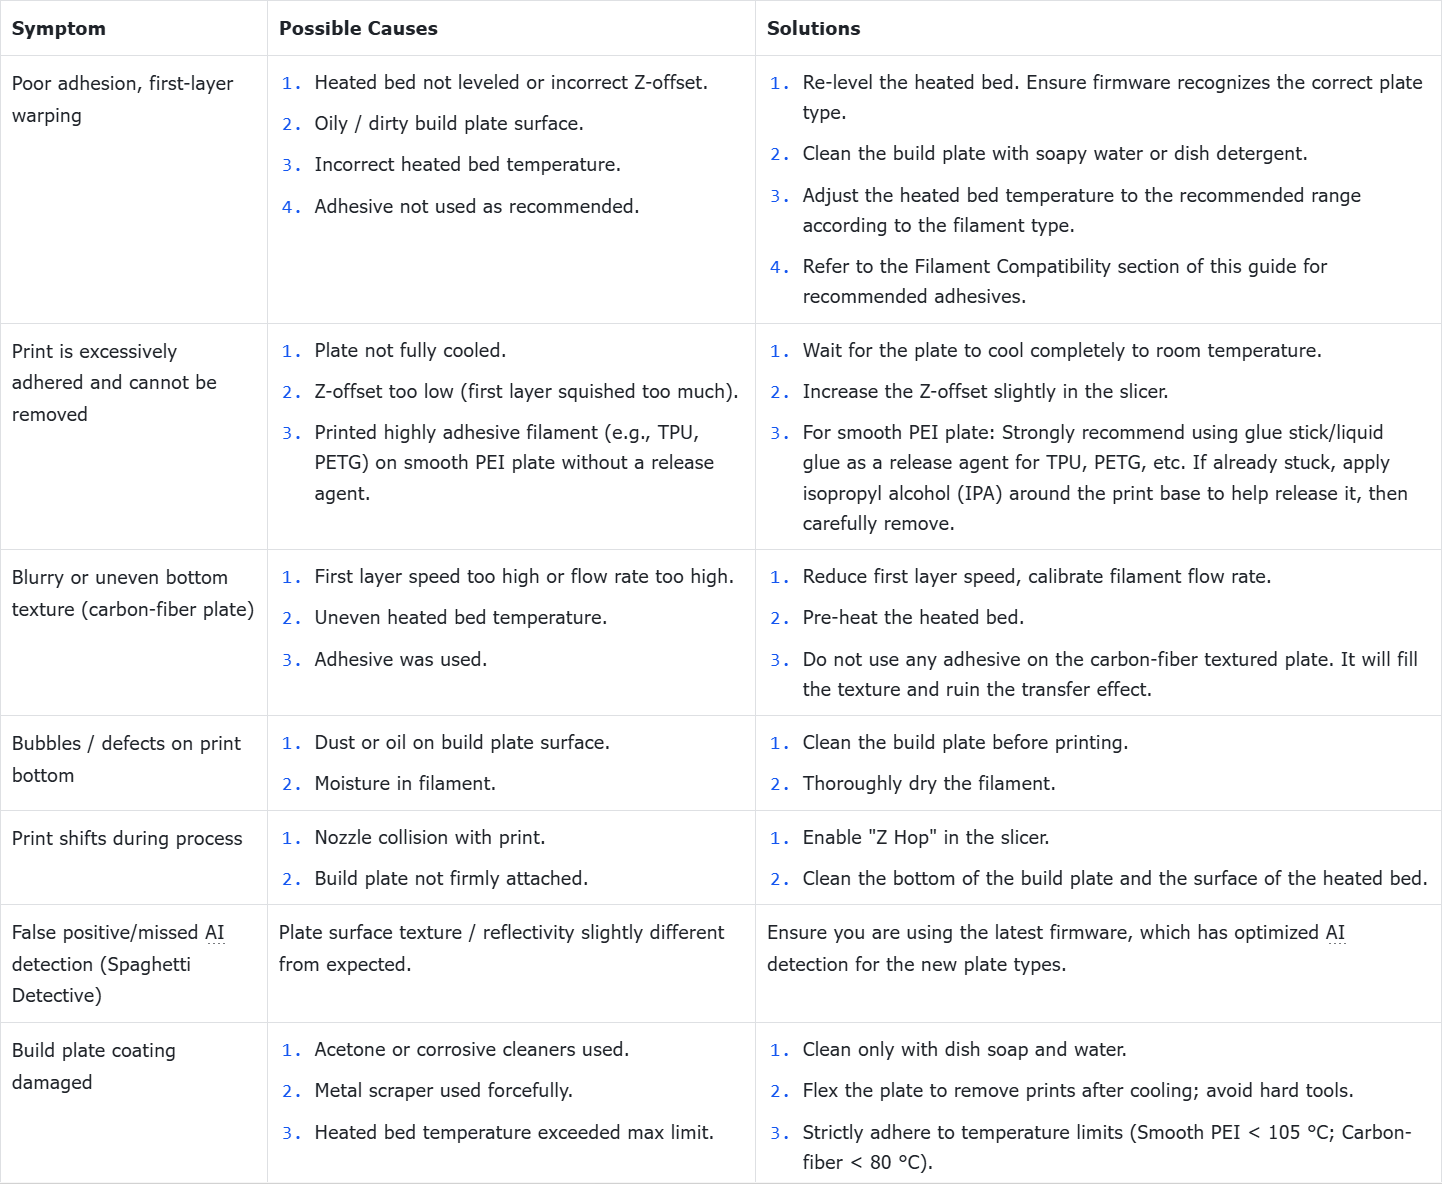
¶ 5. Troubleshooting