¶ 1. Selection Guide
The Snapmaker U1 is equipped with 0.4 mm stainless steel hot ends as standard equipment. You can purchase hardened steel hot ends with different nozzle diameters from the official Snapmaker store as needed.
| Nozzle Diameter | 0.2 mm | 0.4 mm | 0.6 mm | 0.8 mm |
|---|---|---|---|---|
| Nozzle Material | Hardened Steel | Hardened Steel | Hardened Steel | Hardened Steel |
| Print Quality | Extremely fine detail and top-notch quality for tiny elements | High-quality prints with crisp detail for models of standard size | Decent quality but with less distinct detail on smaller models | Basic-quality prints for smaller models, with more noticeable layer lines |
| Recommended Filaments | No particles or debris filament such as Pure PLA, PETG, ABS, ASA, etc | General and conventional composite filaments such as PLA, PETG, PVA, ABS, ASA, PC, TPU, PA, etc | High-flow filaments such as SnapSpeed PLA, TPU, PETG, PVA, ABS, ASA, PC, PA, etc | All kinds of common filaments, especially suitable for low-viscosity filaments |
| Recommended Settings | Optimal layer height: 0.05–0.12 mm (25–60% of nozzle diameter). General recommendation: 0.1 mm | Optimal layer height: 0.1–0.3 mm (25–70% of nozzle diameter). General recommendation: 0.2 mm | Optimal layer height: 0.15–0.45 mm (25–70% of nozzle diameter). General recommendation: 0.3–0.4 mm | Optimal layer height: 0.2–0.6 mm (25–70% of nozzle diameter). General recommendation: 0.4–0.5 mm |
| Applications | Miniature models, elaborate logos, text, molds | Toys, mechanical components, decorative items | Large structural components, household functional parts, industrial or engineering components, high-strength models | Large structural components, household functional parts, industrial or engineering components, high-strength models |
| Maximum Printing Temperature | 300 °C | 300 °C | 300 °C | 300 °C |
The hardened steel hot end is suitable for abrasive filaments containing hard particles, while the stainless steel hot end is suitable for most non-abrasive, general-purpose filaments without fibers or particles.
Nozzle and Filament Compatibility
| Brand | Category | Series | 0.2 mm | 0.4 mm | 0.4 mm (Stainless Steel) | 0.6 mm | 0.8 mm |
|---|---|---|---|---|---|---|---|
| Snapmaker | PLA | Basic | ✔ | ✔ | ✔ | ✔ | ✔ |
| Snapmaker | PLA | SnapSpeed | ✔ | ✔ | ✔ | ✔ | ✔ |
| Snapmaker | PLA | Matte | ✔ | ✔ | ✔ | ✔ | ✔ |
| Snapmaker | PLA | Silk | ✔ | ✔ | ✔ | ✔ | ✔ |
| Snapmaker | PETG | HF | ✔ | ✔ | ✔ | ✔ | ✔ |
| Snapmaker | TPU | 95A HF | / | ✔ | ✔ | ✔ | ✔ |
| Snapmaker | TPU | 90A | / | ✔ | ✔ | ✔ | ✔ |
Mixing different nozzle diameters in the same print job is currently not supported.
Using the 0.2 mm hardened steel hot end with TPU 95A HF is not recommended; use 0.4 mm or larger instead.
¶ 2. Hot End Replacement
Refer to the U1 hot end replacement guide to replace the hot end.
The video tutorial Ceramic Heater & NTC Thermistor Replacement includes content related to hot end replacement. You may also choose to watch the video.
¶ 3. Firmware Configuration
Firmware Version Requirement: V1.3.0 or higher. Update locally via the touchscreen or download the required version from the U1 Firmware Release Notes.
After replacing the hot end, perform the following operations on the touchscreen:
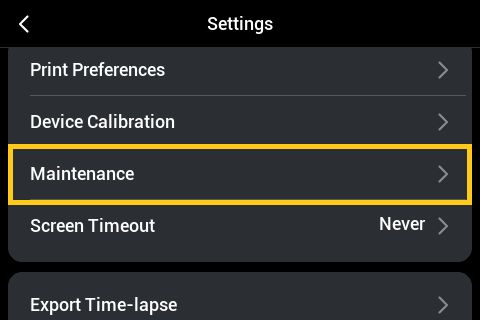
- Set the Nozzle Diameter: On the touchscreen home screen, tap to enter Settings, then navigate to
Maintenance>Toolhead Info.
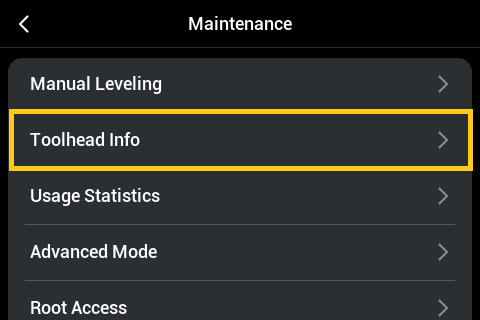
If the nozzle diameter does not match the setting in the sliced file, the touchscreen will display a pop-up reminder.
- Re-run Calibration: On the touchscreen home screen, tap to enter Settings, then tap
Device Calibration. Re-run the Multi-toolhead Offset Calibration and Heated Bed Leveling.
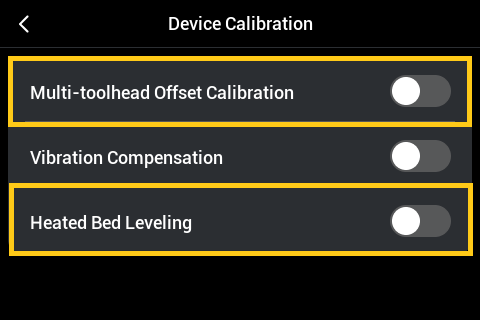
To watch video tutorials for Multi-toolhead Offset Calibration and Manual Leveling, go to: Multi-toolhead Offset Calibration | Home Calibration & Manual Leveling.
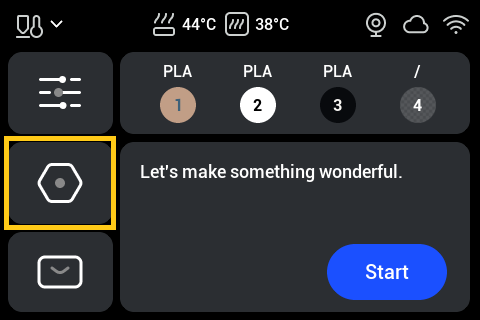
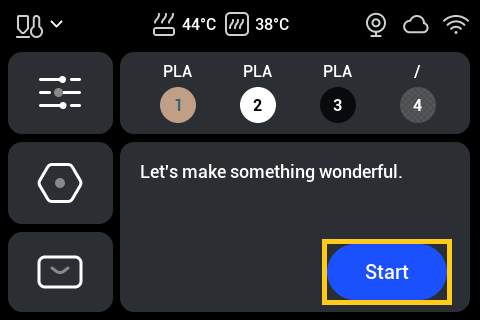
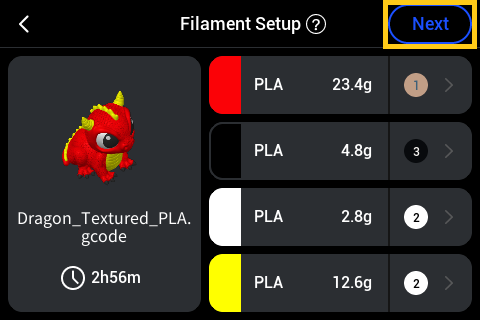
- Perform Dynamic Flow Calibration: Before starting any print job on the touchscreen, tap
Start>Next>Dynamic Flow Calibrationfrom the home screen, then start the print.
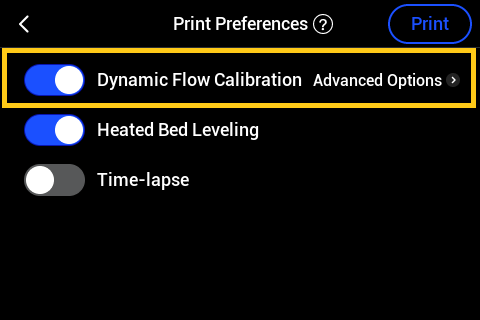
To watch the video tutorial for Dynamic Flow Calibration, go to: Dynamic Flow Calibration.
If you are using 0.2 mm hot ends, dynamic flow compensation is unreliable. Performing Dynamic Flow Calibration is not recommended for 0.2 mm nozzles.
¶ 4. Software Configuration
Snapmaker Orca Version Requirement: V2.3.1 or higher. Check for updates using the software's built-in update function, visit the official Snapmaker website, or download the required version from the Snapmaker Orca Release Notes.
After replacing the hot end, perform the following operations in Snapmaker Orca:
Refer to the Snapmaker Orca Quick Start Guide for U1. Ensure Snapmaker Orca is connected to the printer. Click Synchronize nozzle information to synchronize the printer's nozzle diameters to the software.
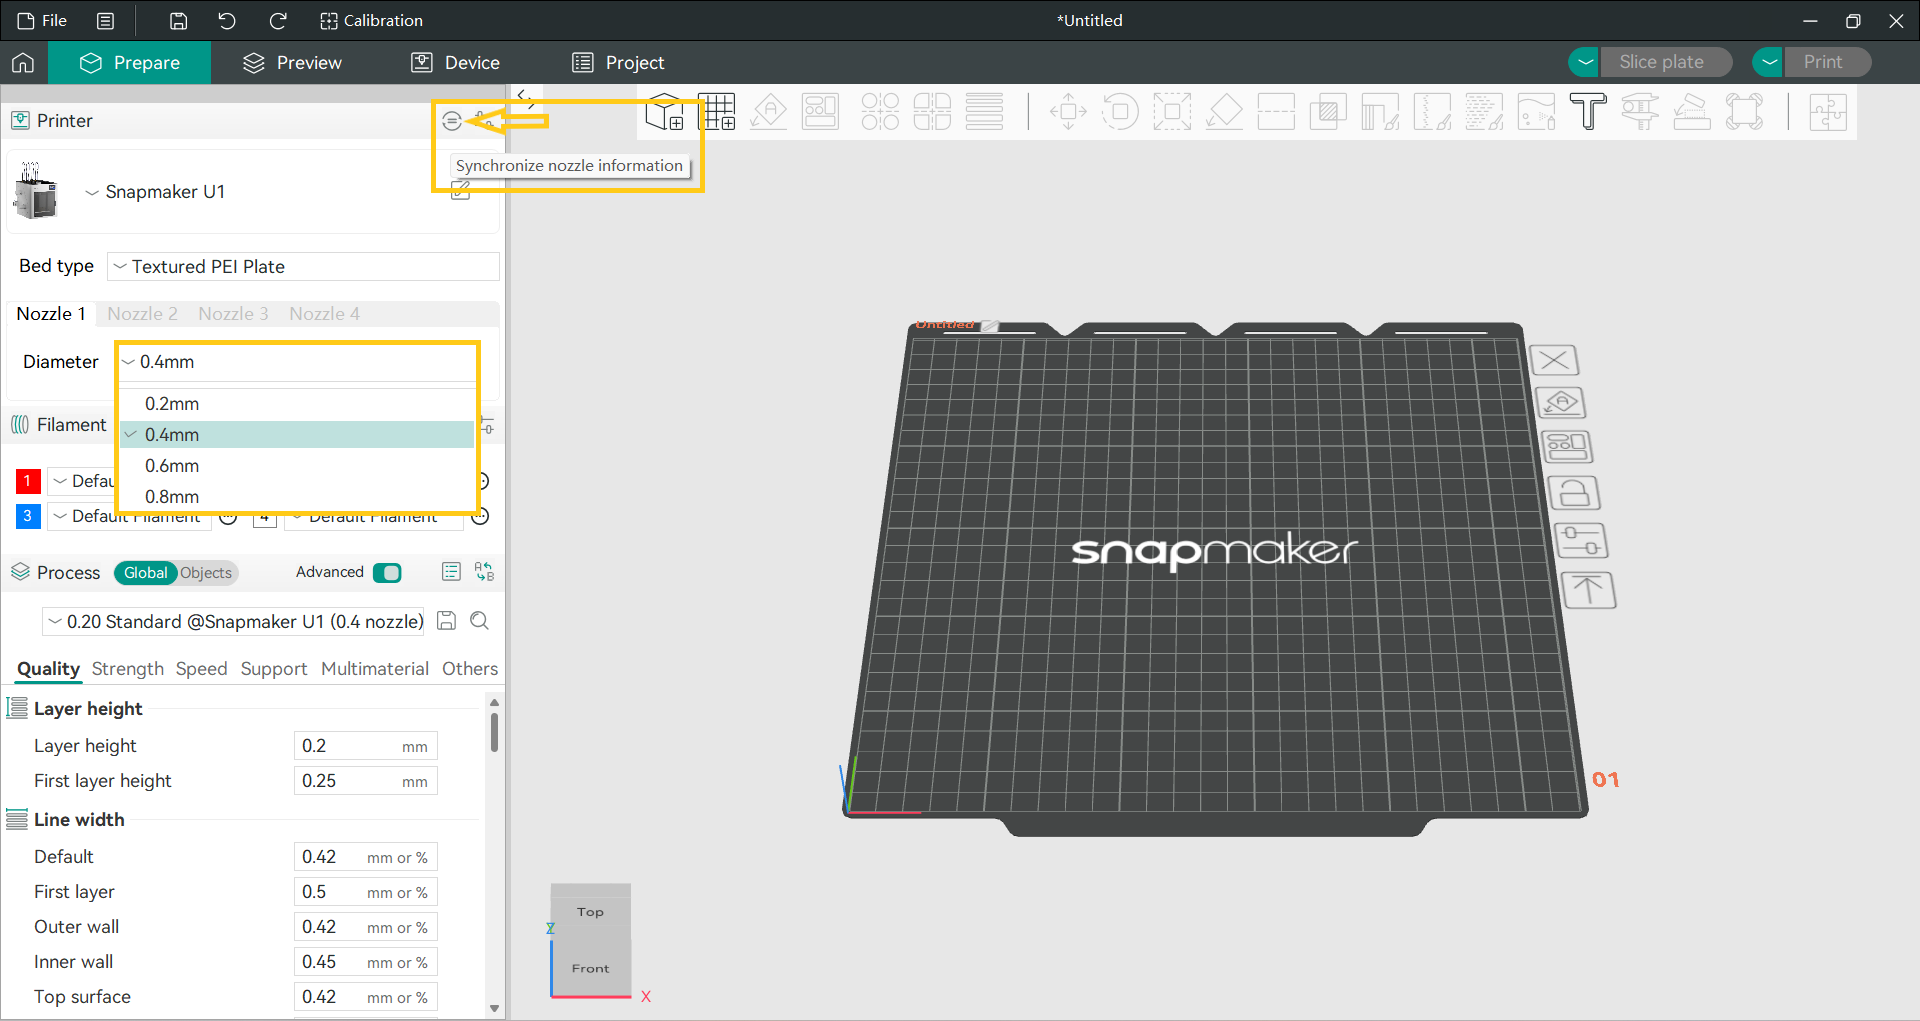
If the nozzle diameters used for slicing in Snapmaker Orca do not match the diameters set on the printer's touchscreen, the print job will not proceed.
You can also manually select the appropriate nozzle diameter for slicing. Once set, the process configuration package will adapt automatically.
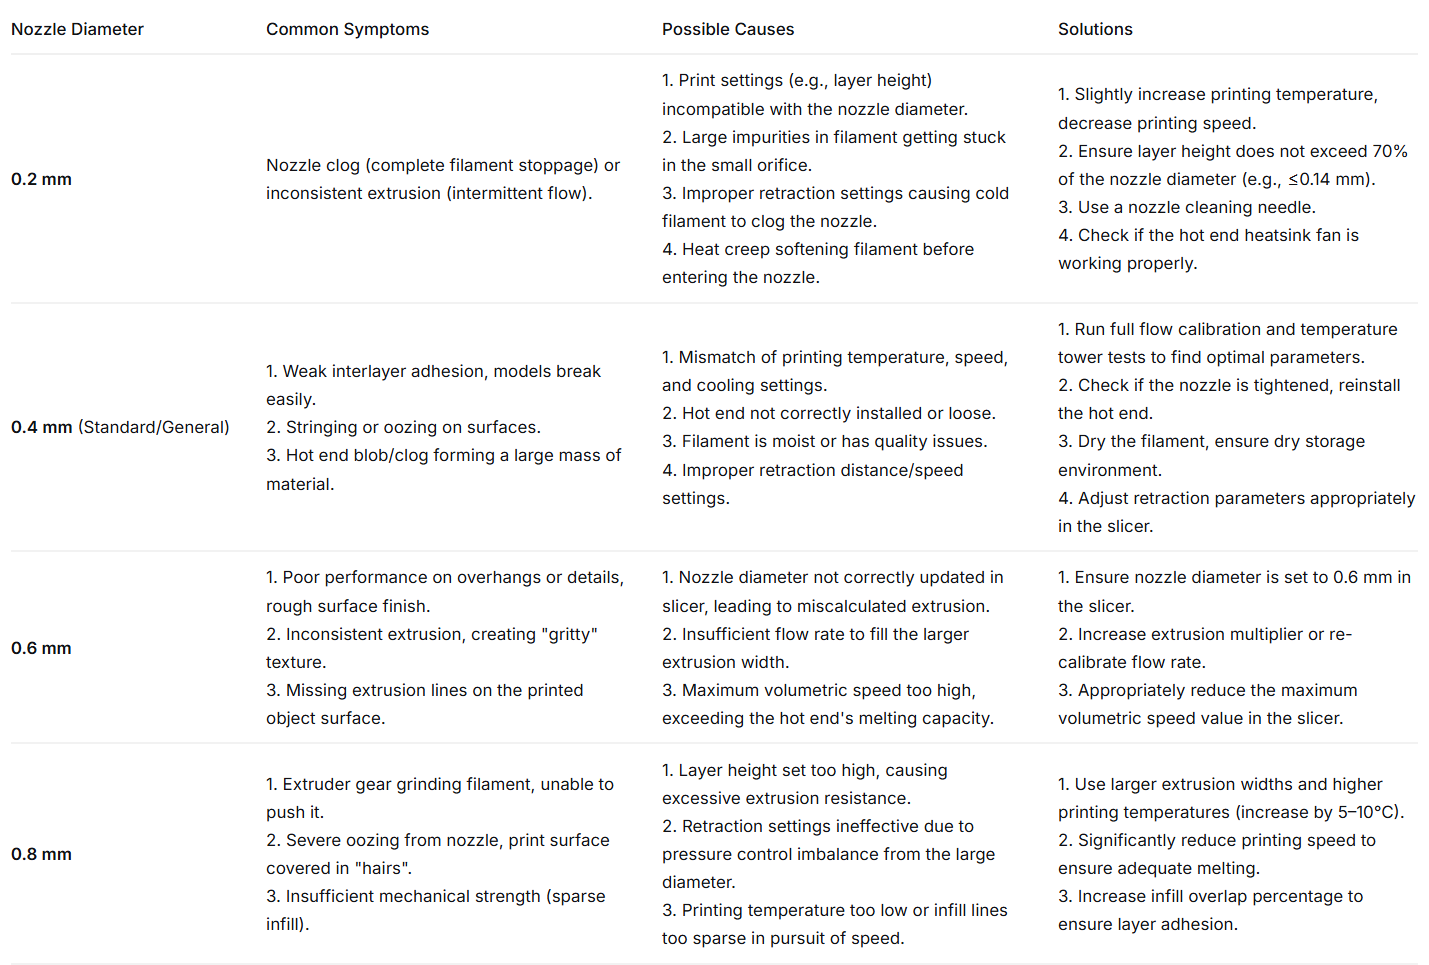
¶ 5. Troubleshooting