¶ 💡 Compatibility
This guide applies to the following machine and software. Please note when referencing:
- Machine model: U1
- Software: Latest firmware and Snapmaker Orca software installed.
¶ ⏰ When to Use This Guide
Refer to this guide when under extrusion occurs on your model.
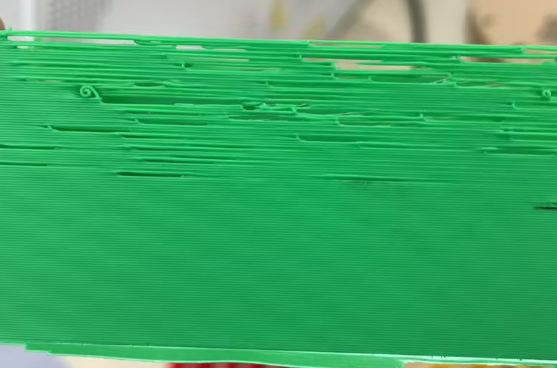
Under extrusion refers to insufficient or abnormal filament extrusion during the printing process, leading to defects such as local voids, delamination, thinner lines, or even incomplete structures. In severe cases, the model may fail to form. Under extrusion compromises both the strength and appearance of the model.
¶ 📋 Quick Info Card
- Difficulty: ⭐⭐☆☆☆
- Estimated Time: 35–45 minutes
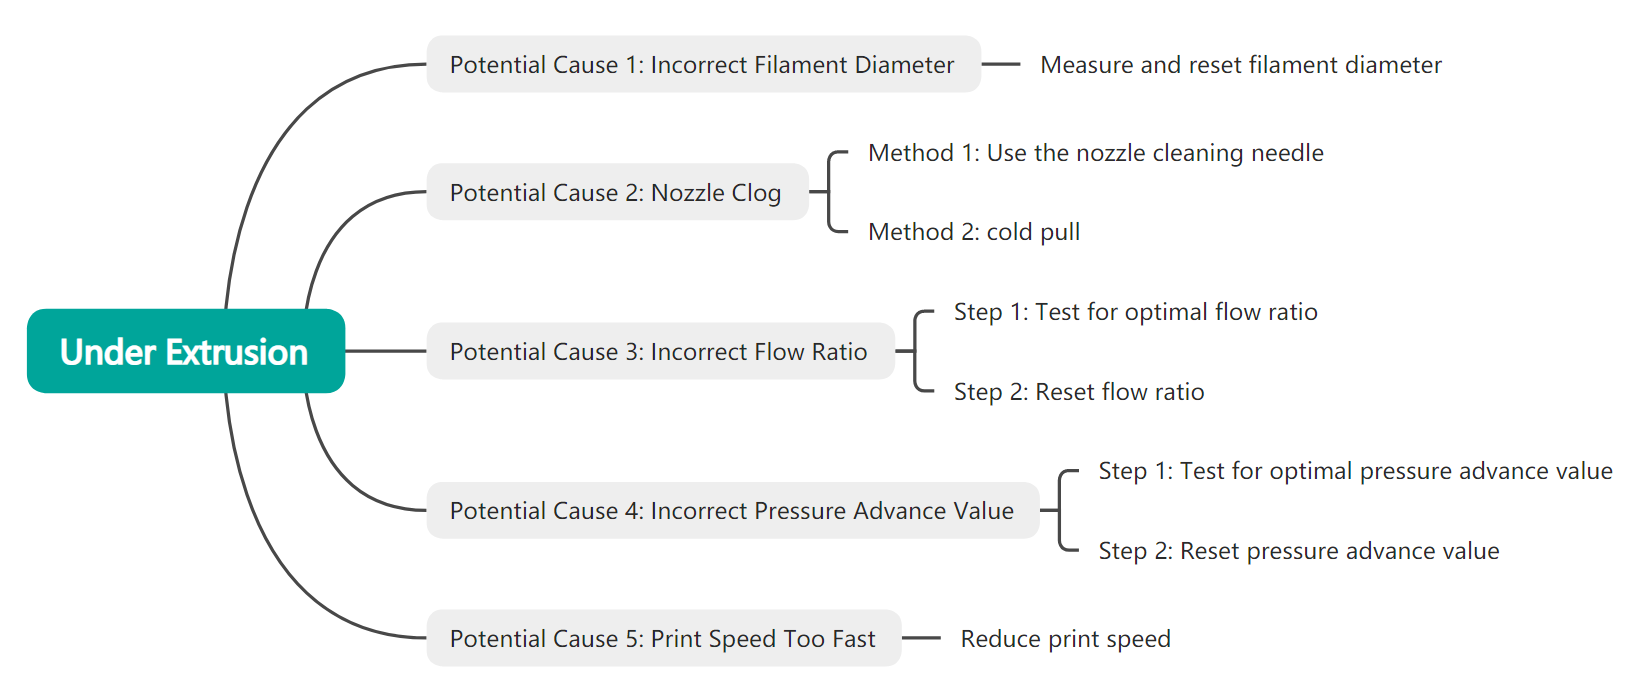
¶ 🔁 Troubleshooting Flowchart
¶ ⚠️ Important Notes
When handling the nozzle, avoid direct contact to prevent burns.
¶ 🪄 Preparation
¶ Tools Needed
- Vernier caliper
- Nozzle cleaning needle
- Heat-resistant gloves
¶ 🛠️ Troubleshooting Steps
¶ Potential Cause 1: Incorrect Filament Diameter
The slicing software automatically calculates the extrusion amount based on the preset filament diameter. In some cases, the filament diameter set in the software may differ from the actual diameter. For example, if the actual filament you are using is thinner than the set value, the actual extrusion amount will be less than what the software estimates, leading to under extrusion.
¶ 1. Measure the Actual Filament Diameter
The actual diameter can vary between different filaments. Therefore, it is recommended to measure the filament you are using for printing.
- Use a vernier caliper to measure the actual diameter of your filament.
It is recommended to measure the filament at 6 different points and calculate the average of the 6 measurements as the result.
¶ 2. Set the Actual Filament Diameter
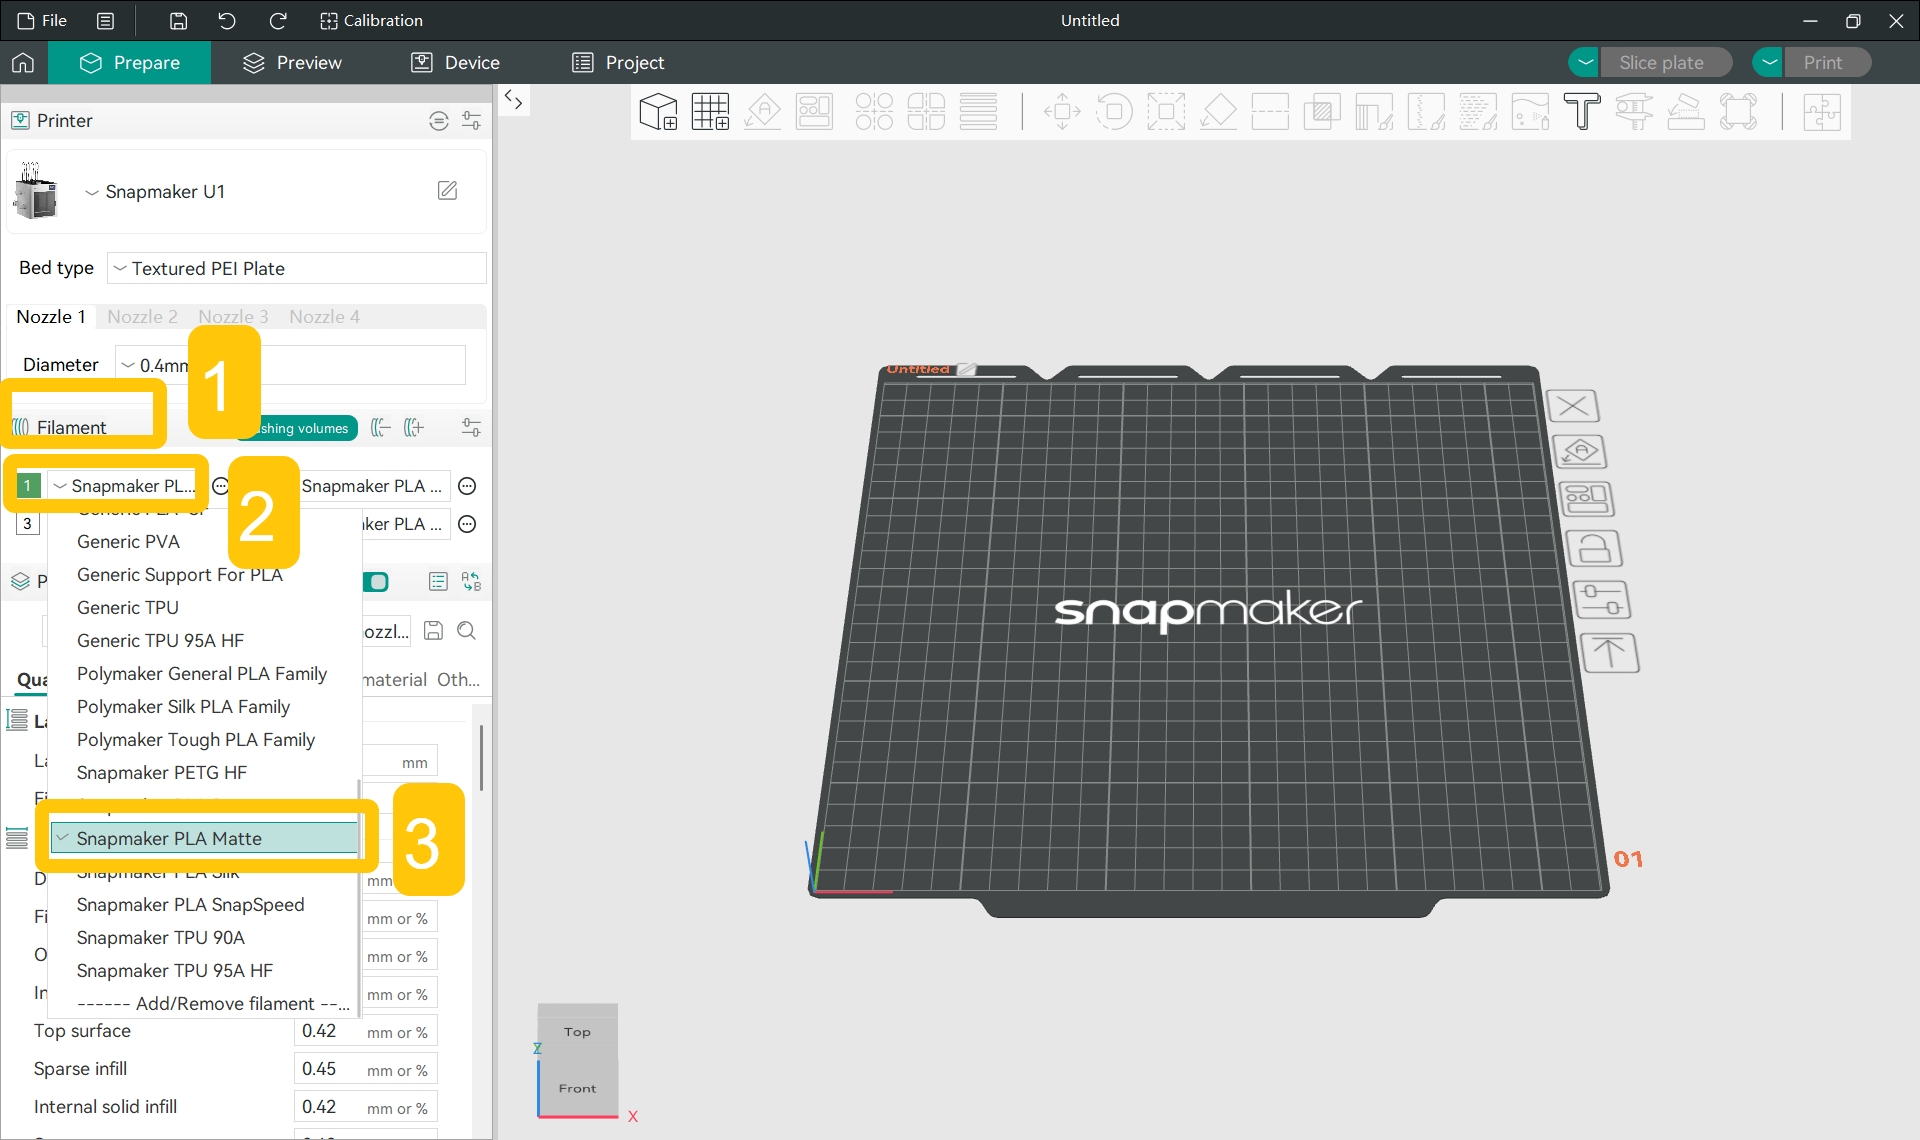
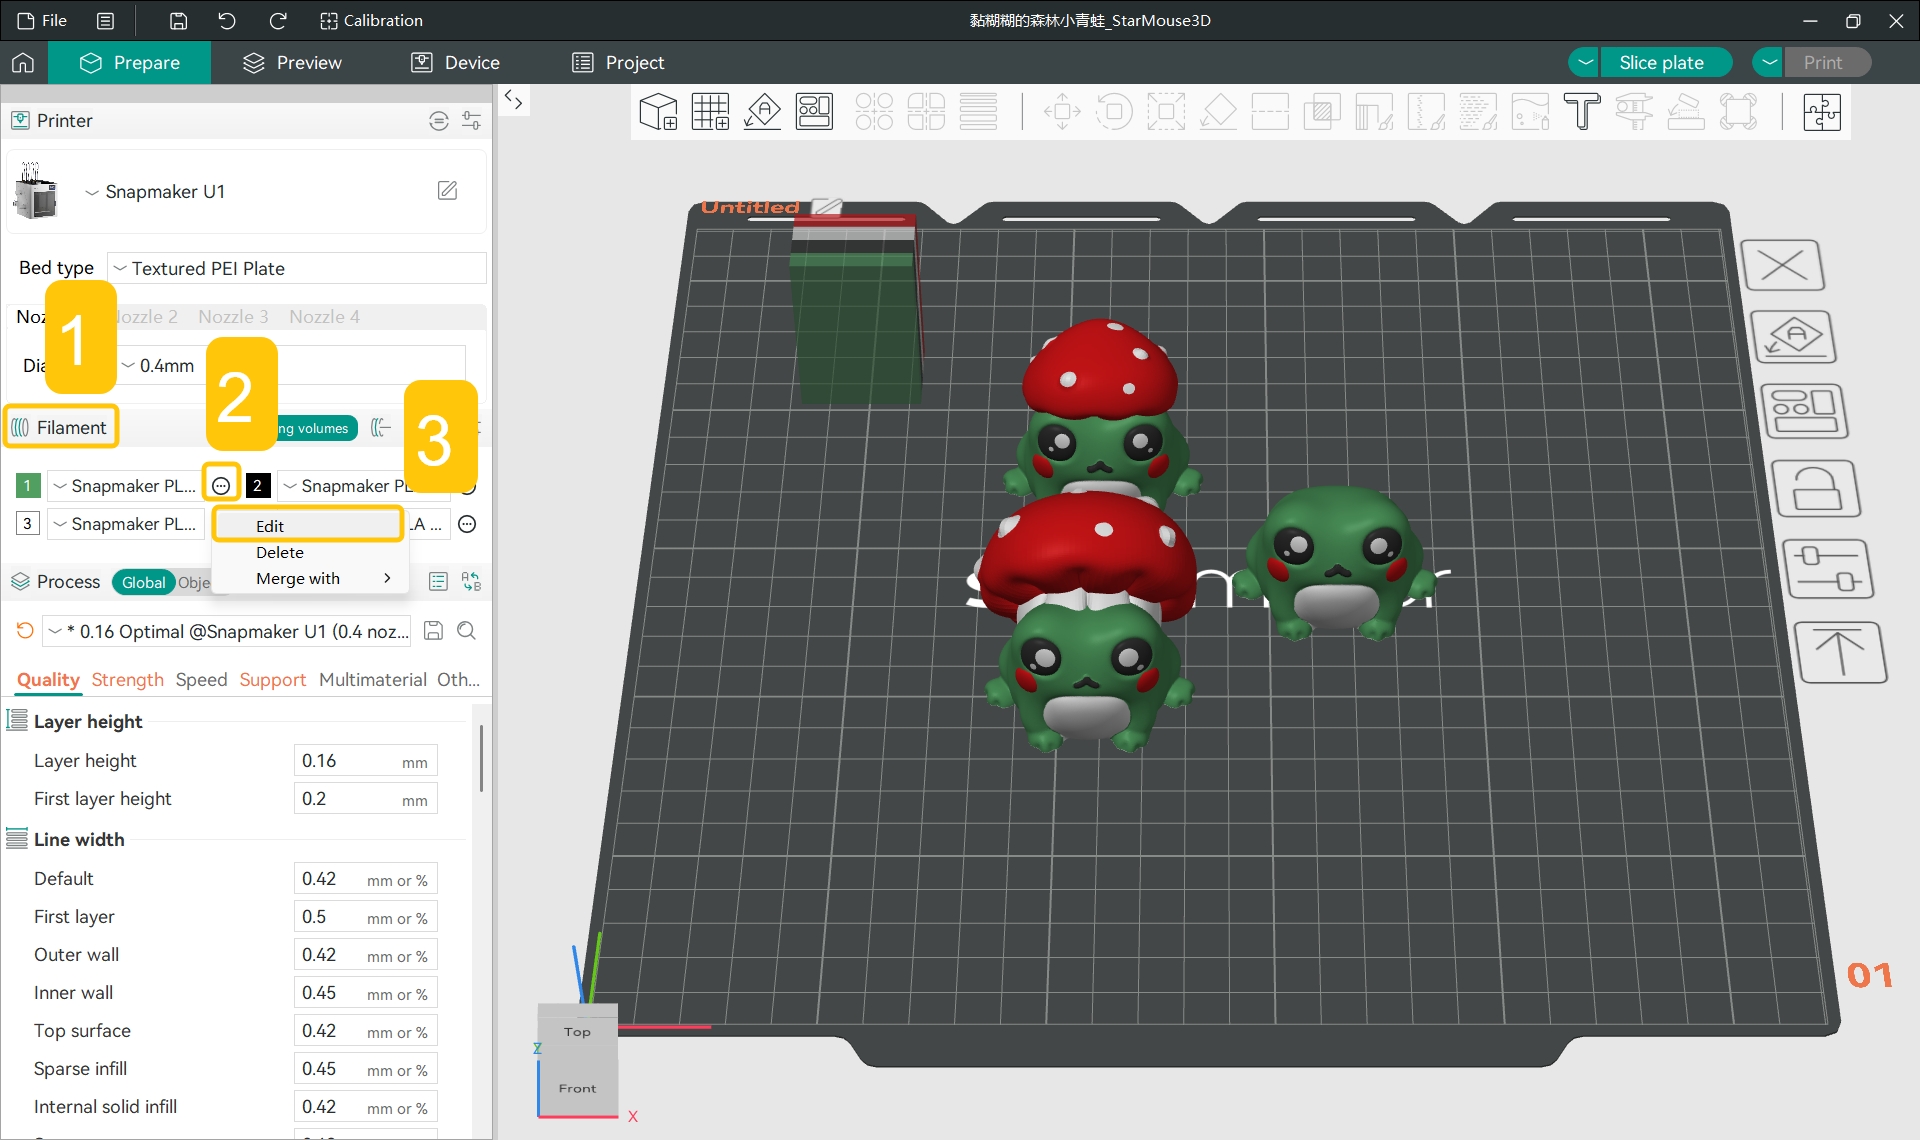
- Open Snapmaker Orca and switch to the
Preparetab.
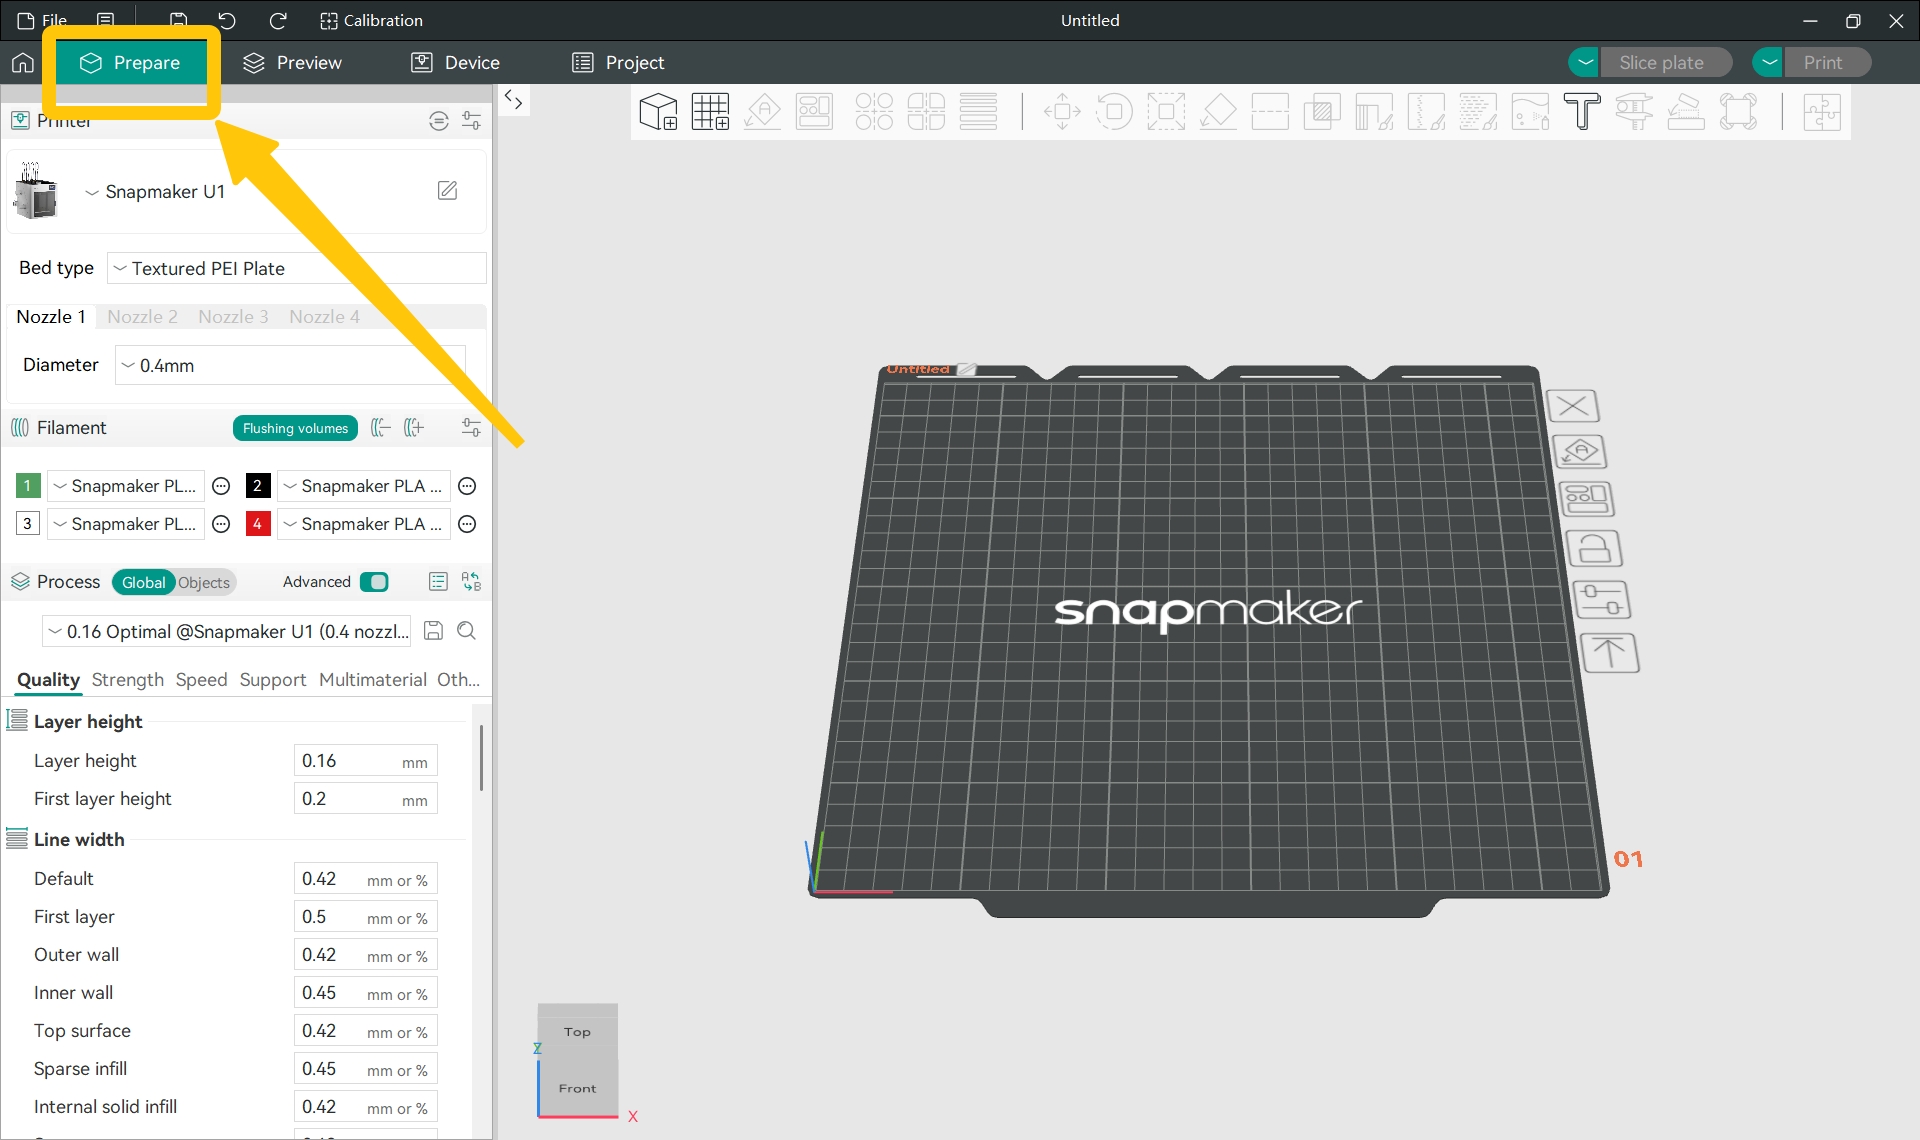
- In the
Filamentsection of the left sidebar, click the specific filament name and select the filament type you used for printing from the drop-down menu.
- In the
Filamentsection of the left sidebar, click the...>Editnext to the specific filament.
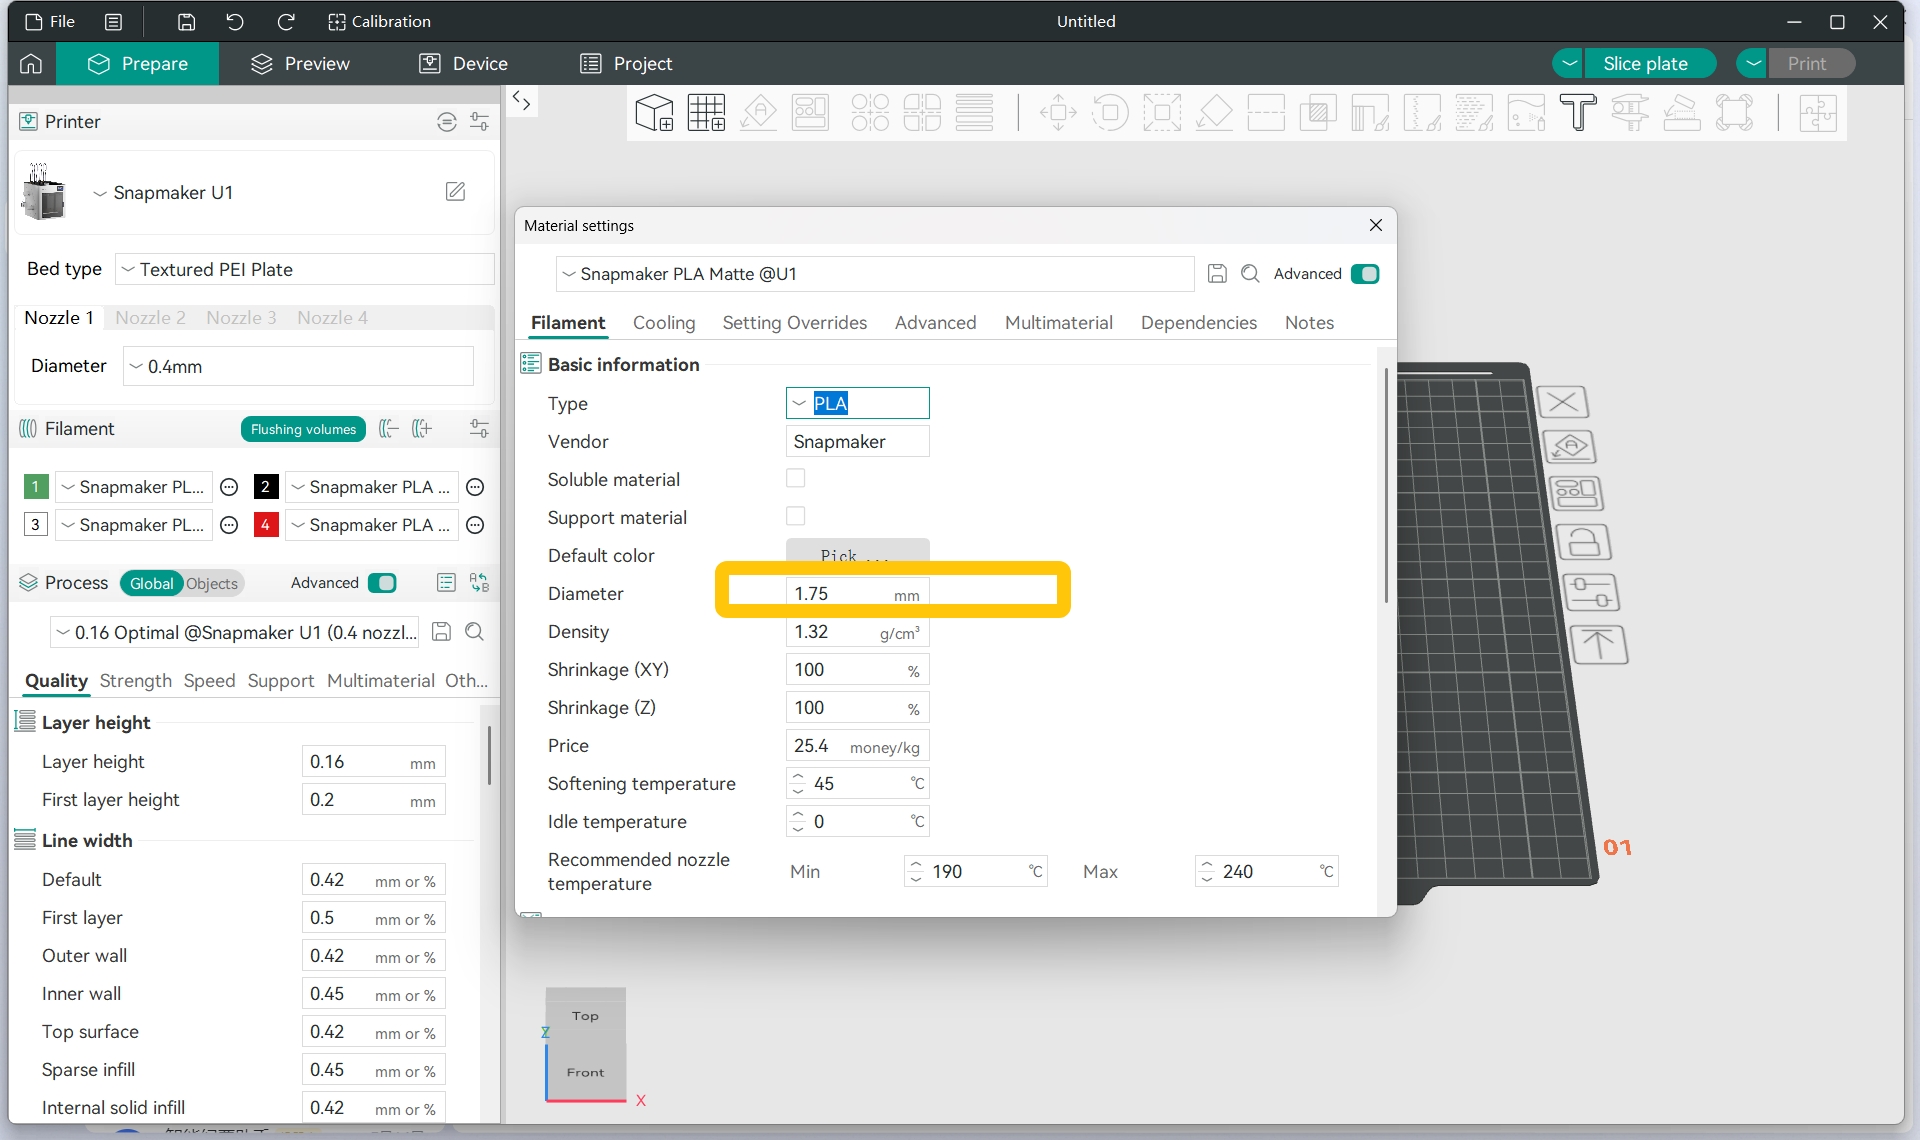
- In the pop-up window, find
Filament>Basic information>Diameter.
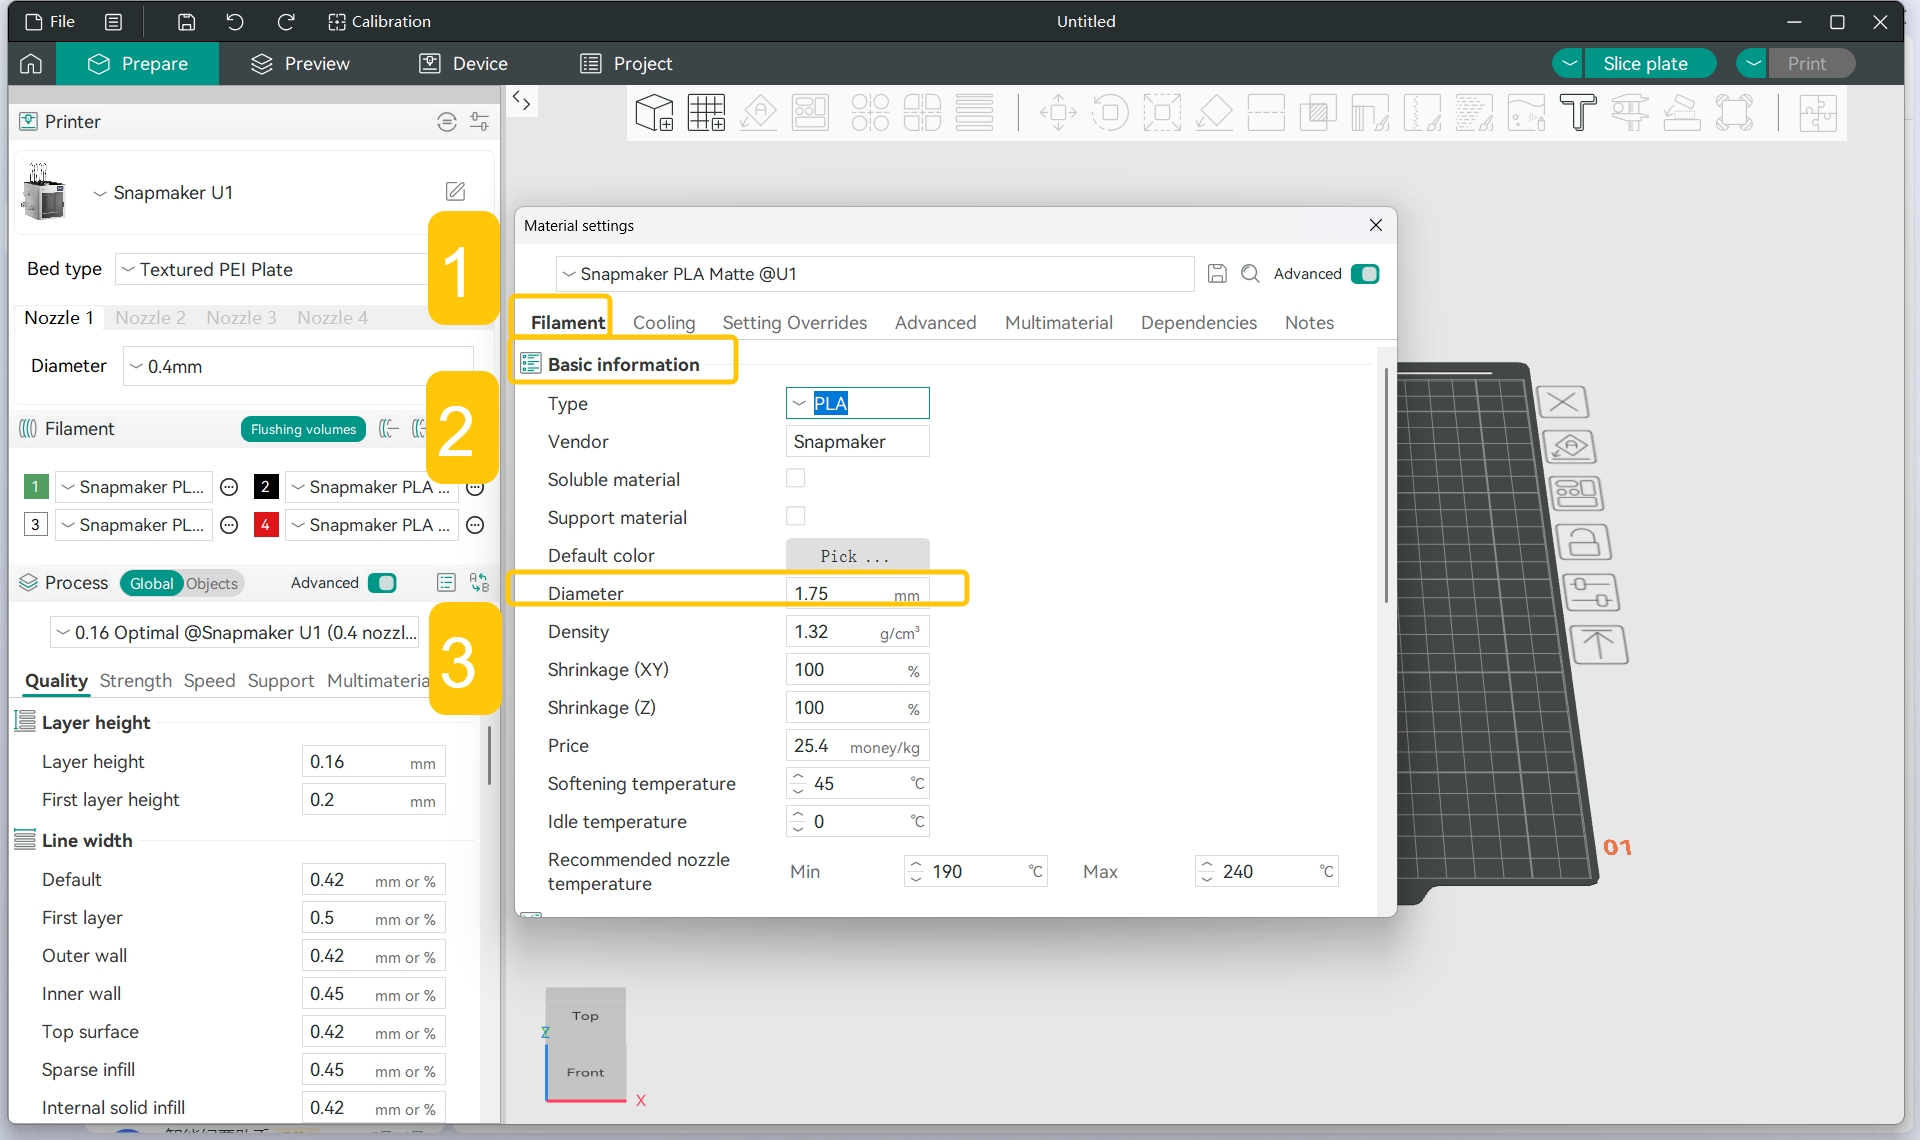
- Set the diameter value to the measurement result.
¶ Potential Cause 2: Nozzle Clog
A clogged nozzle will obstruct filament extrusion, leading to under extrusion.
¶ Method 1: Use the Nozzle Cleaning Needle
If your nozzle is smaller than 0.4 mm in diameter, please skip to Method 2 instead. The nozzle cleaning needle may be too thick and could damage your nozzle.
When the nozzle is slightly clogged, you can use a nozzle cleaning needle to clear it.
The tool box that comes with your Snapmaker U1 includes a dedicated cleaning needle that you can use to clear the clog.
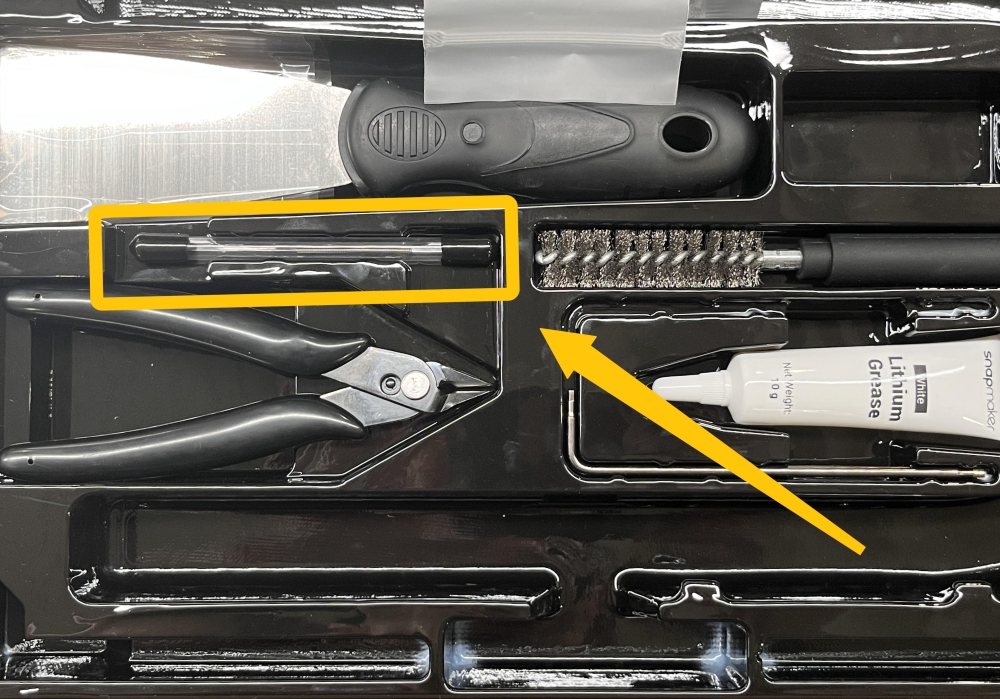
When cleaning, the nozzle must be heated to a high temperature. Do not touch the nozzle directly with your hands to prevent burns. Wearing professional heat-resistant gloves and other protective gear is recommended.
- Refer to the U1 known issues and quick fixes guide and use the cleaning needle to clear the nozzle.
¶ Method 2: Cold Pull
When the nozzle clog is more severe, you can use the cold pull method.
Before performing a cold pull, ensure that filament is loaded in the toolhead you intend to clean.
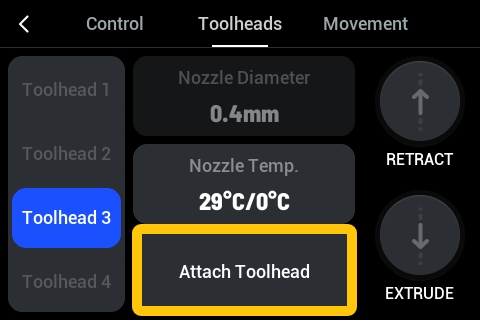
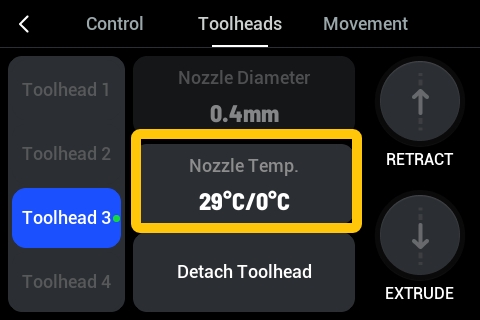
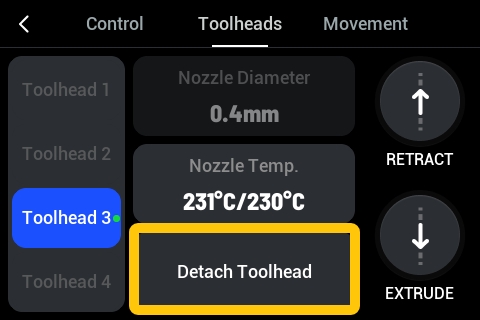
¶ 1. Select the Nozzle for Cold Pull
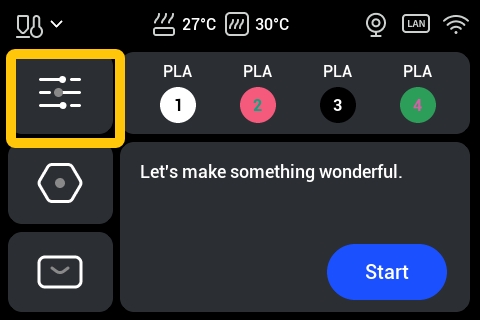
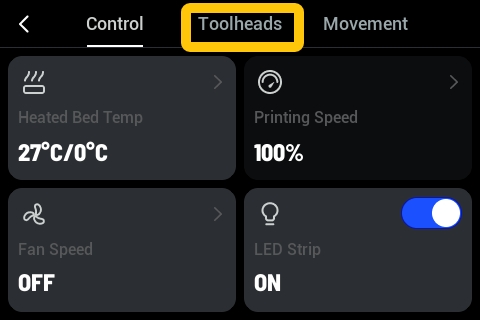
- From the U1 touchscreen Home Screen, tap
Control>Toolheads.
- On the left side of the Toolheads screen, select the nozzle of the toolhead you want to clean by cold pull.
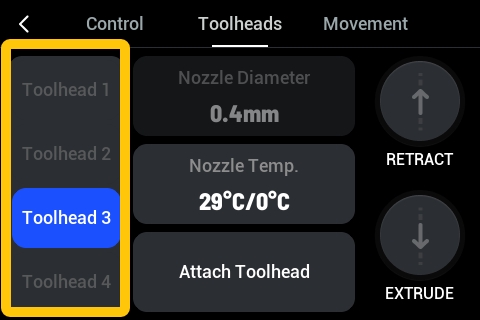
- Tap
Attach Toolheadand you can observe the machine picking up the corresponding toolhead.

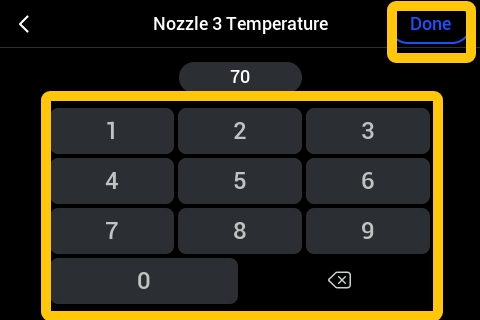
¶ 2. Heat the Nozzle to 230°C
- On the touchscreen Toolheads screen, tap
Nozzle Temp..
- On the Nozzle Temp. screen, tap the temperature display area; set the target temperature to 230°C, and tap
Done.
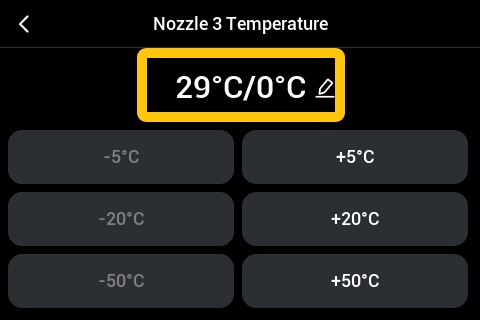
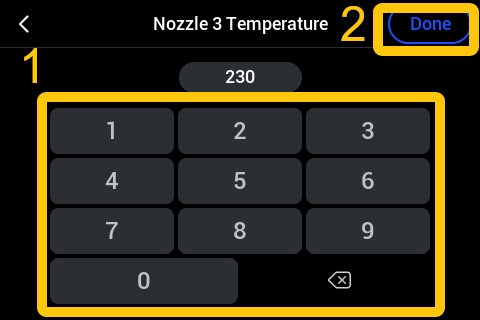
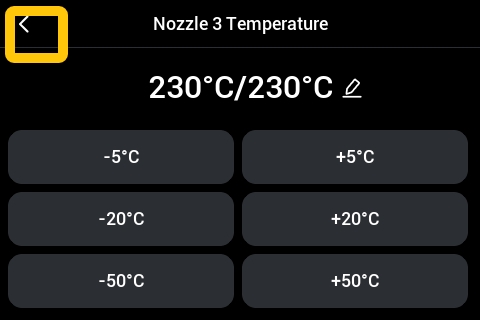
- Wait for the nozzle to heat up to 230°C.
¶ 3. Extrude at High Temperature
- After the nozzle reaches 230°C, return to the Toolheads screen.
- Tap
EXTRUDE, and wait for the toolhead to extrude the filament.
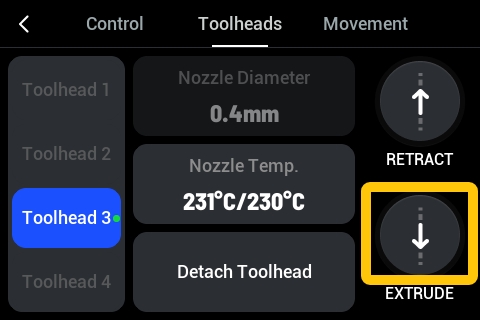
Example: The toolhead extruded filament:
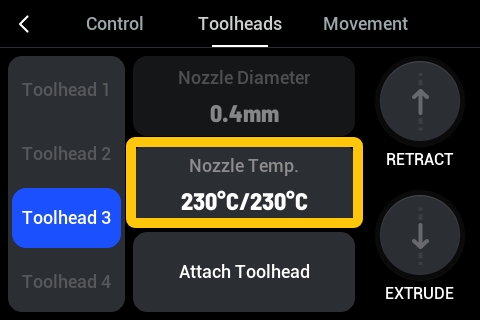
¶ 4. Cool the Nozzle to 70°C
- On the Toolheads screen, tap
Detach Toolhead.
- After the toolhead is returned, lower the nozzle temperature to 70°C.
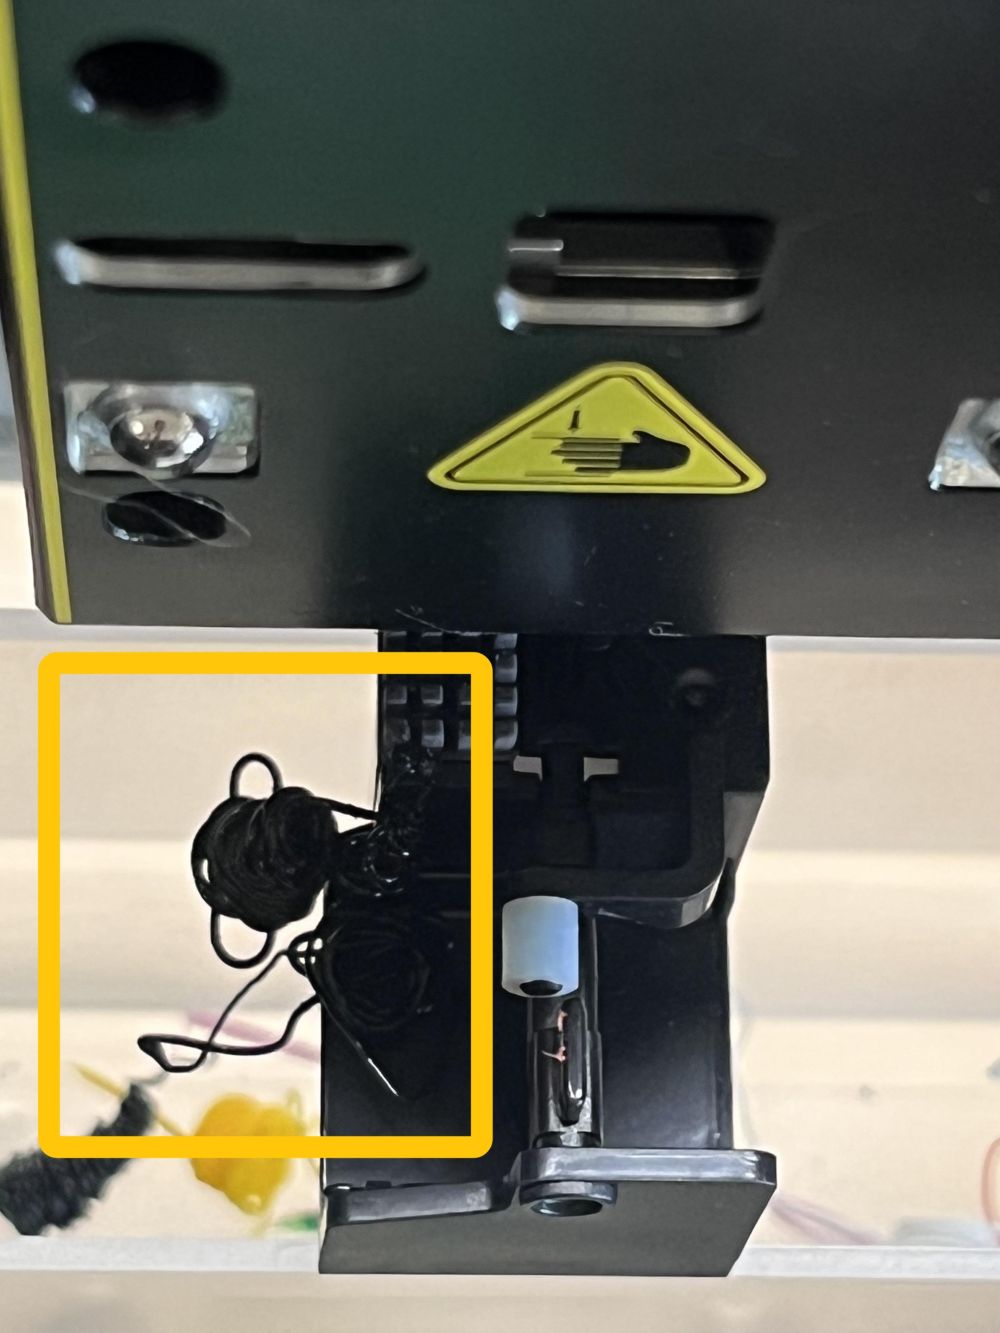
¶ 5. Cold Pull
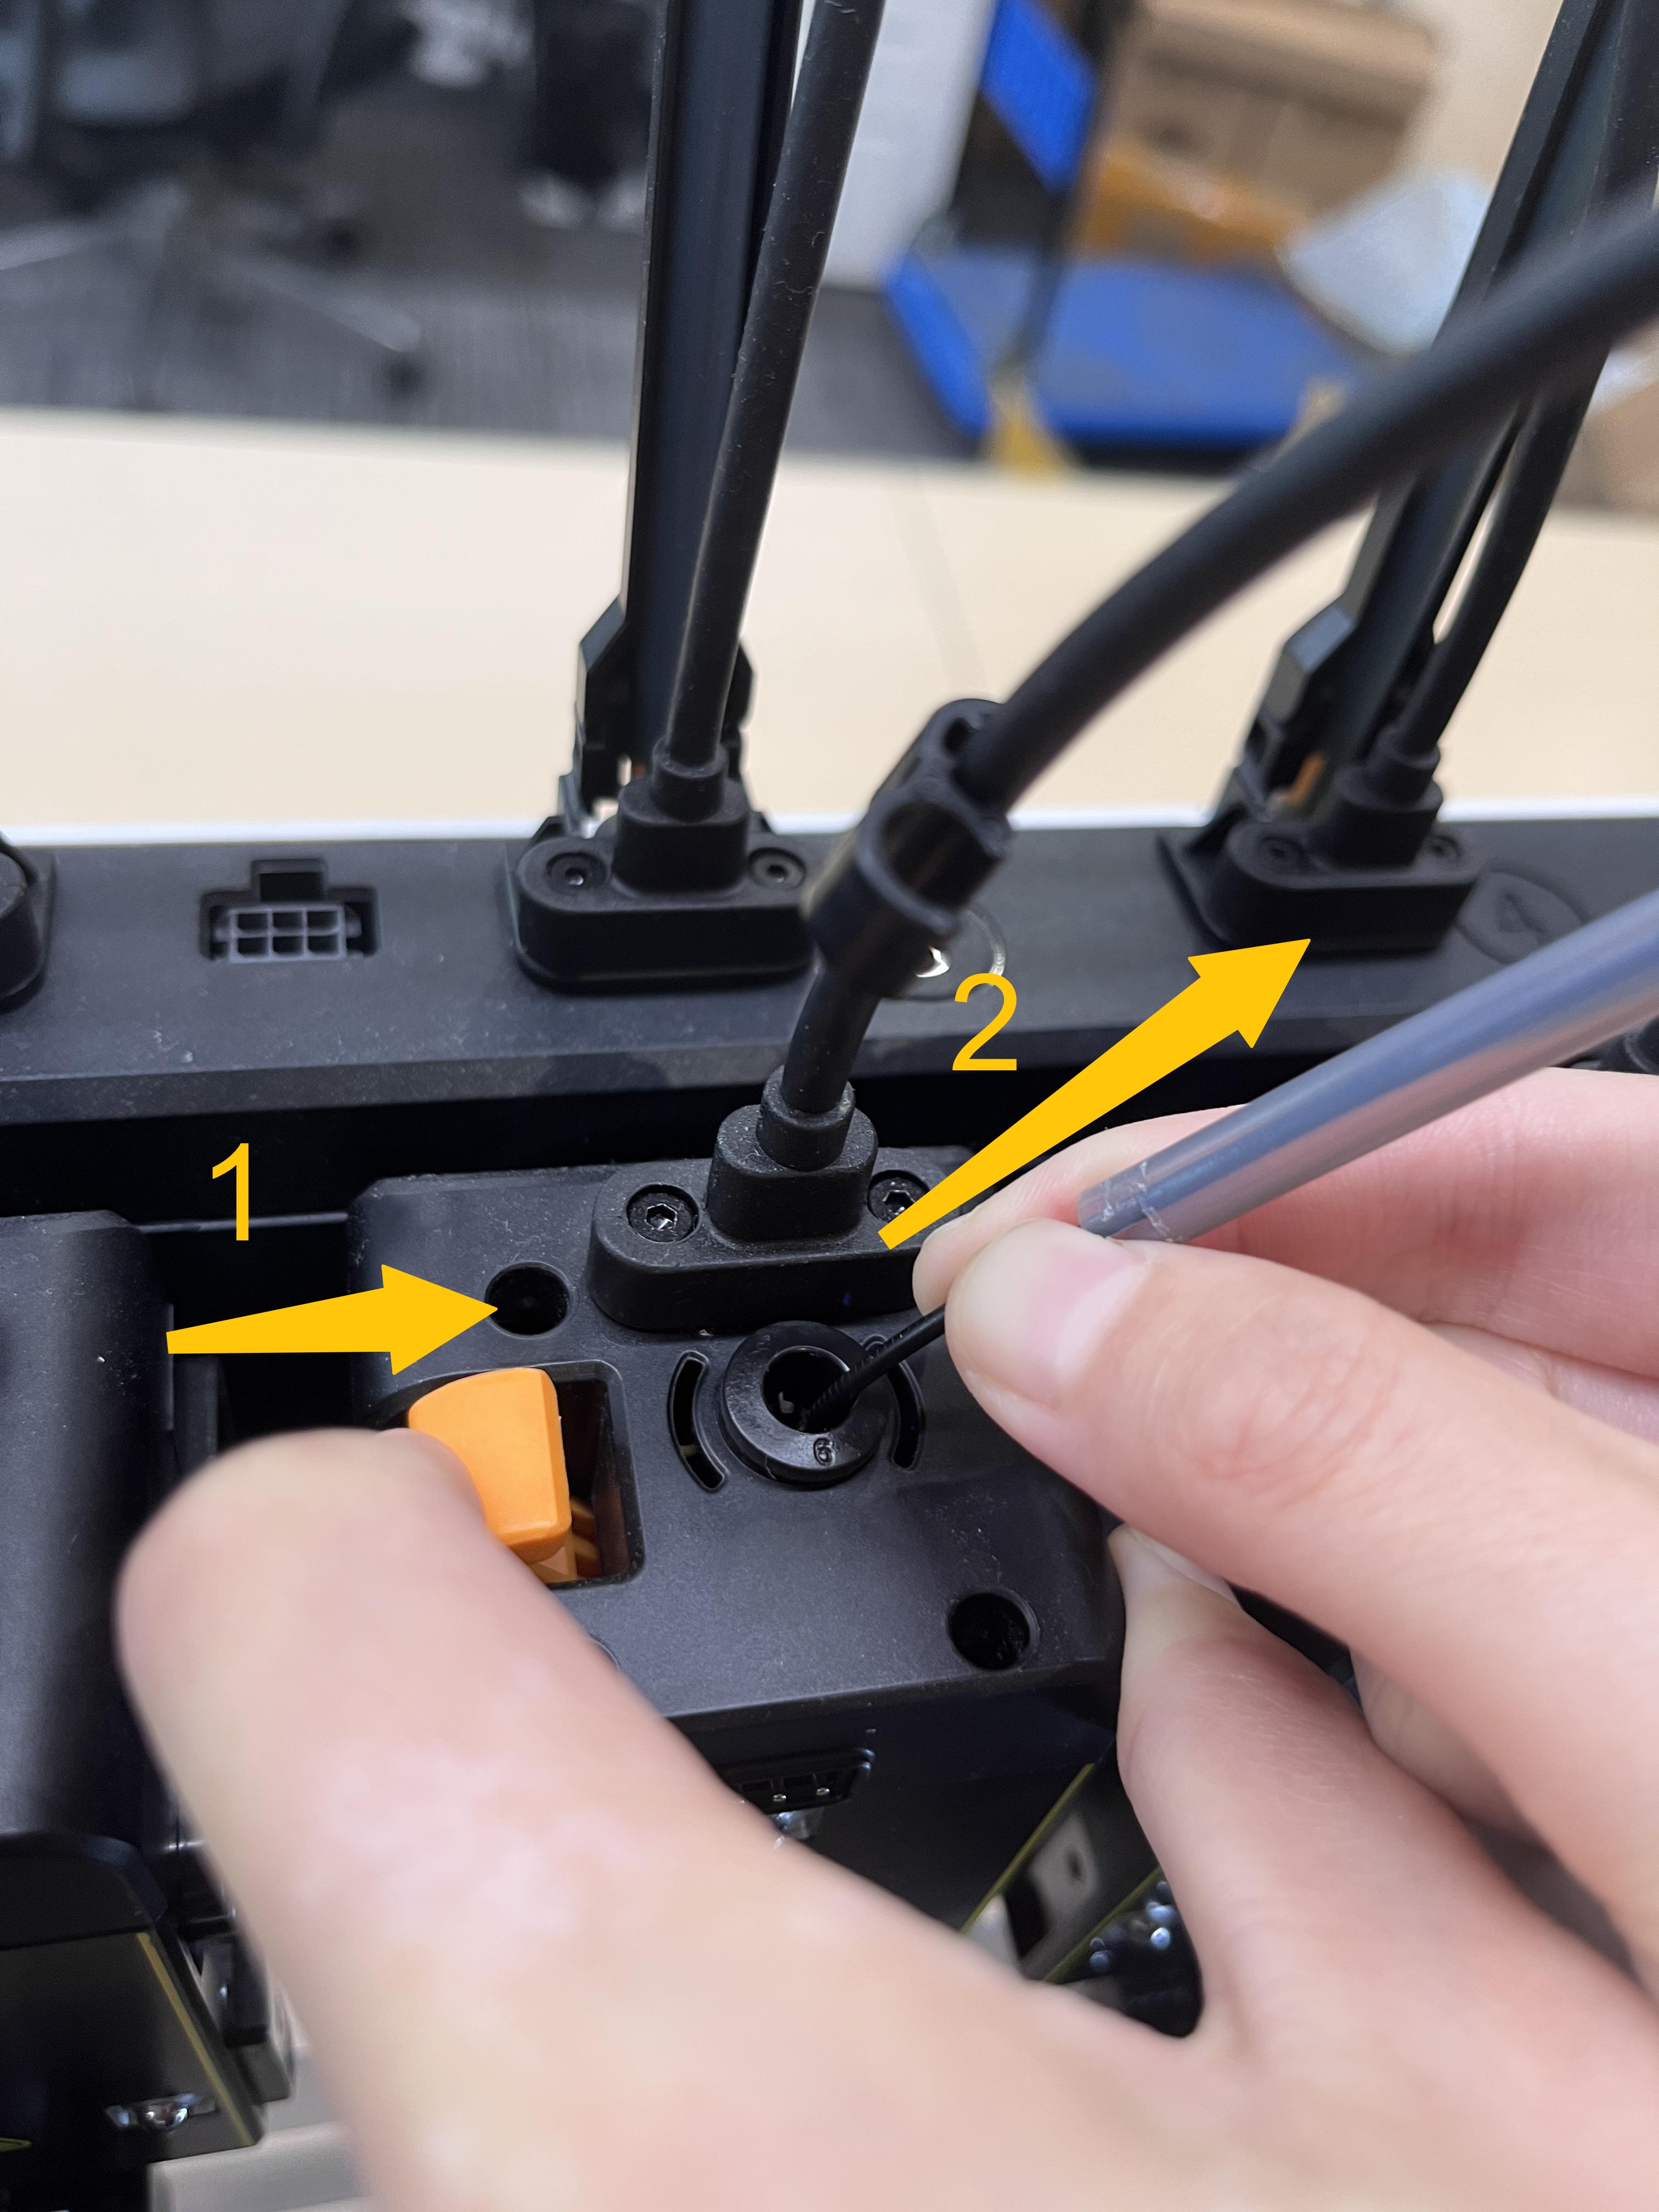
- After the nozzle temperature reaches 70°C, press the round clamp on the toolhead while pulling out the filament tube from the toolhead.

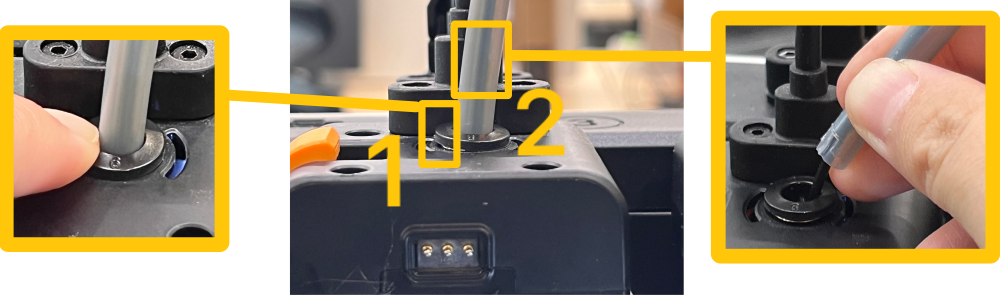
- Keep holding the orange lever on the toolhead while pinching the filament at the top of the toolhead, and pull the filament out steadily at a constant speed.
Note: Normally, moderate force should be sufficient to loosen and pull out the filament. Do not use excessive force to pull it out forcibly.
If you find the filament difficult to pull out, reheat the nozzle to 230°C, perform a high-temperature extrusion, cool the nozzle to 70°C, and then try pulling it out again.
Example: After a successful cold pull, you can see that the tip shape matches the internal shape of the nozzle, presenting a "funnel shape":

¶ 6. Reload Filament
- After the cold pull, simply rotate the filament holder to retract the filament.
During this process, be careful to avoid tangling the filament.
- After retracting the filament, cut off the tip that was deformed by the cold pull, and then reload the filament for normal use.
For reloading, you can refer to the U1 Video Guide: Loading & Unloading Filament.
¶ Potential Cause 3: Incorrect Flow Ratio Setting
Theoretically, the filament extrusion amount is determined by the flow rate setting. However, in reality, the flow rate value in the slicing software may differ from the actual extrusion amount.
Therefore, you can perform a test to calibrate the software settings, achieving better print results and avoiding under extrusion.
¶ 1. Print the "Flow Rate Calibration Model" to Test the Best Flow Correction Value for Your Filament
- In the top menu bar, click
Calibration>Flow rate>YOLO (Recommended)to automatically generate a flow calibration model.
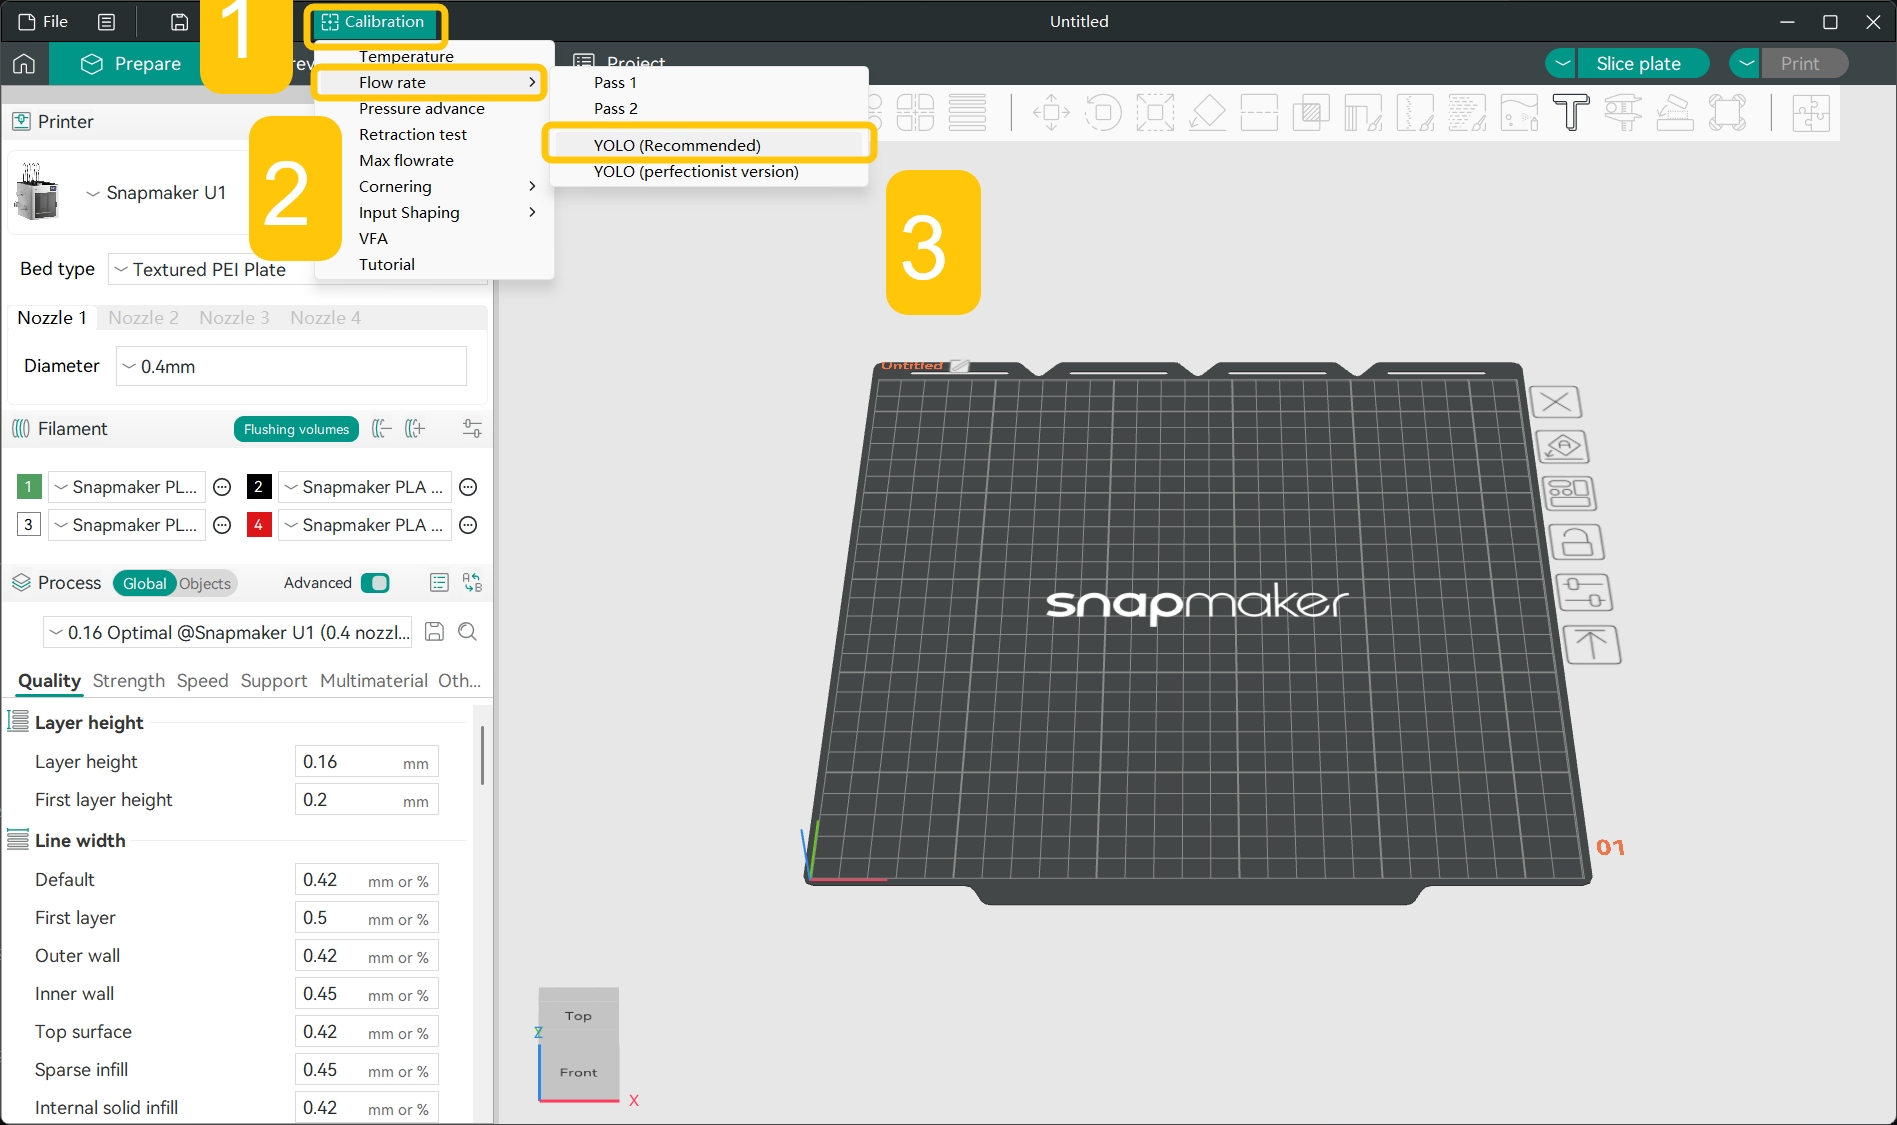
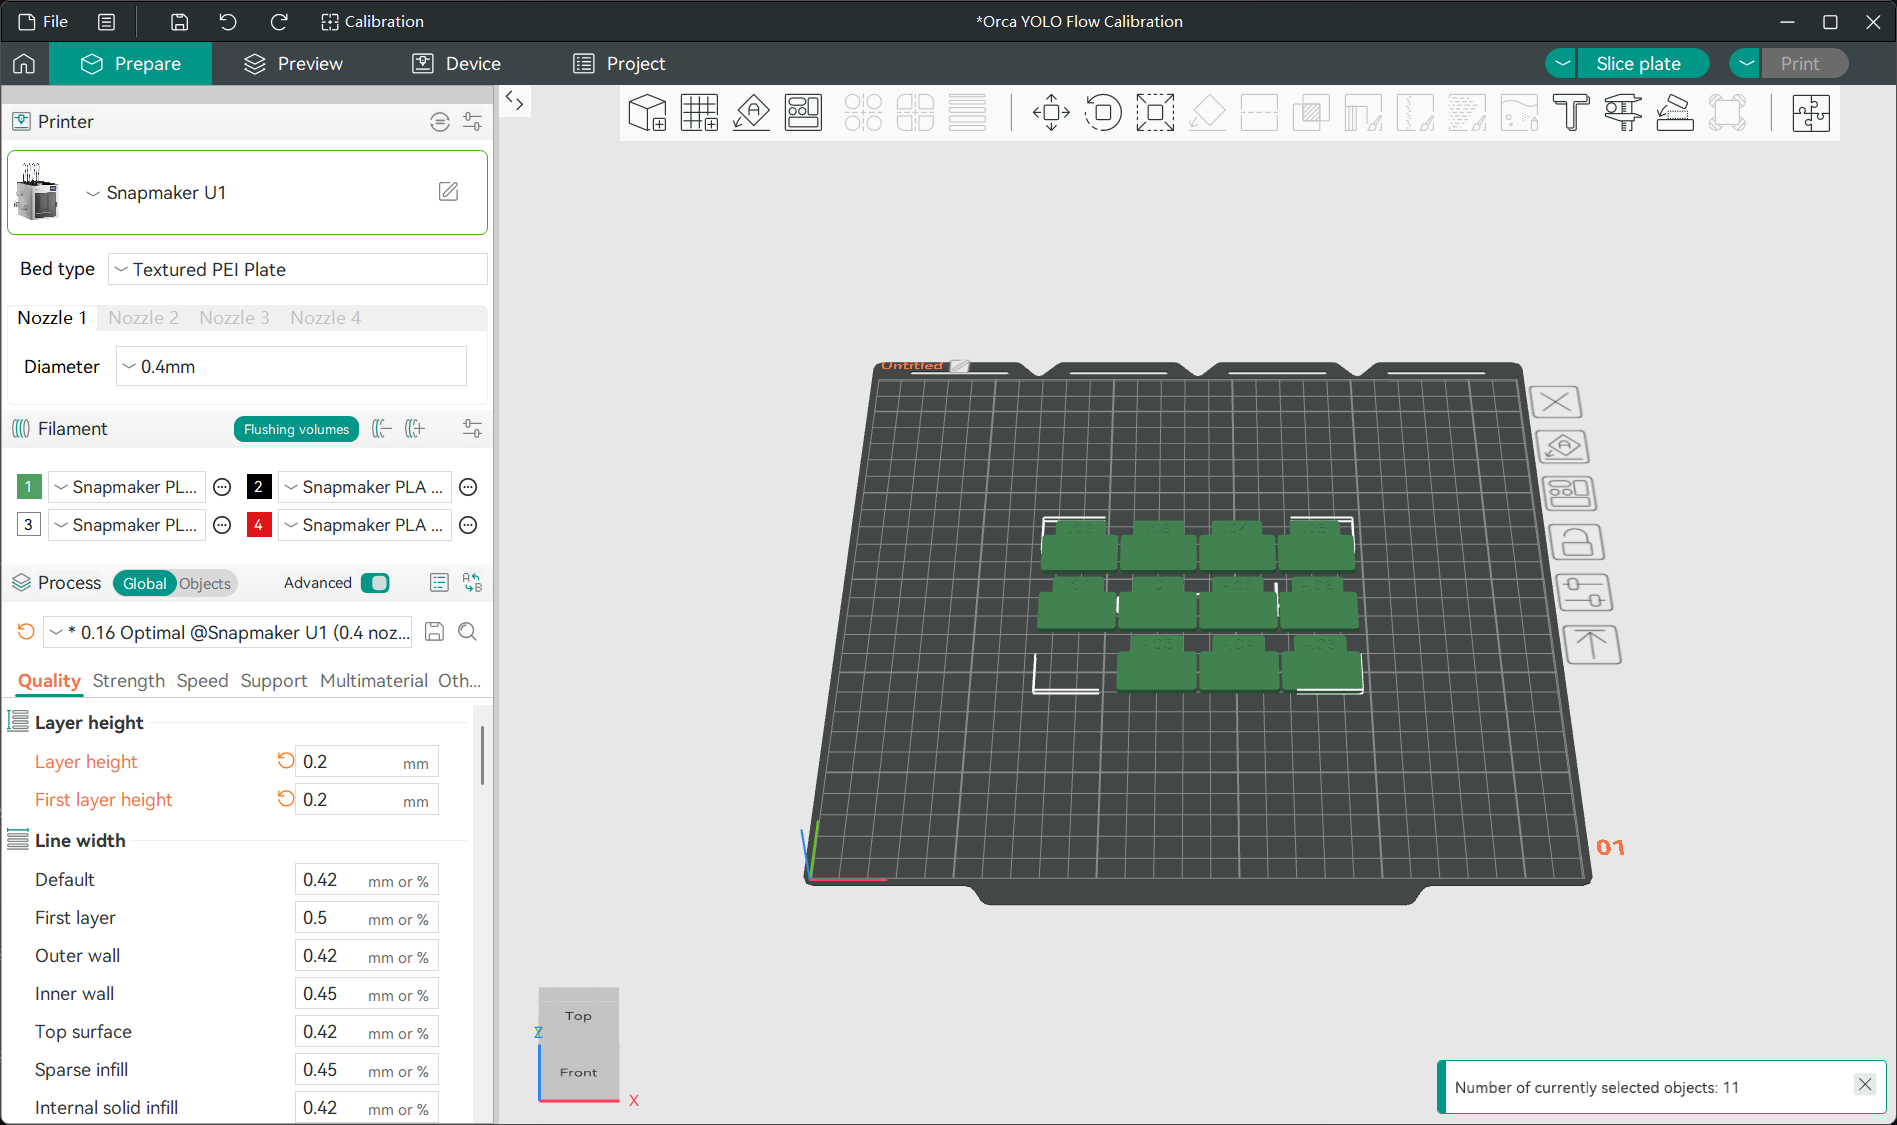
- In the
Filamentsection of the left sidebar, click the specific filament name and select the filament type you used for printing from the drop-down menu.
- Slice the model and print it.
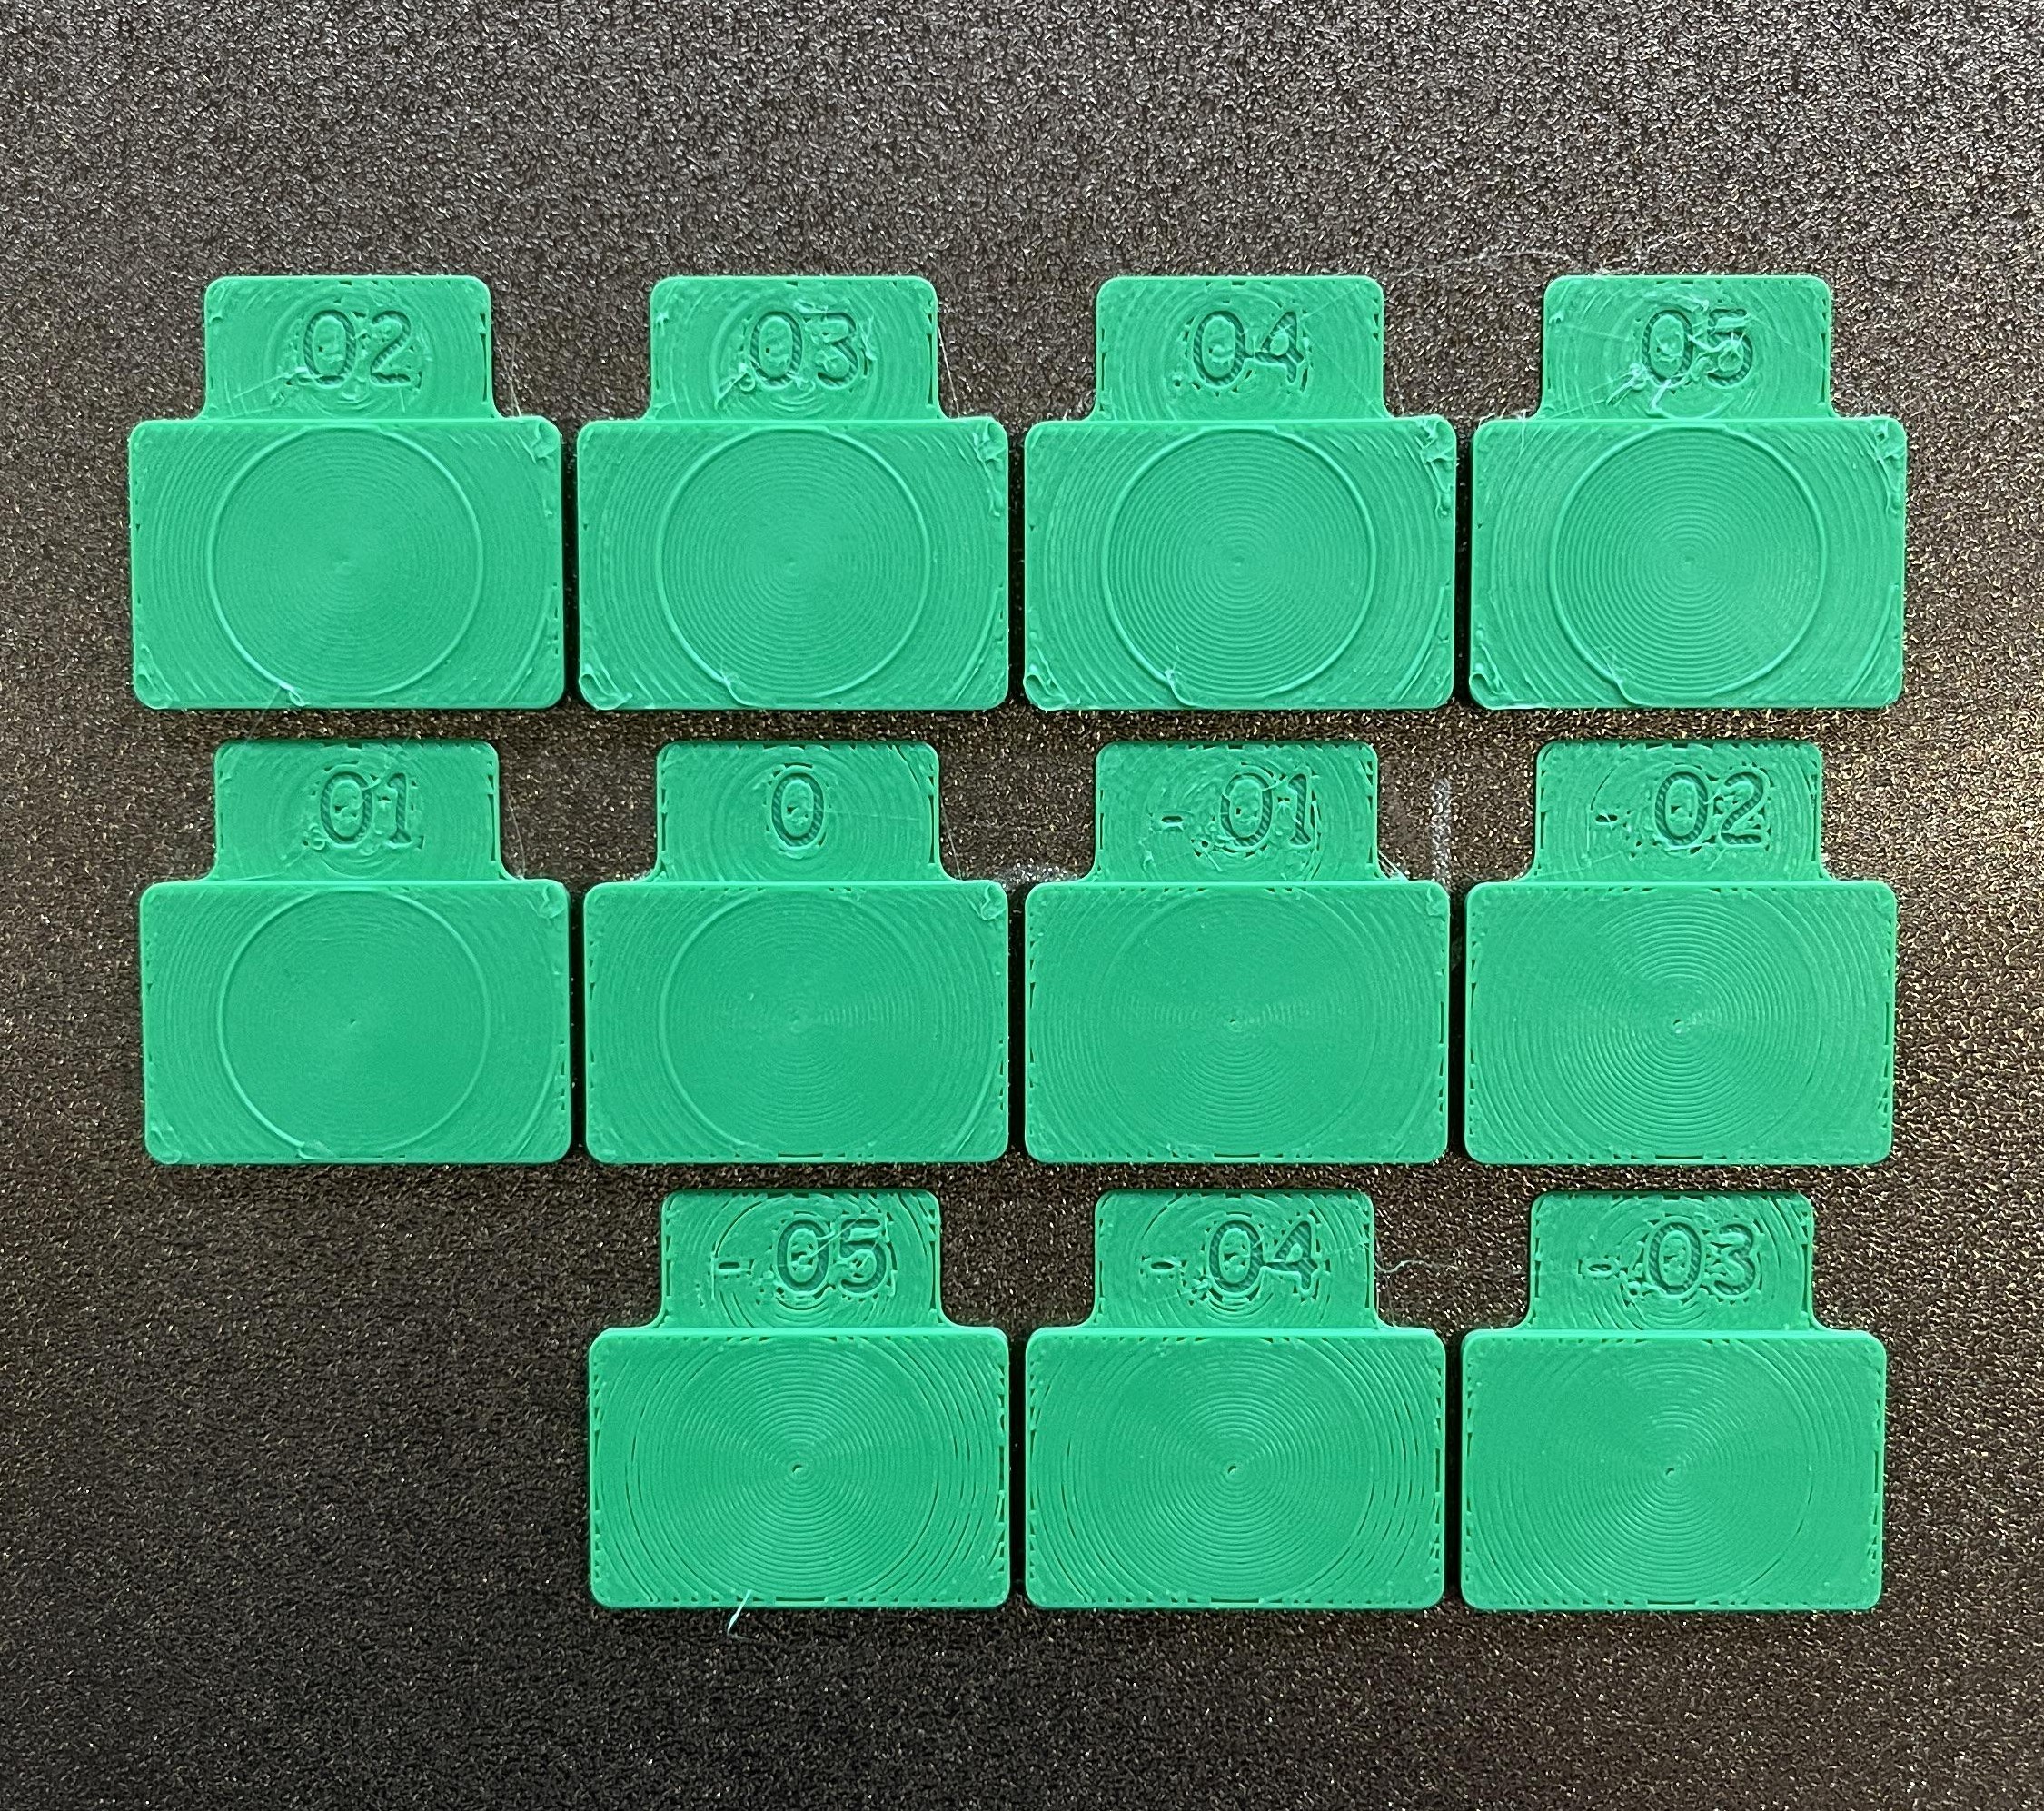
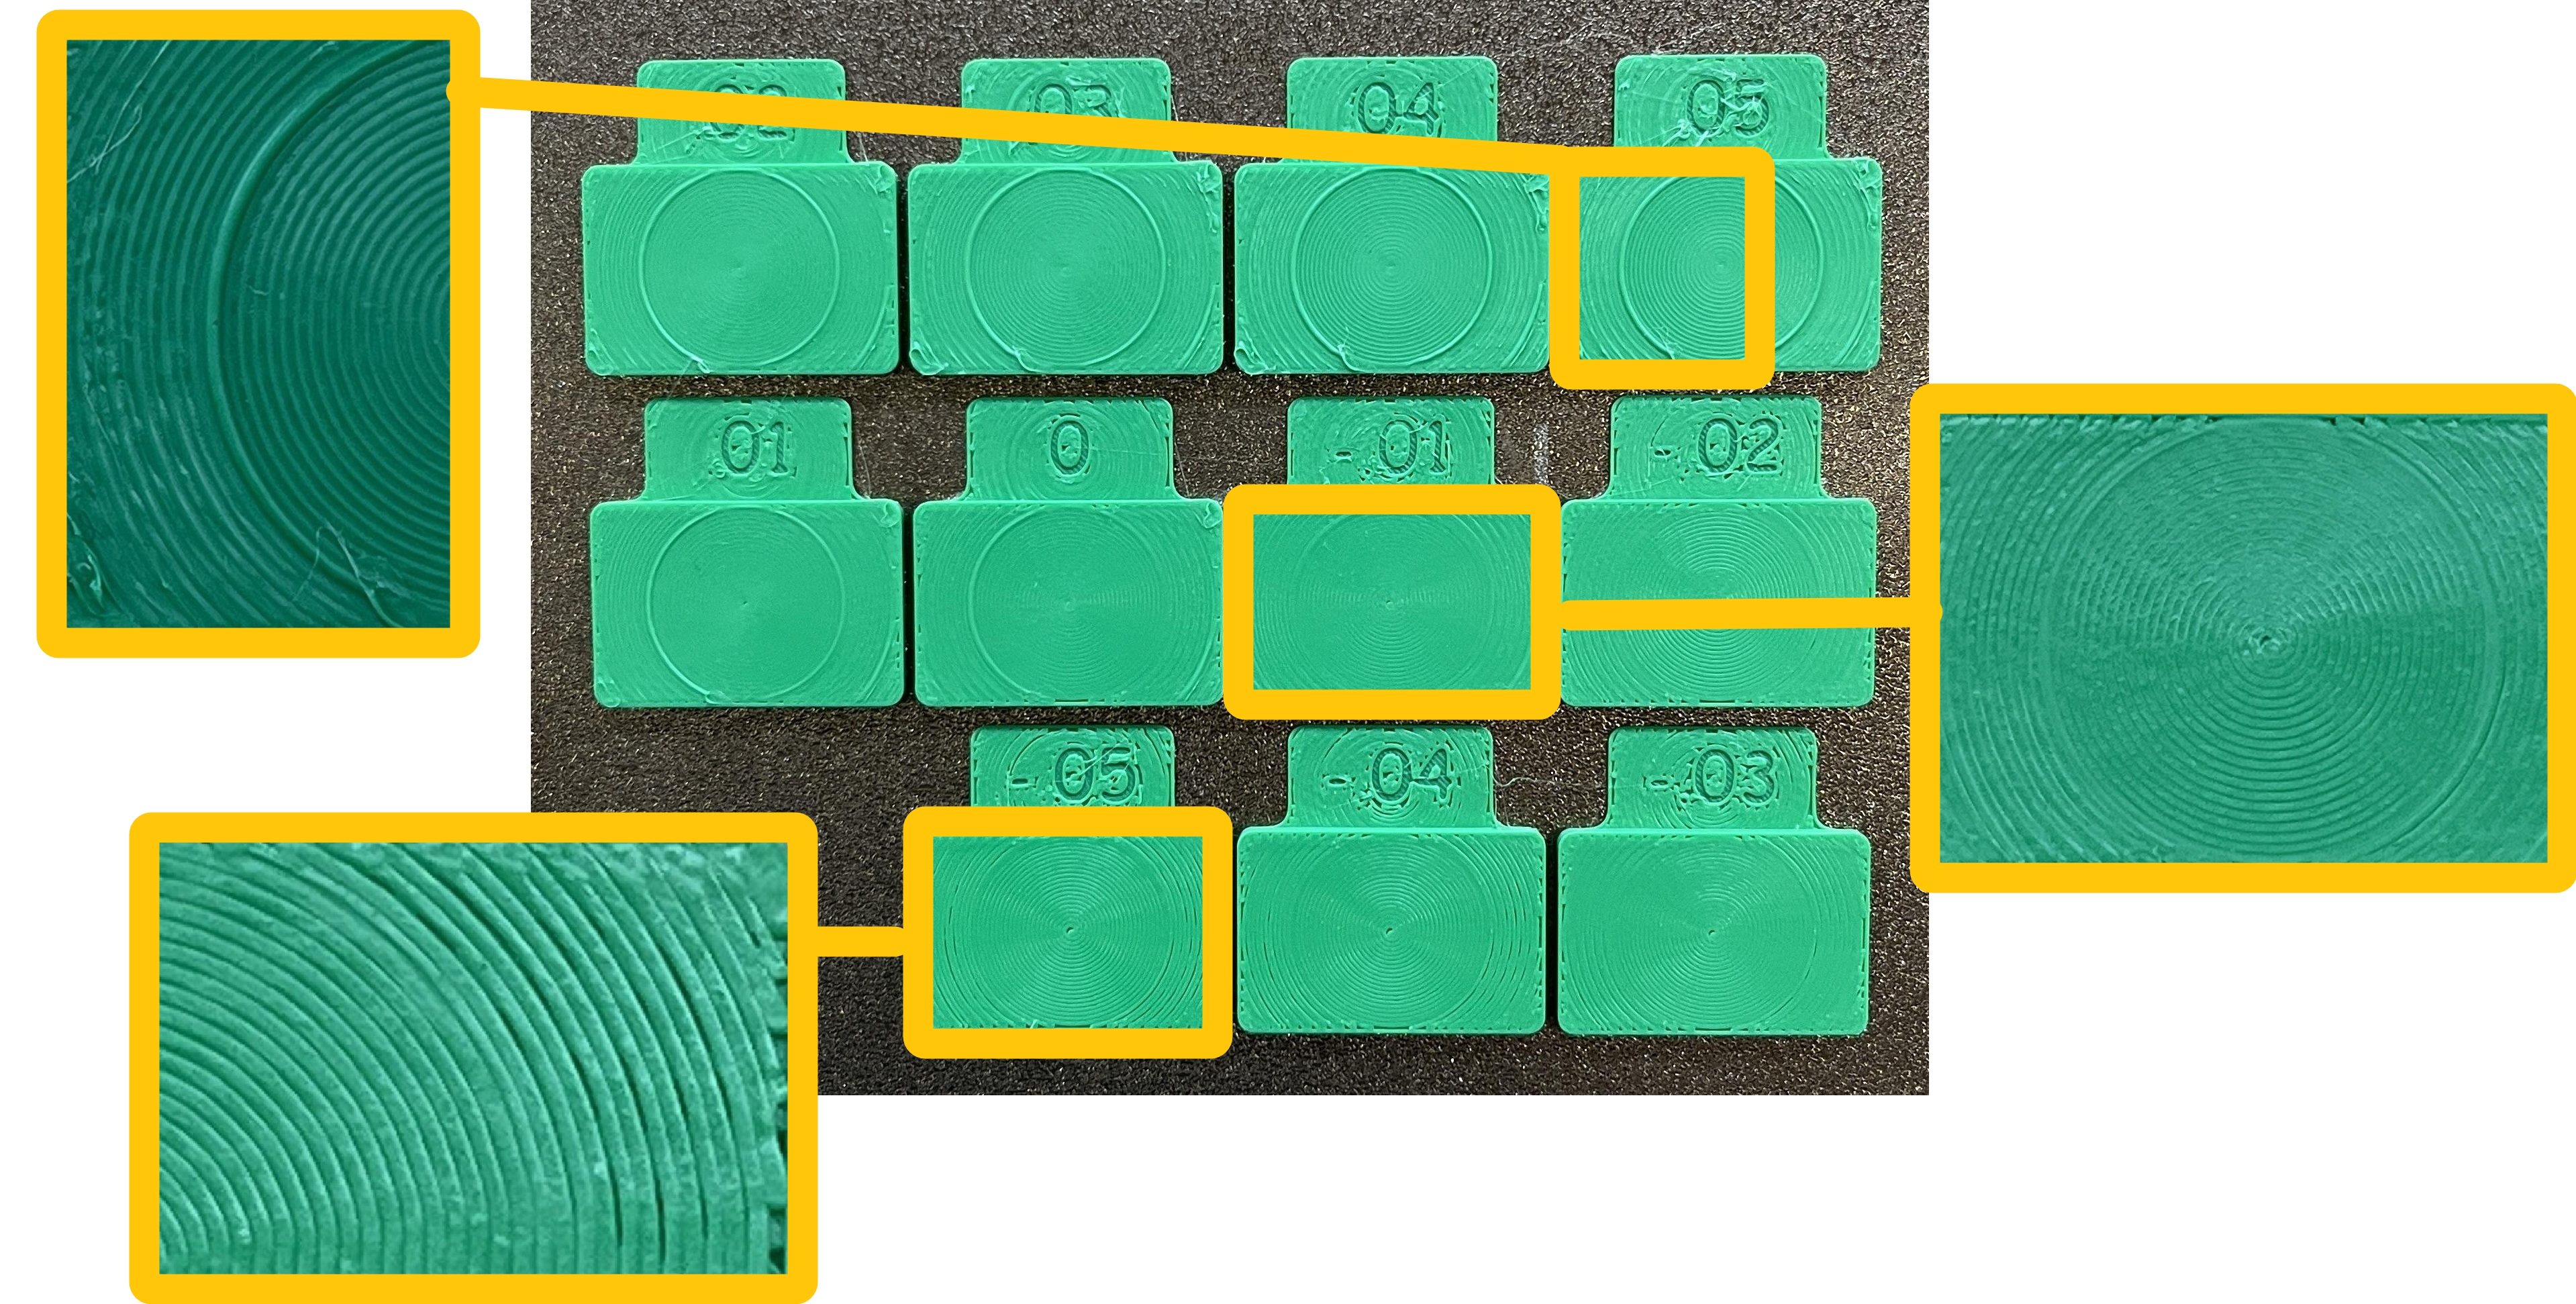
- Observe the print result, and select the block with a surface that has the fewest bulges and gaps. The number on that block is the best flow correction value.
For example, in this case, the block marked -.01 (i.e. 0.01) can be considered the flattest, giving the best flow correction value.
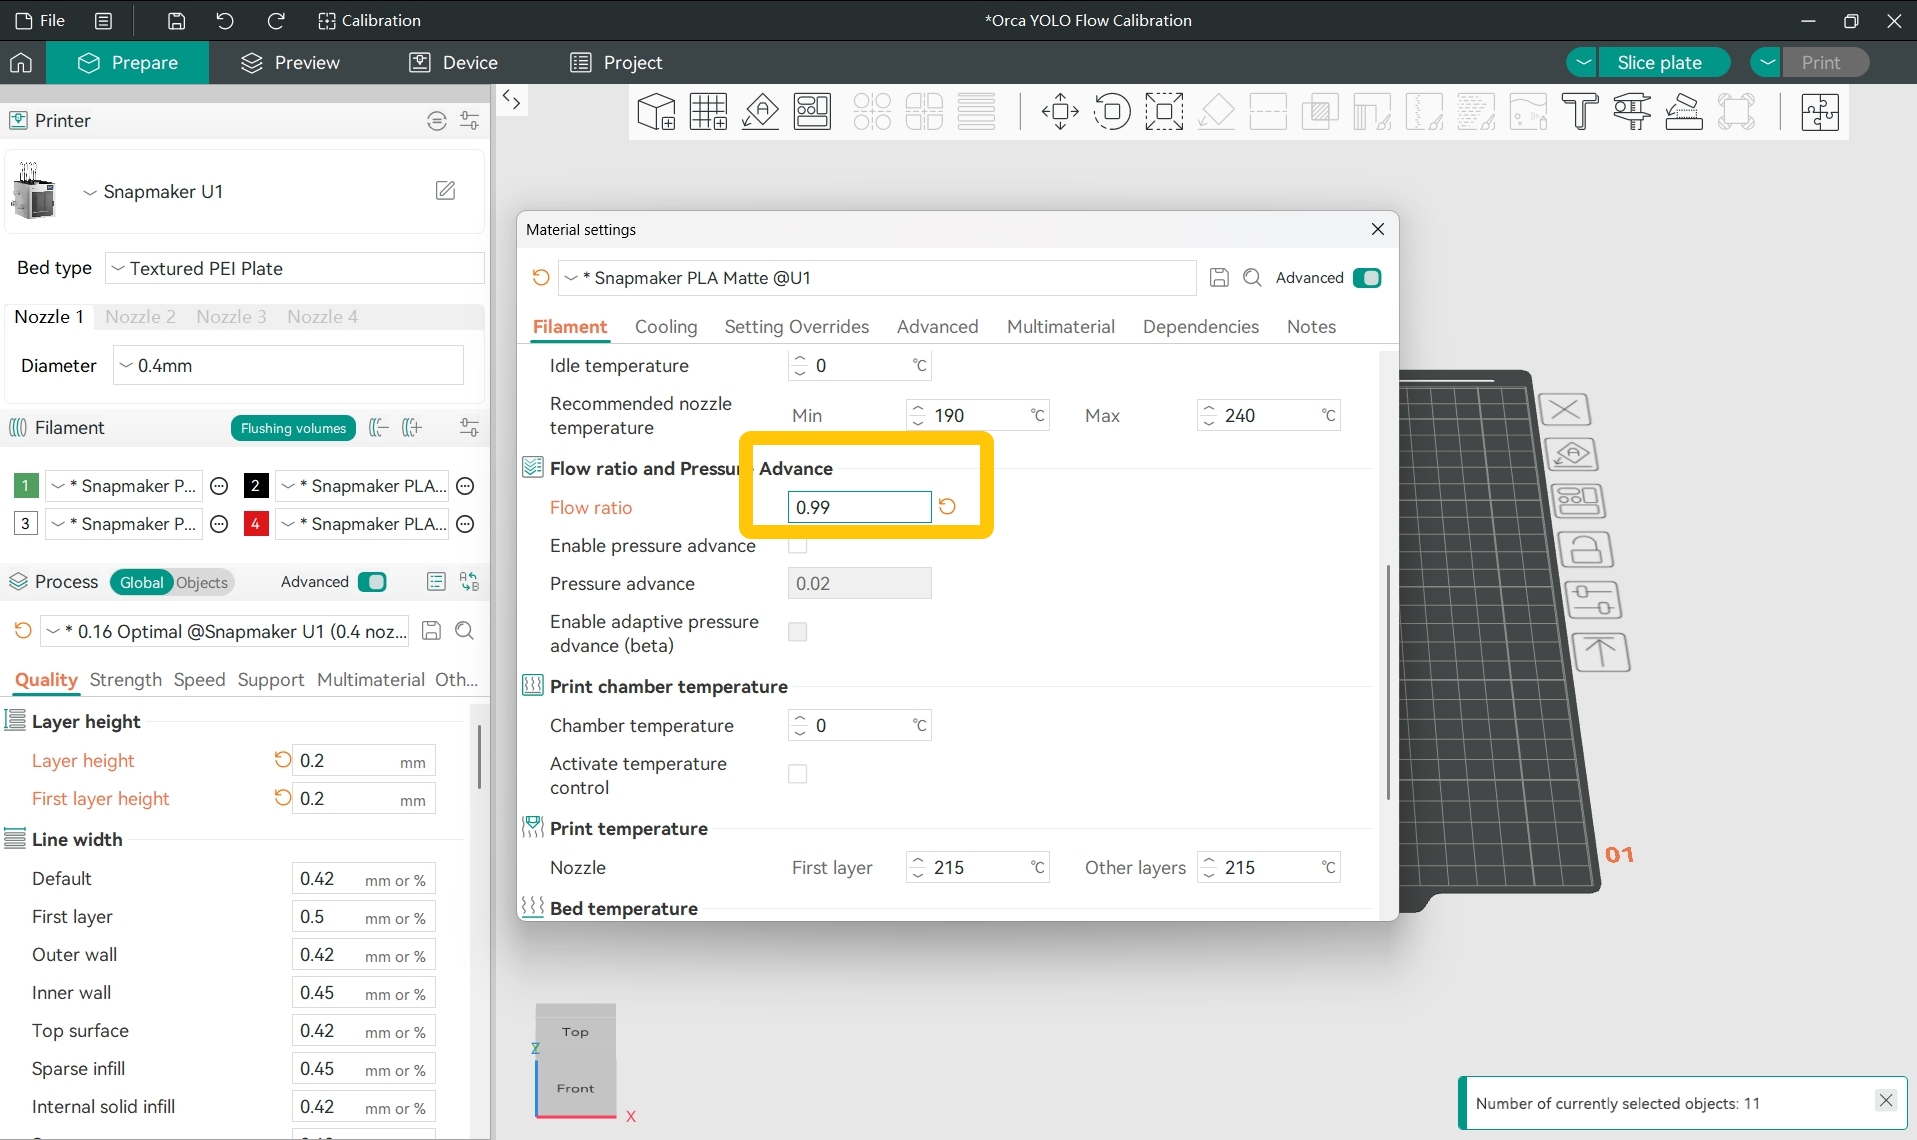
¶ 2. Set the Best Flow Correction Value for Your Filament
- In the
Filamentsection of the left sidebar, click the...>Editnext to the specific filament.
- In the pop-up window, find
Filament>Flow ratio and Pressure Advance>Flow ratio; you can see that the current flow ratio is 1.
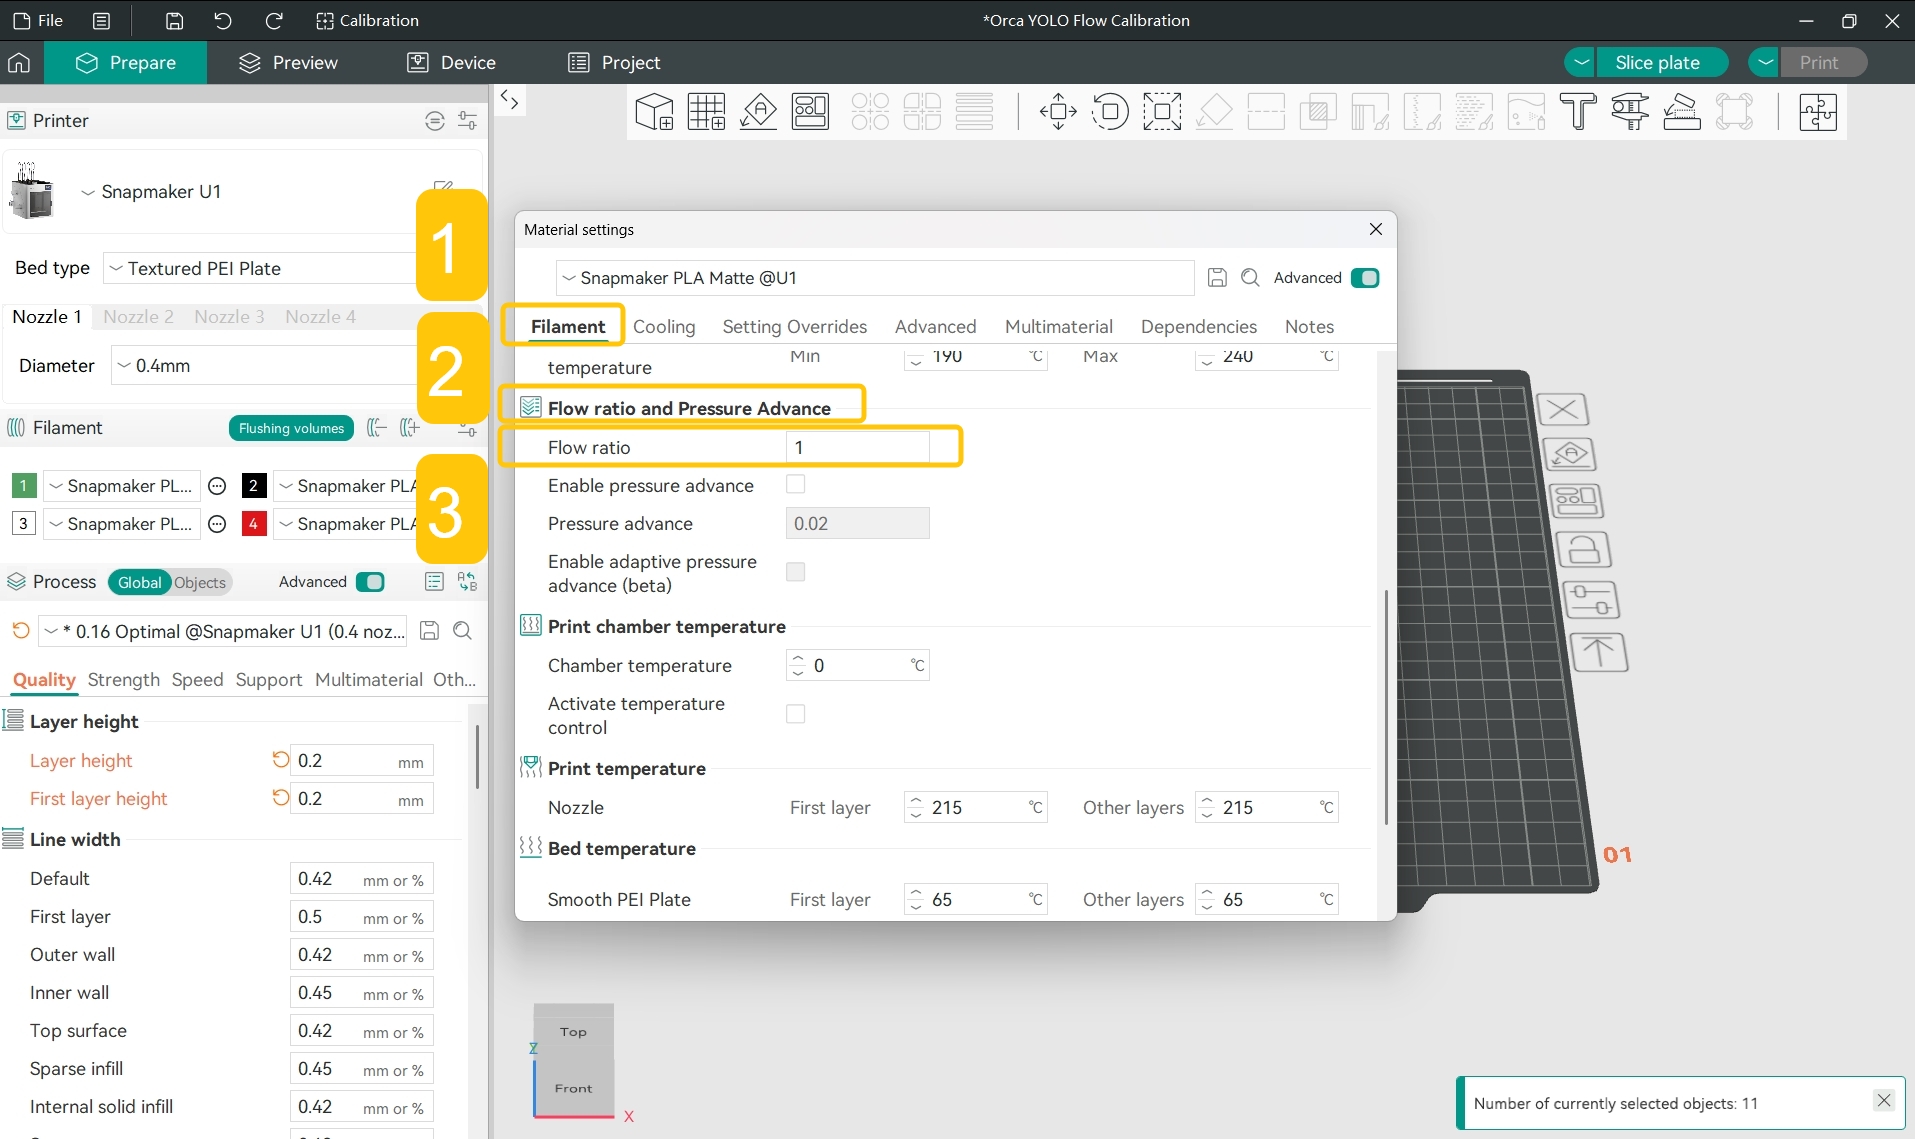
- Calculate what the adjusted flow ratio should be:
For example, if the current flow ratio preset in the software is 1 and the flow correction value is -0.01, the adjusted flow ratio should be 0.99, i.e.:
- Set the flow ratio to the adjusted value.
¶ Potential Cause 4: Incorrect Pressure Advance Value Setting
Pressure advance means that the printer pre-emptively adjusts the extrusion pressure as needed to achieve better print results.
This is often related to the actual moving speed of the nozzle. When the nozzle is about to decelerate, the extrusion pressure should usually be reduced to avoid filament accumulation; when the nozzle is about to accelerate, the extrusion pressure should usually be increased to avoid insufficient extrusion.
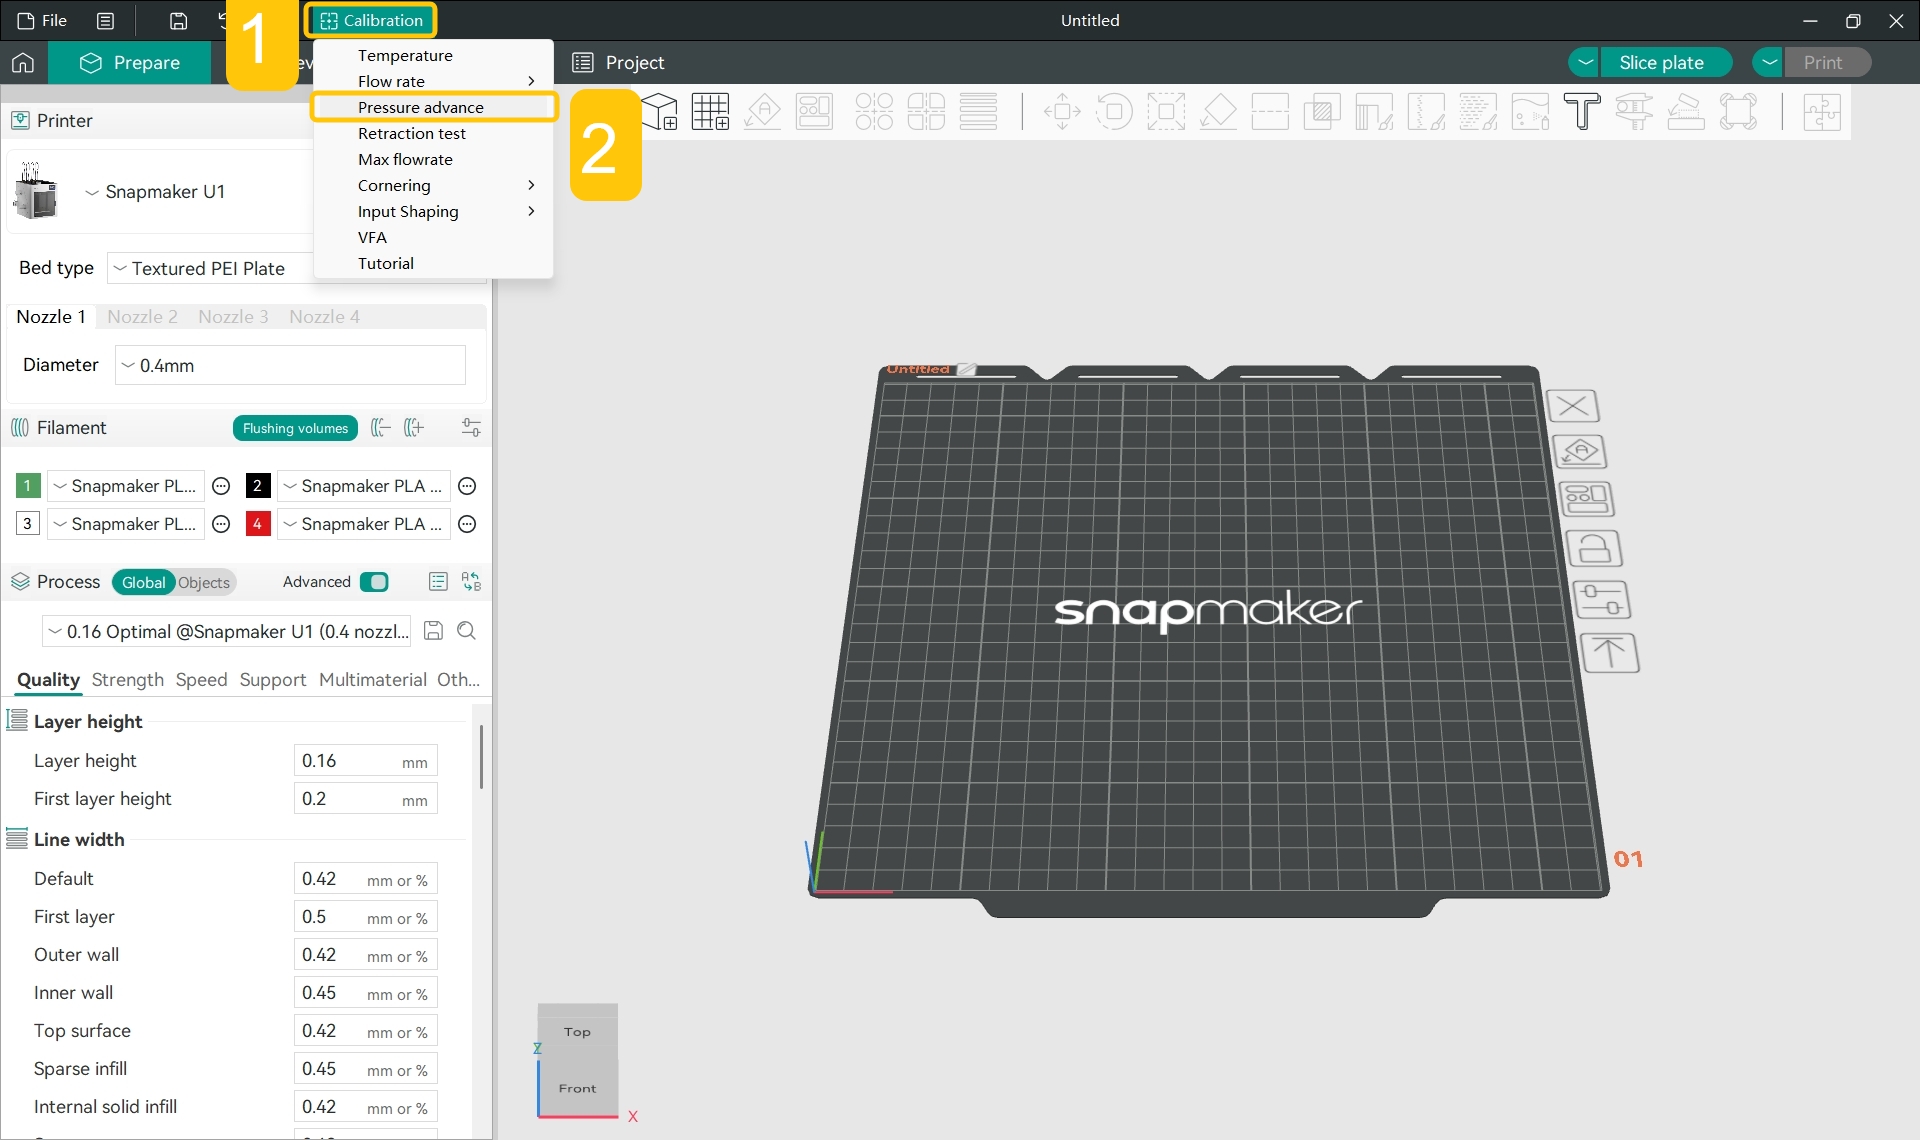
¶ 1. Print the "PA Line Model" to Test the Best Pressure Advance Value for Your Filament
- In the top menu bar, click
Calibration>Pressure Advance.
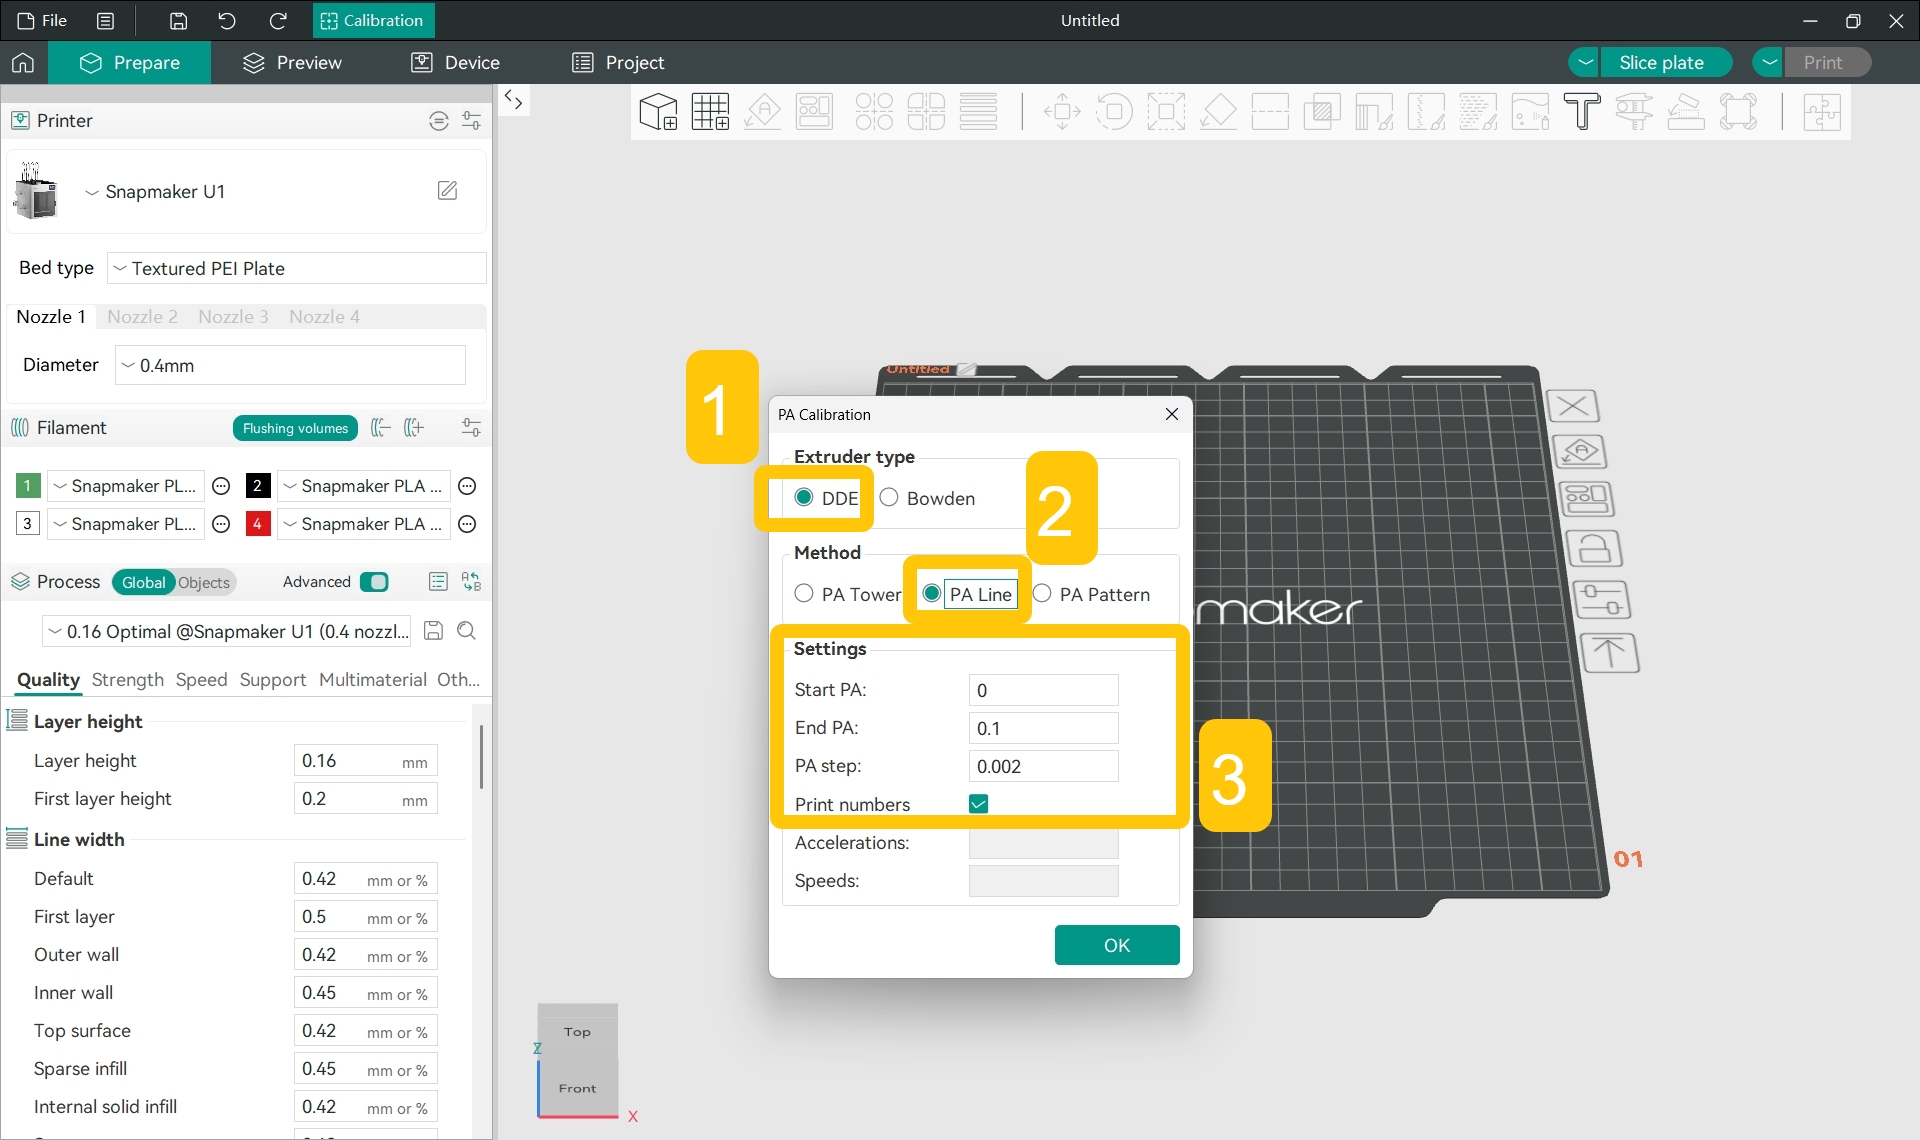
- In the pop-up window, set up the pressure advance test:
- Select DDE (Direct Drive Extruder);
- Select PA Line mode;
- Set start PA, end PA, and PA step;
- Click
OK, and the software will generate the "PA Test" text.
Snapmaker Orca has default start PA, end PA, and PA step values for PA Line mode, and you can directly use the software's preset values for testing and calibration.
Snapmaker U1 uses a direct drive extruder (DDE).
PA Test stands for Pressure Advance Test.
- In the
Filamentsection of the left sidebar, click the specific filament name and select the filament type you used for printing from the drop-down menu.
- In the
Filamentsection of the left sidebar, click the...>Editnext to the specific filament.
- In the pop-up window, find
Filament>Flow ratio and Pressure Advance>Enable pressure advance.
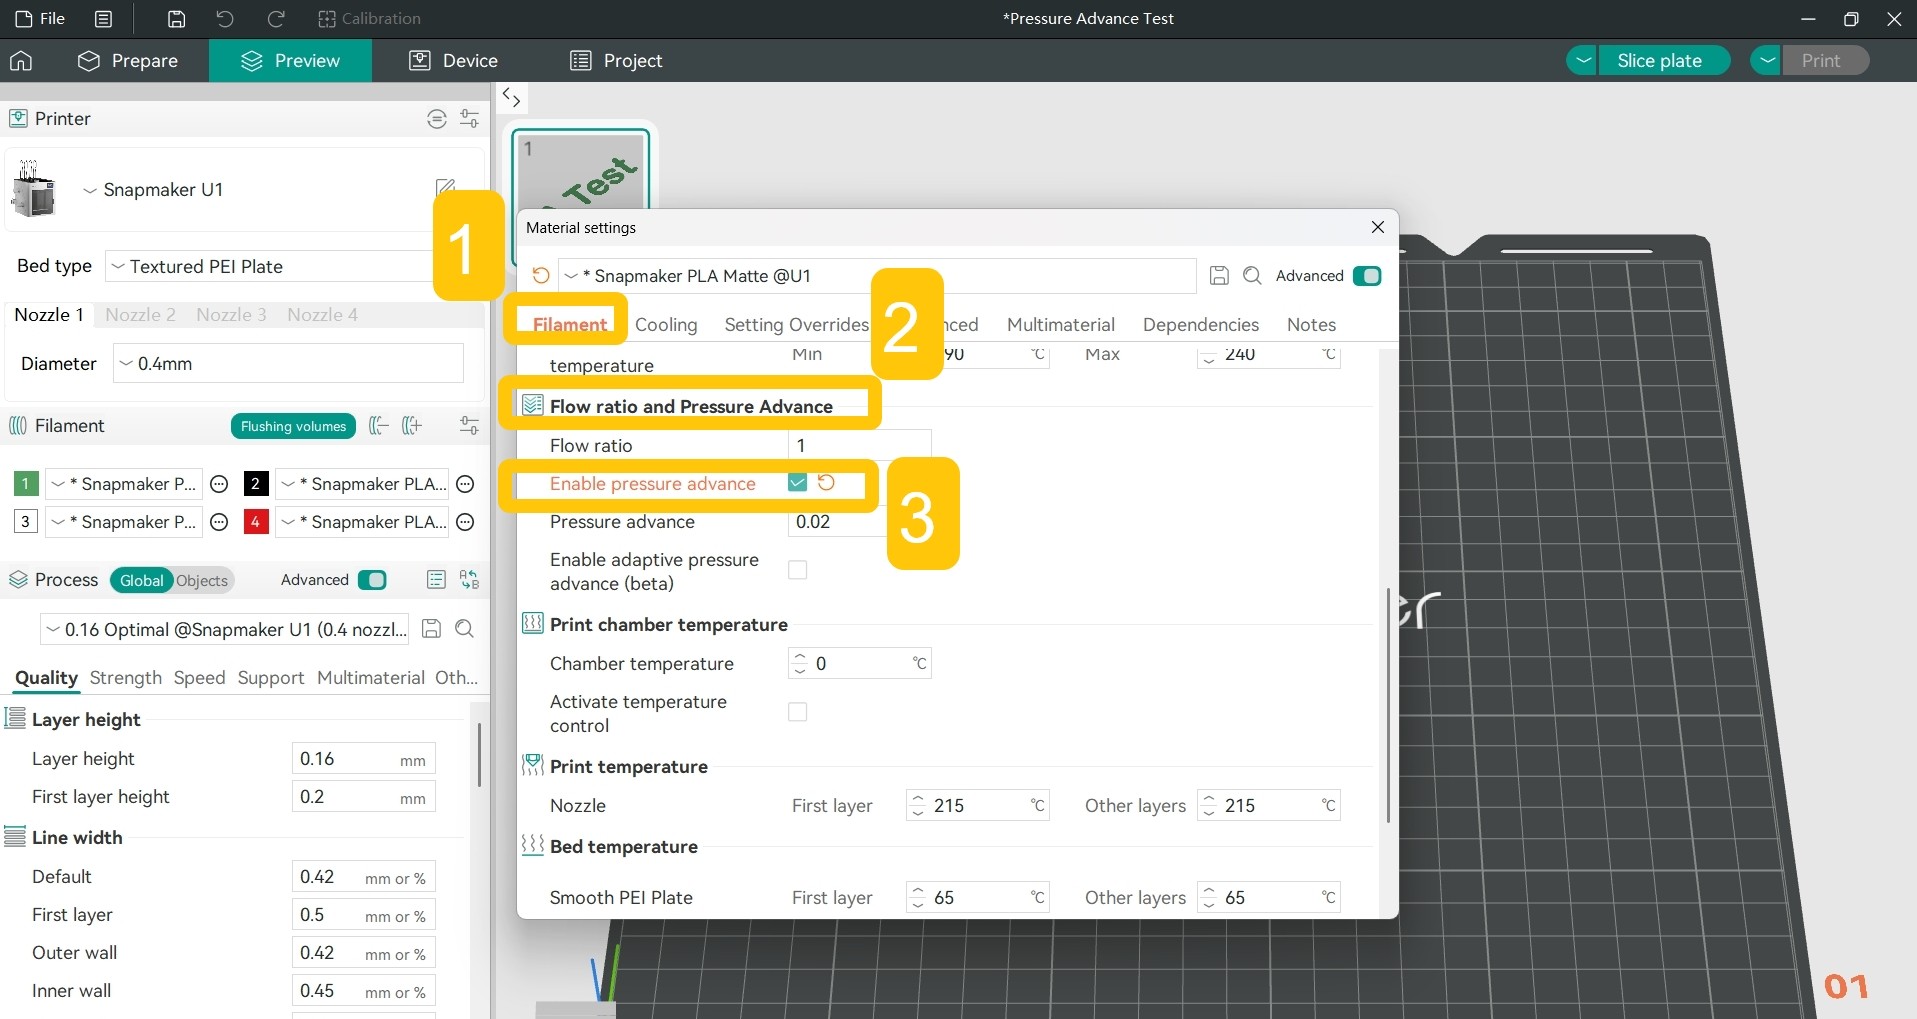
- Click the checkbox to enable pressure advance.
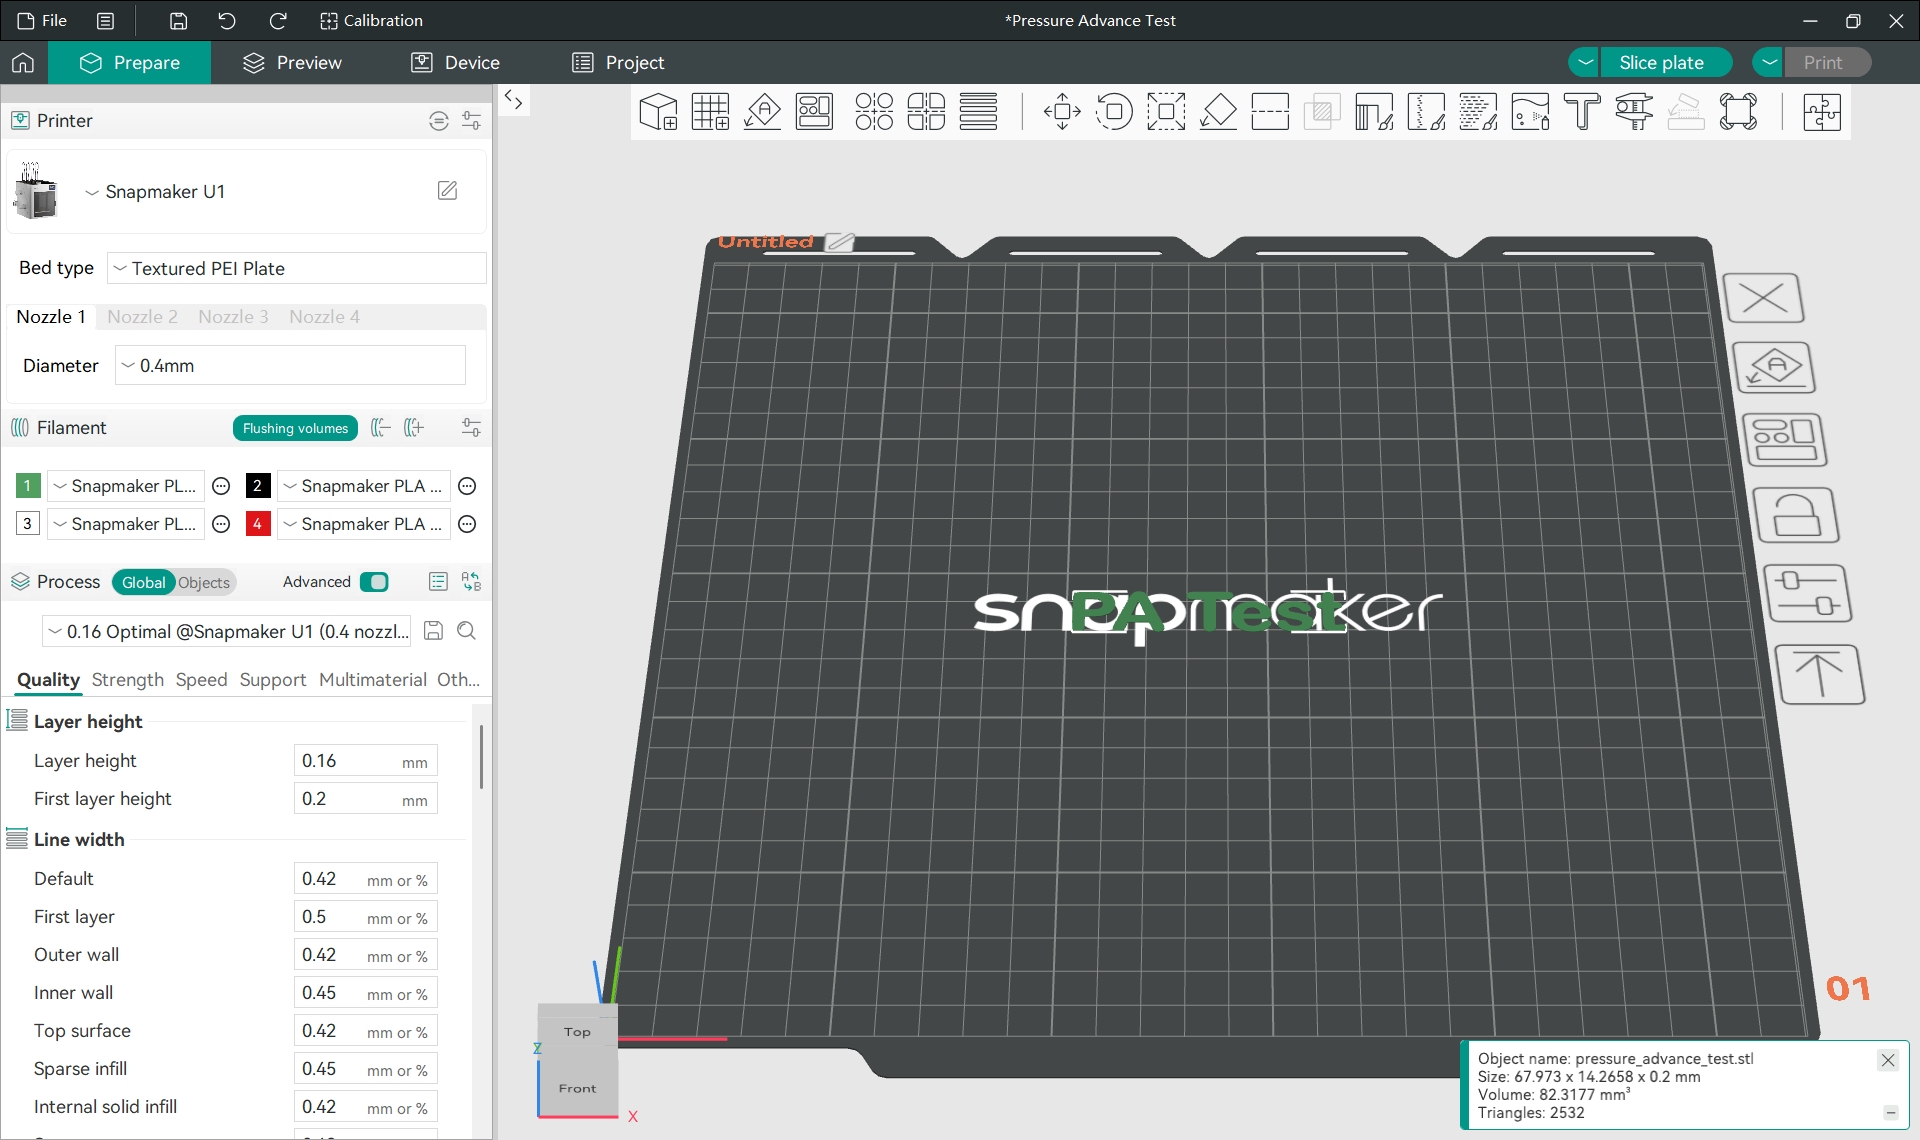
-
Slice the model, and you can see the generated PA line model in the
Previewtab.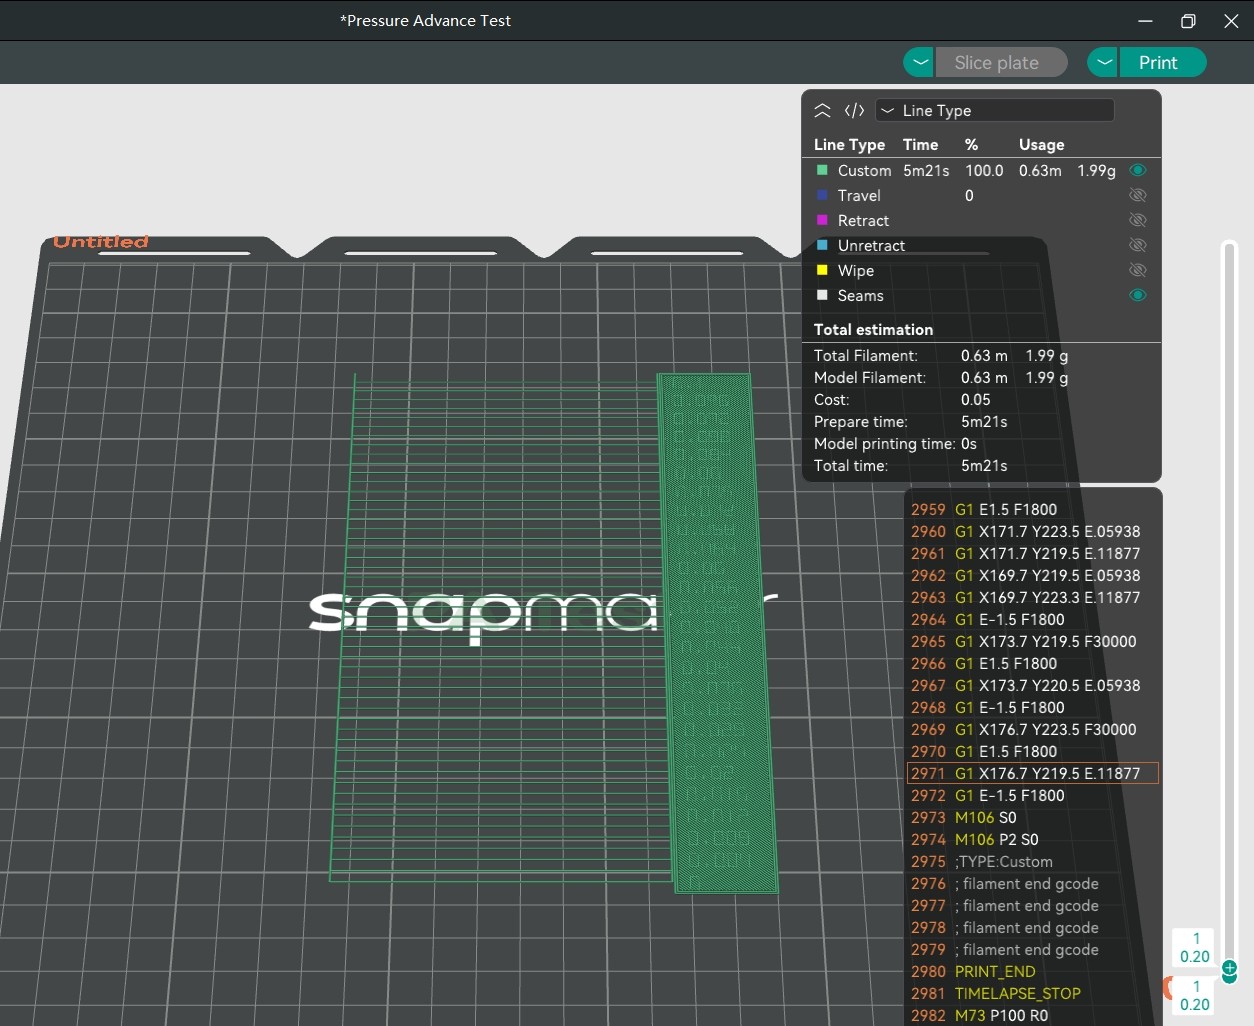
Each line generated by PA Line mode looks the same, but each line has a different pressure advance value. Switch to
Preview>Speed, and you can find that every line accelerates first, then decelerates. Since the pressure advance value is related to the actual moving speed of the nozzle, the acceleration and deceleration lines can be used to calibrate the pressure advance effect.
Just observe which printed line is the most uniform to determine the appropriate pressure advance value.

-
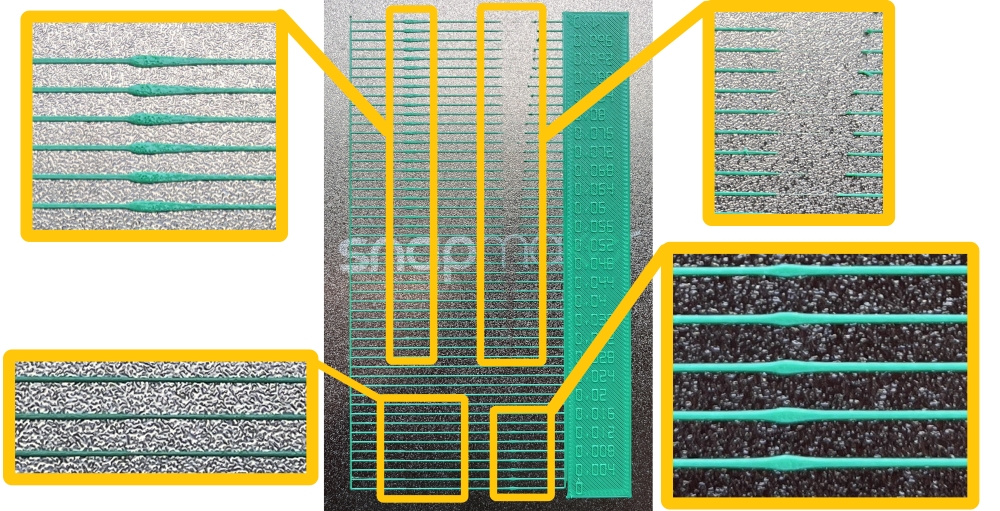
Use the U1 to print the PA line model.
-
Observe the printed PA line model. Select the line with a uniform thickness from start to end, and the number corresponding to its right side is the best pressure advance value.
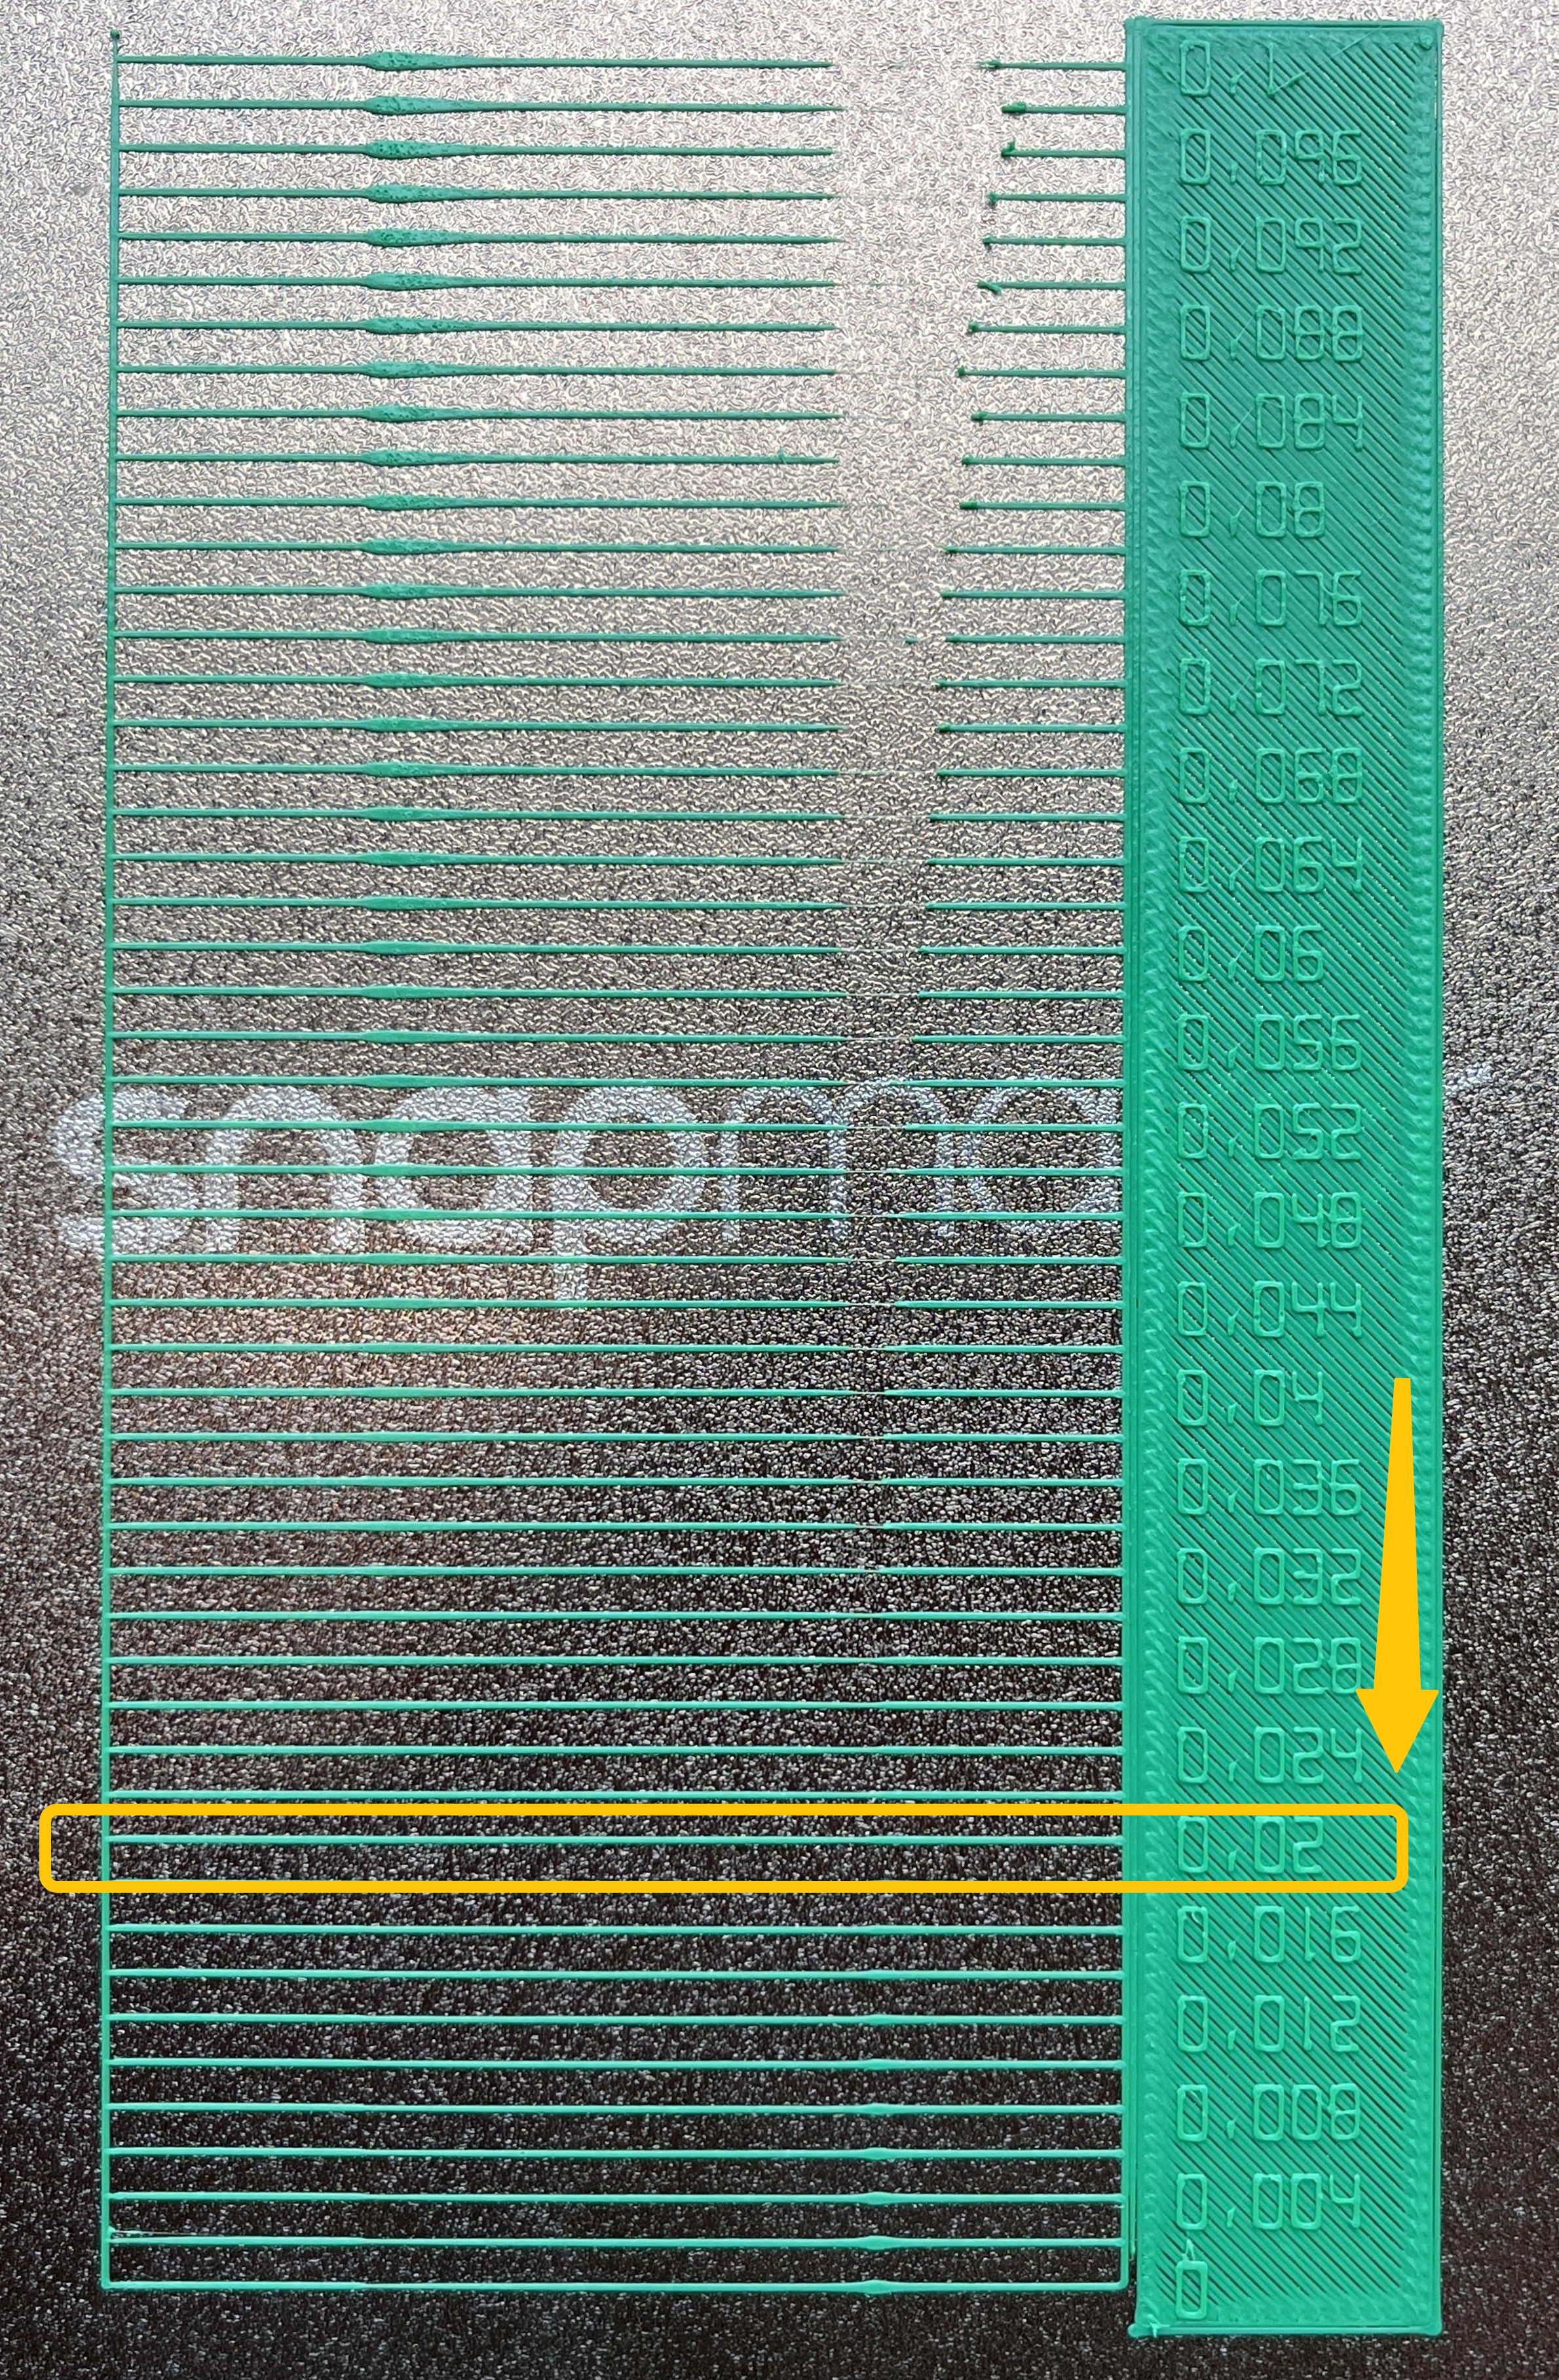
You can see that when the pressure advance value is too small, the line is too thin at the acceleration point and too thick at the deceleration point; when the pressure advance value is too large, the line is too thick at the acceleration point and too thin at the deceleration point.
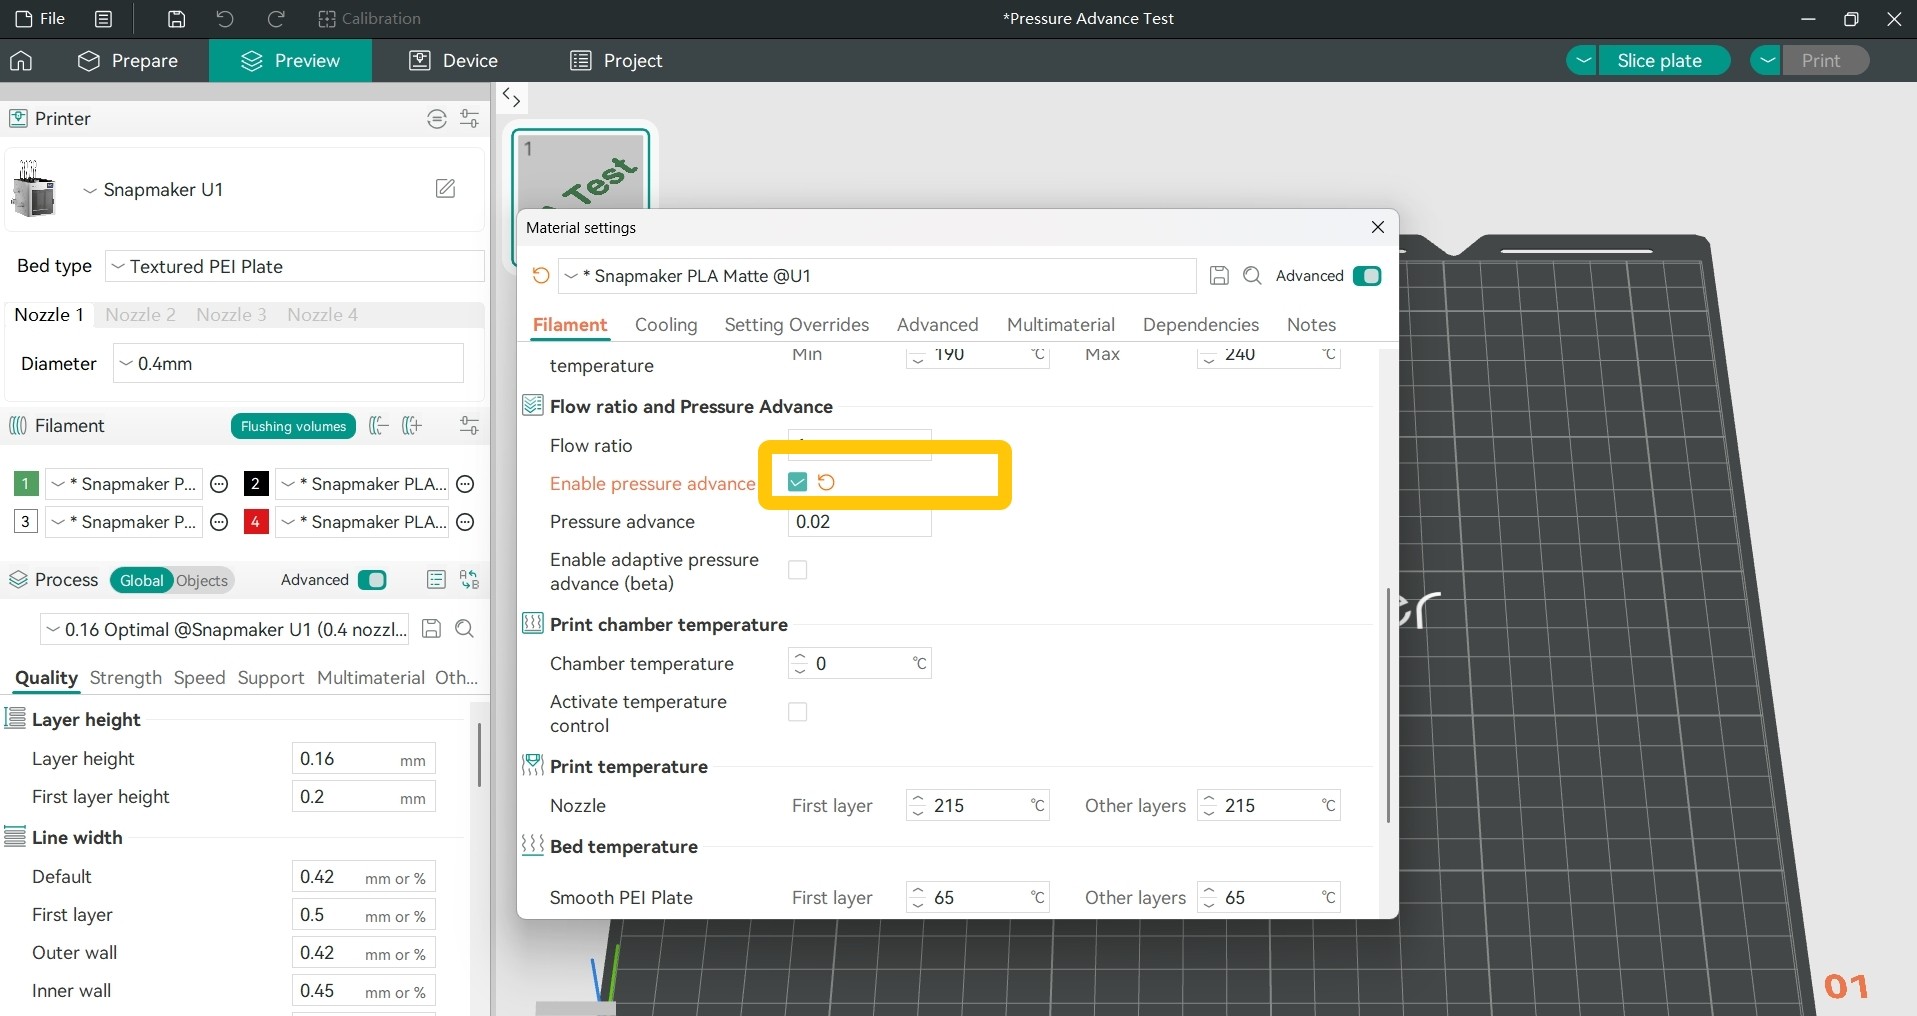
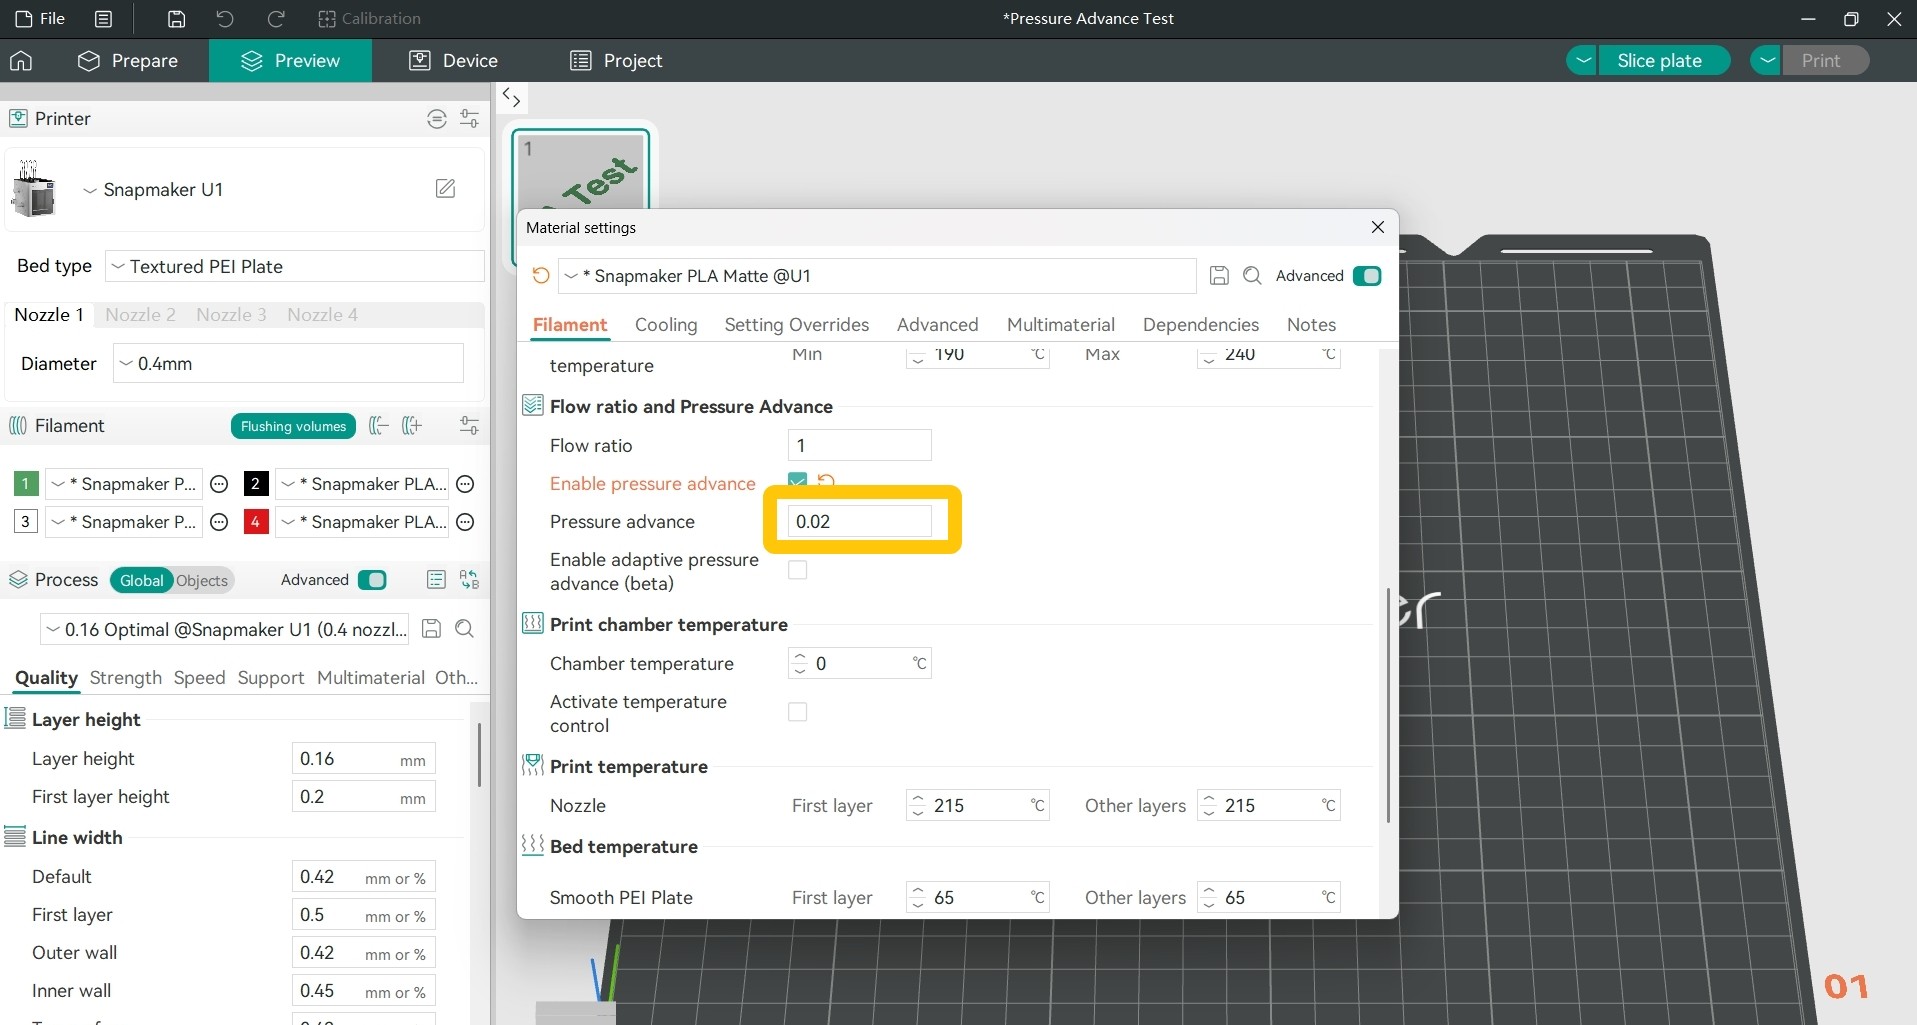
¶ 2. Set the Best Pressure Advance Value for Your Filament
- In the
Filamentsection of the left sidebar, click the...>Editnext to the specific filament.
- In the pop-up window, find
Filament>Flow ratio and Pressure Advance>Pressure Advance.
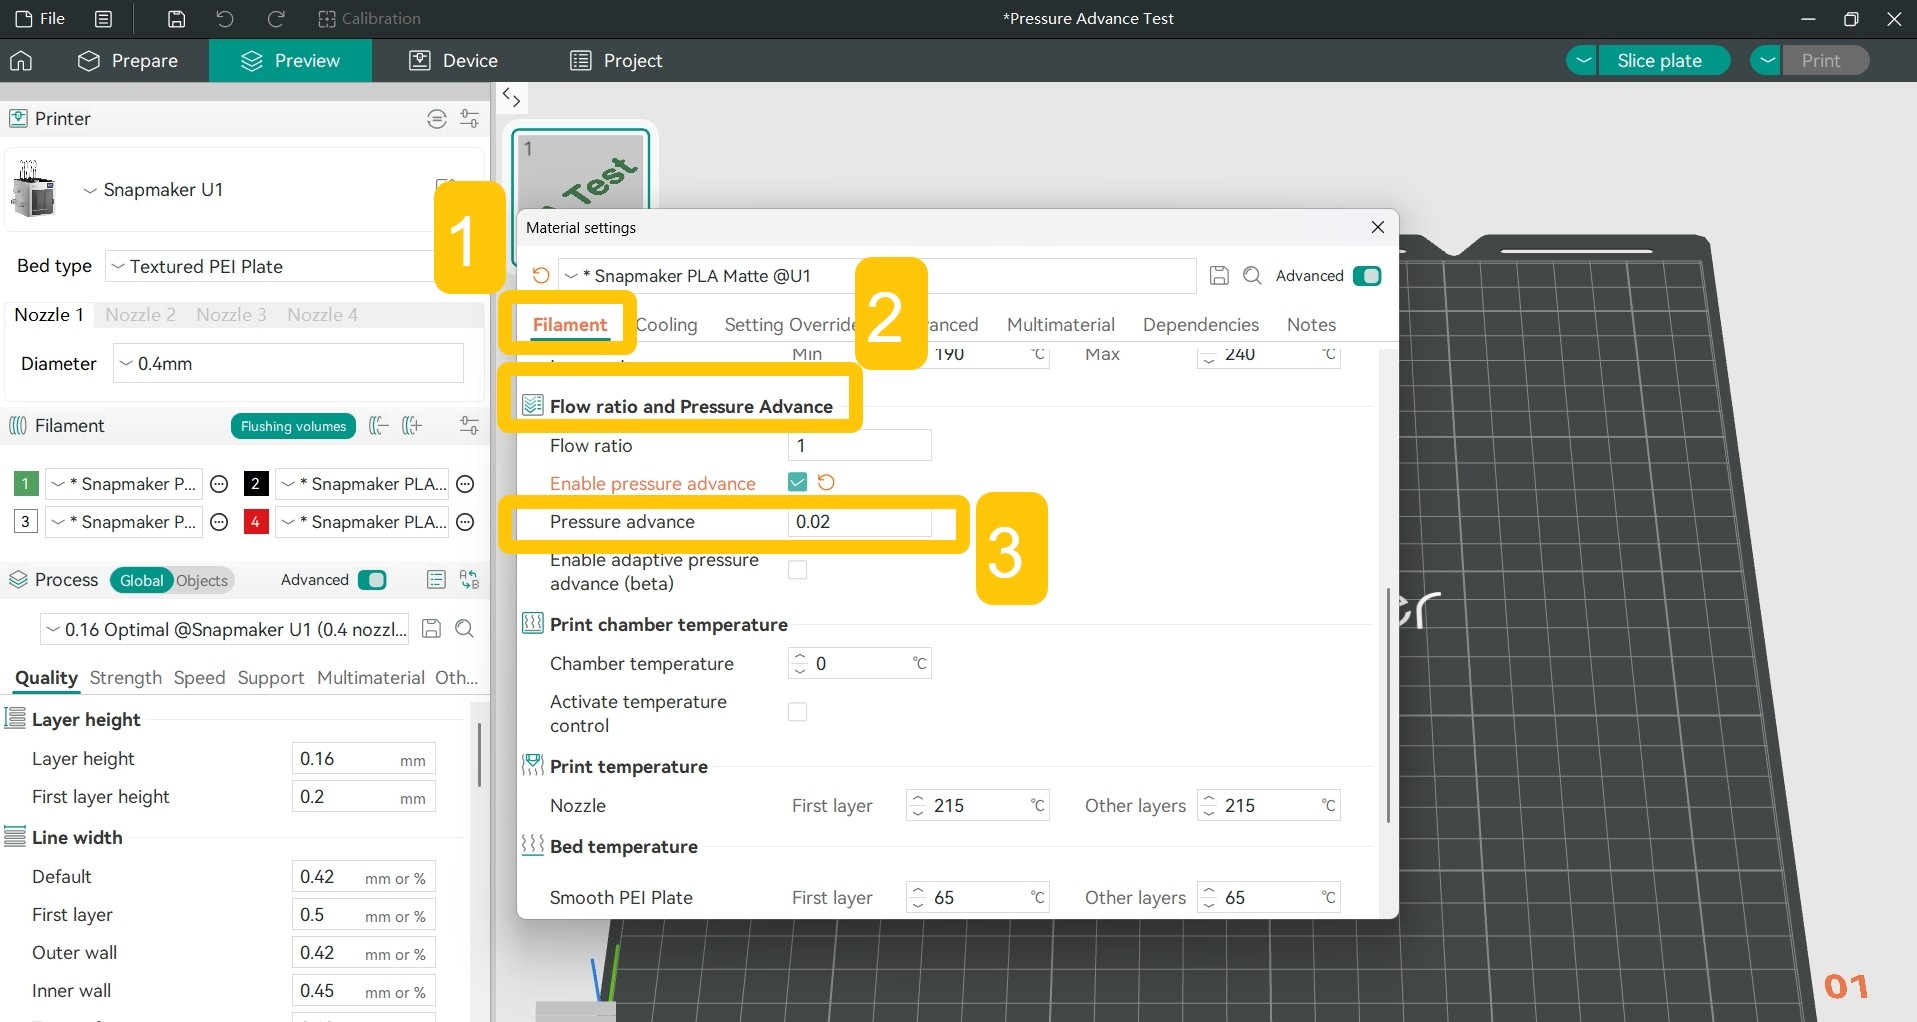
- Set the pressure advance value based on the test result.
¶ Potential Cause 5: Print Speed Too Fast
When the print speed is too fast, the nozzle does not have enough time to melt and extrude the filament, resulting in insufficient actual filament extrusion and causing under extrusion on the model.
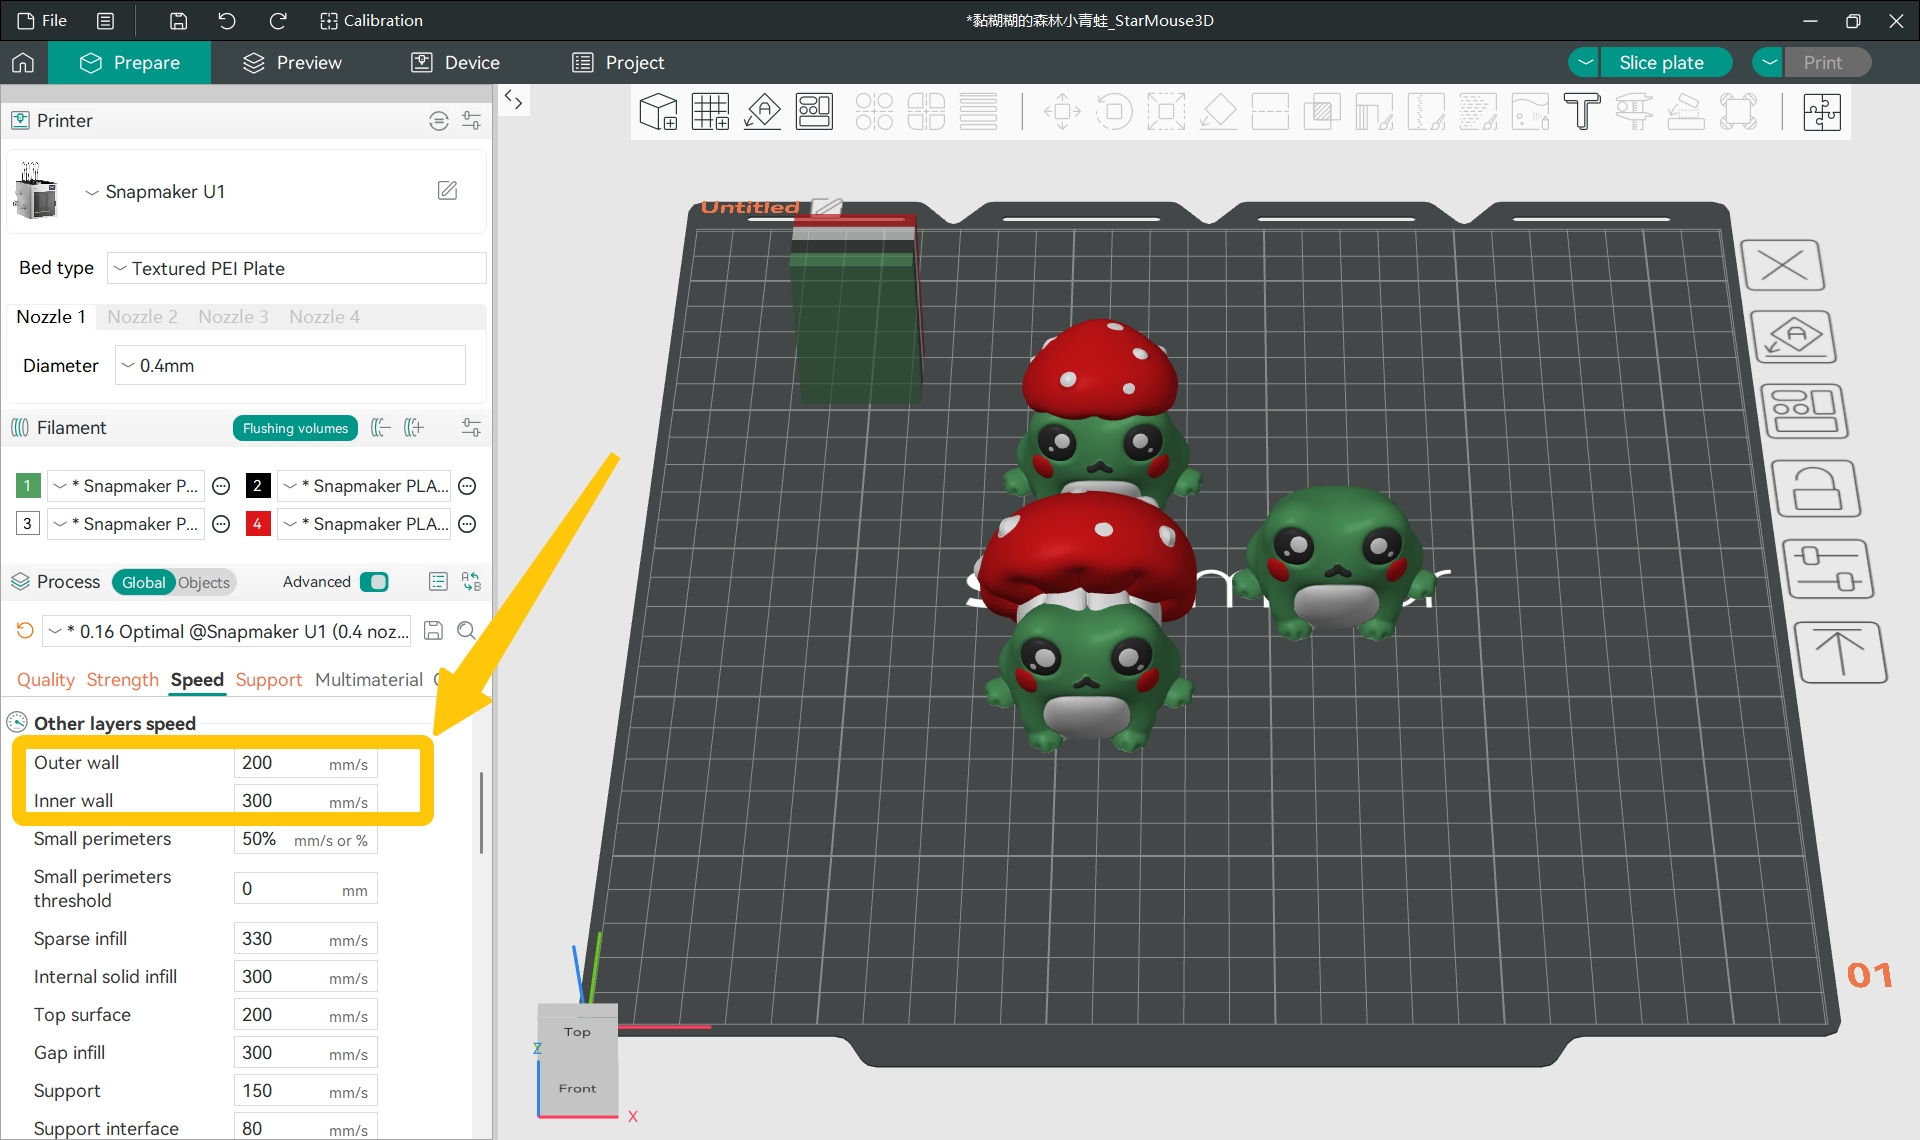
- Enable
Process>Advanced.
- Find
Process>Speed>Other layers speed.
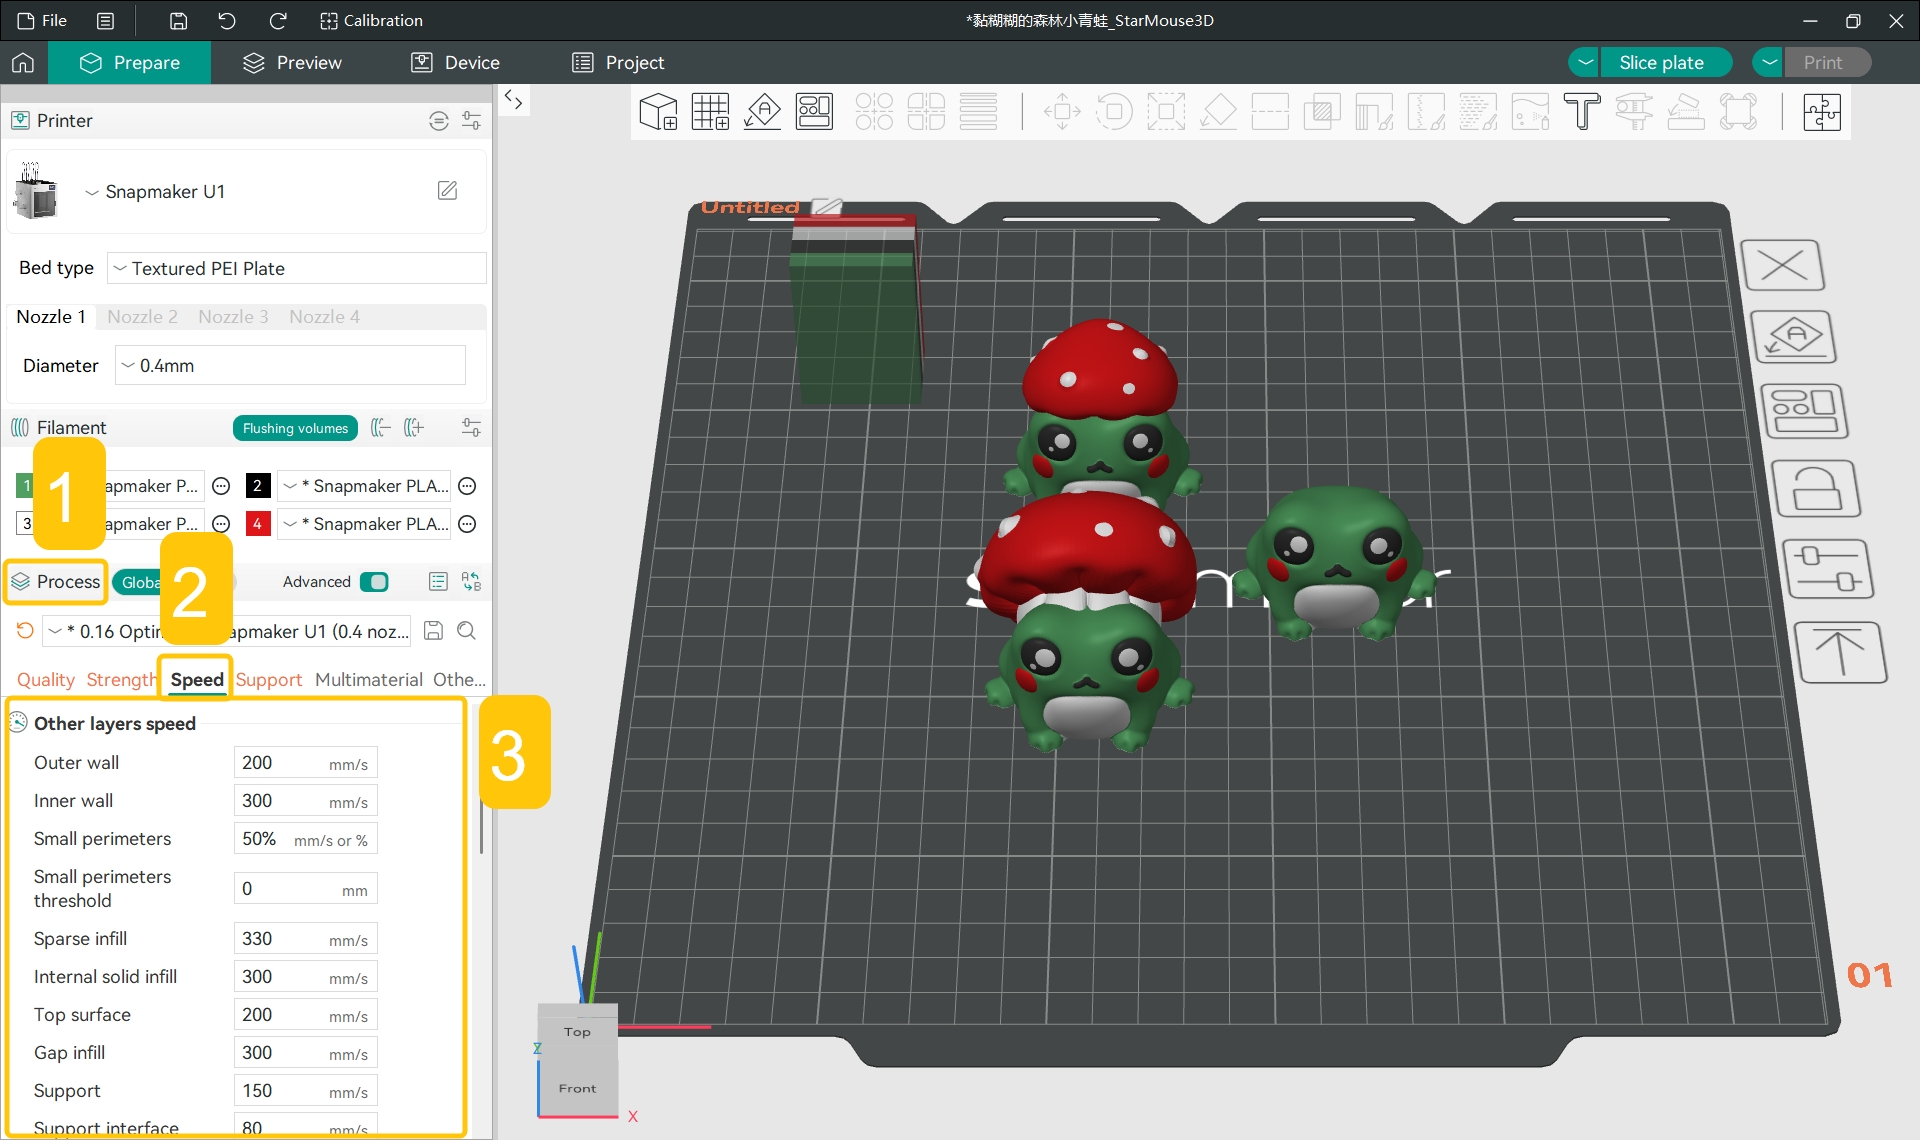
- Appropriately reduce the print speed, especially for the
Outer wallandInner wallvalues.
Outer wall speed is usually lower than inner wall speed. This produces a smoother surface and higher strength, while a higher inner wall speed reduces overall print time.
¶ ✅ Verification
After re-slicing your model and printing it, if the model shows no signs of under extrusion, you have successfully resolved the issue.
¶ 📚 Related Resources
¶ 💬 Reach out to Snapmaker Support
After following the troubleshooting steps, if you find it difficult to resolve your issue, kindly submit a support ticket through https://snapmaker.formcrafts.com/u1-troubleshooting-request and share your troubleshooting results with some pictures/videos.
Our dedicated support team will be more than willing to assist you in resolving the issue.