¶ 💡 Compatibility
This guide applies to the following machine. Please note when referencing:
- Machine model: U1
¶ ⏰ When to Use This Guide
If the touchscreen functions abnormally (intermittently) or becomes completely unresponsive during startup or after using the printer for a period of time, refer to this guide for recovery or hardware troubleshooting.
¶ 📋 Quick Info Card
- Difficulty: ⭐⭐⭐⭐☆
- Estimated Time: 20-40 minutes
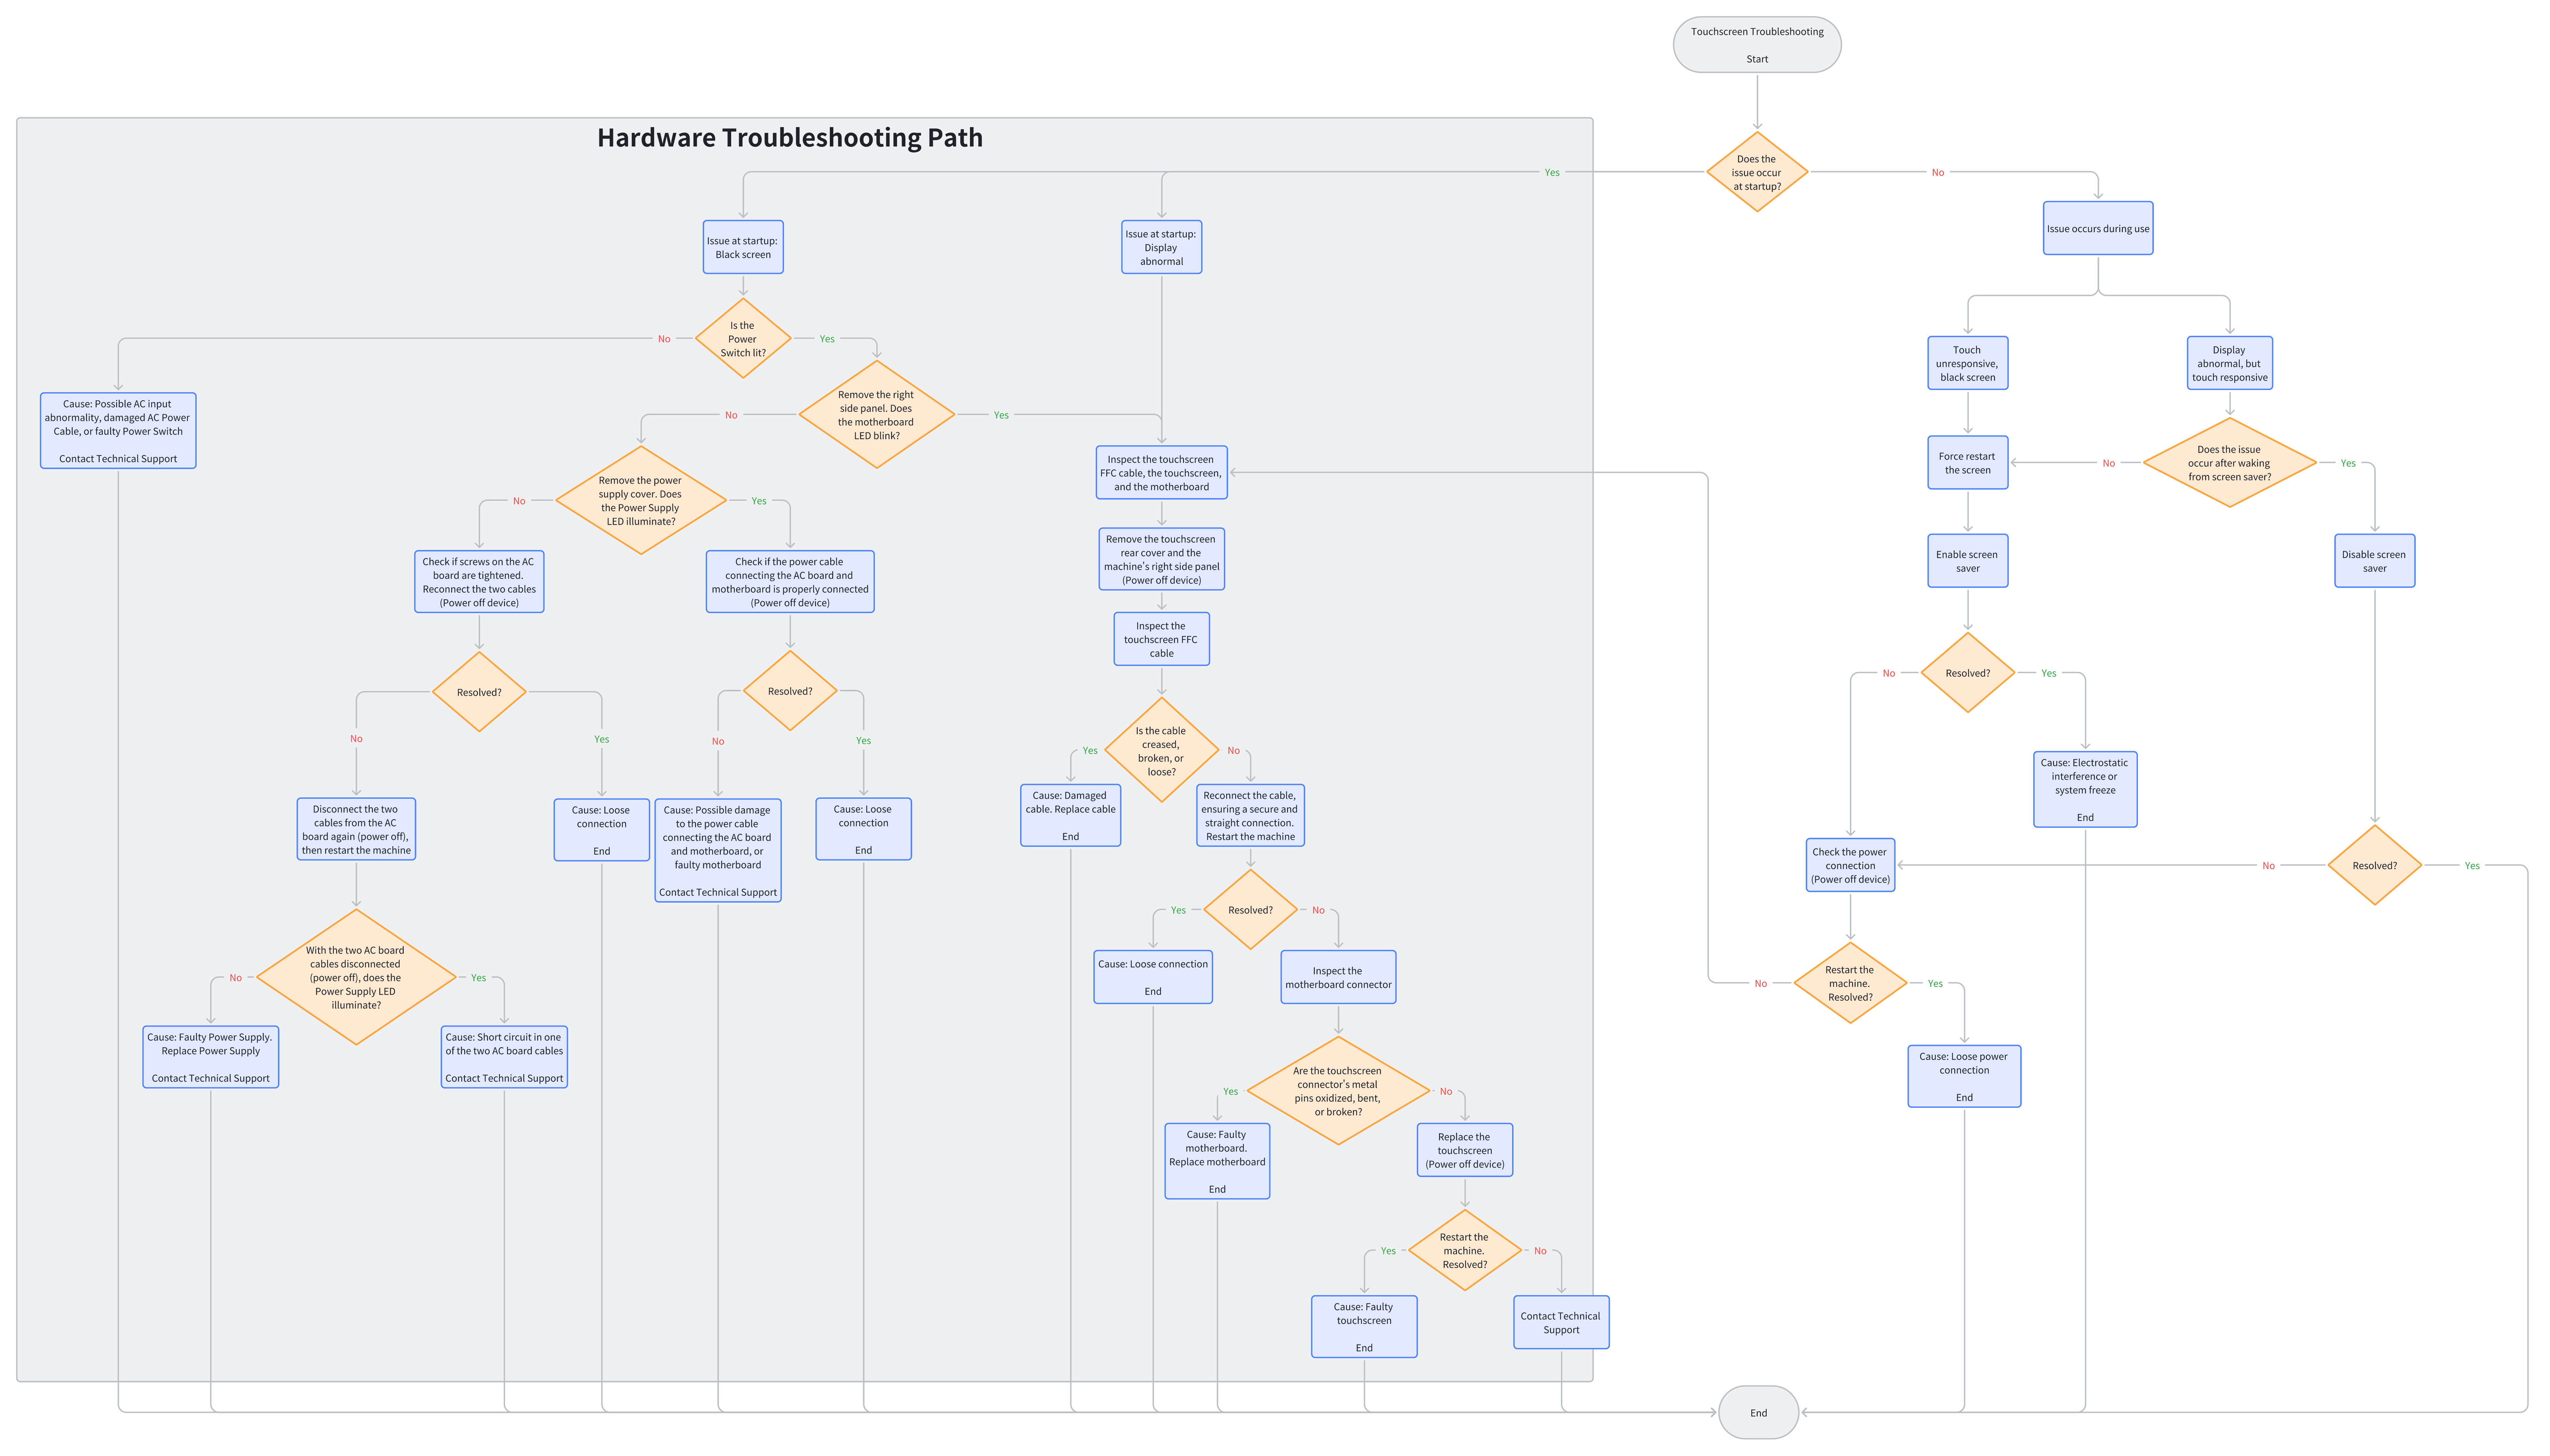
¶ 🔁 Troubleshooting Flowchart
¶ 🔍 Quick Diagnosis
Which of the following scenarios best describes your issue?
- Touch unresponsive or black screen during use > Go to Scenario 1
- Display abnormal (but touch responsive) during use > Go to Scenario 2
- Black screen immediately upon power-on > Go to Scenario 3
- Display abnormal immediately upon power-on > Go to Scenario 4
¶ ⚠️ Important Notes
- When the machine is powered on, do not connect or disconnect any cables unless otherwise specified.
- For machines still under warranty, do not perform deep disassembly to avoid voiding the warranty.
¶ 🪄 Preparation
¶ Tools Required
- H2.0 Hex Key
- Phillips screwdriver (as needed)
- New touchscreen (purchase separately if required)
¶ 🛠️ Troubleshooting Steps
¶ Scenario 1: Touch Unresponsive or Black Screen During Use
(1)Long-press the central area at the top of the touchscreen for approximately 5 seconds to force restart the touchscreen.
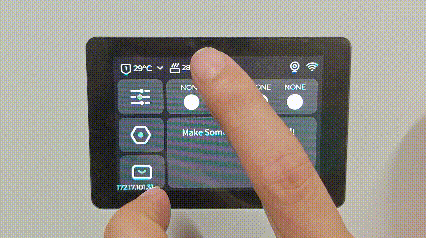
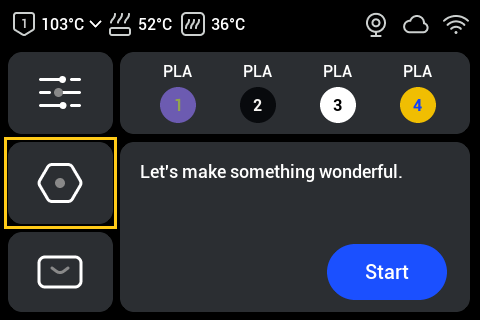
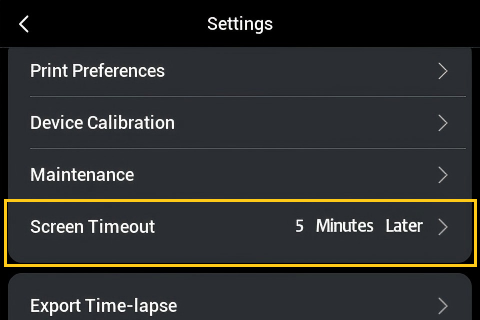
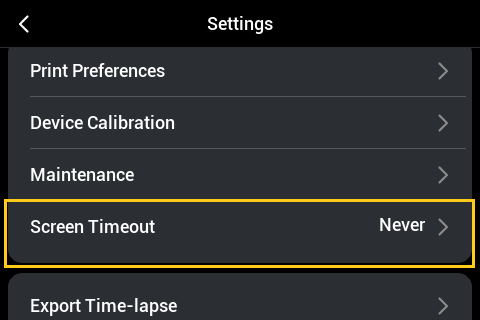
(2)On the touchscreen home screen, navigate to Settings and enable the screen saver.
▶ If the issue is resolved, the cause is electrostatic interference or a system freeze. Troubleshooting ends.
▶ If the issue persists, proceed to the following steps.
(3)Power off the machine.
(4)Check the power connection, then restart the machine.
▶ If the issue is resolved, the cause is a loose power connection. Troubleshooting ends.
▶ If the issue persists, go to Inspect the Touchscreen FFC Cable, the Touchscreen, and the Motherboard.
¶ Scenario 2: Display Abnormal (But Touch Responsive) During Use
Does the abnormality occur after waking from screen saver?
Yes (Click here to expand)
(1)On the touchscreen home screen, navigate to Settings and disable the screen saver.
▶ If the issue is resolved, troubleshooting ends.
▶ If the issue persists, proceed to the following steps.
(2)Power off the machine.
(3)Check the power connection, then restart the machine.
▶ If the issue is resolved, the cause is a loose power connection. Troubleshooting ends.
▶ If the issue persists, go to Inspect the Touchscreen FFC Cable, the Touchscreen, and the Motherboard.
No (Click here to expand)
(1)Long-press the central area at the top of the touchscreen for approximately 5 seconds to force restart the touchscreen.
(2)On the touchscreen home screen, navigate to Settings and enable the screen saver.
▶ If the issue is resolved, the cause is electrostatic interference or a system freeze. Troubleshooting ends.
▶ If the issue persists, proceed to the following steps.
(3)Power off the machine.
(4)Check the power connection, then restart the machine.
▶ If the issue is resolved, the cause is a loose power connection. Troubleshooting ends.
▶ If the issue persists, go to Inspect the Touchscreen FFC Cable, the Touchscreen, and the Motherboard.
¶ Scenario 3: Black Screen Immediately upon Power-On
(1)Check if the power switch is lit.
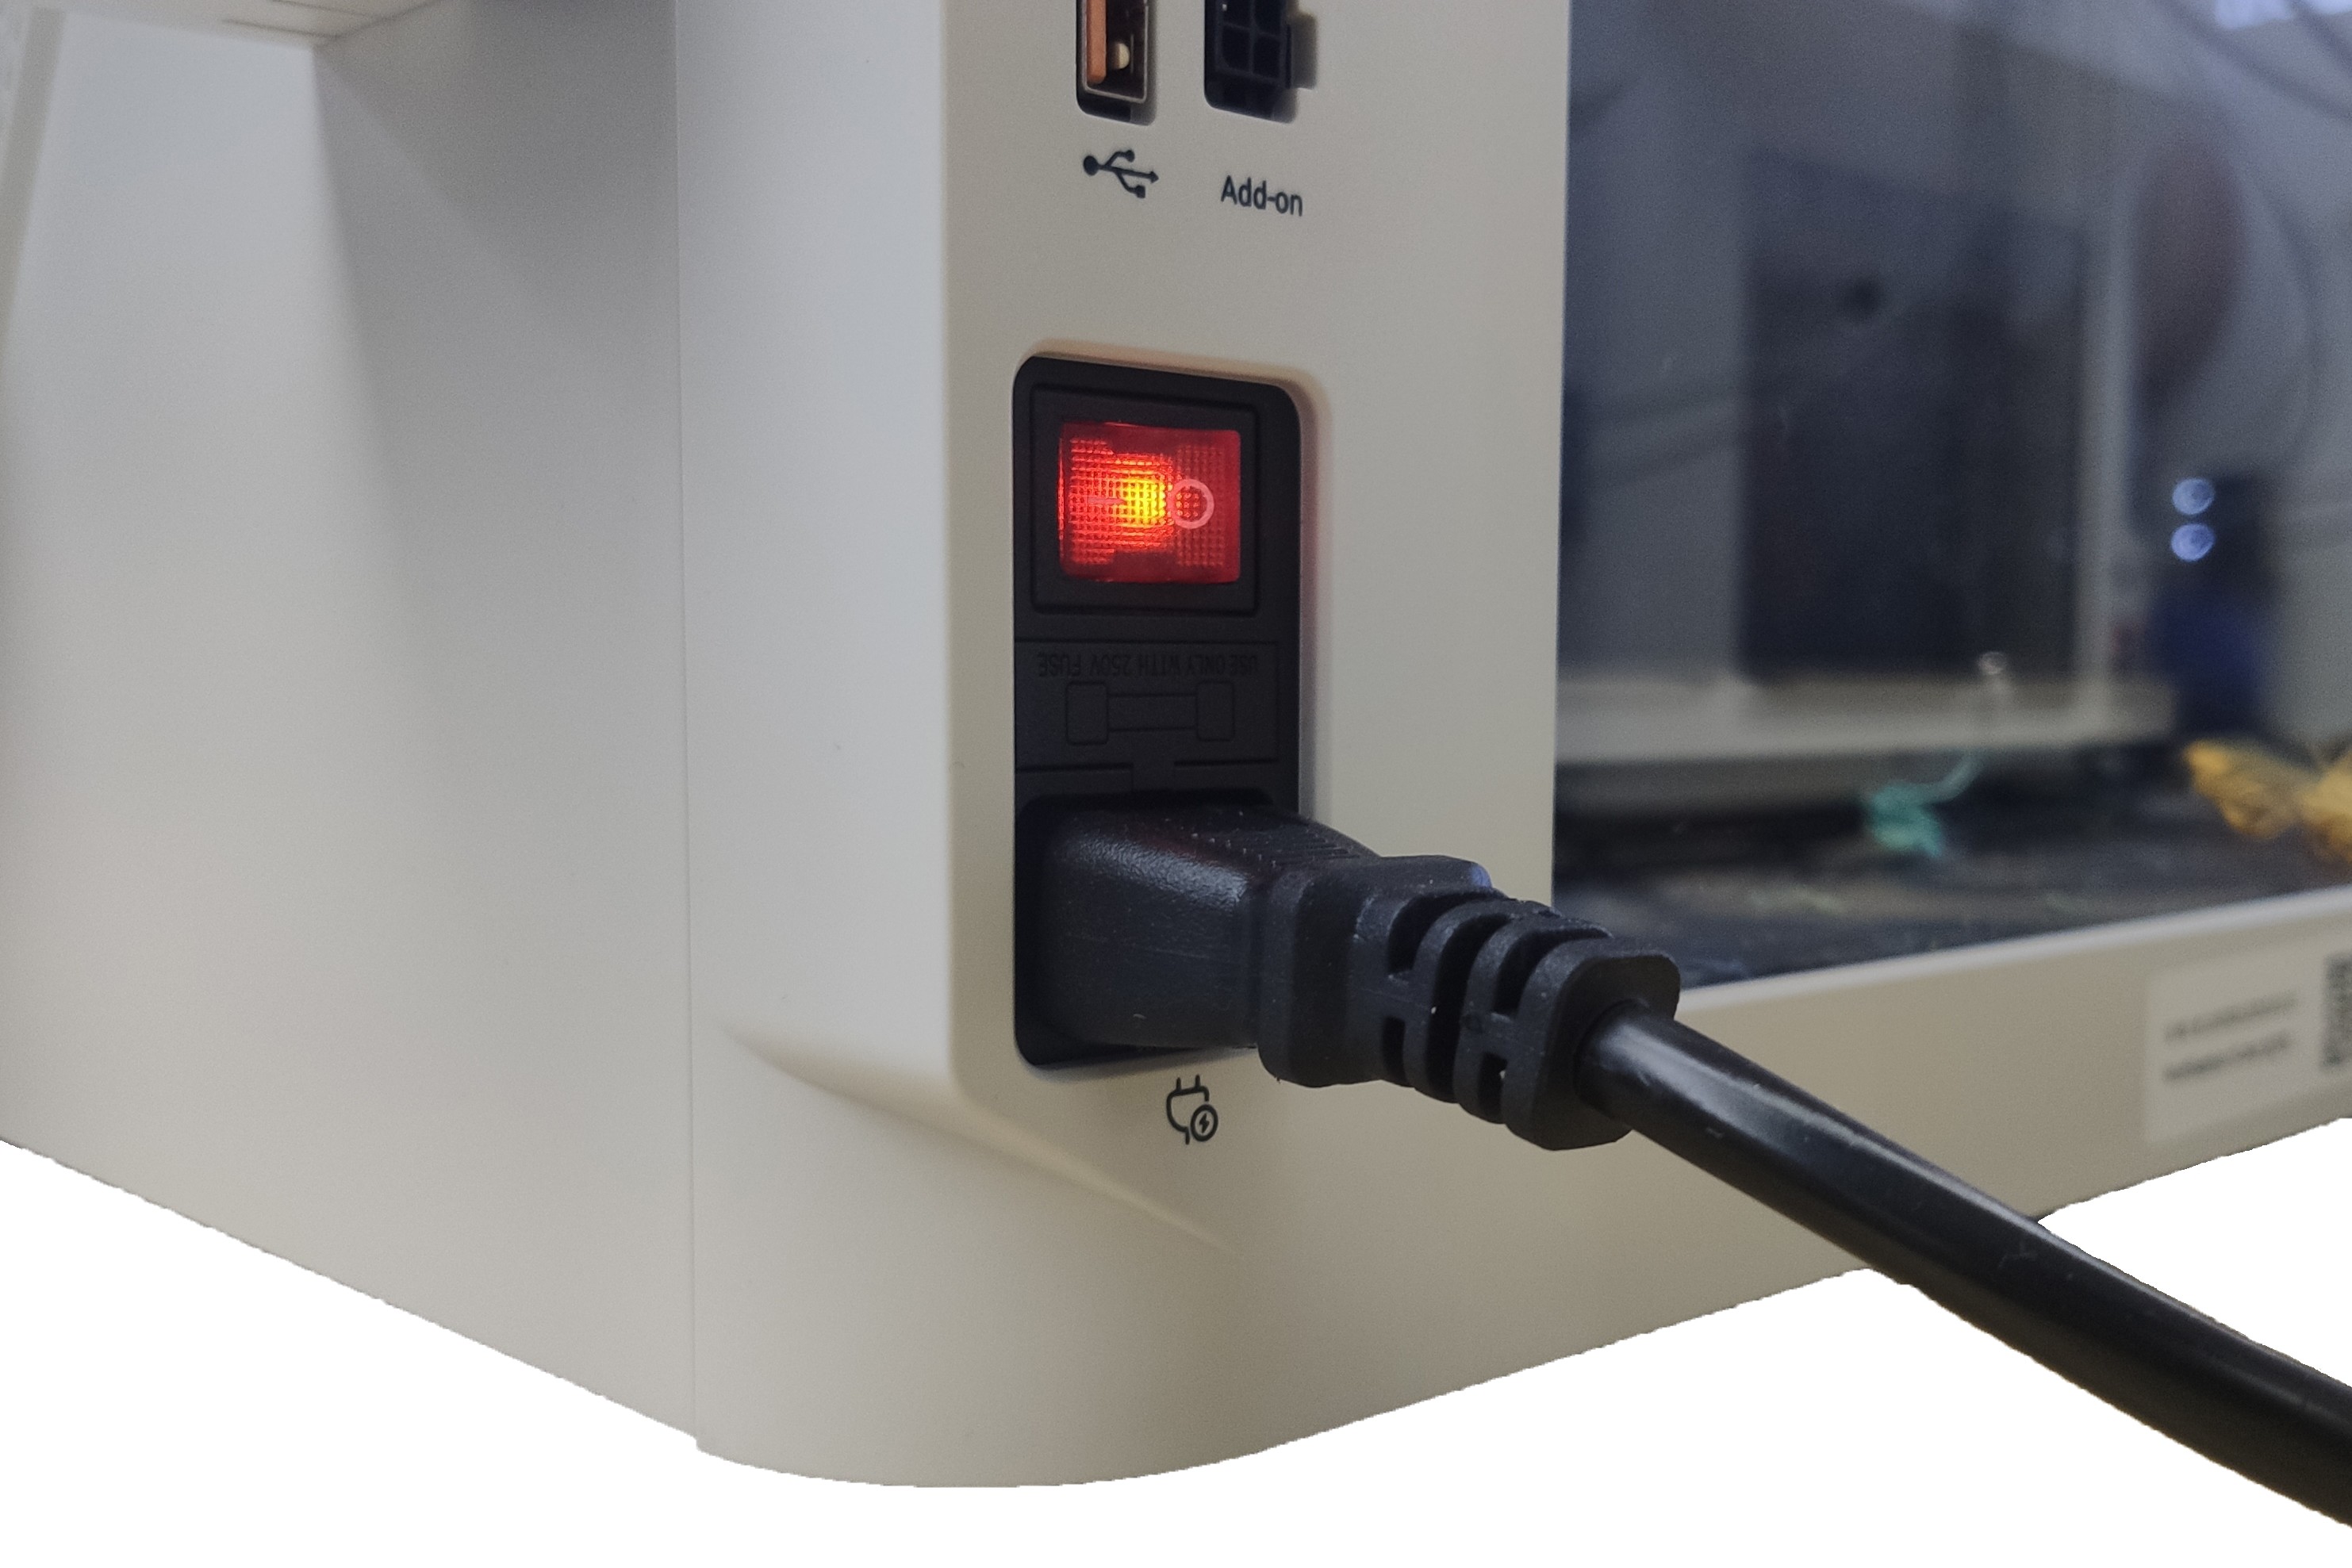
▶ If the power switch is not lit, the cause may be AC input abnormality, a damaged AC power cable, or a faulty power switch. Contact Technical Support for further assistance.
▶ If the power switch is lit, proceed to the following steps.
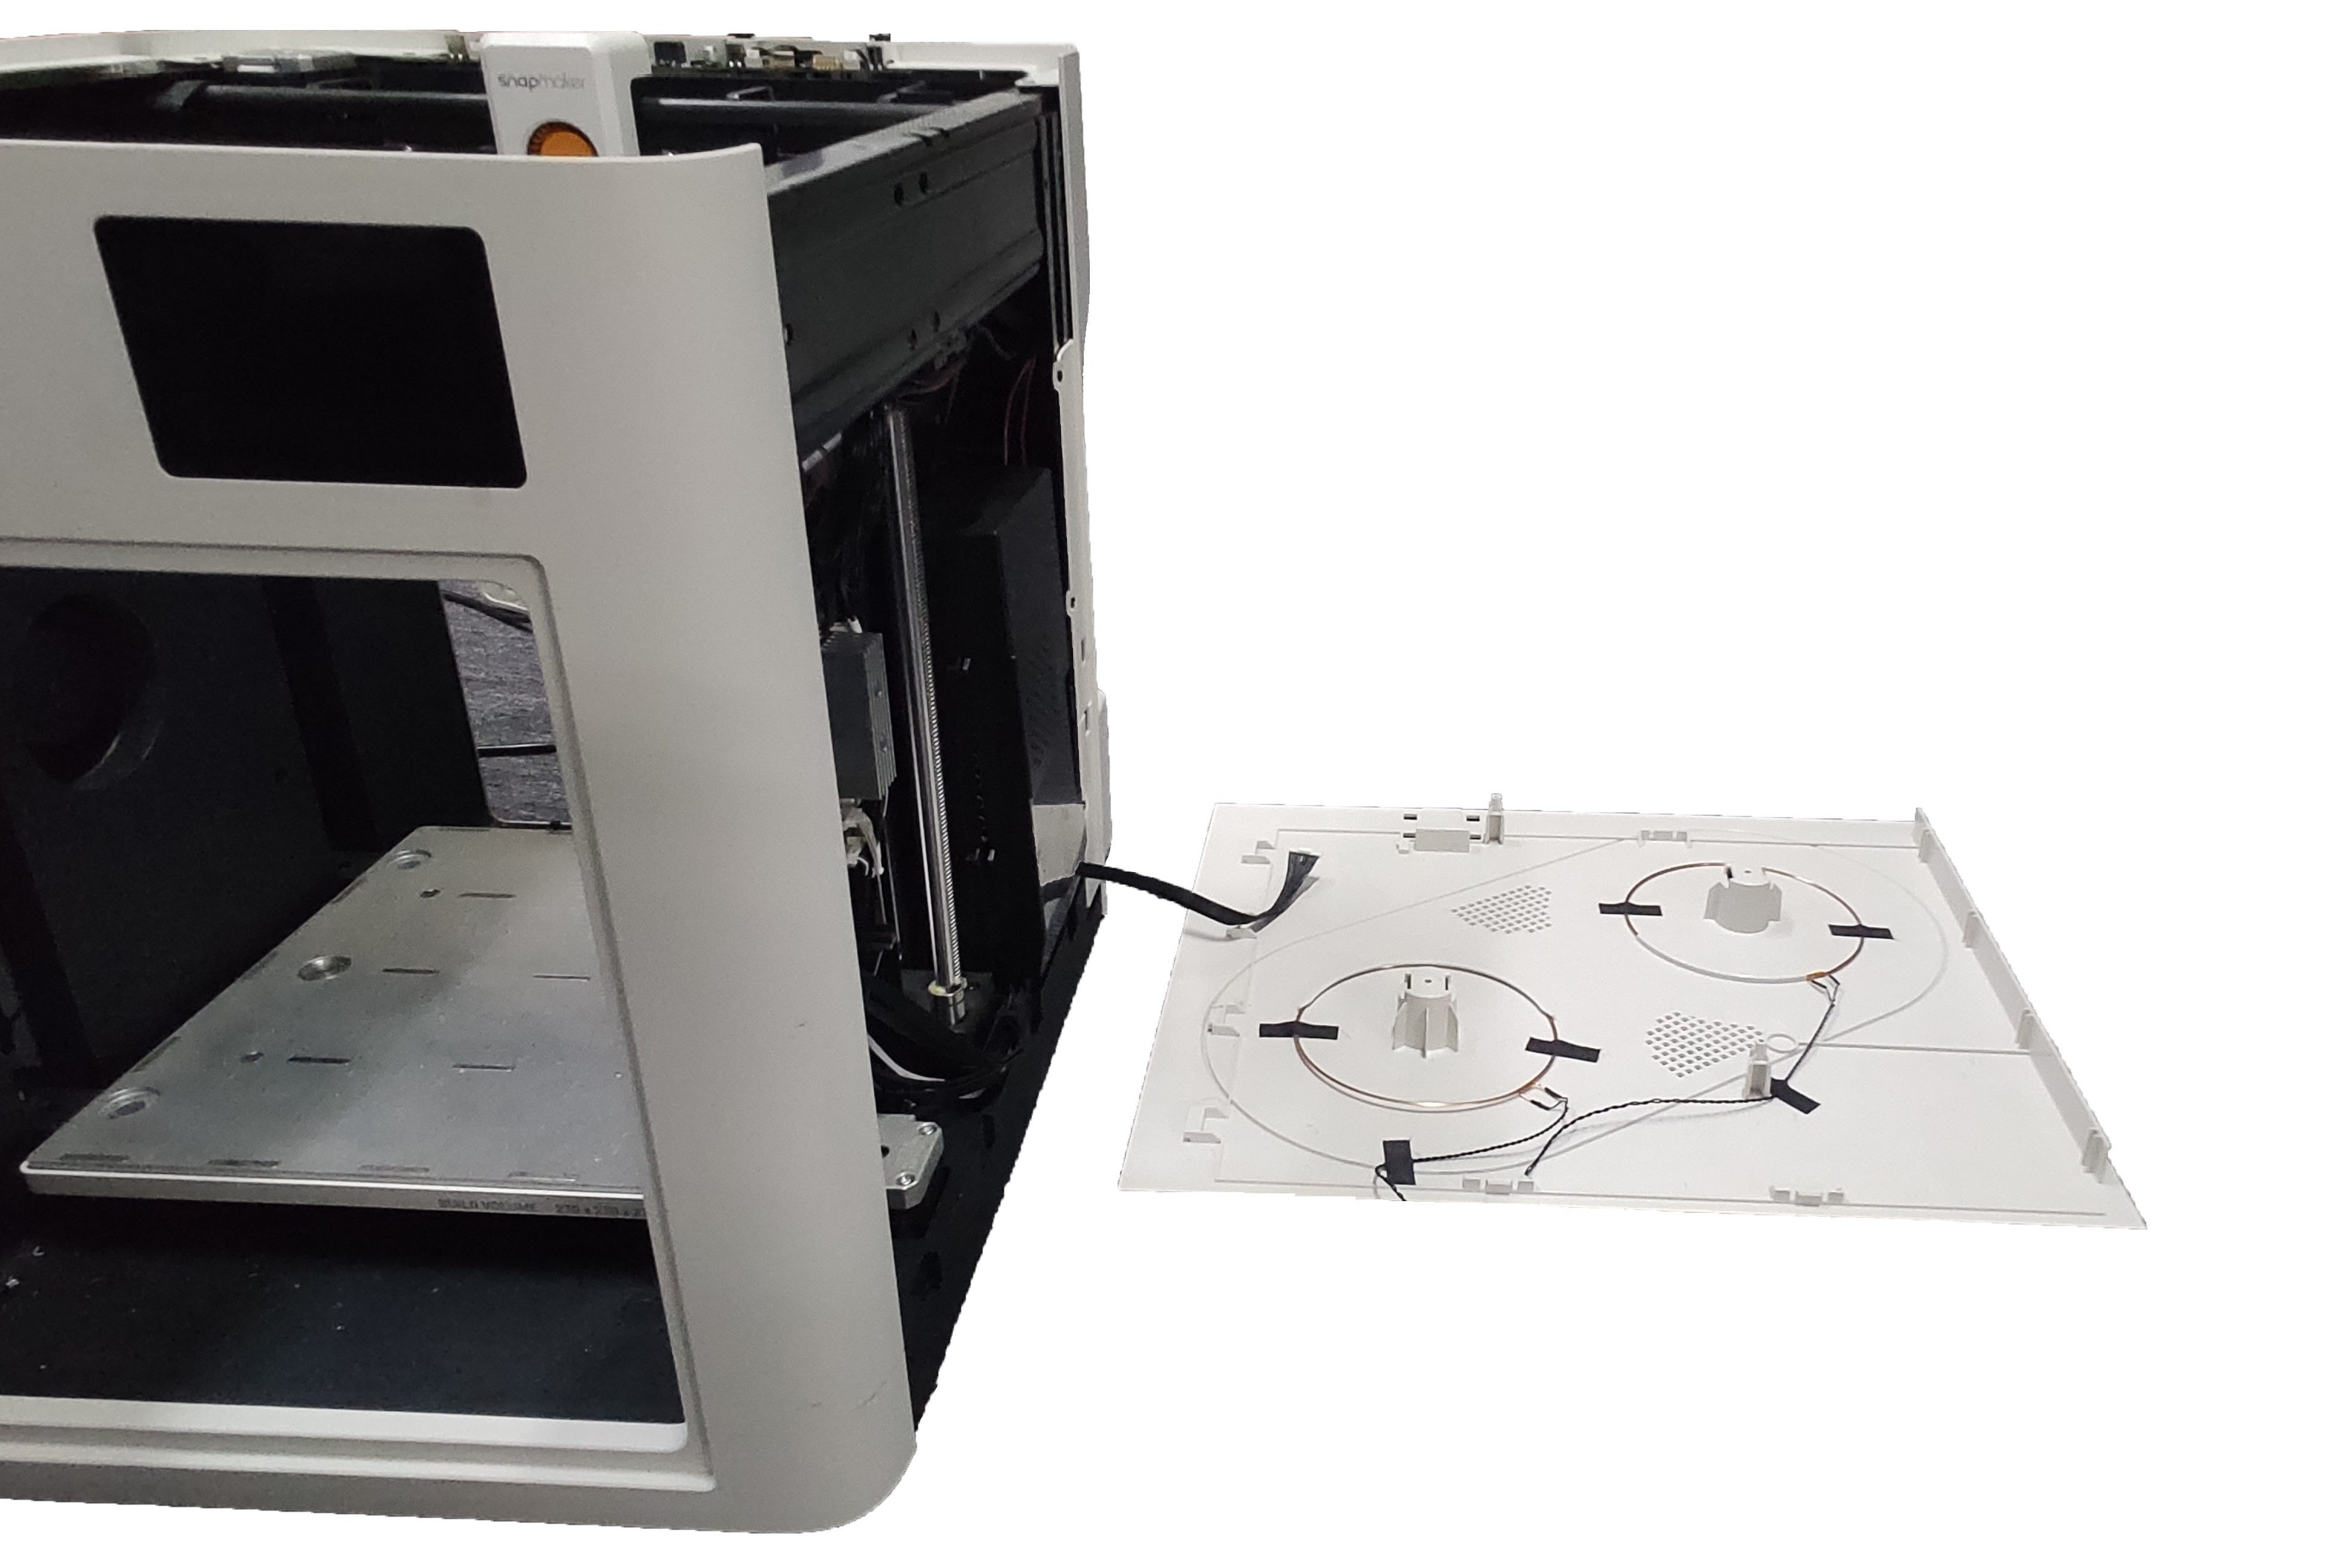
(2)Refer to the U1 Video Guide: How to Remove the Side Panels to remove the machine’s right side panel.
(3)Check if the motherboard LED is blinking.
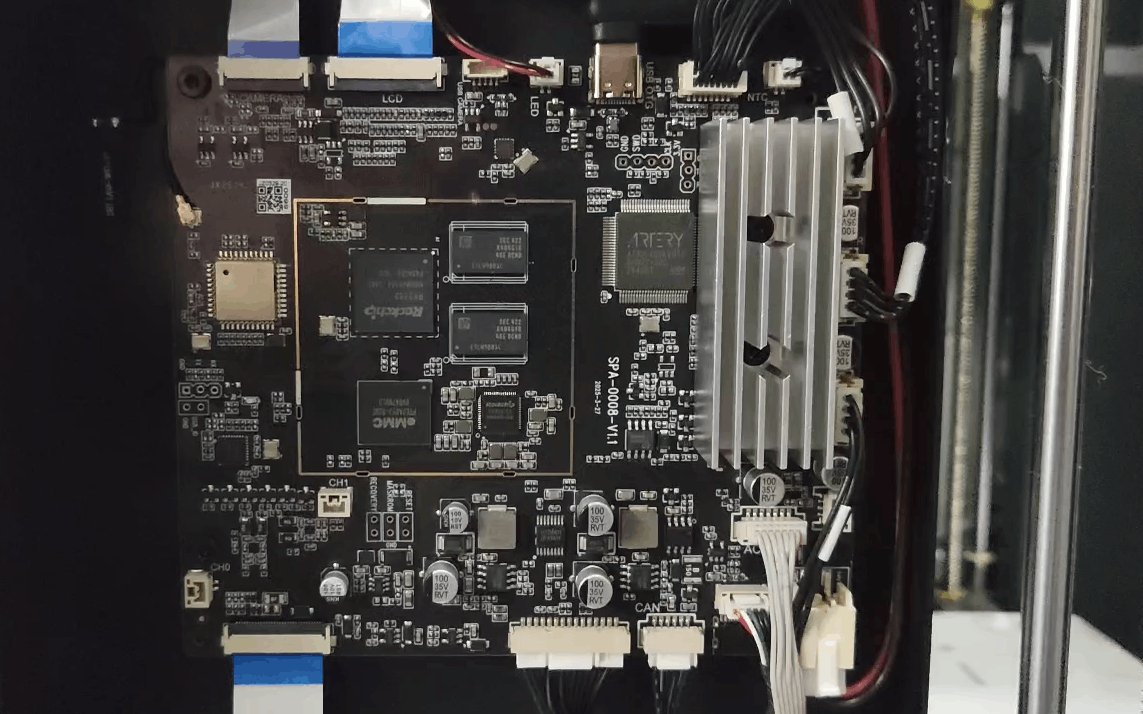
▶ If the motherboard LED is blinking, go to Inspect the Touchscreen FFC Cable, the Touchscreen, and the Motherboard.
▶ If the motherboard LED is not blinking, proceed to the following steps.
(4)Remove the power supply cover and check if the power supply LED is illuminated.
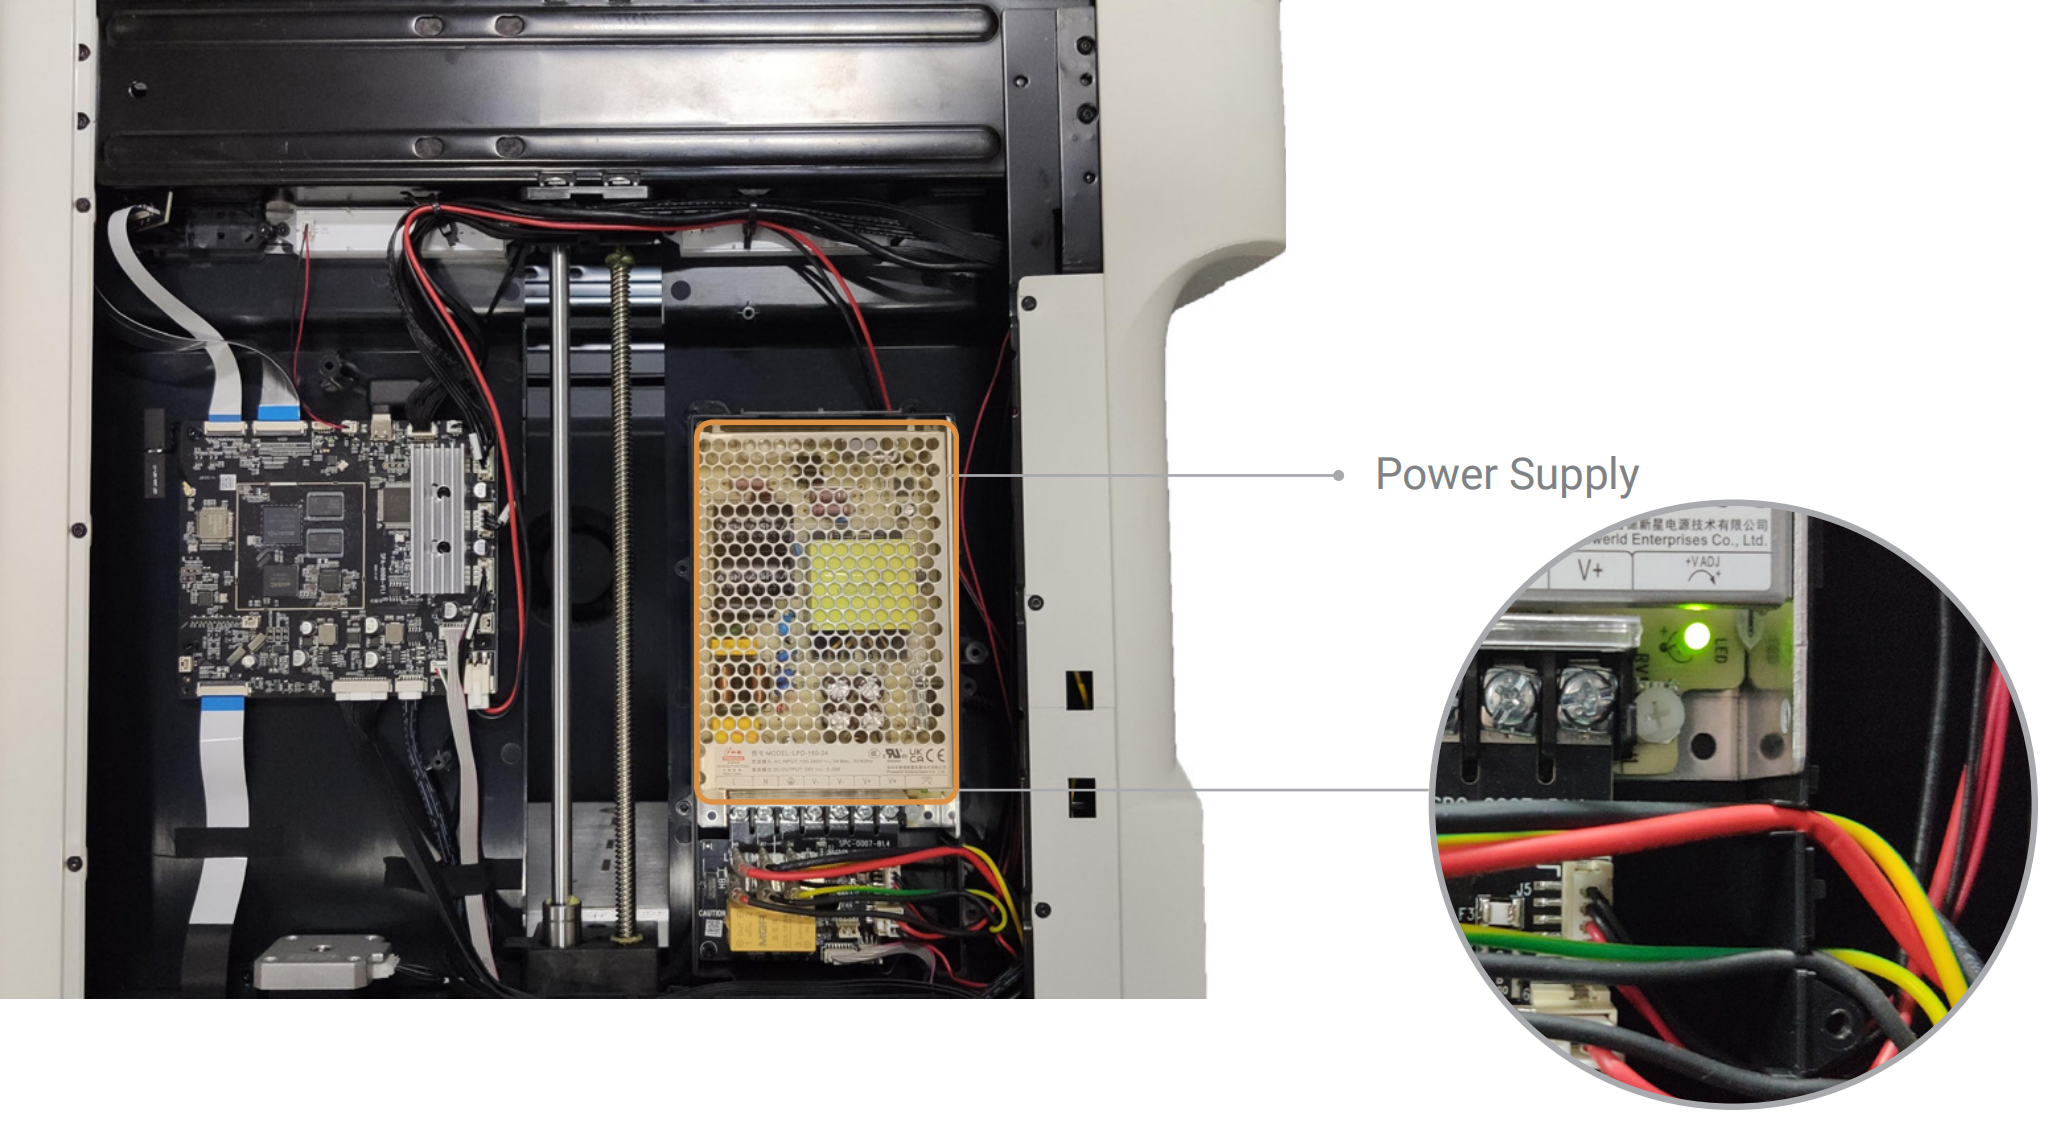
Yes (Click here to expand)
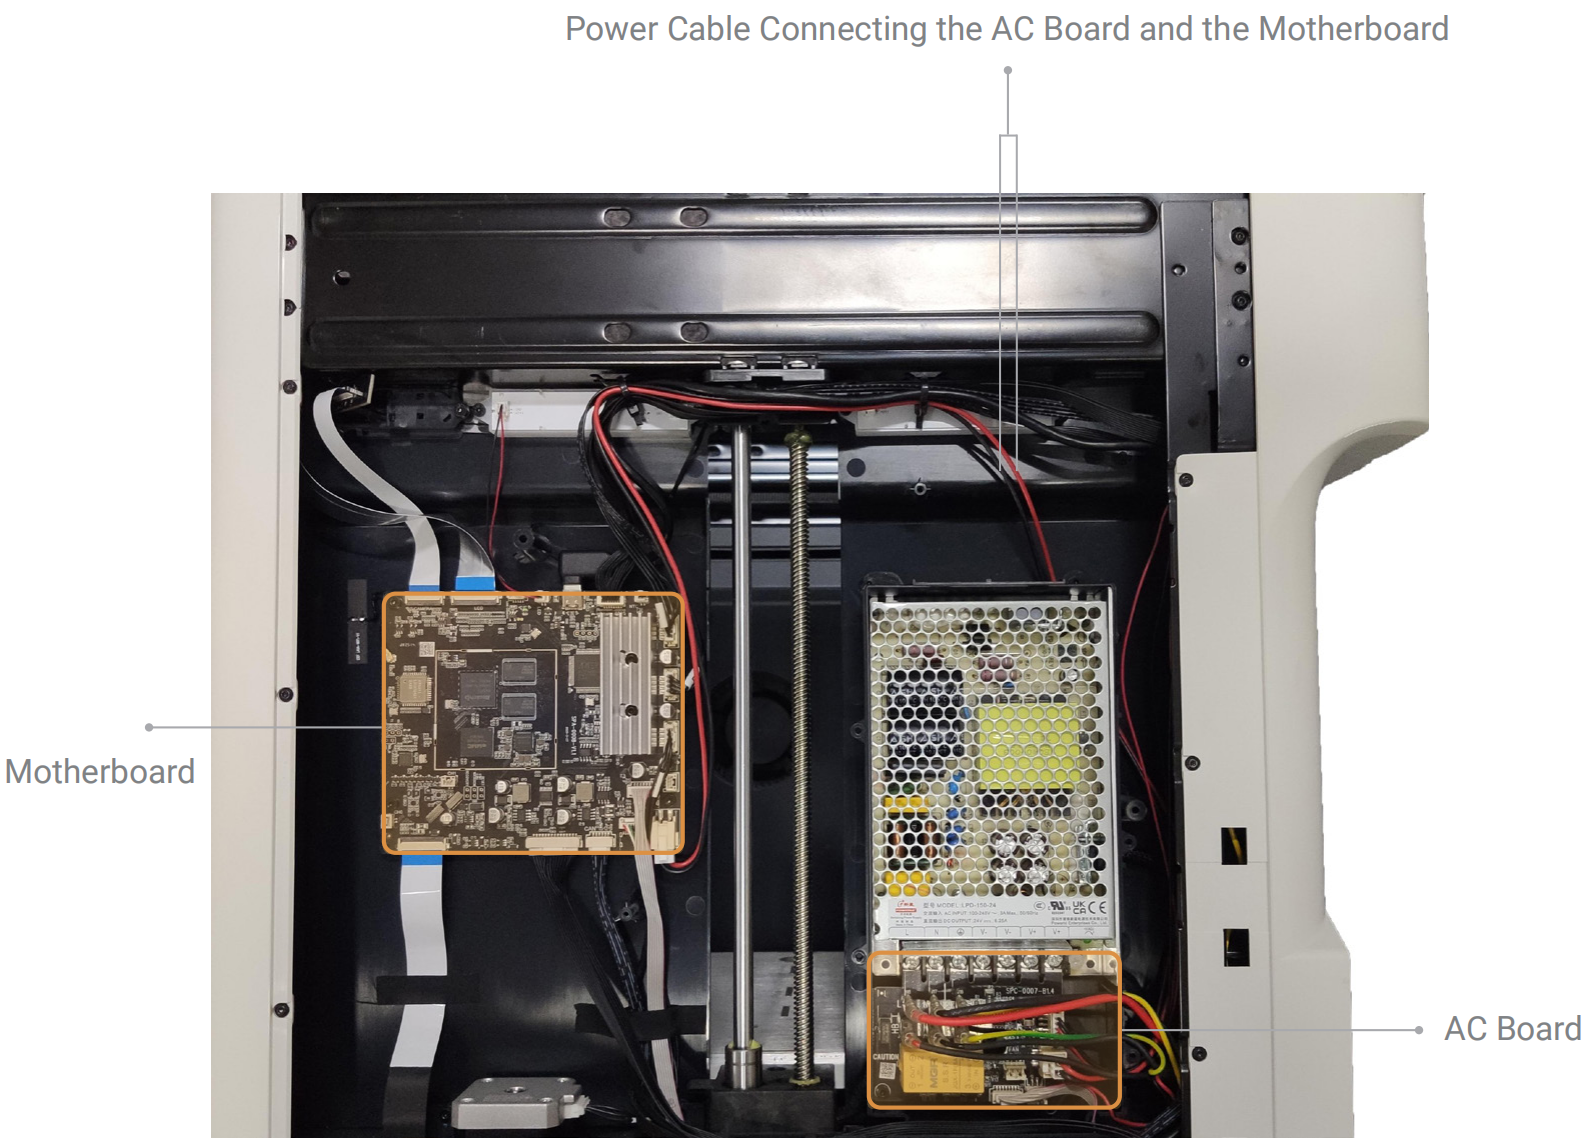
(5)Power off the machine.(6)Check that the power cable connecting the AC board and the motherboard is properly connected.
▶ If the issue is resolved, the cause is a loose connection. Troubleshooting ends.
▶ If the issue persists, the cause may be a damaged power cable connecting the AC board and motherboard, or a faulty motherboard. Contact Technical Support for further assistance.
No (Click here to expand)
(5)Power off the machine.(6)Check that the screws on the AC board are tightened. Reconnect the two cables as indicated.

▶ If the issue is resolved, the cause is a loose connection. Troubleshooting ends.
▶ If the issue persists, proceed to the following steps.
(7)With the machine powered off, disconnect the two cables from the AC board again.

(8)Restart the machine. With the two AC board cables disconnected, check if the power supply LED is illuminated.
▶ If the power supply LED is illuminated, the cause is a short circuit in one of the two AC board cables. Contact Technical Support for further assistance.
▶ If the power supply LED is not illuminated, the cause is a faulty power supply. The power supply needs to be replaced. Contact Technical Support.
¶ Scenario 4: Display Abnormal Immediately upon Power-On
¶ Inspect the Touchscreen FFC Cable, the Touchscreen, and the Motherboard
(1)Power off the machine.
(2)Remove the touchscreen rear cover (no tools required).
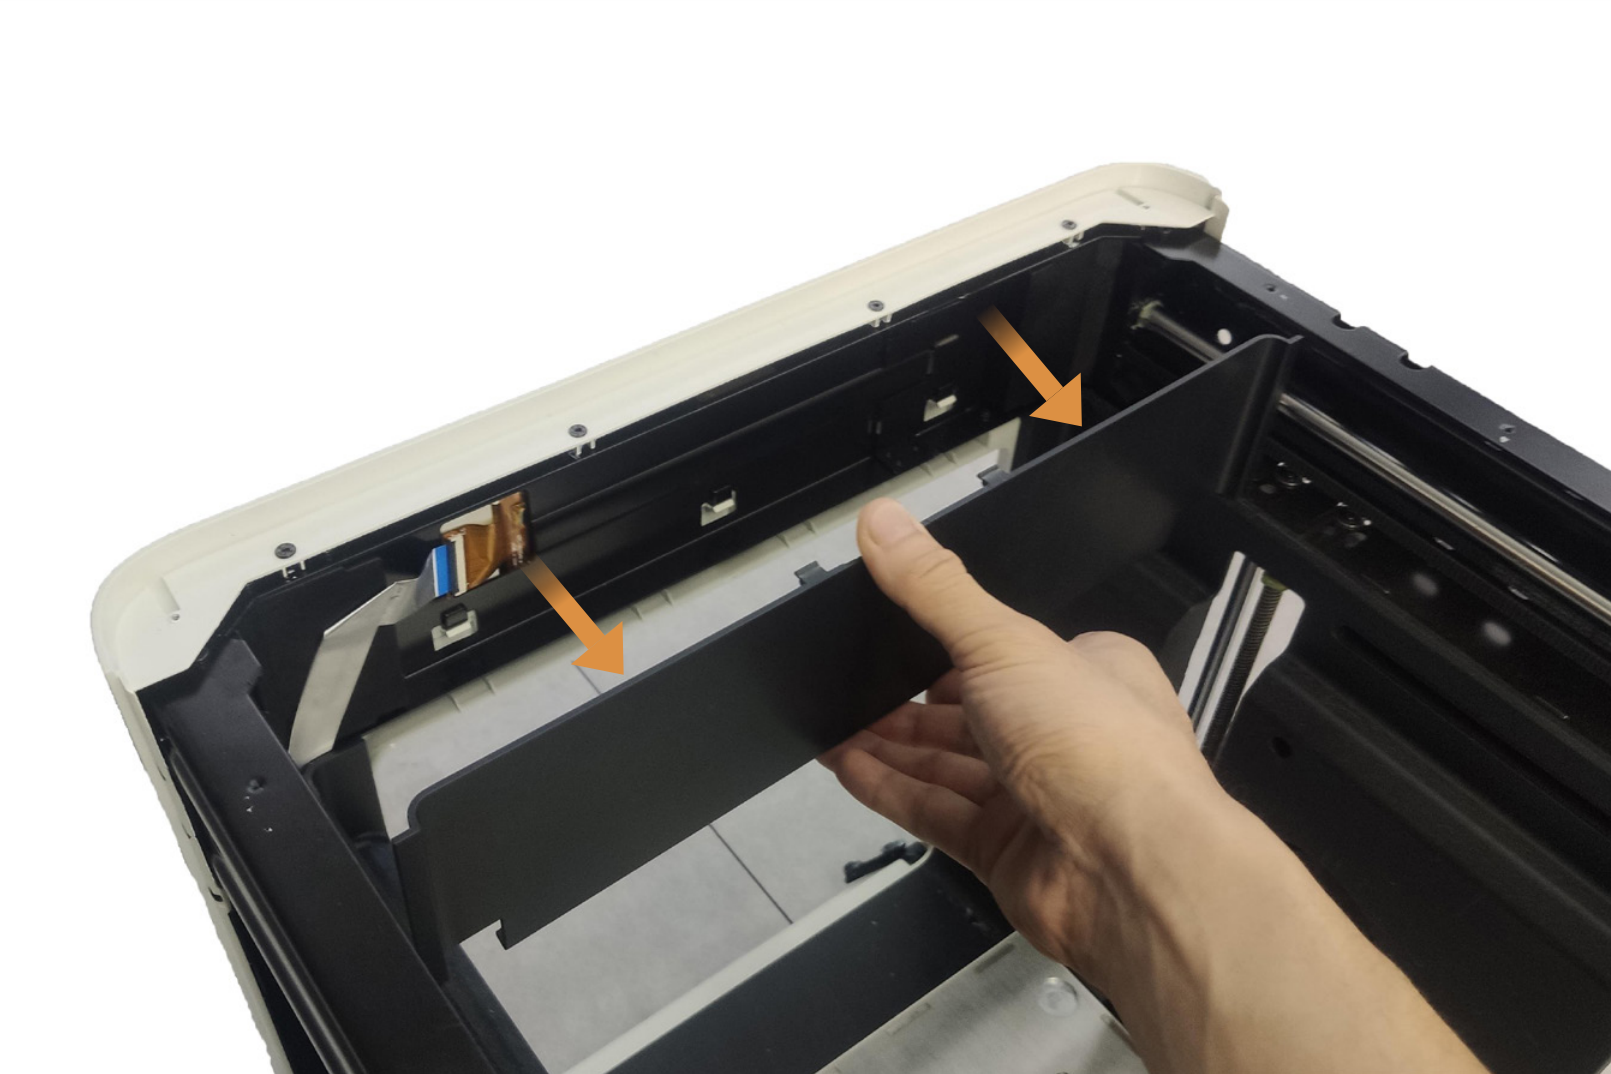
(3)Refer to the U1 Video Guide: How to Remove the Side Panels to remove the machine’s right side panel.
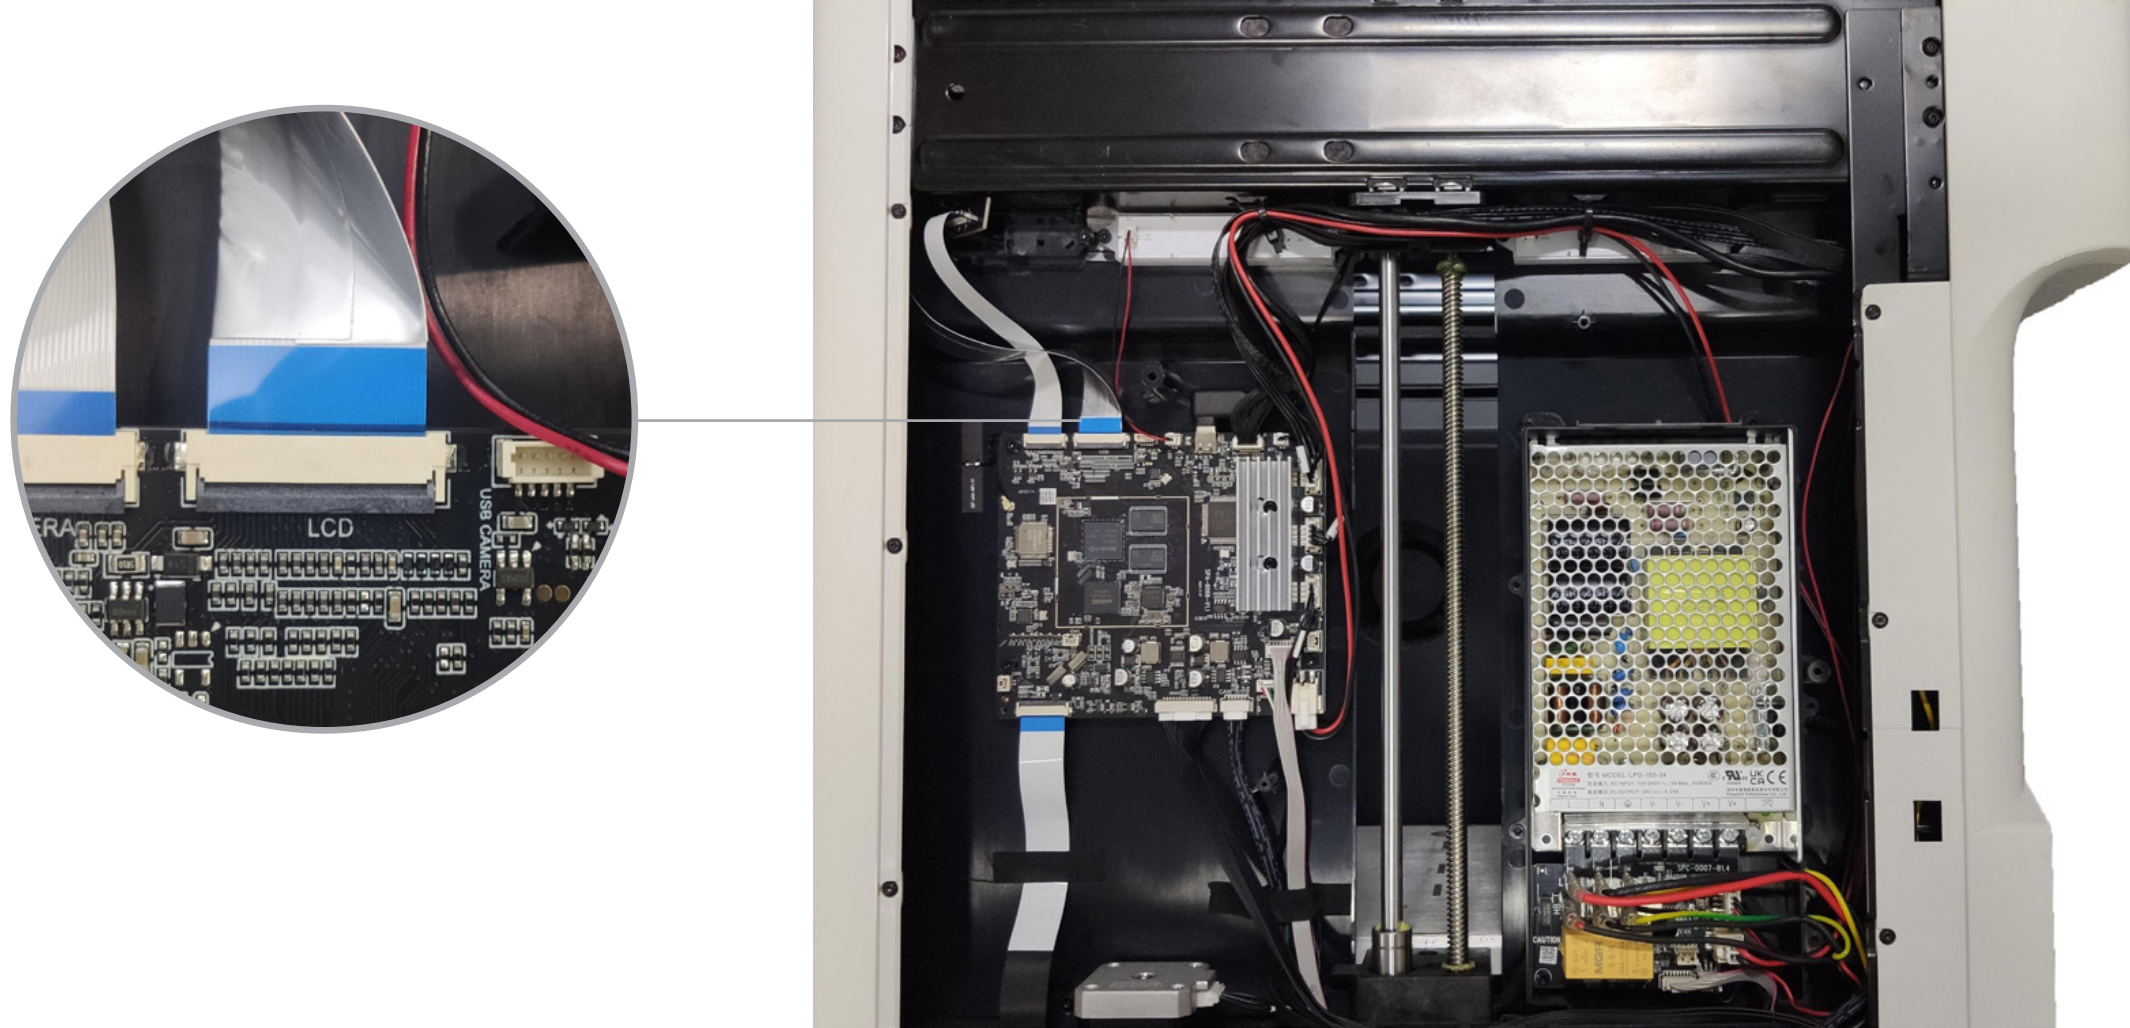
(4)Inspect the touchscreen FFC cable for creases, breaks, or loose connections.
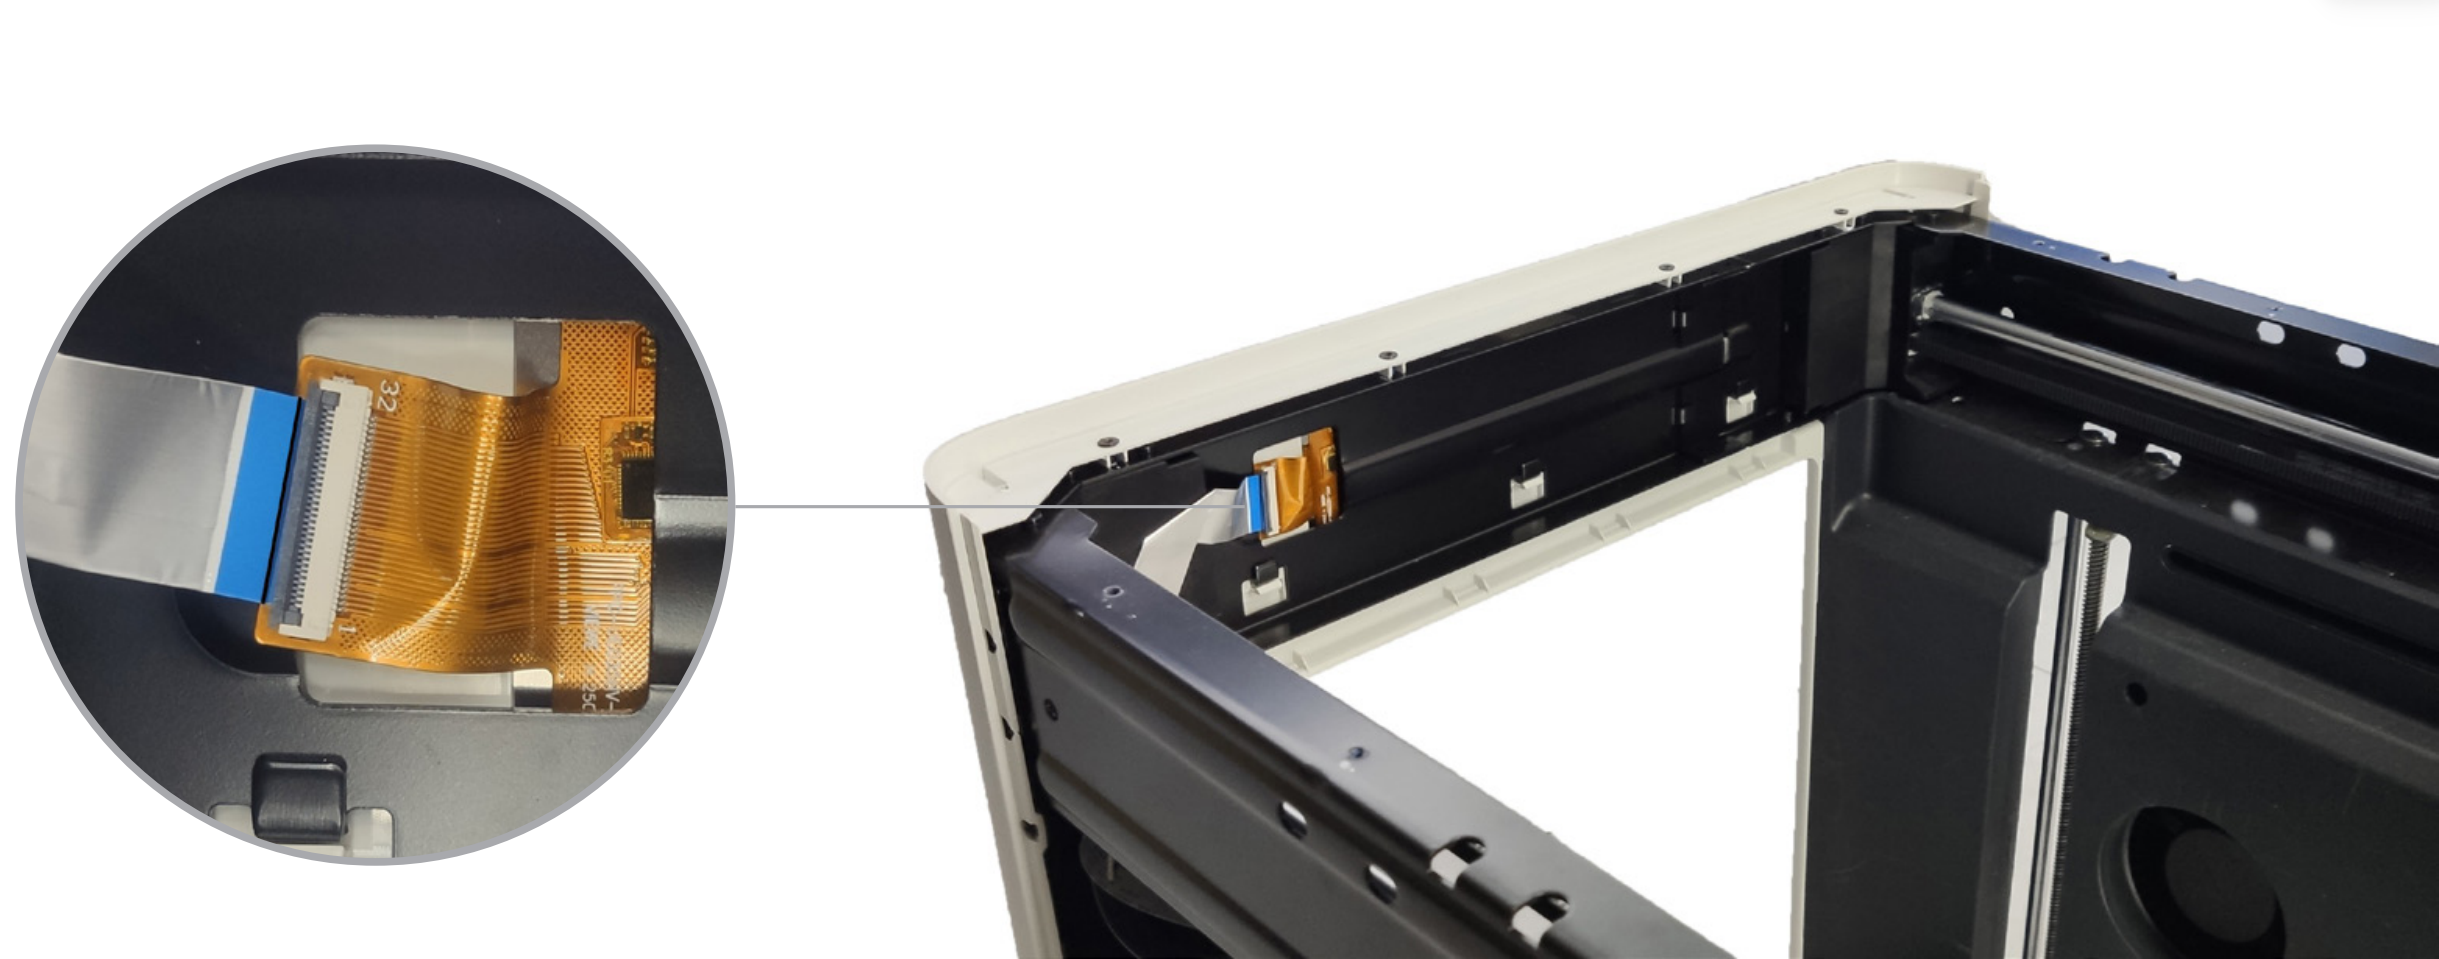
▶ If the FFC cable is damaged, troubleshooting ends. Replace the cable.
▶ If the FFC cable is not damaged, proceed to the following steps.
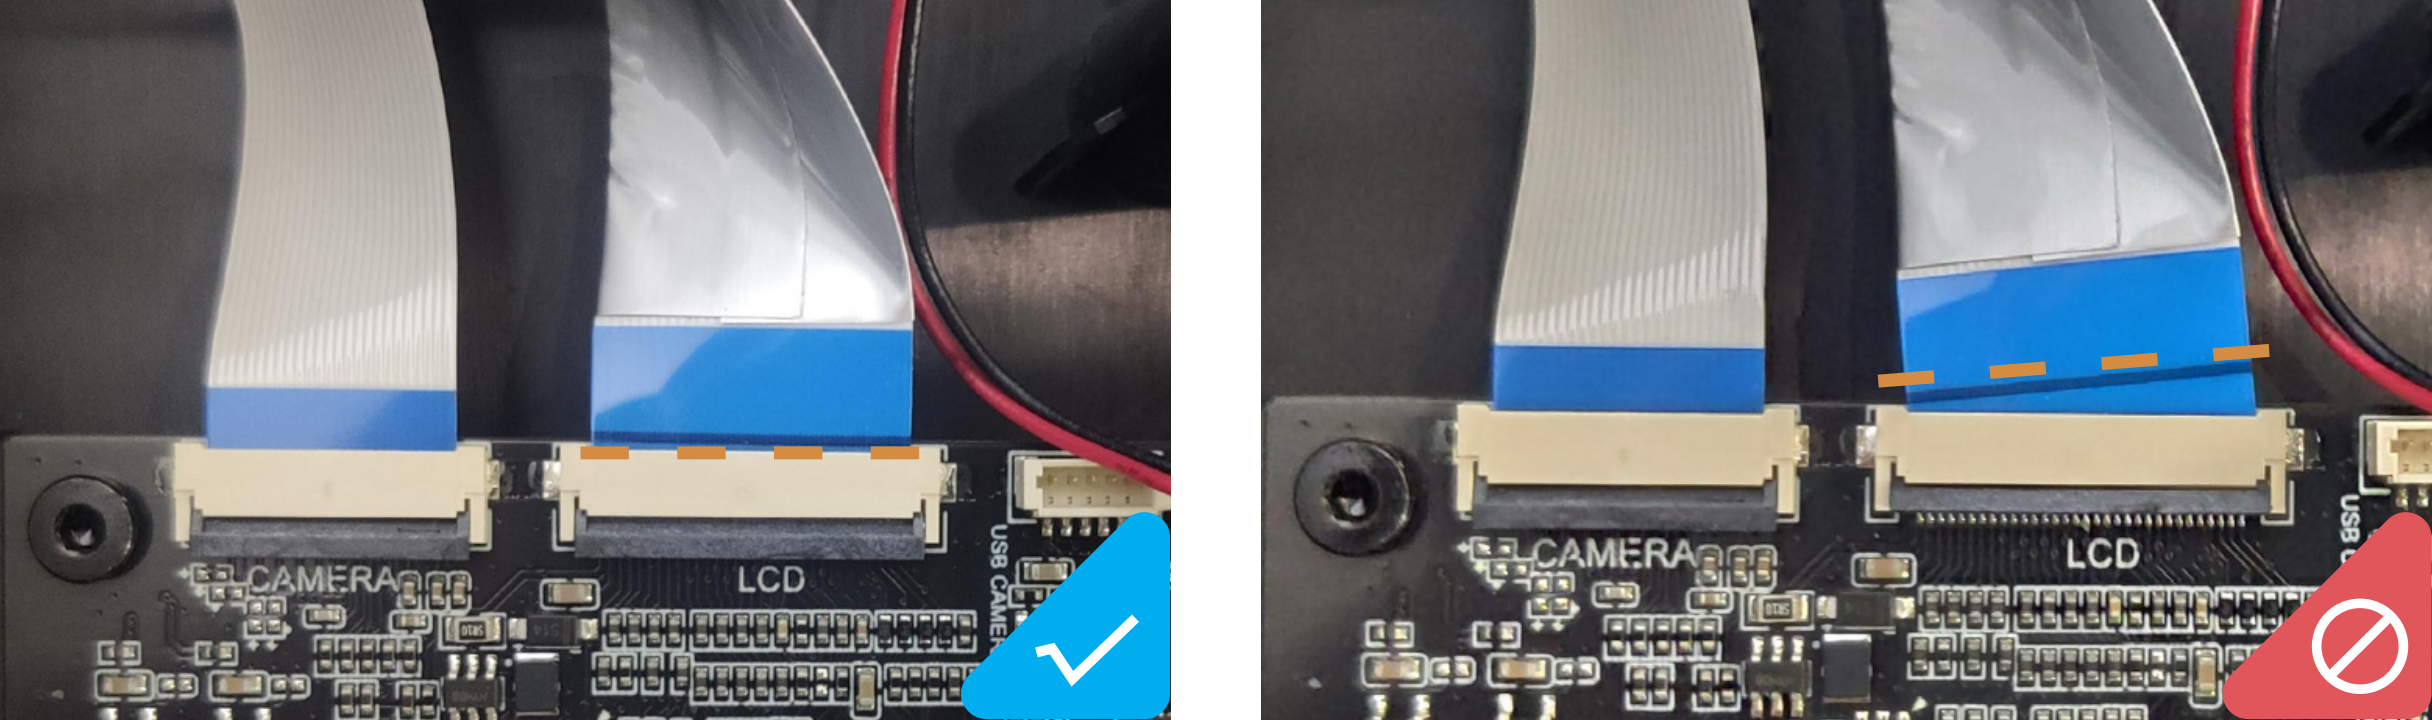
(5)Reconnect the FFC cable, ensuring a secure and straight connection, then restart the machine.
▶ If the issue is resolved, the cause is a loose FFC cable connection. Troubleshooting ends.
▶ If the issue persists, proceed to the following steps.
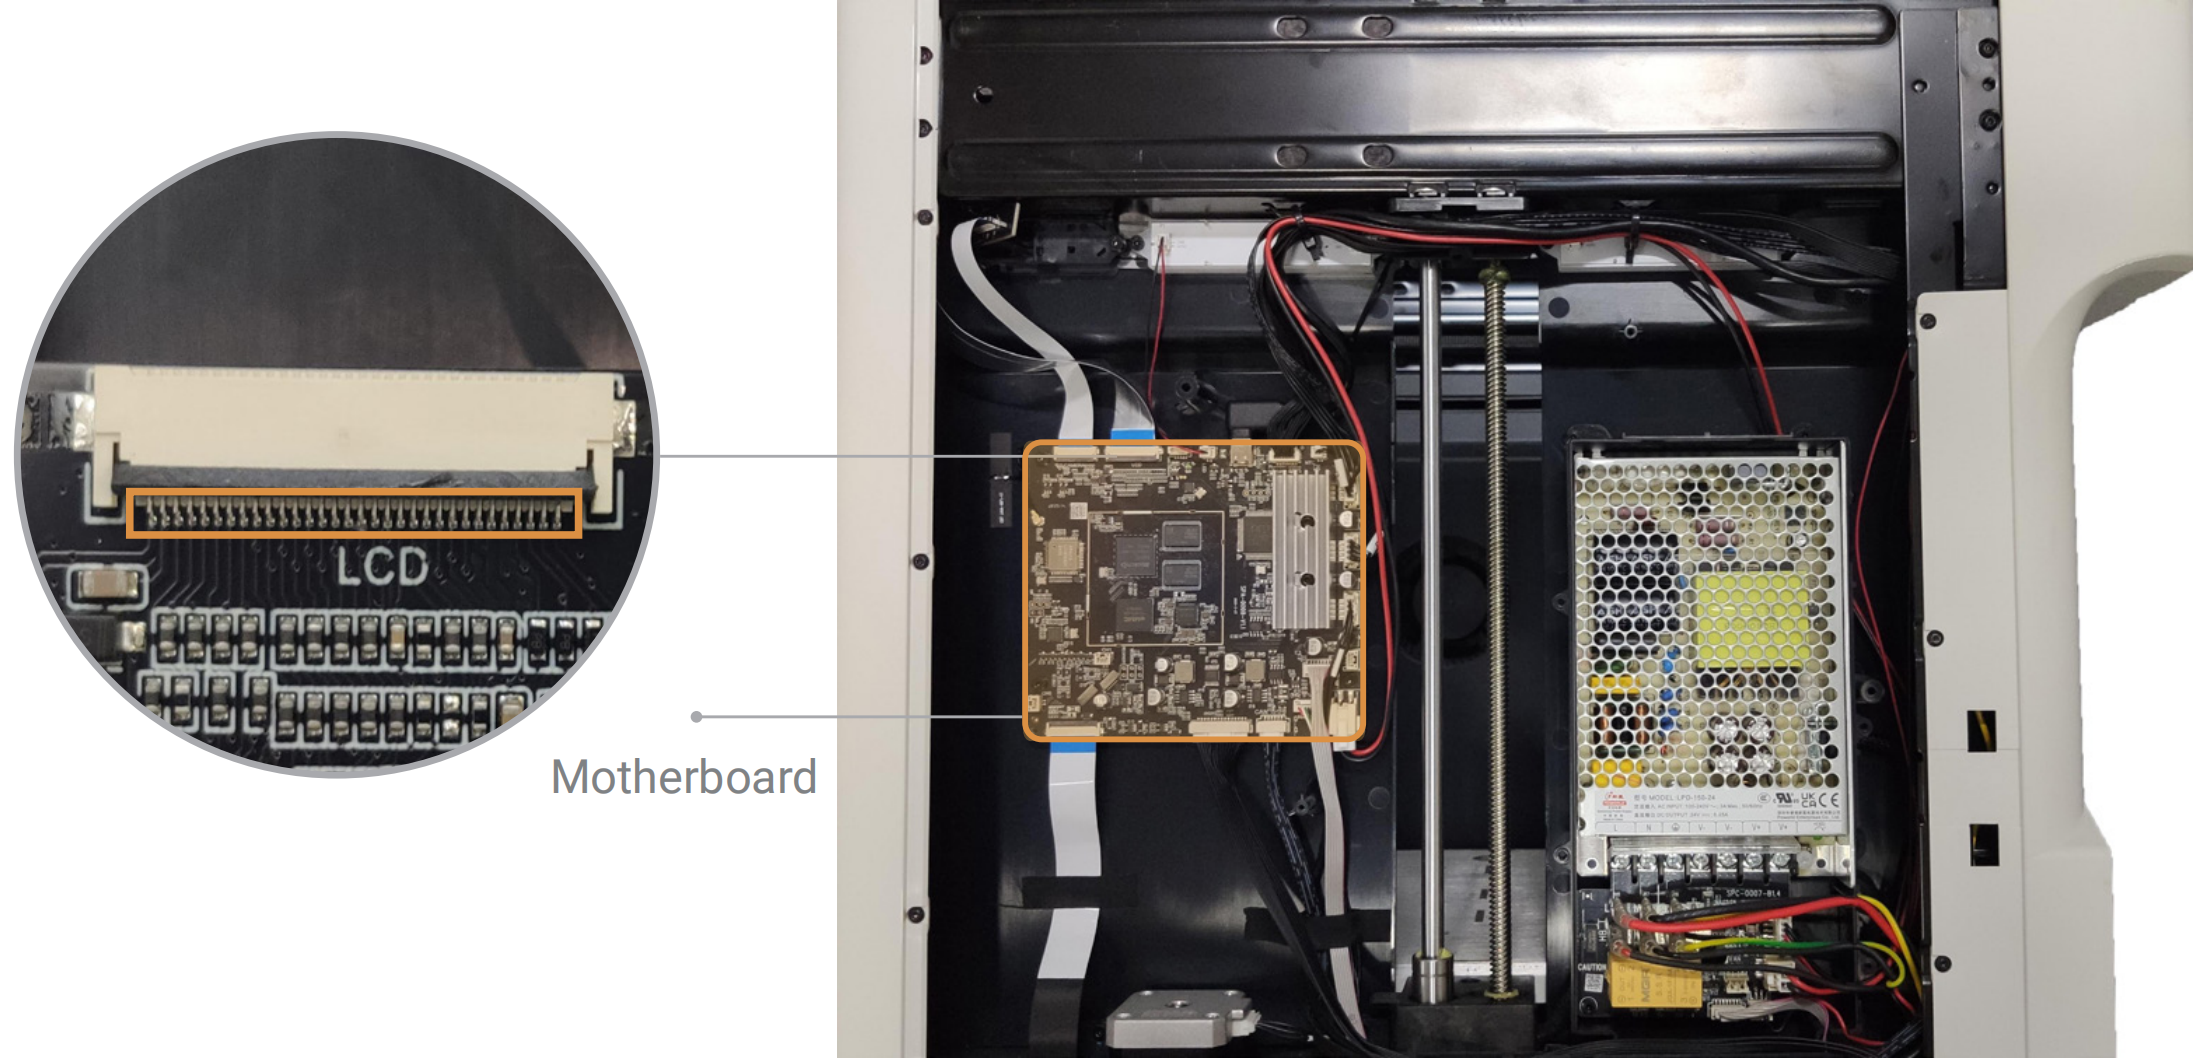
(6)Inspect the metal contacts on the touchscreen interface connector on the motherboard for oxidation, bending, or breakage.
▶ If the motherboard is damaged, troubleshooting ends. Replace the motherboard.
▶ If the motherboard is not damaged, proceed to the following steps.
(7)Power off the machine.
(8)Refer to the U1 Touchscreen Replacement Guide to replace the touchscreen.
▶ If the issue is resolved after restarting the machine, the cause is a faulty touchscreen. Troubleshooting ends.
▶ If the issue persists after restarting the machine, contact Technical Support for further assistance.
¶ ✅ Verification
If the touchscreen functions normally during both startup and printer operation, you have identified the root cause and successfully resolved the issue.
¶ 📚 Related Resources
¶ 💬 Reach out to Snapmaker Support
After following the troubleshooting steps, if you find it difficult to resolve your issue, kindly submit a support ticket through https://snapmaker.formcrafts.com/u1-troubleshooting-request and share your troubleshooting results with pictures or videos. Our dedicated support team will be more than willing to assist you in resolving the issue.