¶ Issue Description
The screen displays an error similar to the one below. The 12th digit of the error code indicates where the fault occurred; 0, 1, 2, and 3 correspond to Toolhead 1, 2, 3, and 4 respectively.
This error indicates that the feeder has detected that the filament is stuck and can no longer be fed, and the machine will pause the print.
The first time you encounter it, you can dismiss the error and tap resume print. If the error occurs frequently, refer to this article to troubleshoot the issue.
¶ Possible Causes
-
Filament tangled / knotted
-
Air printing detection sensitivity set too high
-
Filament guide tube blocked
-
Odometer wheel in the feeder slipping
¶ Troubleshooting Steps
¶ 1. Check whether the filament is tangled
If the filament is tangled, cut it at the feeder inlet, remove the spool, and untangle the filament.
To resume printing, refer to the U1 Cold Pull Guide to pull out any filament remaining in the toolhead, then load the spool again and click Resume Print.
¶ 2. Lower the air printing detection sensitivity
Go to Settings — Print Preferences and set the air printing detection sensitivity to Low.
¶ 3. Check the filament tube for blockage
Visually inspect the guide tube to see whether two strands of filament are visible at any point. If so, the filament has broken inside the guide tube and is obstructing feeding.
Refer to U1 How to Clear Broken Filament from the Guide Tube to resolve the issue.
¶ 4. Check whether the odometer wheel is slipping
4.1 Odometer wheel location
Refer to U1 Video Guide: Auto Loading Failure Troubleshooting 10:15—11:11 to disassemble the feeder. The odometer wheel is located as shown below:
The spring and magnet here are easy to lose. We recommend removing them and setting them aside first.
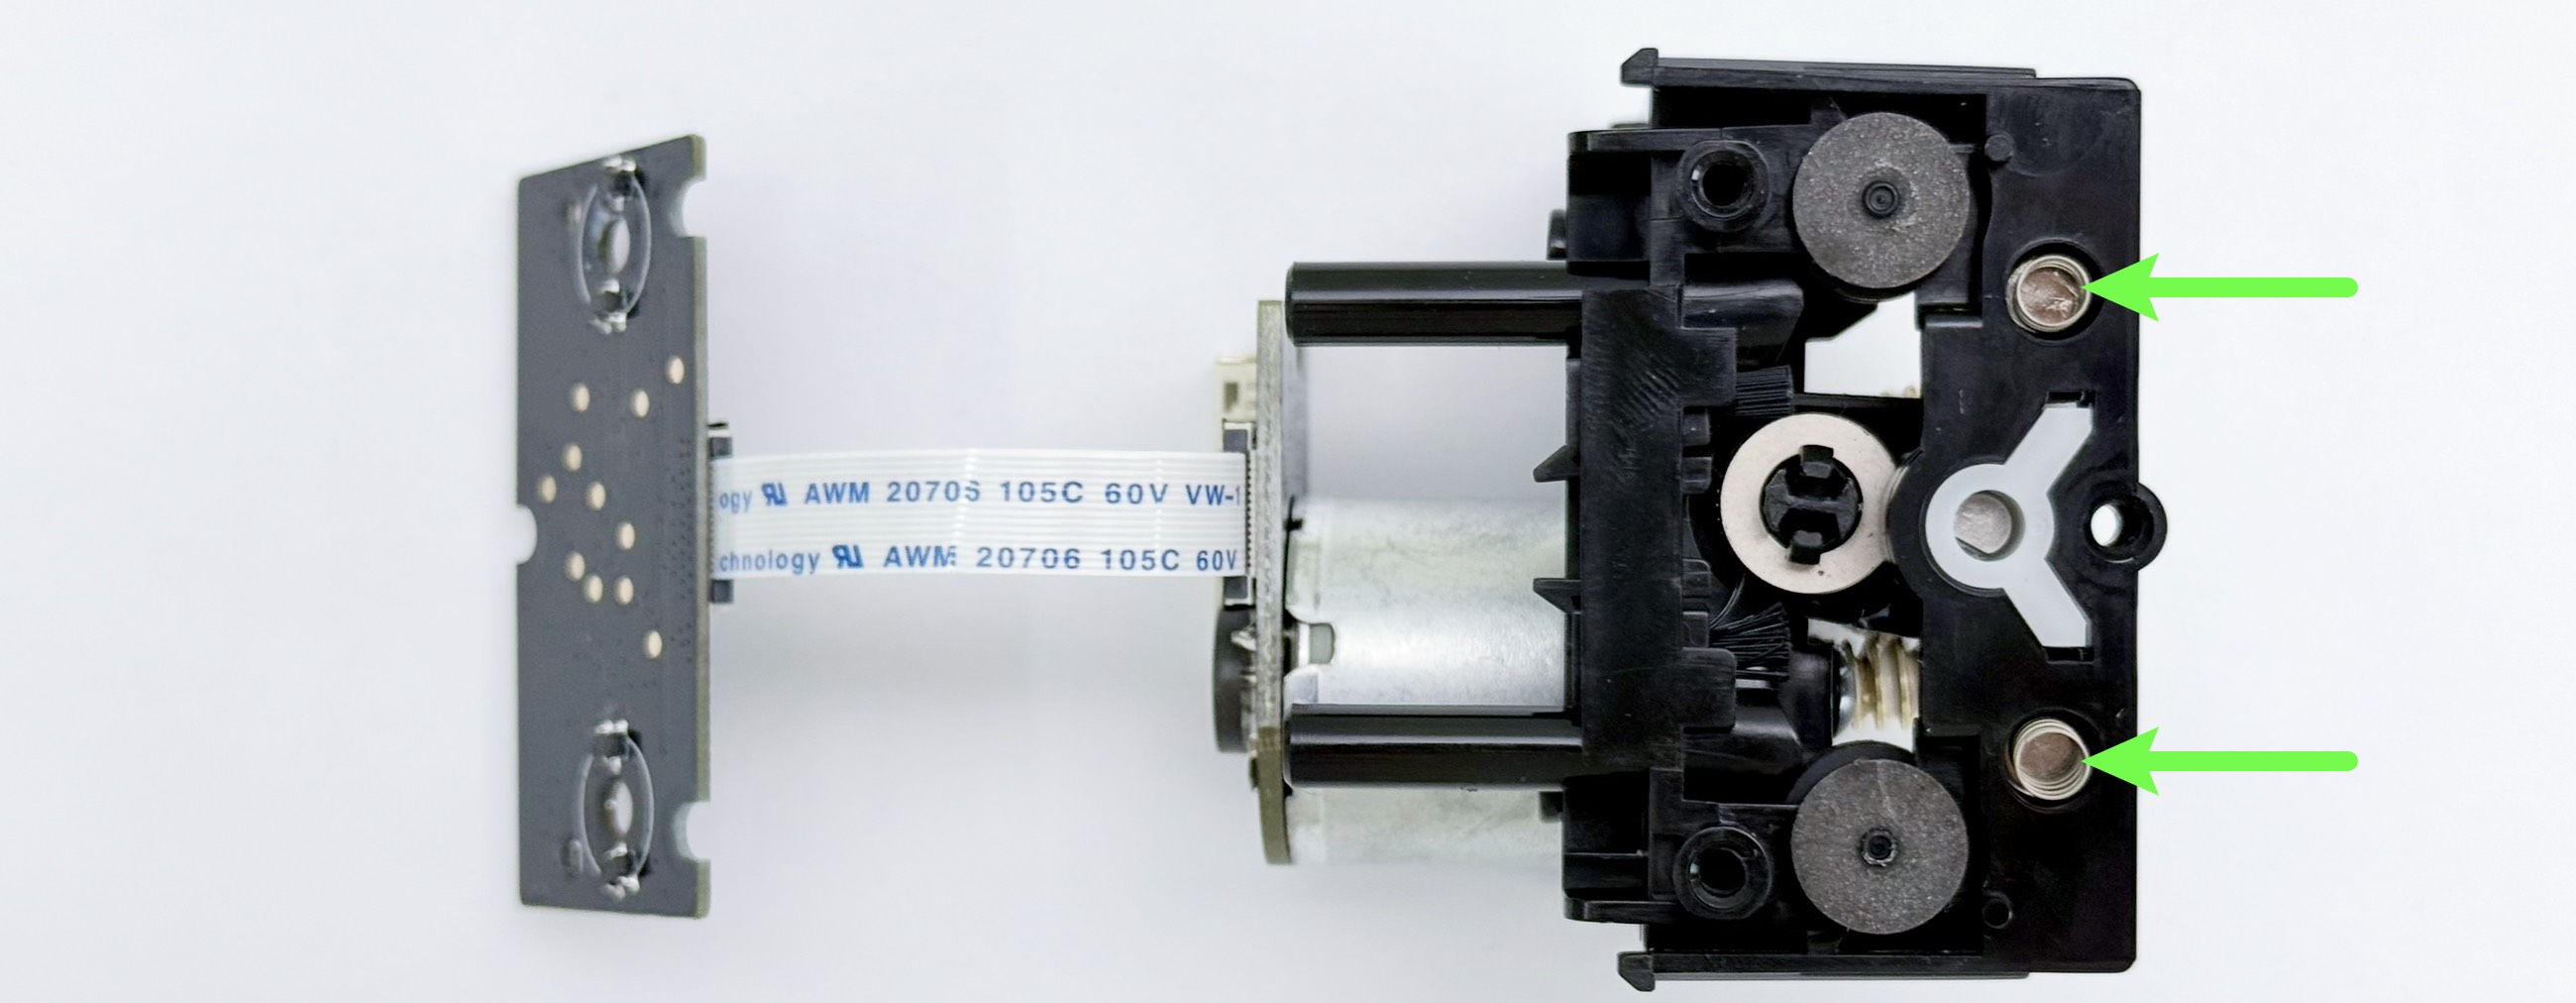
Before checking the odometer wheel, you need to identify which wheel corresponds to the error code. For example, 0002-0523-0000-0038 points to Toolhead 1, i.e. feeding channel 1, which corresponds to the upper odometer wheel in the image.
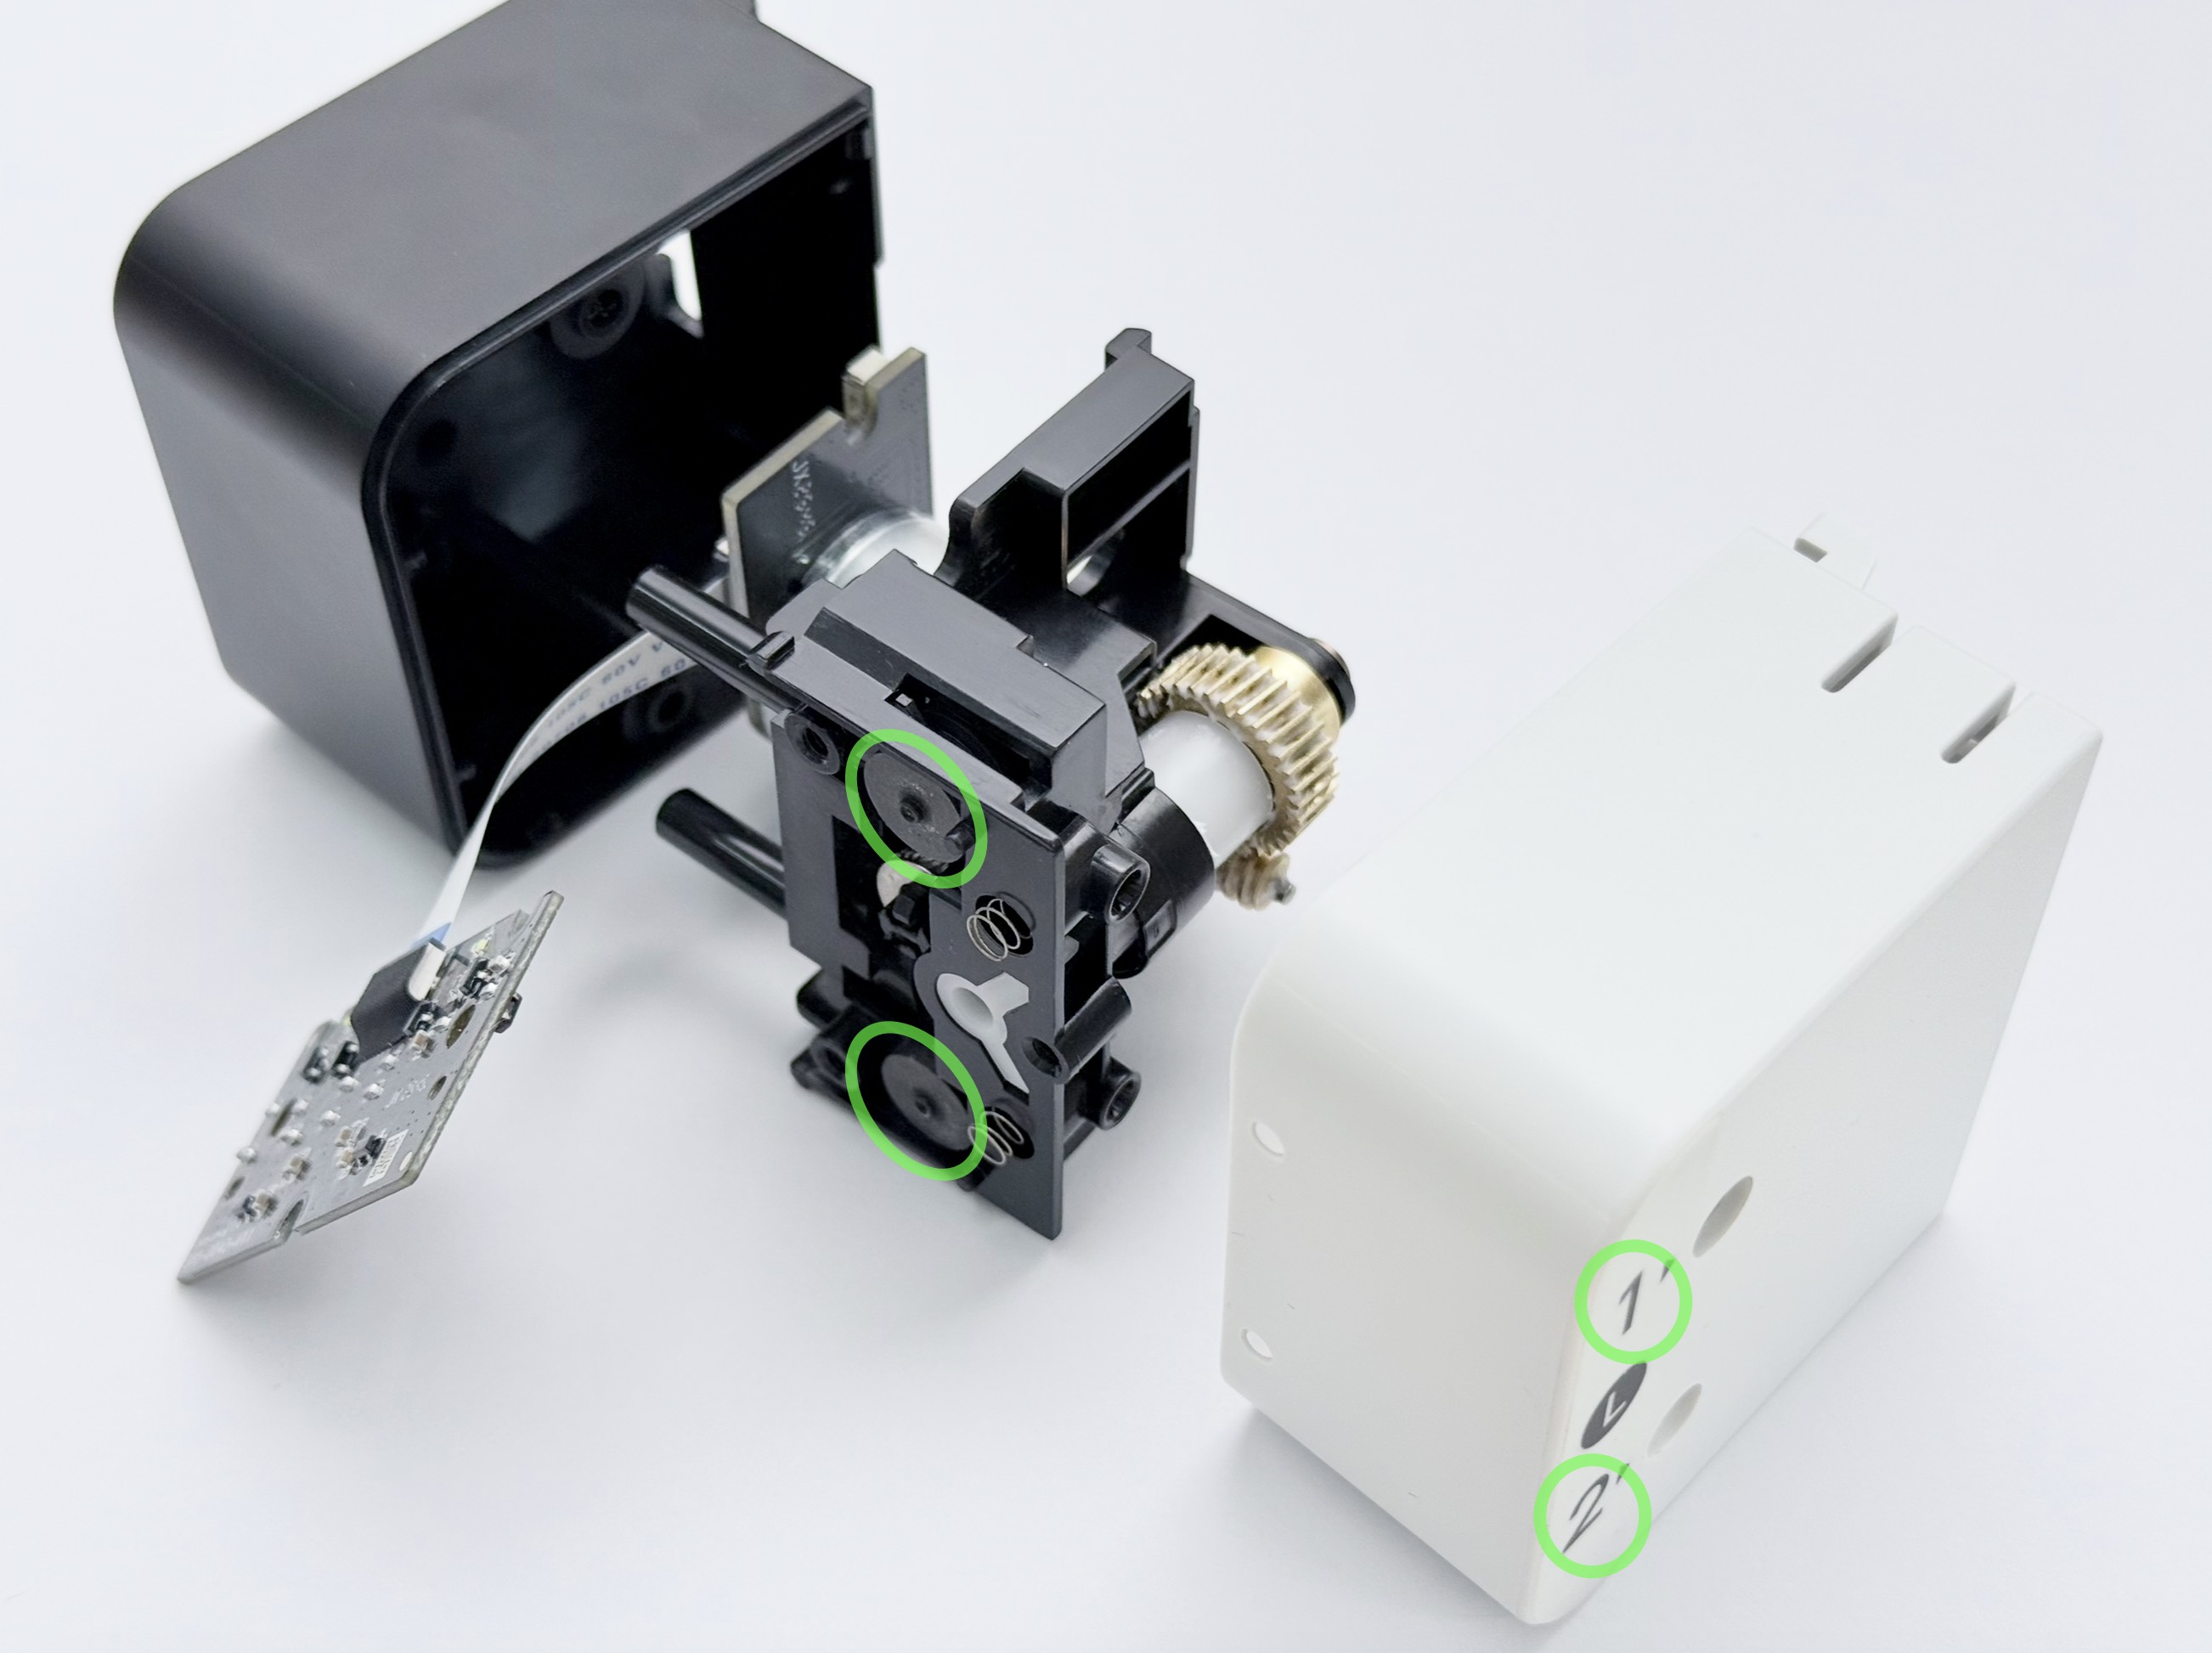
4.2 How the odometer wheel works
(1) After the filament enters the feeder, it rubs against the rubber section at the bottom of the odometer wheel, driving the wheel to rotate.
(2) The PCB above the odometer wheel senses how much the wheel has rotated.
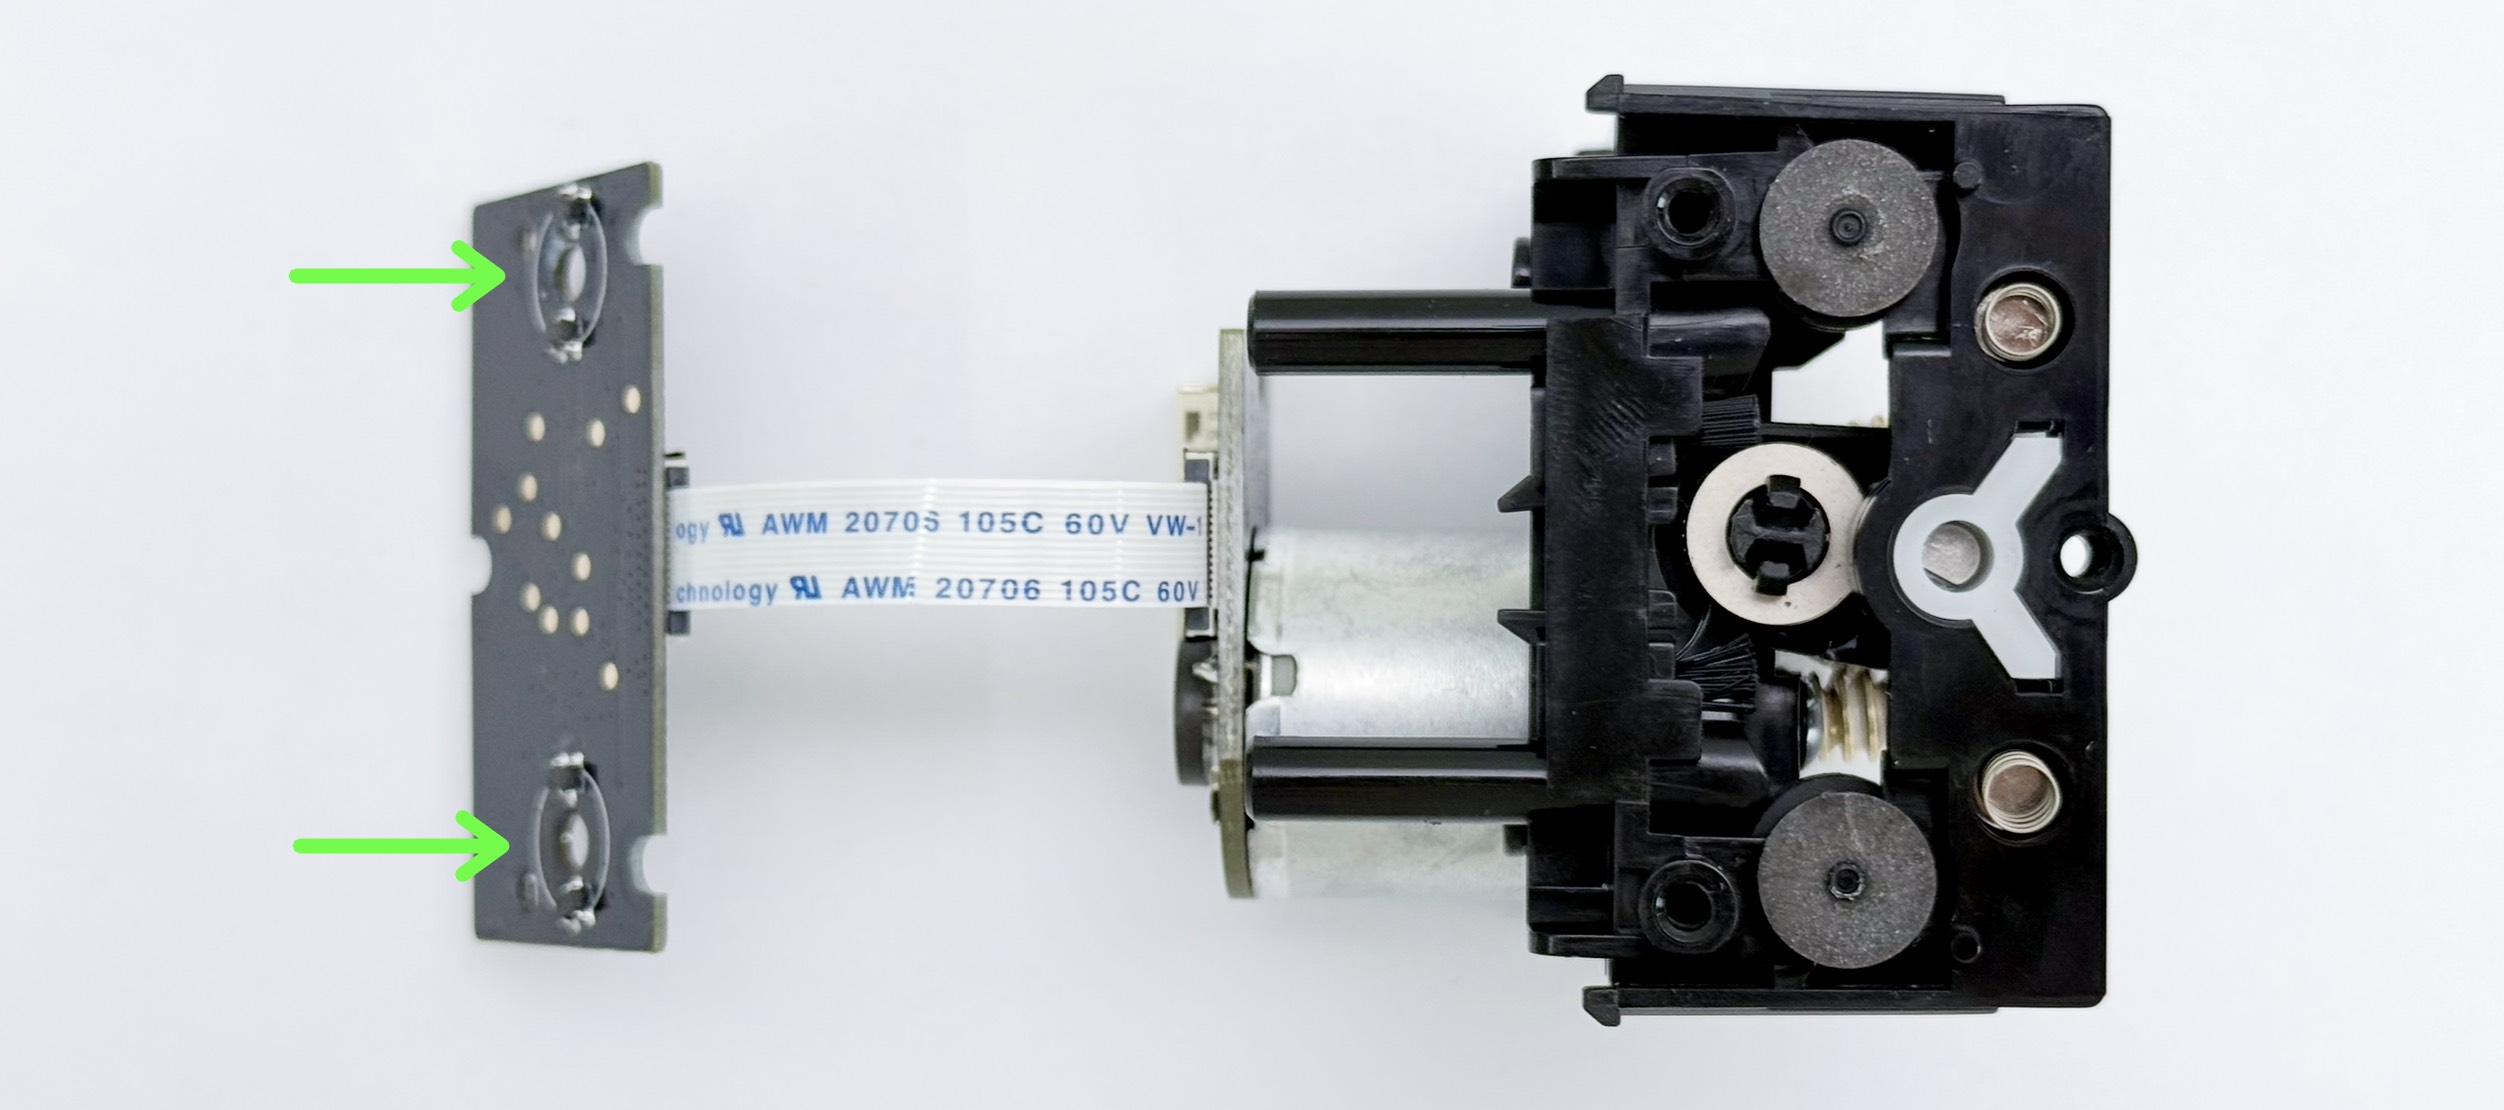
(3) The machine compares the extrusion length specified in the G-code with the amount the odometer wheel has rotated to determine whether the filament is tangled or knotted.
4.3 How to confirm whether the odometer wheel is slipping
Odometer wheel slipping refers to the situation where the filament passes through without driving the wheel to rotate.
(1) Take a piece of rigid filament about 20 cm long. The filament naturally curves; point the curve toward the odometer wheel you want to test — for example, the upper odometer wheel in the image.
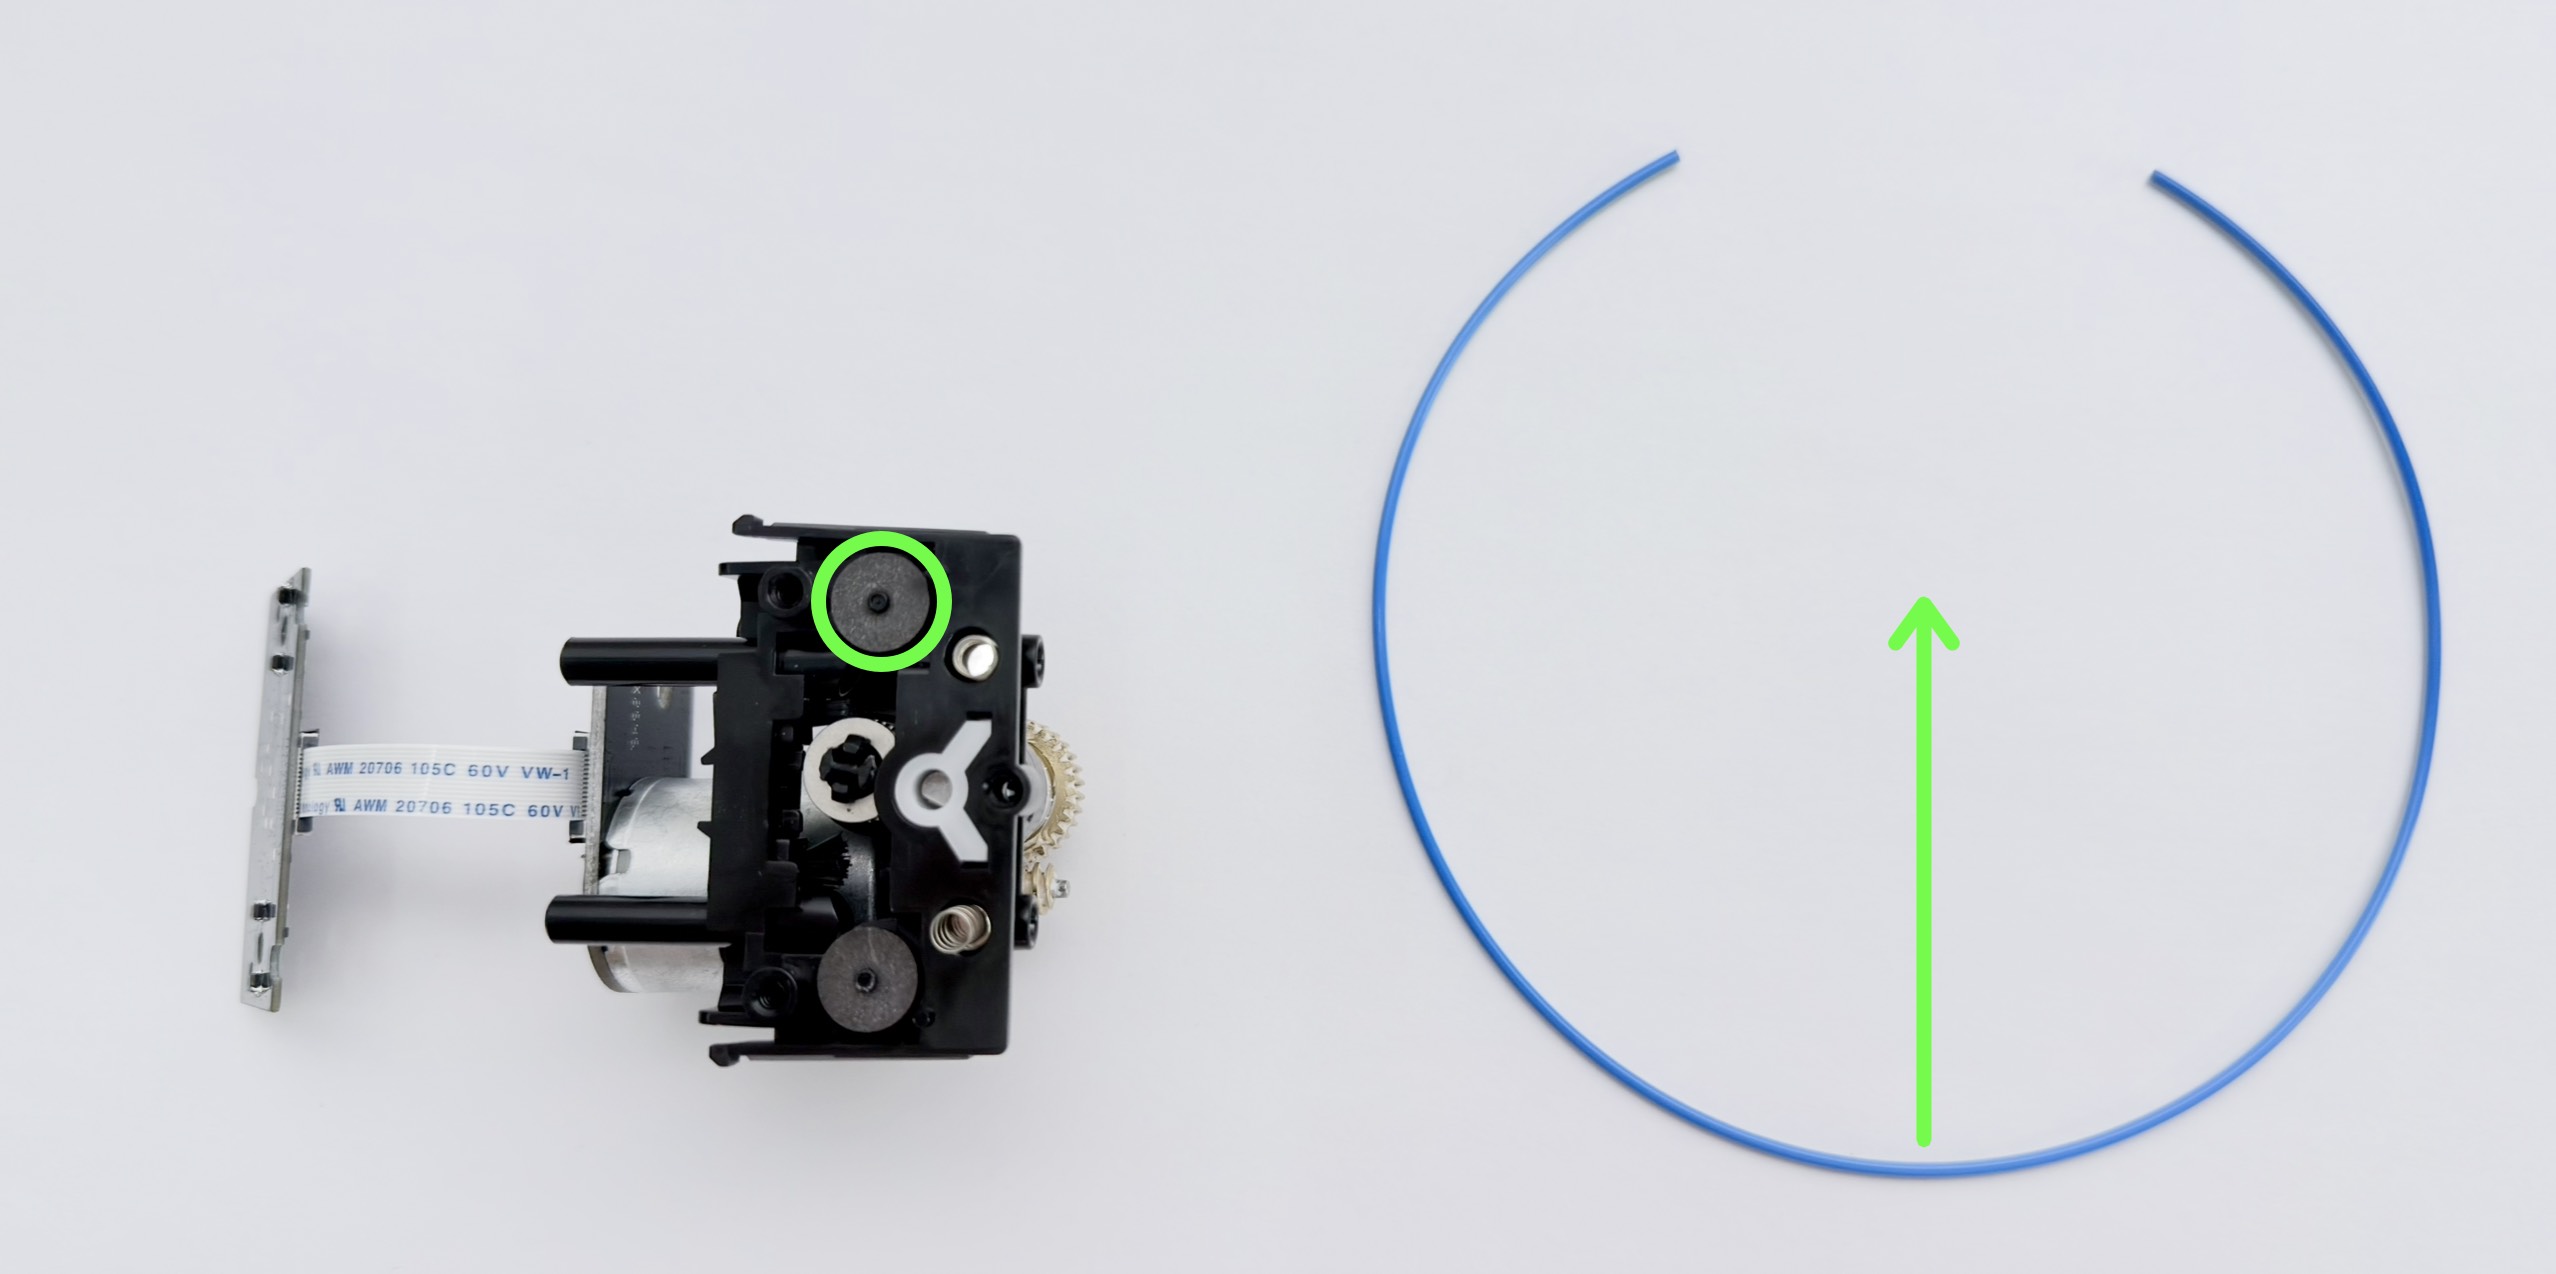
(2) Insert the filament into the inlet and pull it out from the outlet.
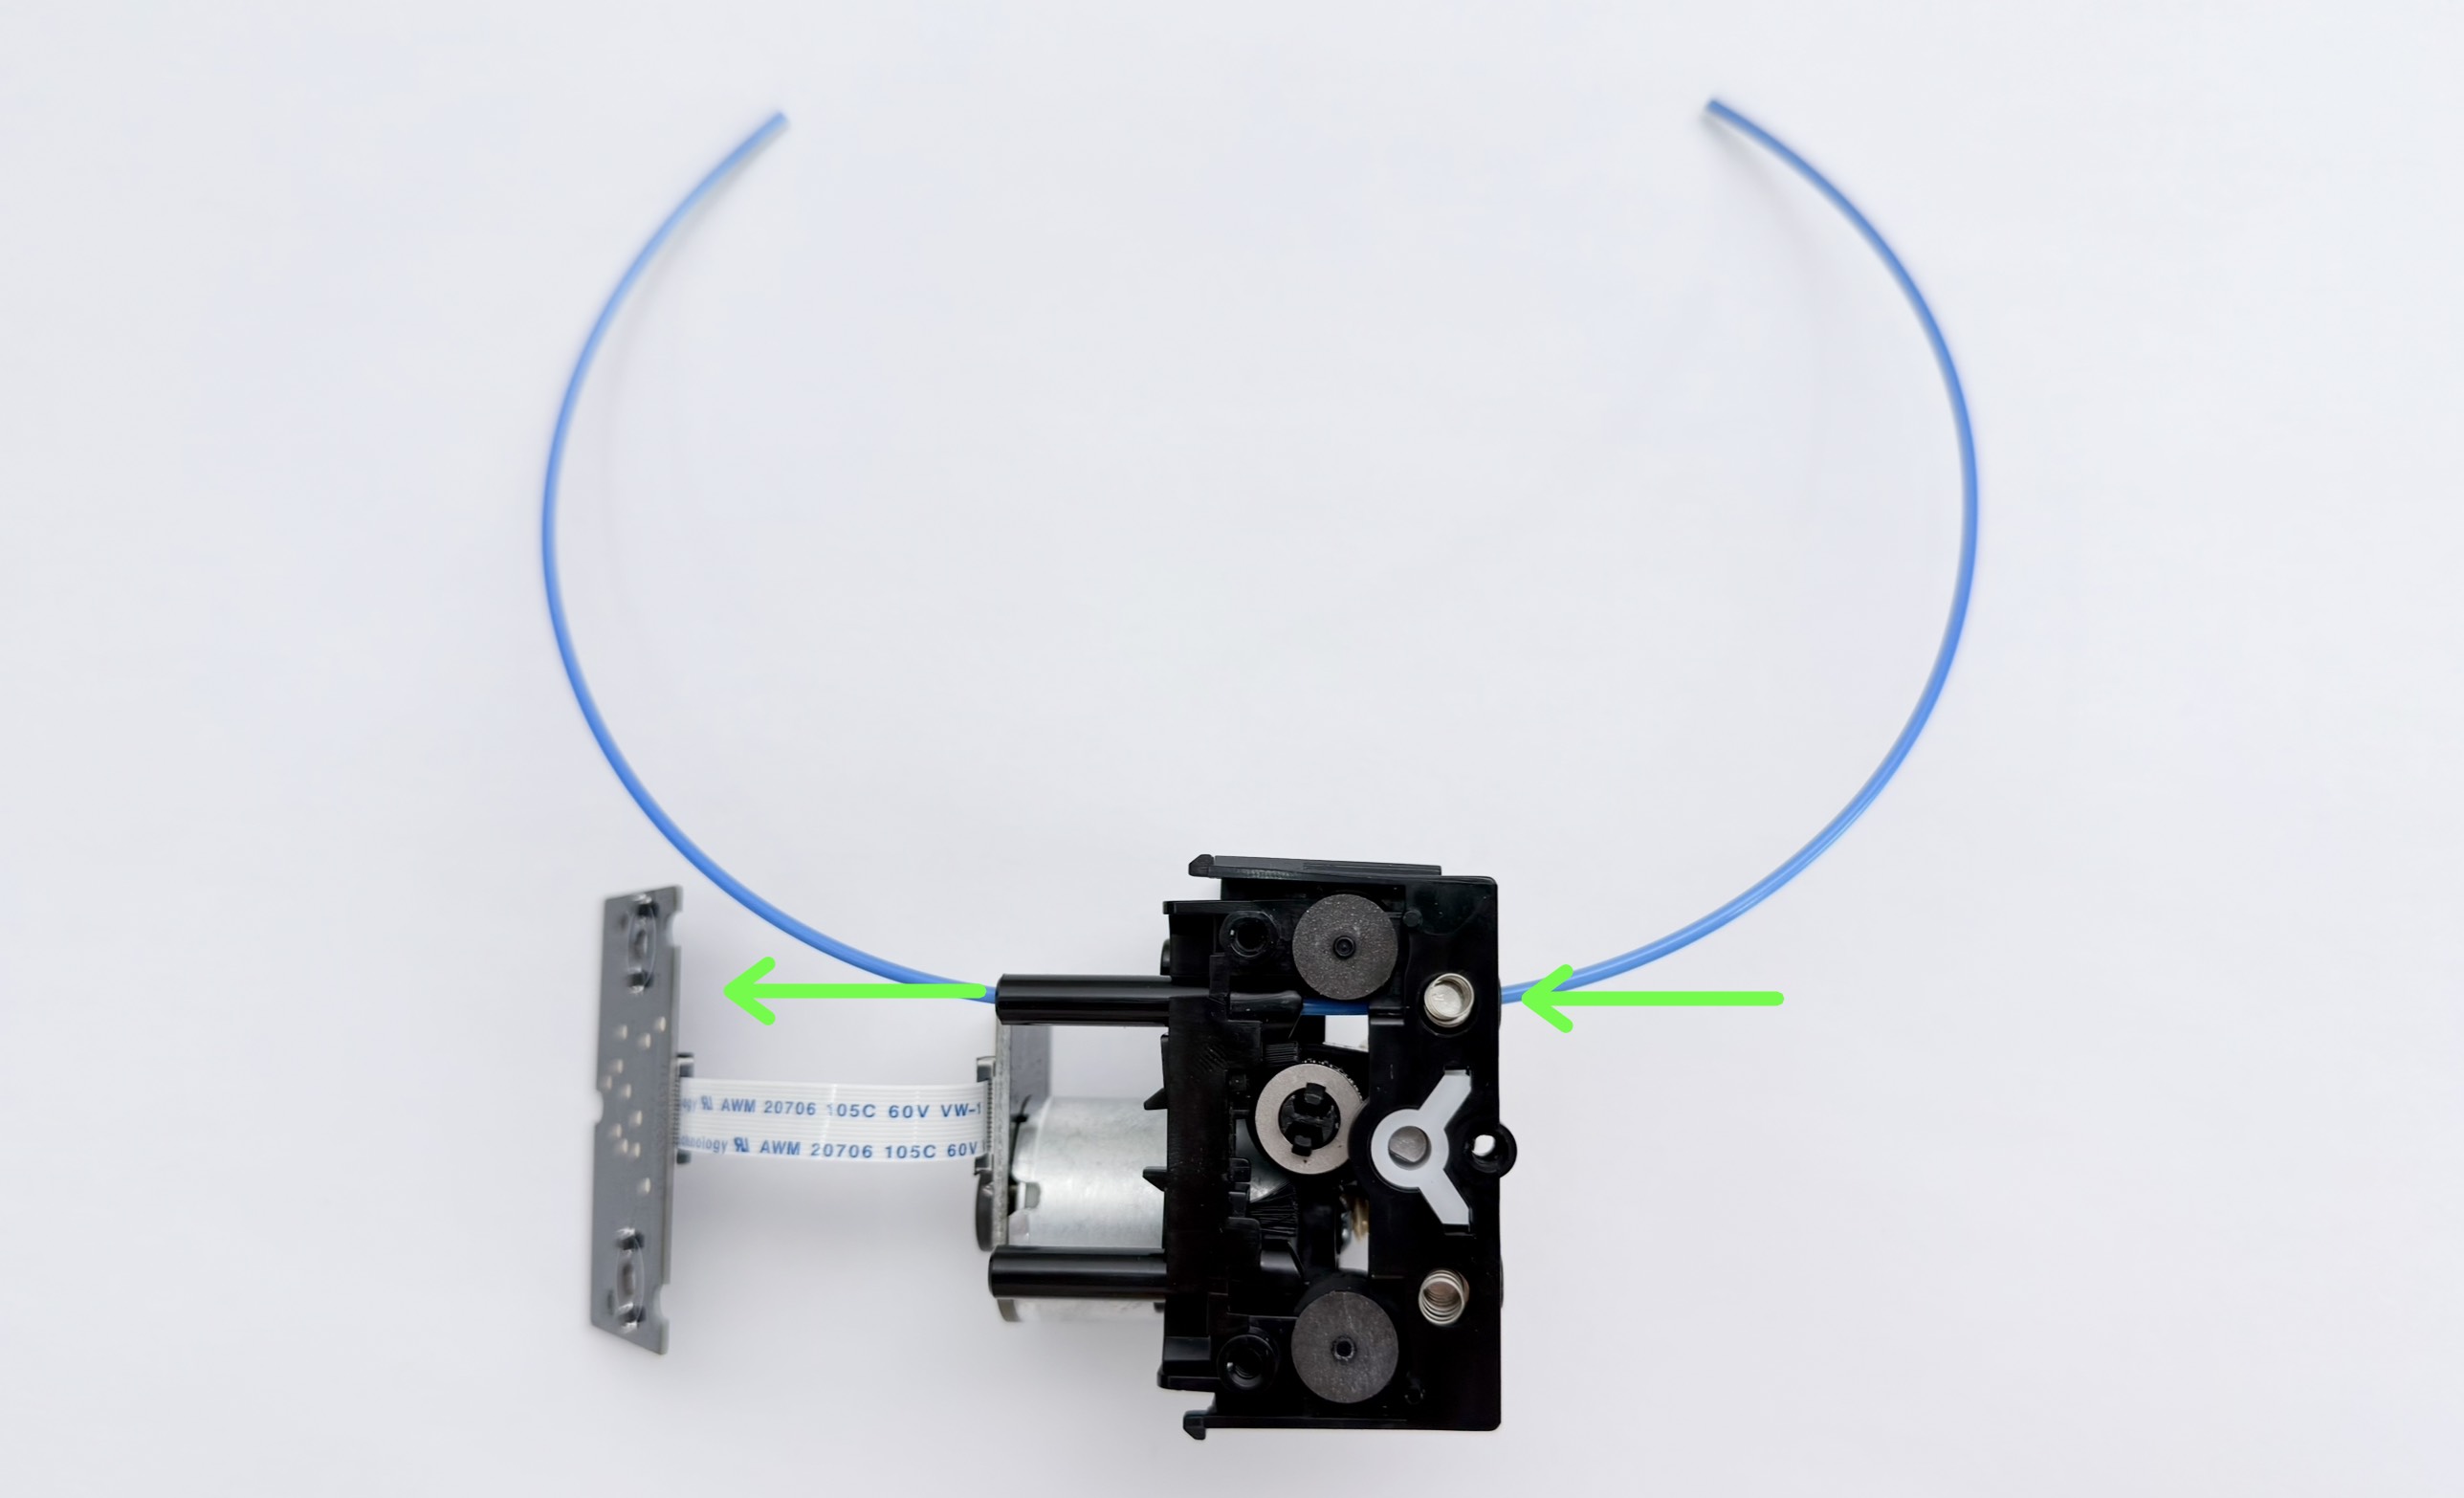
(3) Under normal conditions, the odometer wheel should rotate in sync as the filament passes through the feeder. Little or no rotation indicates slipping.
4.4 Solution for a slipping odometer wheel
(1) Use an H2.0 hex key to remove the 2 screws and take off the filament guide bracket.
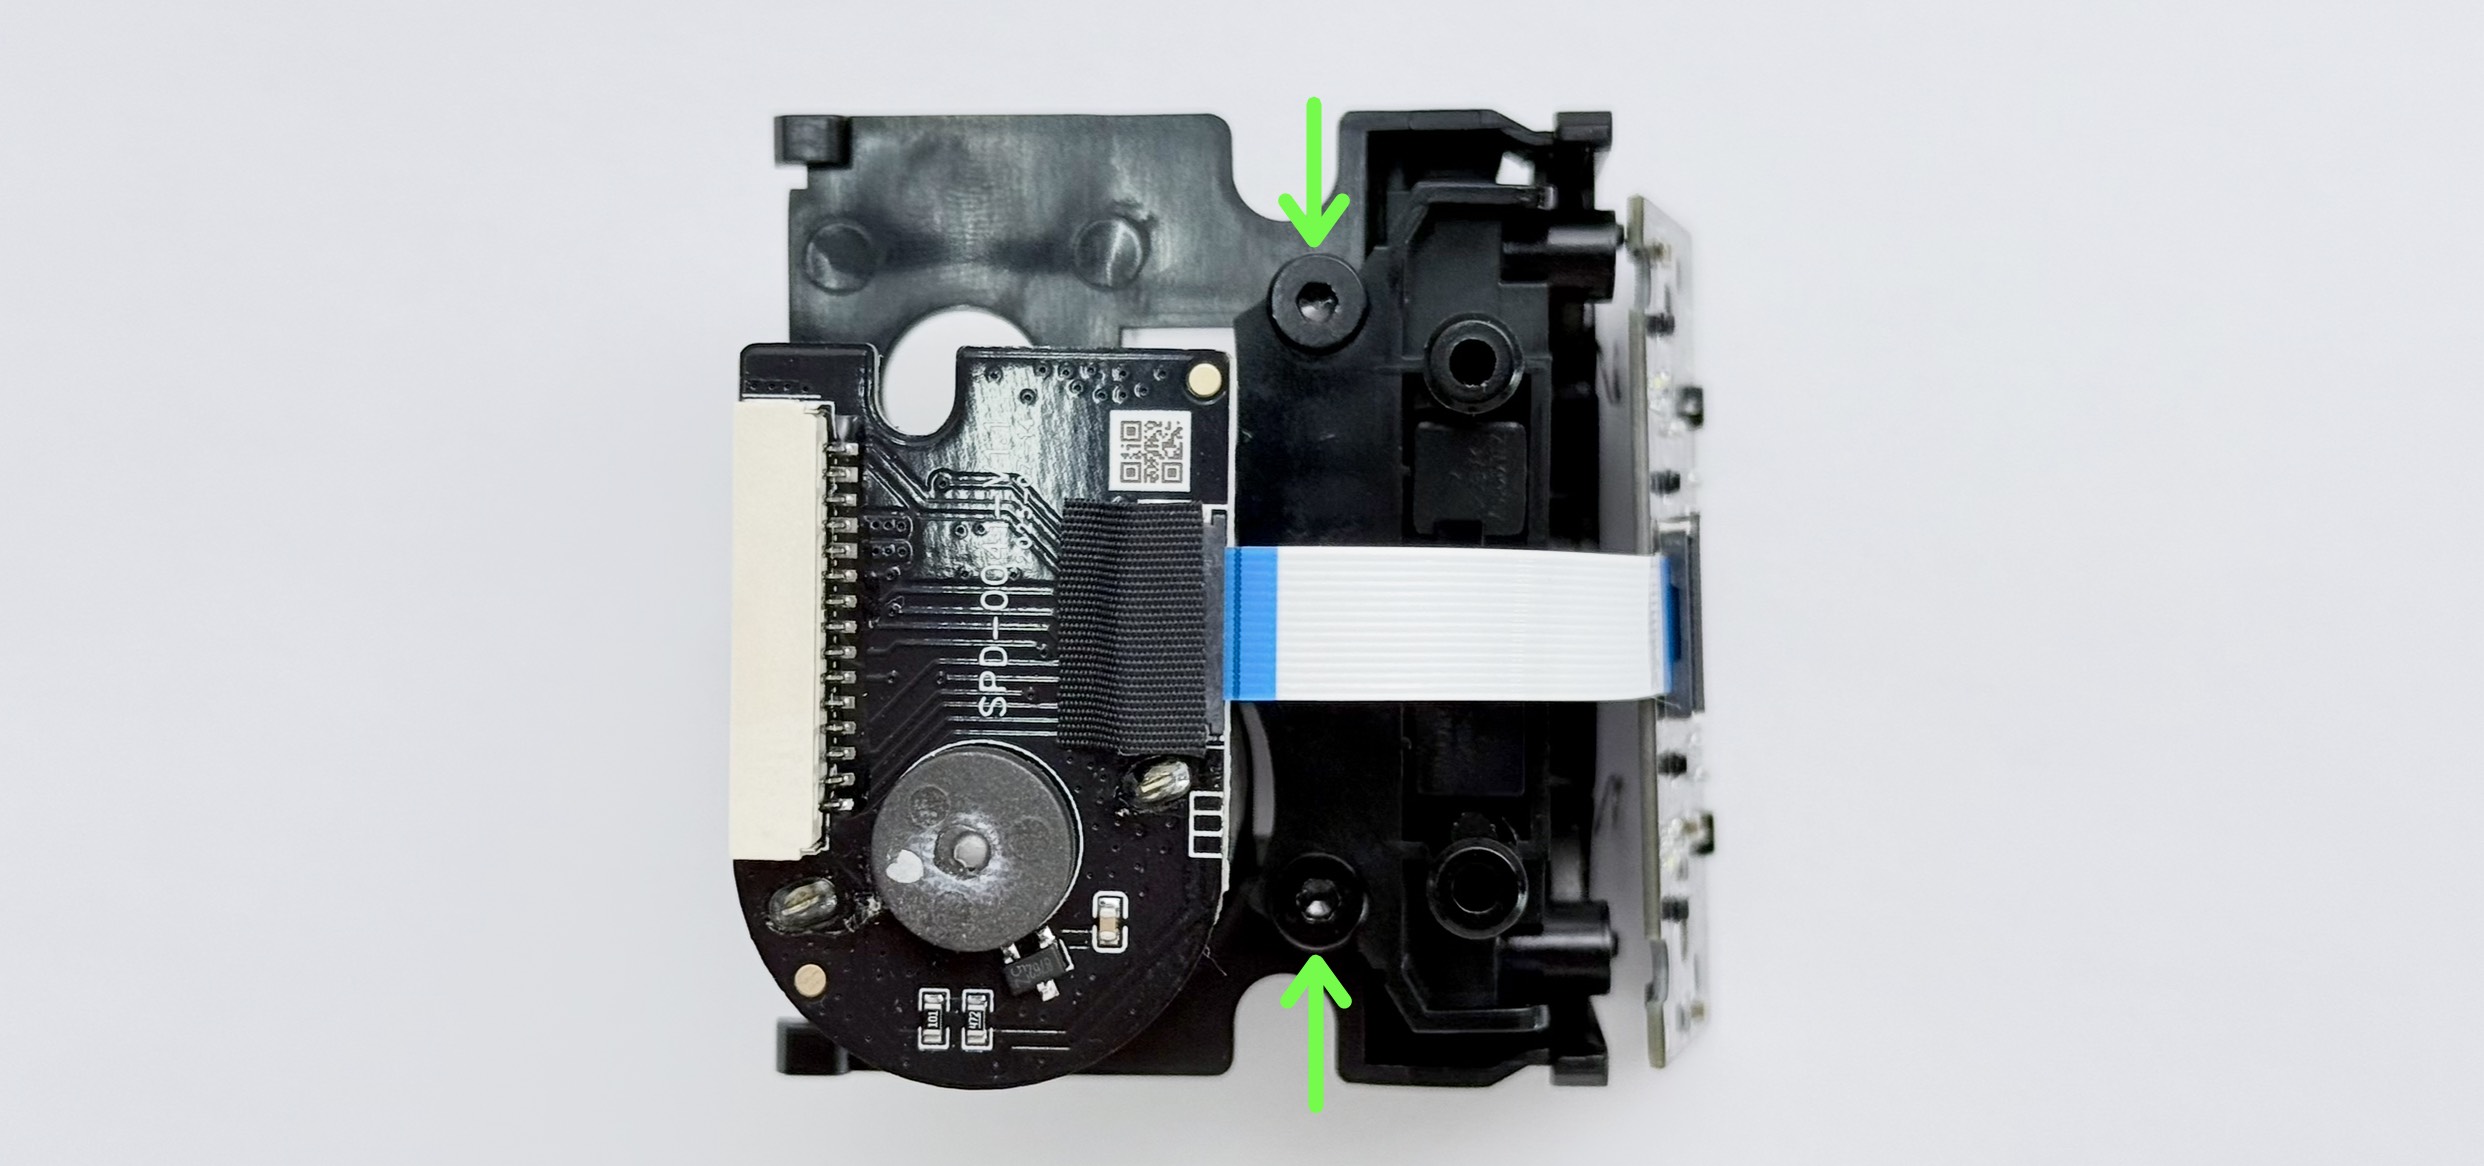
(2) There is some play at both ends of the guide bracket, so you can shift the bracket closer to the slipping odometer wheel to reduce the risk of slipping, then tighten the screws.
Refer to U1 Video Guide: Auto Loading Failure Troubleshooting 11:25—12:13 to reassemble the feeder.
¶ Endnote
If your issue remains unresolved, please contact technical support, our dedicated support team will be more than willing to assist you in resolving the issue.
If you have any suggestions or feedback about this wiki, feel free to leave a comment below. Every piece of feedback helps us improve our documentation.