¶ Video Guide
In the previous TPU printing tutorial, we walked you through loading TPU on the Snapmaker U1, slicing with Snapmaker Orca, and completing your very first TPU print.
However, TPU is inherently more challenging to work with. As a result, many users still run into issues during printing. In this article, we’ll focus on the simplest and most reliable workflow for printing TPU, while also covering the most common problems and their solutions, helping you achieve consistently high‑quality TPU prints.
¶ Recommended TPU Printing Workflow
¶ Prepare the Filament
¶ 1. Use Snapmaker Official TPU Filaments
Snapmaker currently offers two TPU filaments: 95A and 90A.
- 95A HF: stiffer, supports higher print speeds, generally easier to work with
- 90A: softer and more elastic, more challenging to print
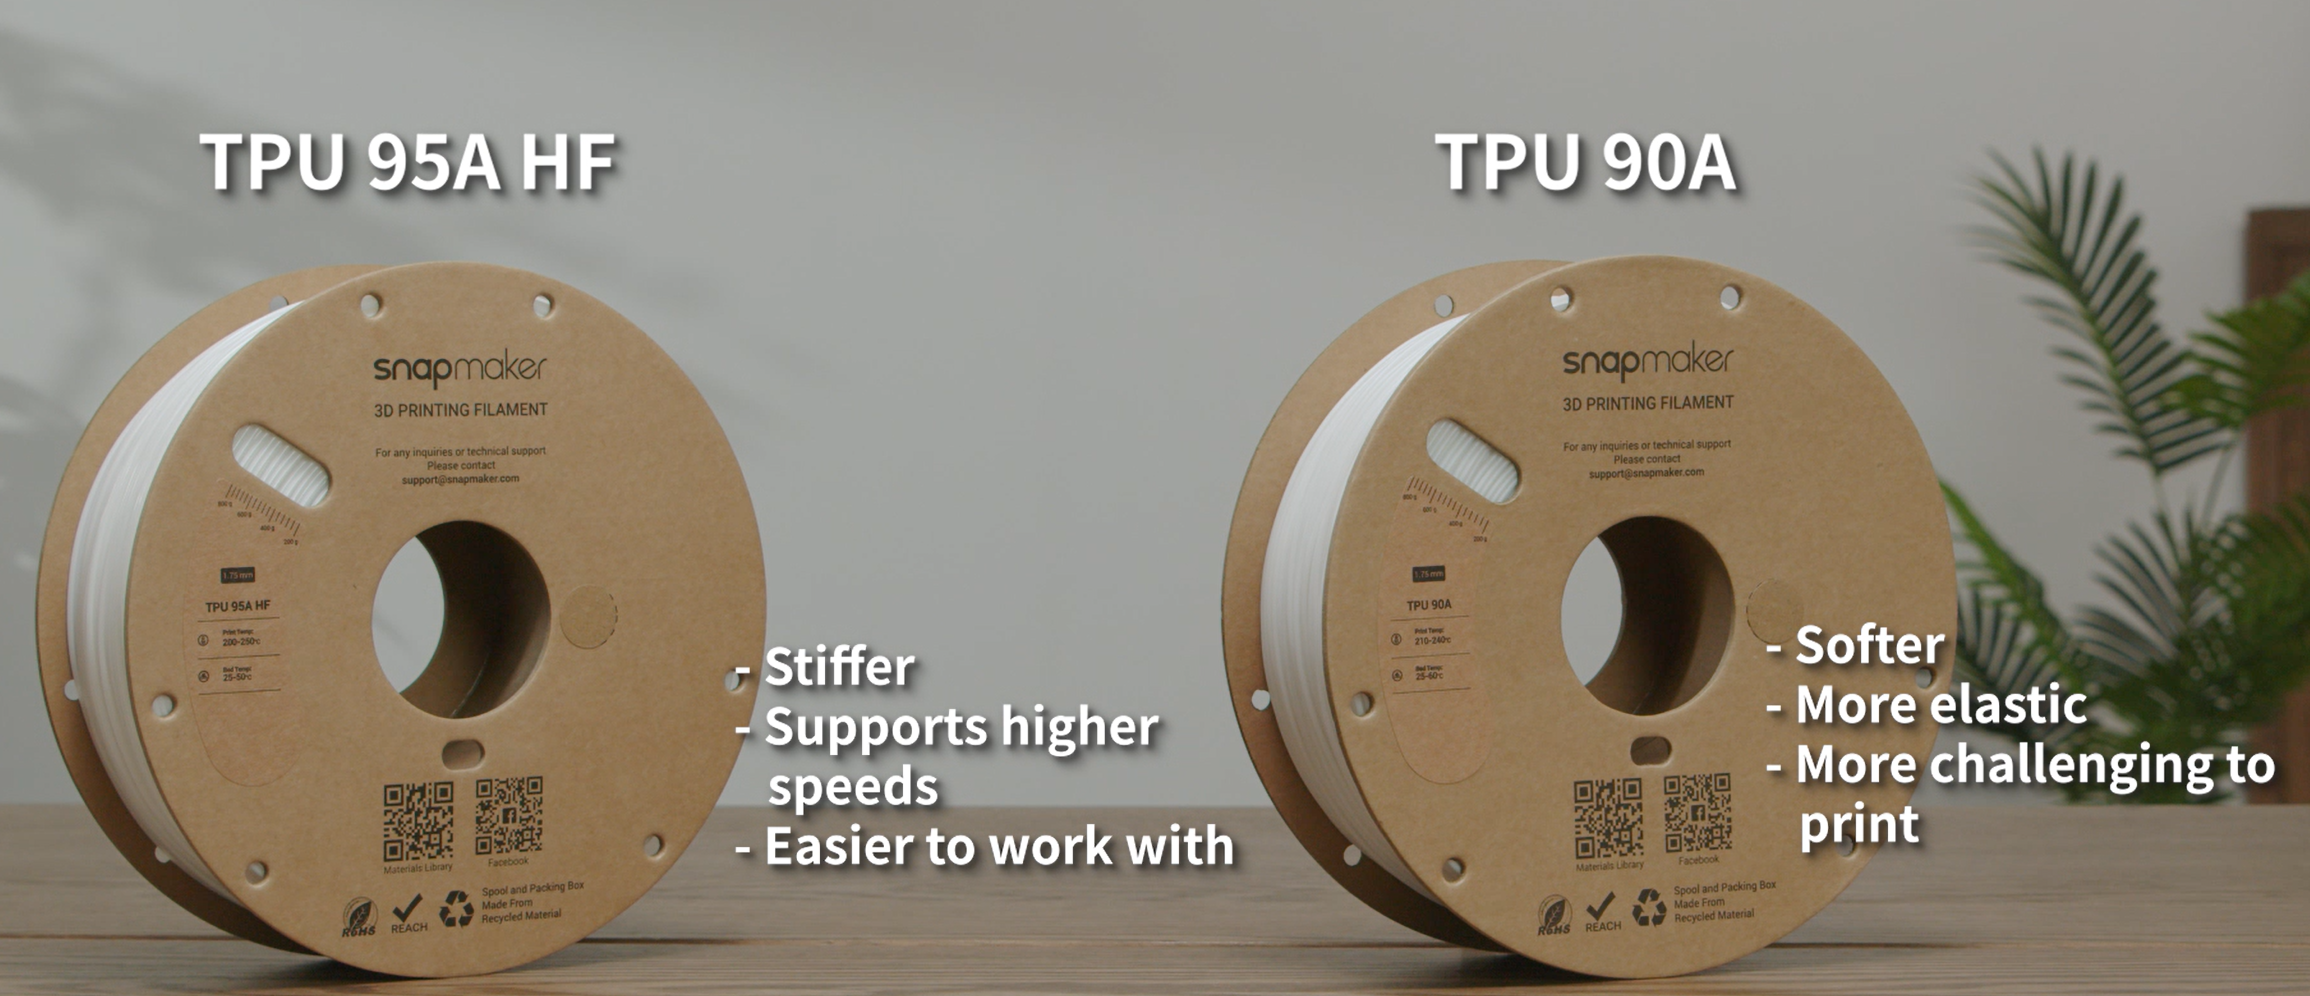
Both materials have been thoroughly tested and tuned. When used with the built‑in profiles in Snapmaker Orca, they can significantly improve your TPU print success rate.
¶ 2. Dry the Filament
TPU absorbs moisture very easily, and excess moisture can seriously affect print quality. Therefore, TPU must be stored in a sealed container. When necessary, you should dry it before use, and keep it sealed throughout the entire print.
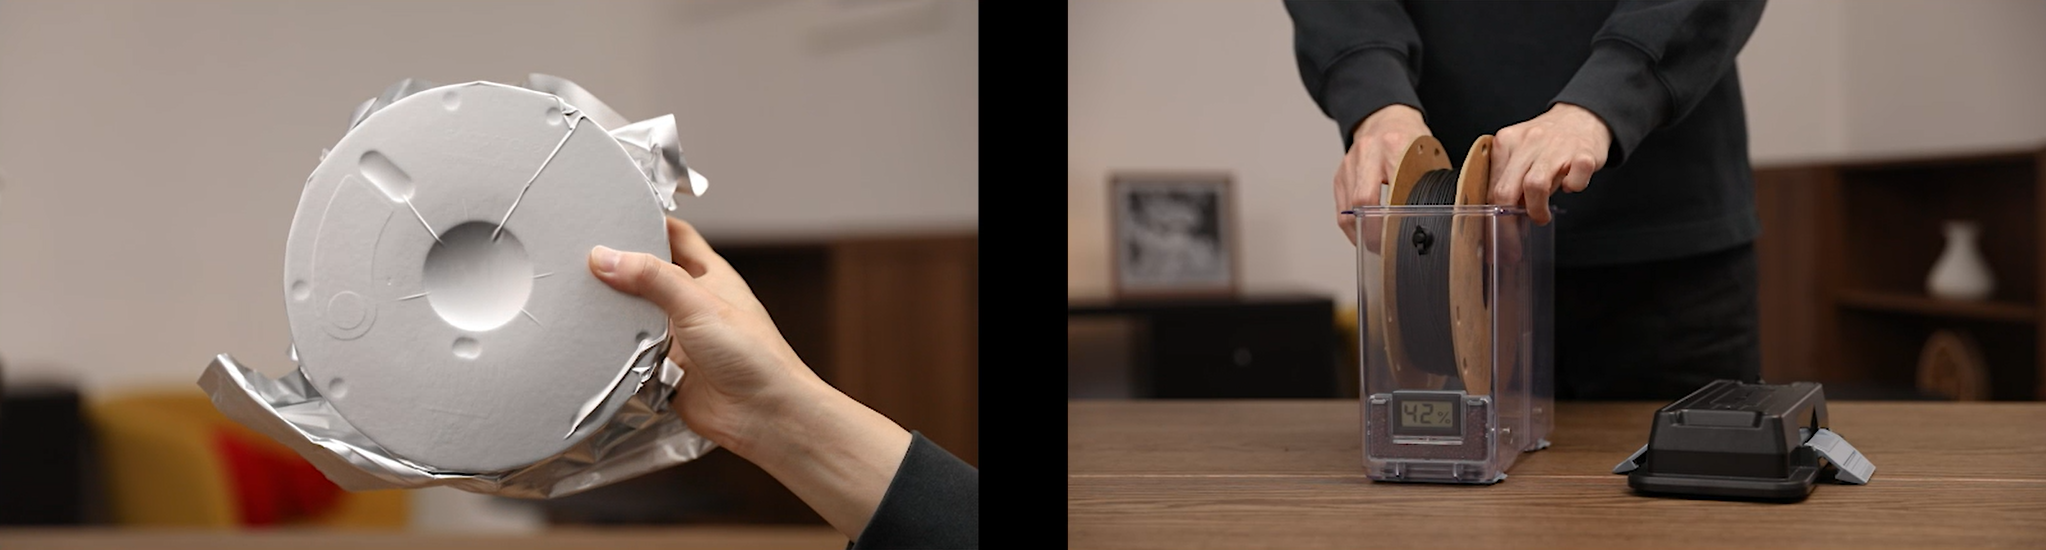
To learn how to dry your filament with the SnapDryer, please watch: U1 Video Guide | Using SnapDryer with U1.
¶ Load the Filament
¶ 3. Manual Loading
TPU can easily bend inside the feeding path, leading to feeding failures. So, we recommend using manual loading.
You can also refer to Part 2 of the video to learn how to load the filament: U1 Video Guide | Printing with TPU.
¶ 4. Edit Filament Information
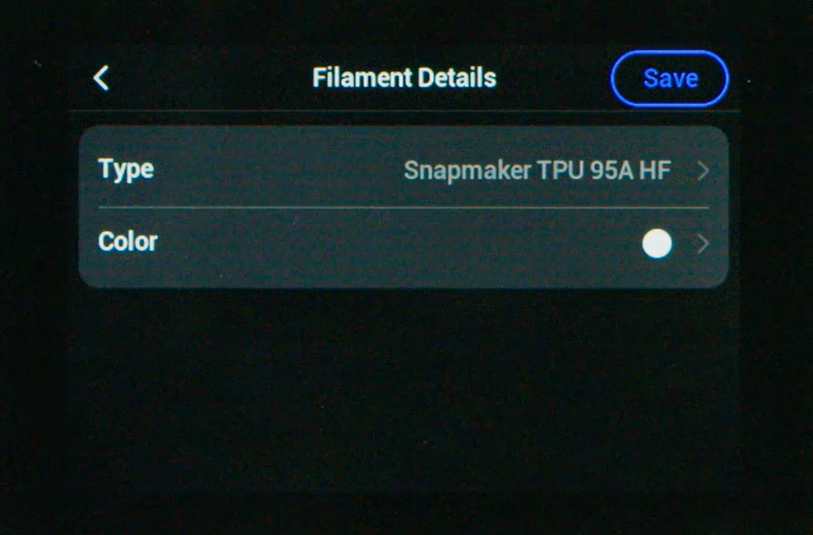
Since we’re using the SnapDryer, the filament information won’t be detected automatically, so you’ll need to enter it manually.
¶ Import TPU Profiles
¶ 5. Update Snapmaker Orca
Update Snapmaker Orca to version 2.3.4 or later.
You can download the required software version from the Snapmaker Orca Release Notes.
¶ 6. Sync Filament Settings
If your printer is already connected to your computer, the filament settings you edit will automatically sync to Orca.
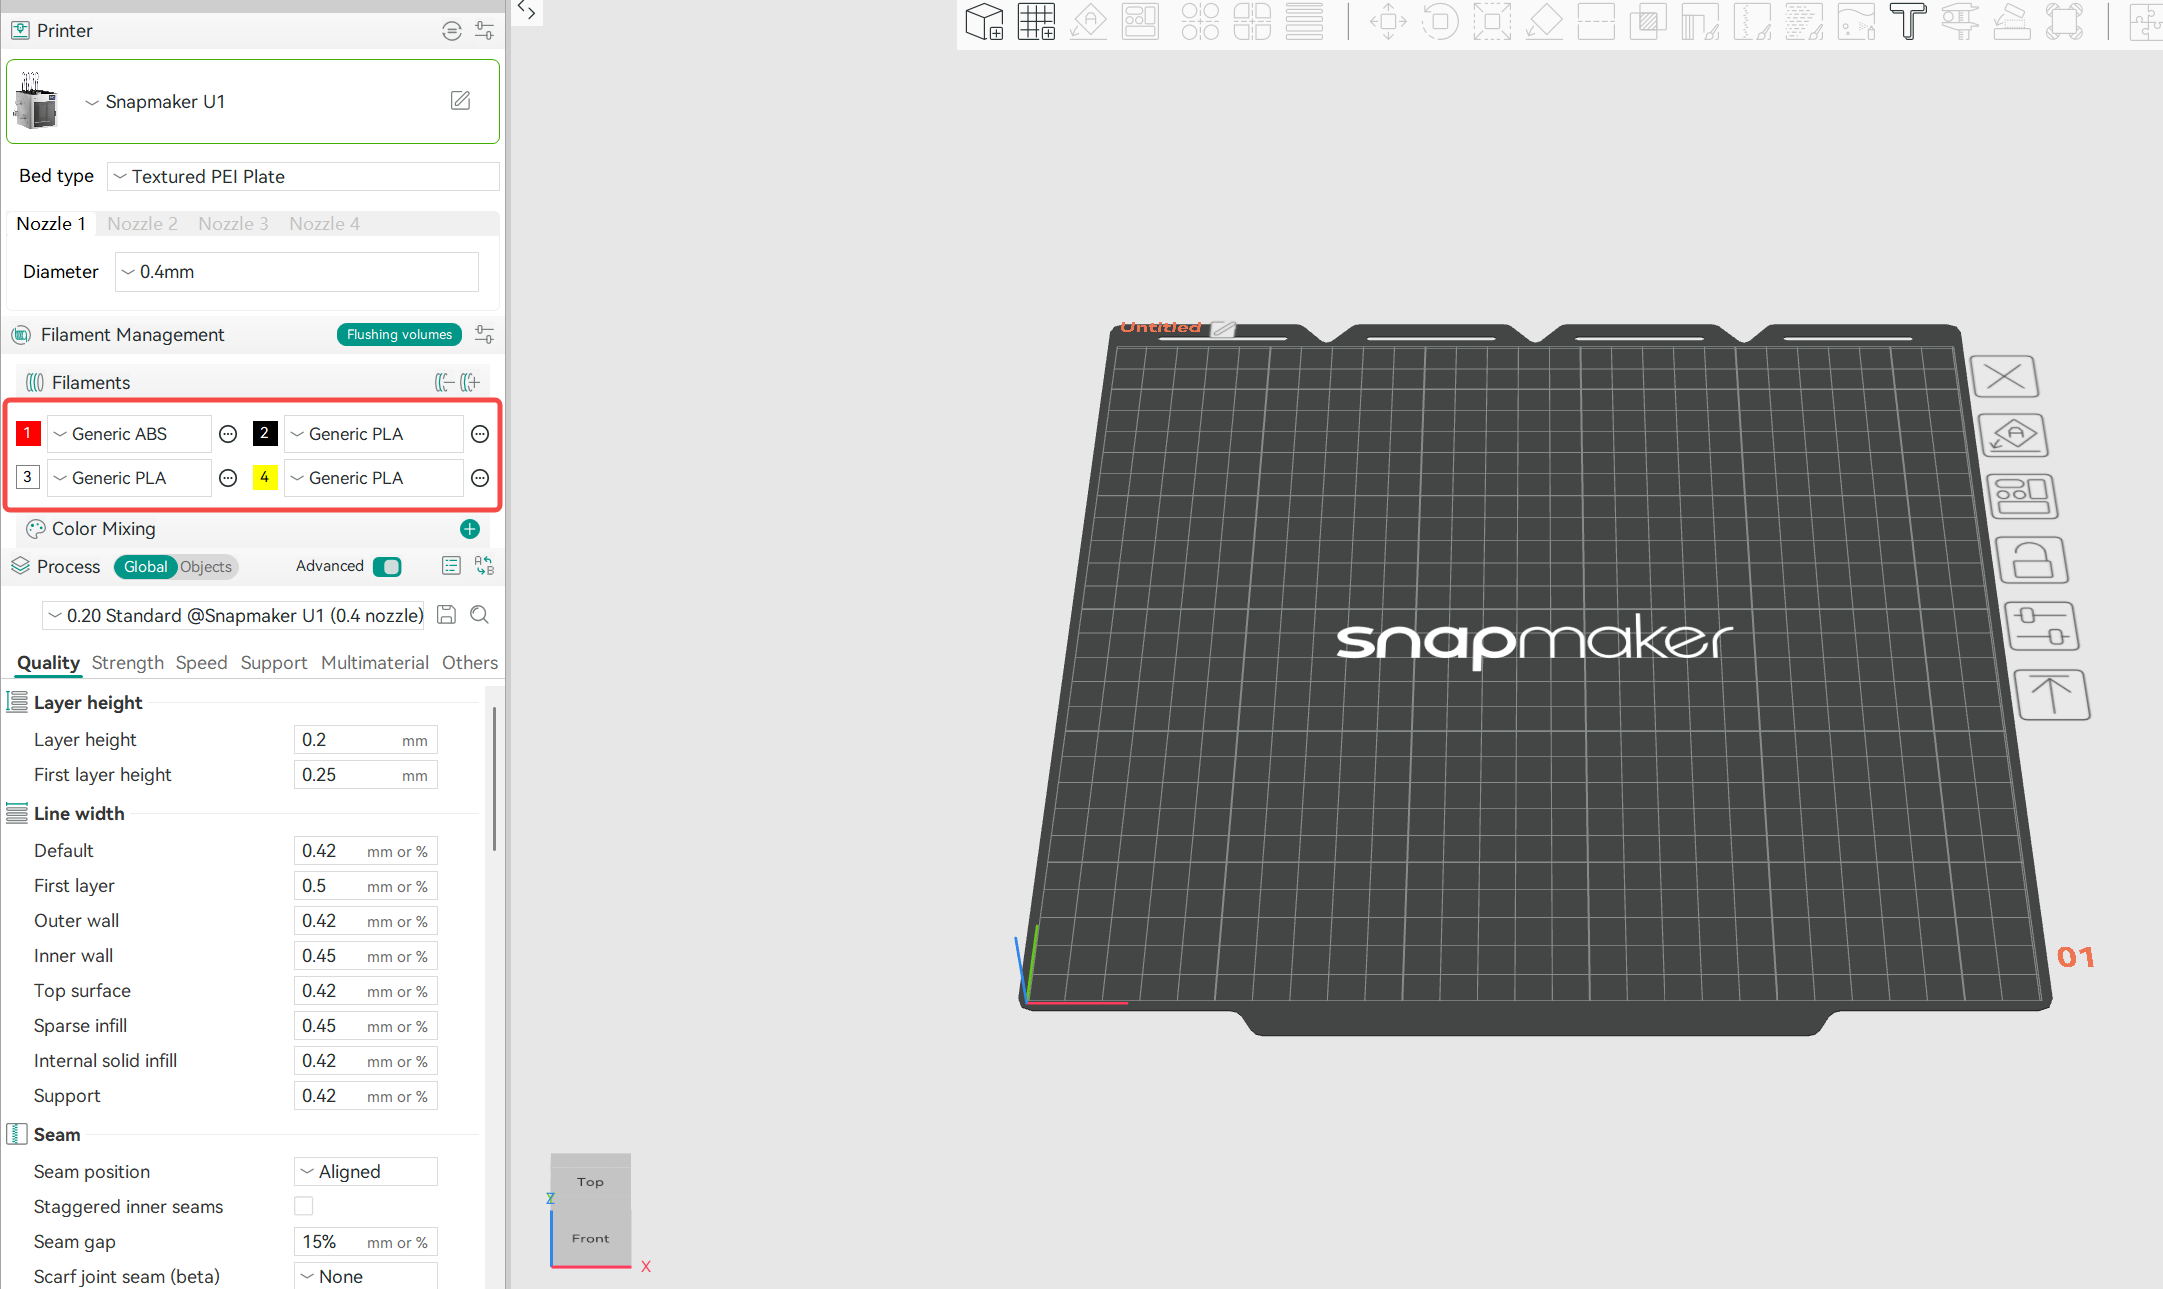
If you don't see the correct filament type in the filament section, click the settings icon under Filament Management and import the latest Snapmaker TPU 90A and Snapmaker TPU 95A HF profiles. Then select the correct filament type in the drop-down menu.
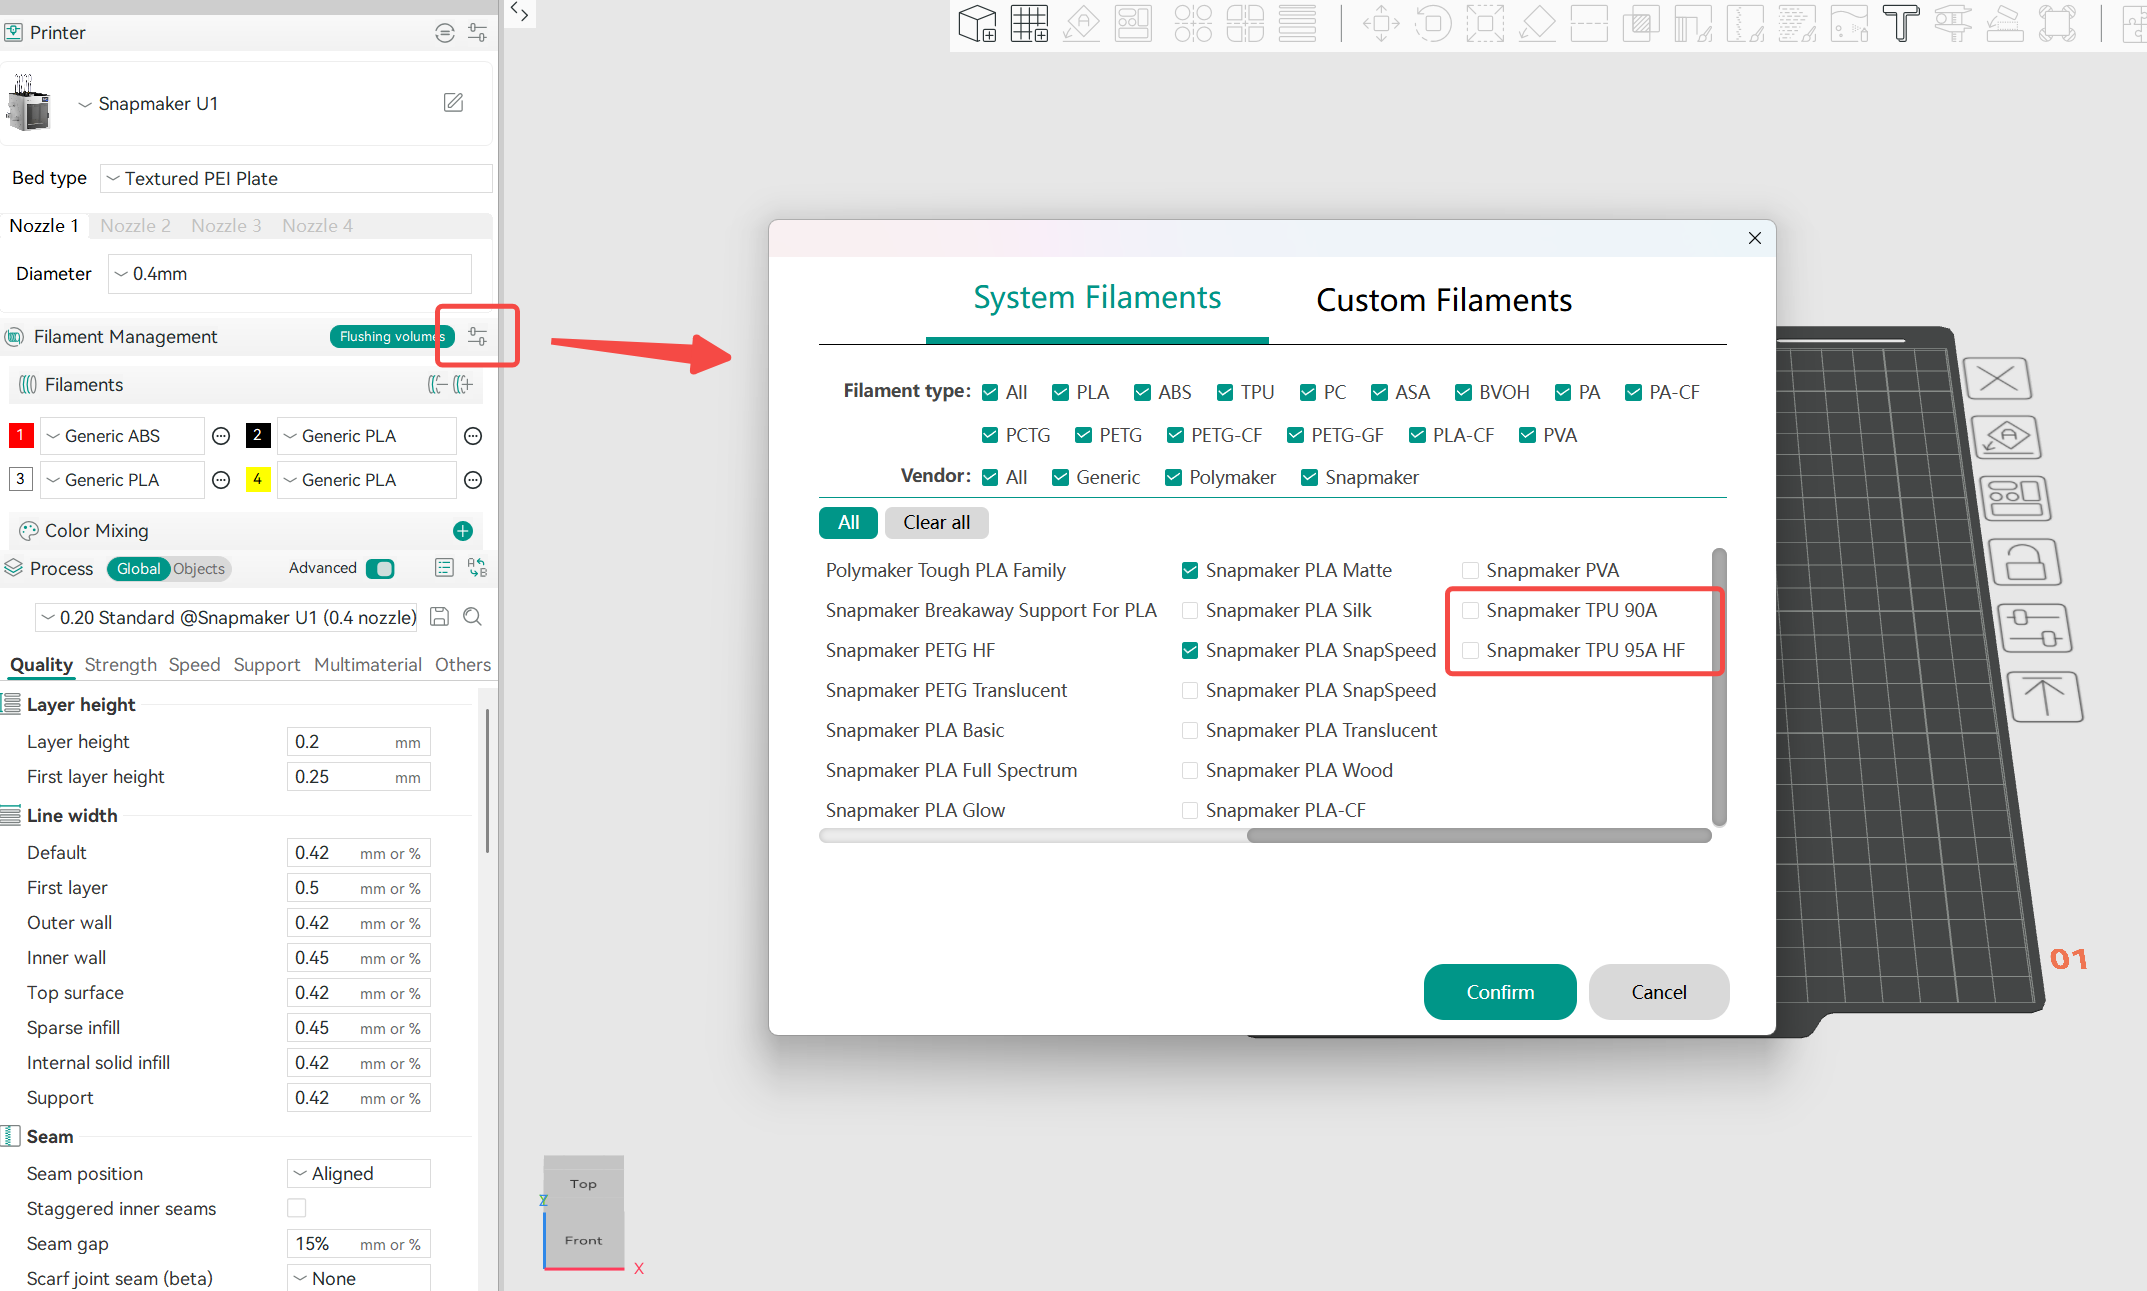
All parameters in the profiles are finely tuned based on extensive testing with Snapmaker’s official TPU filaments. Using these profiles directly can noticeably improve your print quality.
¶ Choose A Model from the Model Library
¶ 7. Download the Model
The Snapmaker Orca Library includes both official models and user‑submitted designs. Every model has been tested and verified by the Snapmaker team, so you can use them right away.
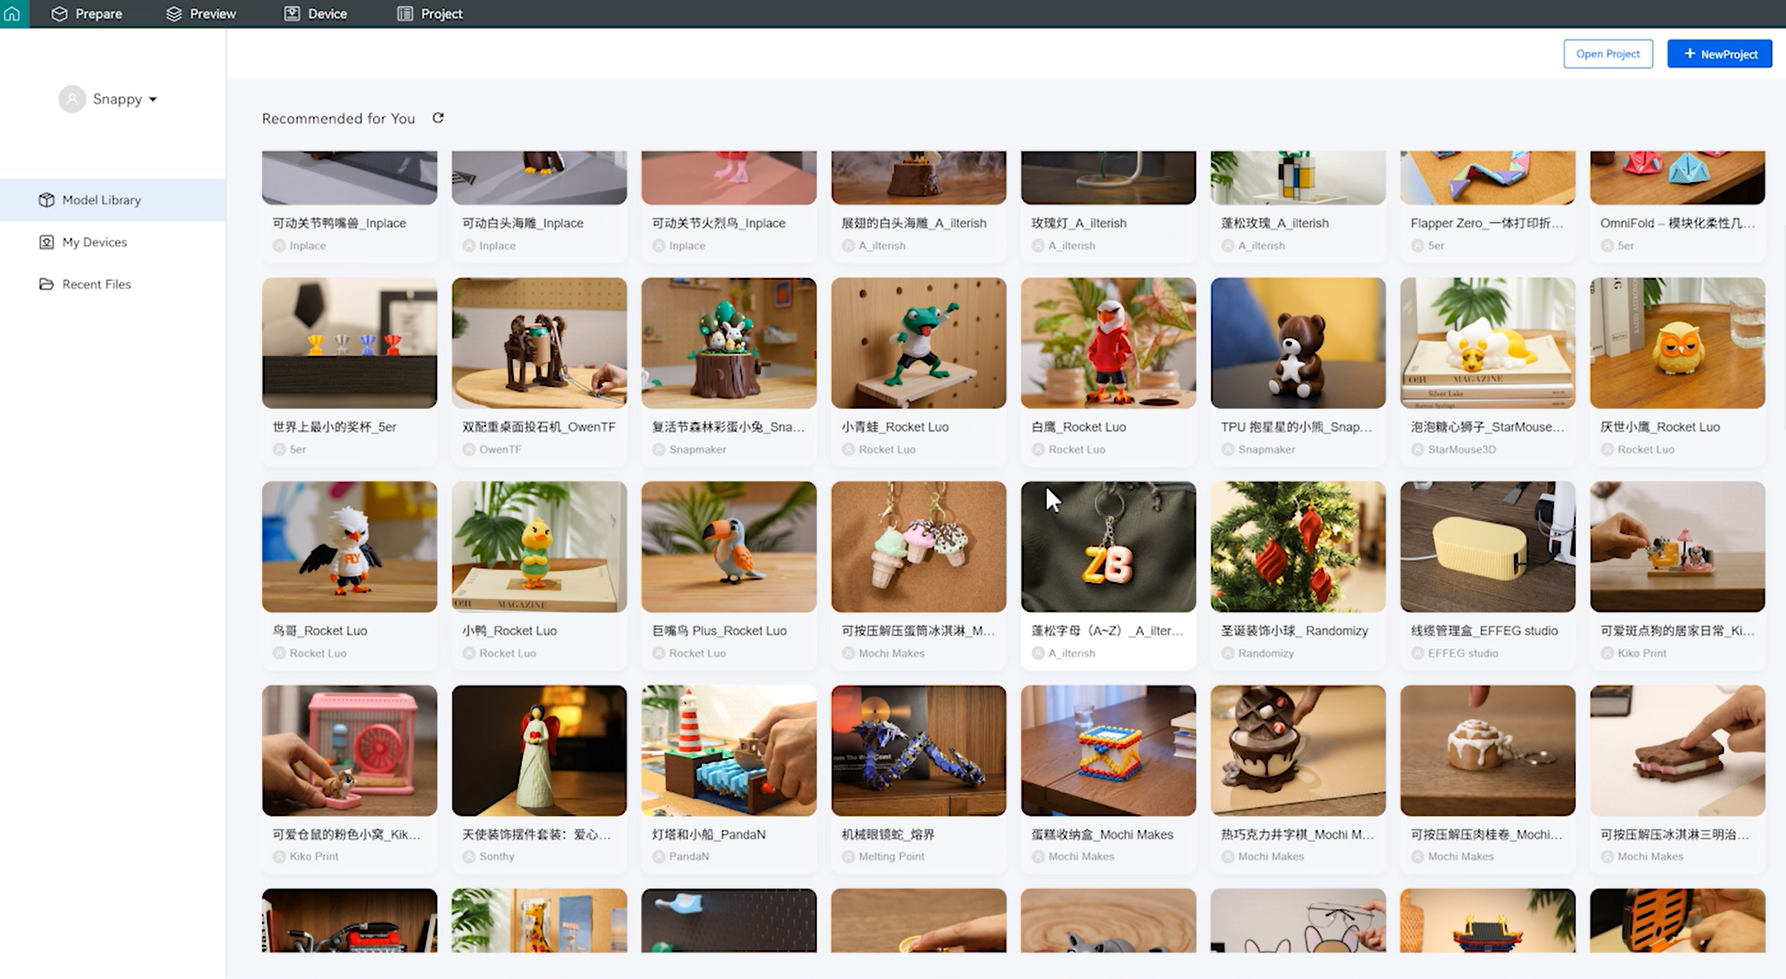
Next, we'll use the Squishy TPU Donut from the Model Library as our printing example.
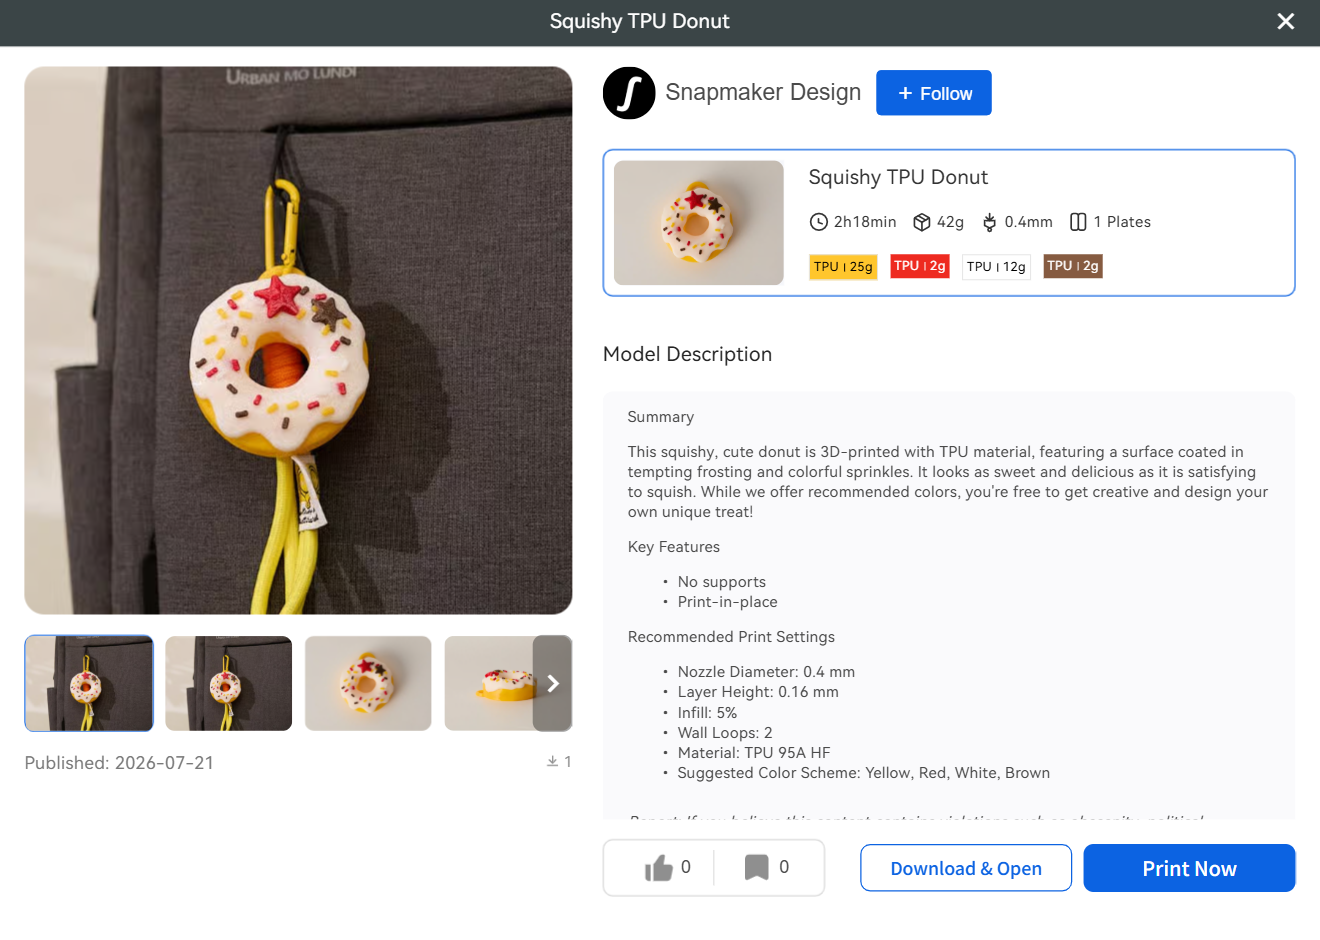
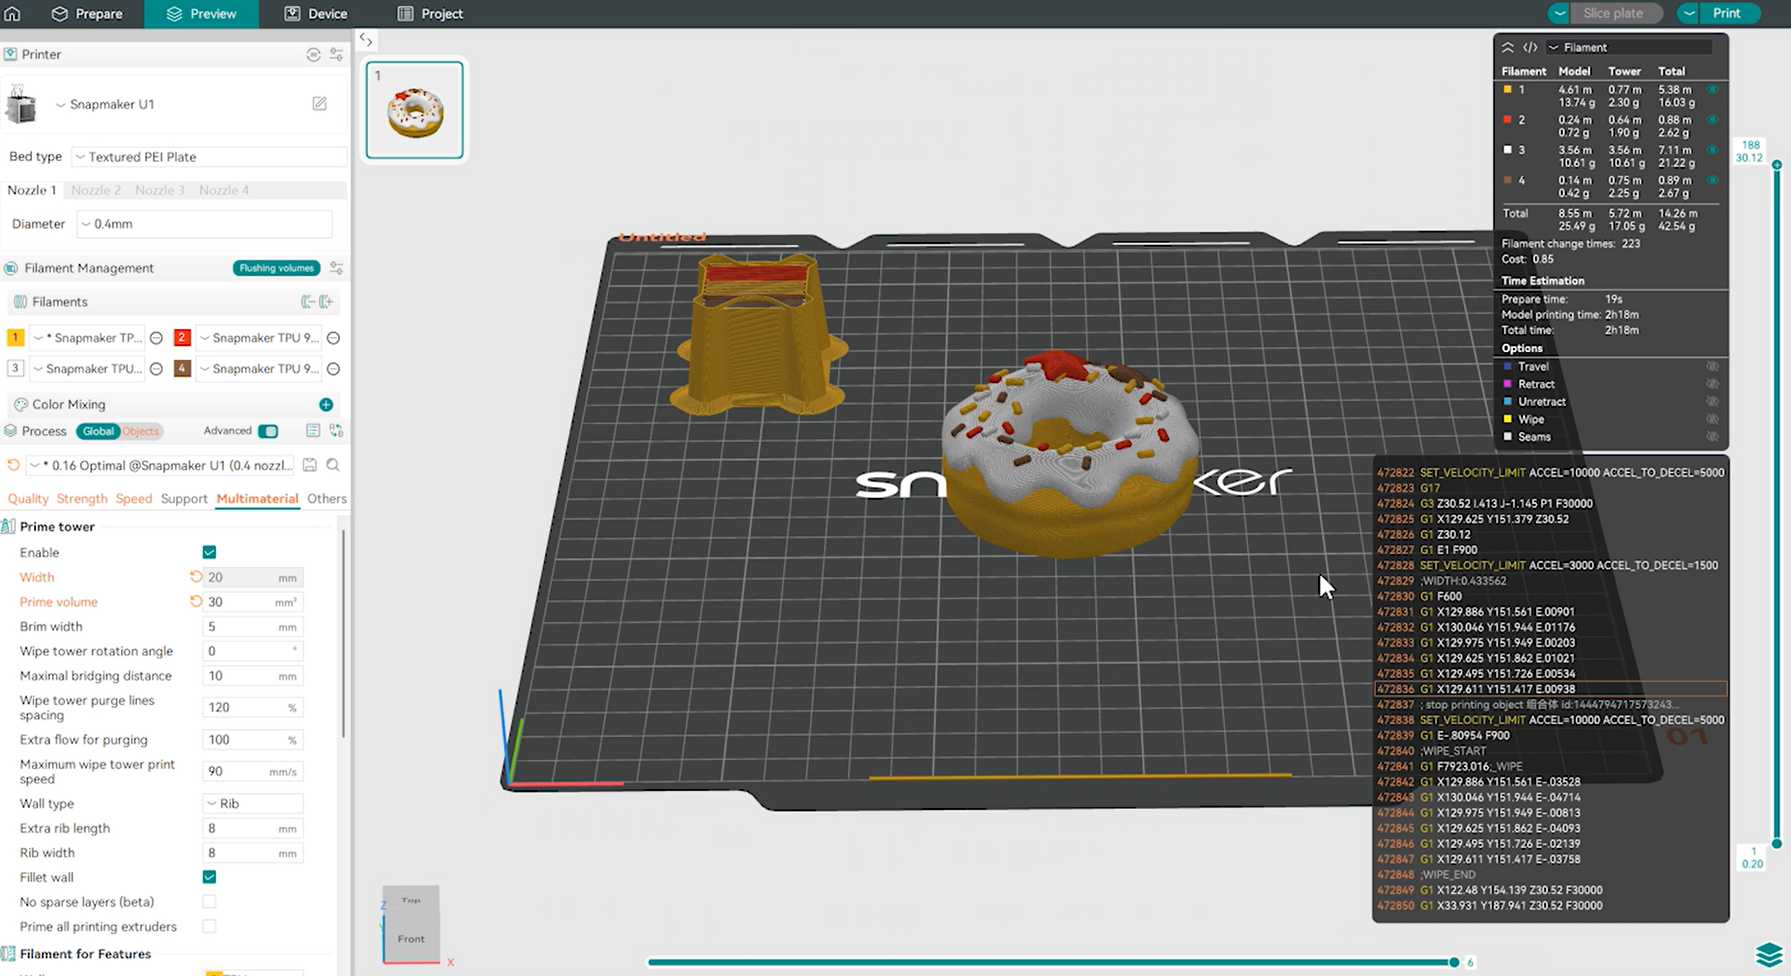
Click Download & Open. Once you import a model, the filament profile and process profile will automatically switch to the project presets. These presets are also the best results from our testing. Slice, preview, and start the print.
¶ Start Printing
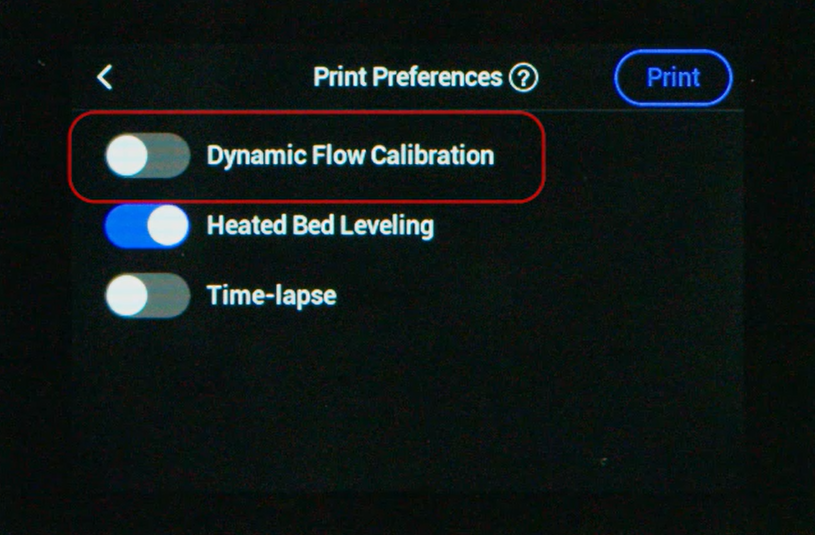
¶ 8. Disable Dynamic Flow Calibration
Because TPU is soft and compressible, it tends to expand and contract during extrusion. This makes dynamic flow calibration unreliable and can negatively affect print quality. Make sure this feature is turned off when starting a print job.
¶ Post-processing
¶ 9. Remove Stringing and Rough Edges with a Heat Gun
A small amount of stringing or rough edges on the printed model is normal. If you want a smoother surface finish, you can use a heat gun for post-processing.
- Temperature: Start at around 200°C and gradually adjust the temperature based on the results.
- How to Use: Hold the heat gun approximately 5–10 cm (2–4 in.) away from the model and quickly sweep it back and forth over the stringing or edges. Avoid heating the same area for too long, as this may cause deformation or scorching.
- Notes: A heat gun is not recommended for smoothing large surface areas. To further improve surface quality, optimize the filament condition and print settings instead.
¶ Common TPU Printing Issues and Fixes
Besides filament brands and print settings, TPU print quality is also affected by many other factors, such as storage conditions, model geometry, and the overall maintenance of your printer.
Next, we’ll walk through the most common TPU print quality issues, the potential causes behind failed prints, and the corresponding solutions.
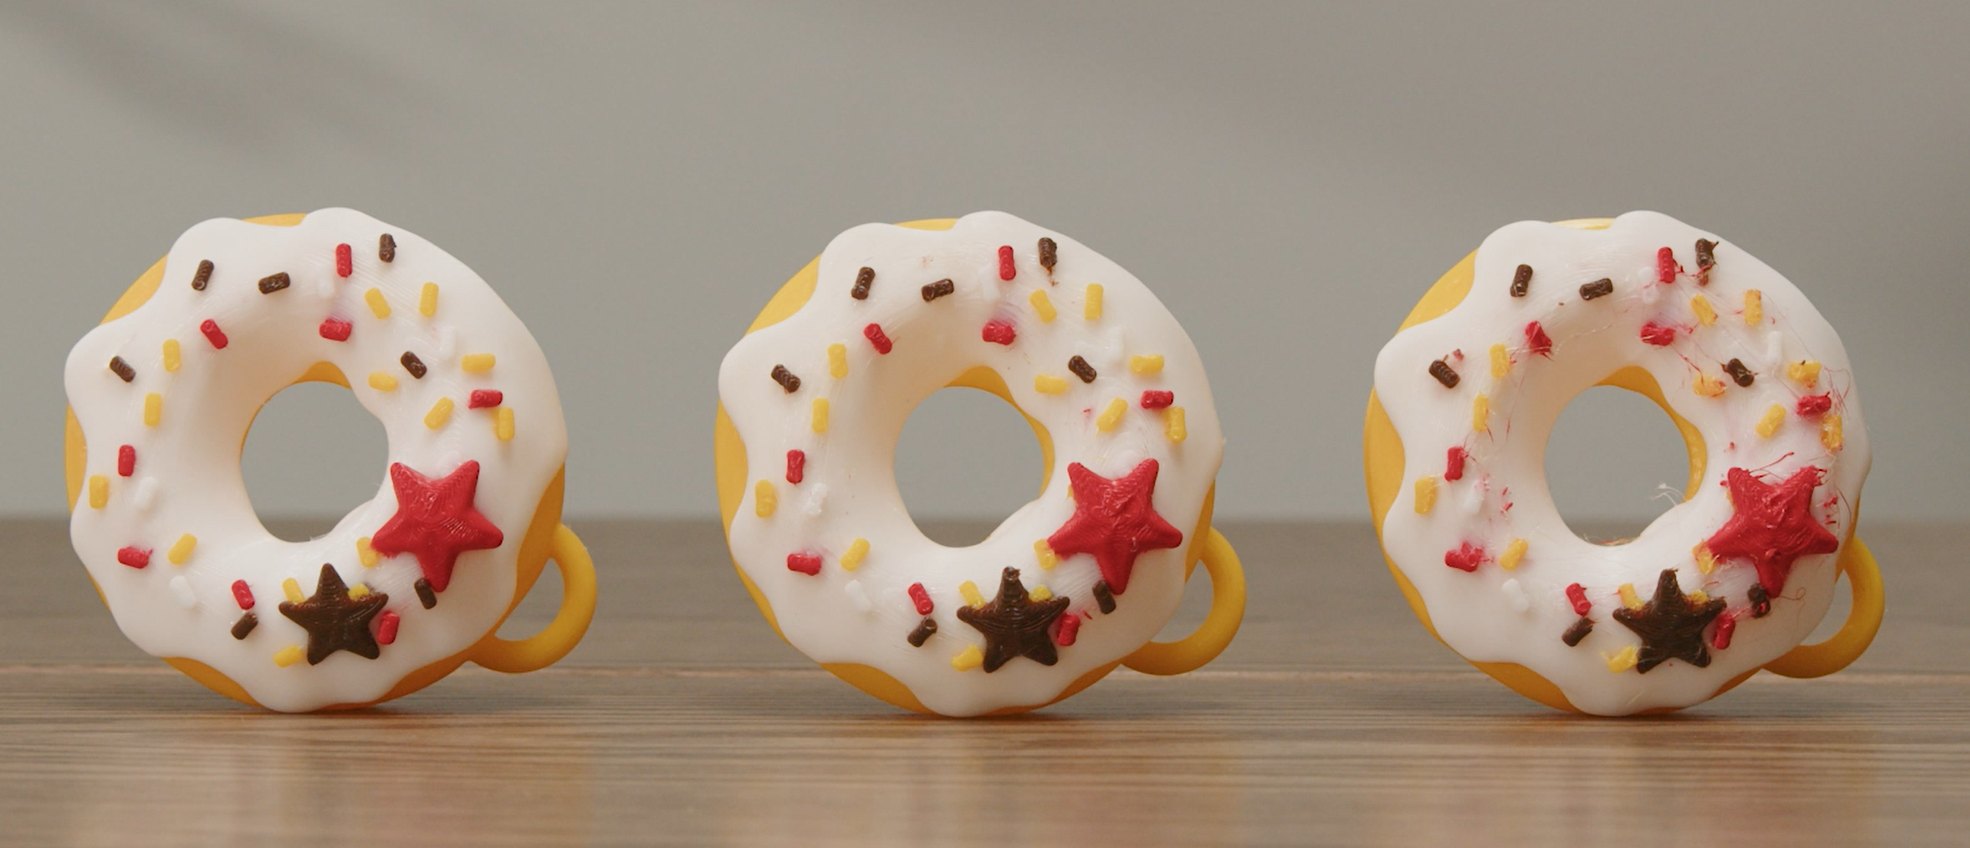
¶ Unmelted Filament Leaking Through Toolhead Gaps
Because TPU is difficult to control during feeding and retraction, excessive resistance can cause the filament to build up inside the toolhead, or even squeeze out through small gaps.
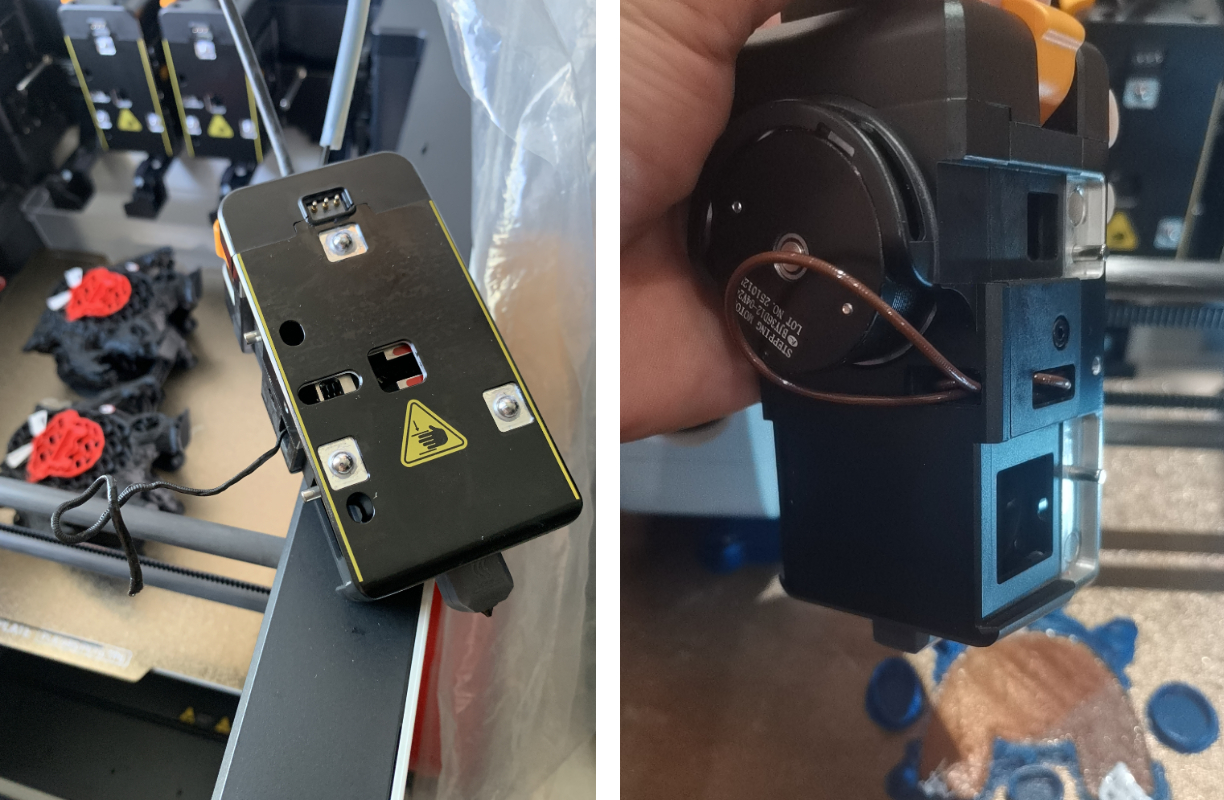
If you encounter this issue, you can fine-tune the print settings in Snapmaker Orca.
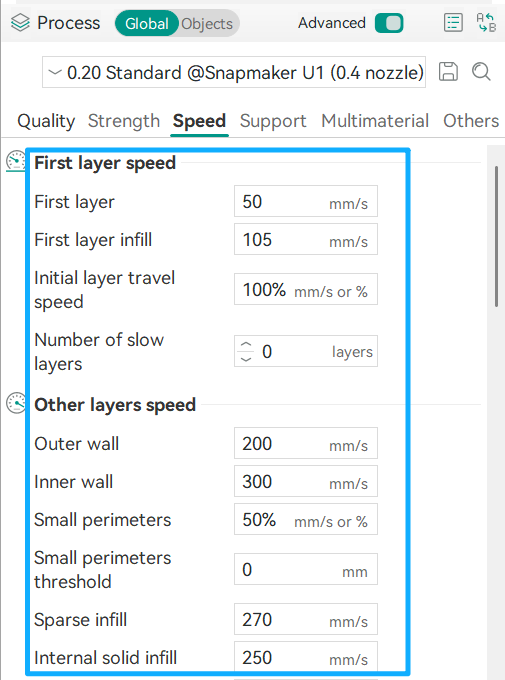
- Reduce the print speed. In the Process panel, go to
Global>Speed>Other layers speed, then reduce the Outer wall and Inner wall speeds.
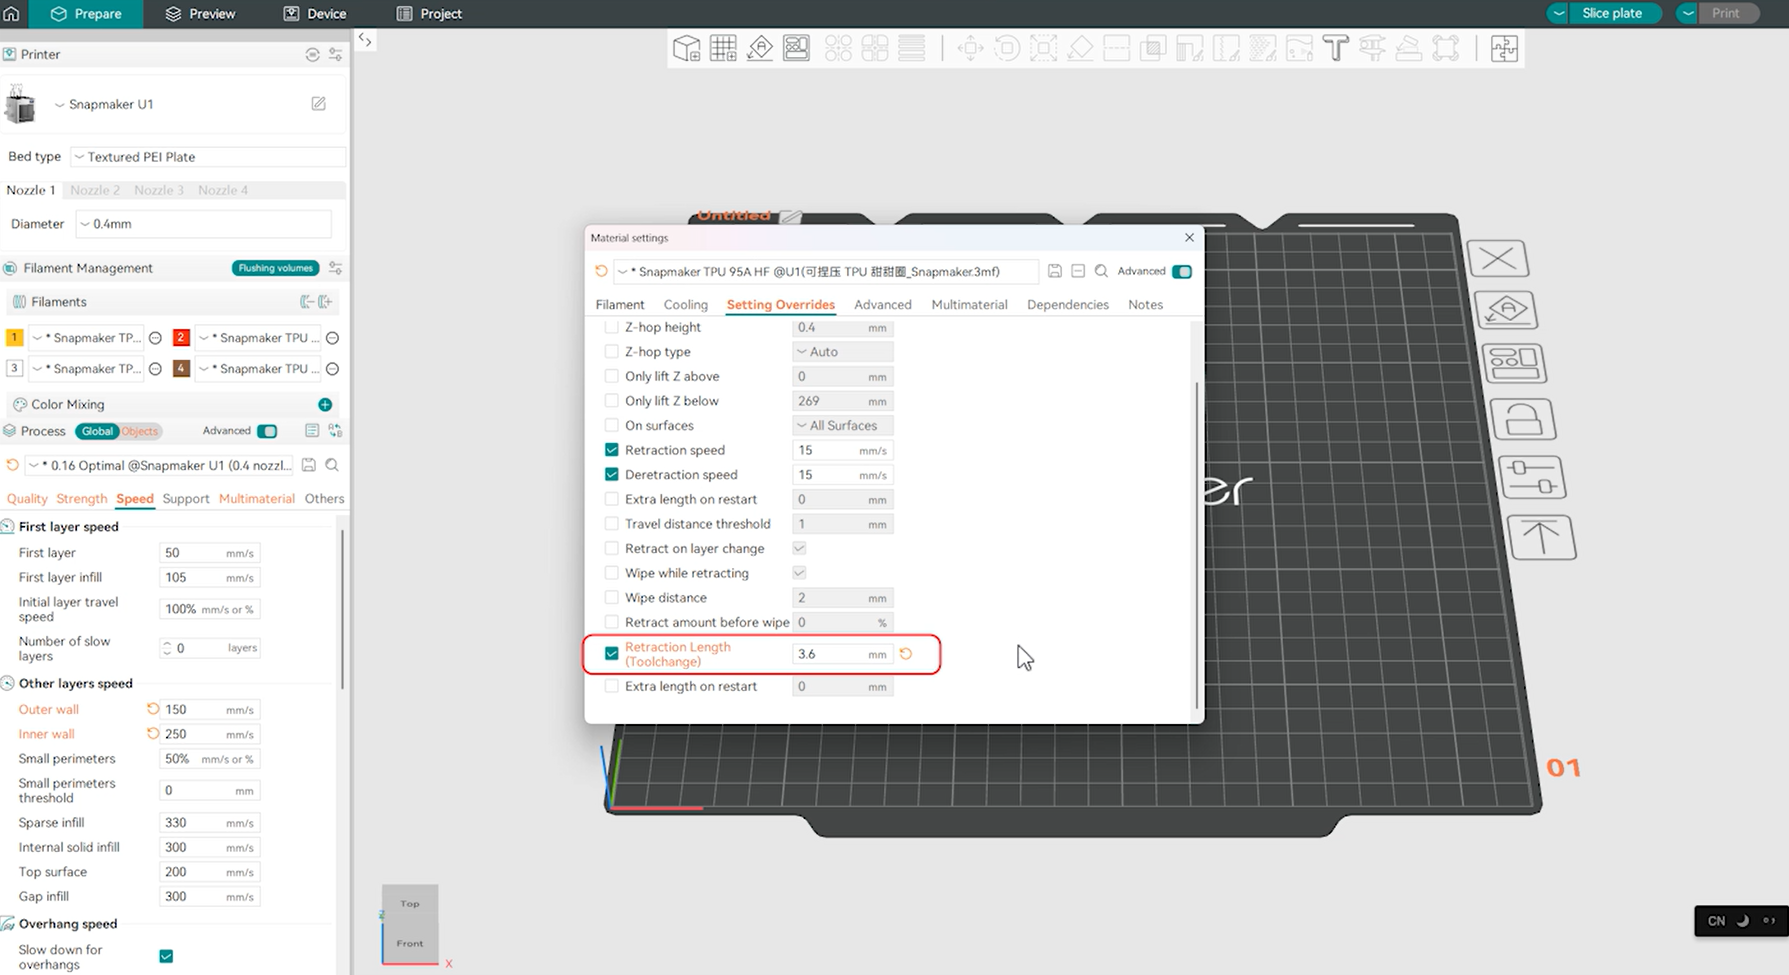
- Reduce the toolchange retraction length. In the Filament list, click the button next to the filament, then go to
Edit>Setting Overrides. FindRetraction Length (Toolchange)and reduce the value as needed.
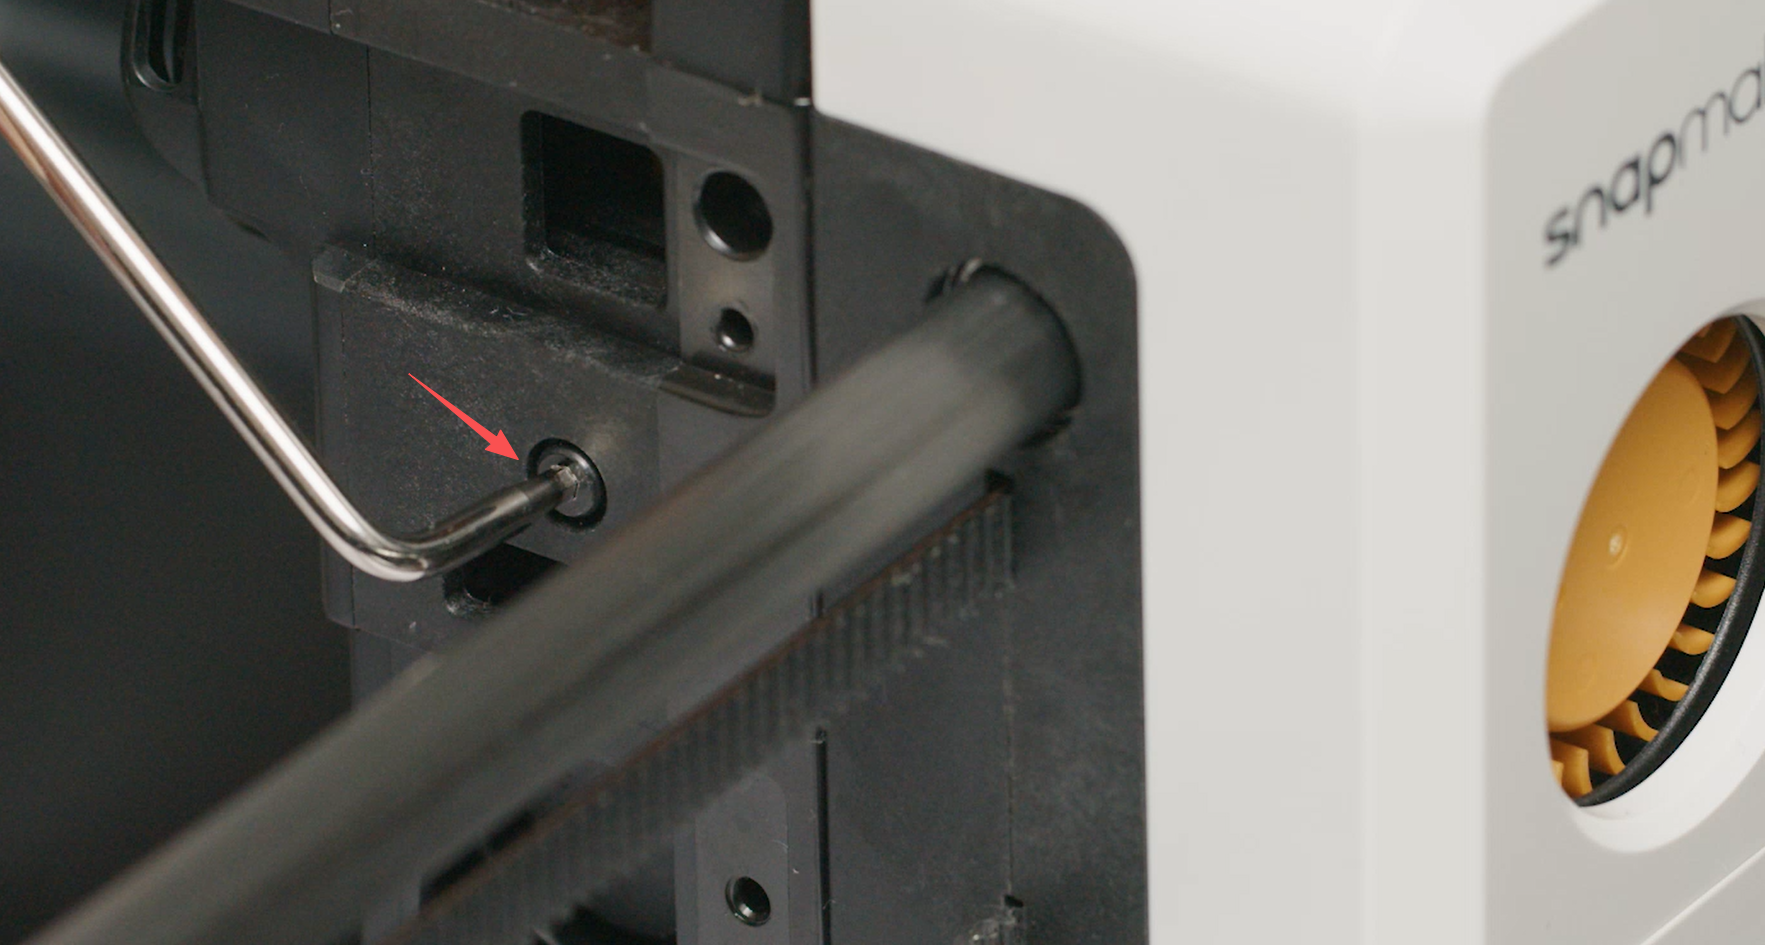
At the same time, slightly loosen the screws on the side of the toolhead to reduce feeding resistance.
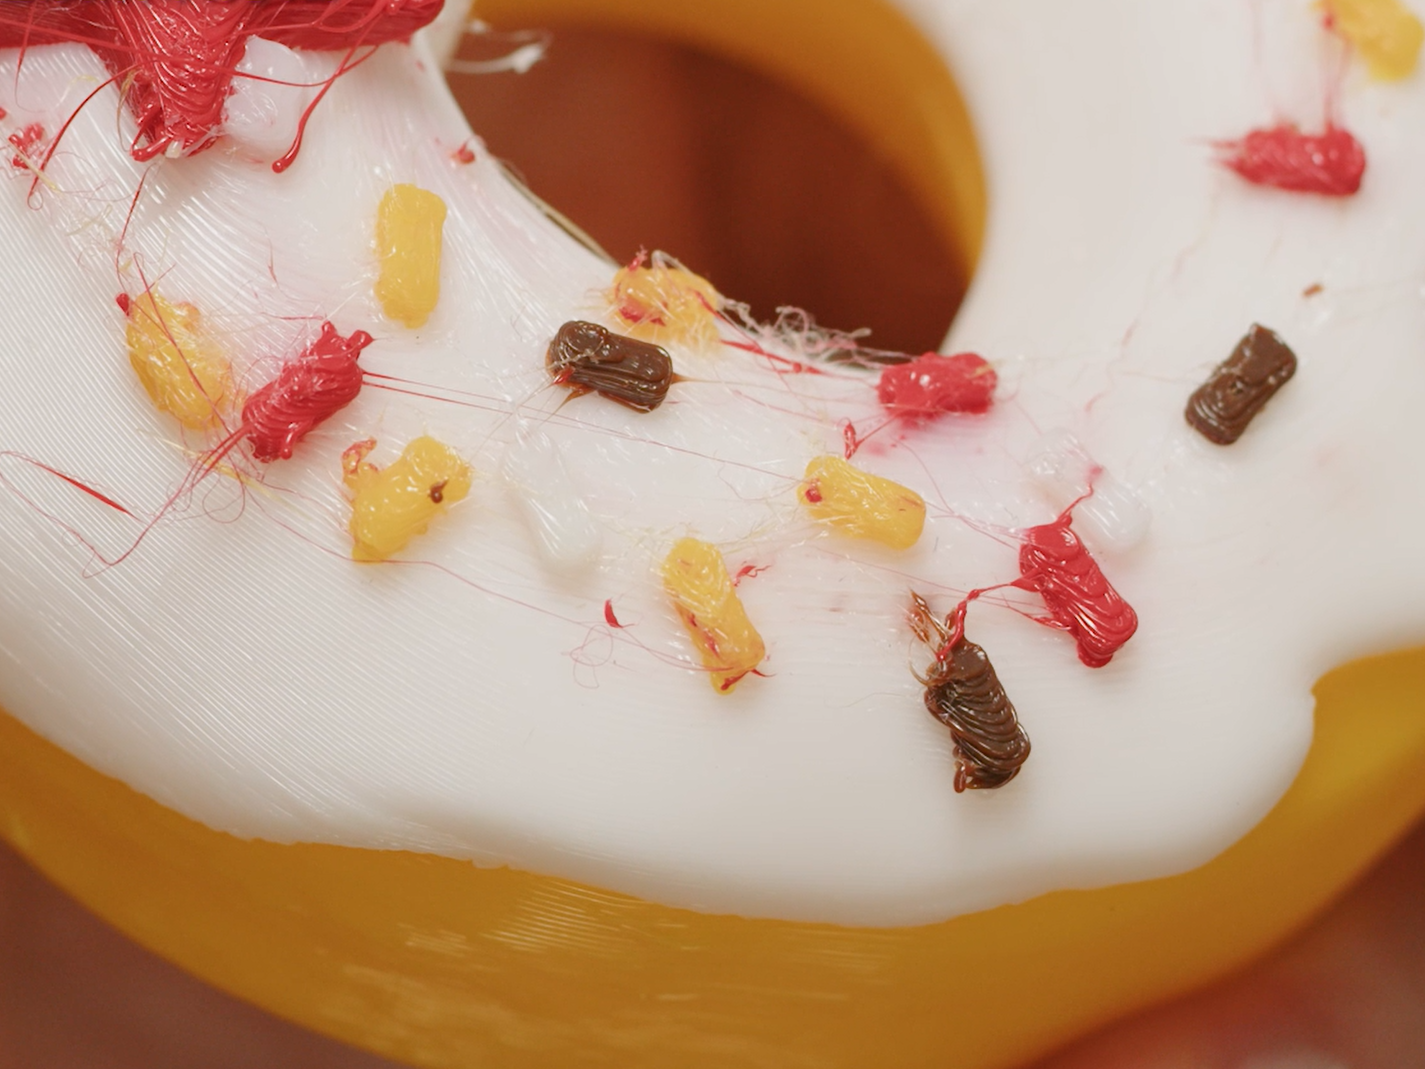
¶ Stringing & Color Bleeding
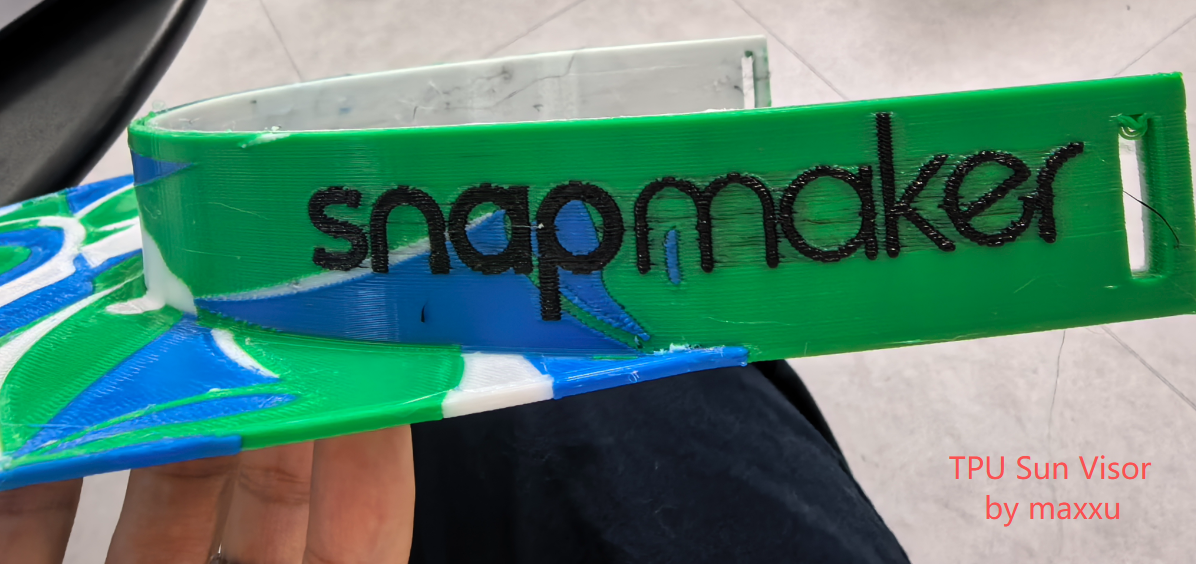
Stringing and color bleeding are often caused by moisture in the filament, which creates bubbles when heated in the hotend. So the first step is to replace the filament or dry it thoroughly.
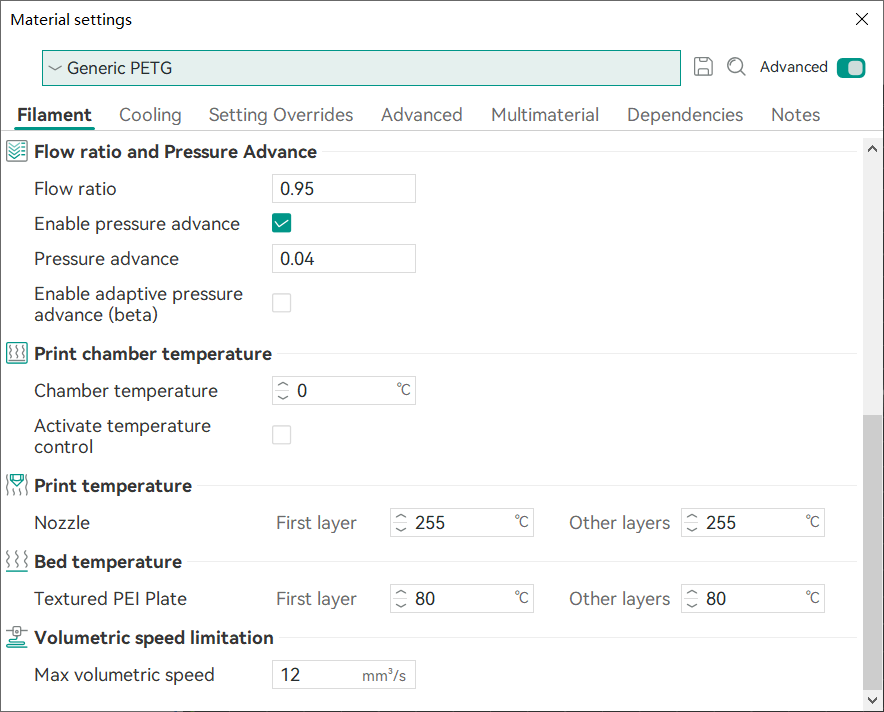
If the filament itself is fine, you can try lowering the print temperature. In the Filament list, click the button next to the filament, then go to Edit > Filament. Find Print Temperature and reduce the temperature for Other layers as needed.
If you’re comfortable editing models, you can also optimize small or isolated features to reduce unnecessary travel moves and minimize stringing.
¶ Heavy Layer Lines
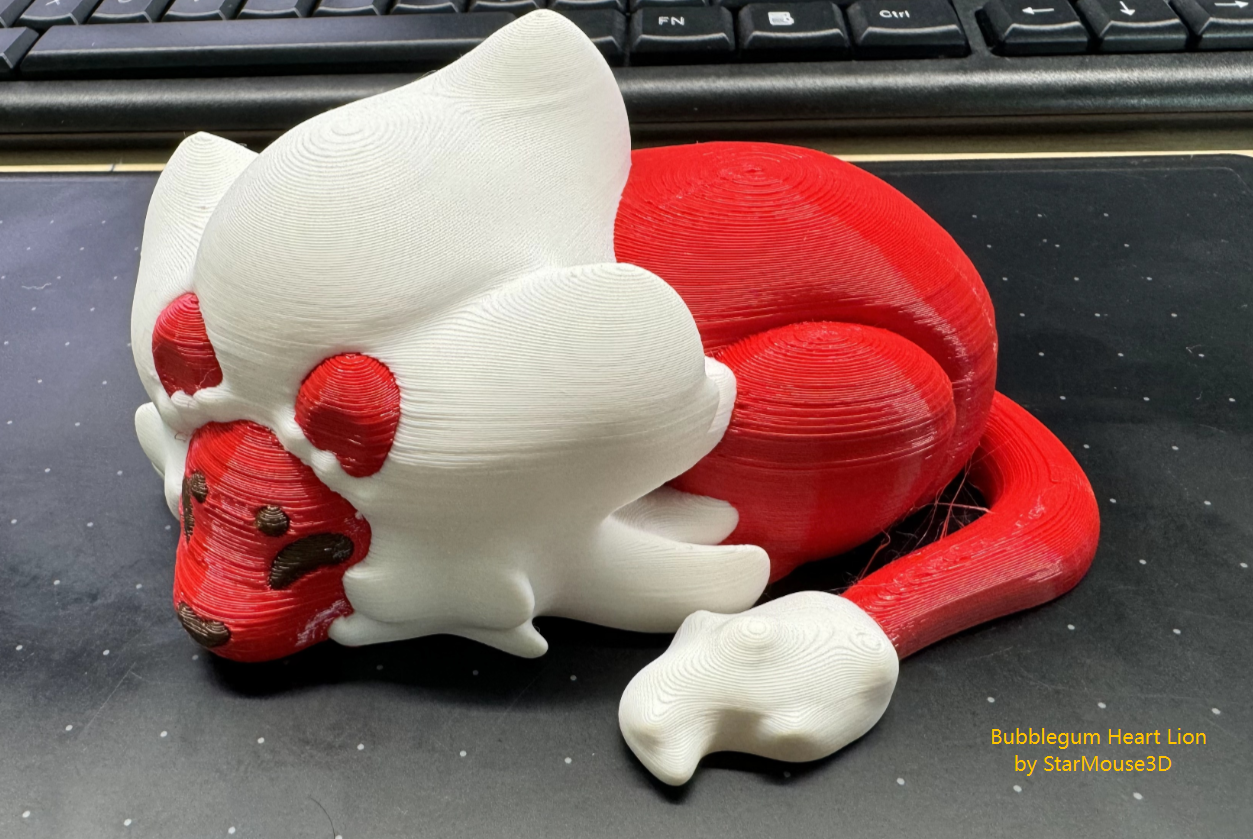
If the layer lines on your print are too obvious, you can adjust the following print settings.
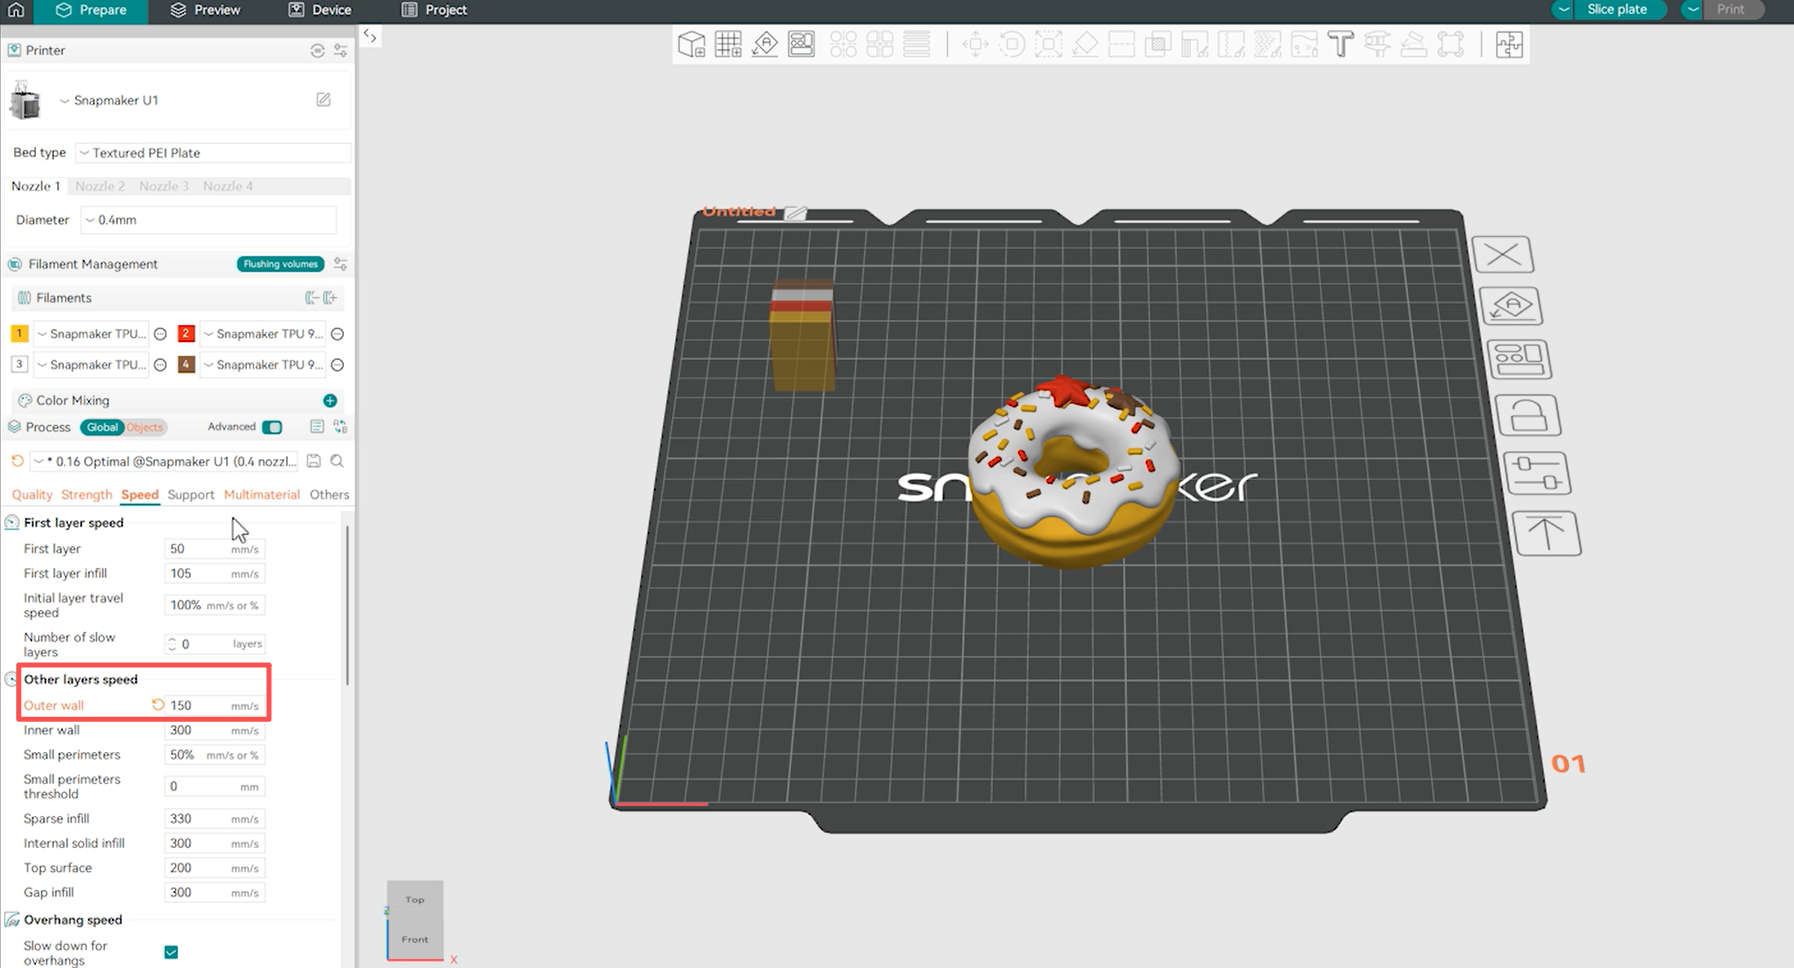
- In the Process panel, go to
Global>Speed>Other layers speed, then reduce the Outer wall speed.
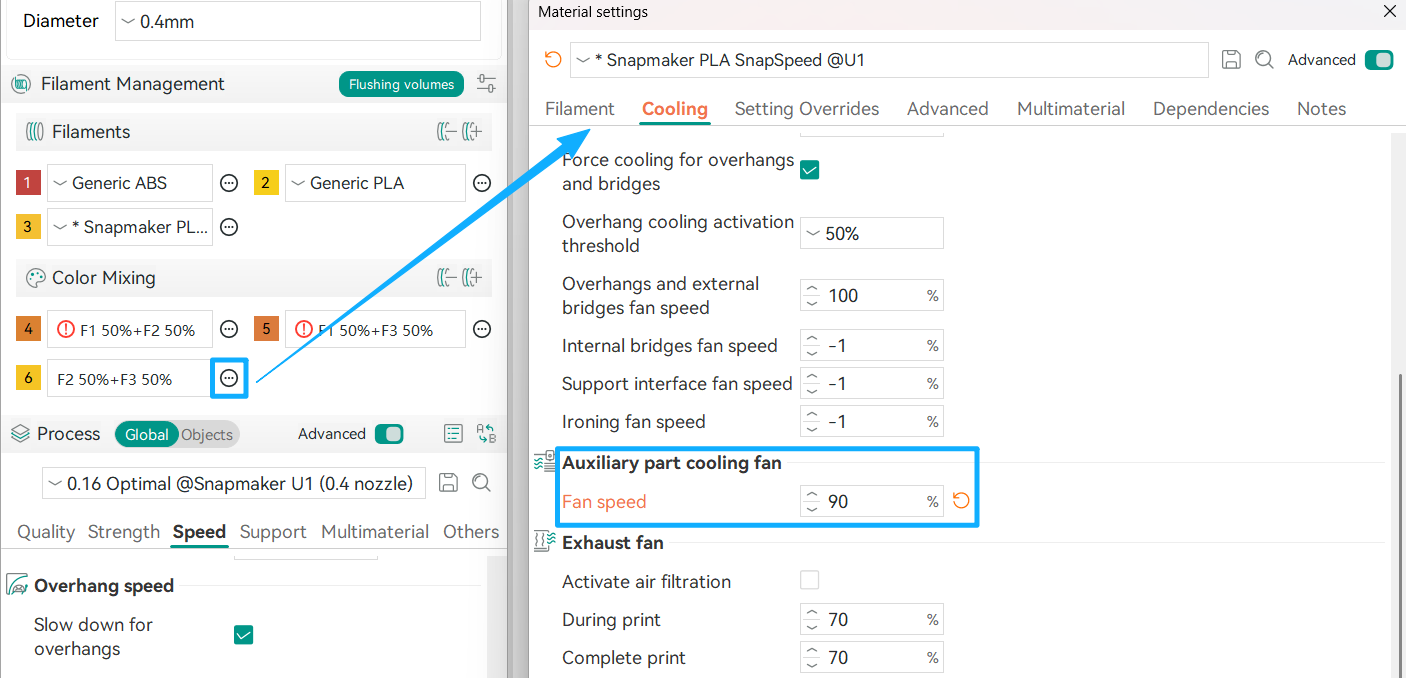
- In the Filament list, click the button next to the filament, then go to
Edit>Cooling. FindPart cooling fanand increase the part cooling fan speed. Faster cooling helps the outer walls solidify more quickly, reducing deformation caused by nozzle drag.
¶ Wipe Tower Collapse
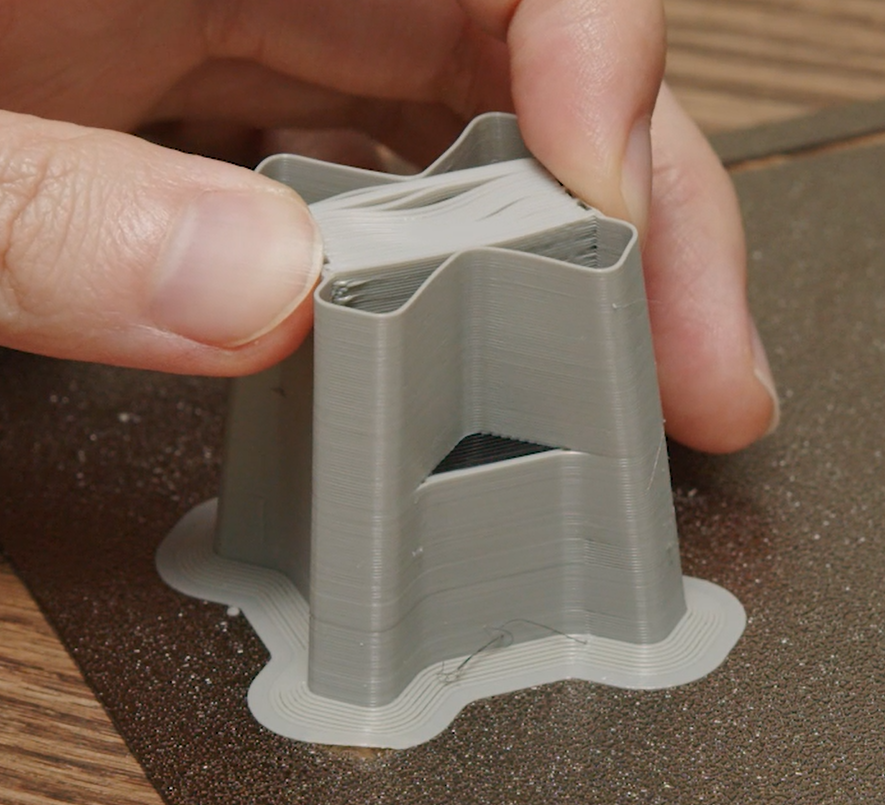
TPU wipe towers have weak layer-to-layer support and low rigidity, making them more likely to collapse when pulled or bumped.
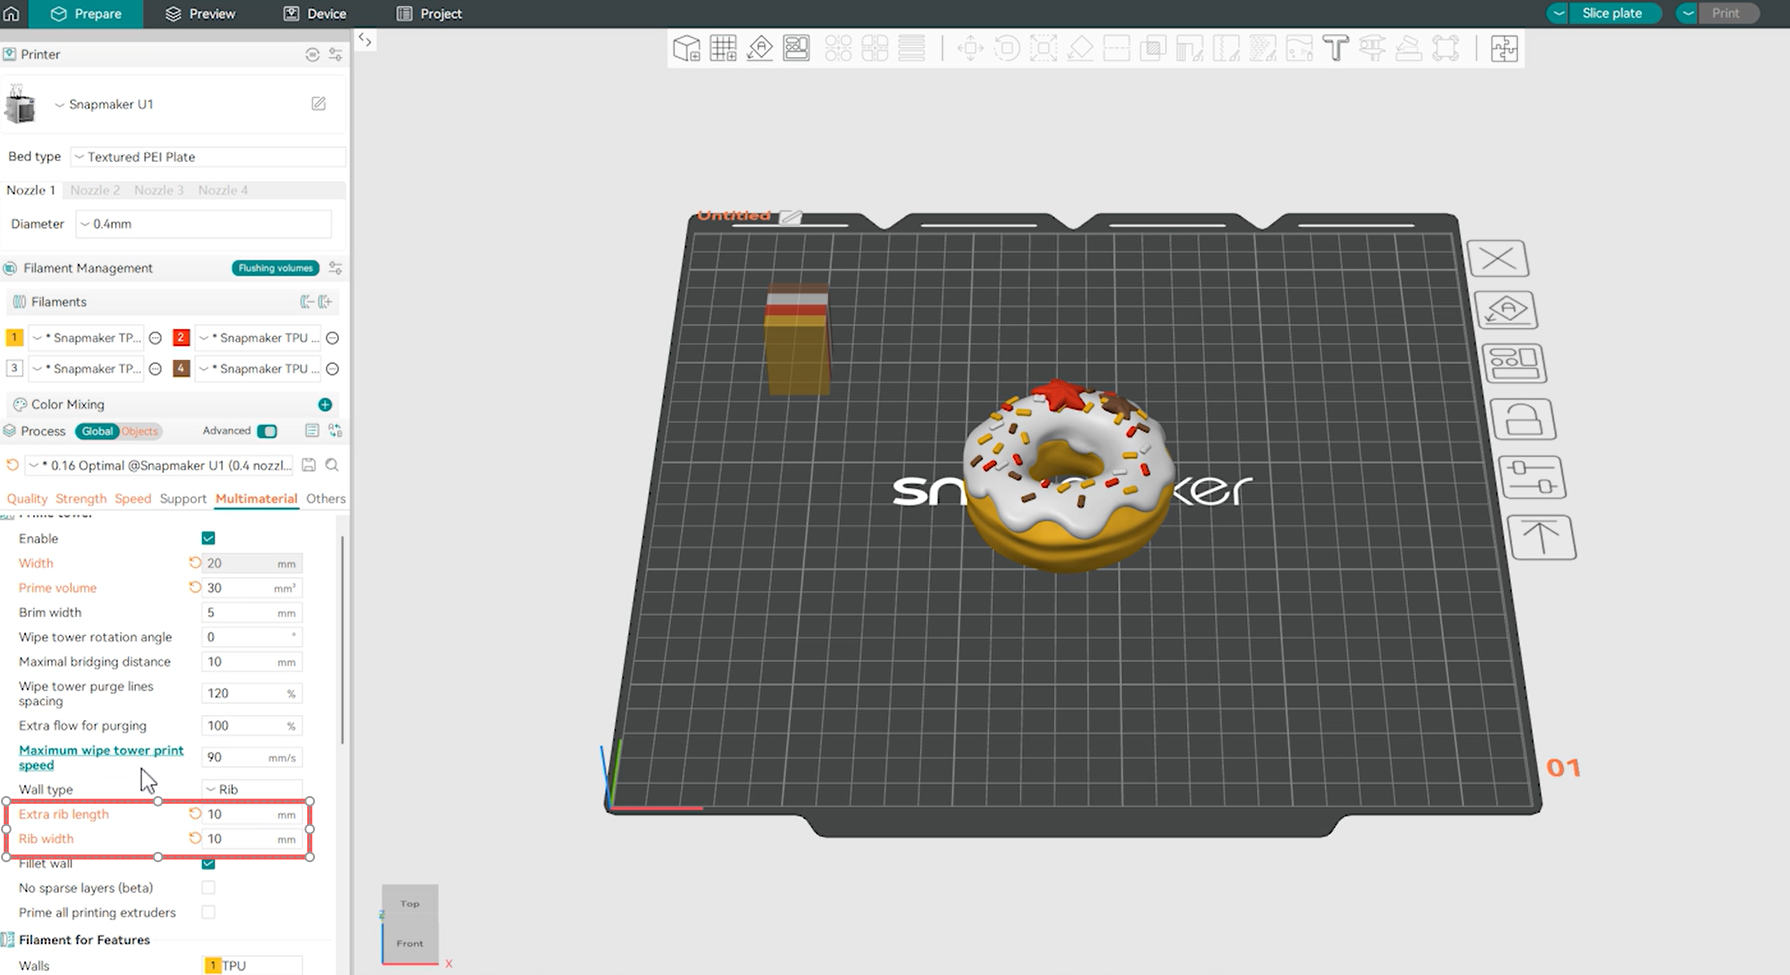
If a collapse occurs, you can adjust the print settings. In the Process panel, go to Global > Multimaterial, increase the width and length of the tower ribs.
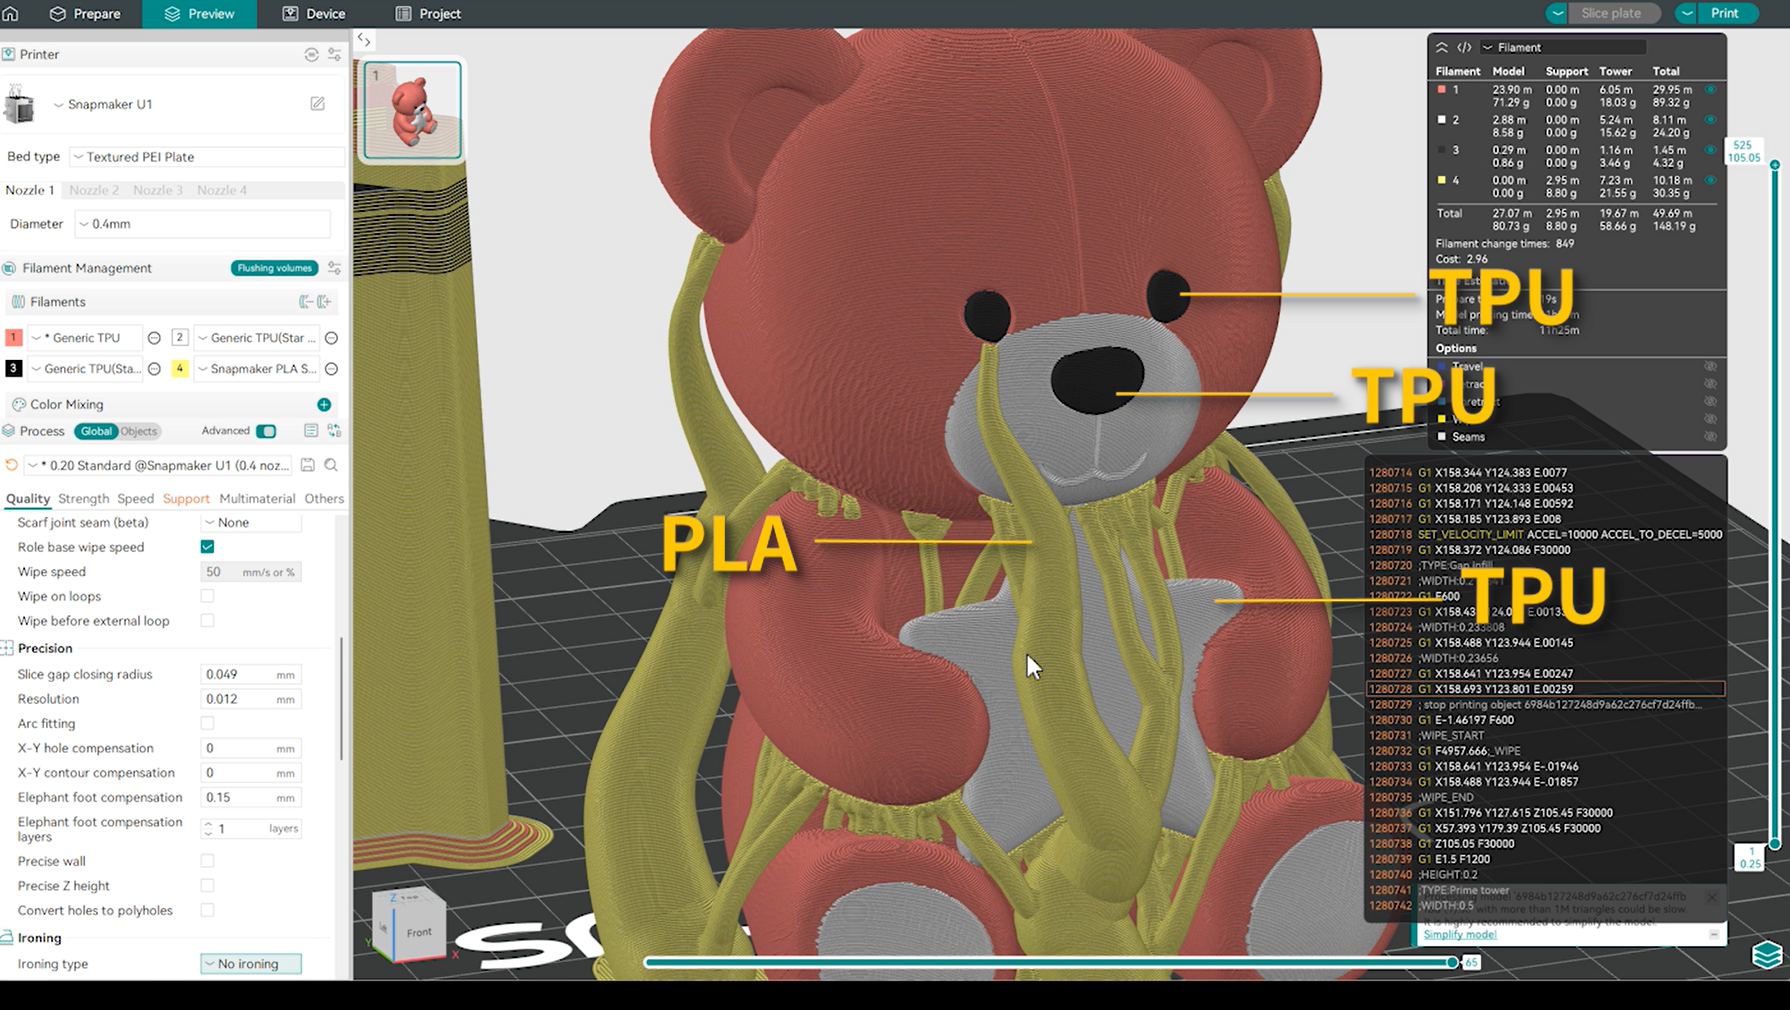
Additionally, when printing with multiple materials, the wipe tower is printed with all involved materials by default. If these materials don’t adhere well to each other (for example, TPU & PLA), the vertical stability of the tower will be further reduced.
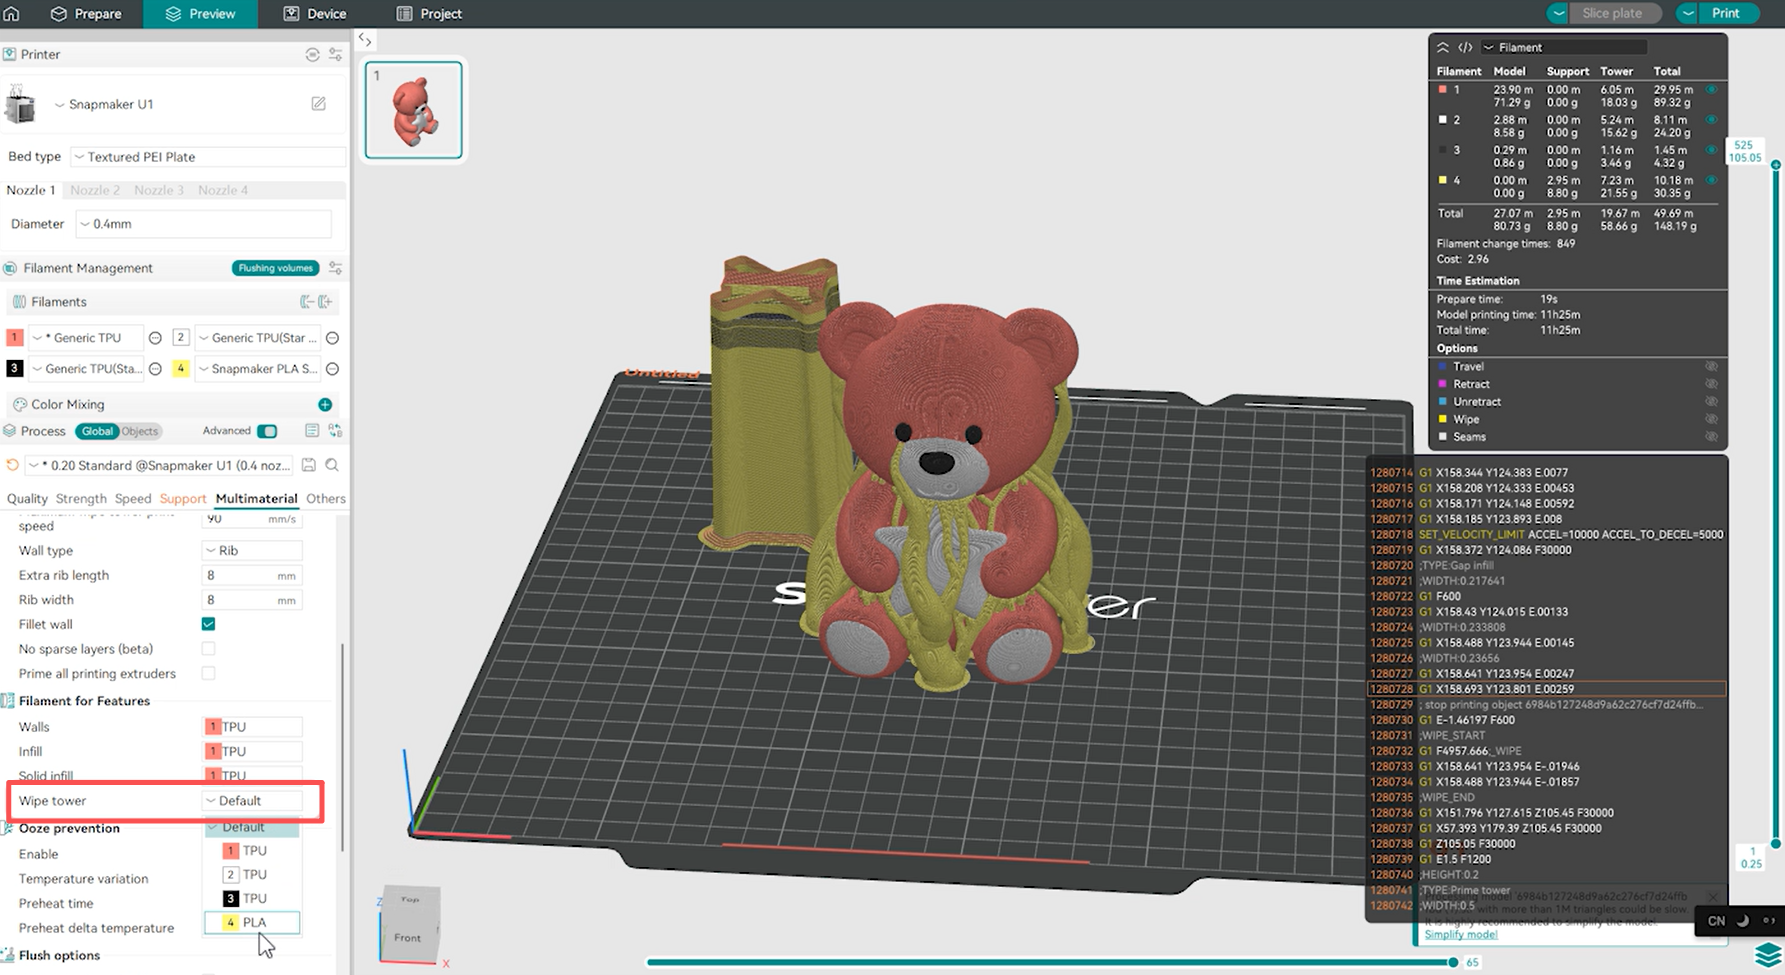
In this case, go to Process > Global > Multimaterial > Filament for Features and assign any single spool to the wipe tower. This ensures the outer walls of the tower are always printed with the same material, improving its structural stability.
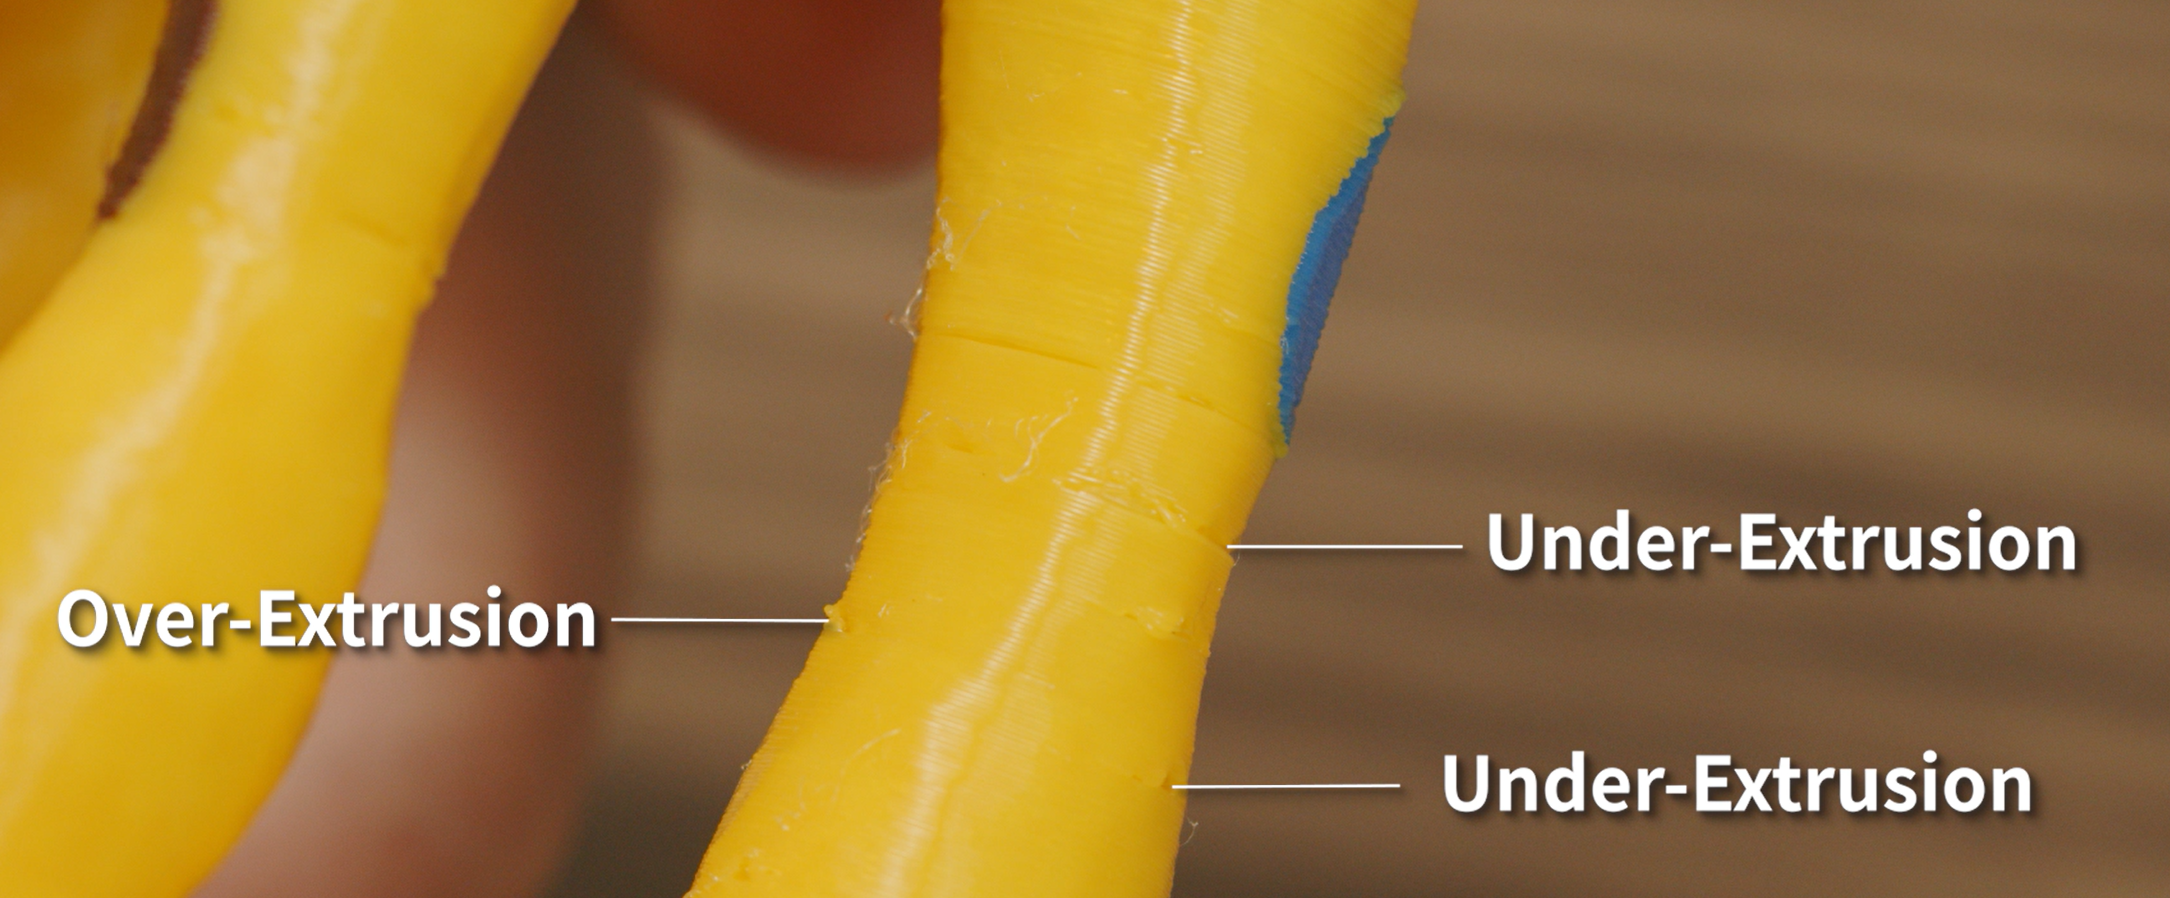
¶ Over‑Extrusion / Under‑Extrusion
TPU is highly sensitive to resistance along the extrusion path, and even small changes can cause pressure fluctuations inside the nozzle. When the resistance becomes too high and extrusion drops, you may see gaps or dents. Once the pressure builds up, the filament may suddenly surge out, creating bumps on the surface.
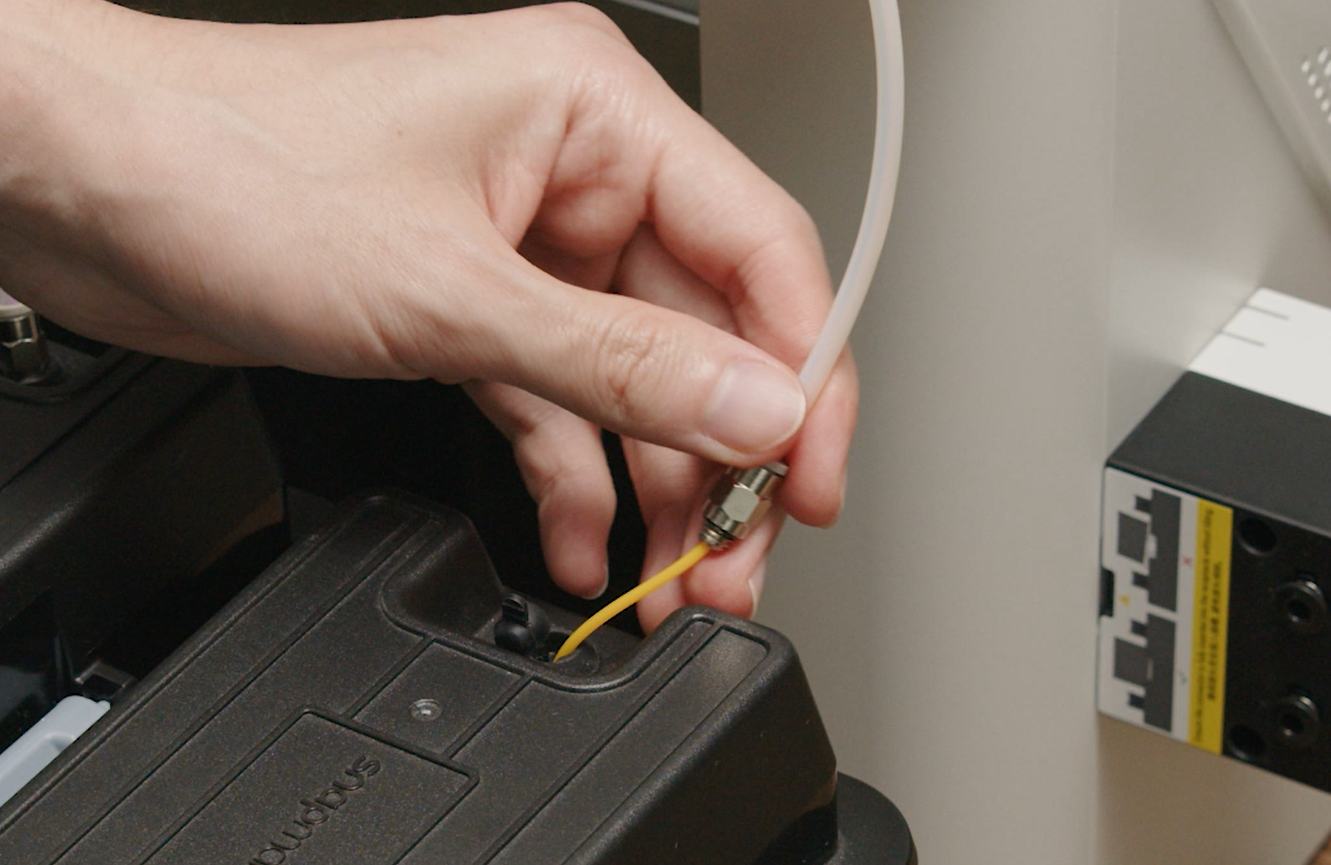
In this case, check whether the filament tube is bent or loose, whether the outlet of the dryer box is too tight, and whether the spool holder rotates smoothly.
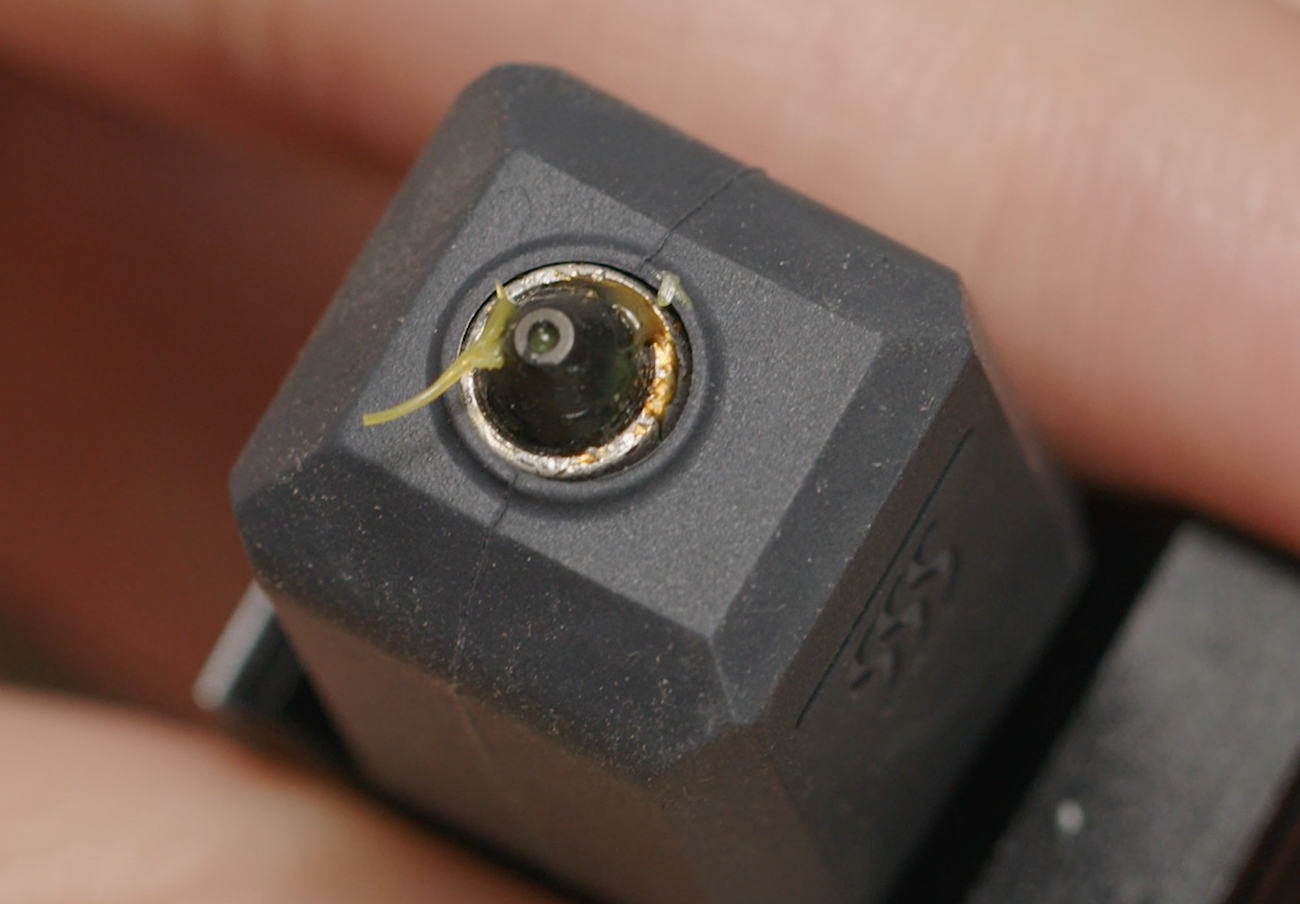
Also, TPU tends to build up inside the nozzle, causing partial clogs that further reduce extrusion stability.
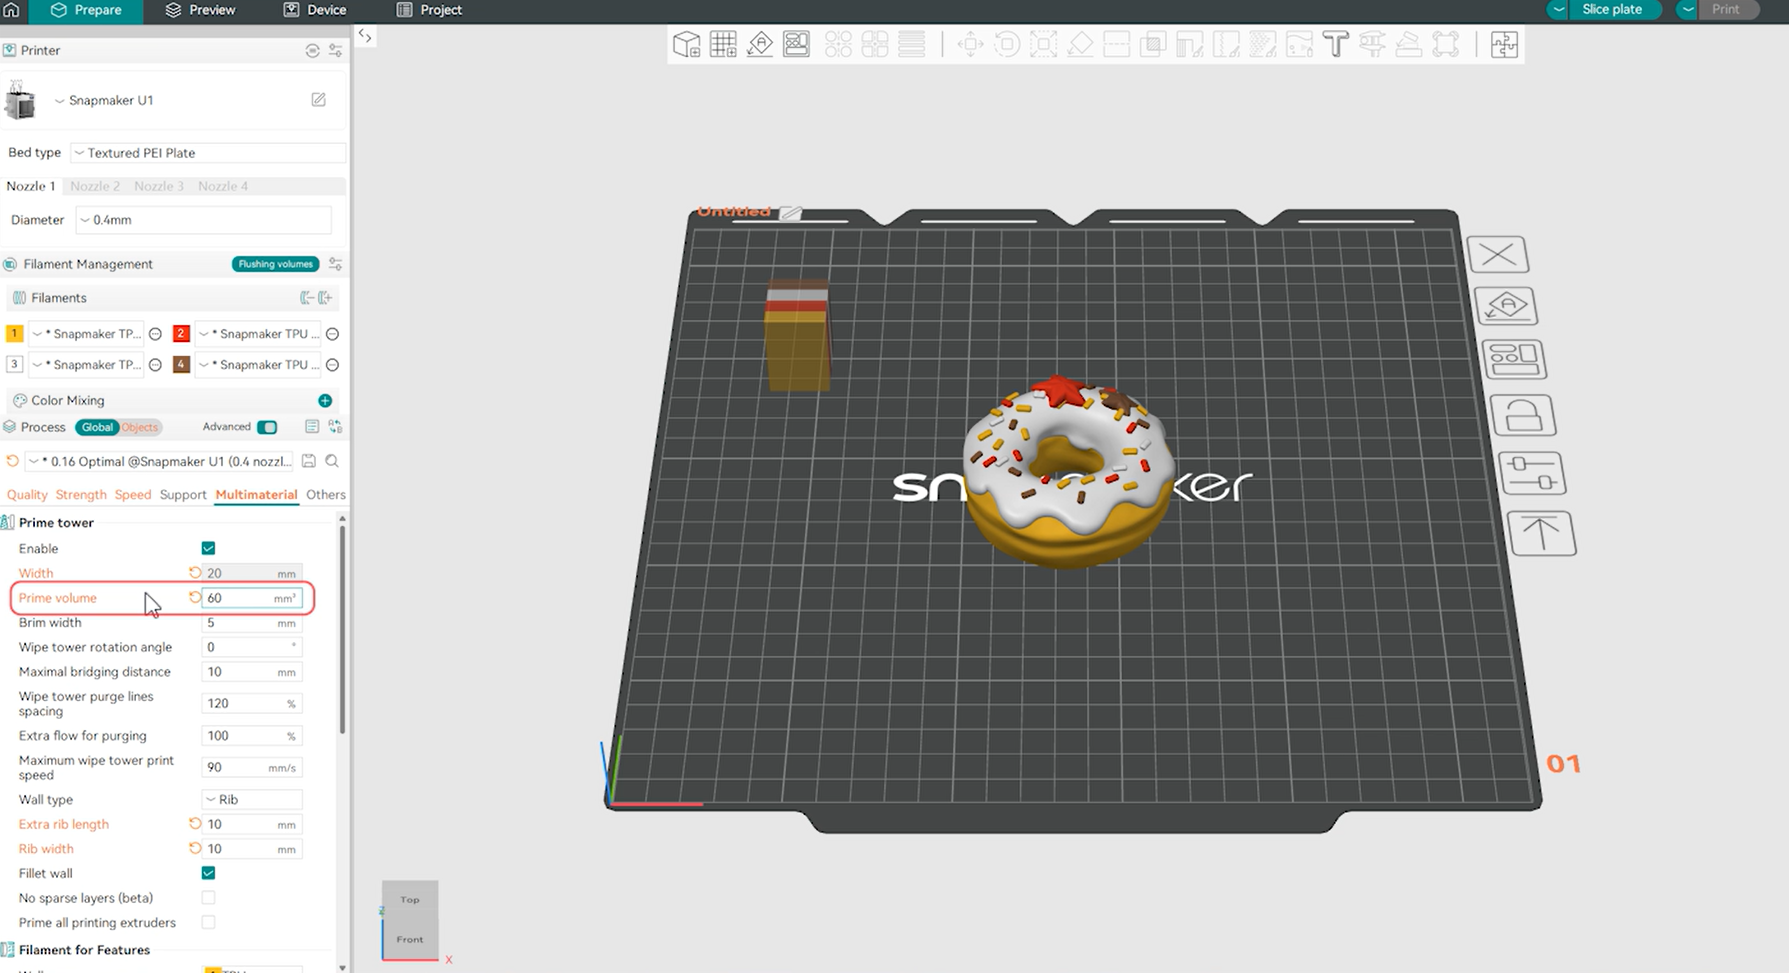
If the external filament path is clear, try increasing the purge volume for the wipe tower. In the Process panel, go to Global > Multimaterial > Prime Tower and increase the prime volume.
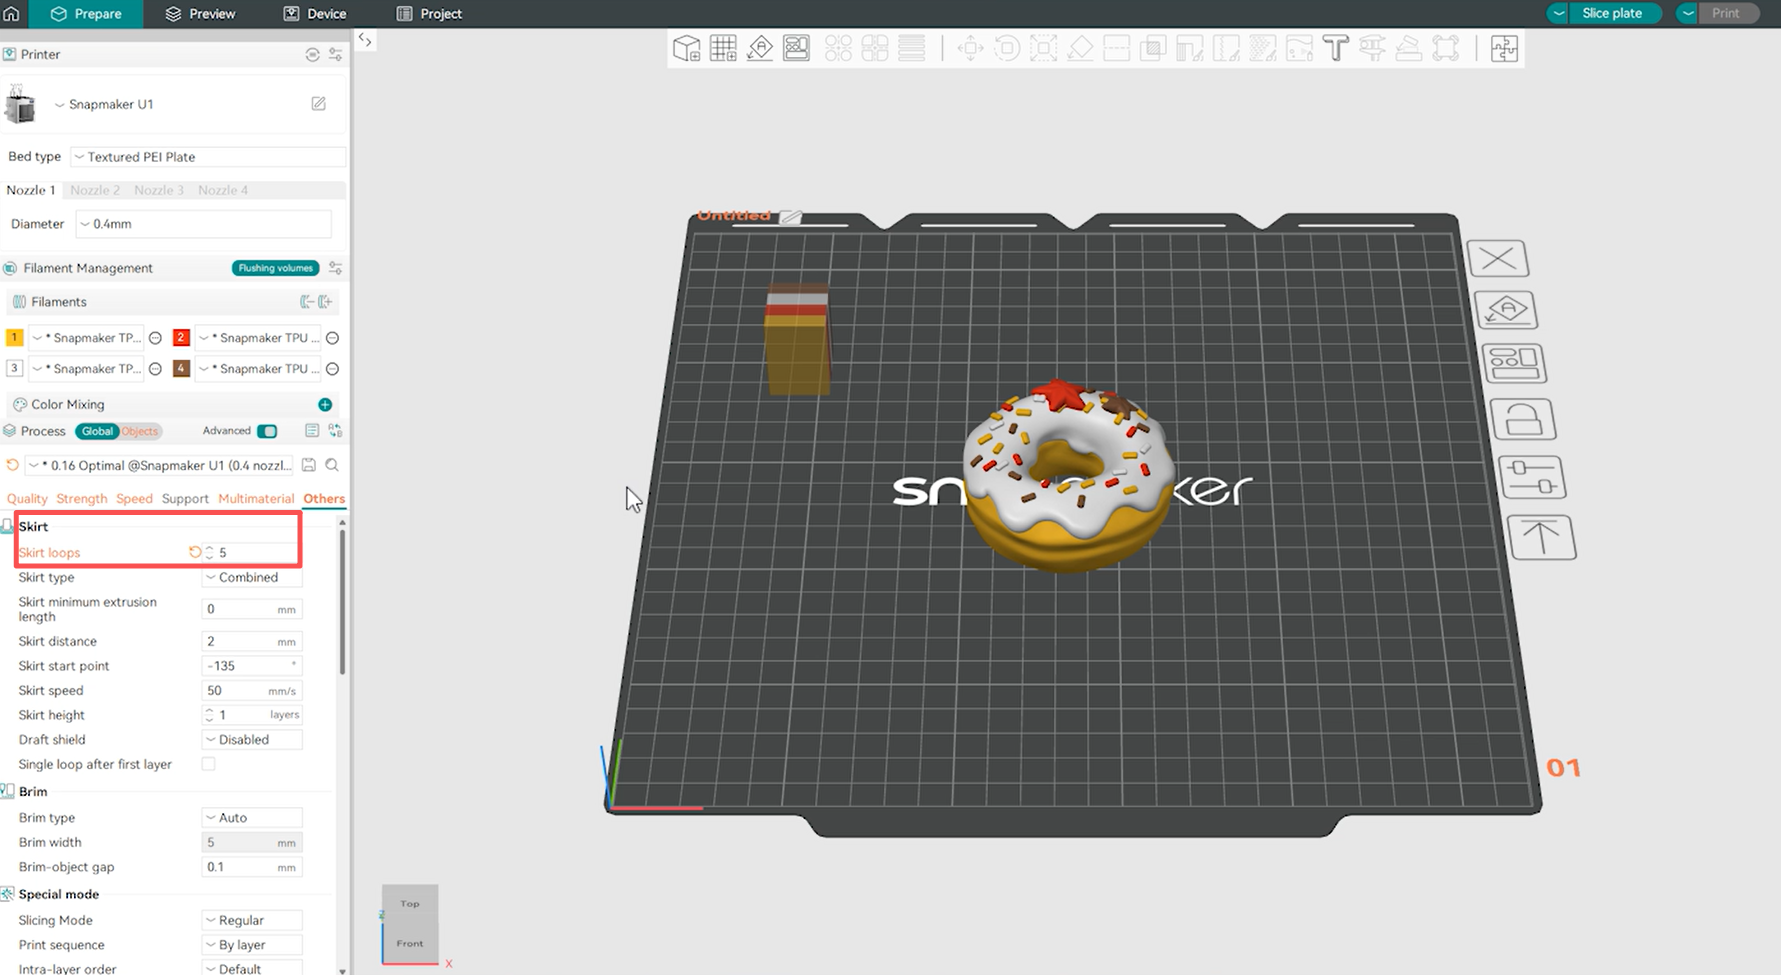
Additionally, increase skirt loops under Others > Skirt so the nozzle performs continuous extrusion before printing the model, helping clear any remaining TPU inside the hotend.
¶ Other Common Issues
If you encounter general printing issues that are not specific to TPU, such as air printing, you can follow the corresponding video for troubleshooting:
If layer shifting occurs, follow the multi-toolhead offset calibration tutorial to recalibrate:
If the first layer is rough or material builds up, and automatic leveling doesn’t help, you’ll need to run manual leveling: