Though the machine model depicted in some illustrations is not Ray, the related instructions apply equally to Ray.
This guide applies to the 1.6W/10W/20W/40W Laser Module.
¶ 01 Before You Start
- Update the printer firmware and Snapmaker Luban (hereafter Luban) to their latest version.
- Turn off the machine.
- It is recommended to put the machine inside a correctly assembled and connected Enclosure.
- Prepare the required tools and accessories.
- Extension Cord for Rotary Module × 1(sold separately in our online store)
- H2.5 screwdriver × 1
- M4 × 8 screw × 4
- Air purifier × 1 (recommended)
¶ 02 Assembly & Installation
Before the assembly, be sure to turn off the machine first.
¶ 2.1 Assembling the Rotary Module
¶ 2.2 Installing the Rotary Module on Ray
¶ 2.3 Connecting the Rotary Module to Ray
¶ 03 First Work
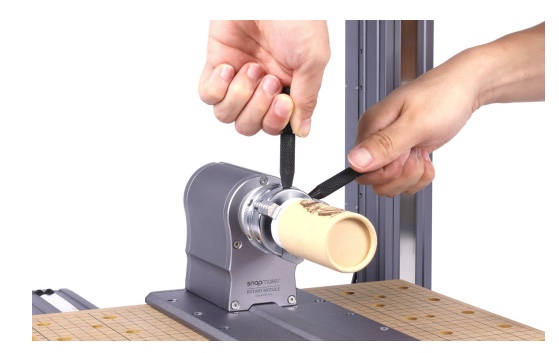
¶ 3.1 Fixing the material
While fixing, rotate the material by the desired degree for later machining.
¶ 3.3 Generating the G-code file using Luban
- Launch Luban, and click Laser > 4-axis to enter the Laser G-code Generator on the Home page.
- Follow the Beginner's Guide to generate the G-code file of the test model.
- Export and transfer the G-code file to the machine.
If the Beginner’s Guide does not pop up or quits unexpectedly, you can click Help > Beginner’s Guide in the top menu bar.
You can also import your own files and configure the parameters.
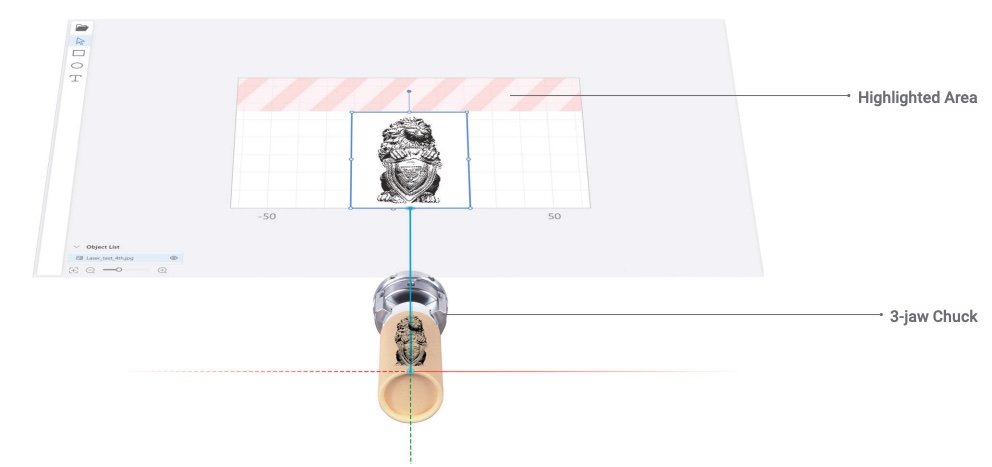
The canvas in the Snapmaker Luban equals the lateral area of your material. After you input the diameter and length of your material, Luban will adjust the size of the canvas. You should put your object within the canvas. The stripe-highlighted area is where the material is clamped by the 3-jaw chuck.
- Launch Luban, and click Laser > 4-axis to enter the Laser G-code Generator on the Home page.
- Follow the Beginner's Guide to get familiar with the basic operations.
- Click the File icon on the left toolbar to import a design file and adjust the size and position of the imported object, then click Next.
- Select the object and click Create Toolpath, then configure the parameters in the Toolpath Settings window.
You can use the preset parameters of Luban or make adjustments to them.
-
Click Generate G-code and Preview.
-
Export and transfer the G-code file to the machine.
If the Beginner’s Guide does not pop up or quits unexpectedly, you can click Help > Beginner’s Guide in the top menu bar.
The canvas in the Snapmaker Luban equals the lateral area of your material. After you input the diameter and length of your material, Luban will adjust the size of the canvas. You should put your object within the canvas. The stripe-highlighted area is where the material is clamped by the 3-jaw chuck.
¶ 3.4 Adjusting the laser height
¶ 3.5 Setting the work origin
Please ensure that the laser will only be emitted to the surface of the material by running the boundary.
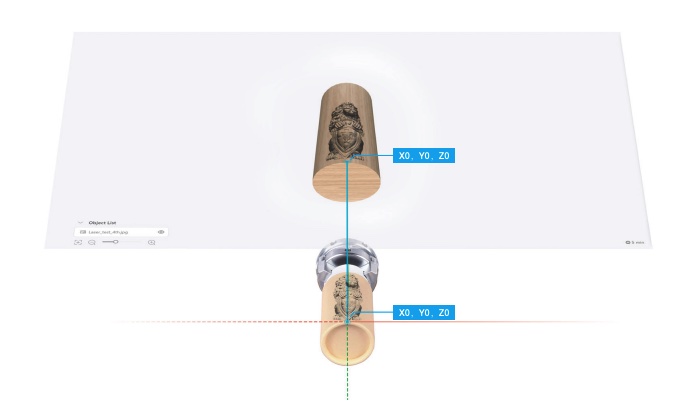
Setting the work origin helps the machine find out how to carve the material. The work origin (X0, Y0) on the material corresponds to the work origin (X0, Y0) in Luban.
¶ ❗ 3.6 Checking before starting the task
Before starting engraving and cutting, be sure to perform the following check.
- The material has been secured onto the Rotary Module.
- You have worn the laser safety glasses.
¶ 3.7 Starting engraving and cutting
A large amount of smoke can be produced during laser machining (especially with the 20W/40W Laser Module). Therefore, it is recommended to turn on an air purifier or exhaust fan before the task.
Press and hold the work switch. The machine will start to perform laser engraving and cutting.
¶ 3.8 Removing the finished work
After the engraving and cutting are completed, remove the finished work with the two chuck wrenches.


