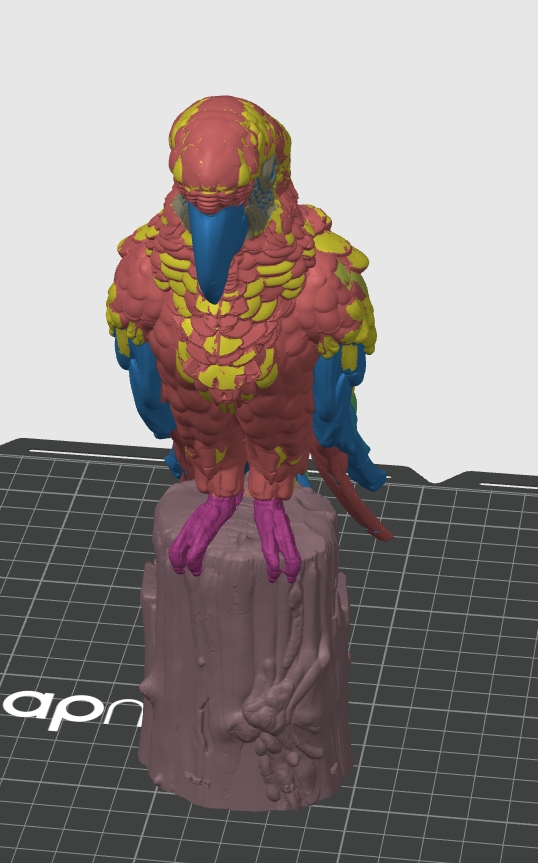
Due to factors such as filament properties, model geometry, print settings, and lighting conditions, the final print result produced with Full Spectrum may differ from the expected appearance.
Therefore, Full Spectrum is best suited for users who are familiar with 3D printing and slicing settings and are willing to experiment with new features, as well as creators who place a greater emphasis on color expression, gradients, and texture effects.
For print jobs that require high repeatability, accurate color reproduction, or high precision, use this feature with caution.
When printing multi-color models with a limited palette, your available filaments might not always align with the model's intended colors. The Full Spectrum feature helps you bridge this gap by mixing your existing filaments to approximate the original look.
The Color Mixing Match feature automatically calculates the most suitable mixing ratios for your current filament setup and applies these mixed colors directly to your model. This allows you to achieve a broader range of color effects than solid filaments alone can provide.
When using the color mixing feature, filaments with higher TD values and good translucency are recommended, such as the Snapmaker PLA Full Spectrum Filament Bundle.
Please be aware that due to monitor rendering and factors including ambient lighting, filament properties, model geometry, and print settings, some color variation between the tutorial previews and your final printed product is normal and expected.
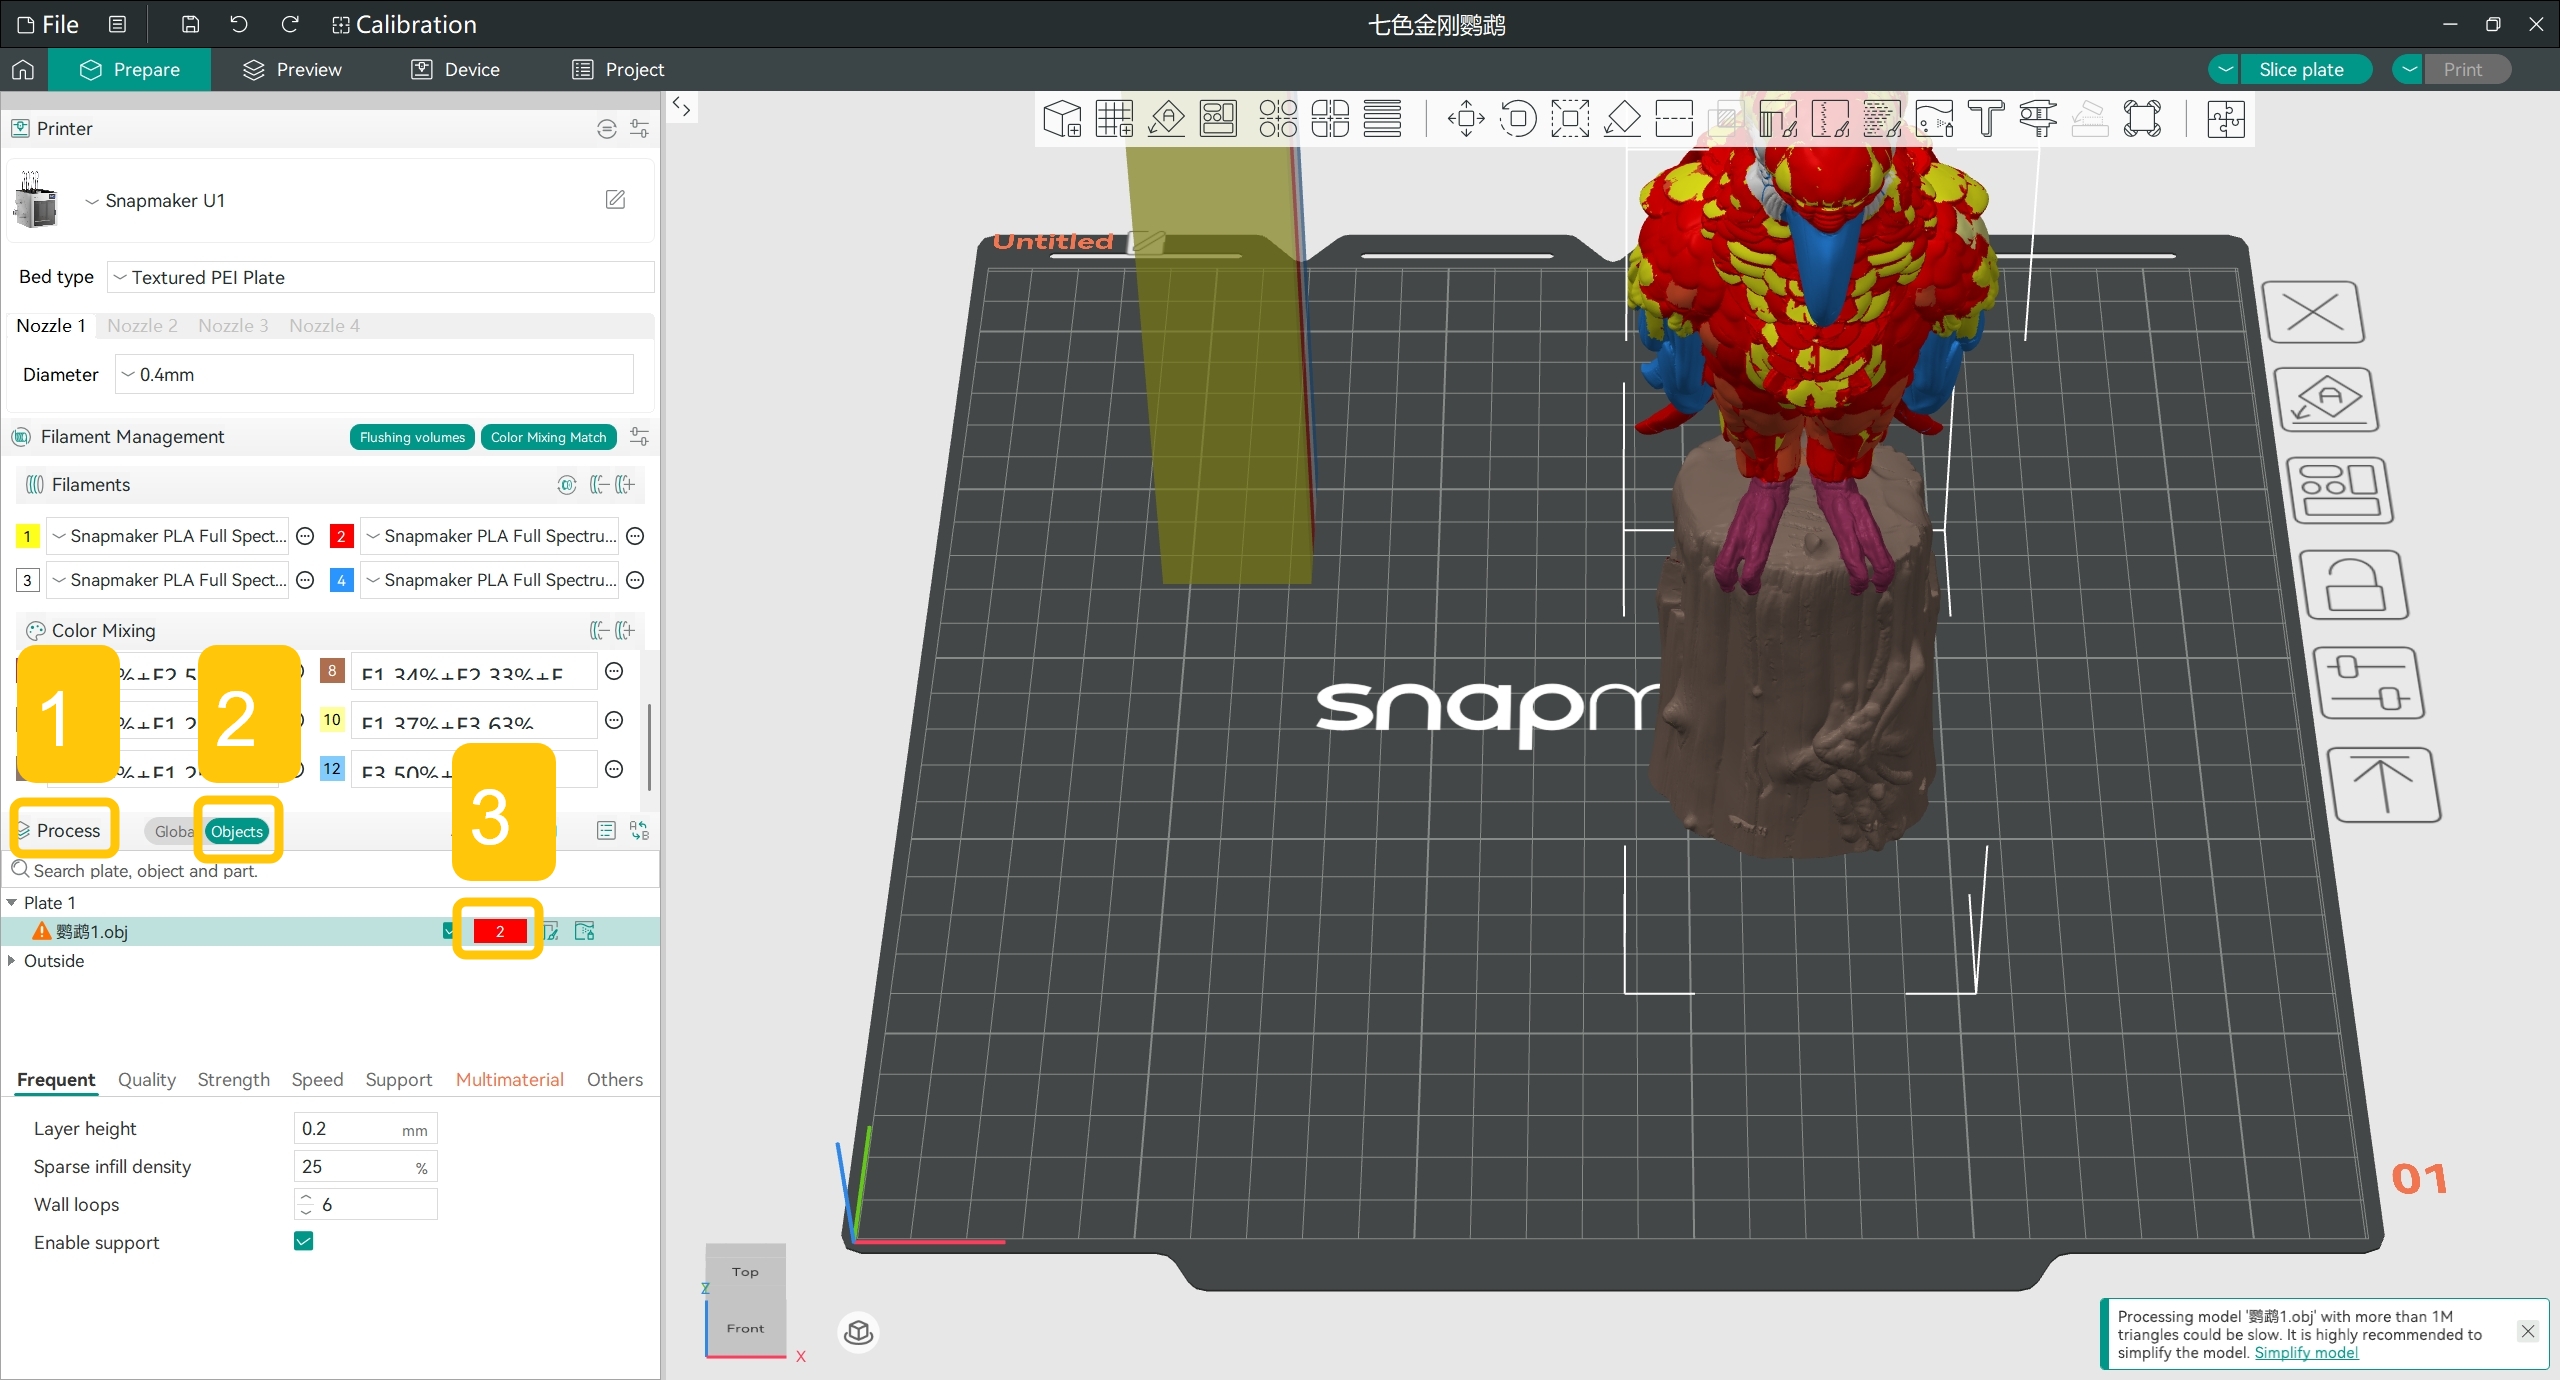
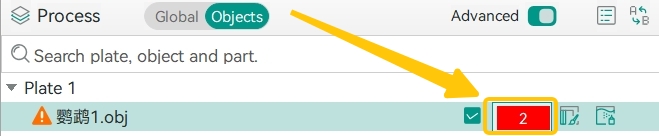
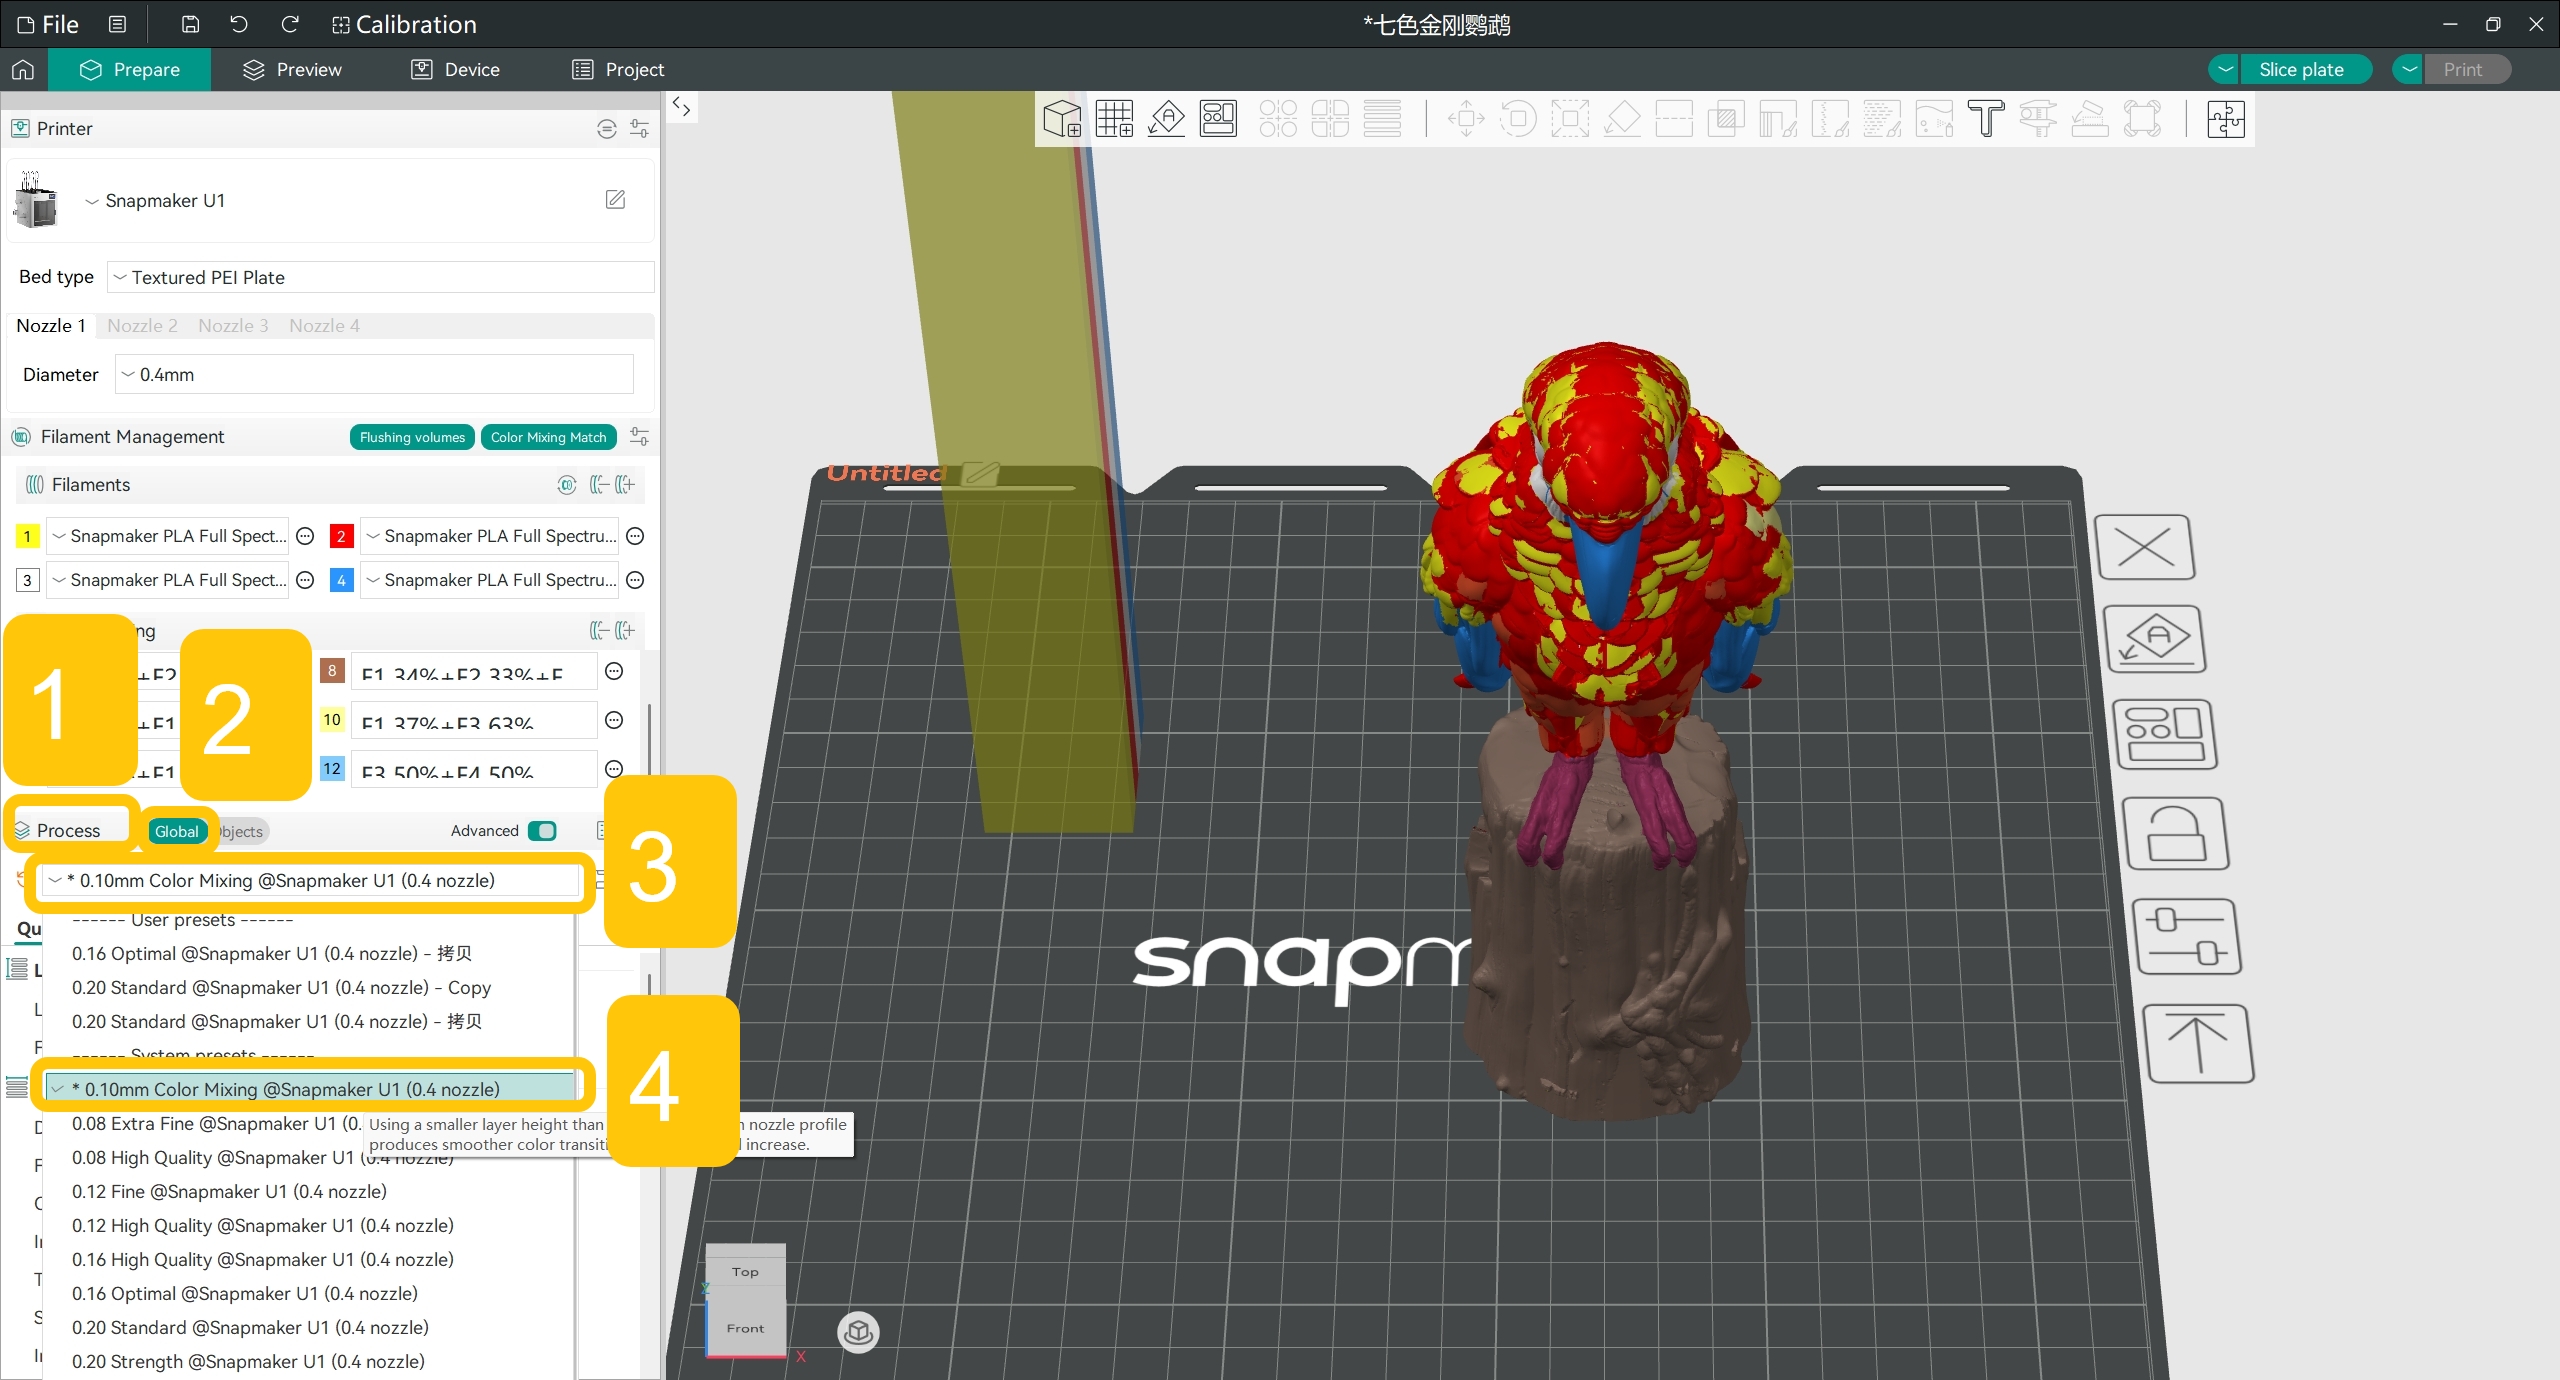
Go to Process, enable Objects, and find the filament display box for each object within the plate you intend to print.
Ensure that the filament for each object is non-default.
Please ensure each object is assigned a specific filament; otherwise, Color Mixing Match may not work for objects left on default.
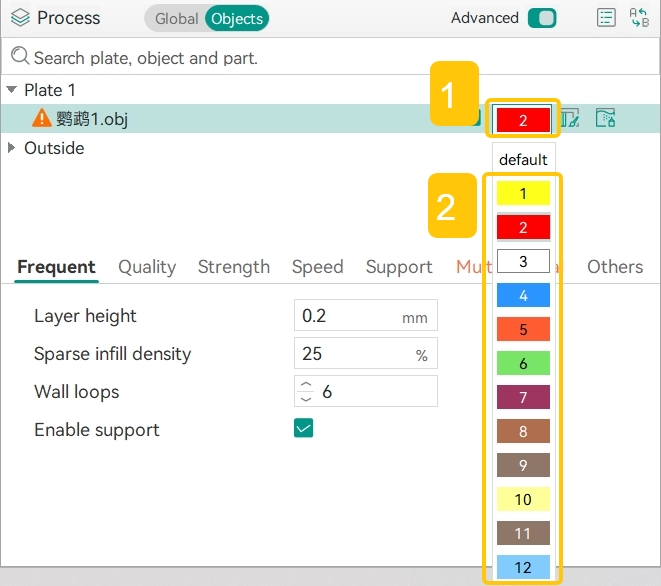
❌️ Case of default: A filament for an object in the plate is default.✅️ Case of non-default: The filament for an object in the plate is set to Filament 2. This number is consistent with the color numbering in Filament Management > Filaments and Filament Management > Color Mixing.
If an object's filament is found to be default, click the filament display box and select a specific filament from the dropdown menu.
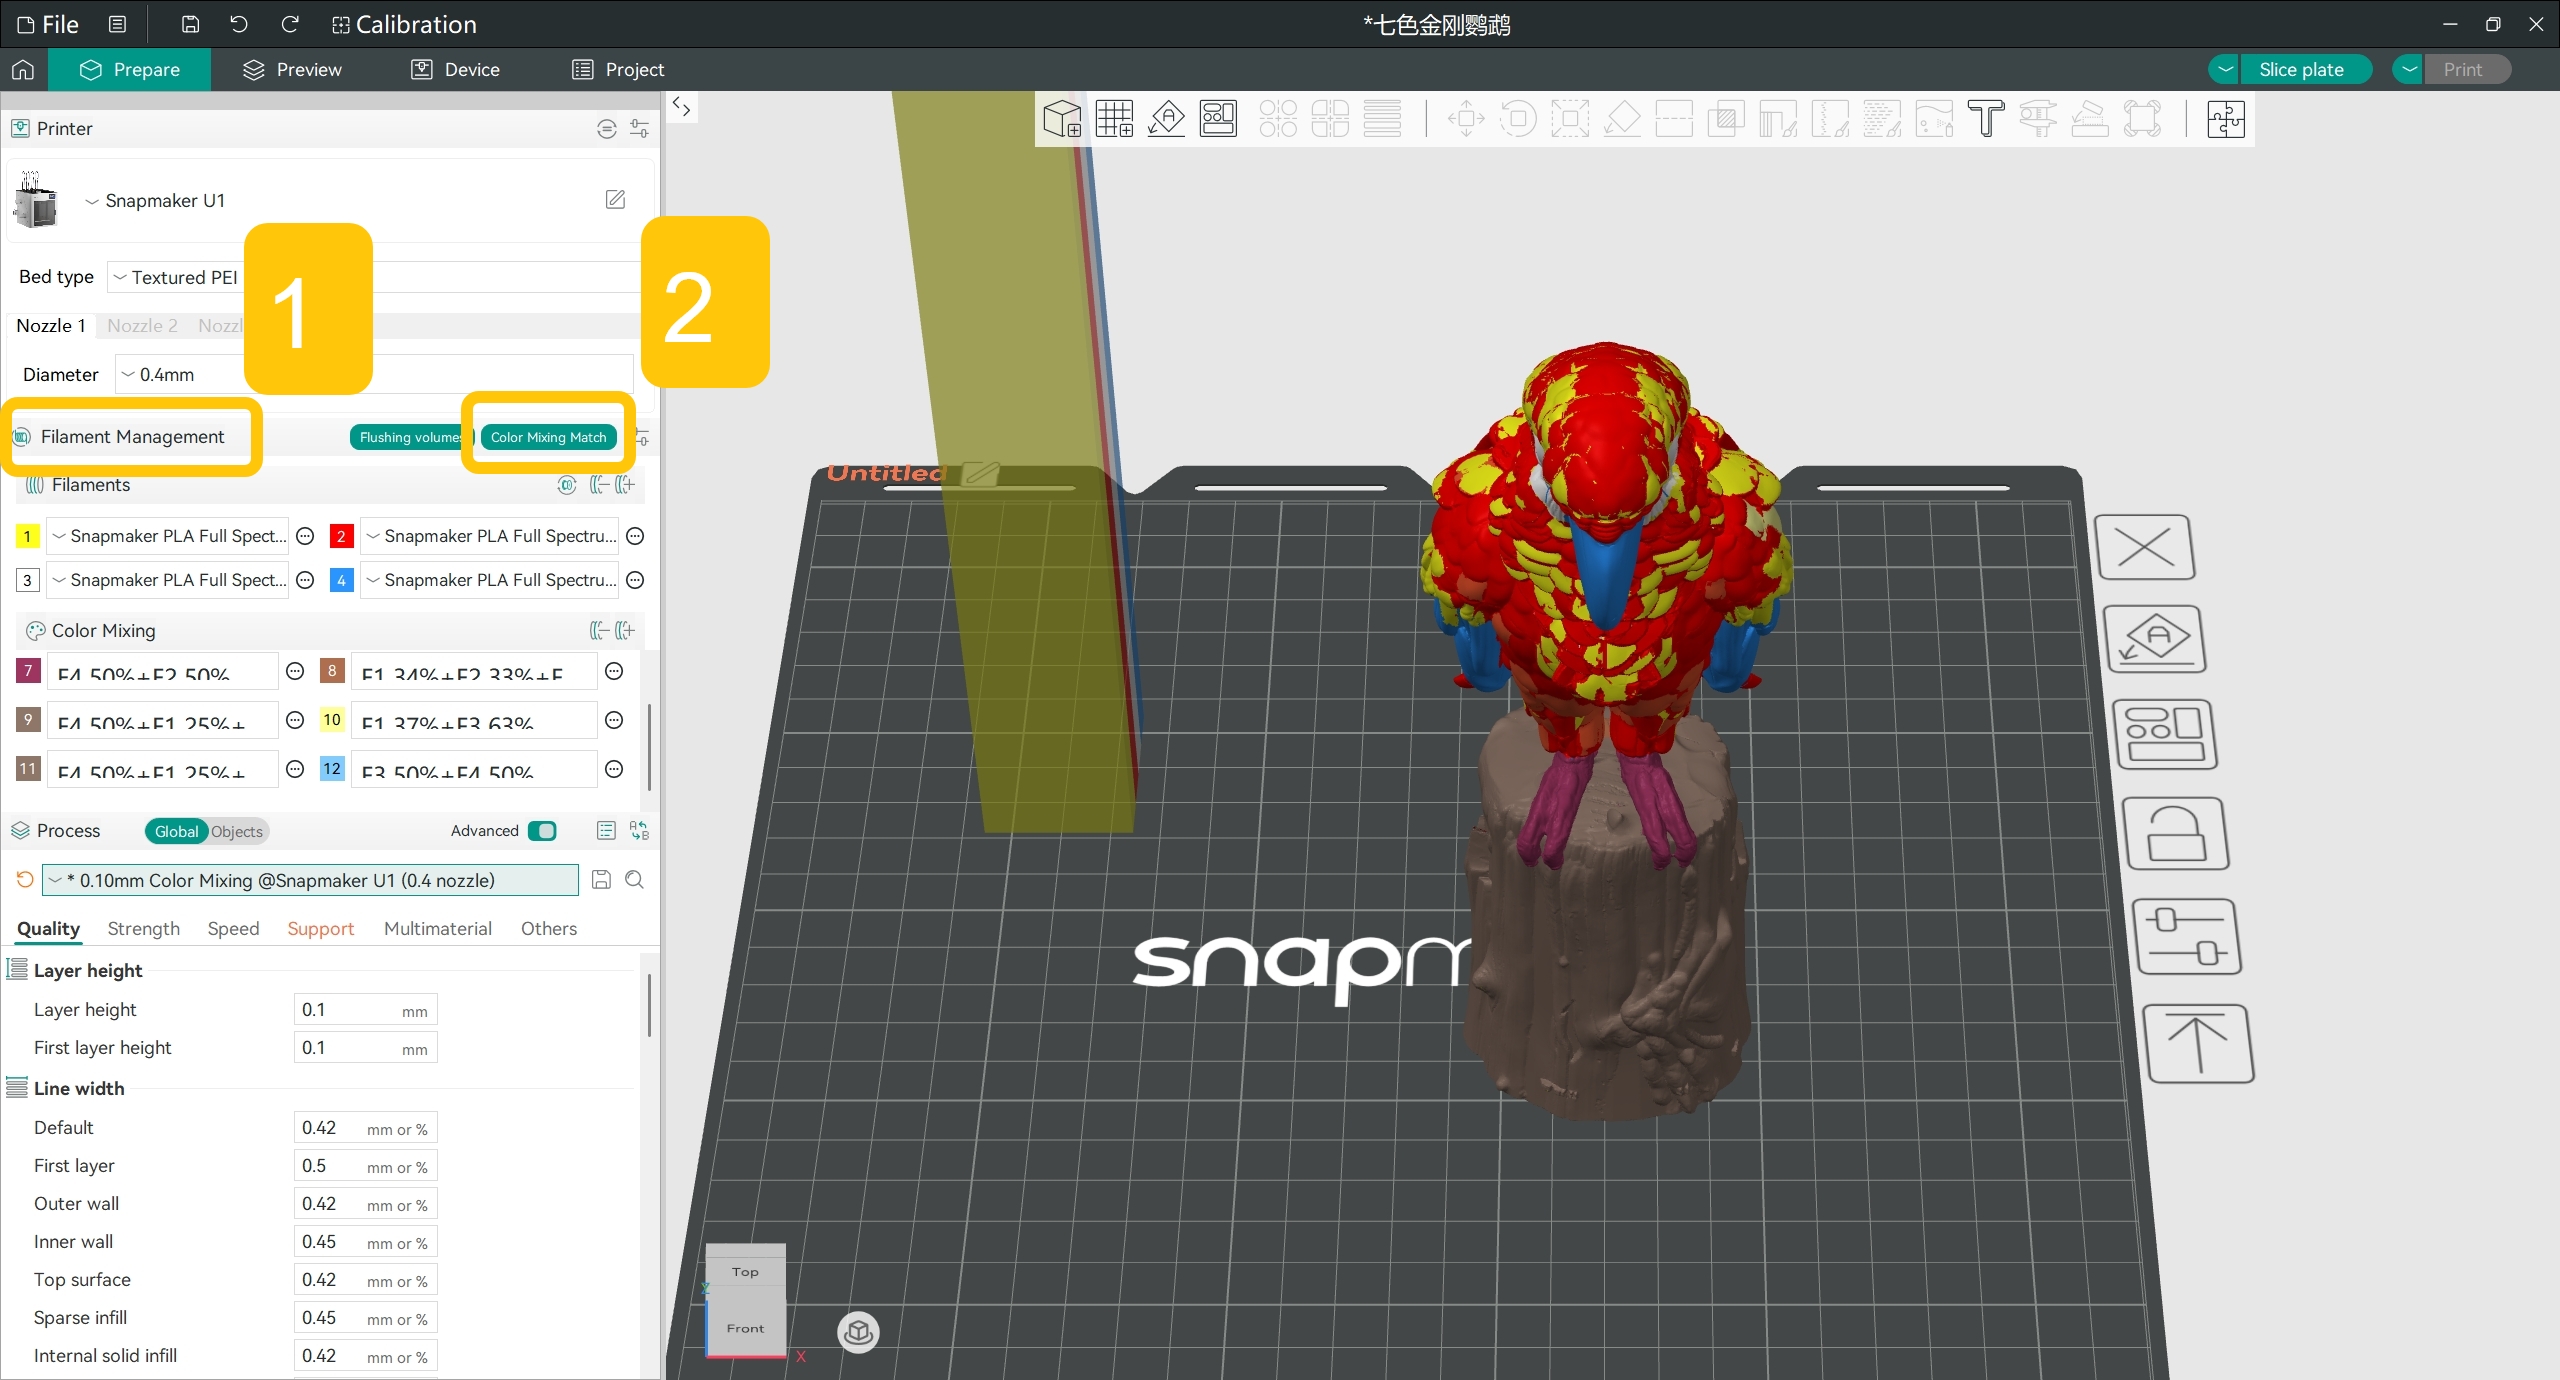
In the left side bar, find Filament Management. Click Color Mixing Match on its right.
In the pop-up window, select a Match Mode based on your needs.
💡 Auto Mode: Match using the official Snapmaker PLA Full Spectrum Filament Bundle
In Auto Mode, the software calculates mixing ratios based on the official Snapmaker PLA Full Spectrum Filament Bundle to best approximate the original colors of the model.
To ensure mixing and printing quality while approximating the original colors of the model, the mixing ratio for each color in Auto Mode ranges from 0% to 70%.
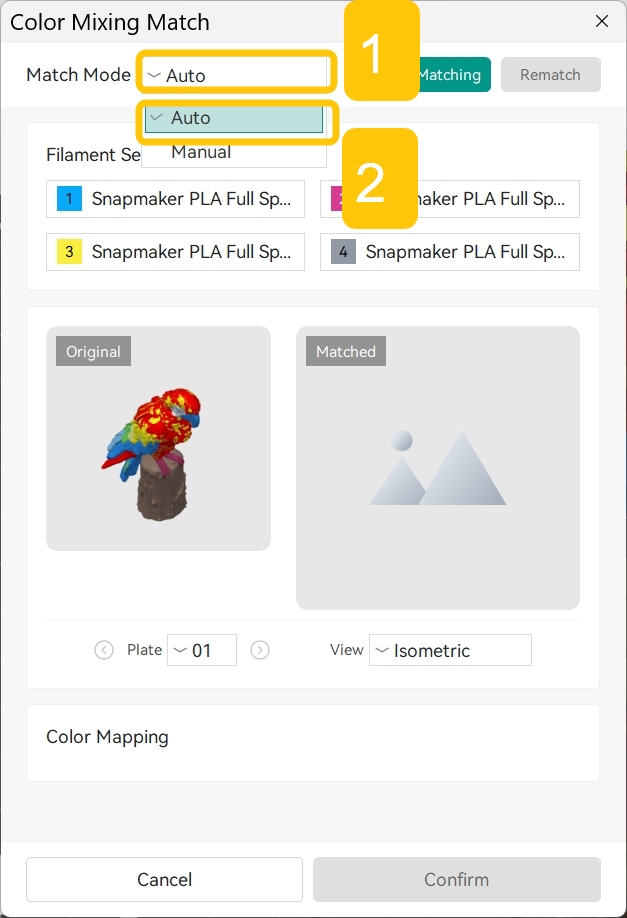
In the Color Mixing Match window, click the selection box to the right of Match Mode; from the dropdown menu, select Auto.
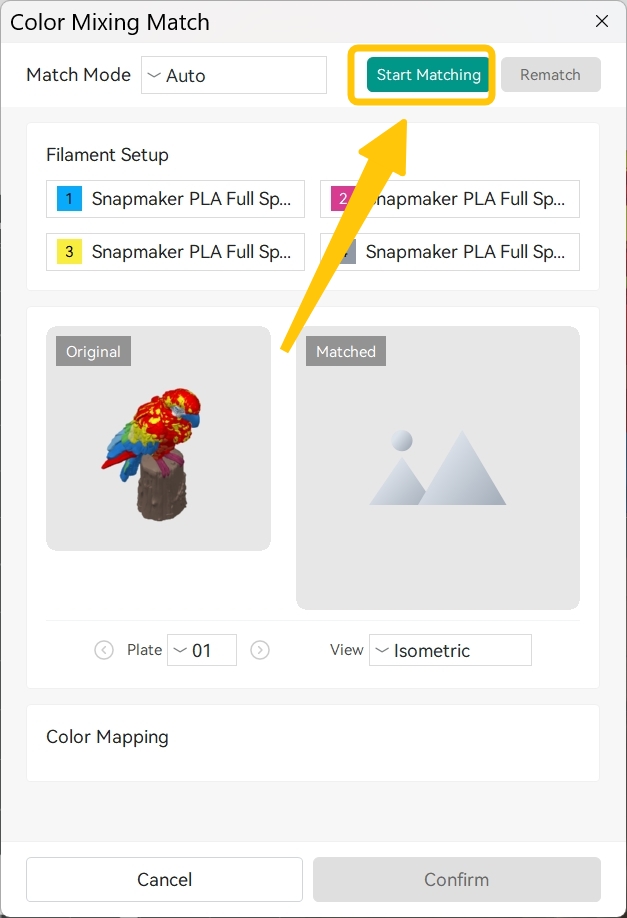
Click Start Matching and wait for the software to automatically complete the matching.
💡 Manual Mode: Match using my own filament list
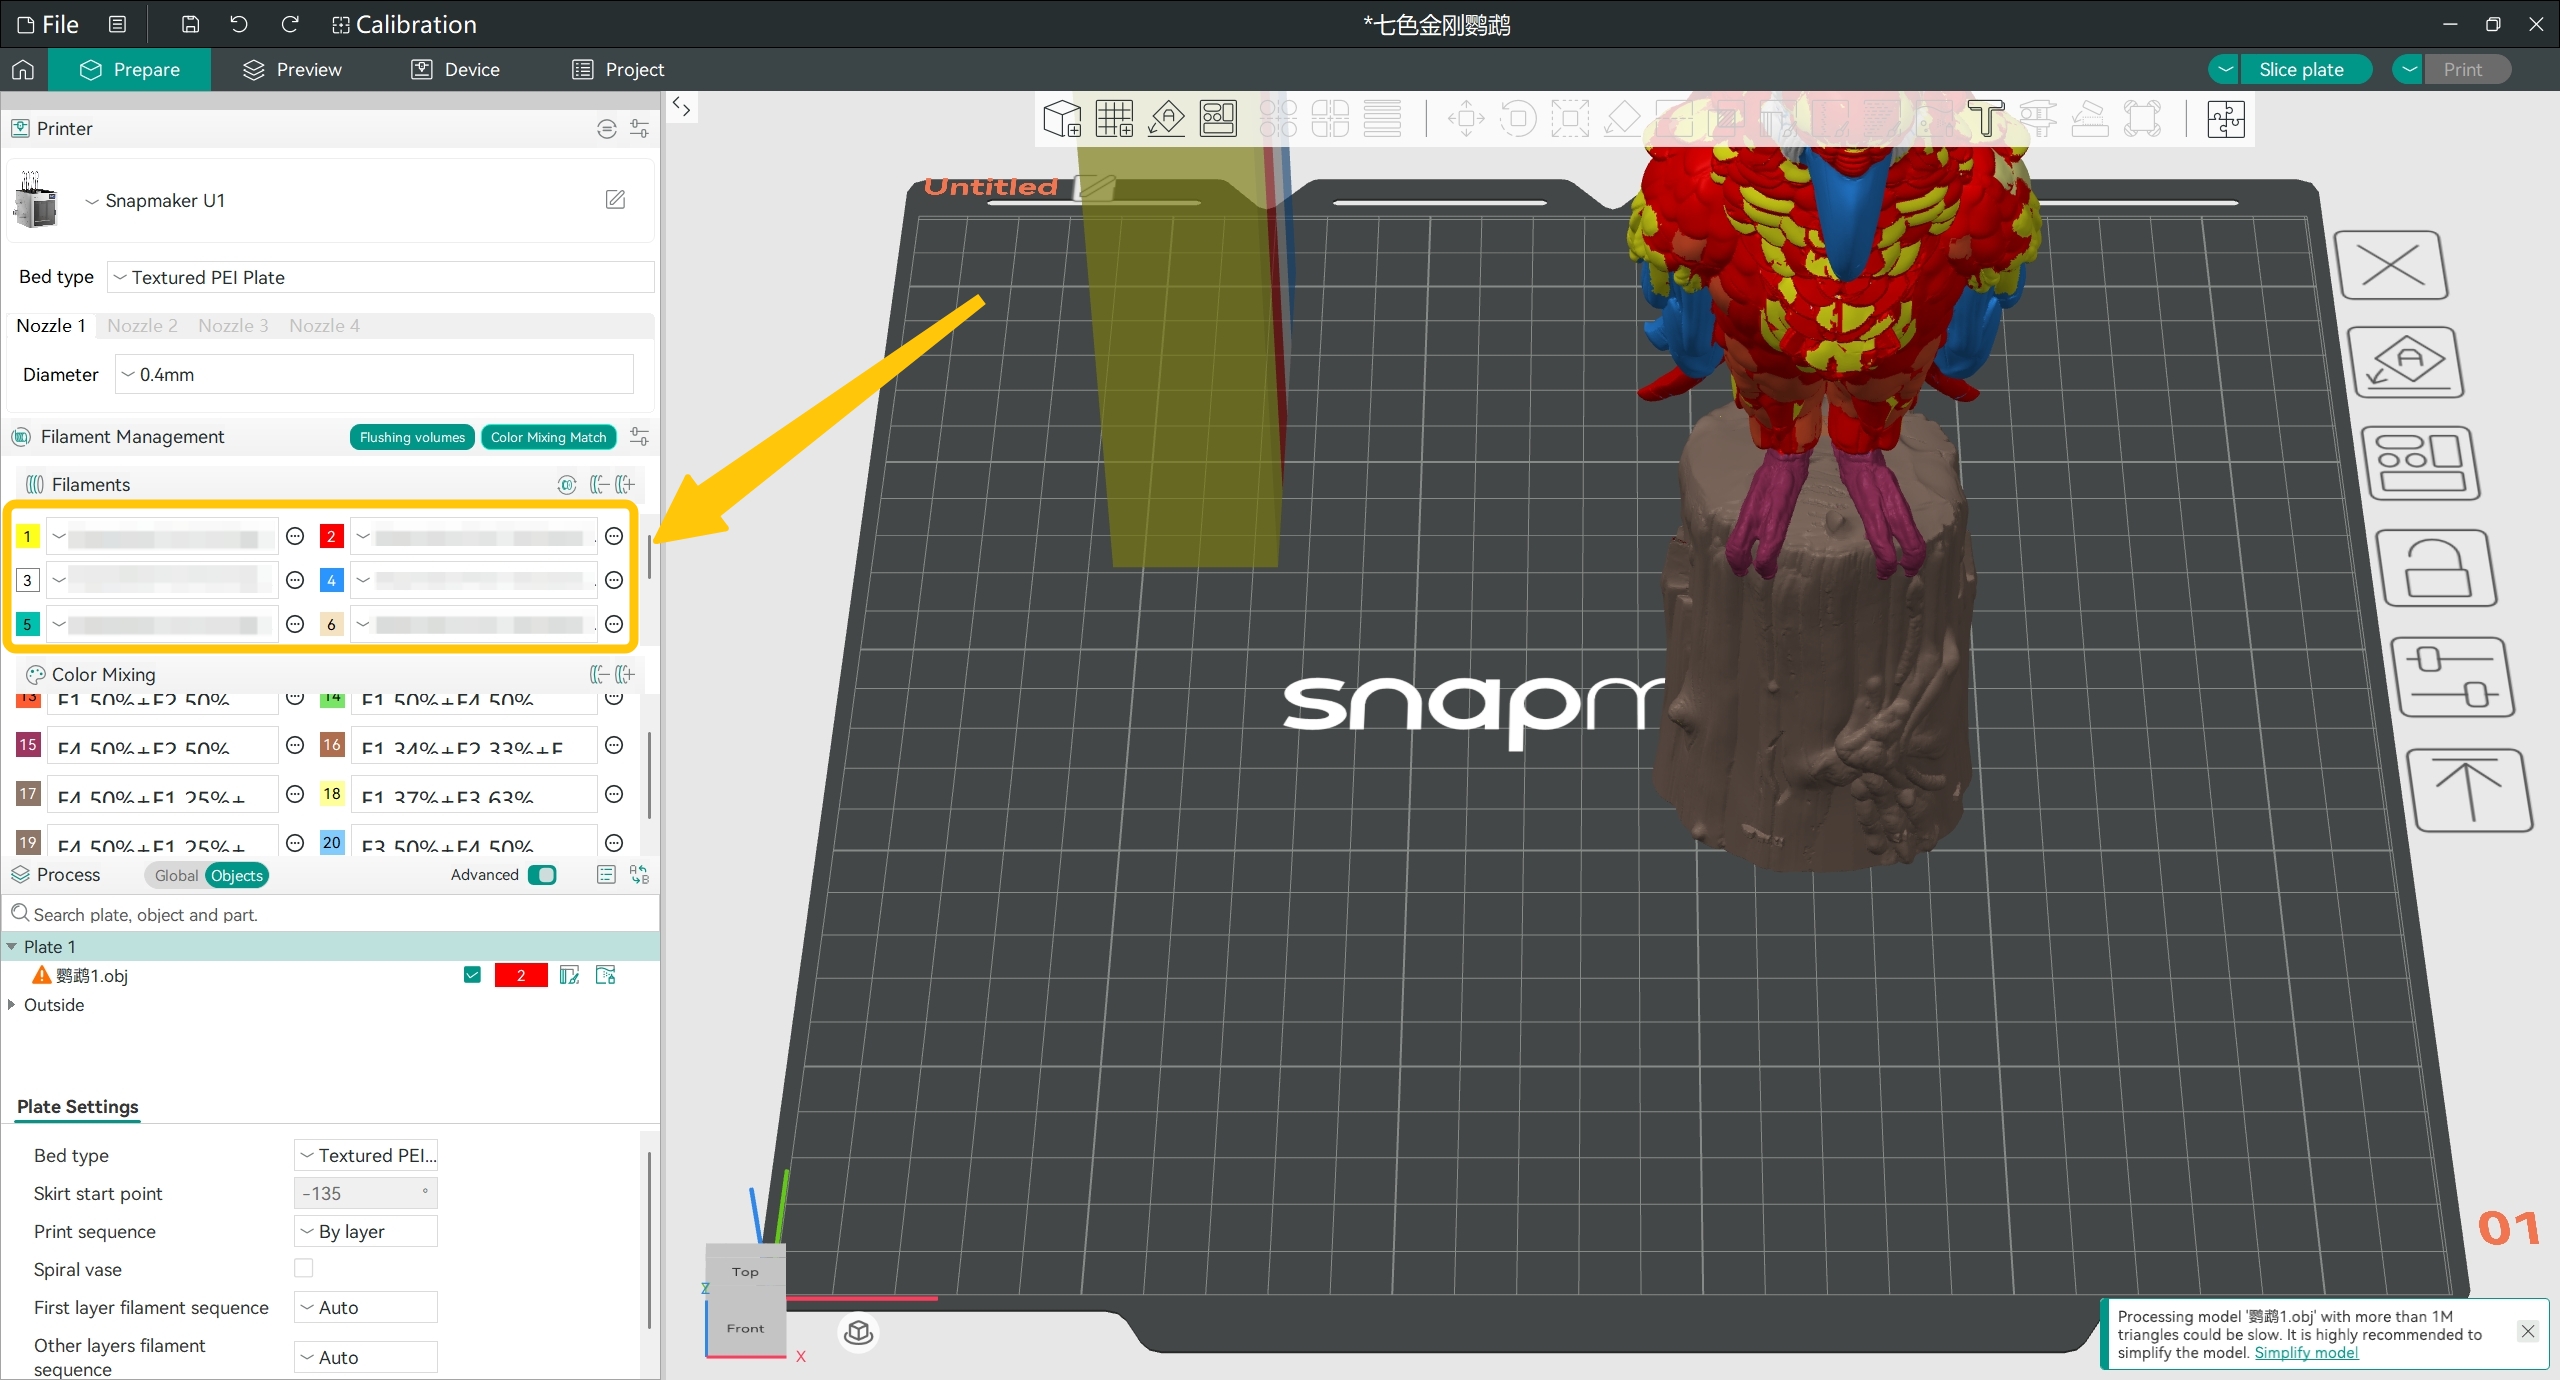
Manual Mode uses the filaments configured in Filament Management > Filament in the left side bar. You can select up to 4 filaments from this list to mix. You can add the base filaments you plan to use to Filament Management > Filaments before accessing the Color Mixing Match feature.
Manual Mode uses these filaments for the Color Mixing Match
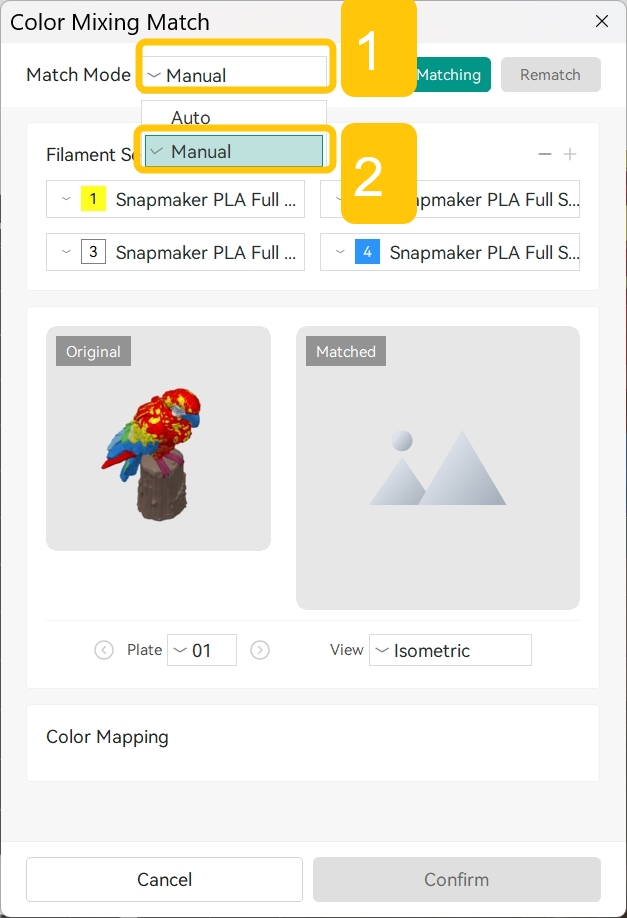
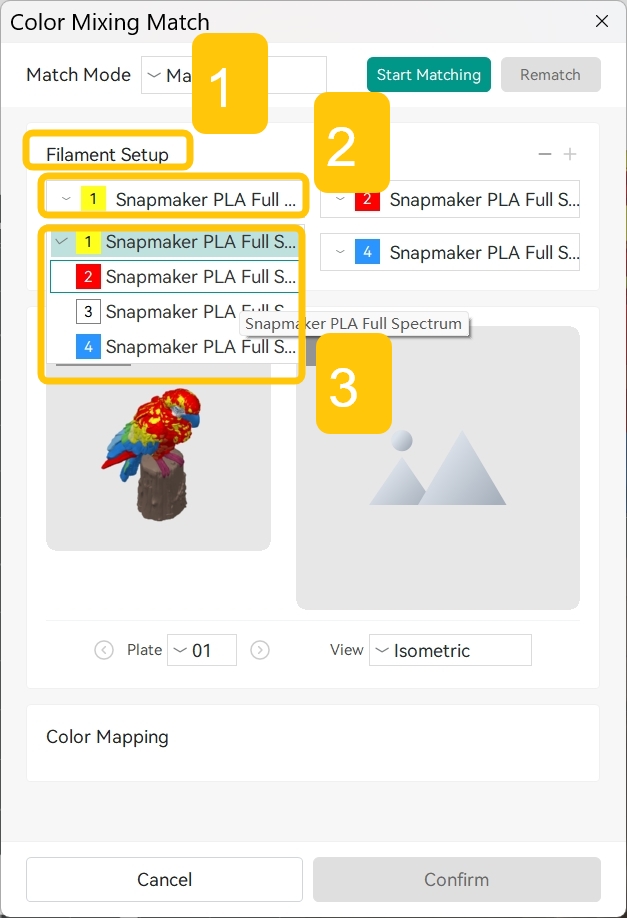
In the Color Mixing Match window, click the selection box to the right of Match Mode; from the dropdown menu, select Manual.
In Filament Setup, click the filament name and select the filament you want to use for matching from the dropdown menu.
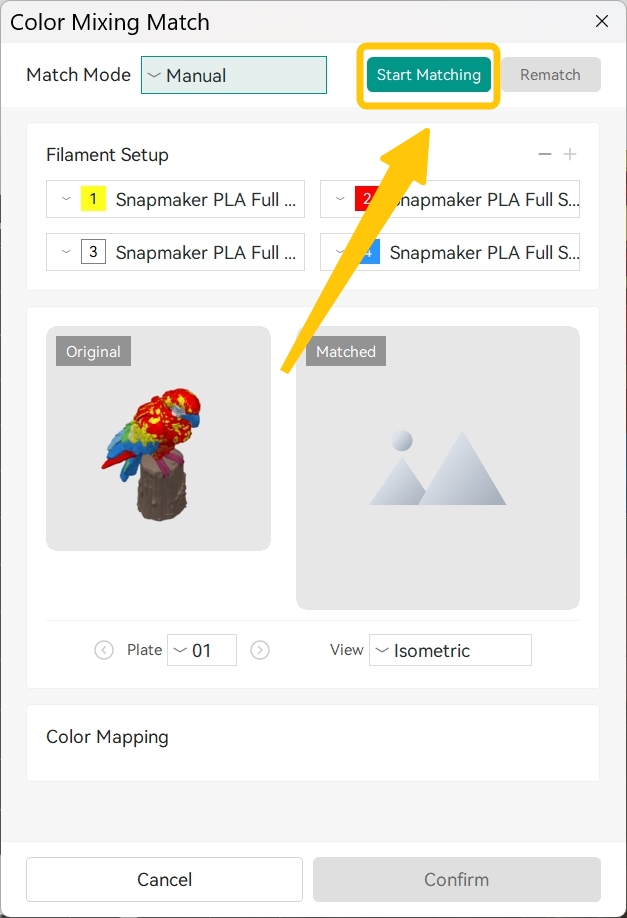
Click Start Matching and wait for the software to complete the matching.
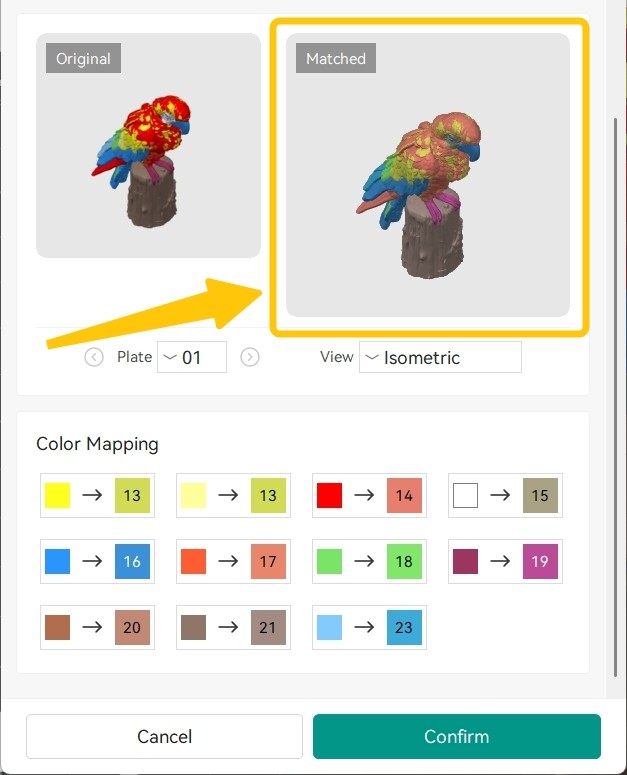
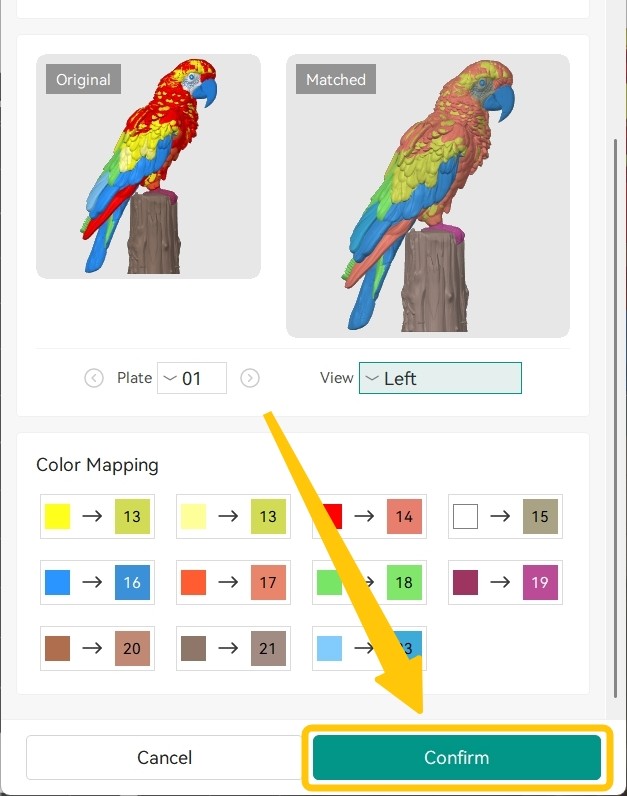
View the effect of the model after matching in Matched.
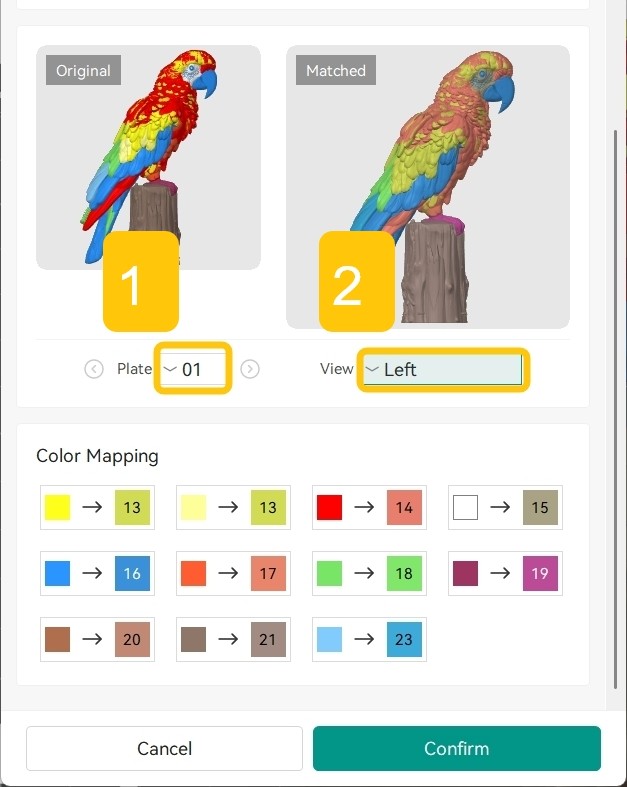
Adjust the Plate number to view matching effects for different plates.
Adjust the View to compare the model before and after matching from different perspectives.
The colors in the Matched view represent the software's closest approximation of the original colors based on your current filament setup. Due to factors such as filament properties, model geometry, print settings, and lighting, the software preview may differ from the actual printed results.
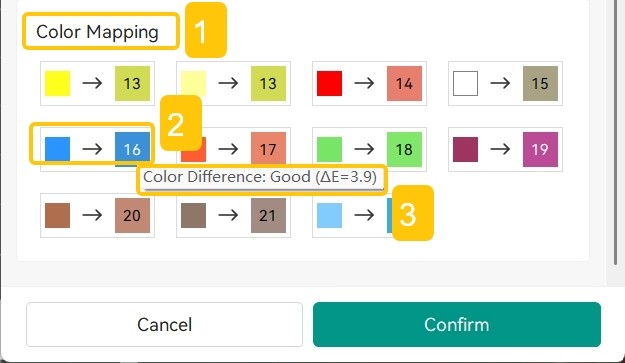
You can check the color differences before and after mapping in the Color Mapping section. Hover your mouse over each color's mapping relationship to view the color difference rating and value (ΔE). A smaller (ΔE) value indicates a closer match to the original color.
Color Mapping Key: Original Color (left) → Matched Color (right)
Click Confirm. This will save the matched mixed colors to the left side bar.
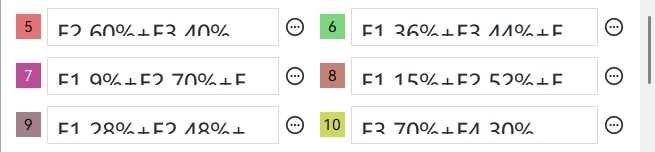
After clicking Confirm, you can see that the mixed colors have been updated in the left side bar under Filament Management > Color Mixing. The mixed colors are also automatically applied to the model according to the matching scheme.
Mixed colors updated to Filament Management > Color Mixing
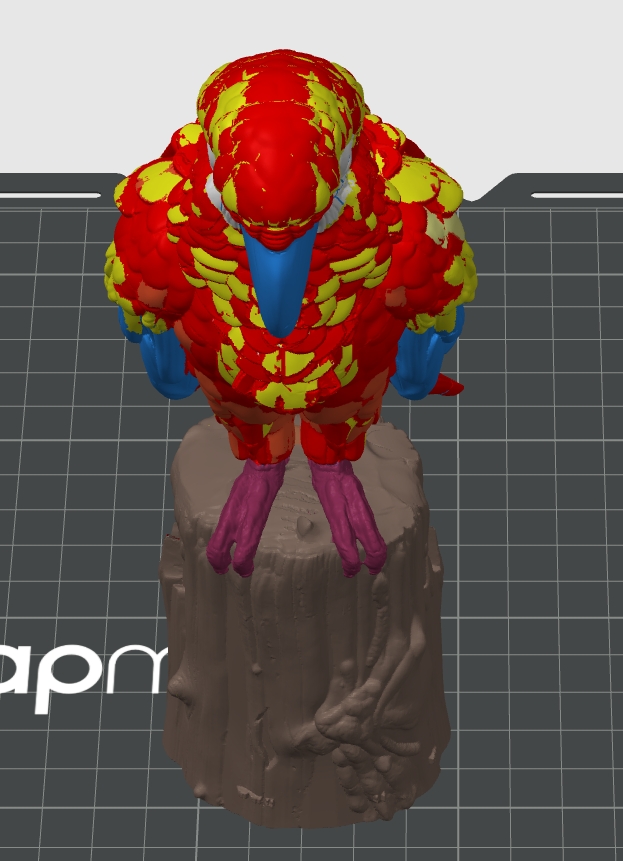
Original model before using Color Mixing MatchAfter using Color Mixing Match, the software automatically calculated the mixed colors closest to the original colors and applied them to the model.