¶ Problem Description
- The touchscreen is black when power on the machine.
- During printing, the machine suddenly lost power, and after restarting, the screen doesn't turn on.
¶ Possible Causes
- The AC power cord is loose or damaged.
- The rocker switch has poor contact or is damaged.
- The power supply is damaged.
- The mainboard is damaged.
- The screen is damaged.
¶ Phenomenon
Before diving into a detailed test, observe the machine's condition during the black screen issue. This might help determine which component is faulty based on the symptoms.
We have listed some phenomena and their associated possible causes below:
¶ After powering on the machine, does the light bar illuminate?
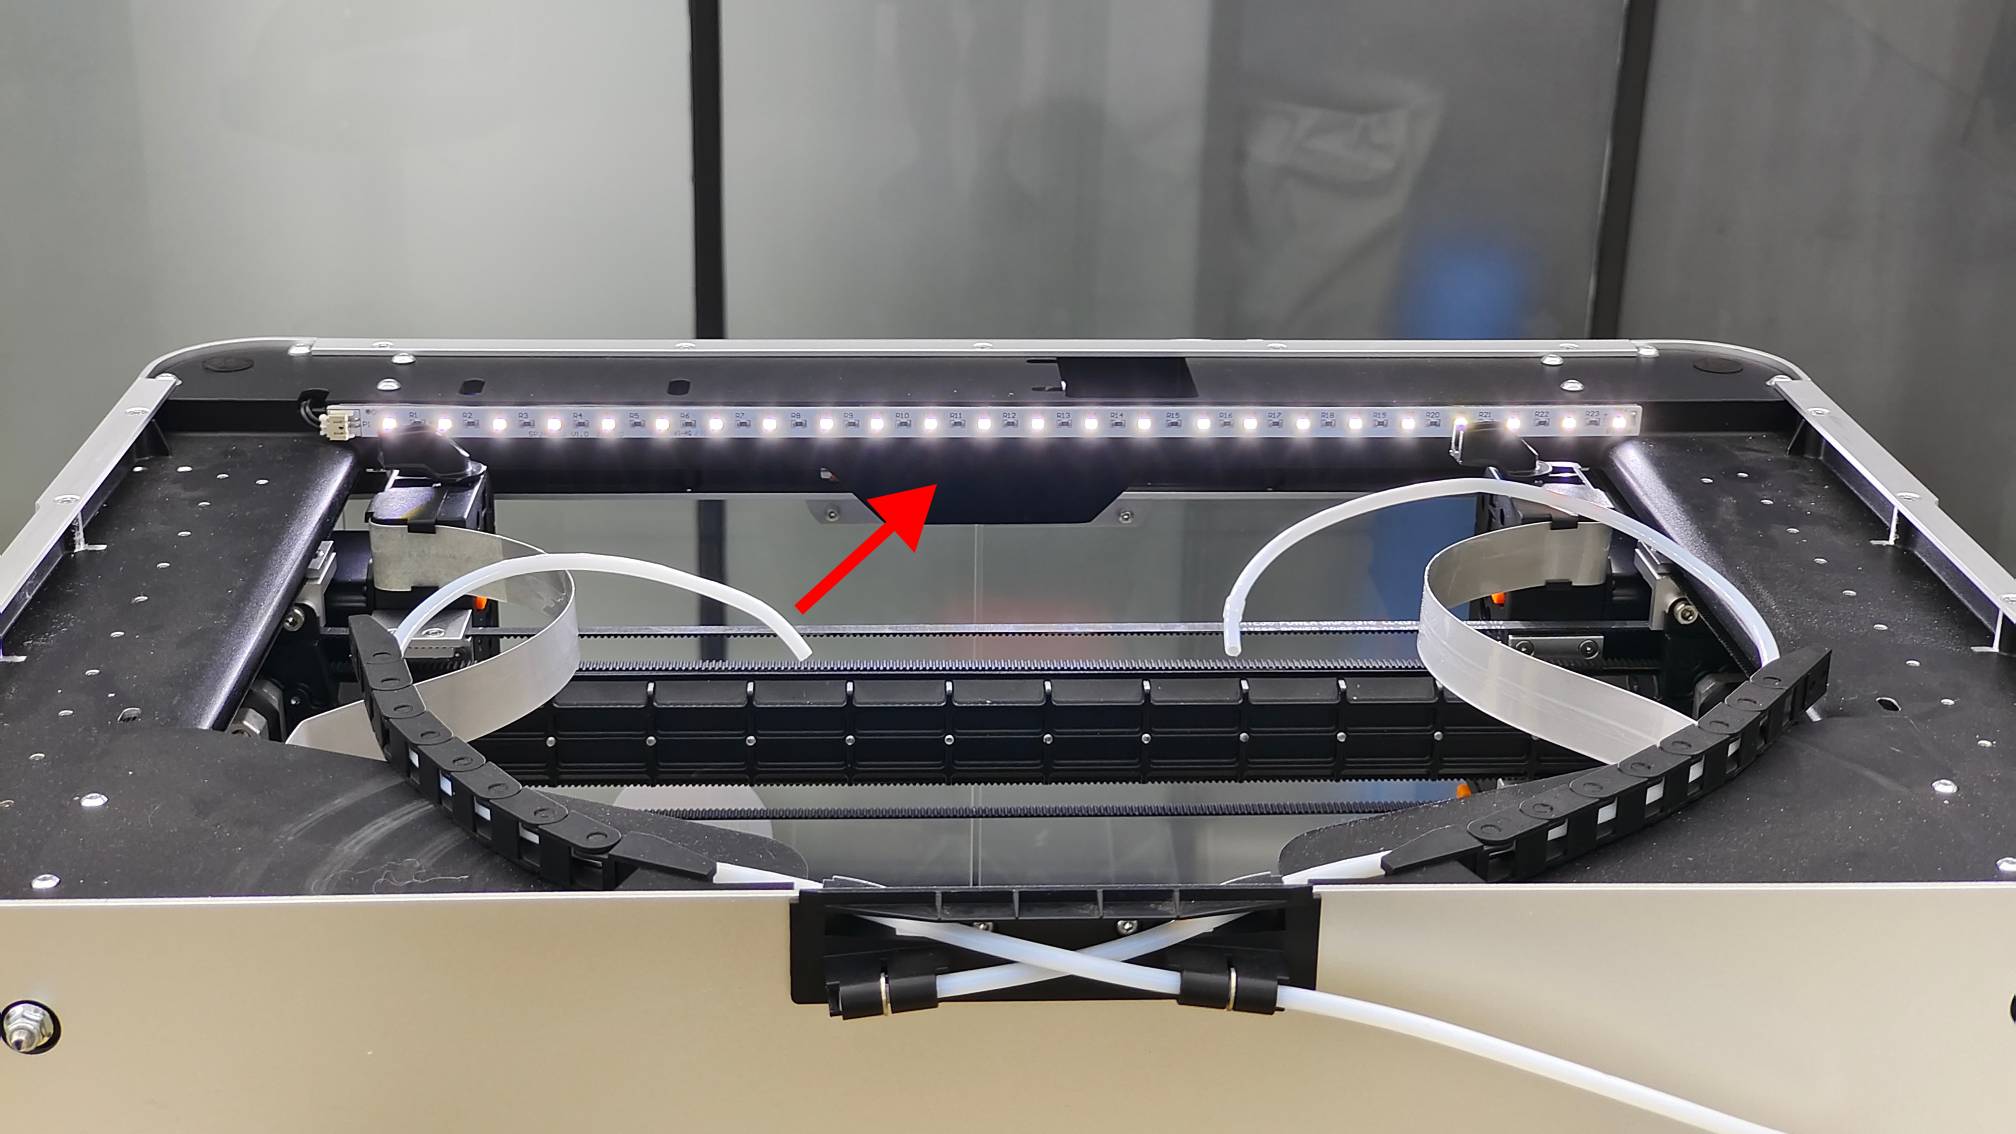
Yes: This indicates that the power supply is functioning correctly. Go to troubleshooting step 4.
No: This indicates that the power supply is not working. Go to troubleshooting step 1.
¶ After powering on the machine, can you manually move the axes?
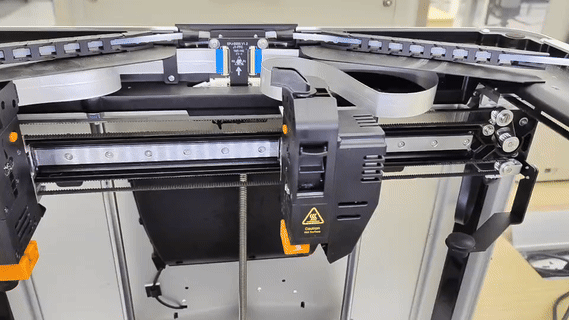
Yes: This indicates that the power supply is functioning correctly. Go to troubleshooting step 4.
No: This indicates that the power supply is not working. Go to troubleshooting step 1.
Under normal circumstances, when the machine is powered on, the motors should lock, and you shouldn't be able to move the axes by hand.
¶ Connect the machine to Luban using a USB cable. Then, establish a serial connection in Luban and try controlling the machine. Check if you can control the machine's movements normally.
Yes: This indicates that the power supply and mainboard are functioning correctly. Go to troubleshooting step 5.
No: This indicates that the power supply or mainboard is not working. Go to troubleshooting step 1.
¶ Troubleshooting Steps
¶ 1. Check if the AC power cord is loose.
With the machine powered off, unplug and reinsert the AC power cord to the machine to ensure a secure connection.
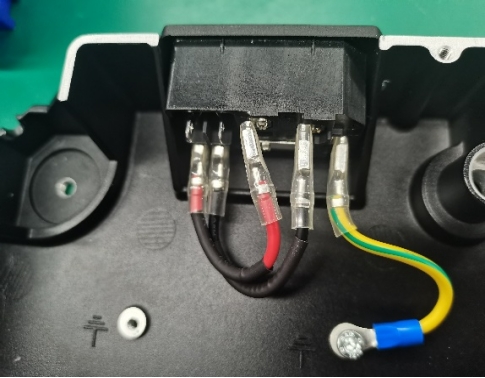
¶ 2. Check if the rocker switch has poor contact or is damaged.
Turn the rocker switch to the "on" position and observe whether the red indicator light on the switch lights up.
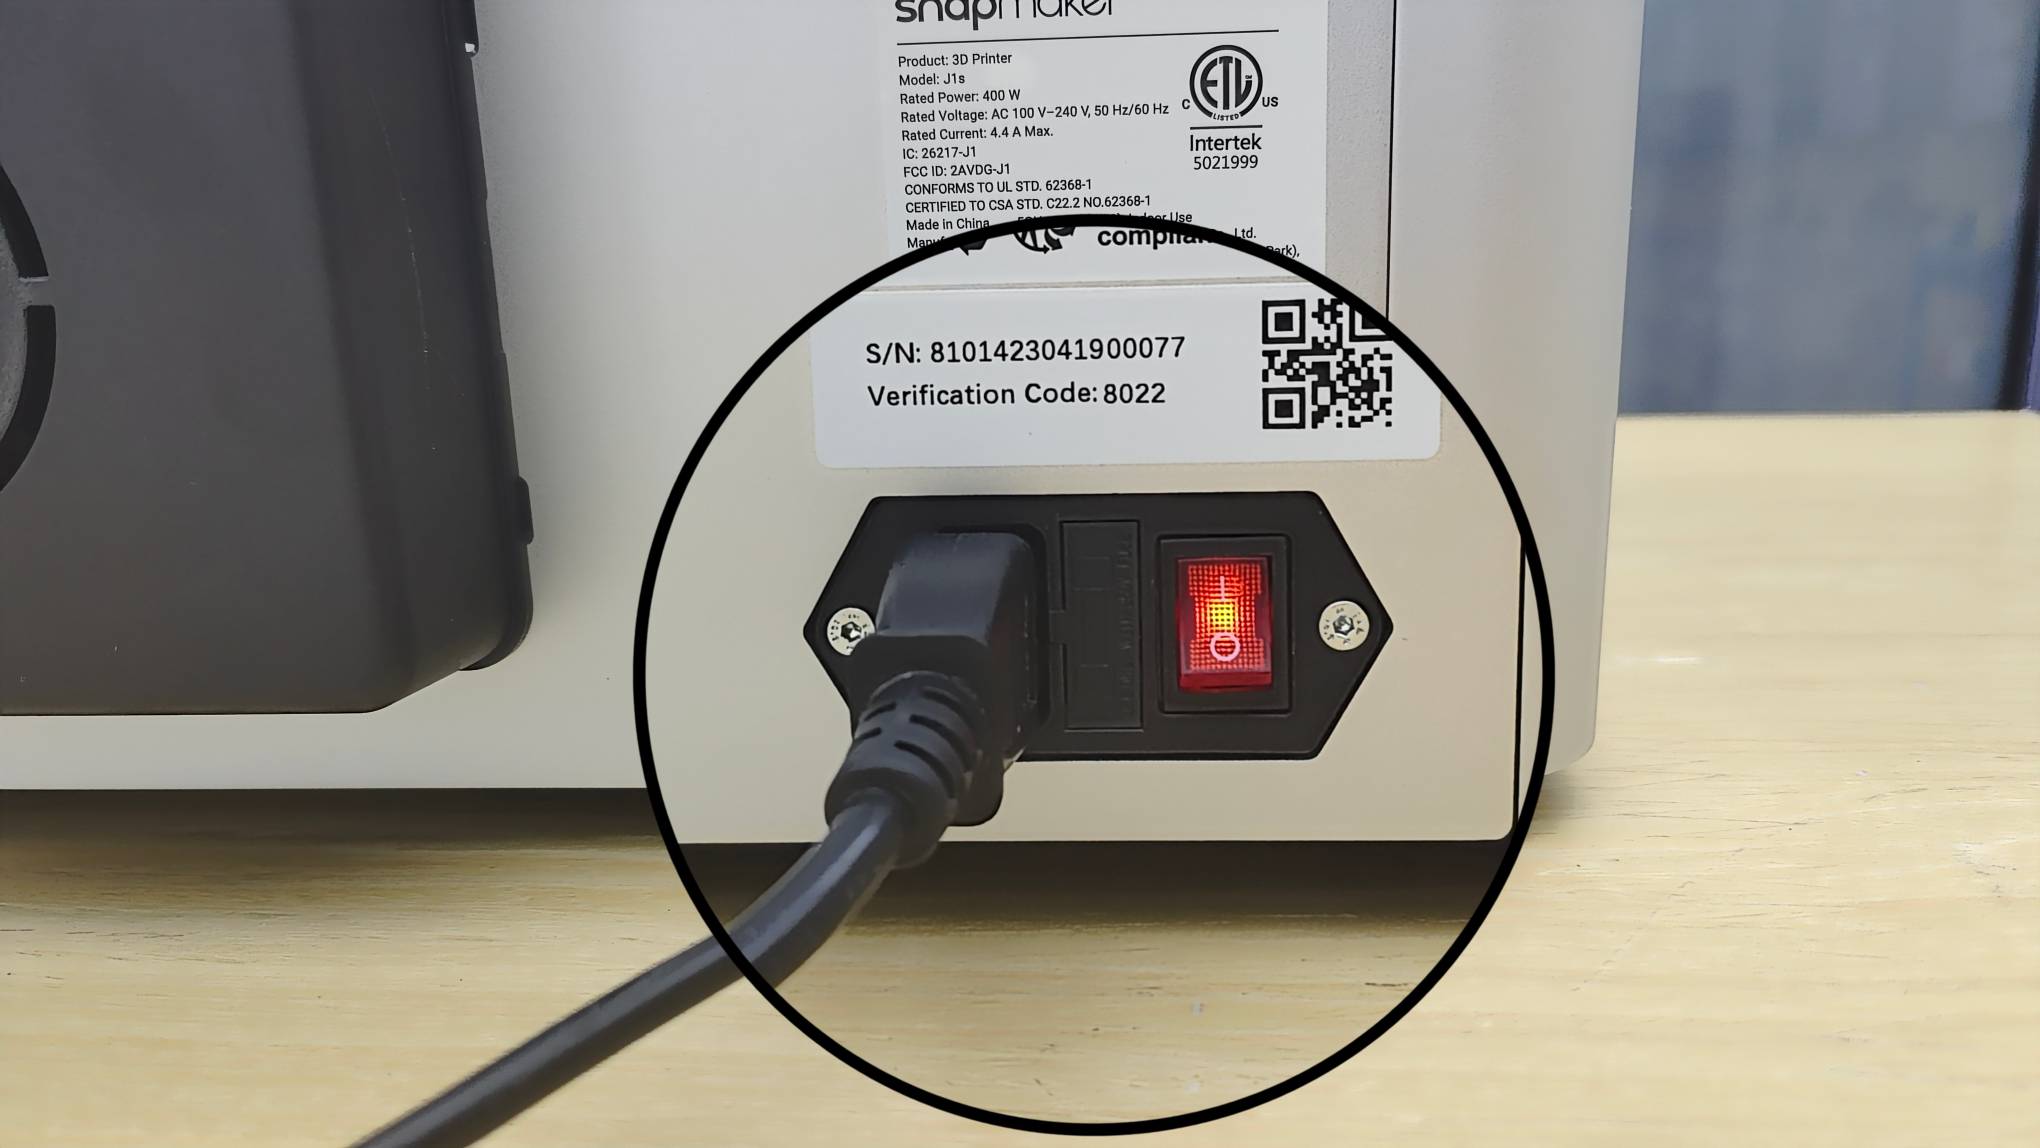
If the red indicator light on the rocker switch does not light up, it could be due to a loose connection or damage to the AC power cord or the rocker switch itself.
- To check the AC power cord:
Use a multimeter to test the continuity of the AC power cord. If you don't have a multimeter, you can try using another 220v power cord to determine if the issue is with the AC power cord.
- To check the rocker switch:
Try turning the rocker switch on and off multiple times. If the indicator light turns on at any point, it suggests that the rocker switch may have a contact issue.
Remove the screws securing the bottom cover, then take off the cover and check the cables connected to the rocker switch for any looseness or damage.
 |
 |
|---|
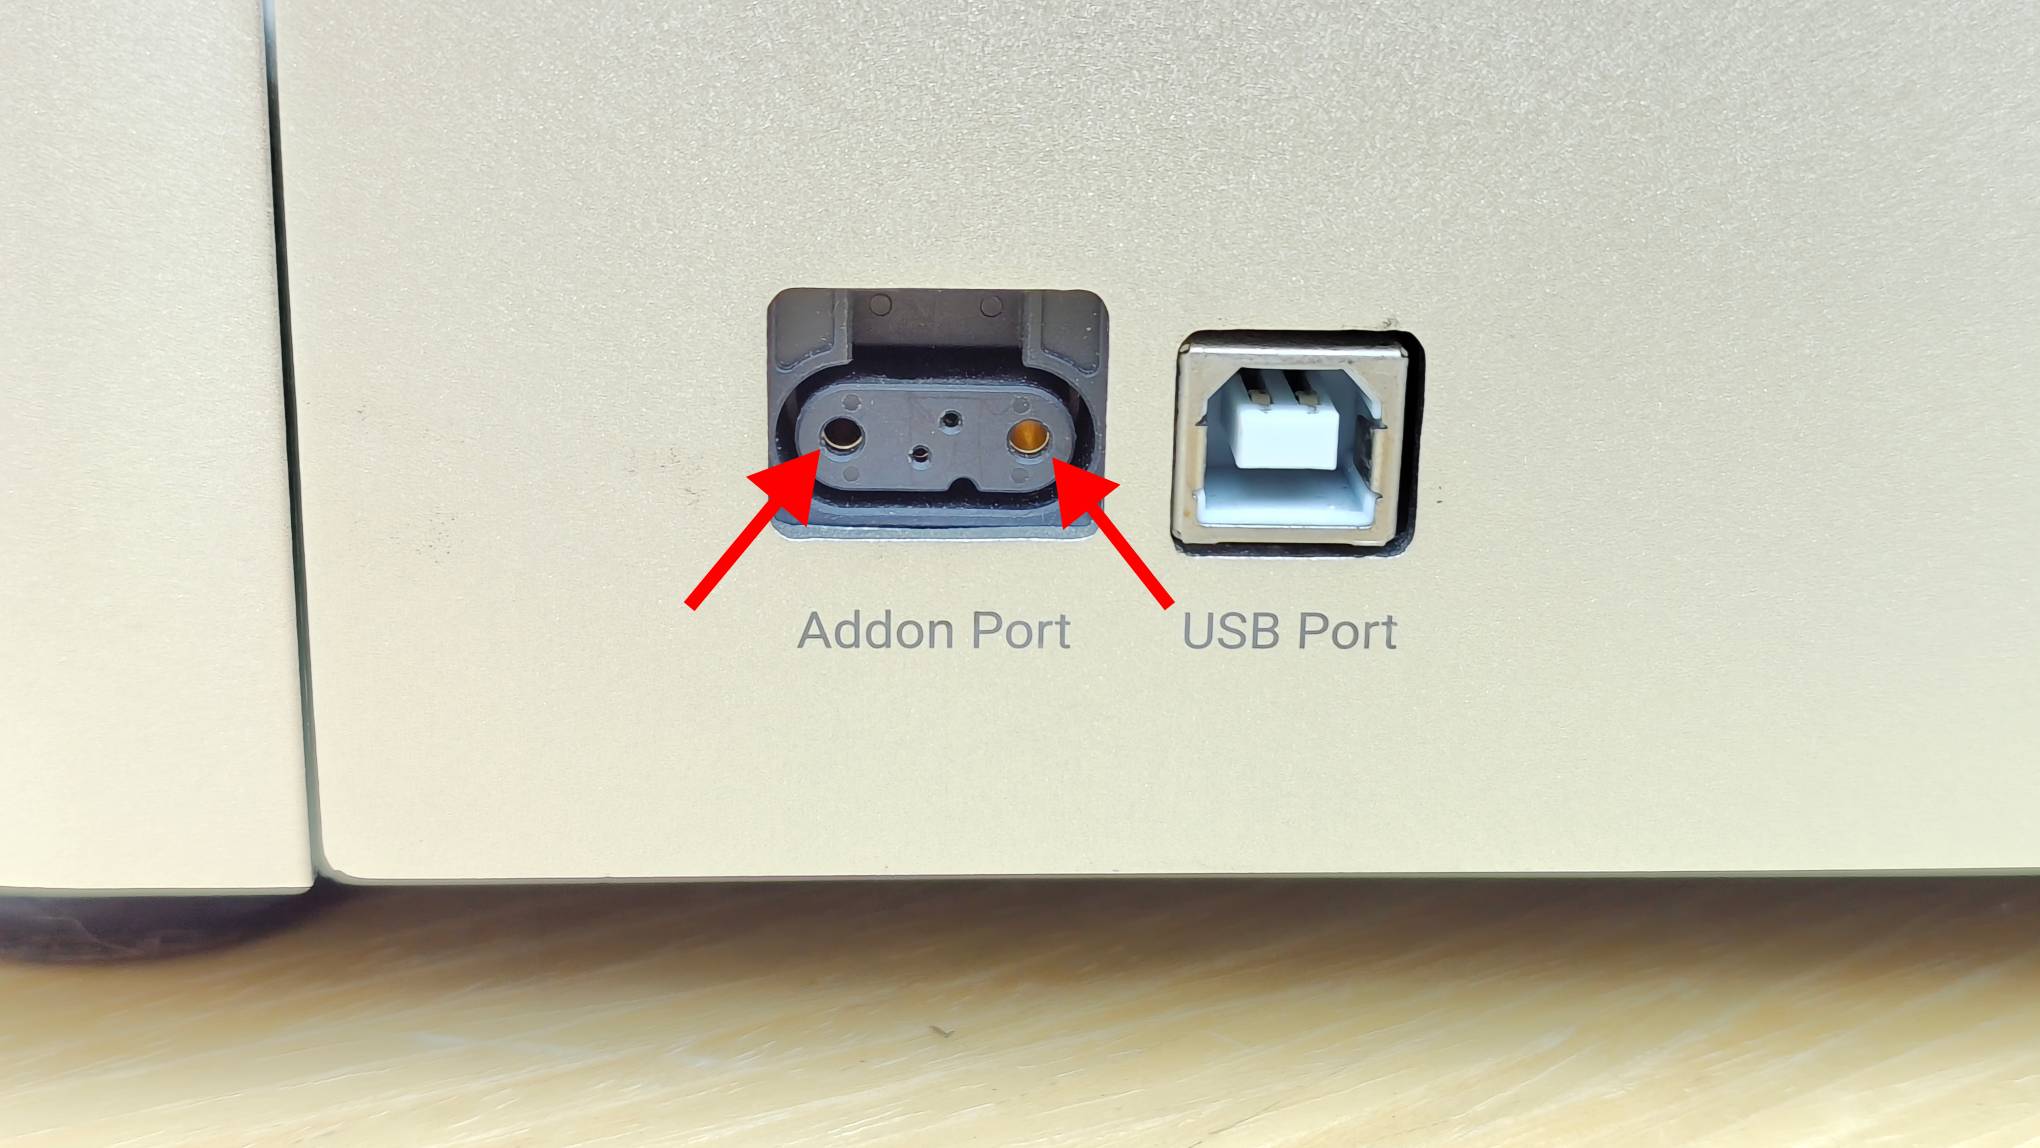
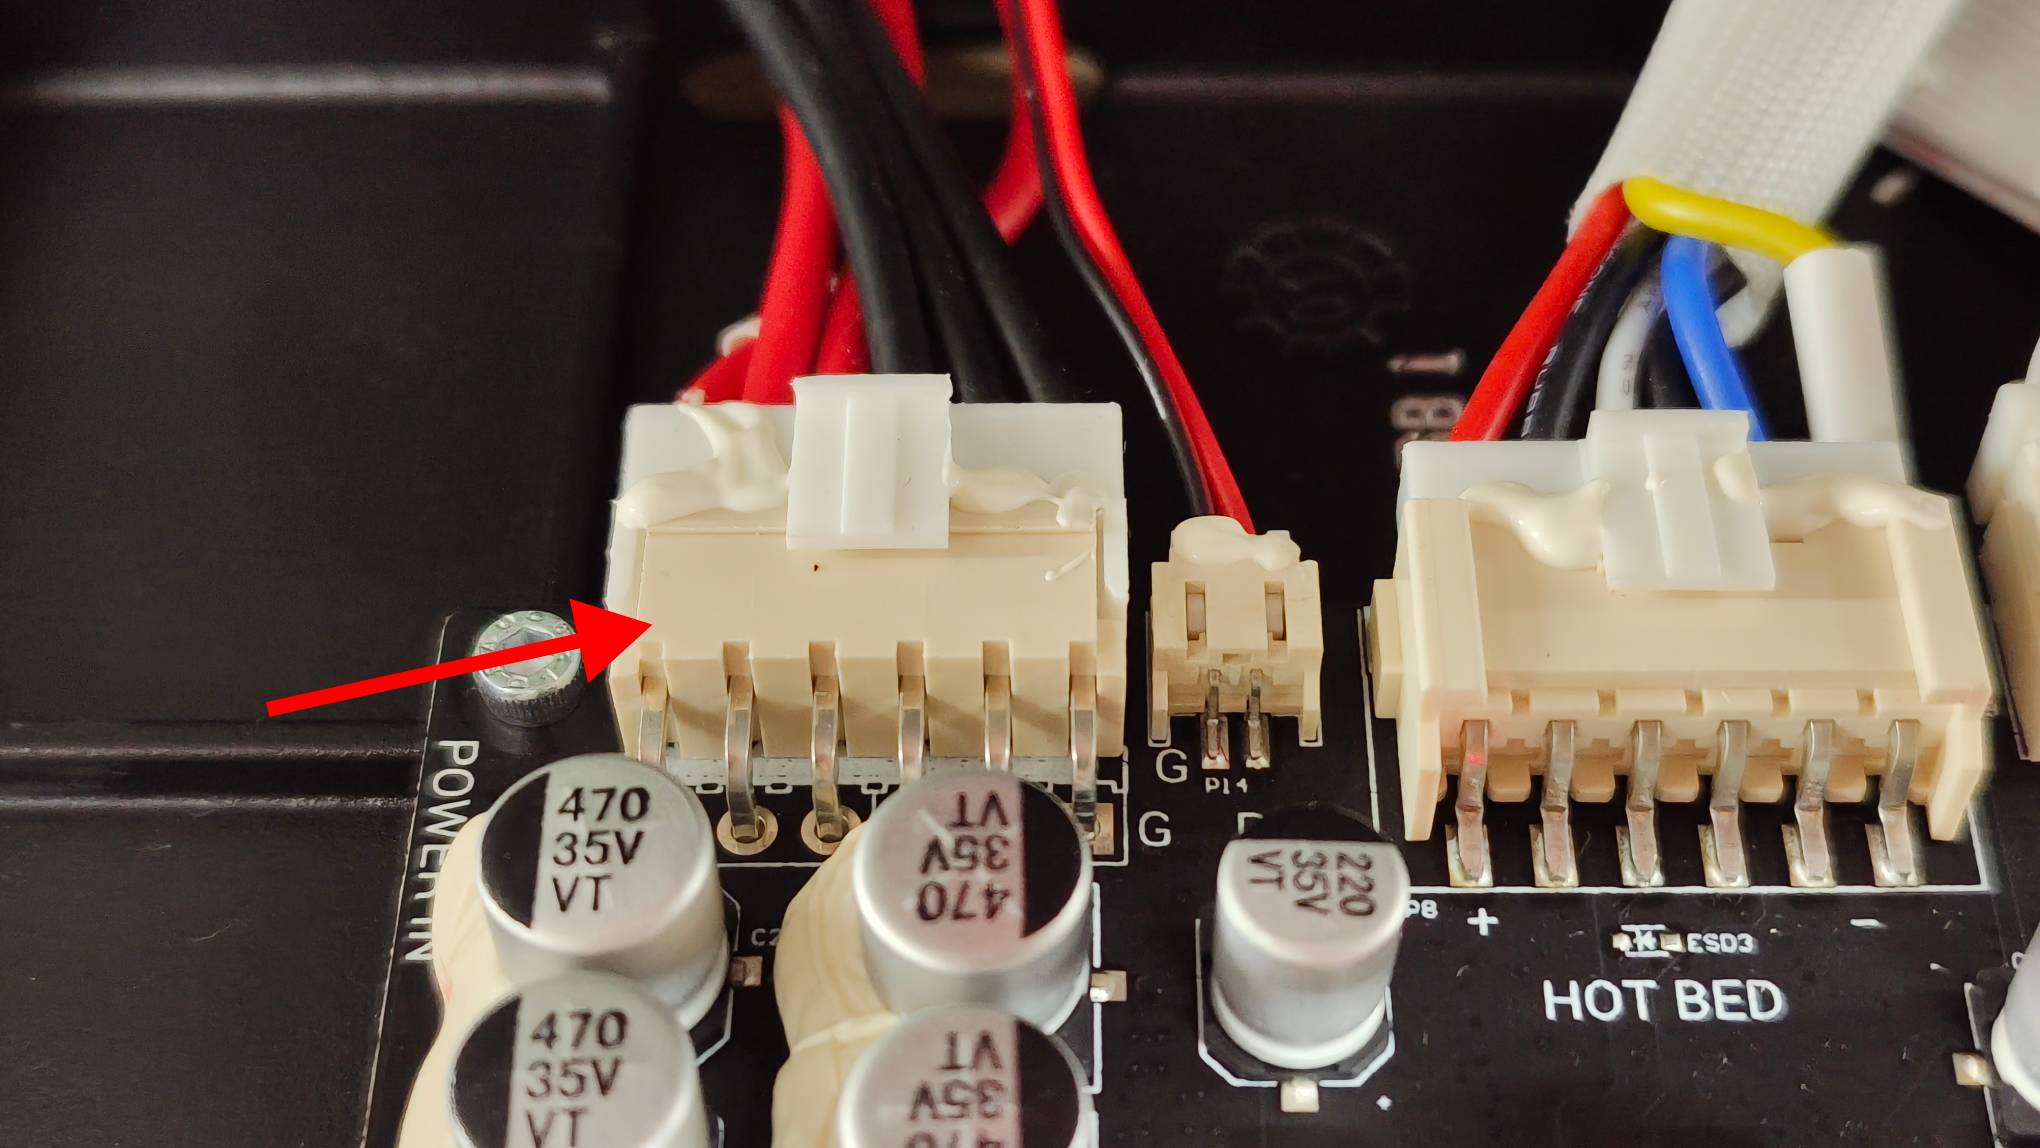
¶ 3. Check if the power supply is damaged.
Use a multimeter set to DC mode to measure the two large pin terminals at the add-on port. If you get a 24V reading, it indicates that the power supply is functioning correctly. If not, the power supply is likely damaged.
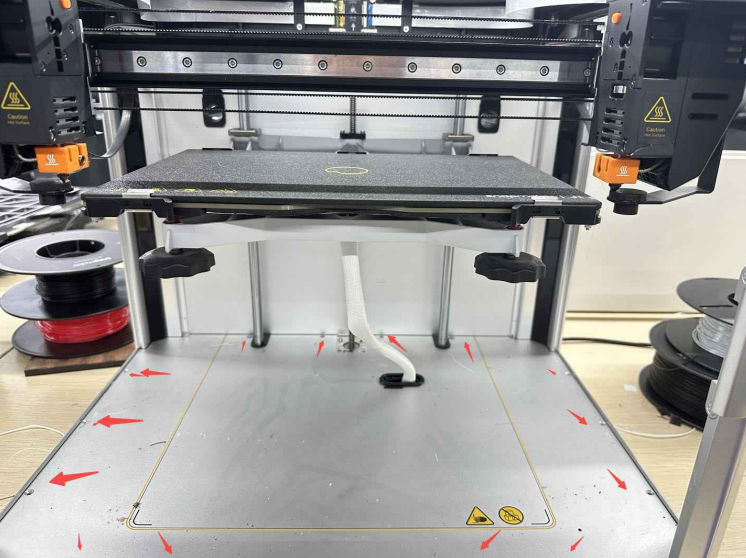
¶ 4. Check if the mainboard is damaged.
Unscrew the screws securing the bottom cover of the machine, then remove the cover. Check if the red indicator light on the mainboard is lit.

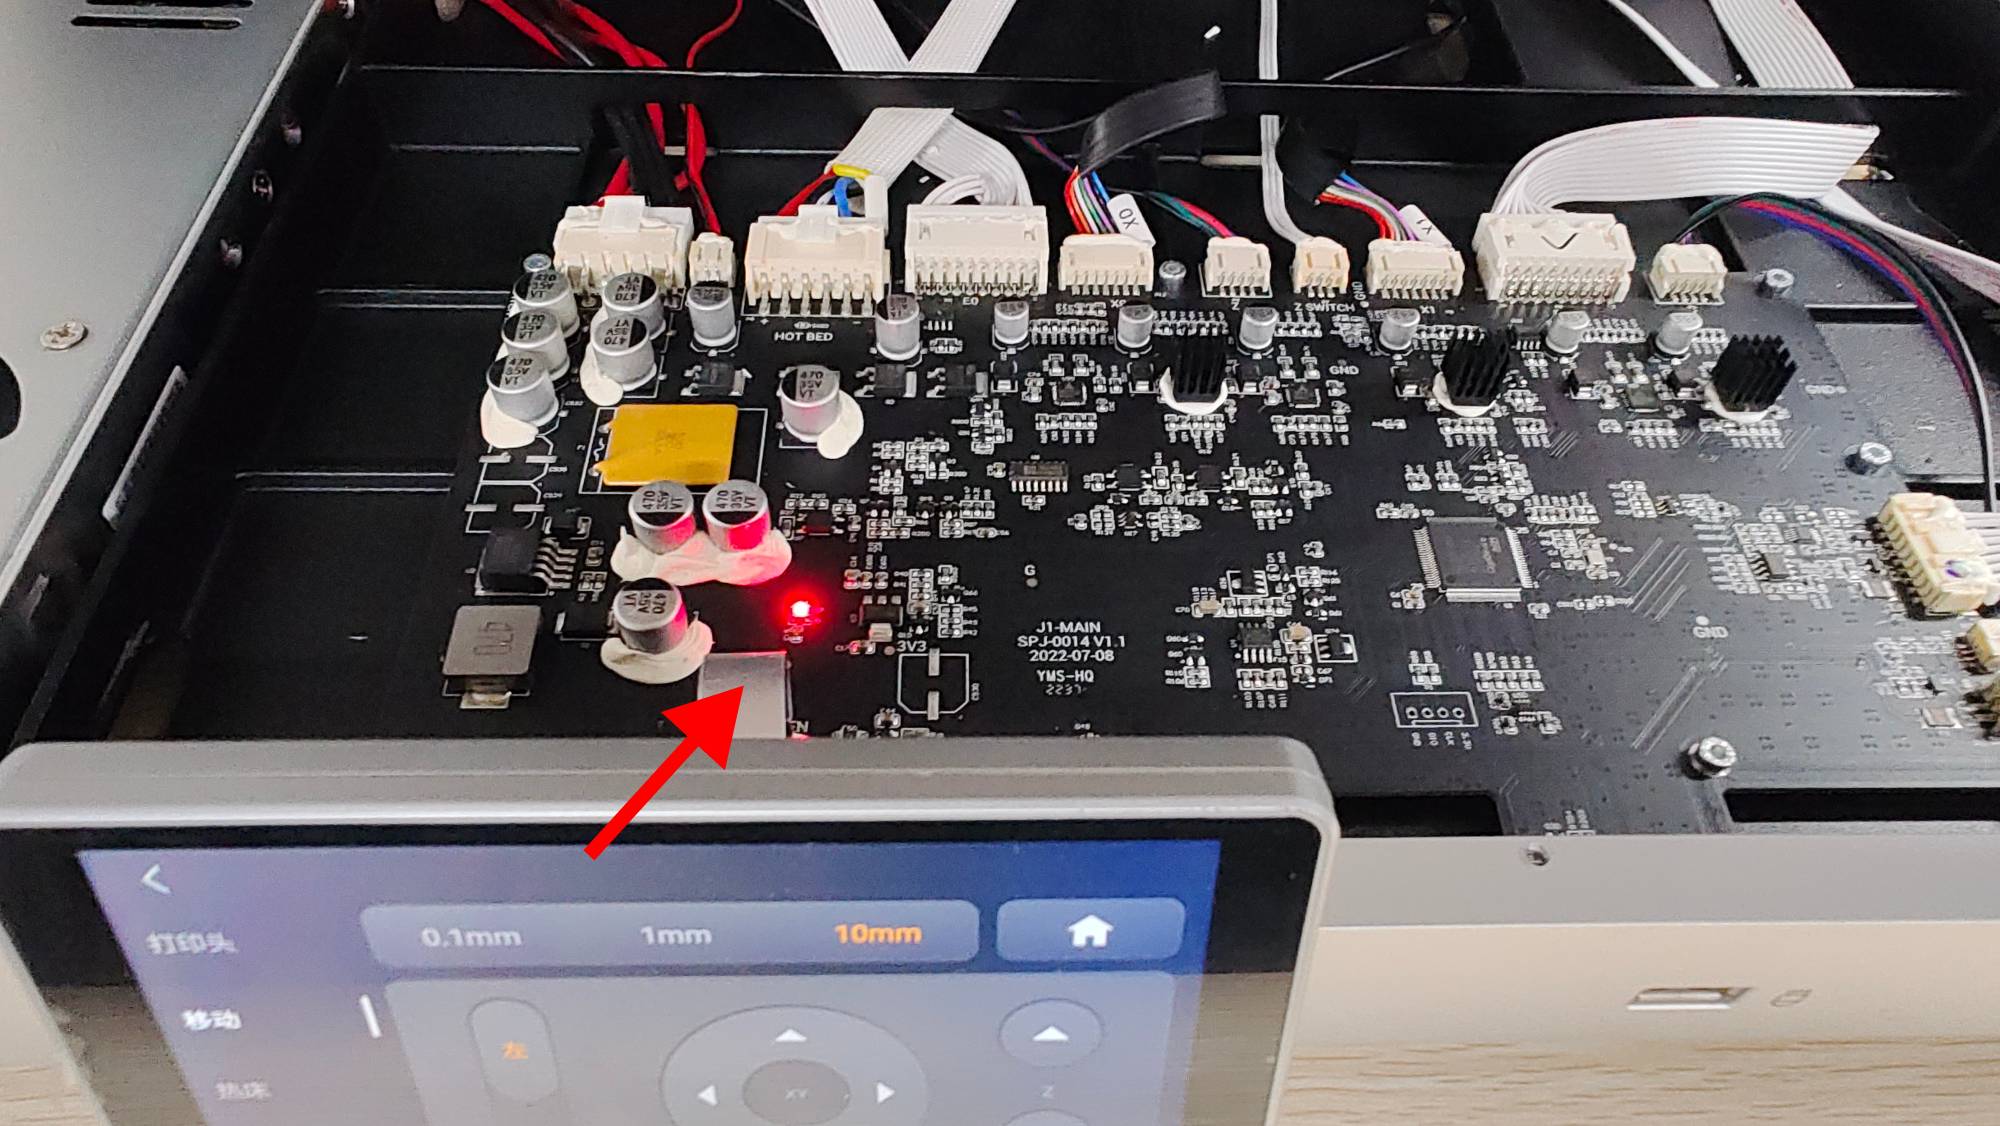
If the red indicator light is lit. Then connect the machine to Luban using a USB cable. Then, establish a serial connection in Luban and try controlling the machine. Check if you can control the machine's movements normally.
Connecting the machine to Snapmaker Luban via the serial port
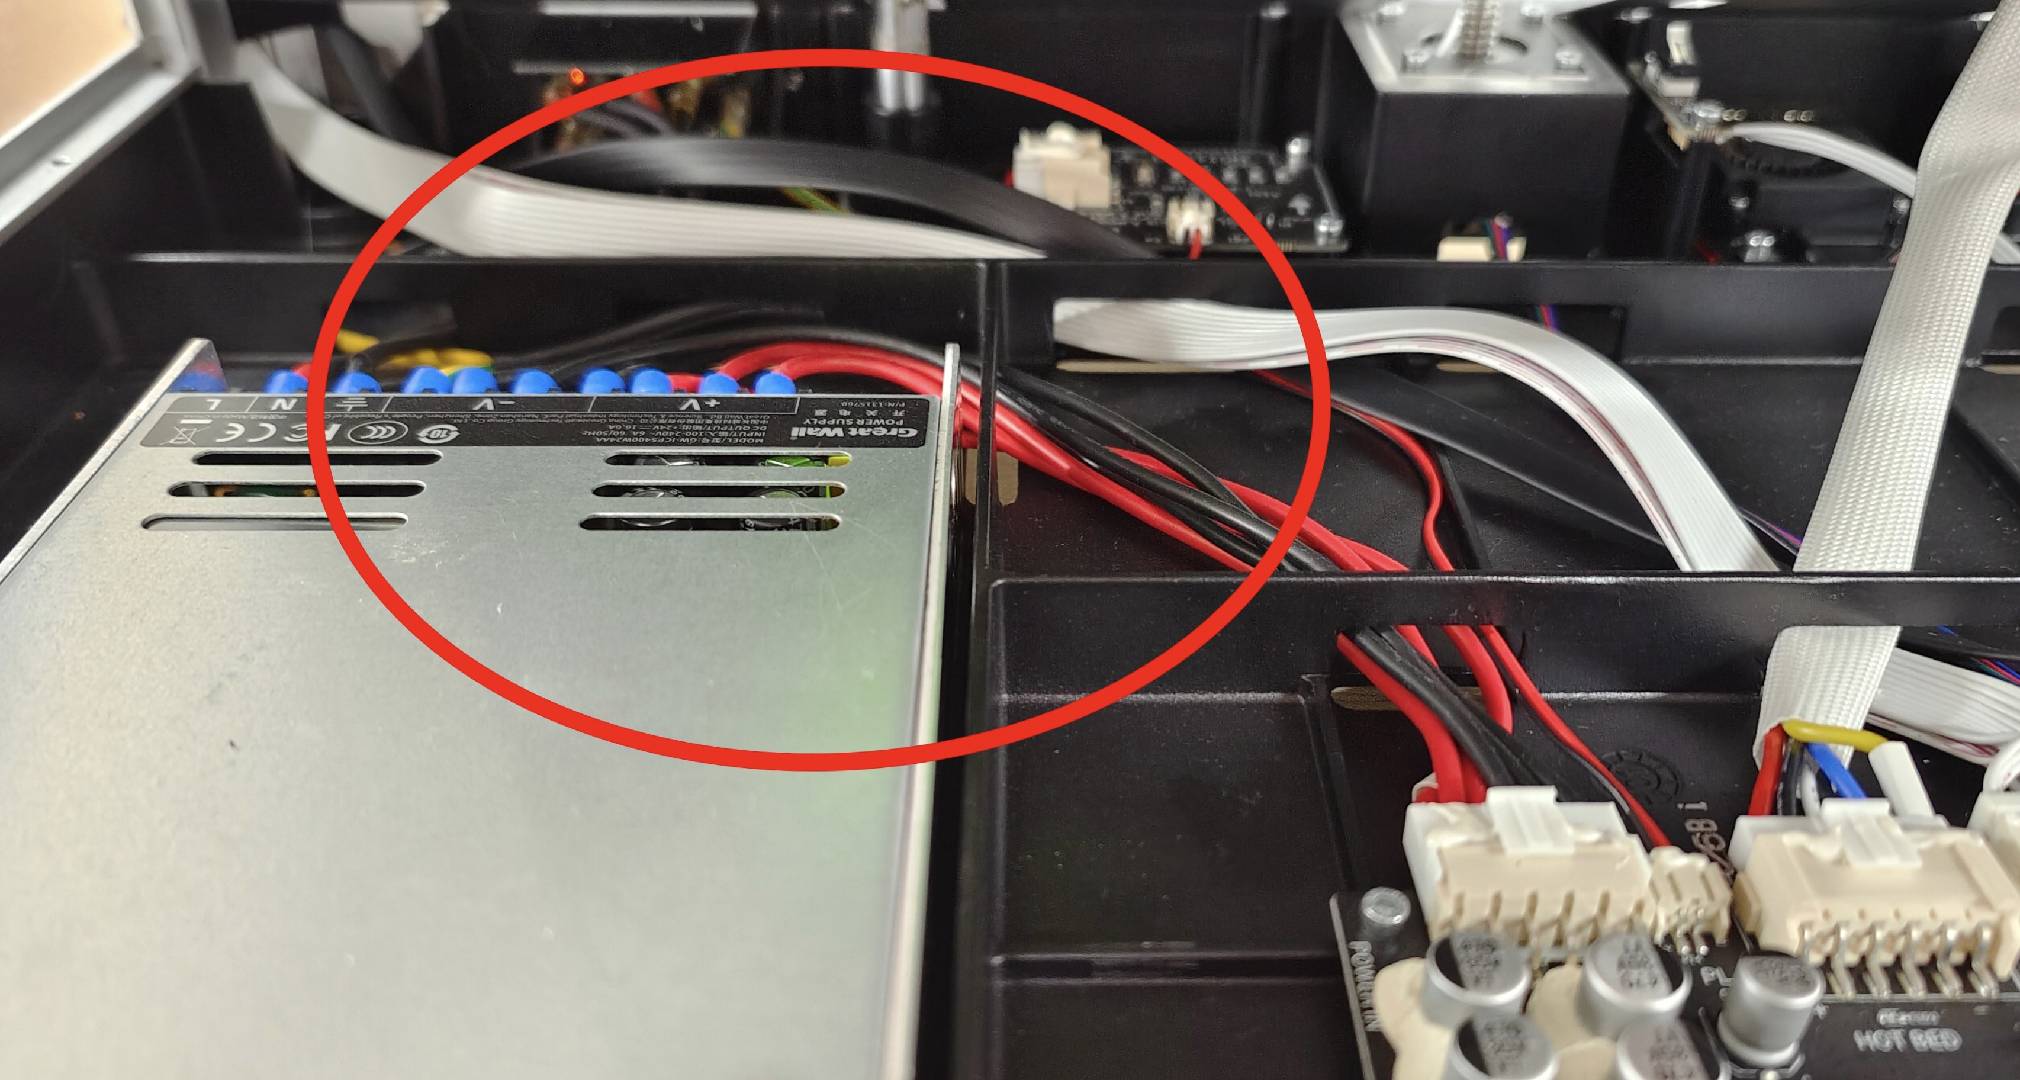
If the red indicator light is NOT lit. Use a multimeter set to DC mode to measure the power supply connector on the mainboard. Check if there is a 24V voltage present.
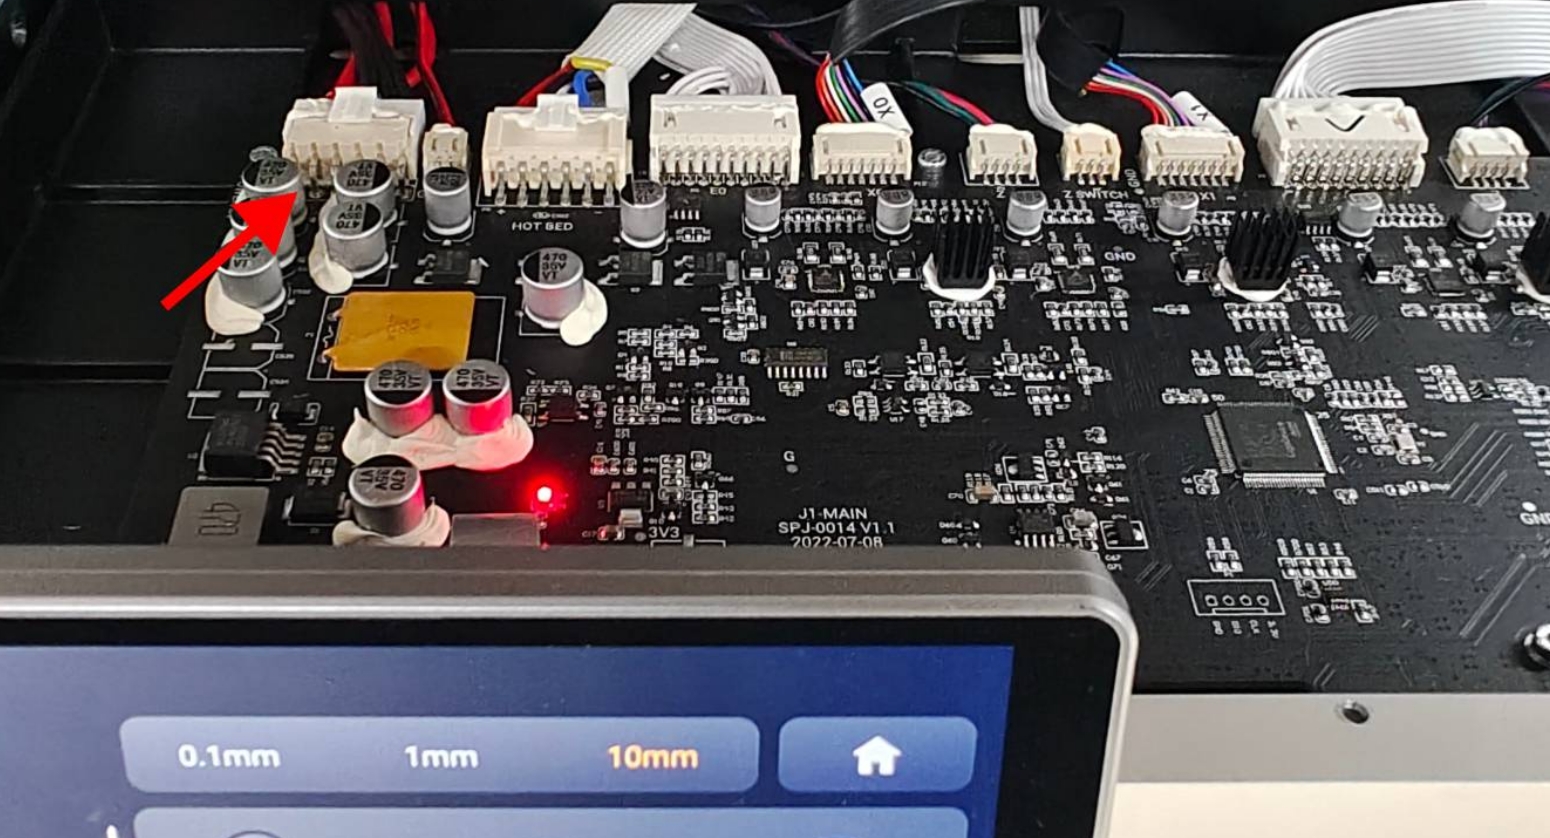
When measuring, avoid touching high-voltage areas (indicated by the red circle), and try to wear insulated gloves if possible.
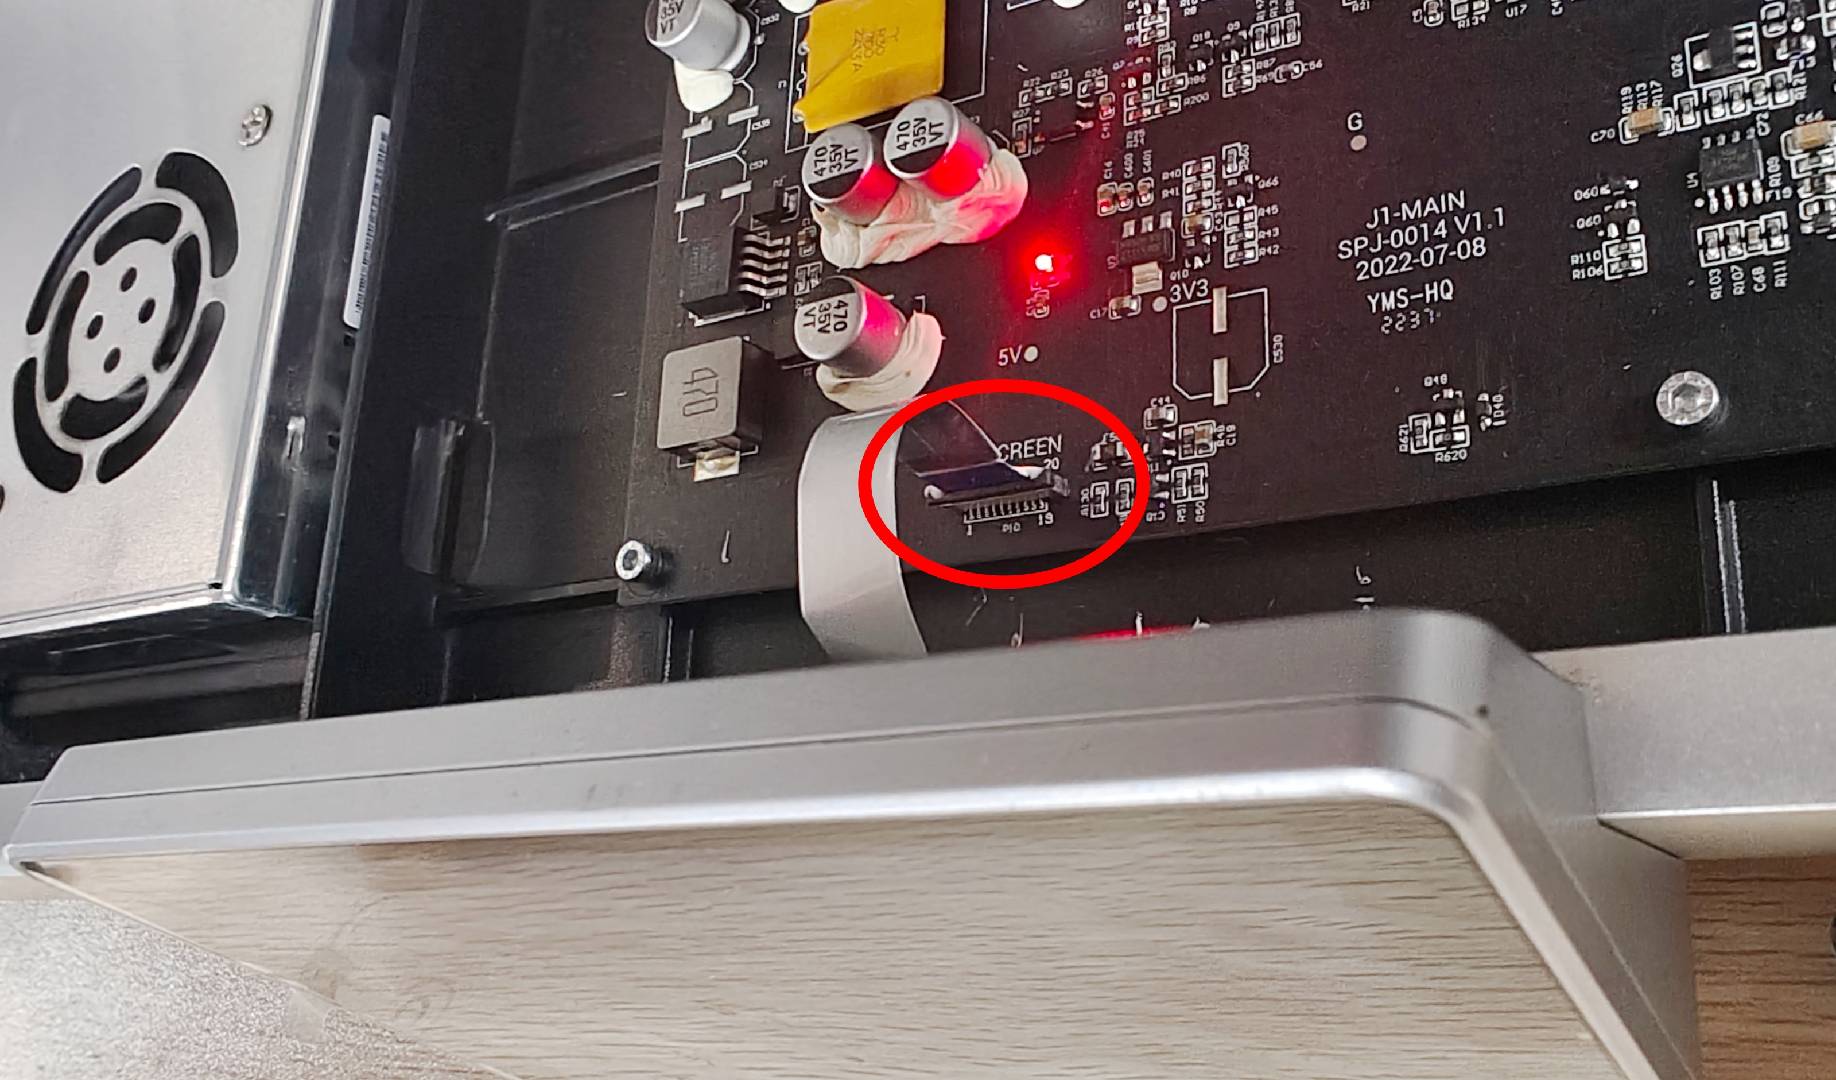
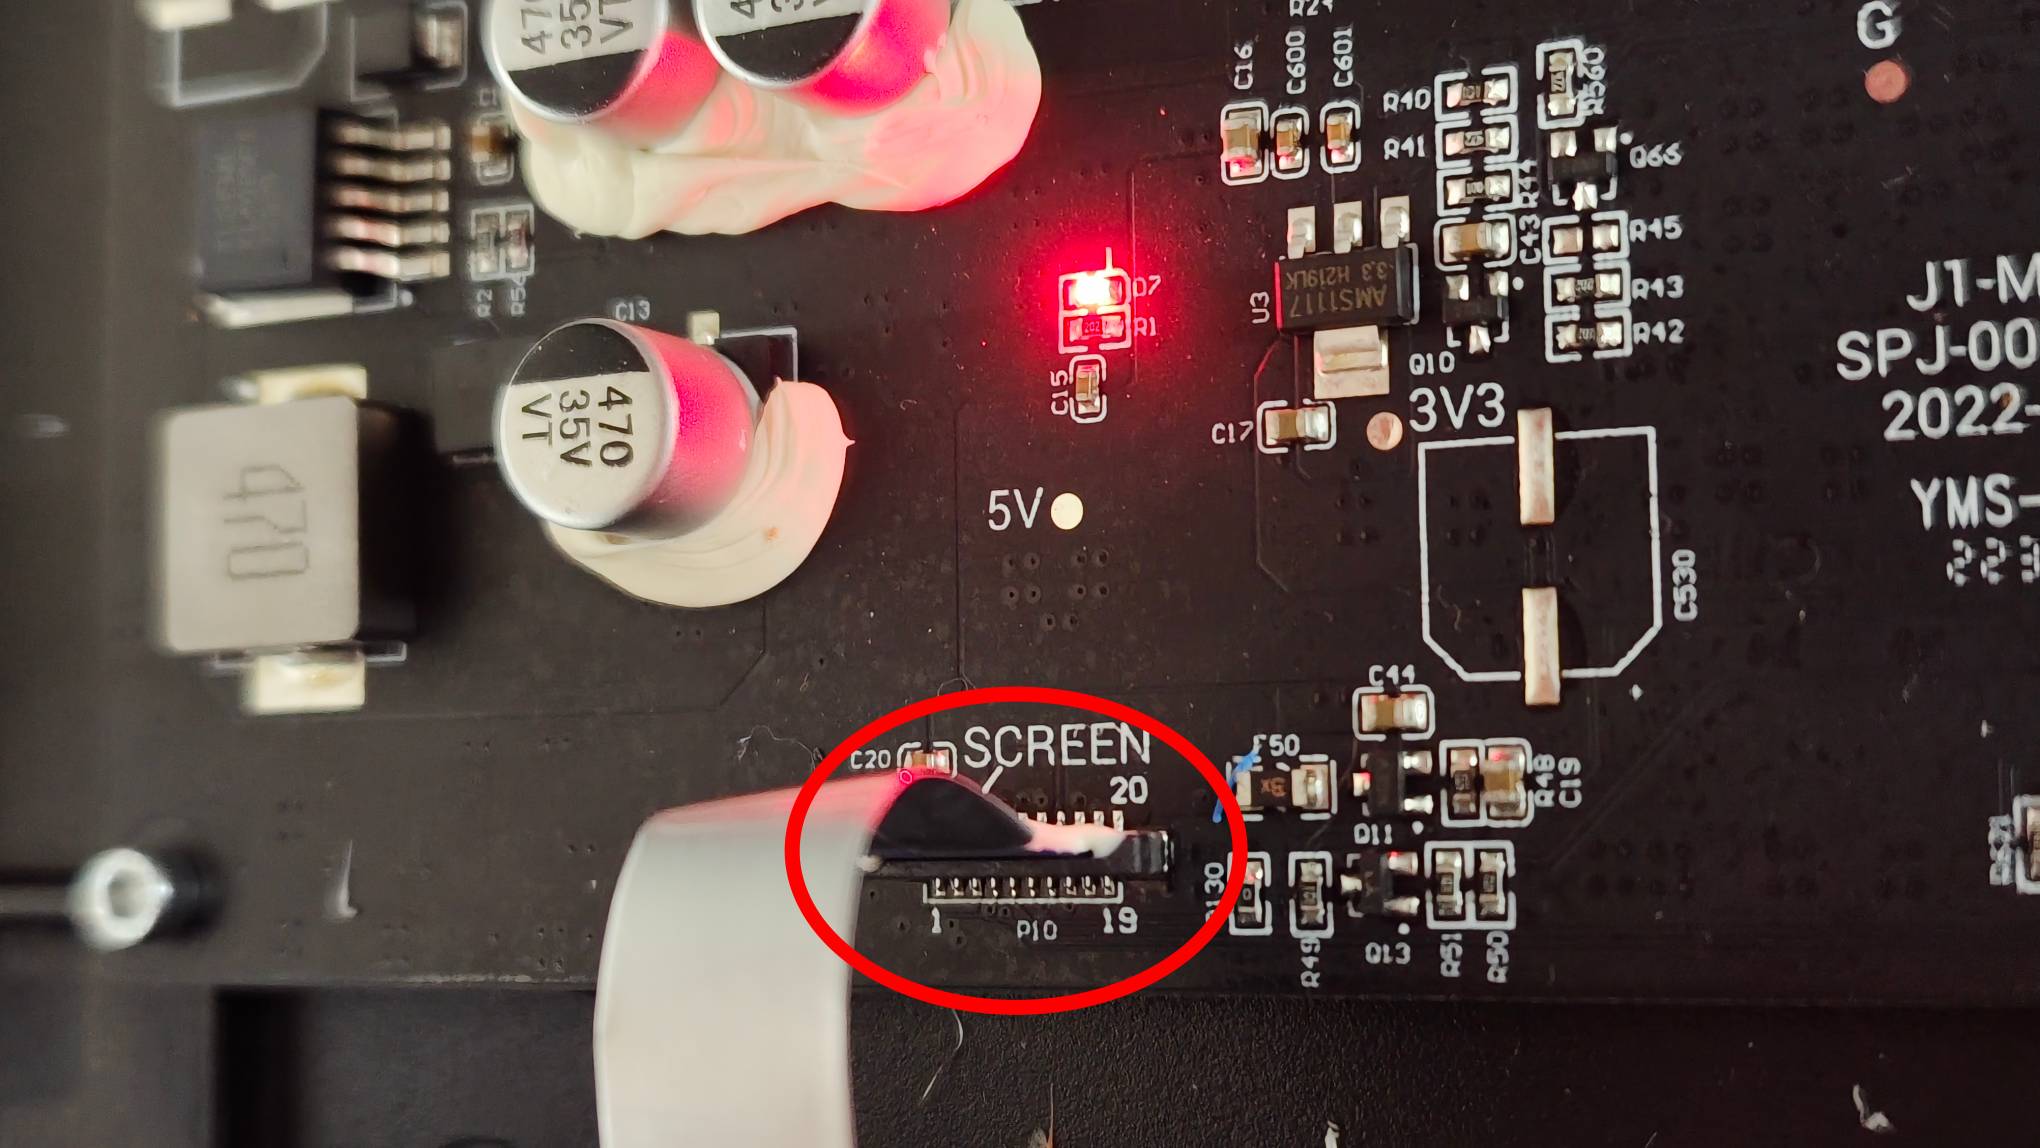
¶ 5. Check if the touchscreen is damaged.
Check if the touchscreen FFC cable connecting to the mainboard is loose. If it is, reinsert it securely.
¶ Contact Support
After following the troubleshooting steps, if you find it difficult to resolve your issue, kindly submit a support ticket through https://snapmaker.formcrafts.com/support-ticket and share your troubleshooting results with some pictures/videos. Our dedicated support team will be more than willing to assist you in resolving the issue.