¶ When & Why
When any of the following occurs, you need to replace the hot end:
- When you have a specific need for a certain nozzle diameter or nozzle hardness, which cannot be met by the hot end (with 0.4 mm brass nozzle) that comes with your Snapmaker J1/J1s.
- When the nozzle becomes clogged with unremovable blockage or shows clear signs of wear and tear, leading to inadequate filament coming out of the nozzle or no filament coming out at all.
- When the nozzle becomes clogged frequently, and it cannot be fixed by following the troubleshooting methods in this article.
¶ Before You Start
- Unload filament (refer to - Aided unloading or Manual unloading).
- Go back to the home screen and wait for the nozzle temperature shown at the top of the screen to drop below 40°C (104°F), which takes about 15 minutes.
Nozzle temperatures can reach up to 300°C (572°F). Always ensure that the nozzle has cooled to below 40°C (104°F) before proceeding; otherwise, you may get burned. It is recommended to wear insulated gloves when operating.
¶ Tools Required
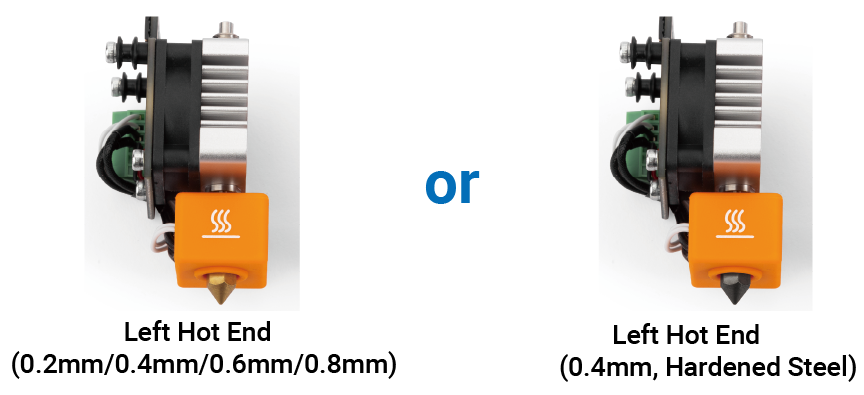
- New left hot end
- H2.0 hex key (provided in the toolbox)

¶ Procedures
We take Left Hot End (0.4mm) to illustrate the installation procedures. All steps apply to Left Hot End (0.2mm/0.6mm/0.8mm) and Left Hot End (0.4mm, Hardened Steel).
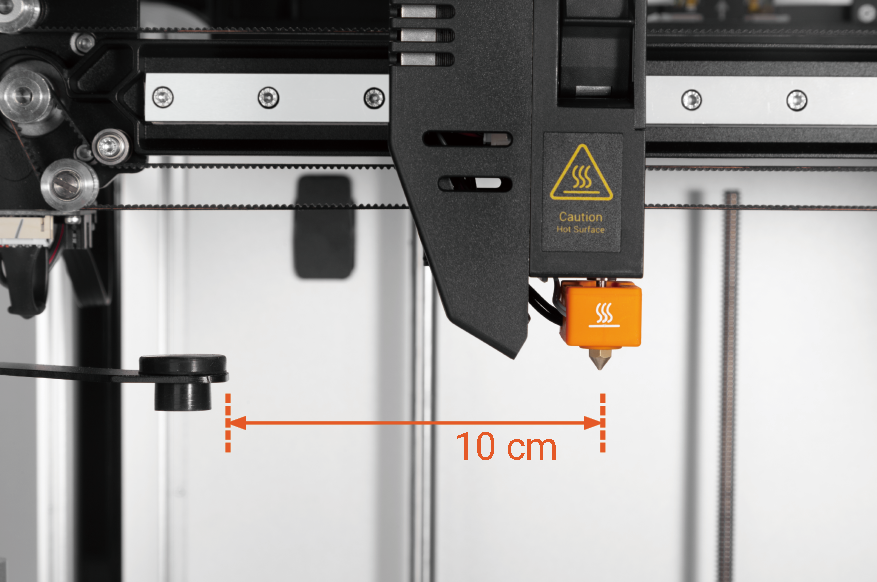
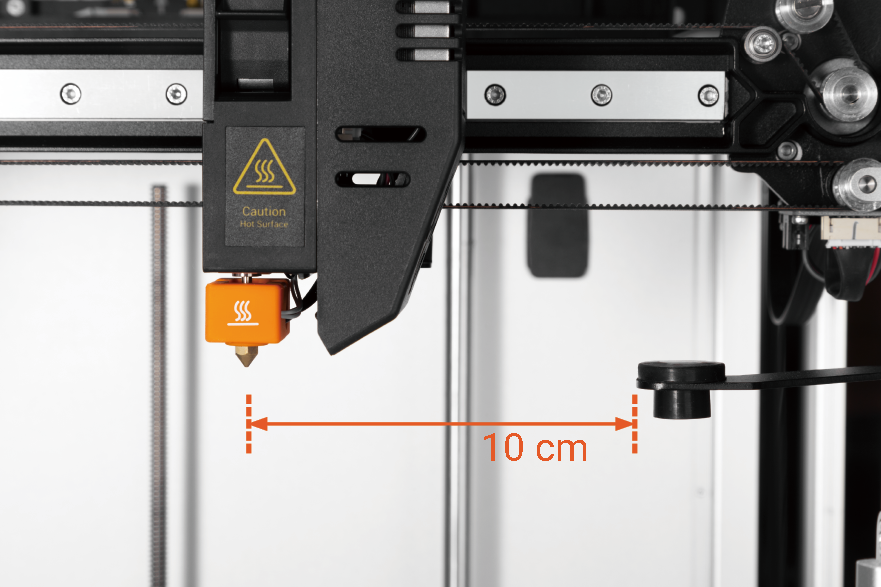
- On the Touchscreen, tap Control > Move, and move the extruder to approximately 10 cm away from the nozzle wiper.
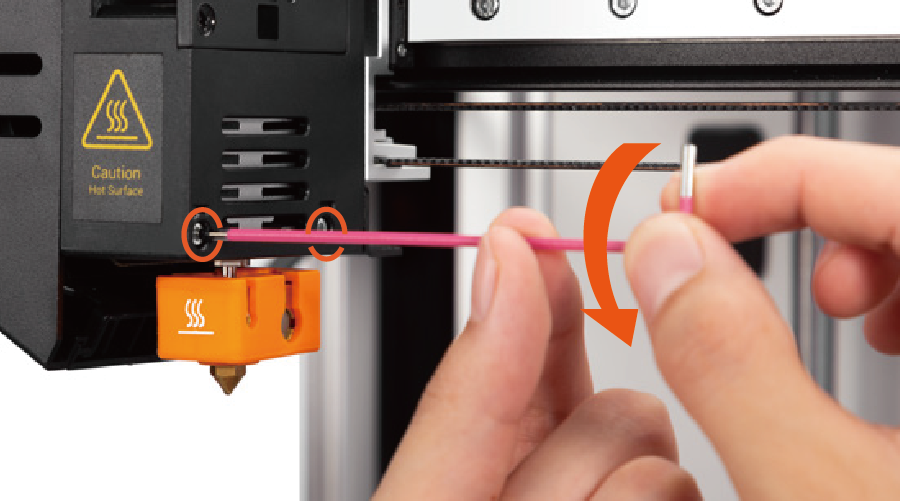
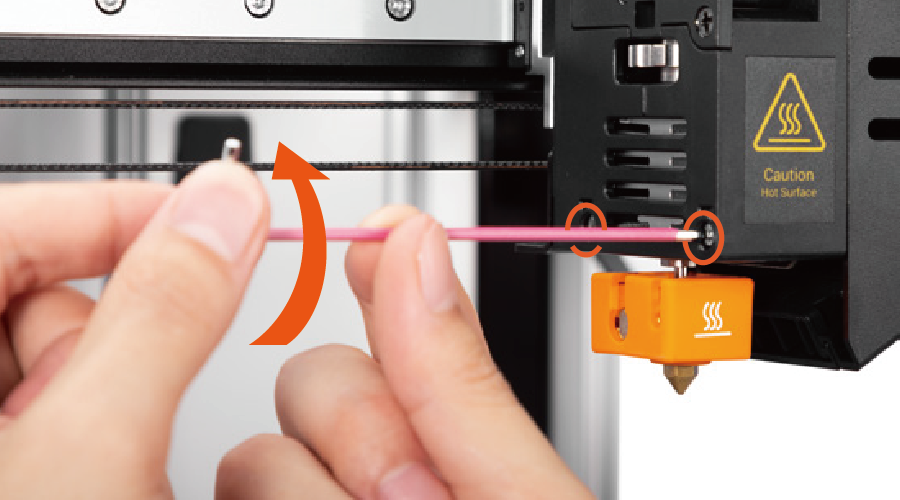
2. Use H2.0 hex key to loosen the two screws on the inner side of the extruder without unscrewing them.
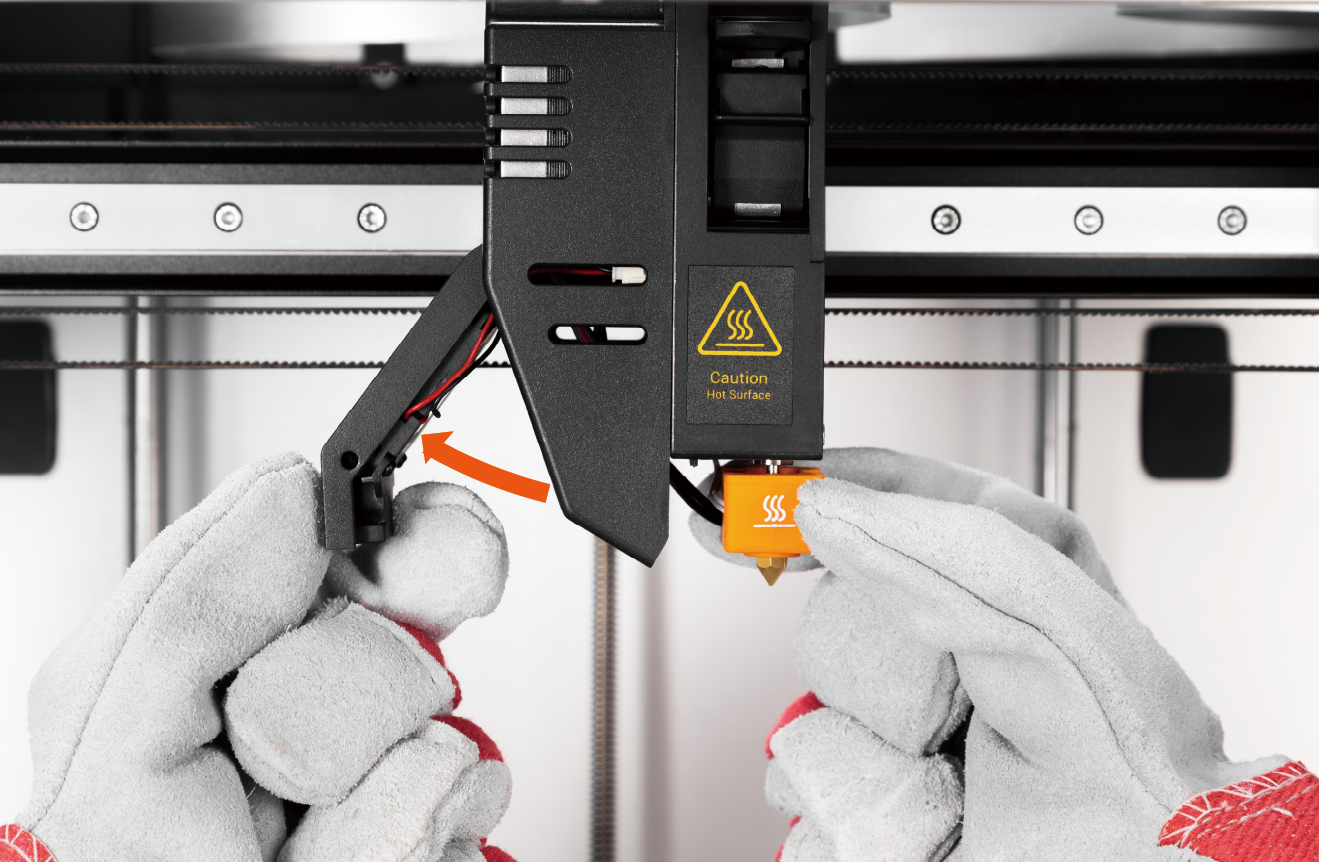
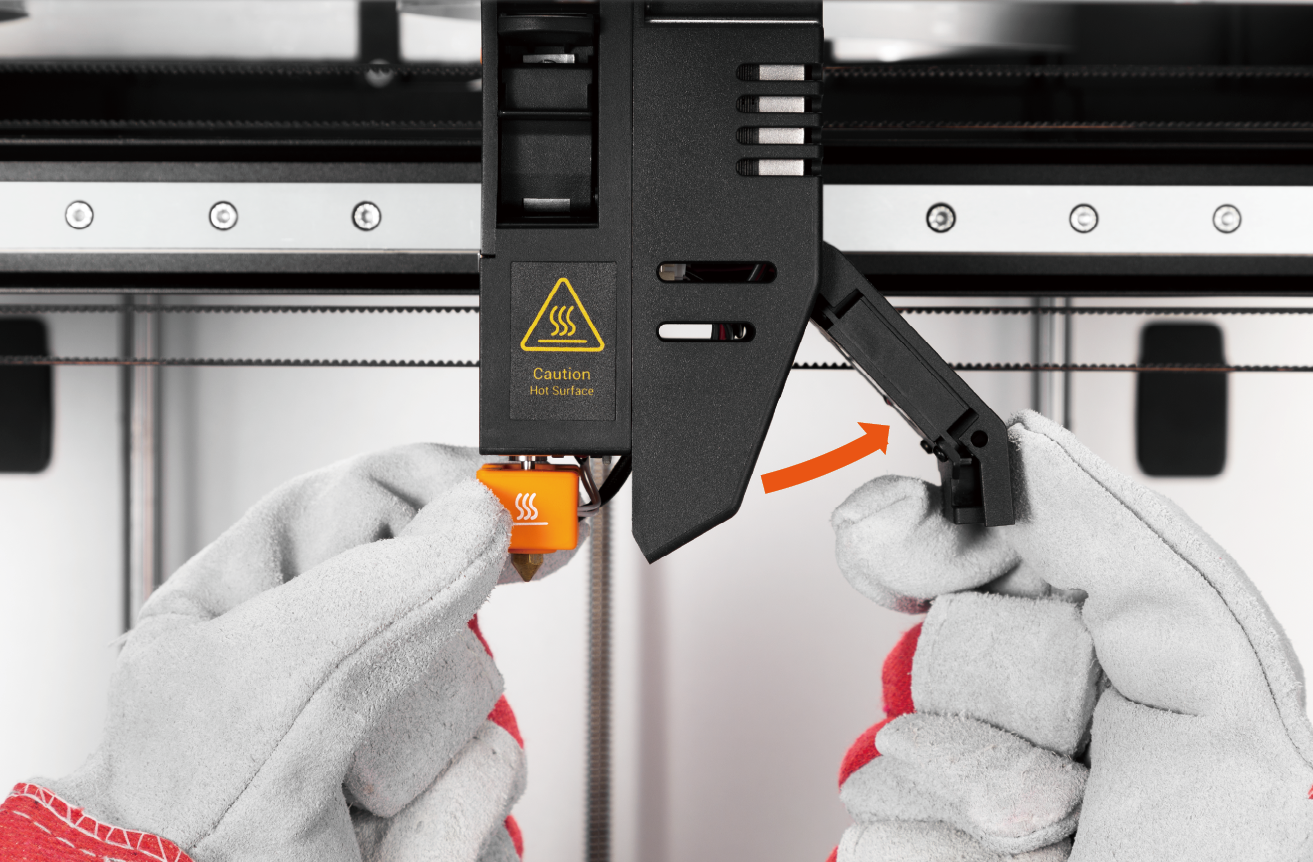
3. Hold the hot end with one hand to prevent it from falling off automatically, and gently push outward to open the extruder’s side cover with the other hand.
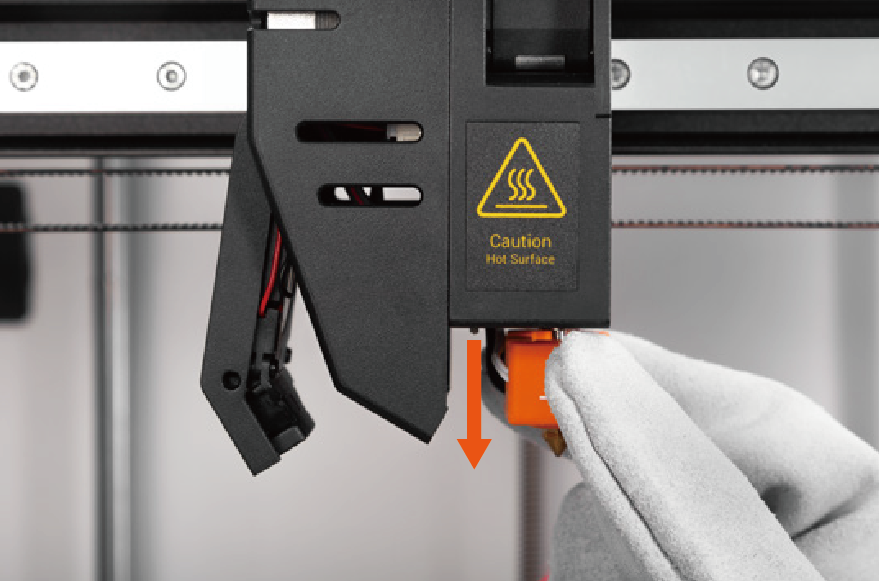
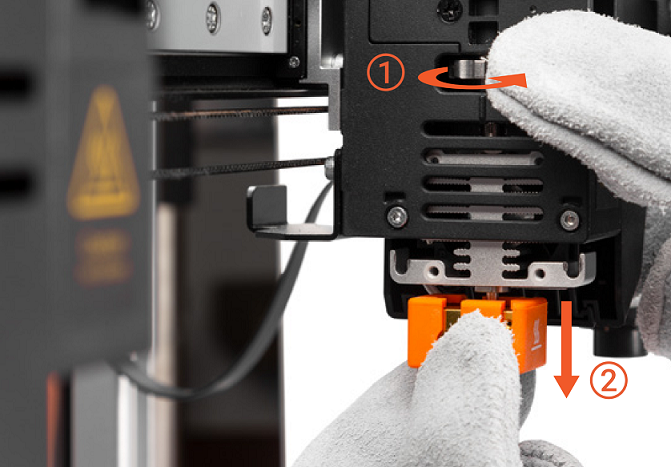
- Hold the hot end sock and pull it downwards gently to remove the hot end.
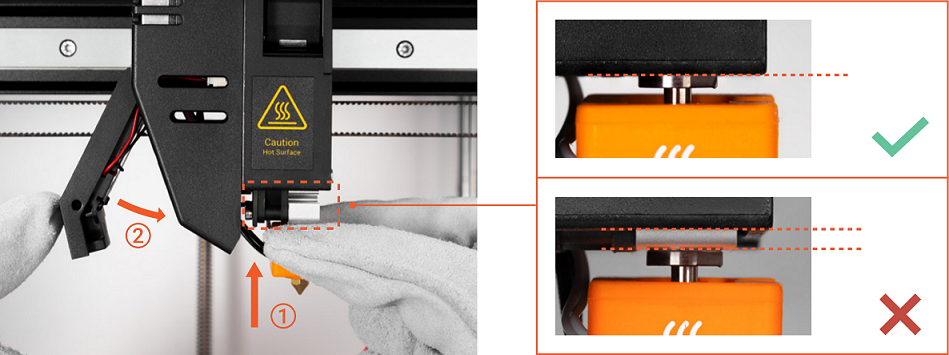
- Hold the new hot end and push it upwards to the standard position shown below with one hand, and then close the side cover with the other hand.
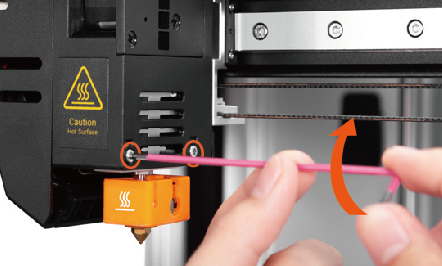
- Tighten the two screws on the extruder using H2.0 hex key.
-
Redo Heated Bed Leveling, Z Offset Calibration and XY Offset Calibration.
If you need to replace both left and right hot end, it is recommended to do this step after finishing the assembly of the two hot ends.
If you are installing hot ends (0.4mm, Hardened Steel, All-metal), you need to update the Touchscreen firmware and auto-tune PID value for the hot end before Step 7. Refer to - Installing the Hot Ends (0.4mm, Hardened Steel, All-metal)
¶ Tools Required
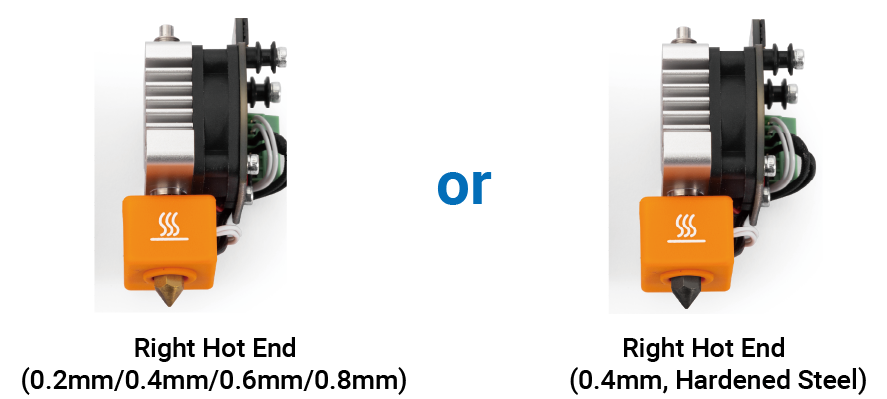
- New right hot end
- H2.0 hex key (included in the Tool Box)

¶ Procedures
We take Right Hot End (0.4mm) to illustrate the installation procedures. All steps apply to Right Hot End (0.2mm/0.6mm/0.8mm) and Right Hot End (0.4mm, Hardened Steel).
- On the Touchscreen, tap Control > Move, and move the extruder to approximately 10 cm away from the nozzle wiper.
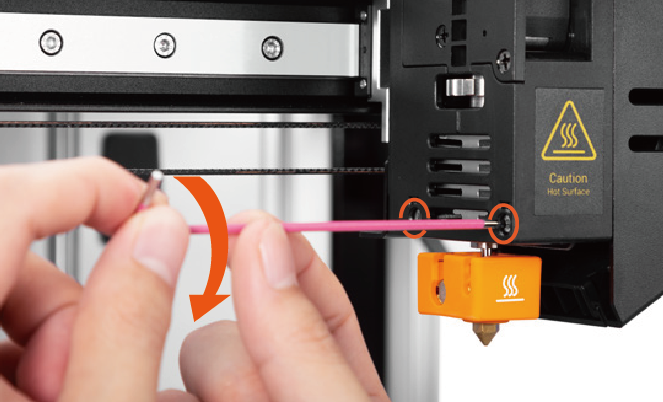
- Use H2.0 hex key to loosen the two screws on the inner side of the extruder without unscrewing them.
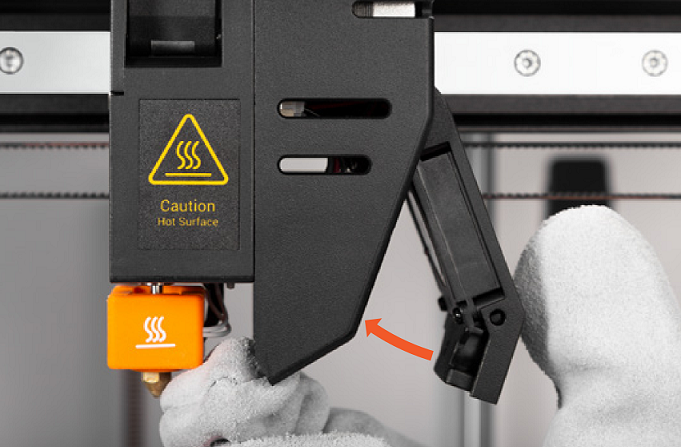
3. Hold the hot end with one hand to prevent it from falling off automatically, and gently push outward to open the extruder’s side cover with the other hand.
- Rotate the thumb wheel on the right extruder counterclockwise with one hand to loosen the hot end while holding the hot end sock and pulling it downwards gently with the other hand until you can remove the hot end.
- Hold the new hot end and push it upwards while rotating the thumb wheel clockwise to secure it to the standard position shown below.
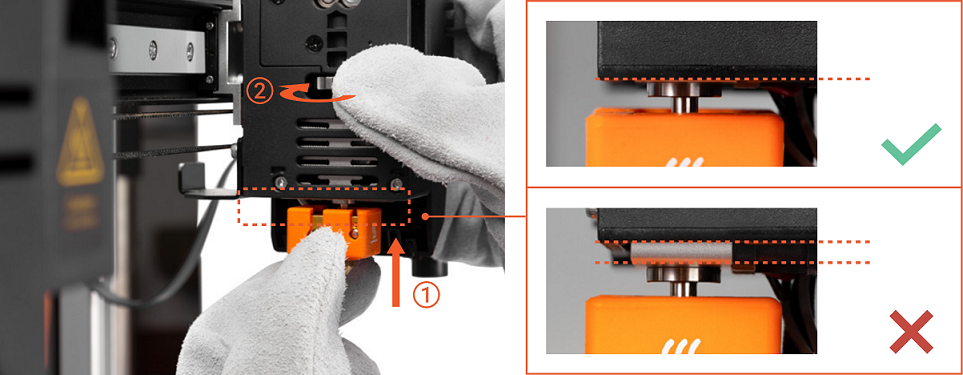
- Close the extruder's side cover.
7. Tighten the two screws on the extruder using 2.0 hex key.
-
Redo Heated Bed Leveling, Z Offset Calibration and XY Offset Calibration.
If you need to replace both left and right hot end, it is recommended to do this step after finishing the assembly of the two hot ends.
If you are installing hot ends (0.4mm, Hardened Steel, All-metal), you need to update the Touchscreen firmware and auto-tune PID value for the hot end before Step 8. Refer to - Installing the Hot Ends (0.4mm, Hardened Steel, All-metal)