After exporting G-code to workspace, you can set the work origin on Luban.
Setting the work origin via the L bracket is not supported when you start the job on Luban.
¶ How It Works
Determine where the carving will take place by setting the work origin. The work origin corresponds to the (0, 0) coordinate origin in the software.

¶ Procedures
- On the control panel, click X+, Y+ or X-, Y- button or direction arrows to move the CNC bit to where the work origin of the X and Y axes will be.
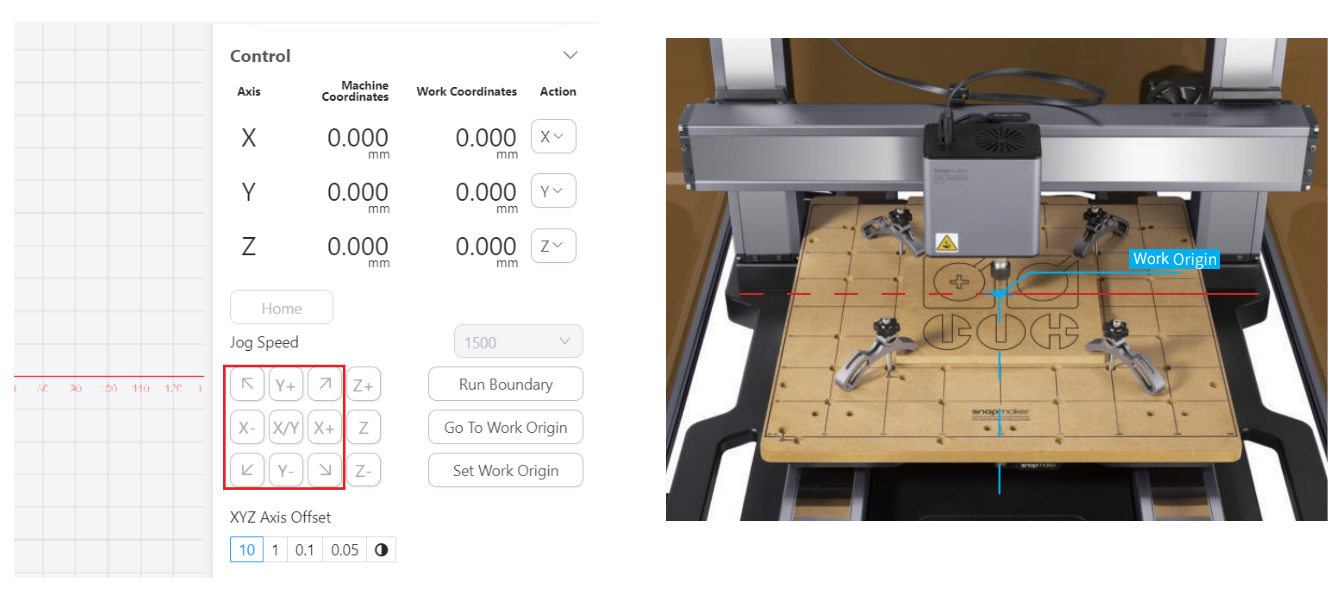
For easier observation, you can move the CNC bit closer to the material surface, but make sure it wont run into any part of the machine.
- Click Z+ button to lift the CNC bit until it is above the clamp set, and then tap Run Boundary to check if the work origin of the X and Y axes is set properly. If any part of the boundary trailed by the CNC bit goes outside of the material, or if the CNC Bit collides with any parts of the machine, reset the work origin of the X and Y axes, and run the boundary again.
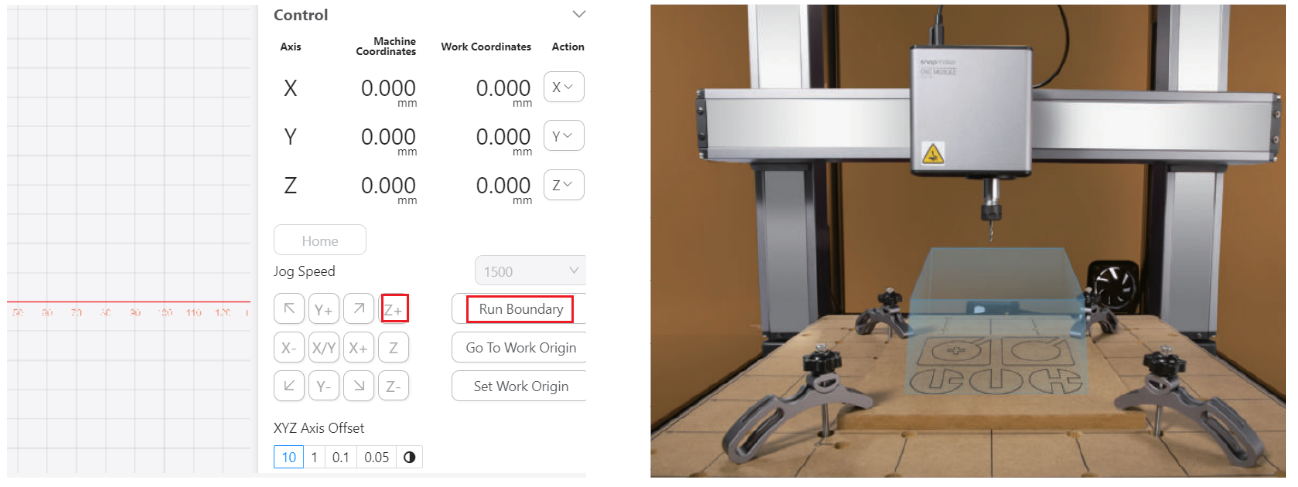
If the CNC bit runs into any part of the machine, press the emergency stop button on top of the Integrated Controller. After you have handled the emergency, rotate the emergency stop button clockwise to release it. Change the CNC bit (refer to Changing CNC bits) if it is damaged due to the collision.
If you have run the boundary with the CNC bit above the clamp set, you can lower the CNC bit to run the boundary again to locate the machining area more precisely. But note: Always make sure the CNC bit is above the material surface when running the boundary to avoid damaging the bit or the material.
-
Place the calibration card or a piece of A4 paper between the CNC bit and the material. Click Z+ or Z- button to adjust the height of the CNC bit. If you can feel slight resistance when pulling out the calibration card and wrinkle the card when you push it forward, then the work origin of the Z-axis is properly set.
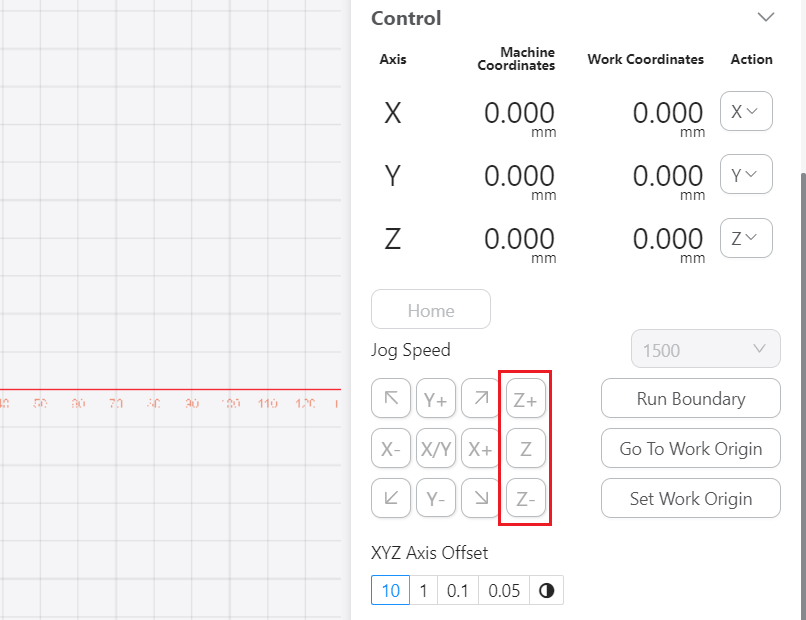

-
Click Set Work Origin to save the current position of the toolhead as the work origin.
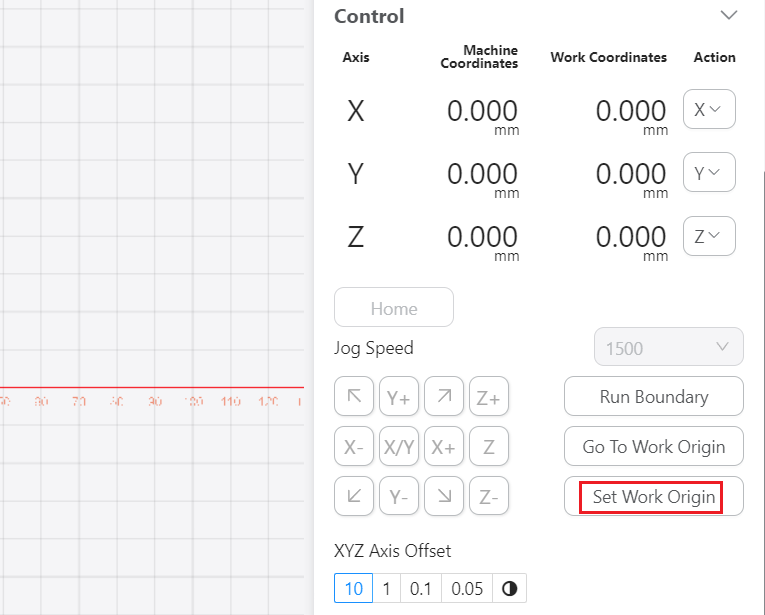
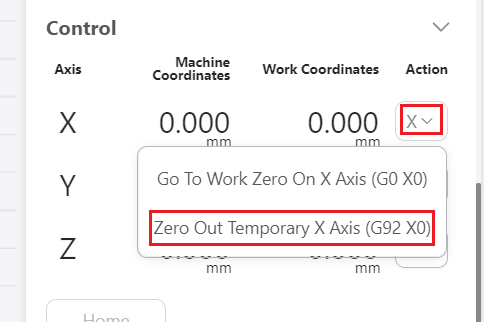
You can also seperately set the work origin for each axis. Take X-axis for example, first tap X+ or X- button or direction arrows to move the CNC bit to where the work origin of the X-axis will be, then click X > Zero Out Temporary X Axis.
Related Pages
