Snapmaker Luban includes built-in recommended parameters for laser machining materials, tested by our official team. If you wish to achieve optimal engraving or cutting results with other untested materials, you can utilize the Material Test feature to conduct your own tests.
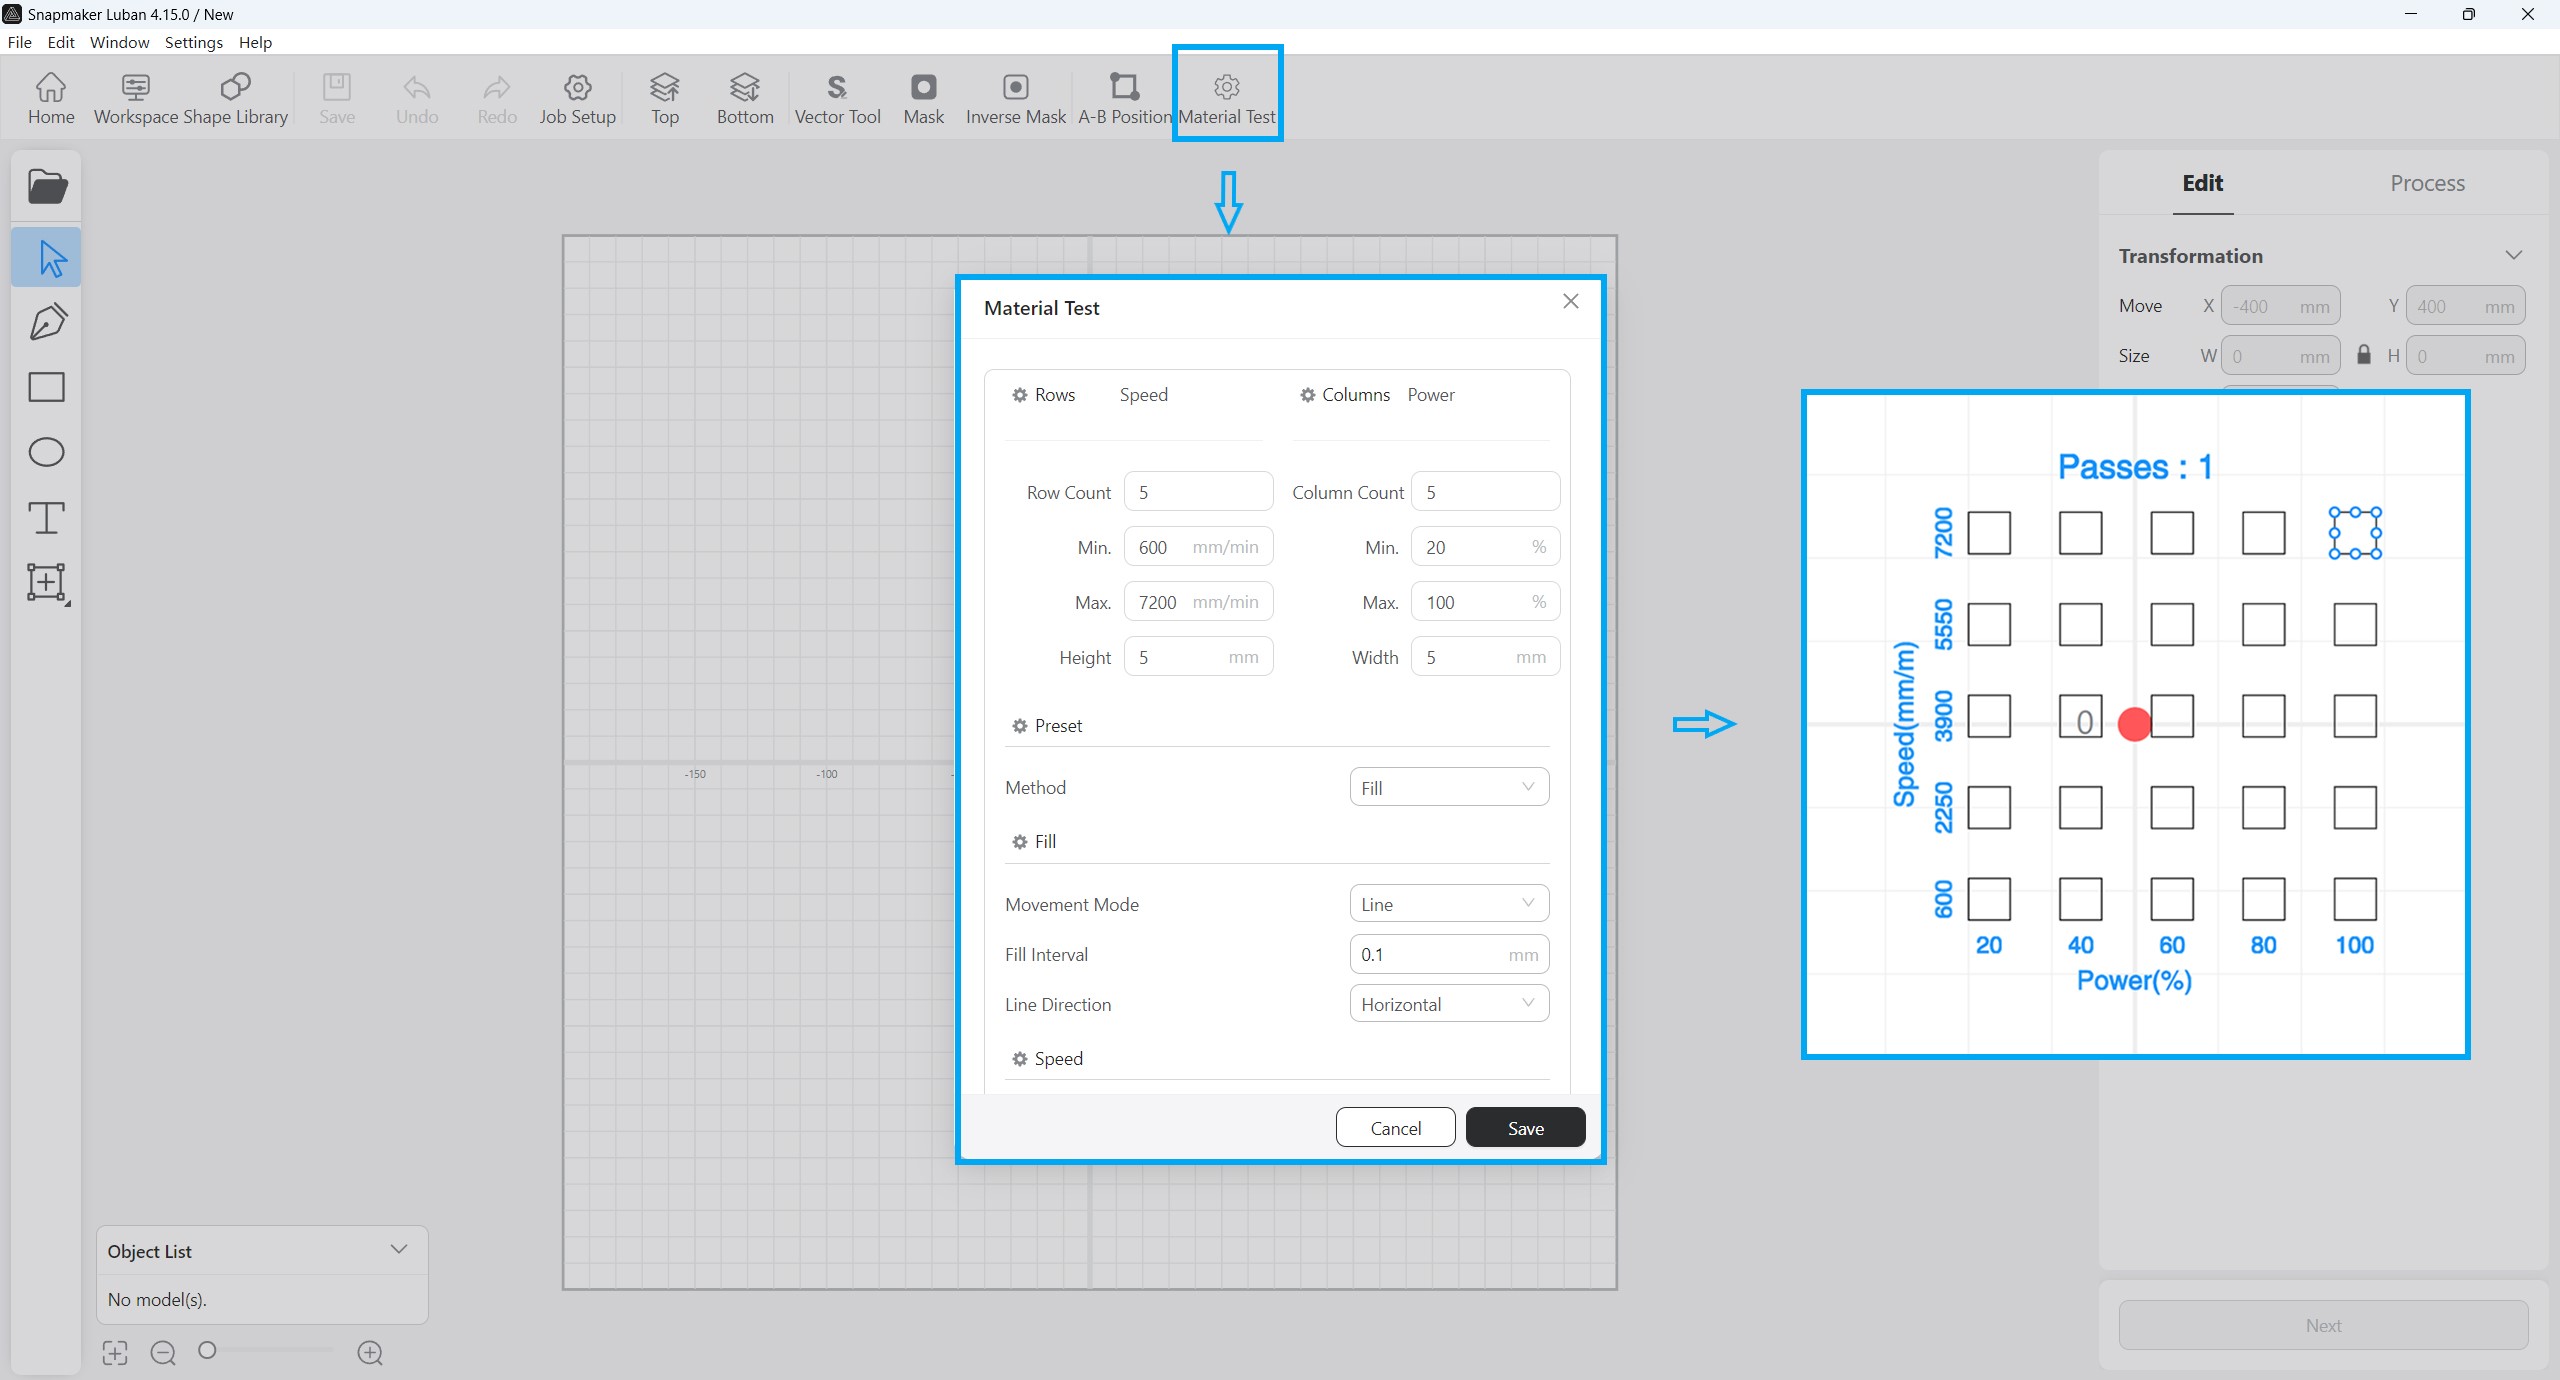
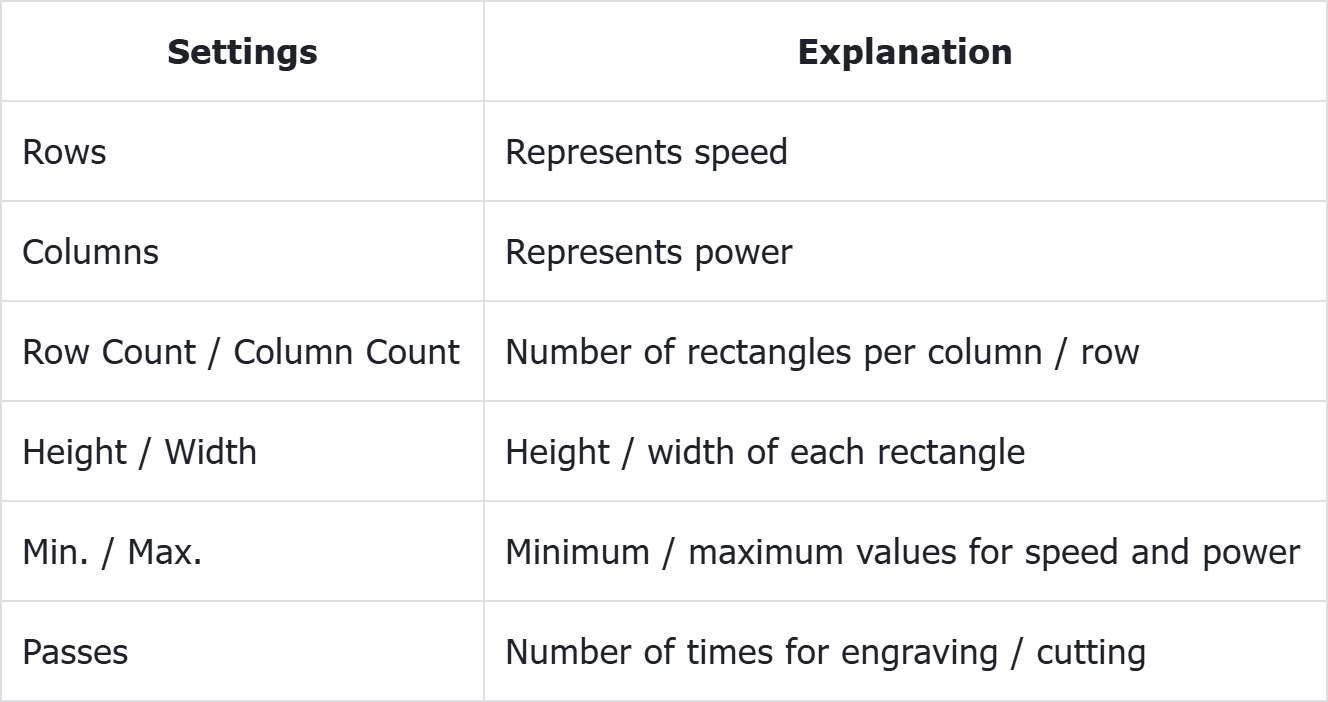
Access the laser G-code generator, click on Material Test at the top, where you can set the number and size of rectangles to be engraved or cut according to your needs. By comparing the engraving or cutting results of different rectangles in the array and following the evaluation criteria, you can determine the best processing parameters.
Avoid using highly reflective materials (except for 304 stainless steel and anodized aluminium), as they can reflect blue light, which may increase the safety risk of burning nearby objects or even causing fires.
Before You Start
If you have installed Snapmaker Luban, update it to version V4.15.0 or later.
The combination of different speeds and power levels can significantly affect laser engraving results (such as engraving depth and color), making this a two-factor test with the speed (mm/min) and power (%) as the variables. The evaluation results depend to some extent on personal preference.
Fires are likely to occur when the machine engraves at a low speed and with high power simultaneously. Therefore, you need to pay close attention at such phases during the test and should immediately stop the machining when you detect any excessive burning.
¶ Procedures
- Based on the size of the test material, set the number and size of rectangles to be engraved, as well as the ranges for speed and power.
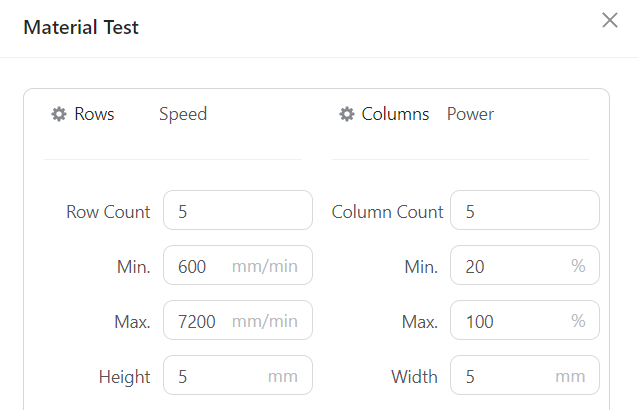
The maximum speed for Snapmaker 2.0 is 7200 mm/min, for Snapmaker Artisan is 12000 mm/min, and for Snapmaker Ray is 30000 mm/min.
- Select the processing method as needed.

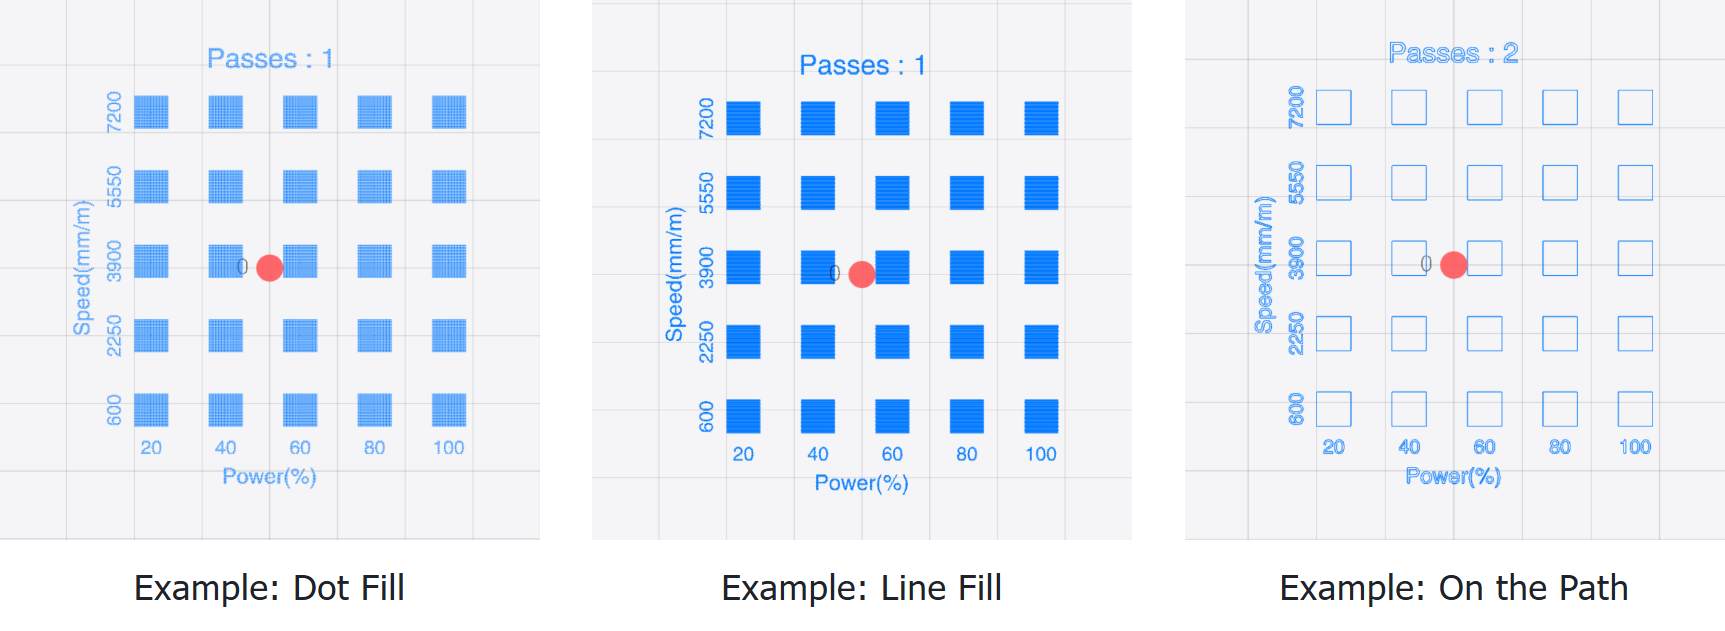
- Configure any additional parameters as needed and save the settings.
For definitions of some parameters, refer to Dot Width Compensation, Over Scanning, and Scan Offset.
If the Half Diode Mode is checked for the engraving test, it should also be selected for subsequent actual engraving jobs.
- Create the toolpath, generate the G-code file, and export it to a USB flash drive.
If your machine is connected to Luban, you can also transfer the G-code file via serial port or Wi-Fi.
-
Insert the USB flash drive into the integrated controller, select the G-code file on the touchscreen, and enter the laser job preparation interface.
-
Adjust the laser height and set the XY work origin.
-
Start machining.
-
When the machining is finished, follow the criteria to evaluate the optimal engraving power and speed.
- Create the toolpath, generate the G-code, and export it to a microSD card.
If your machine is connected to Luban, you can also transfer the G-code file via serial port or Wi-Fi.
-
Insert the microSD card into the machine.
-
Adjust the laser height and set the XY work origin.
-
Start machining.
-
When the machining is finished, follow the criteria to evaluate the optimal engraving power and speed.
¶ Evaluation Criteria
You can select the rectangle with the most acceptable engraving result (considering the color of the rectangle, the engraving depth, etc) based on your own preferences and the usage of the creation. Generally, the rectangle with the clearest lines and the least excessive charring is considered to have been engraved with optimal power and speed.
If you encounter difficulties in evaluating the best-engraved rectangle, you can select a speed range (the optimal speed may fall within this range) and conduct further tests with subdivided speed intervals.
During the entire testing process, the laser power remains at a maximum of 100%. The machine cuts multiple rectangles within the speed range you set to determine the upper limit of laser cutting speed.
¶ Procedures
- Set the laser power to 100%. Based on the dimensions of the test material, configure the number and size of rectangles to be cut, as well as the range of speeds.
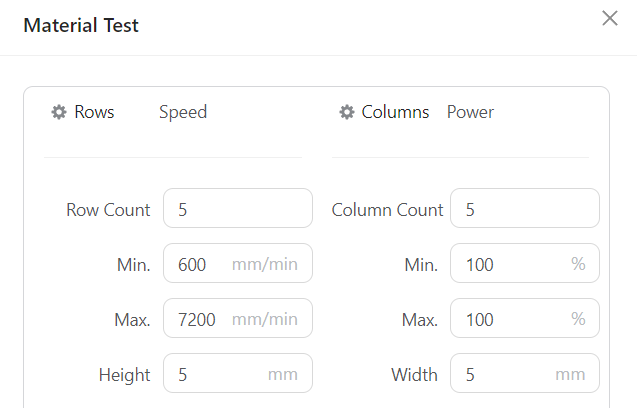
The maximum speed for Snapmaker 2.0 is 7200 mm/min, for Snapmaker Artisan is 12000 mm/min, and for Snapmaker Ray is 30000 mm/min.
- Select On the Path as the processing method.

- Configure any additional parameters as needed and save the settings.
If using the 20W or 40W laser module, it is recommended to enable the Air Assist Pump.
To ensure cutting power, it is not recommended to enable the Half Diode Mode.
- Create the toolpath, generate the G-code file, and export it to a USB flash drive.
If your machine is connected to Luban, you can also transfer the G-code file via serial port or Wi-Fi.
-
Insert the USB flash drive into the integrated controller, select the G-code file on the touchscreen, and enter the laser job preparation interface.
-
Adjust the laser height and set the XY work origin.
-
Start machining.
-
When the machining is finished, follow the criteria to evaluate the optimal engraving power and speed.
- Create the toolpath, generate the G-code, and export it to a microSD card.
If your machine is connected to Luban, you can also transfer the G-code file via serial port or Wi-Fi.
-
Insert the microSD card into the machine.
-
Adjust the laser height and set the XY work origin.
-
Start machining.
-
When the machining is finished, follow the criteria to evaluate the optimal engraving power and speed.
¶ Evaluation Criteria
The rectangle with the optimal cutting speed is the one which is completely cut through with the highest speed.
Considering the fault tolerance in future machining, however, it is recommended to subtract a value of 120 from the tested speed. For example, if the optimal speed directly obtained from the test according to the criteria is 1380 mm/min, then 1260 mm/min should be regarded as the optimal speed for cutting the tested material.