When using the Snapmaker J1 3D printer for the first time, you need to complete the hardware installation and the initial setup of the touchscreen as demonstrated in this chapter.
¶ Unboxing
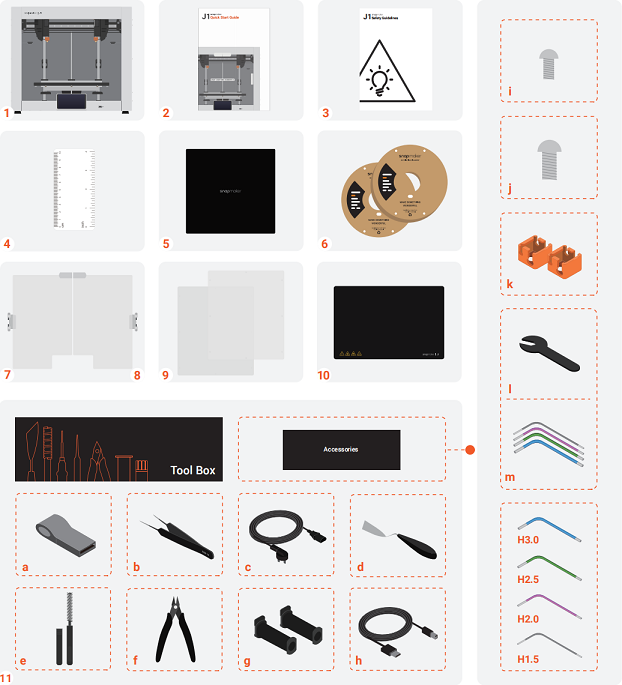
¶ Parts List
-
Snapmaker J1 3D Printer × 1
-
Quick Start Guide × 1
-
Safety Guidelines × 1
-
Calibration Card × 1
Used for heated bed leveling and Z-axis offset calibration (in manual mode). -
Wiping Cloth × 1
Used for daily cleaning of the printer. -
Filament × 2
Materials needed for 3D printing. -
Left Door × 1
-
Right Door × 1
-
Side Panel × 2
-
PEI Glass Plate × 1
A printing platform on which the filament is fabricated. -
Tool Box × 1
a. USB Flash Drive × 1
b. Tweezers × 1
Used for gripping excess filament extruded from the nozzle.
c. Power Cable × 1
d. Palette Knife × 1
Used for removing prints from the PEI glass plate.
e. Wire Brush × 1
Used for cleaning the nozzles.
f. Diagonal Pliers × 1
Used for cutting filaments and remove supports.
g. Filament Holder × 2
Used for hanging filaments.
h. USB-B Cable × 1
Used for connecting the printer to a computer.
i. M3 × 6 Screw × 16
j. M4 × 8 Screw × 4
k. Hot End Sock × 2
Silicone socks wrapping around the hot ends to maintain a stable printing temperature and prevent bleeding impurity.
l. 5.5mm Wrench × 1
Used for adjusting the tension of the belts.
m. Hex Key × 4
Used for maintenance and installing the enclosure door and side panels.
¶ Hardware Installation
- Place the printer horizontally on a solid table or workbench.
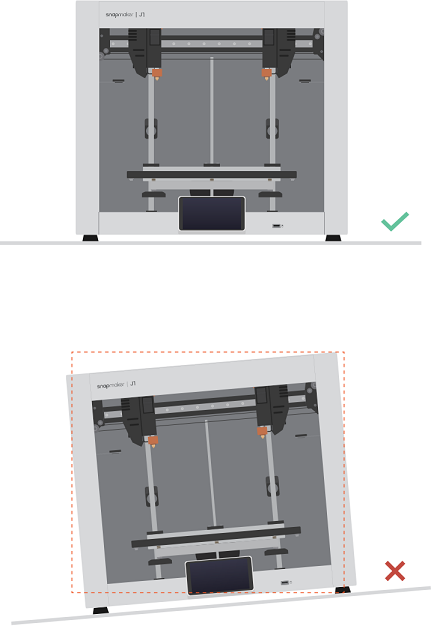
For your convenience of changing filaments, it is recommended to leave a clearance of over 30 cm around the machine body.
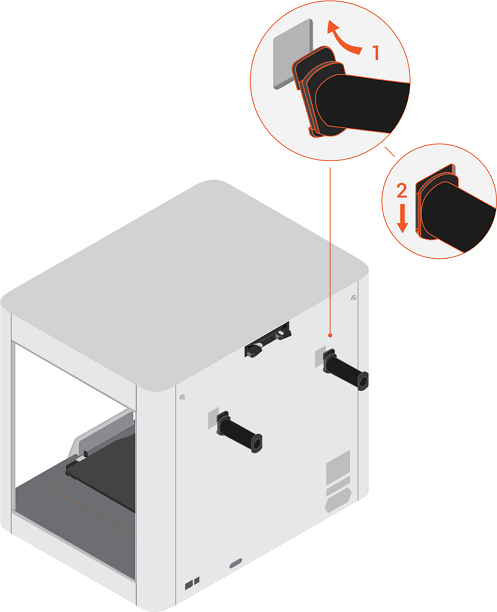
- Install filament holders.
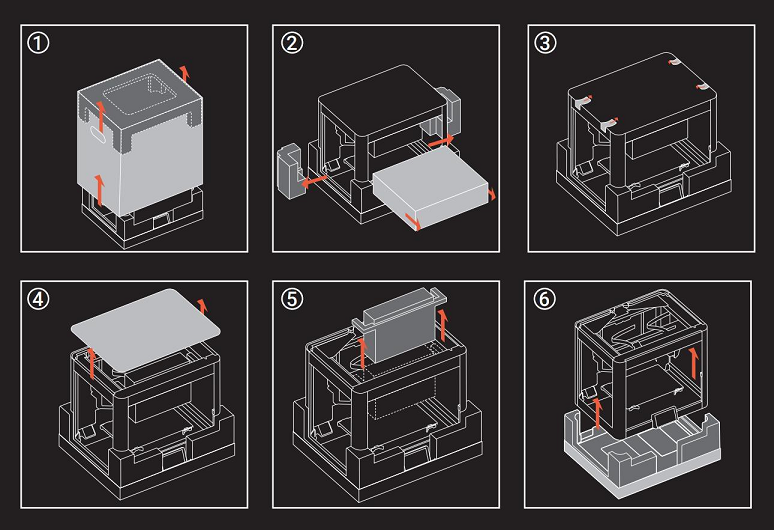
- Install the enclosure doors with the provided green hex key (H2.5) and M4 × 8 screws in the tool box.

When using an hex key, you can hold the longer end first to loosen the screw, and then switch to the shorter end to unscrew the screw quickly.
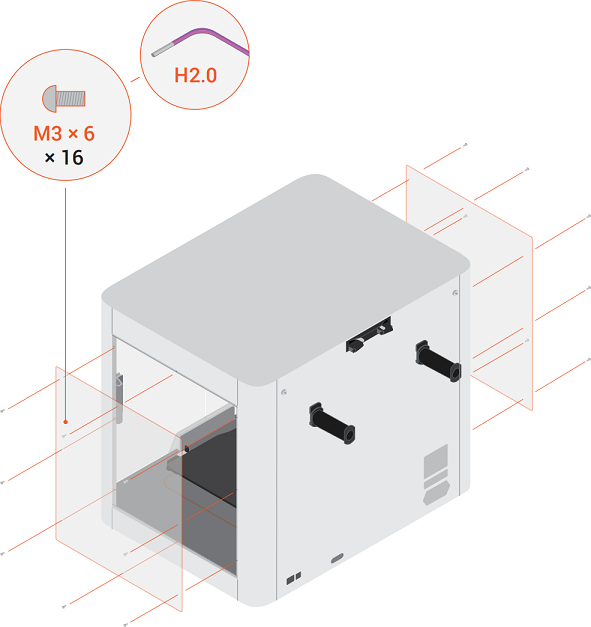
- Install the left and right side panels with the provided pink hex key (H2.0) and M3 × 6 screws in the tool box.
- Install the PEI glass plate.

The PEI glass plate is fragile, handle it carefully.
- Make sure the power switch is off, and then connect the power cable.
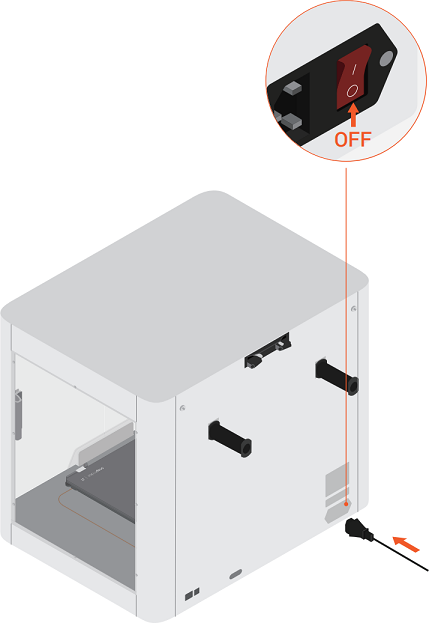
Make sure the power switch is turned off before connecting the power cable, or the printer may be damaged.
¶ Touchscreen Initial Settings
When you first boot the Snapmaker J1, you need to complete a series of initial settings under the guidance of the touchscreen. Turn on the power switch on the back of the machine body, and the touchscreen will automatically run the initial setup process.
To re-enter the wizard, tap Settings > Machine Settings > Wizard.
¶ General Initial Settings
When you turn on your Snapmaker J1 for the first time, you need to complete the following general initial settings:
-
Select the machine language
-
Read Terms & Conditions and User Experience Improvement Program
-
Name your J1
-
Connect to a Wi-Fi network
¶ Wizard
After completing the general initial setup, the wizard will guide you through the following steps to prepare for printing:
-
Heated Bed Leveling
-
Z Offset Calibration
-
XY Offset Calibration
-
Offset Calibration Check
-
Vibration Compensation Calibration