¶ Step 1 - Download & Installation
-
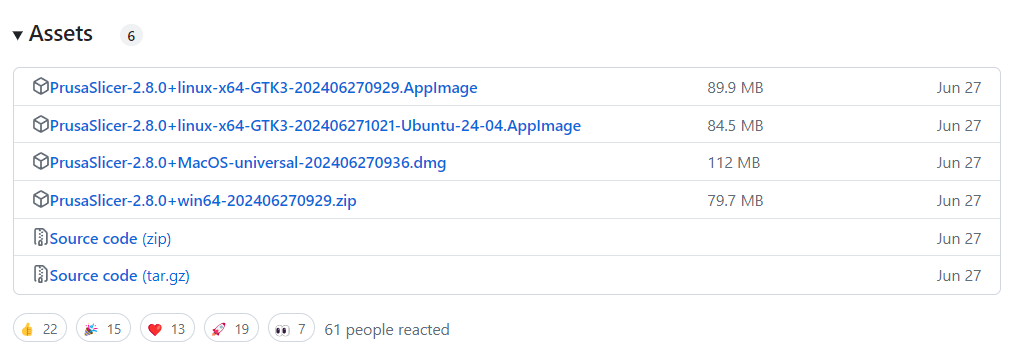
Download PrusaSlicer from PrusaSlicer Official Website or Github.
When downloading from Github, scroll down to locate Assets section, and make sure you download the correct version for your computer.
-
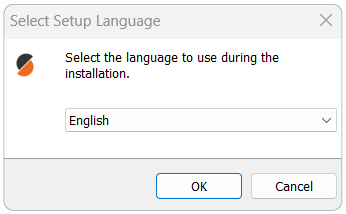
Select Setup Language.
-
Follow the on-screen instructions to complete the installation.
¶ Step 2 - Configuration Wizard
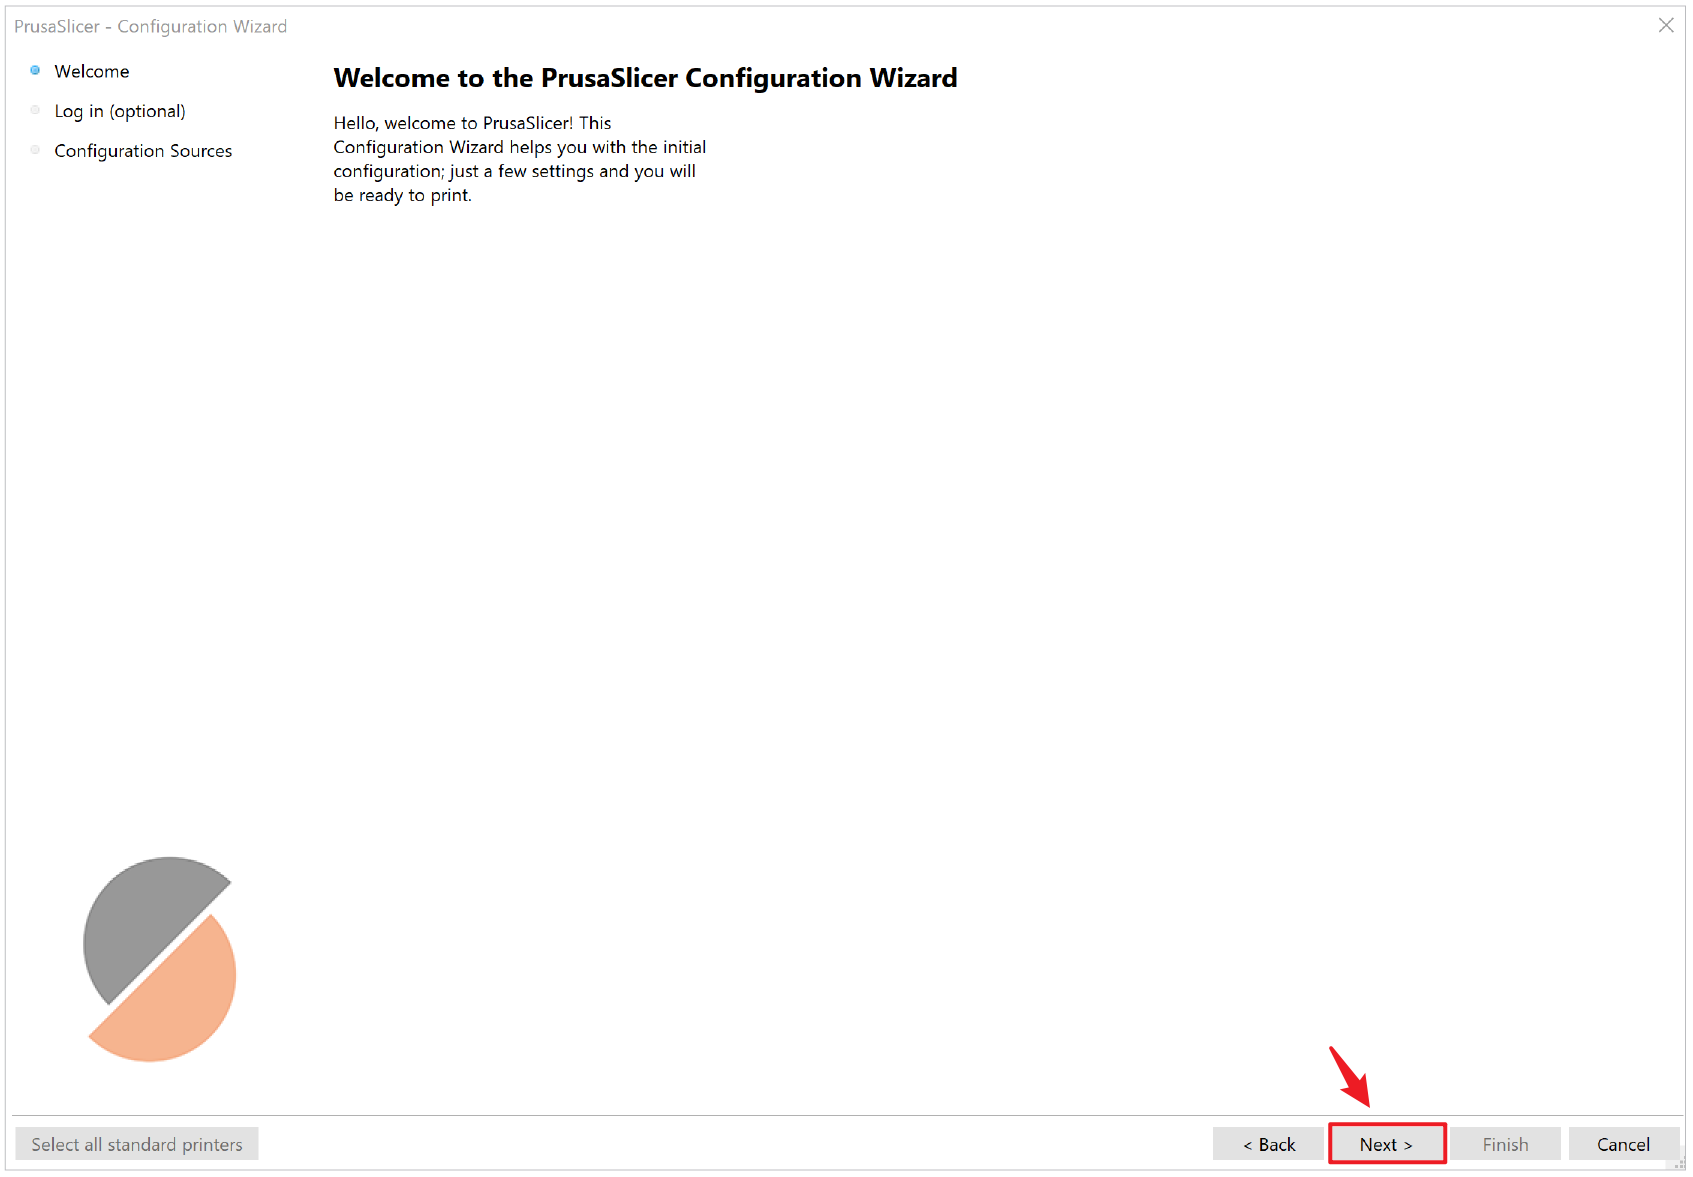
When you launch PrusaSlicer for the first time, a Configuration Wizard window opens automatically to help you with the initial configuration.
Configuration Wizard can also be launched manually from the top menu by clicking Menu > Configuration > Configuration Wizard.
¶ Welcome
Click Next to start set up process.
¶ Log in
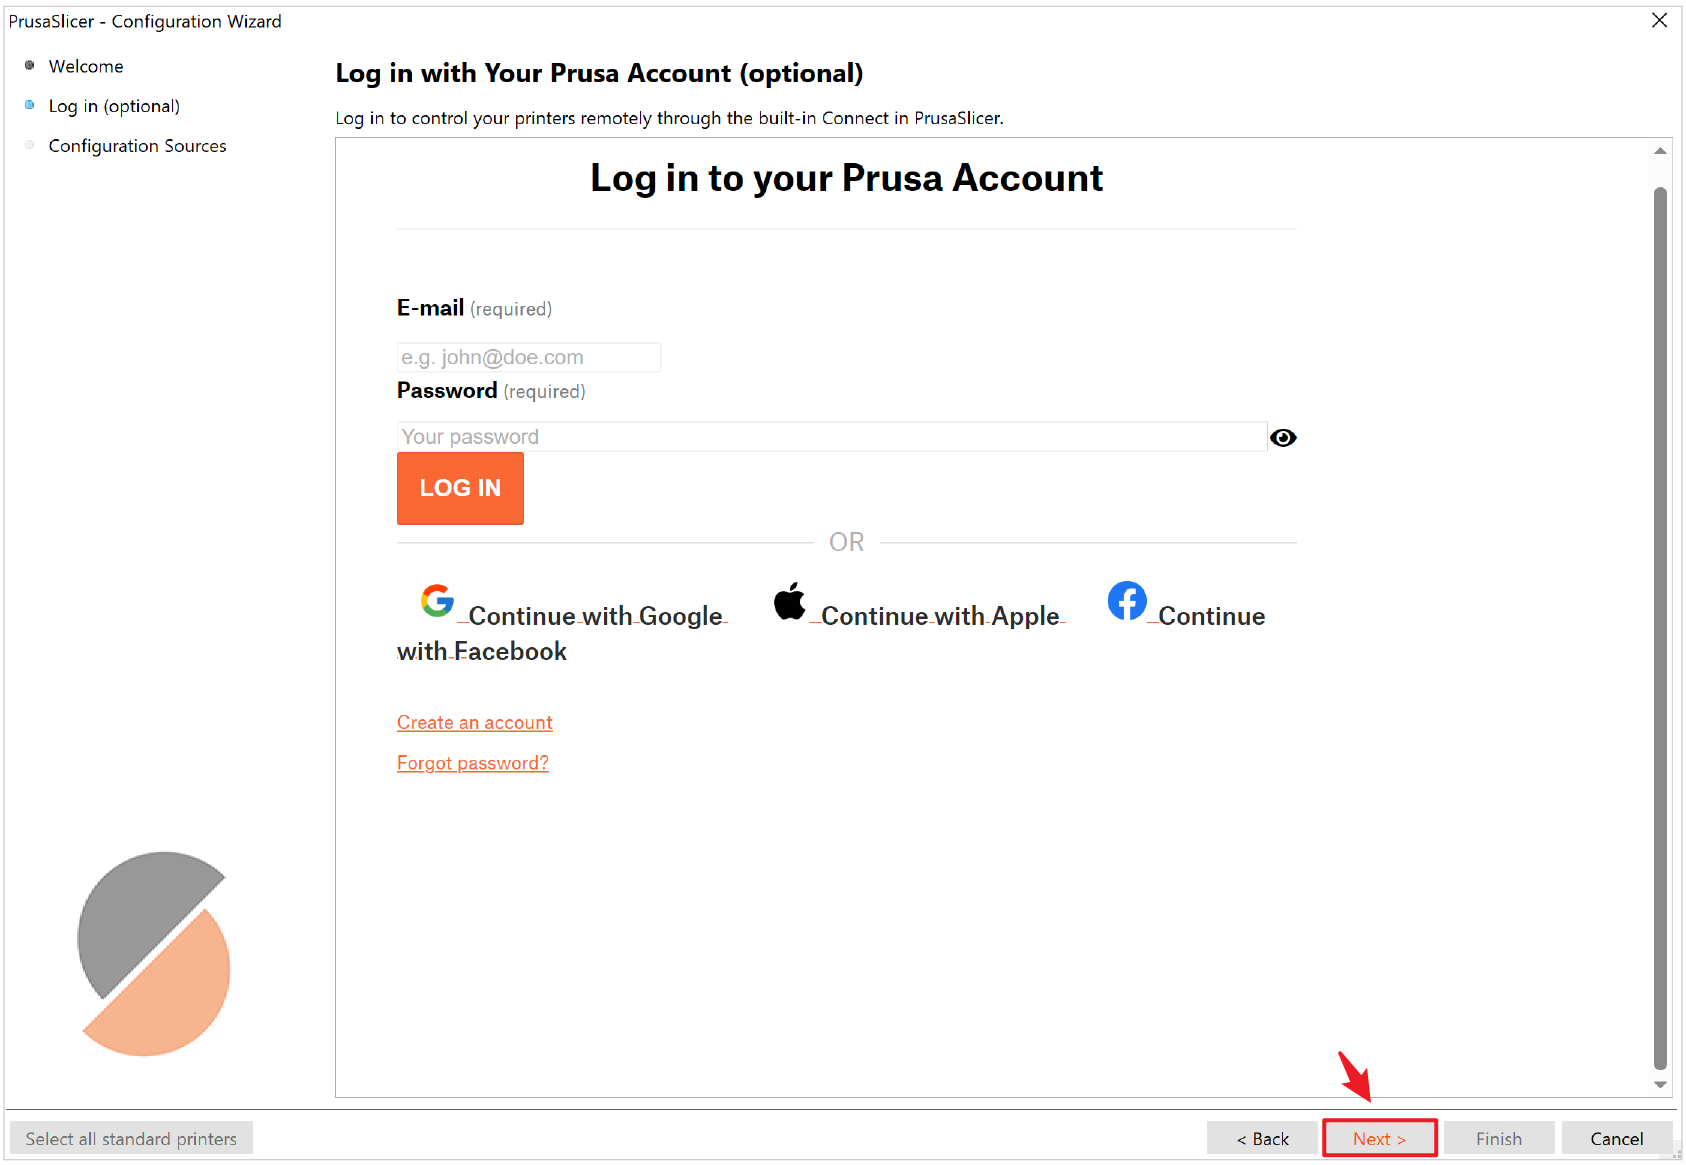
To use Snapmaker machines, there is no need to select login region as currently we do not support online printing. You can directly click Next.
¶ Configuration sources
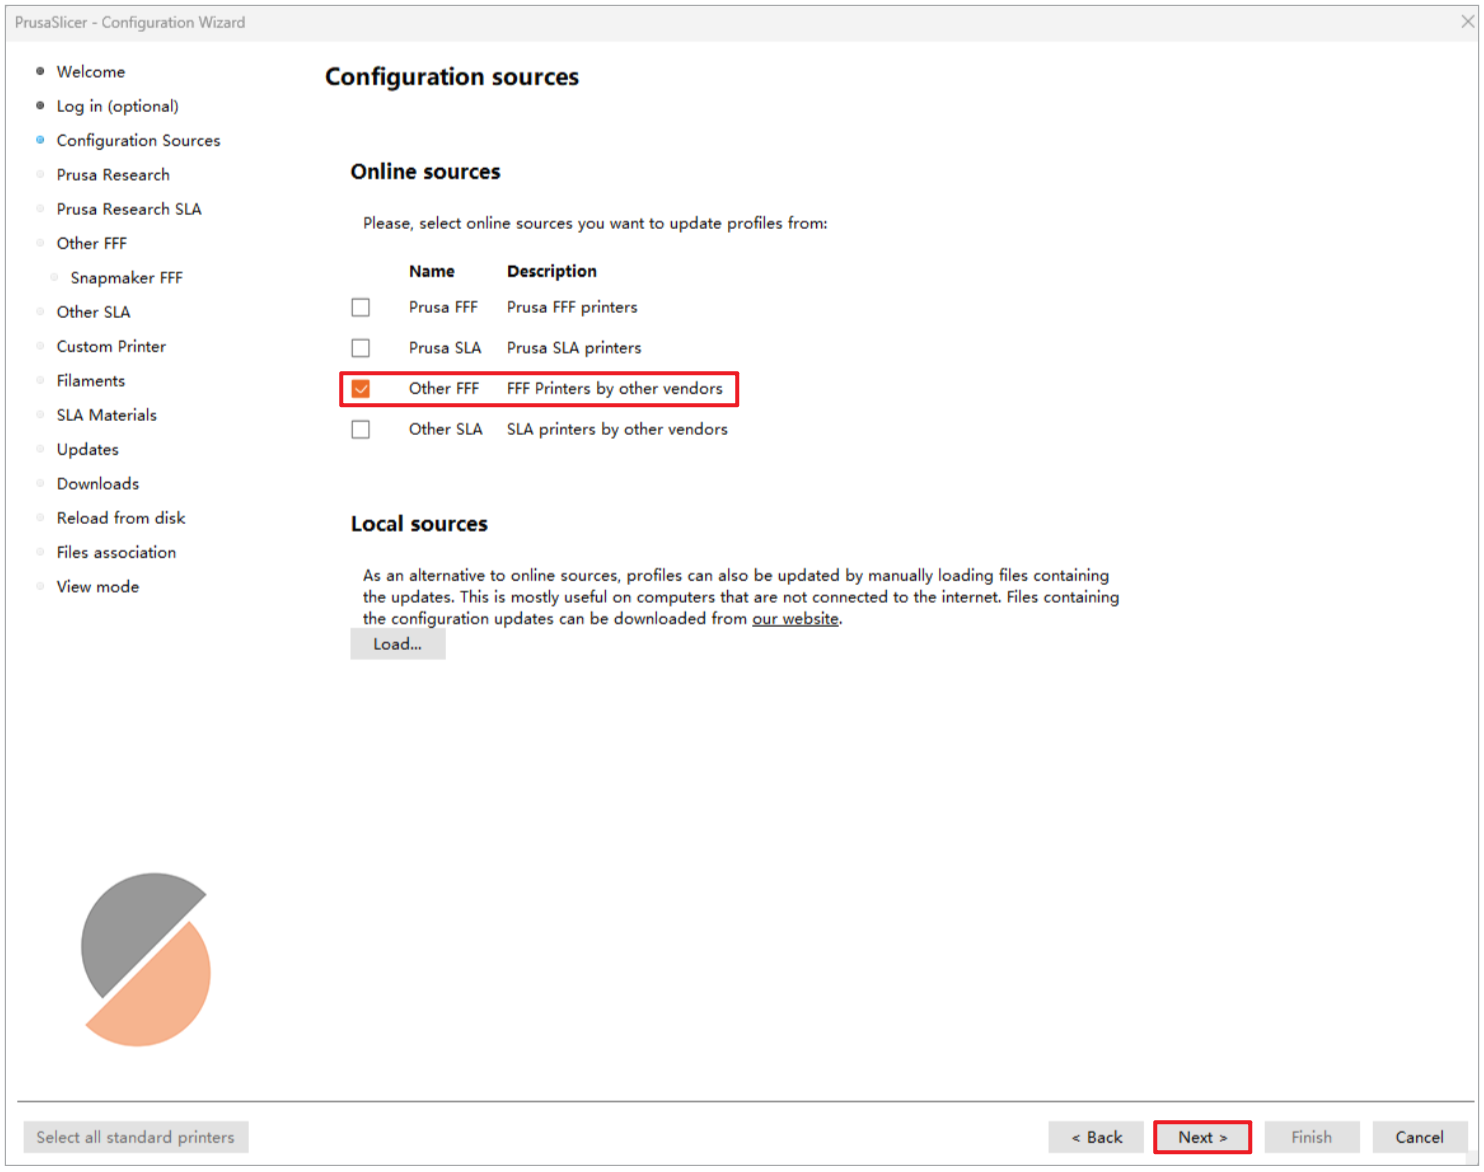
This function is necessary when not logged in with a Prusa Account. Currently, PrusaSlicer provides an option to select printer and filament presets from built-in online sources. To print with Snapmaker printers, please follow the stpes below:
- Tick Other FFF, then click Next.
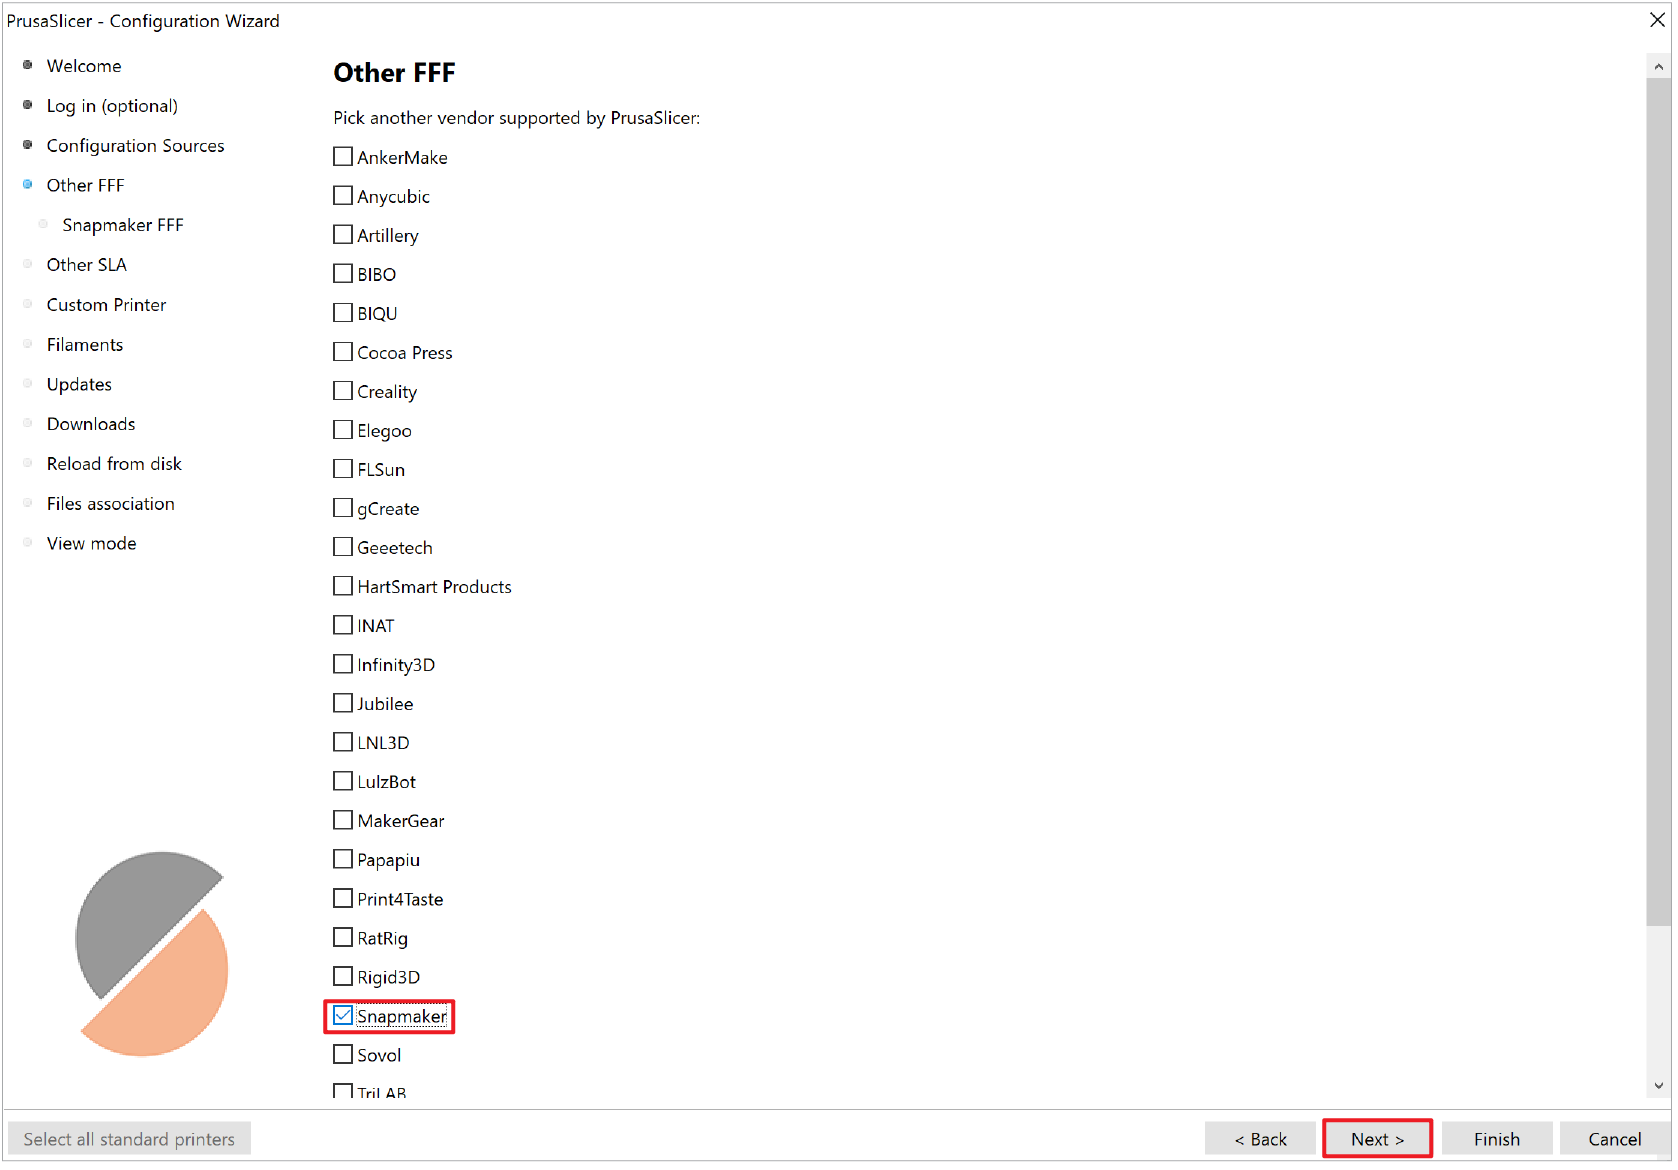
- Tick Snapmaker as the third party vendor, then click Next. This opens a new indented tab, which allows you to select the printer(s).
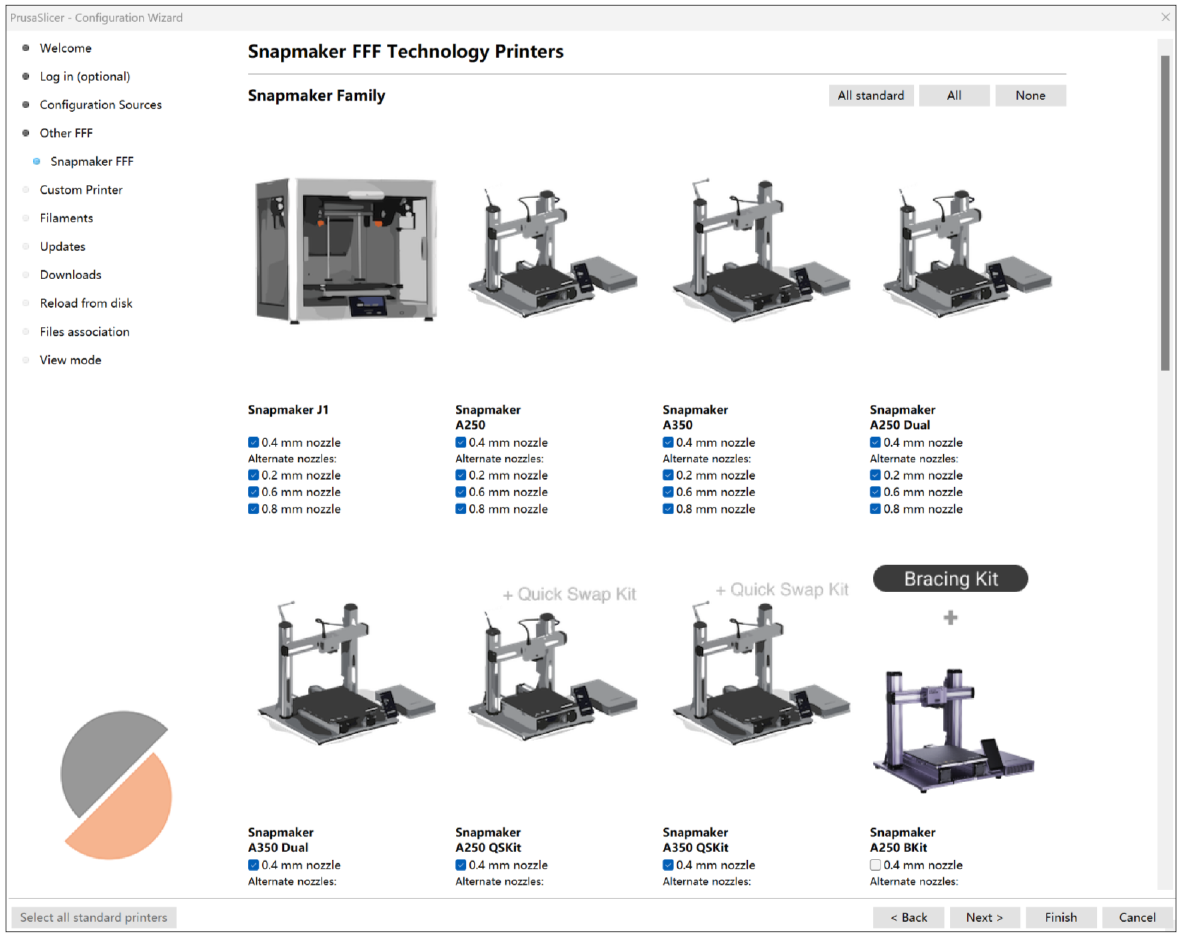
- Select the printers and nozzles that you prefer to display in the slicer operation menu. You may select any or all of the options available to you. Click Next when you finish.
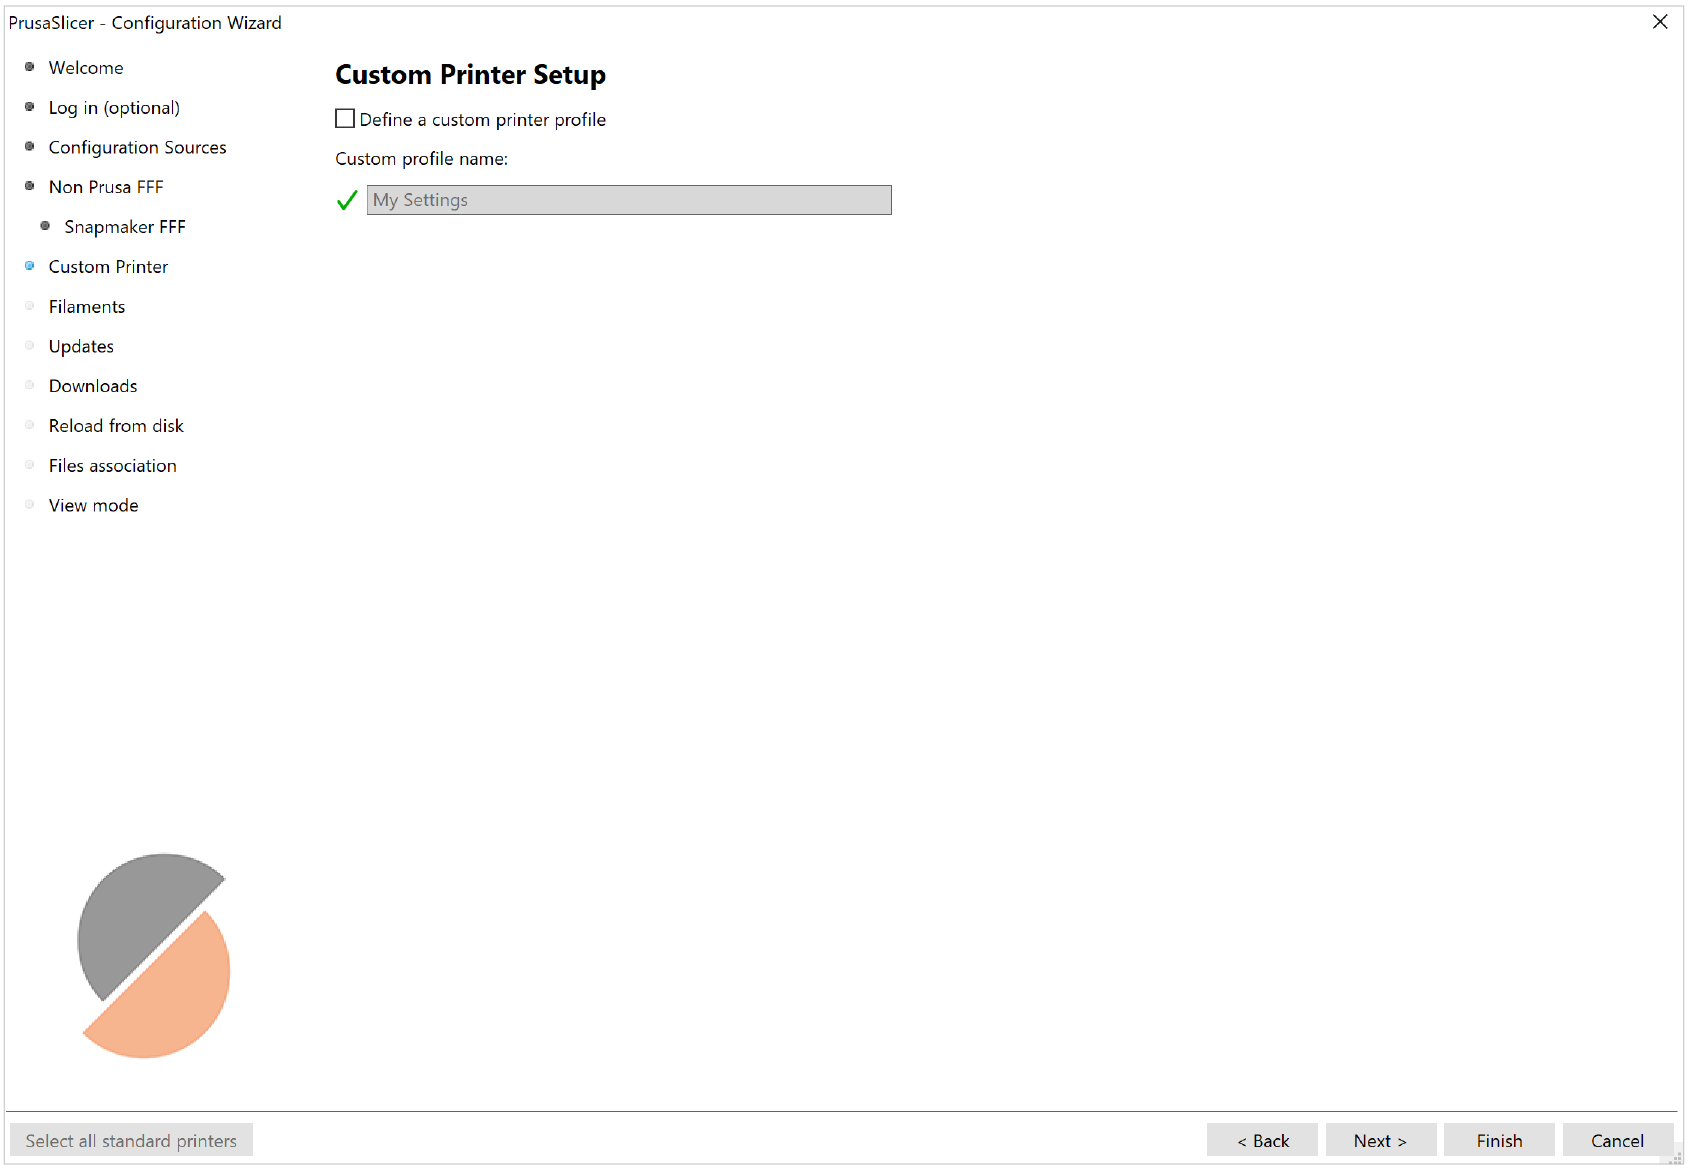
Then it will direct you to Custom Printer Setup tab, where you can customize printer settings, if not needed, directly click Next.
- Select the filaments you prefer to display in the filament preset list. You can choose as many as are available. Click Next when you finish.

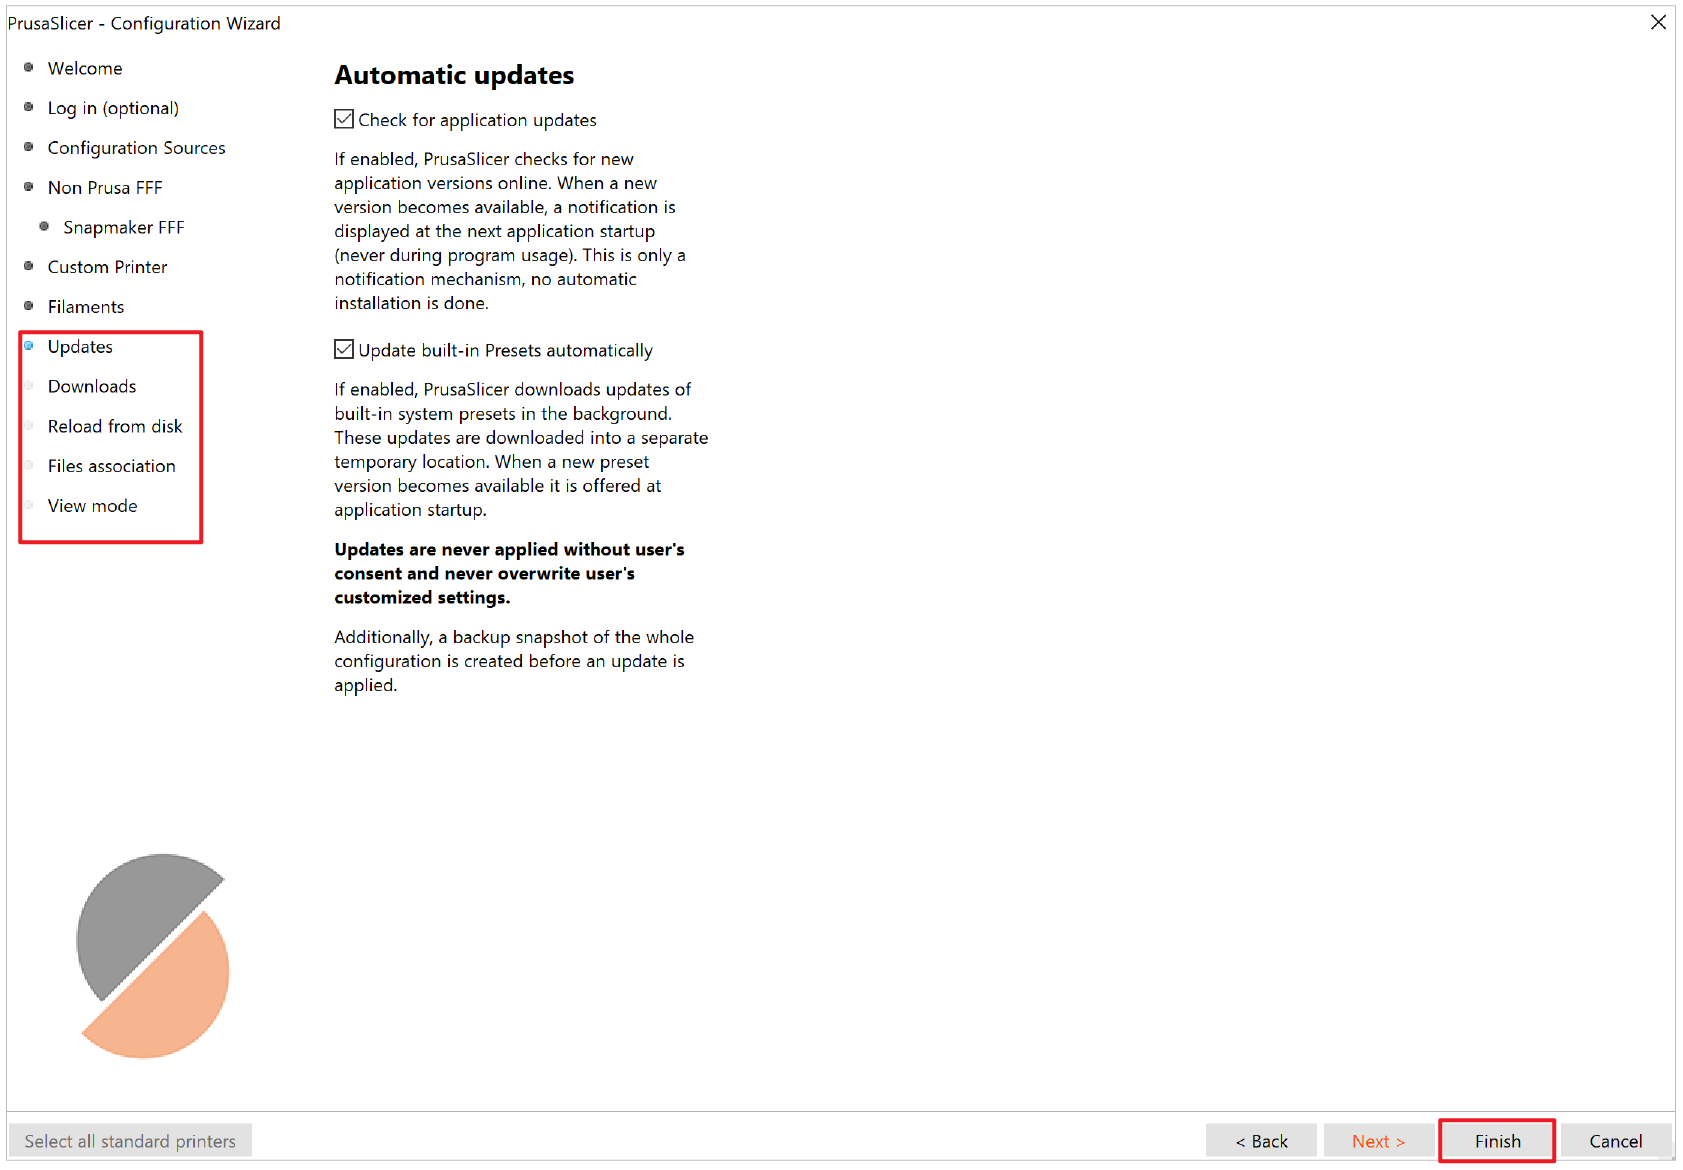
- Based on your own needs and preferences, complete the Updates, Downloads, Reload from disk, Files association and View mode configuration settings. Then click Finish at last to save the changes.
¶ Step 3 - First Print
¶ Import the model file
You can either drag a model file into the slicer, or click ![]() , or clcik File - Import to import a model file. Supported 3D formats are STL, STEP, 3MF, OBJ, and AMF.
, or clcik File - Import to import a model file. Supported 3D formats are STL, STEP, 3MF, OBJ, and AMF.
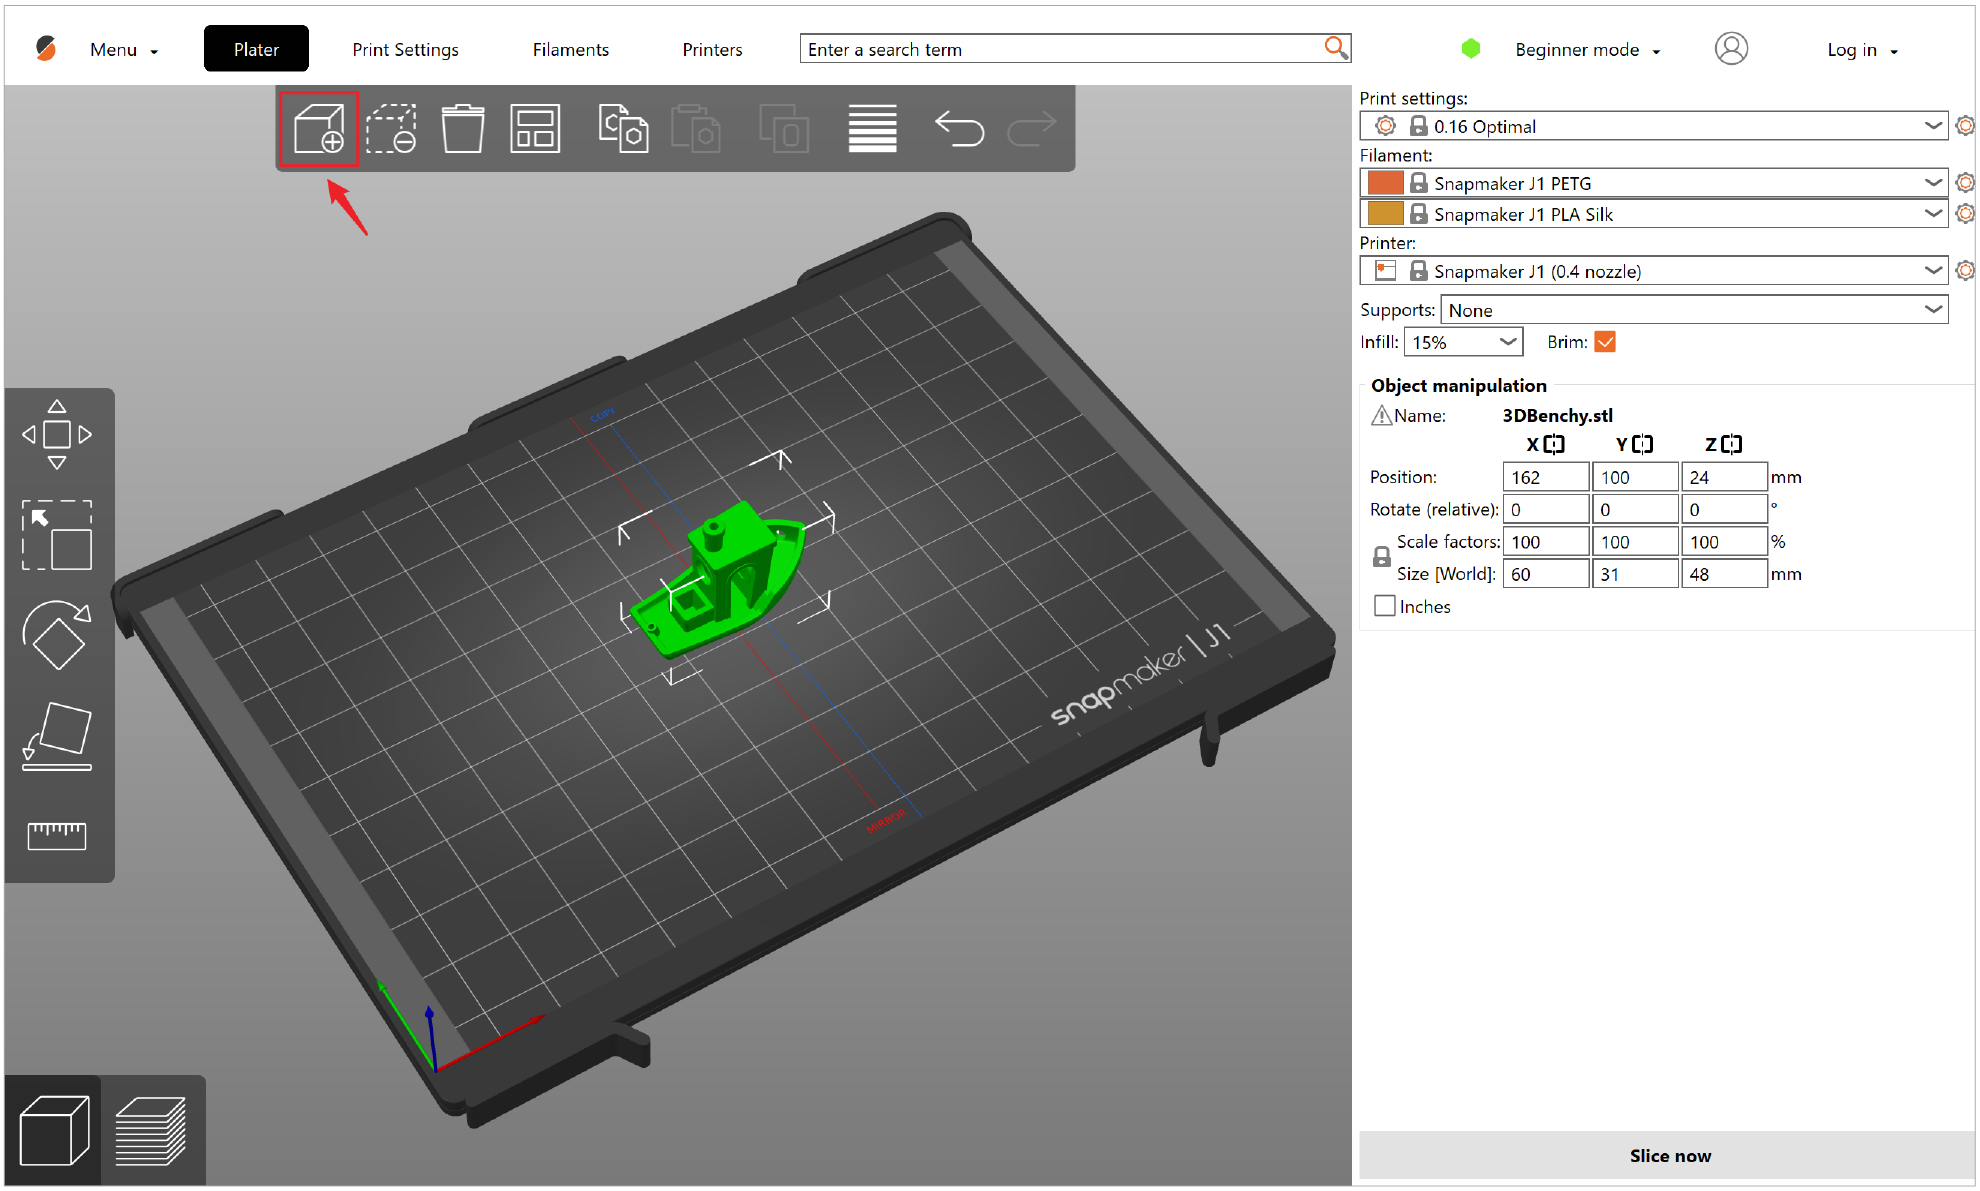
You can download the 3DBenchy model from Thingiverse.
¶ Select printer
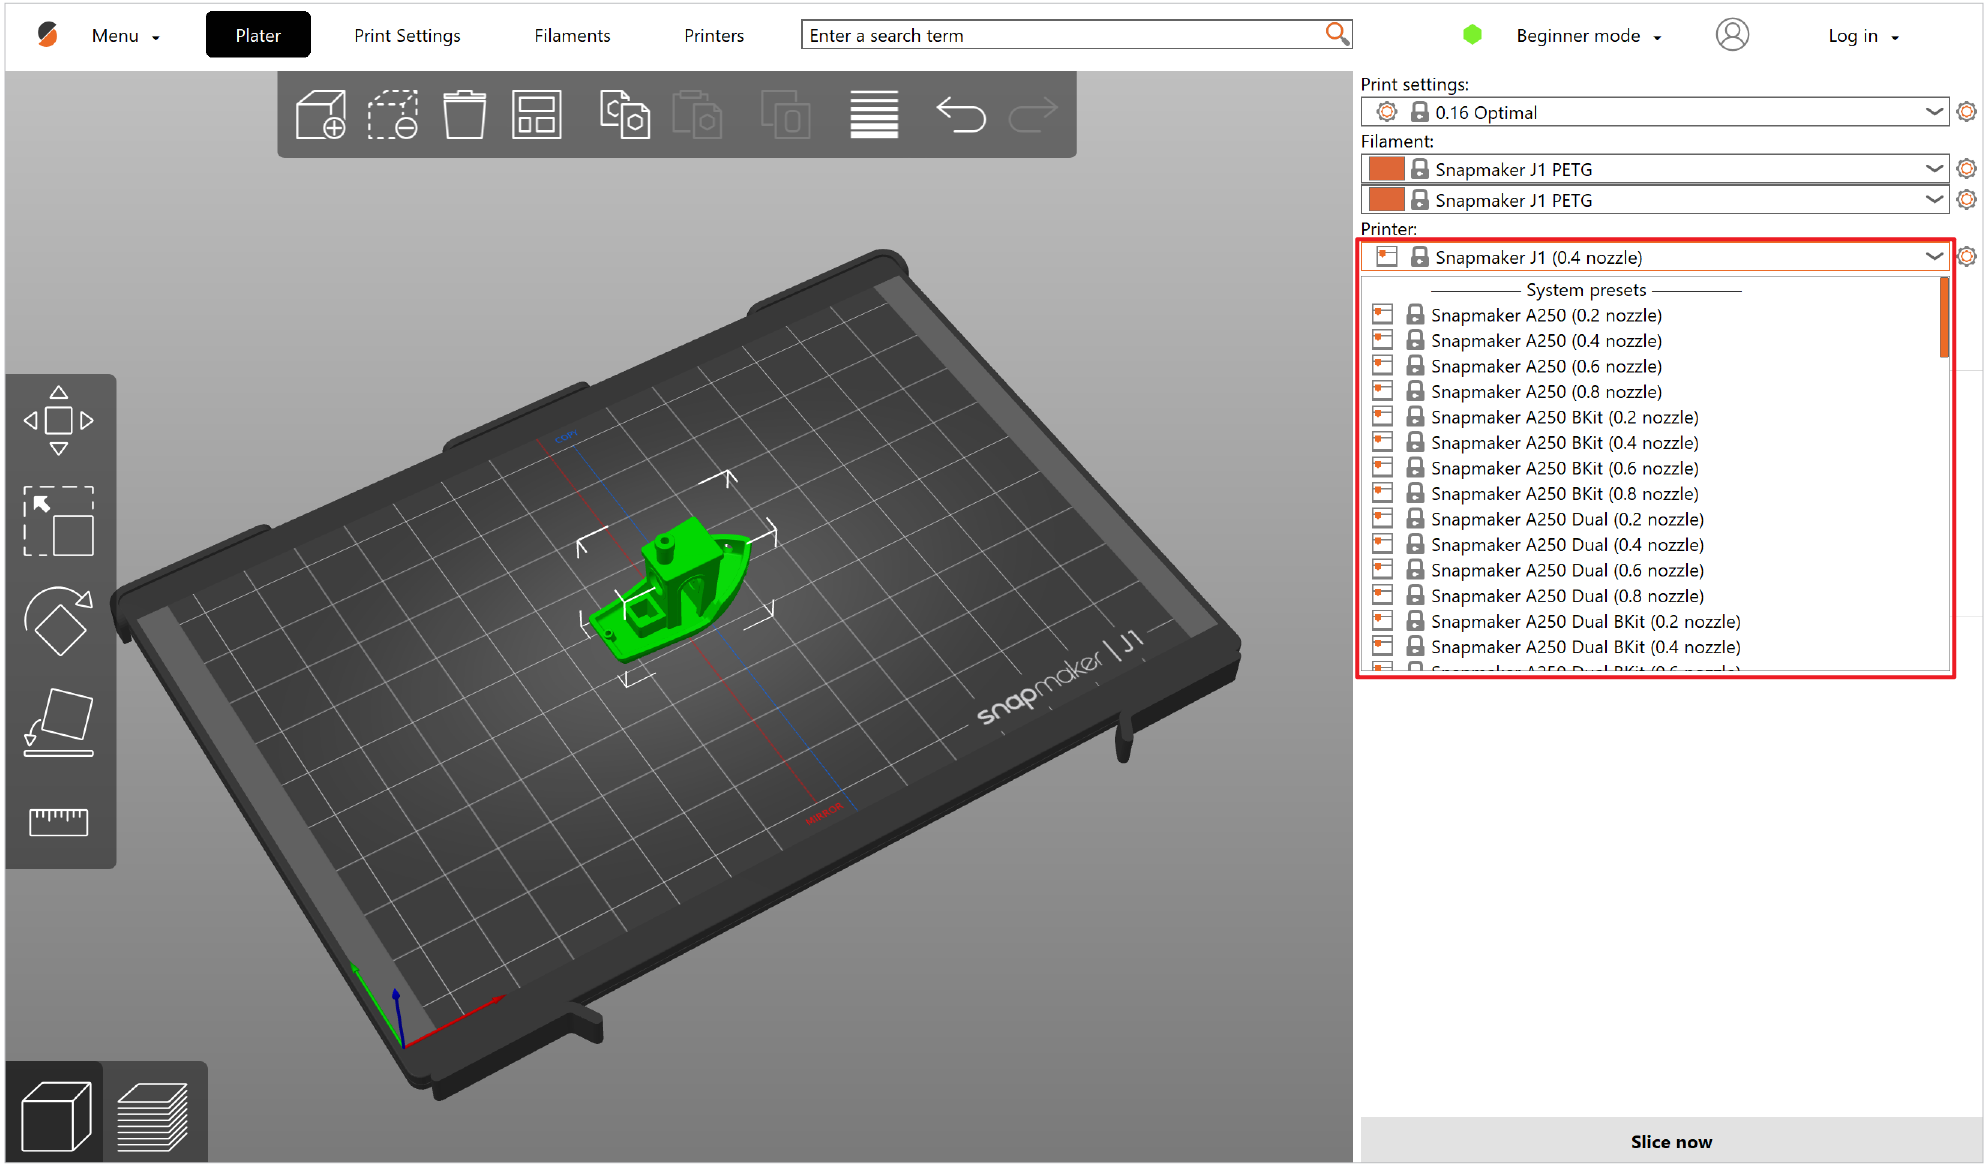
If you only selected one printer and nozzle size in the Configuration Wizard, you already have the correct printer selected. If you chose to import multiple printer profiles, select the one you wish to use from the drop-down menu in the right panel.
¶ Select material
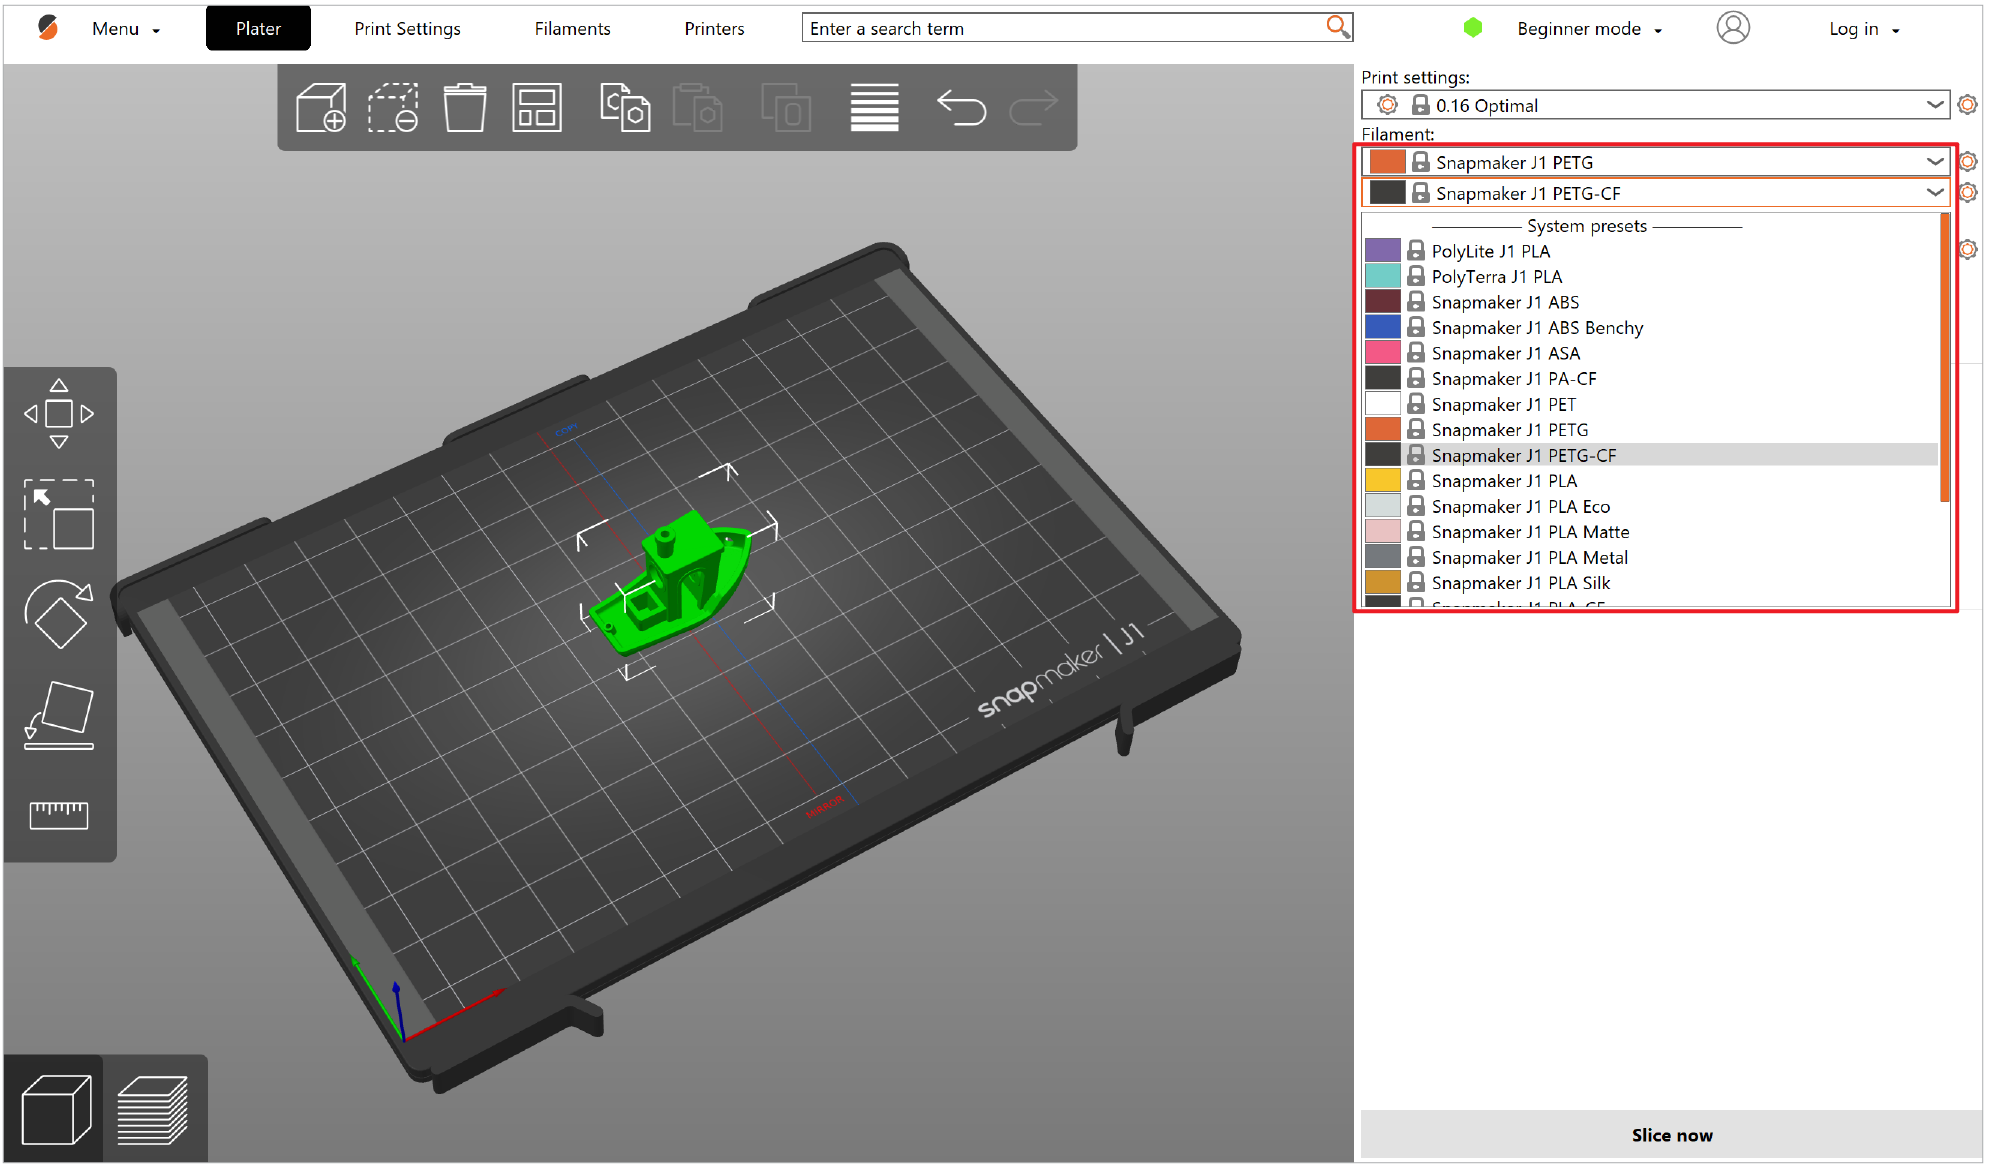
Select the material presets for the left and right nozzles.
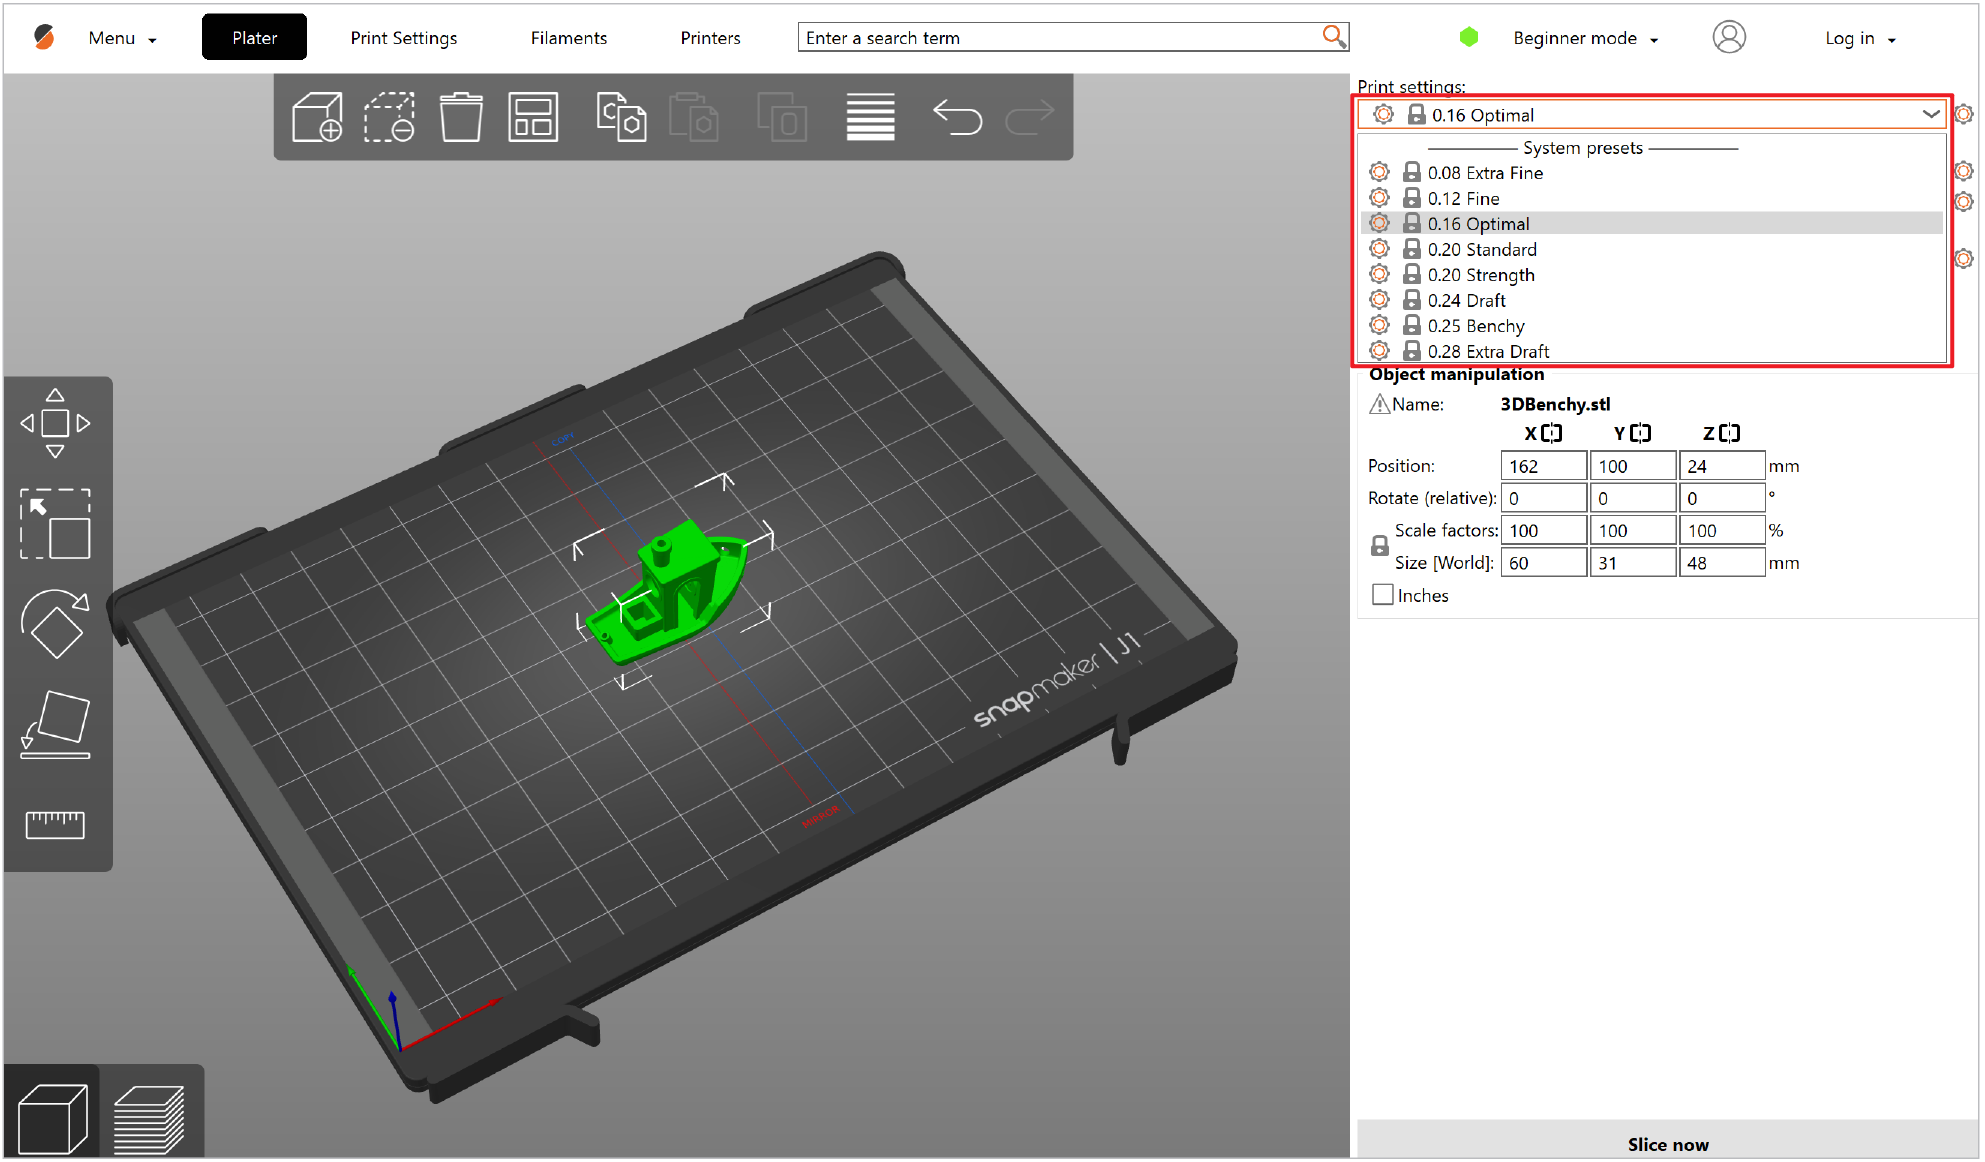
¶ Select a print profile/layer height
By adjusting the height of the individual printed layers you can balance the print quality and the print time. PrusaSlicer has various print profiles to select from. You can use 0.2 mm layer as it offers very good print quality at reasonable print times.
¶ Paint the model
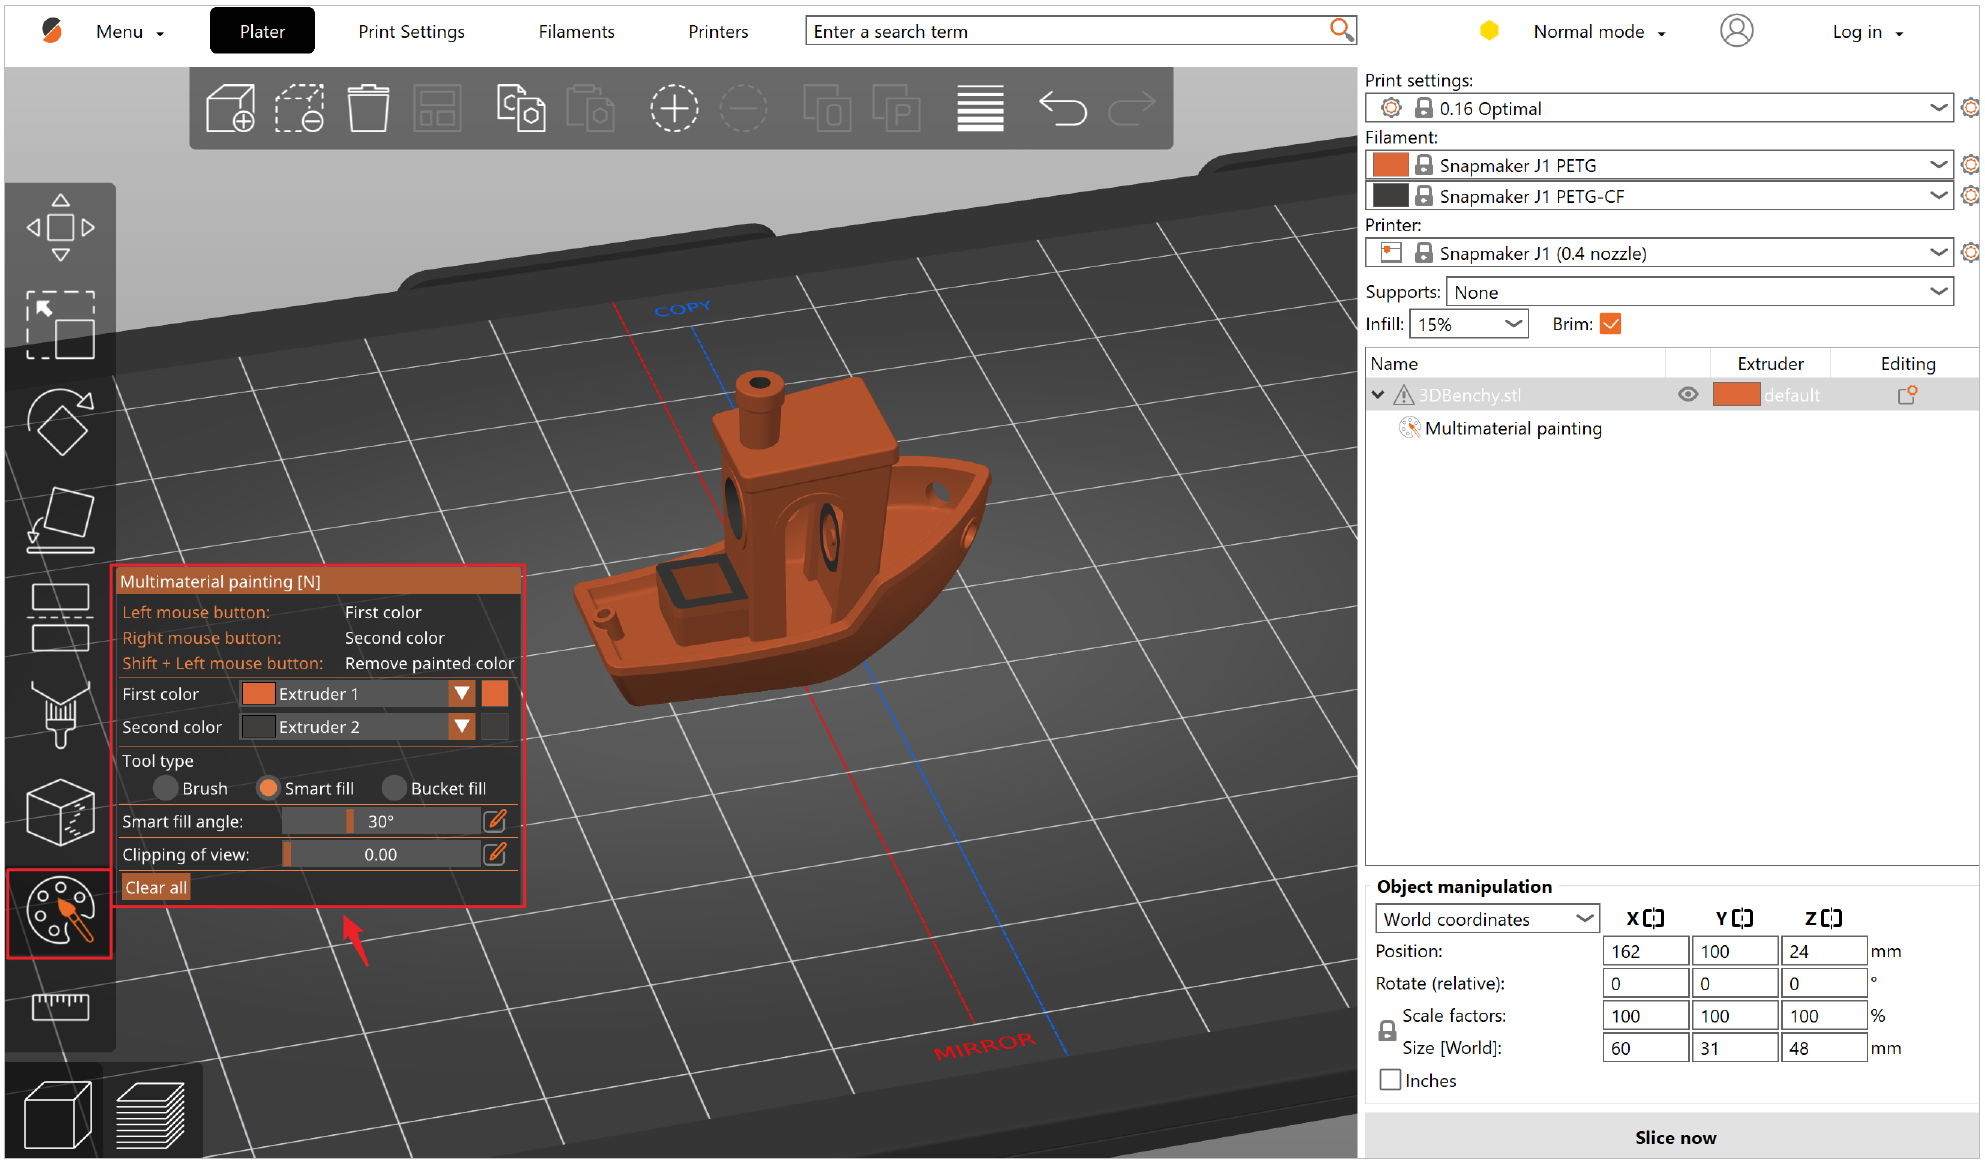
Use the Multimaterial panting tool to assig the left/right extruder to different models or parts of a model.
¶ Set Supports, Infill and Brim
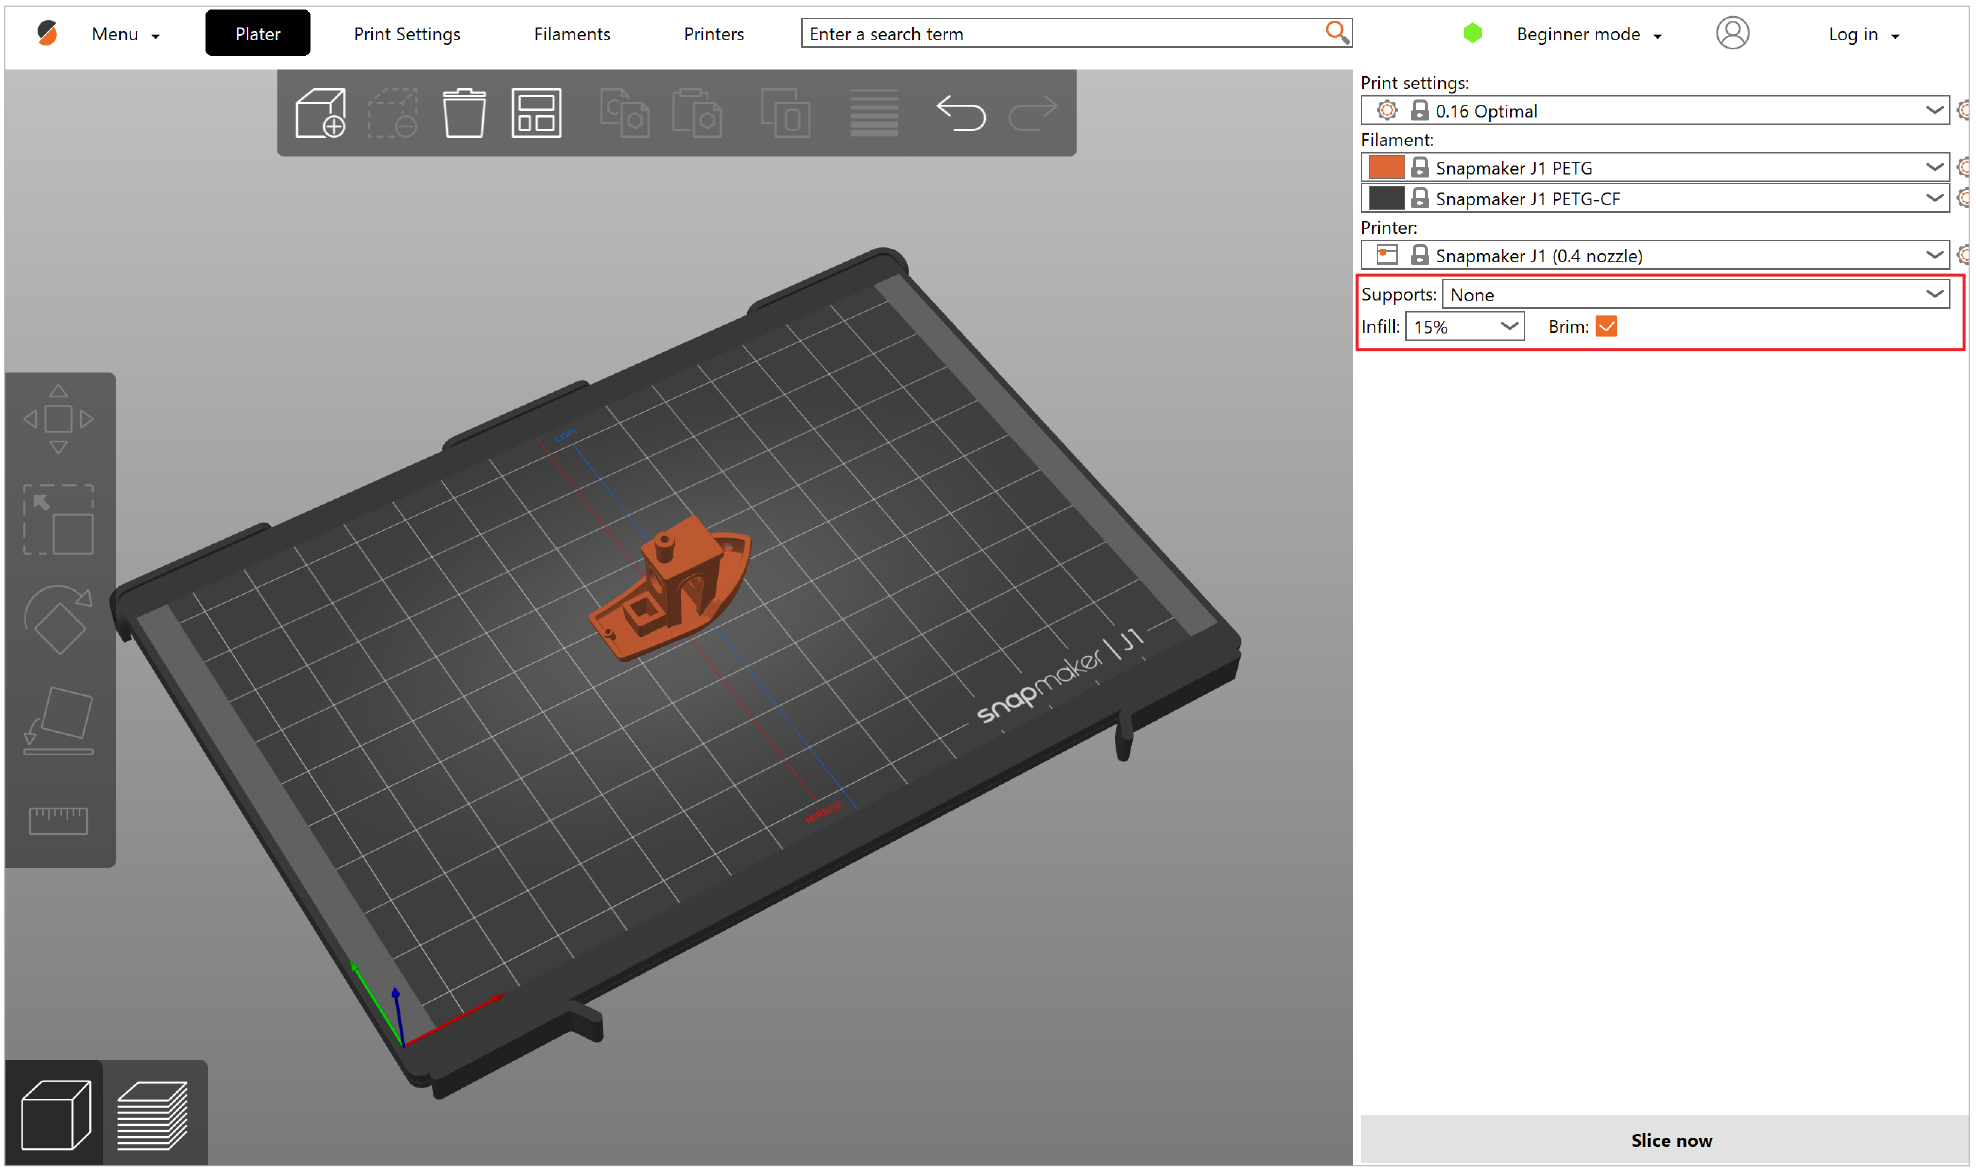
In the drop-down box, you can select a support type, PrusaSlicer can detect where to place supports and generate them automatically.
In the drop-down box of Infill, you can adjust the amount of infill. Generally, values around 15% work well.
A brim is recommended to turn on to increase adhesion to the print bed and decrease the possibility of warping.
¶ Previewing G-code before print
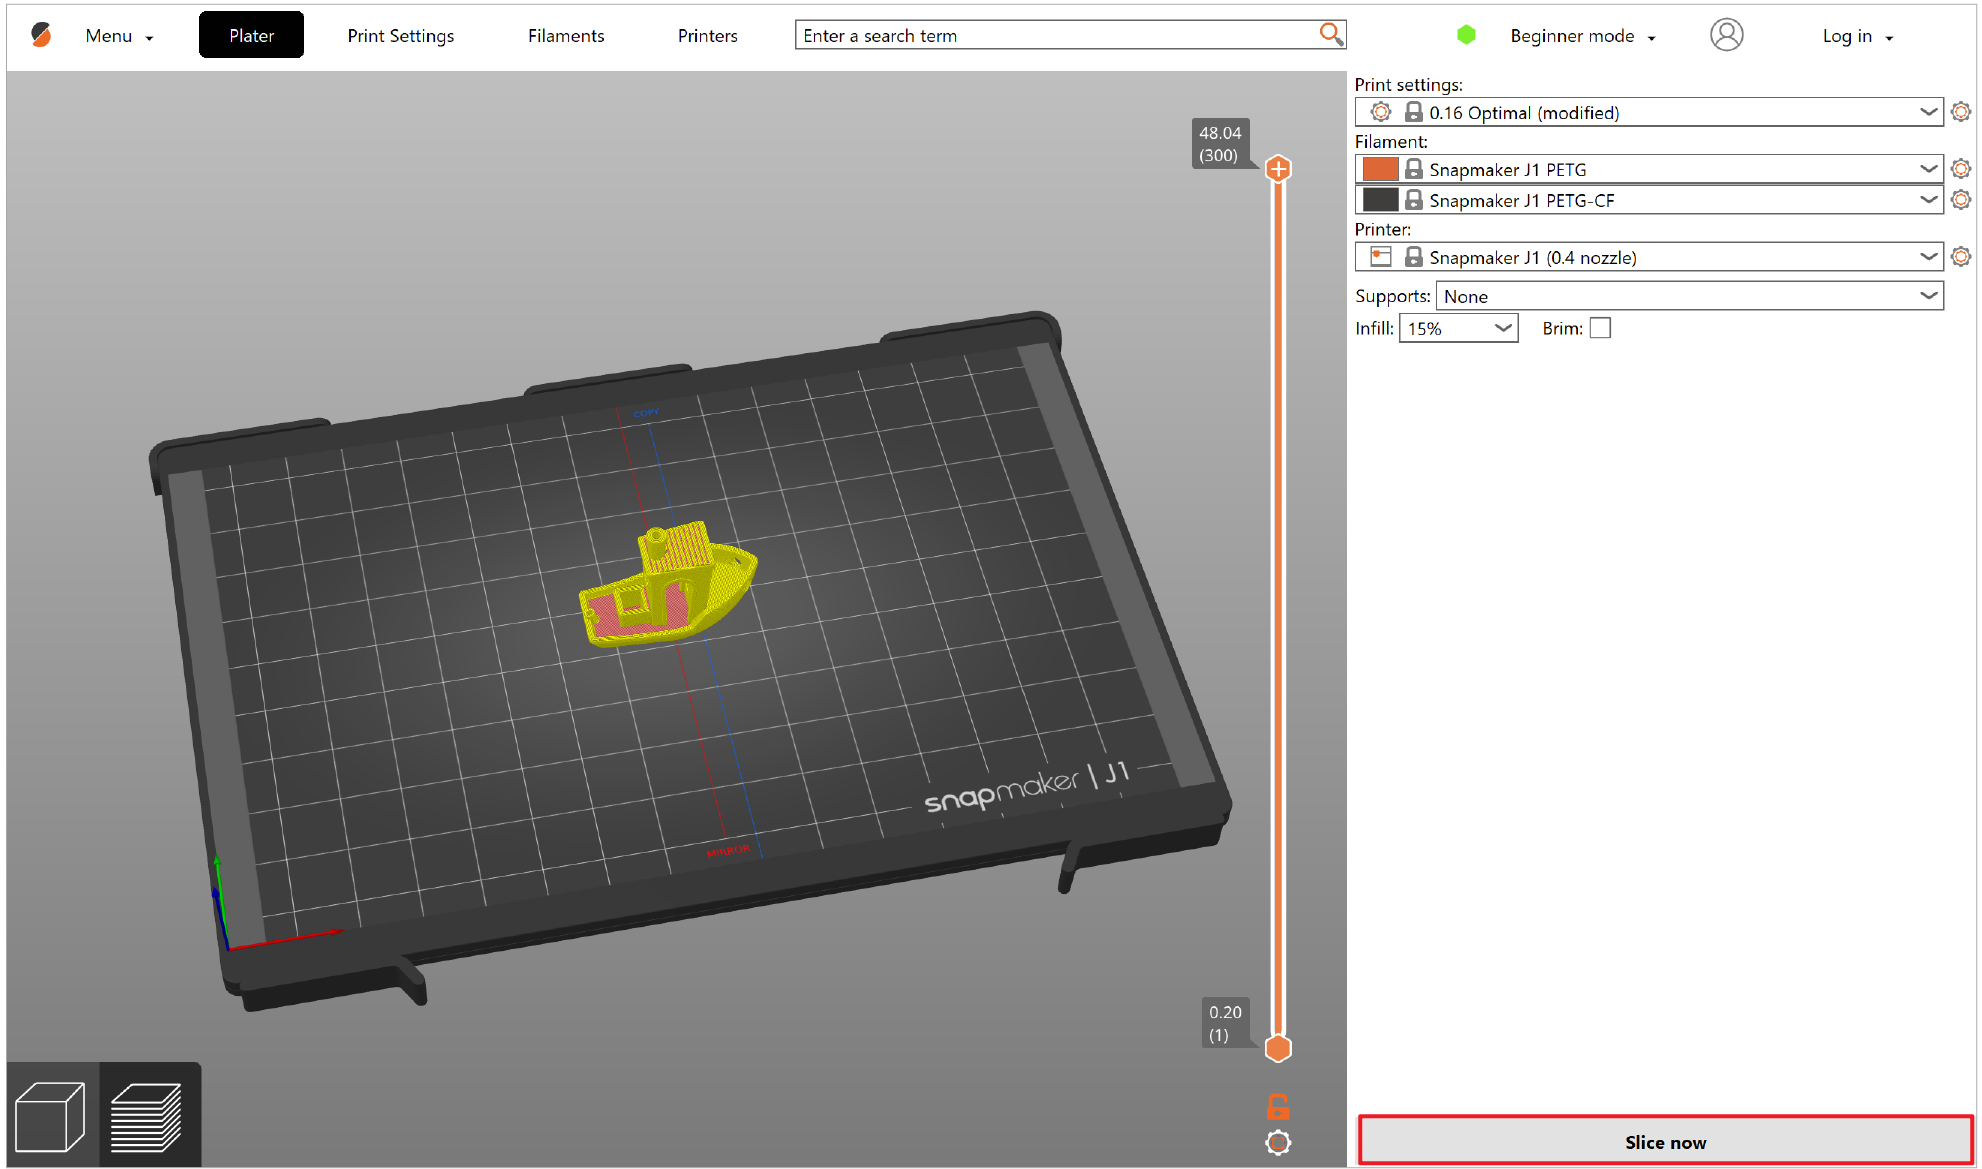
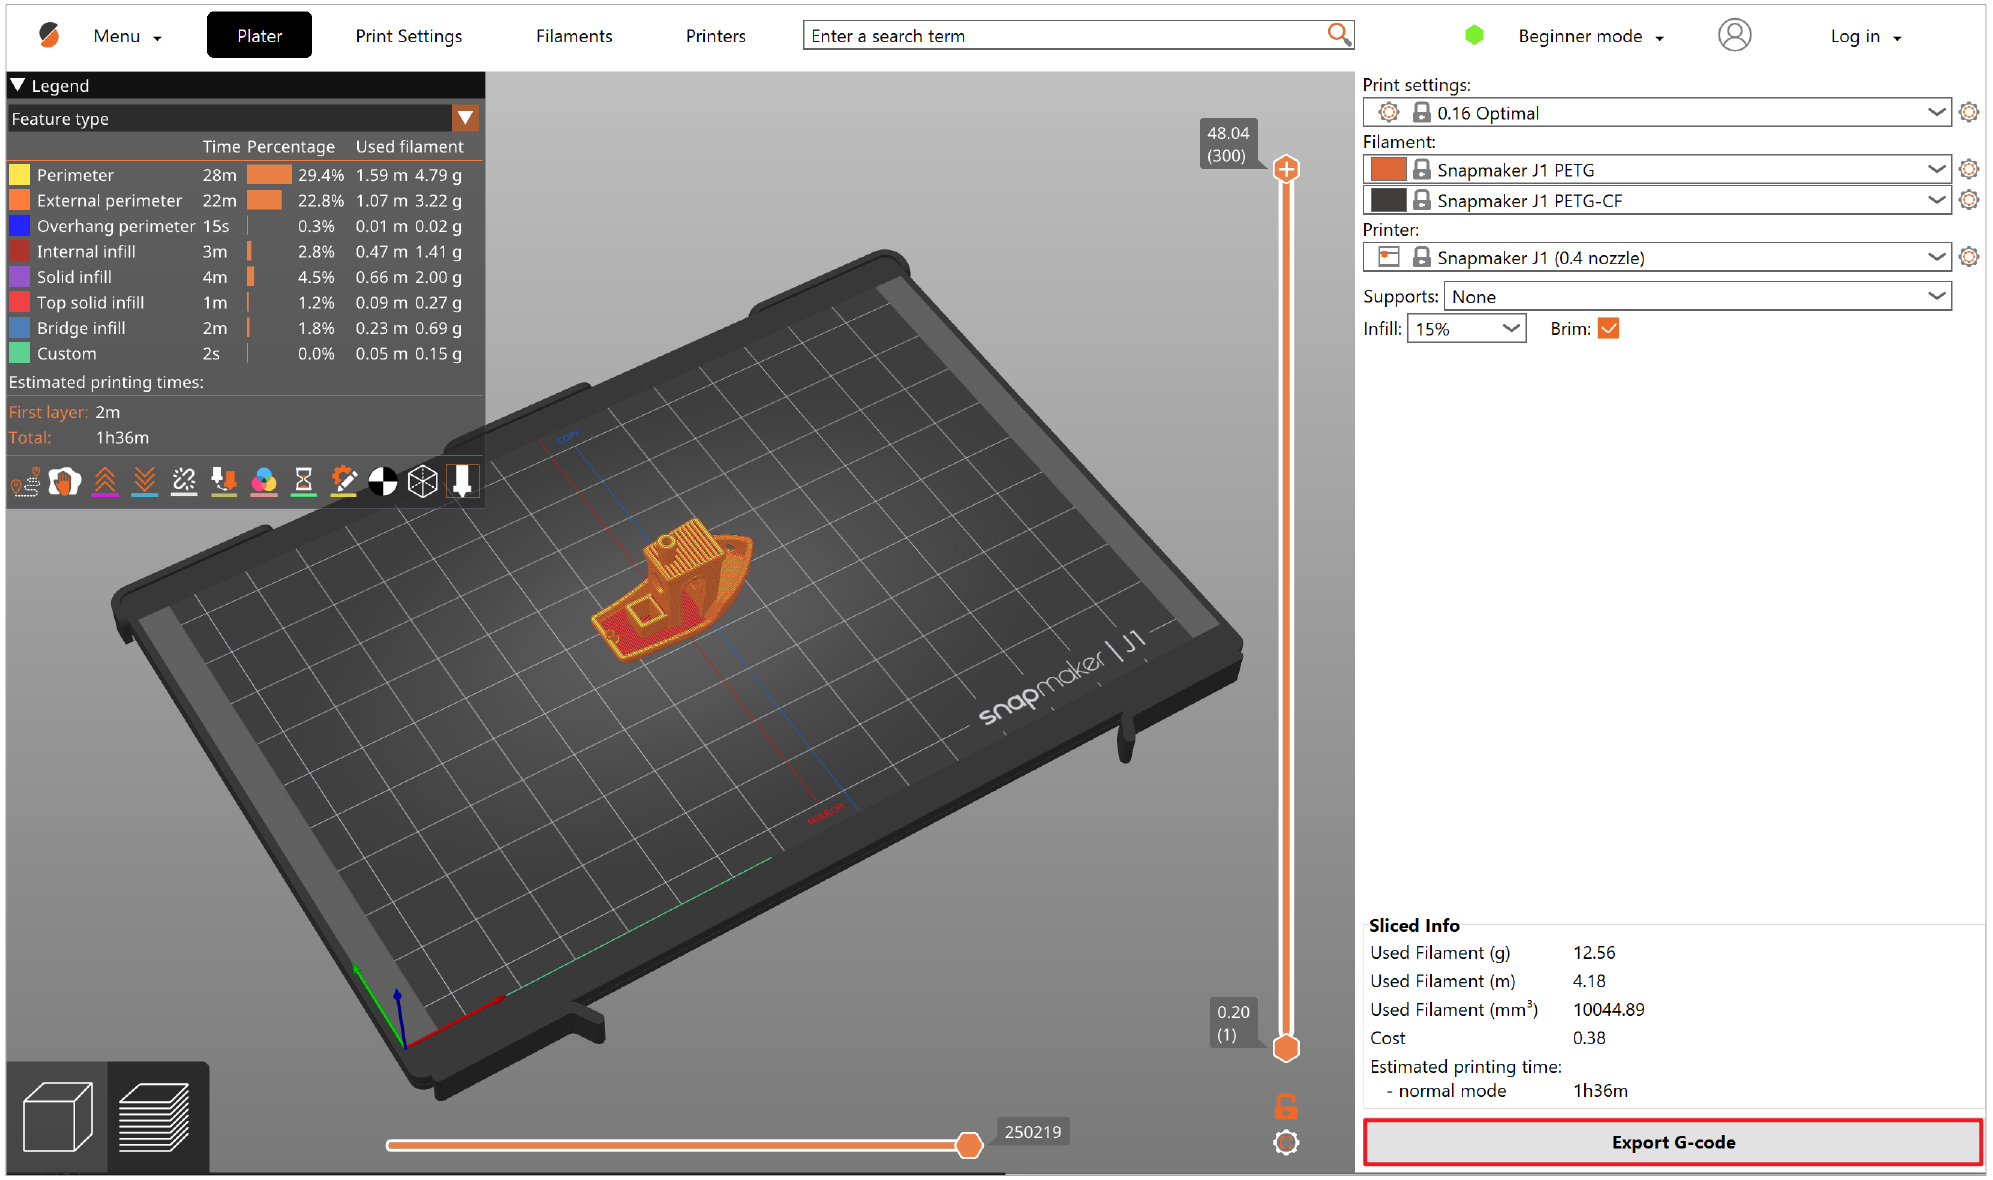
It’s a good practice to always preview the G-code before printing it. When you click the Slice now, you’ll be automatically switched to the preview mode.
¶ Exporting the G-code
Click Export G-code to save the file to USB flash drive.
¶ Start Printing
Insert the USB flash drive into the machine, locate the G-code file on Touchscreen, then follow the on-screen instructions to start printing.
Currently, G-code files cannot be transferred wirelessly from PrusaSlicer to Snapmaker machines.
Community Resource: Special thanks to community contributor macdylan (Dylan) for developing "sm2uploader", a command-line tool that sends G-code files to Snapmaker printers via WiFi. This tool enables you to send G-code using third-party slicers like Cura, PrusaSlicer, and OrcaSlicer. Learn more about "sm2uploader" from Dylan's original forum post here.
¶ Reference
If you need more information, please refer to PrusaSlicer Official Documention.