¶ Compatibility
This article applies to the following model and module. Please take note when referencing:
Model: U1
¶ Error Codes
This troubleshooting guide applies when the screen displays the following error codes:
| 0003-0522-0002-0006 | 0003-0522-0003-0006 |
| 0003-0522-0004-0006 | 0003-0522-0005-0006 |
| 0003-0522-0002-0008 | 0003-0522-0003-0008 |
| 0003-0522-0004-0008 | 0003-0522-0005-0008 |
¶ Issue Description
-
The startup process takes longer than usual (over 30 seconds), and the indicator light on the toolhead flashes on and off 2–3 times.
-
The setup wizard gets stuck and shows an error message: "System Failed to Start"
-
Both the heated bed and toolhead temperatures are not detected, and the touchscreen displays "--".
¶ Terminology
Different from our official term, some people may use the following terms to describe the issue:
- Toolhead assembly disconnected
- Tool head disconnected
- Print head disconnected
- Extruder disconnected
¶ Possible Causes
- Loose USB cable on the toolhead
- Faulty USB cable
- HUB board failure
- Toolhead PCB failure
- Connection cable failure between the hub board and the mainboard.
- Mainboard failure
¶ Troubleshooting Steps
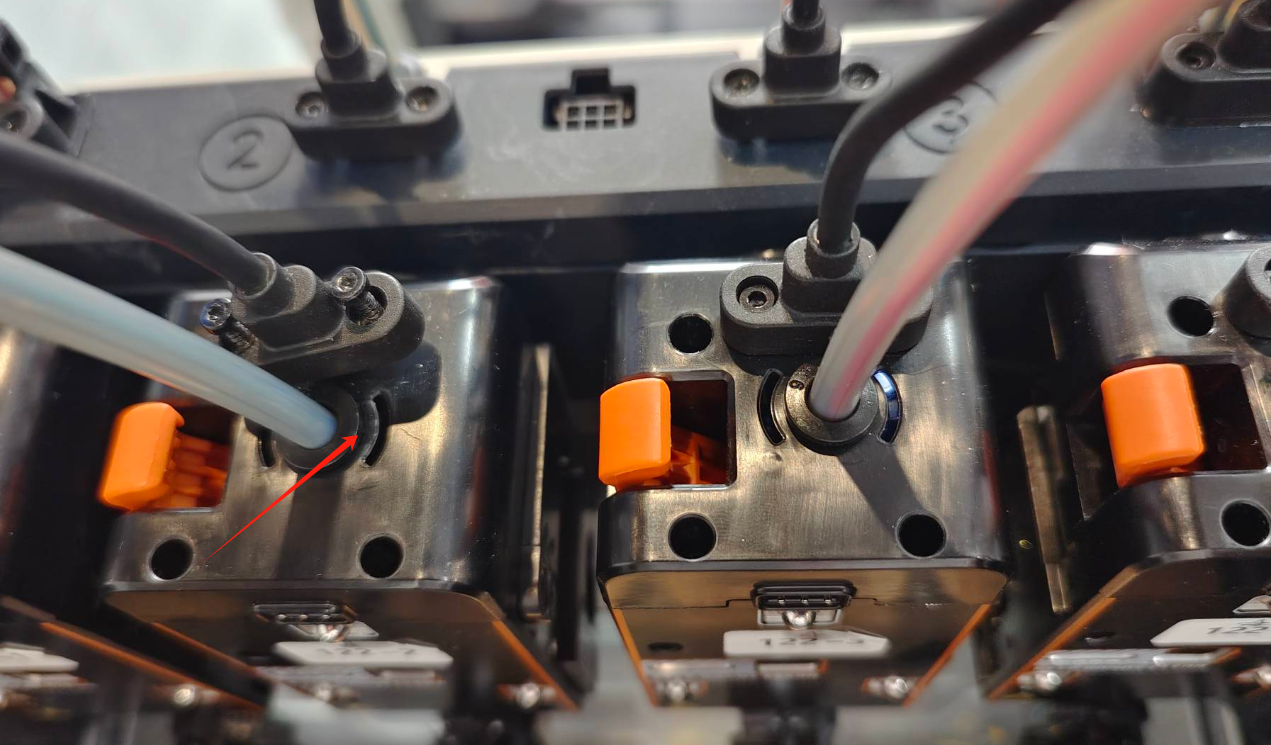
¶ Step 1: Check the status of the toolhead PCB indicator lights
- Look through the top covers of all four toolheads and check if the indicator light inside is on. A properly connected toolhead should show a white light.
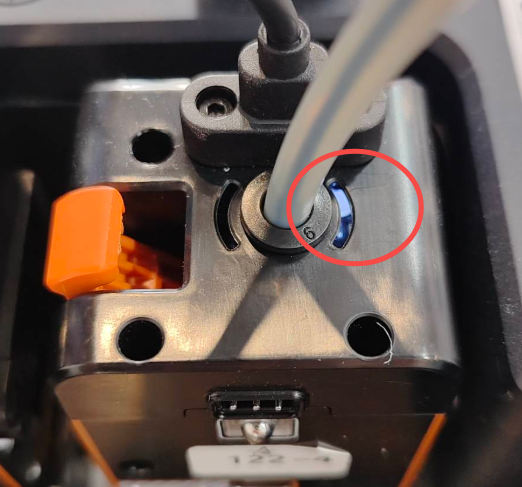
- In the example below, the indicator light on the left (Head 2) is off, which indicates an abnormal condition.
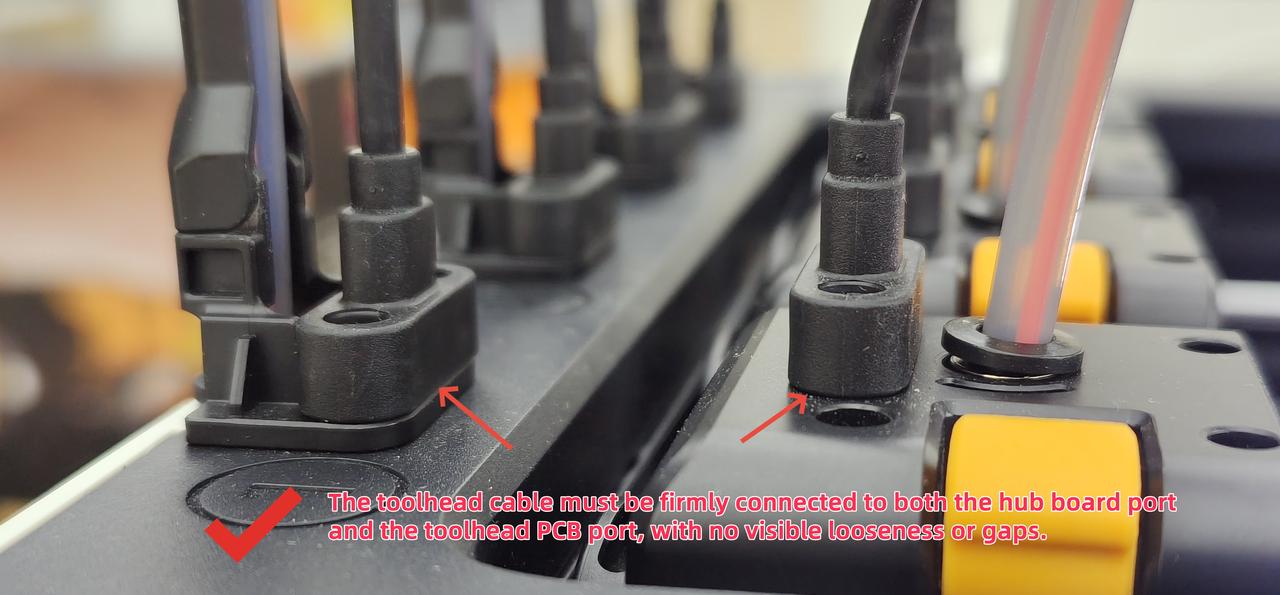
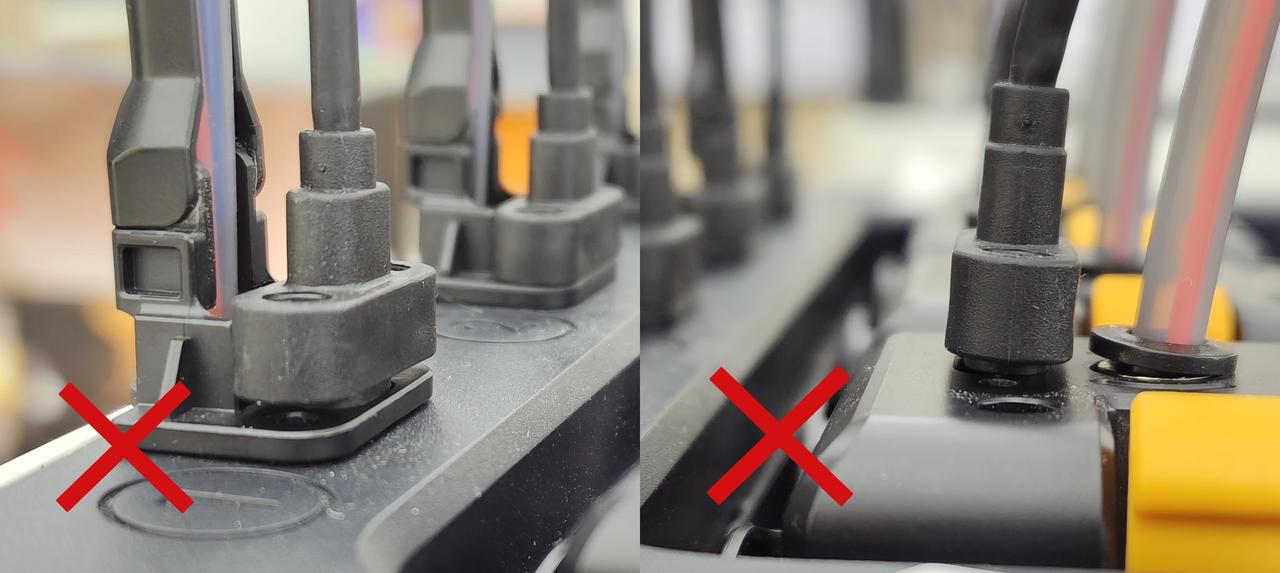
¶ Step 2: Check for loose USB cables
(1) For toolheads with indicator lights that are off, manually check whether the USB cables are securely connected at both ends — to the toolhead PCB and the HUB board. Ensure there are no loose connections.
Correct installation:
Incorrect installation:
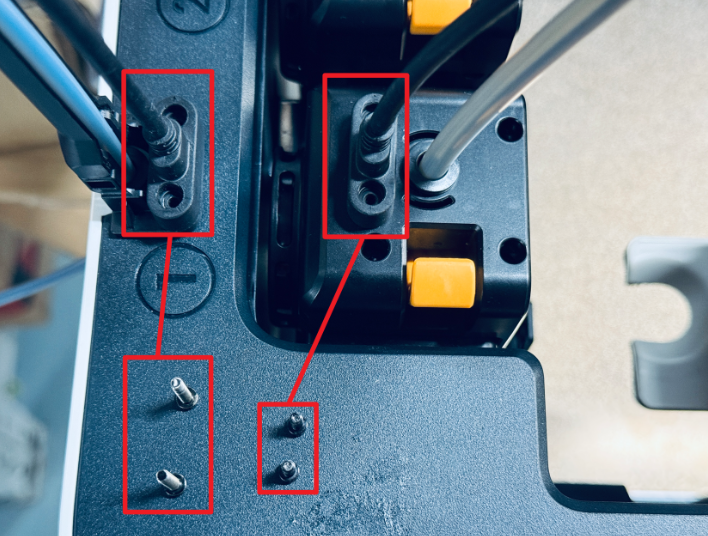
(2) Verify that the correct screws are used for both ends of the toolhead cable. The two ends require different types of screws to avoid incorrect installation.
-
The longer screws are used to secure the hub board end, and the shorter screws are used to secure the toolhead end.
-
Using a long screw on the toolhead end may cause poor cable contact and lead to connection issues.
(3) If the indicator lights of all four toolheads are off, it may be caused by one faulty toolhead.
To identify the problematic toolhead, disconnect the USB cable of each toolhead one by one:
-
Power off the U1.
-
Disconnect the USB cable of the first toolhead.
-
Power on the machine and wait for about 2 minutes.
-
Check whether the indicator lights on the remaining toolheads turn on.
- If not, power off again and repeat the same process for the second toolhead, and so on.
-
Continue until you identify which toolhead is causing the issue.
¶ Step 3: Reinsert the USB cable 180°
For the problematic toolhead, try reinserting its USB cable after rotating it 180°, and check whether the indicator light turns on.
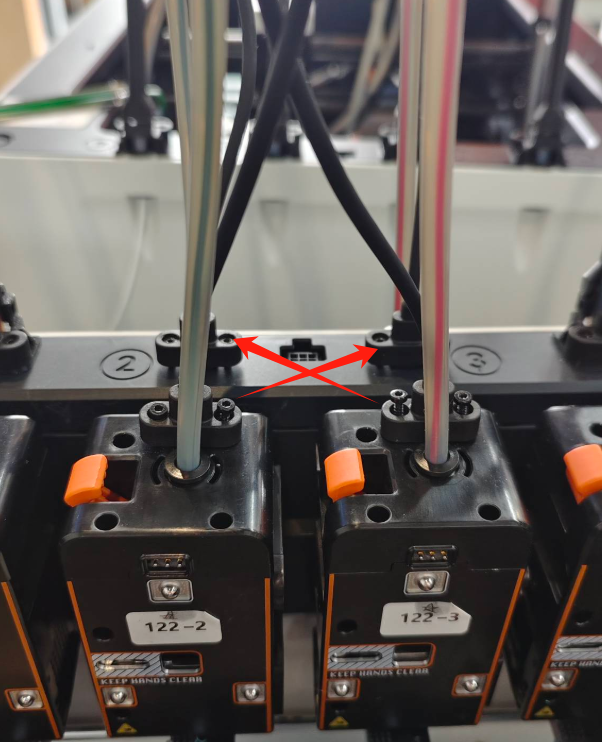
¶ Step 4: Replace or swap the USB cables
If rotating the cable does not resolve the issue, try replacing the USB cable with that of another toolhead and check whether the indicator light turns on, to confirm whether the problem lies with the cable.
Example:
-
Power off the U1 and disconnect the USB cables of toolhead 2 and toolhead 3.
-
Swap their USB cables and power on the machine.
-
Observe whether the issue follows the cable.
- For example, if toolhead 2’s LED was off and toolhead 3’s LED was on before swapping, check whether toolhead 2’s LED turns on and toolhead 3’s LED turns off after swapping.
If the problem moves with the cable, the USB cable is faulty and should be replaced.
¶ Step 5: Swap USB cable ports on the Hub board
If the issue remains with Head 2 after the cable swap, turn off the printer and connect Head 2’s USB cable to the Hub port originally used by Head 3. Then restart the machine and observe.
If the light turns on, the original HUB port may be faulty — please replace the HUB board.
¶ Step 6: Swap the toolhead PCB
If the Hub port works fine, try swapping the toolhead PCB with another to check if the issue is caused by a faulty PCB.
¶ Step 7: Possible failure of the hub board connection cable or the mainboard.
If none of the above steps resolve or identify the issue, the problem may lie with the hub board connection cable or the mainboard itself. Please summarize the results of the previous troubleshooting steps and contact Snapmaker support for further assistance.
¶ Reach out to Snapmaker Support
After following the troubleshooting steps, if you find it difficult to resolve your issue, kindly submit a support ticket through https://snapmaker.formcrafts.com/u1-troubleshooting-request and share your troubleshooting results with some pictures/videos.
Our dedicated support team will be more than willing to assist you in resolving the issue.