¶ Compatibility
This article applies to the following model and module. Please take note when referencing:
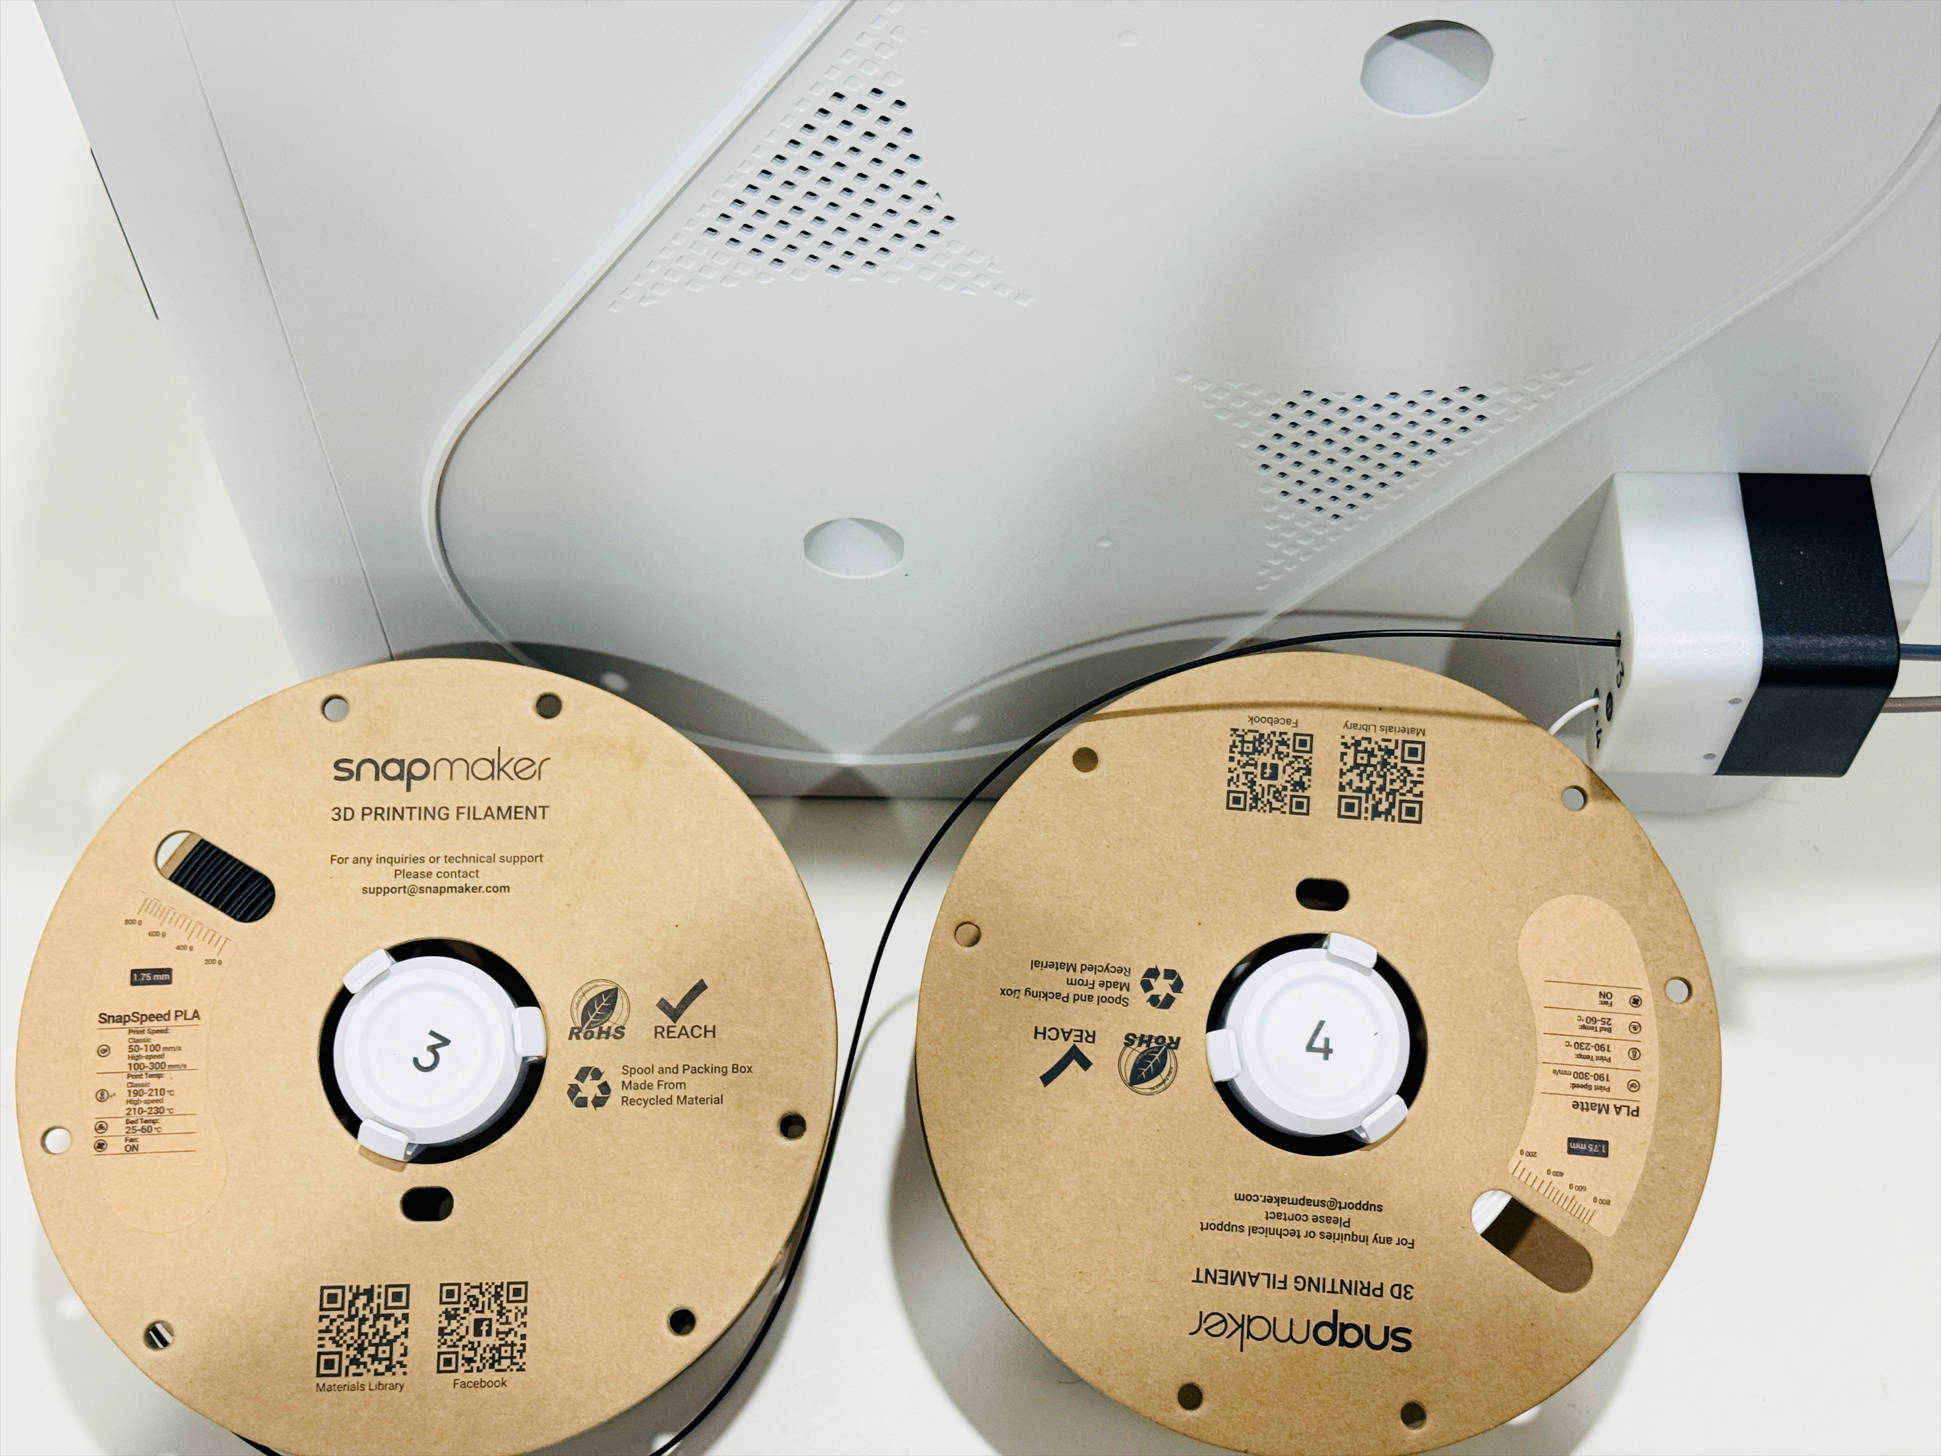
Model:U1
Filament:Snapspeed
¶ Issue Description
Issue1-Filament info reversed on the same side
Issue2-Filament not detected after loading
¶ Possible Causes
¶ 1. Filament info reversed on the same side
(1) Wrong filament loading path
(2) RFID cable reversed
¶ 2. Filament not detected after loading
(1) Spool too far from RFID coil
(2) Spool RFID not programmed
(3) Loose or disconnected RFID cable
(4) Detached RFID coil
¶ Troubleshooting Steps
¶ 1. Filament info reversed on the same side
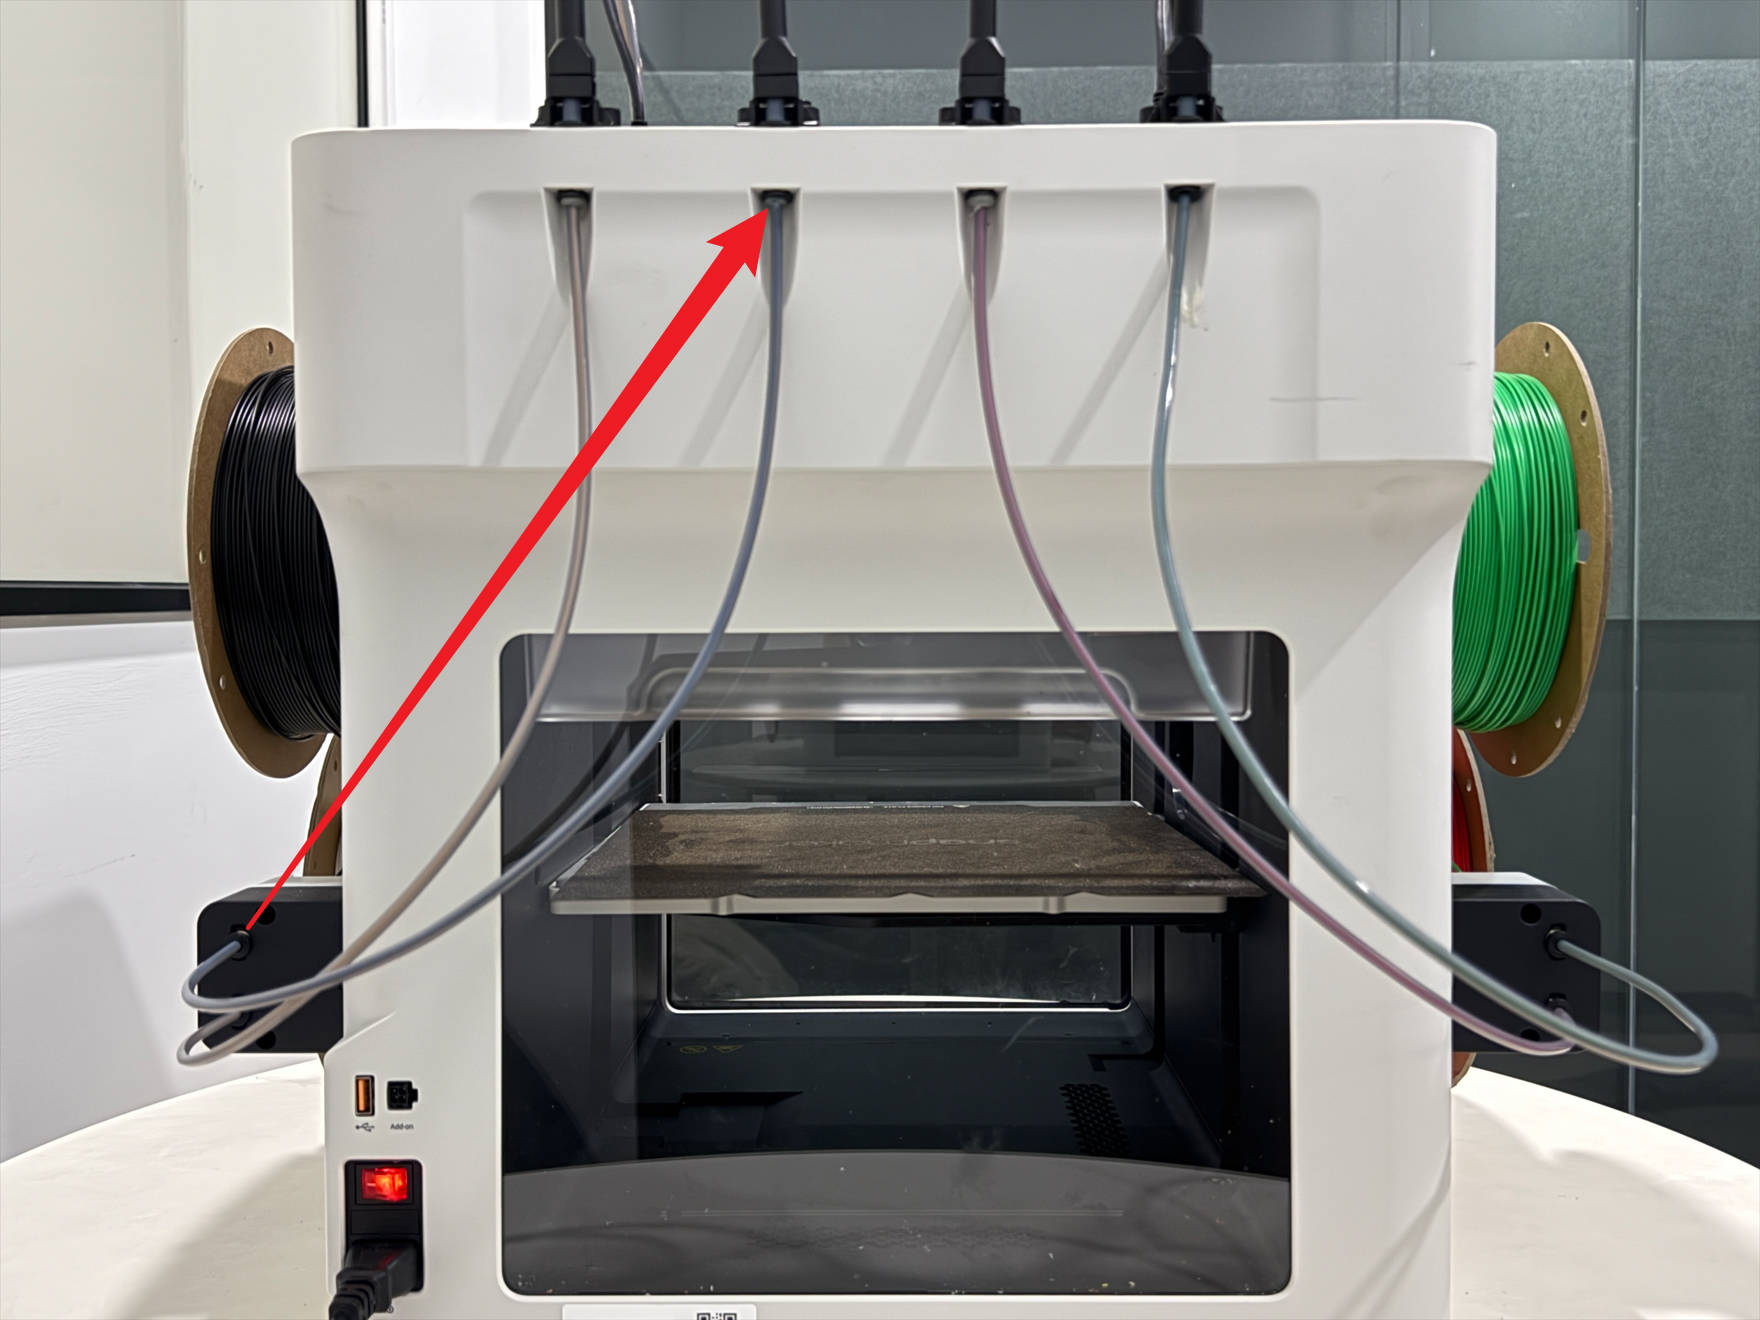
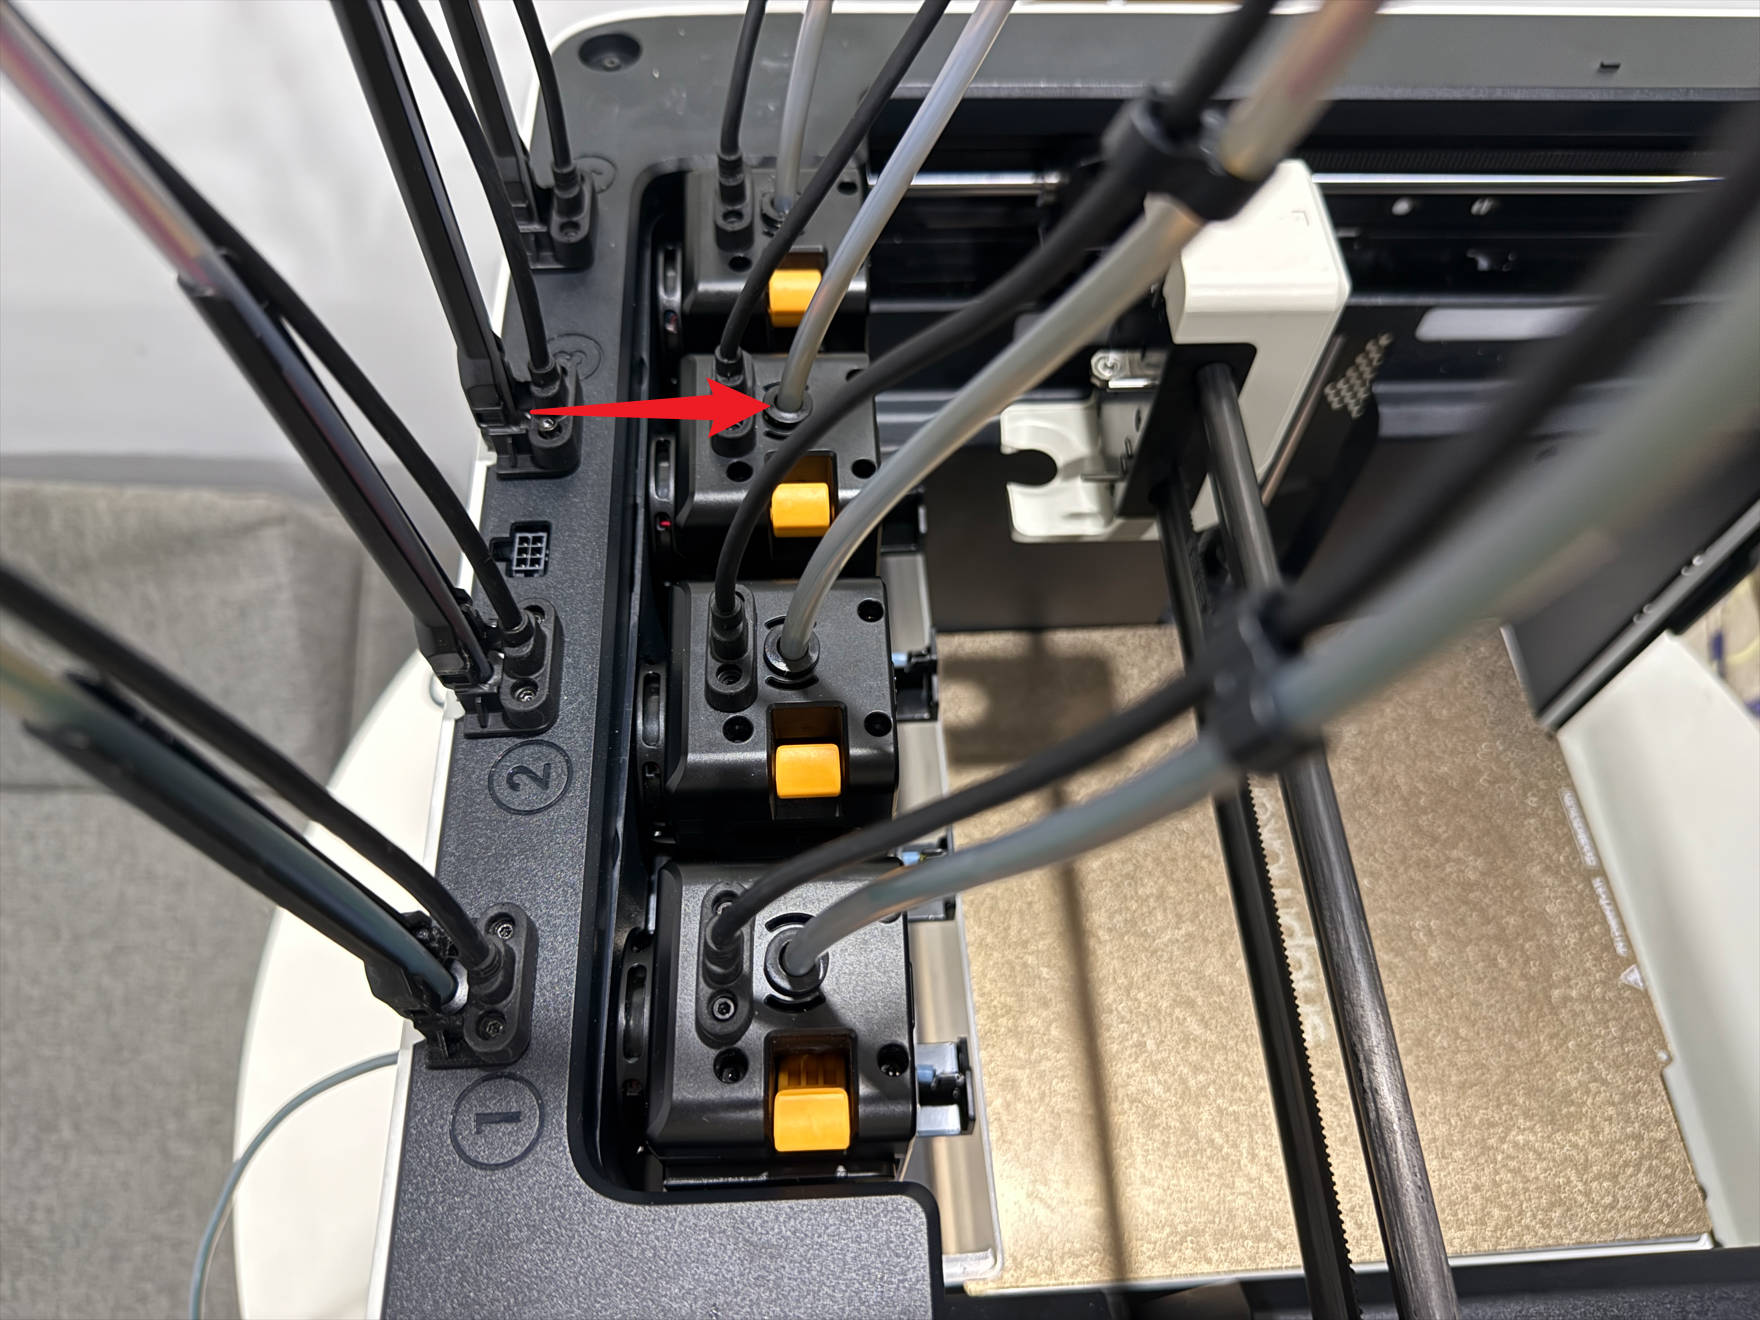
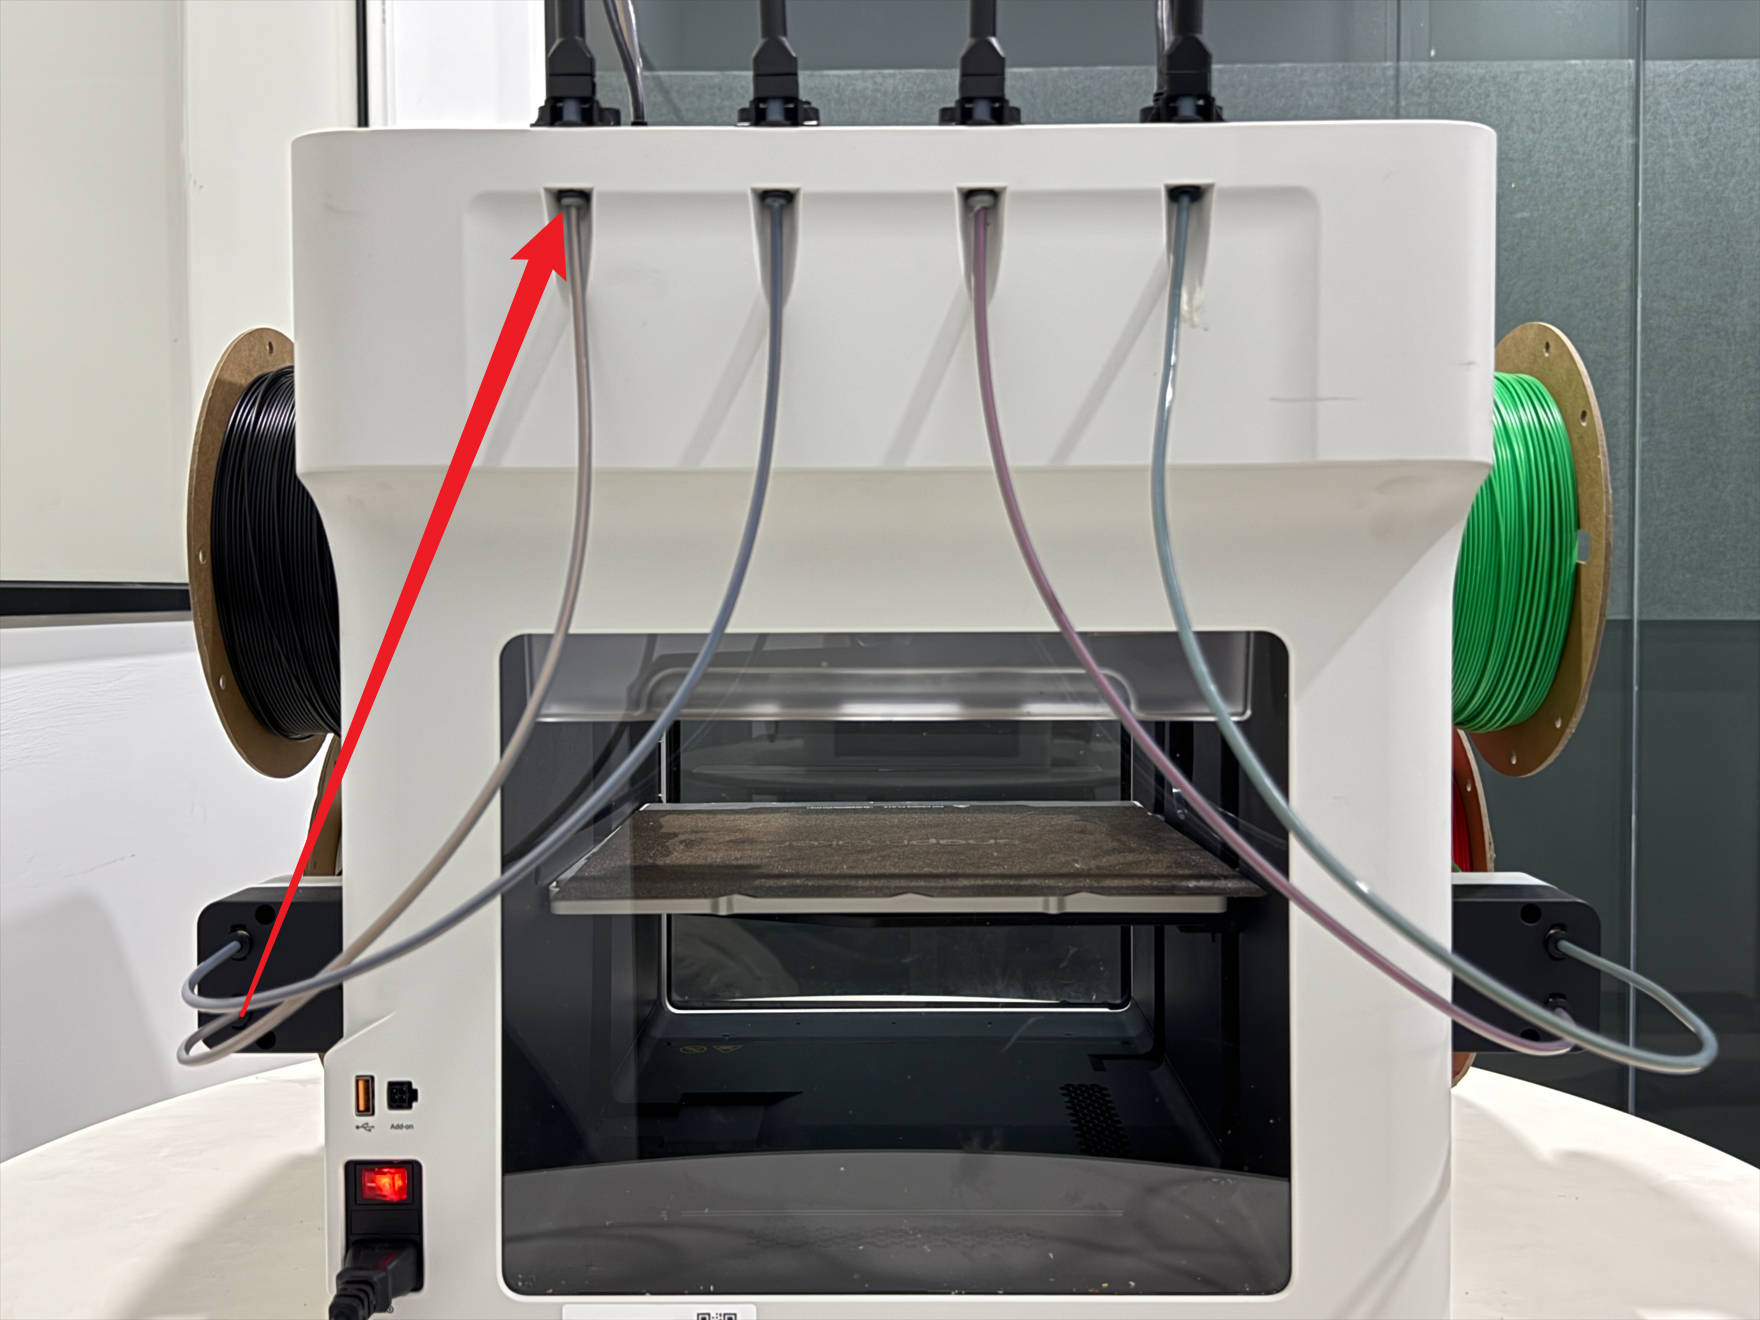
¶ 1.1 Check filament loading path
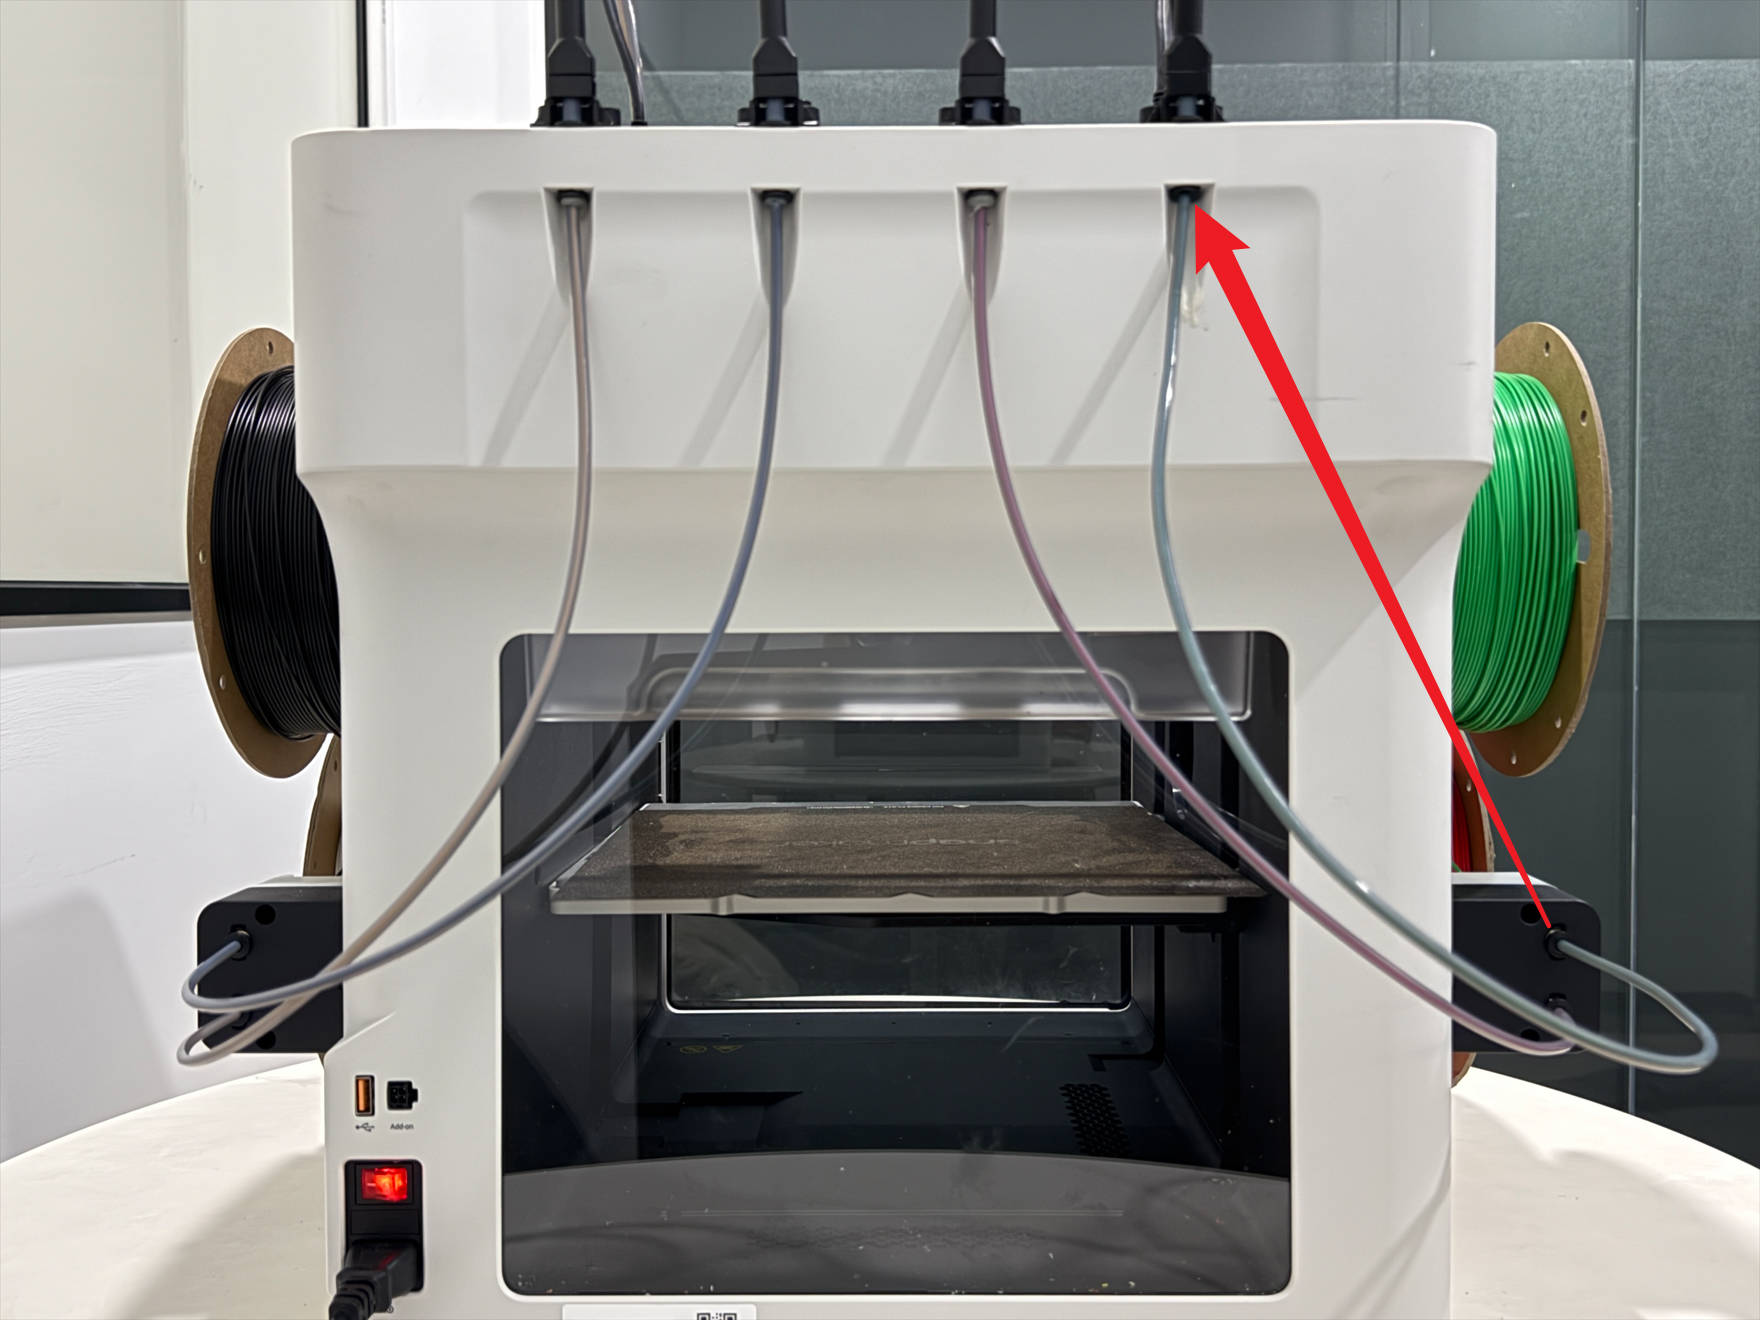
| Toolhead | Spool→Filament feeder | 4mm filament tube | 6mm filament tube |
|---|---|---|---|
| Toolhead1 | 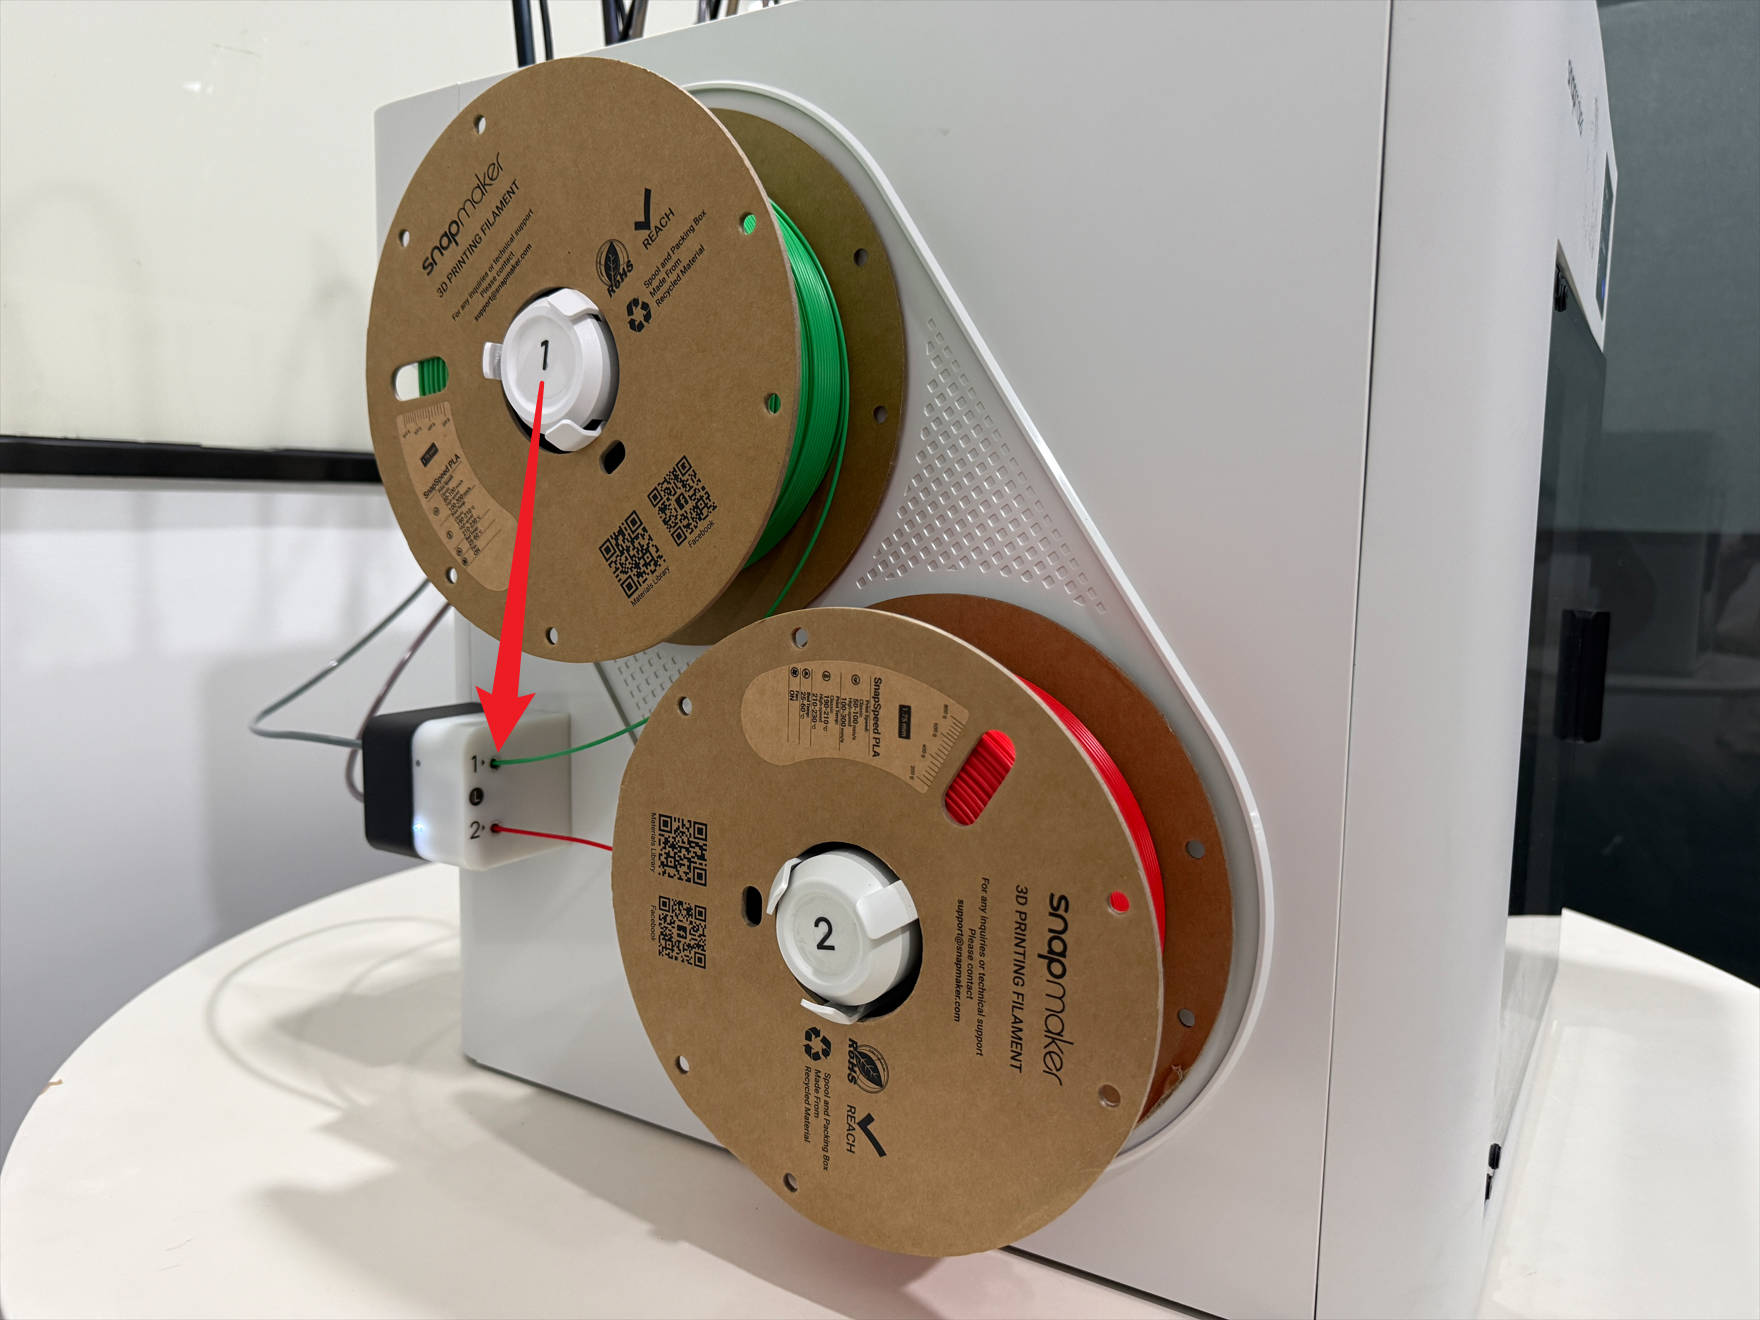 |
 |
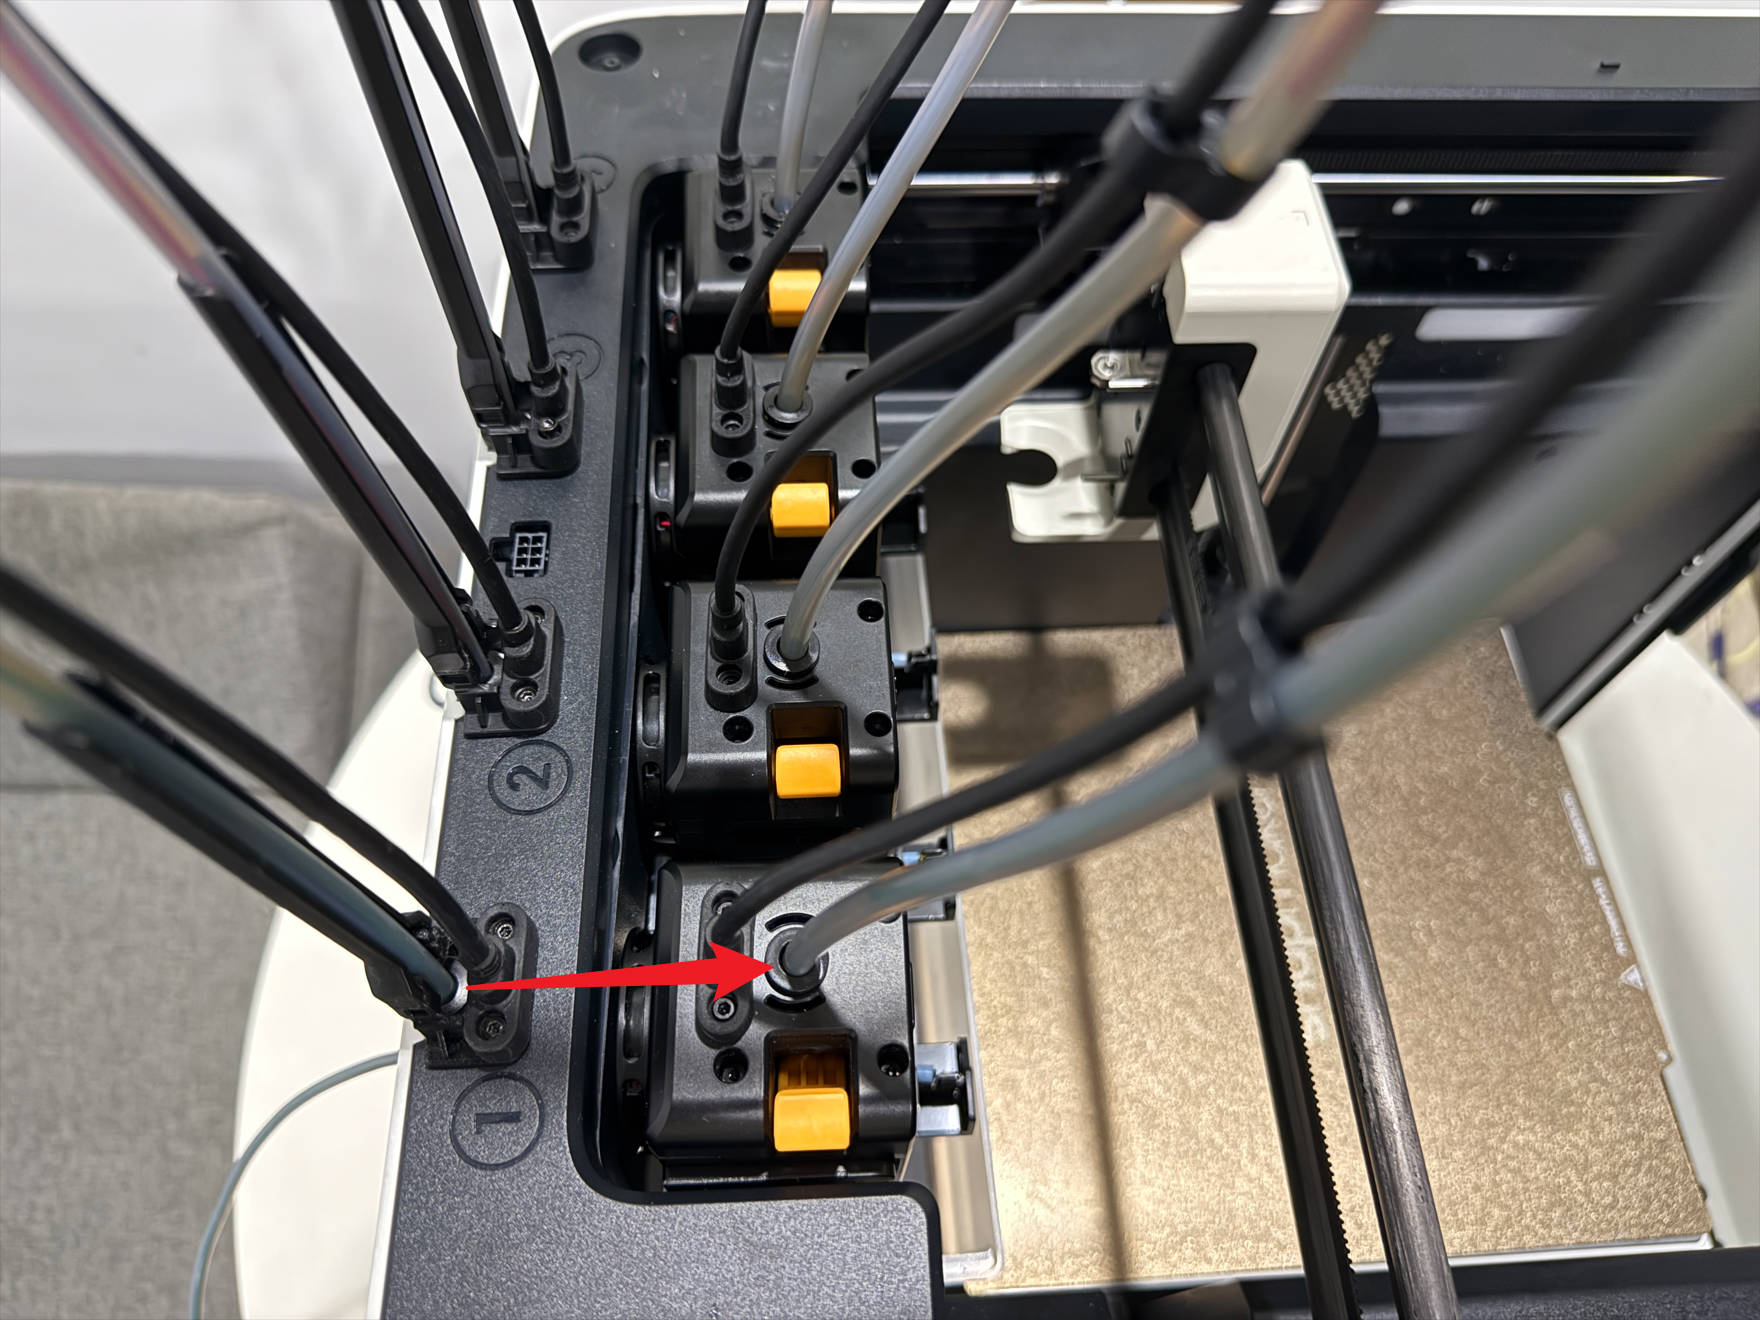 |
| Toolhead2 | 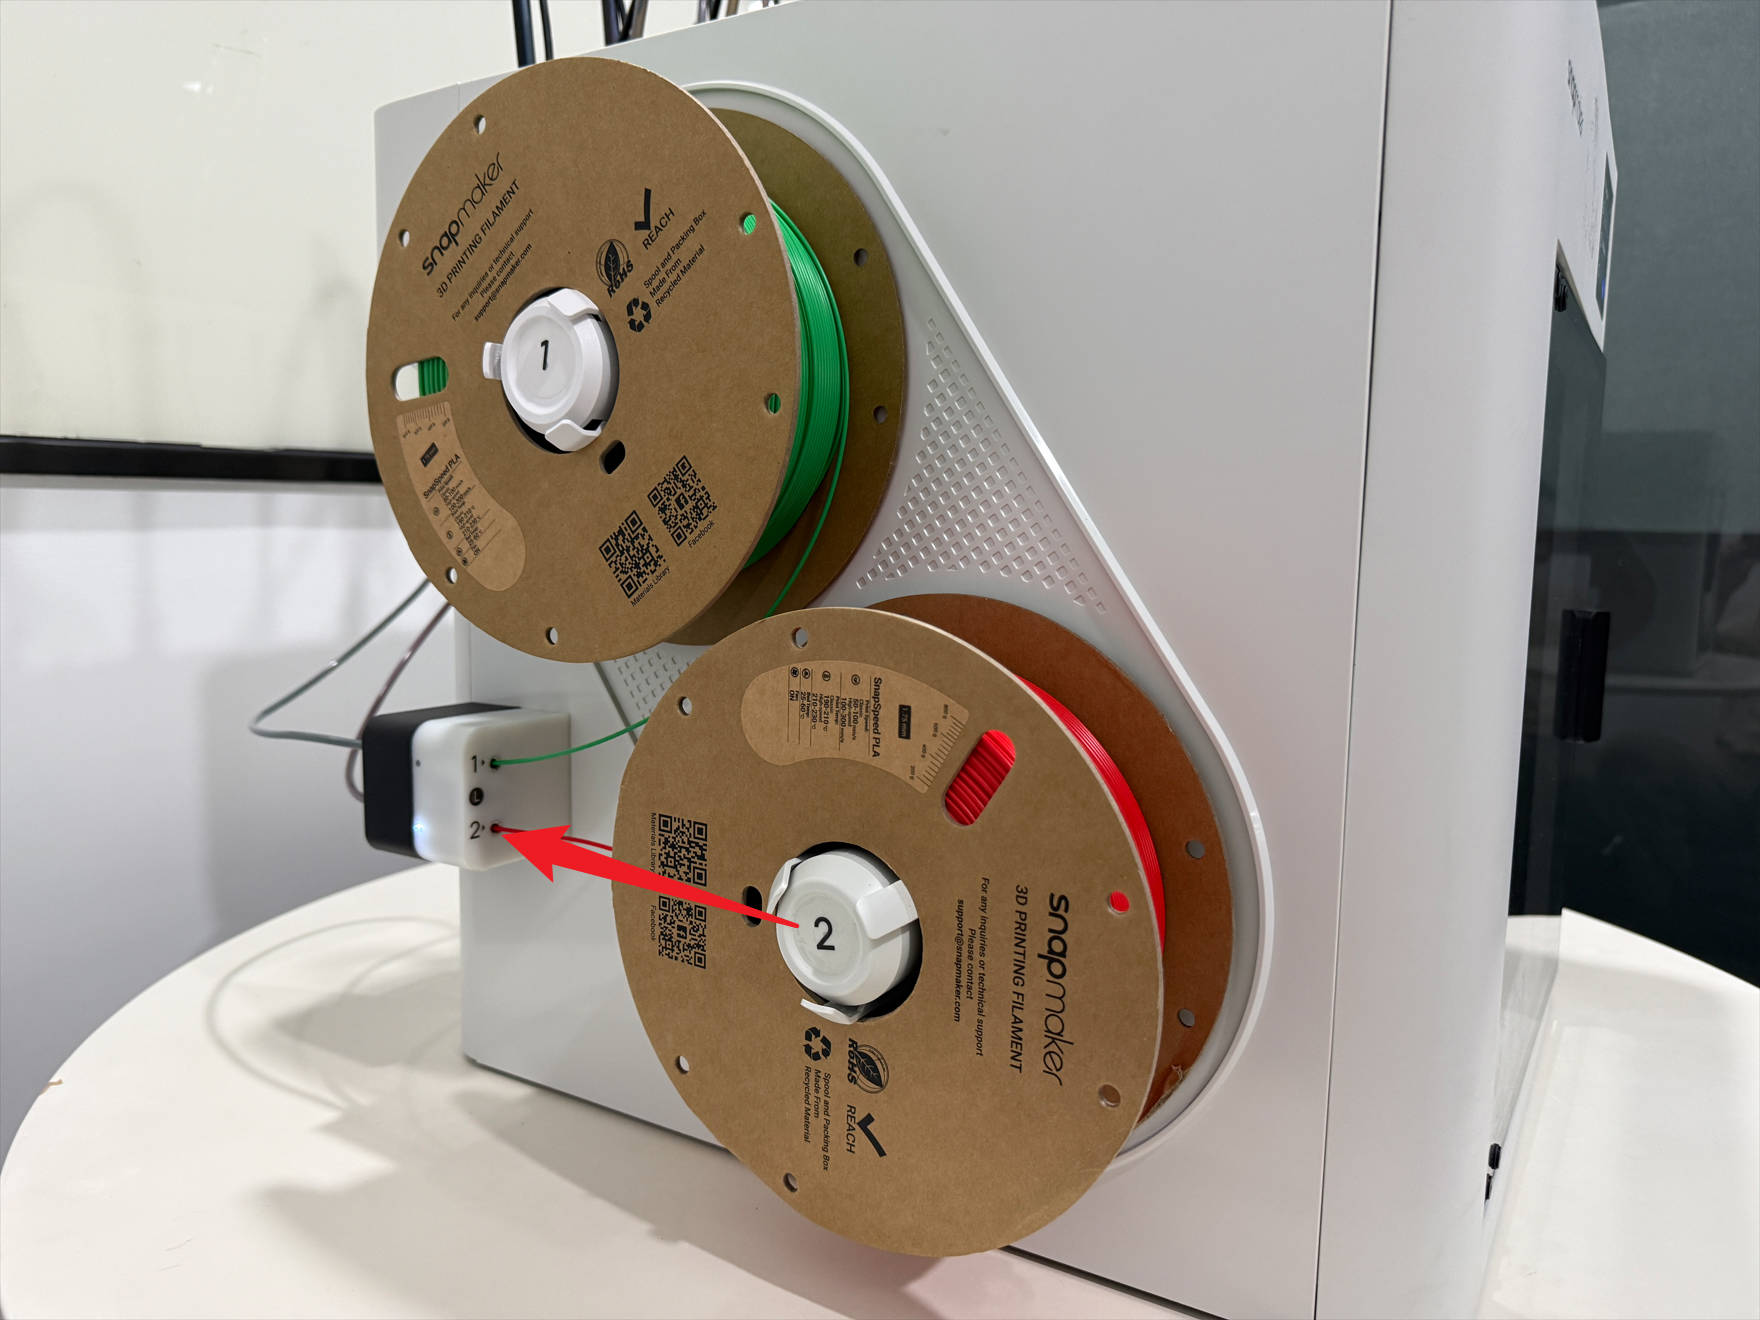 |
 |
 |
| Toolhead3 | 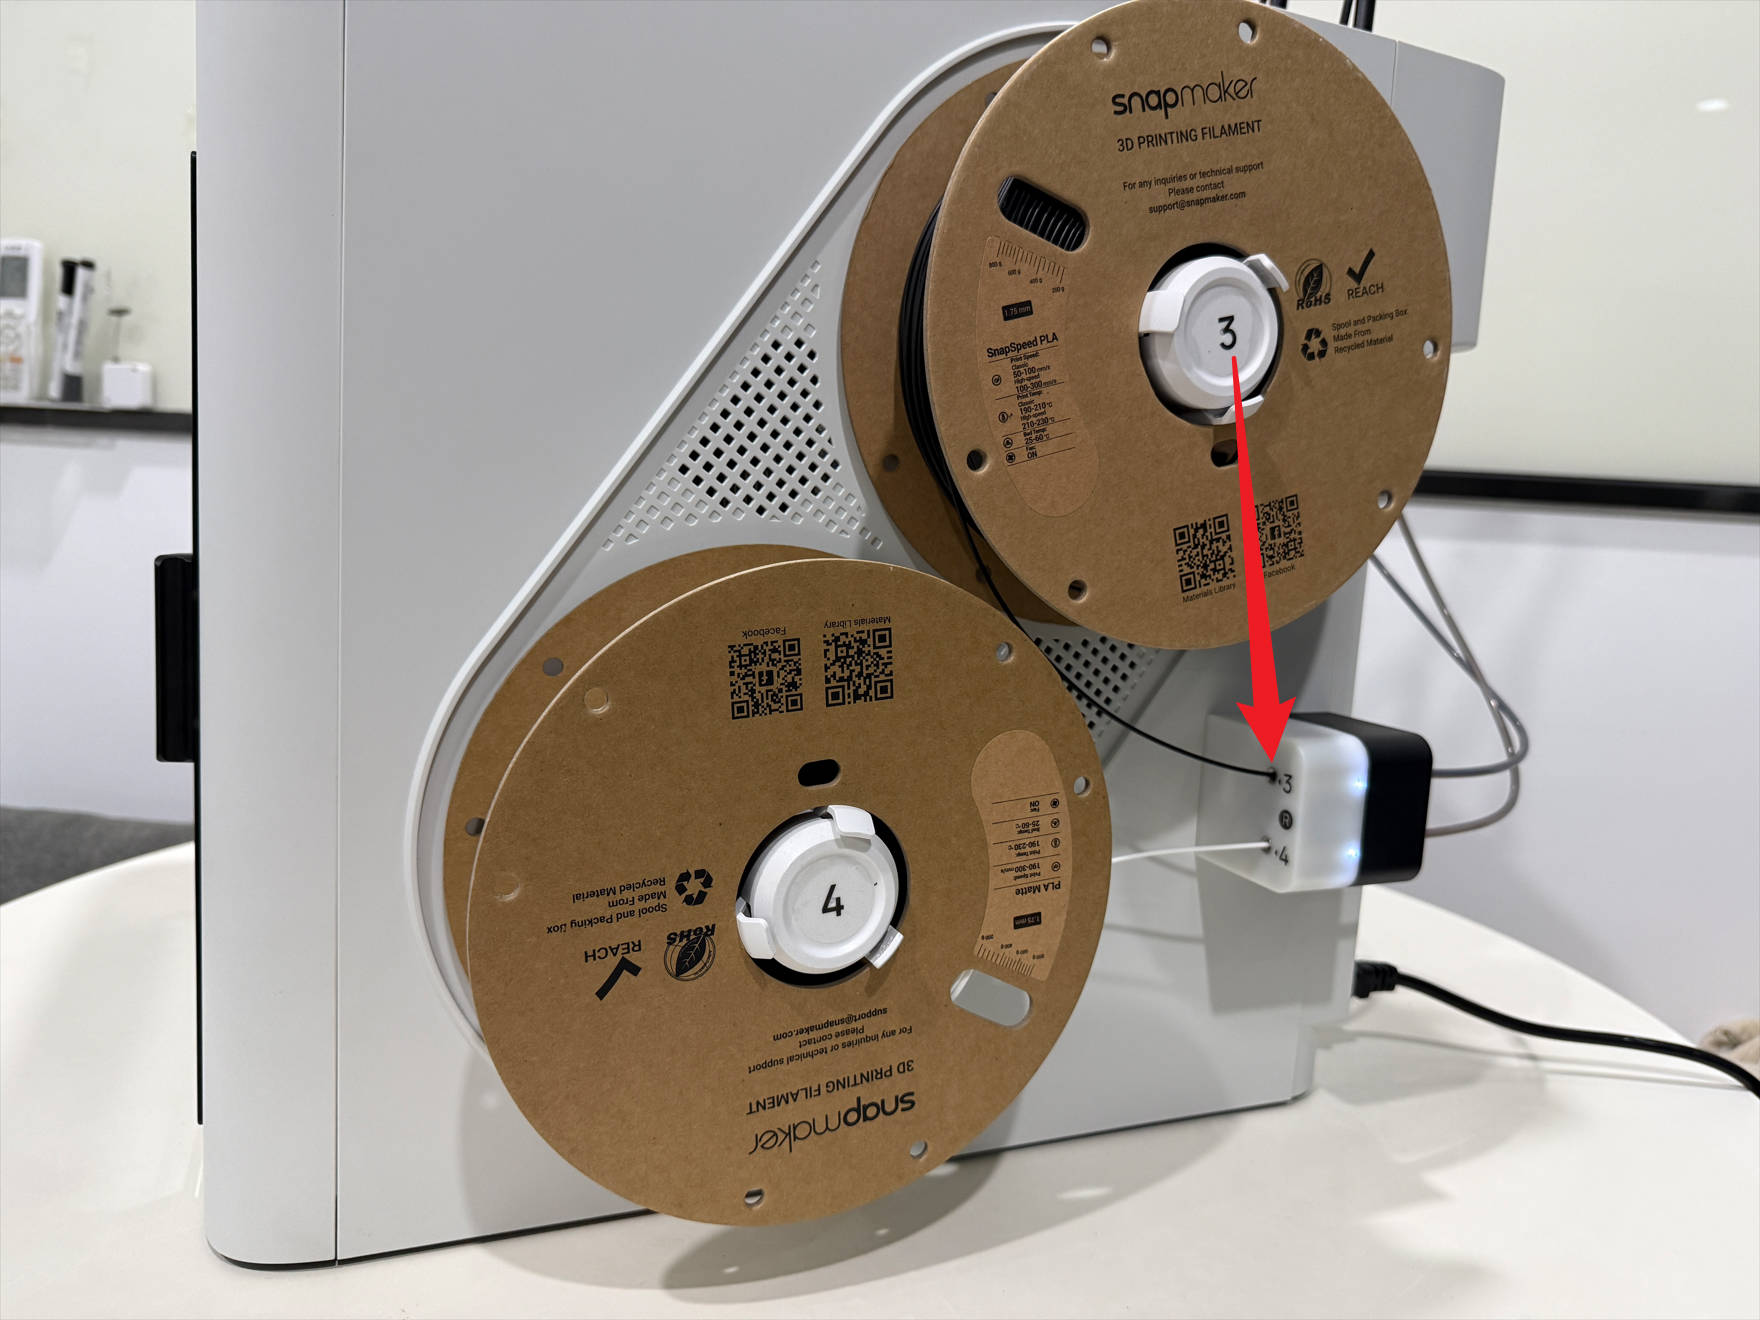 |
 |
 |
| Toolhead4 | 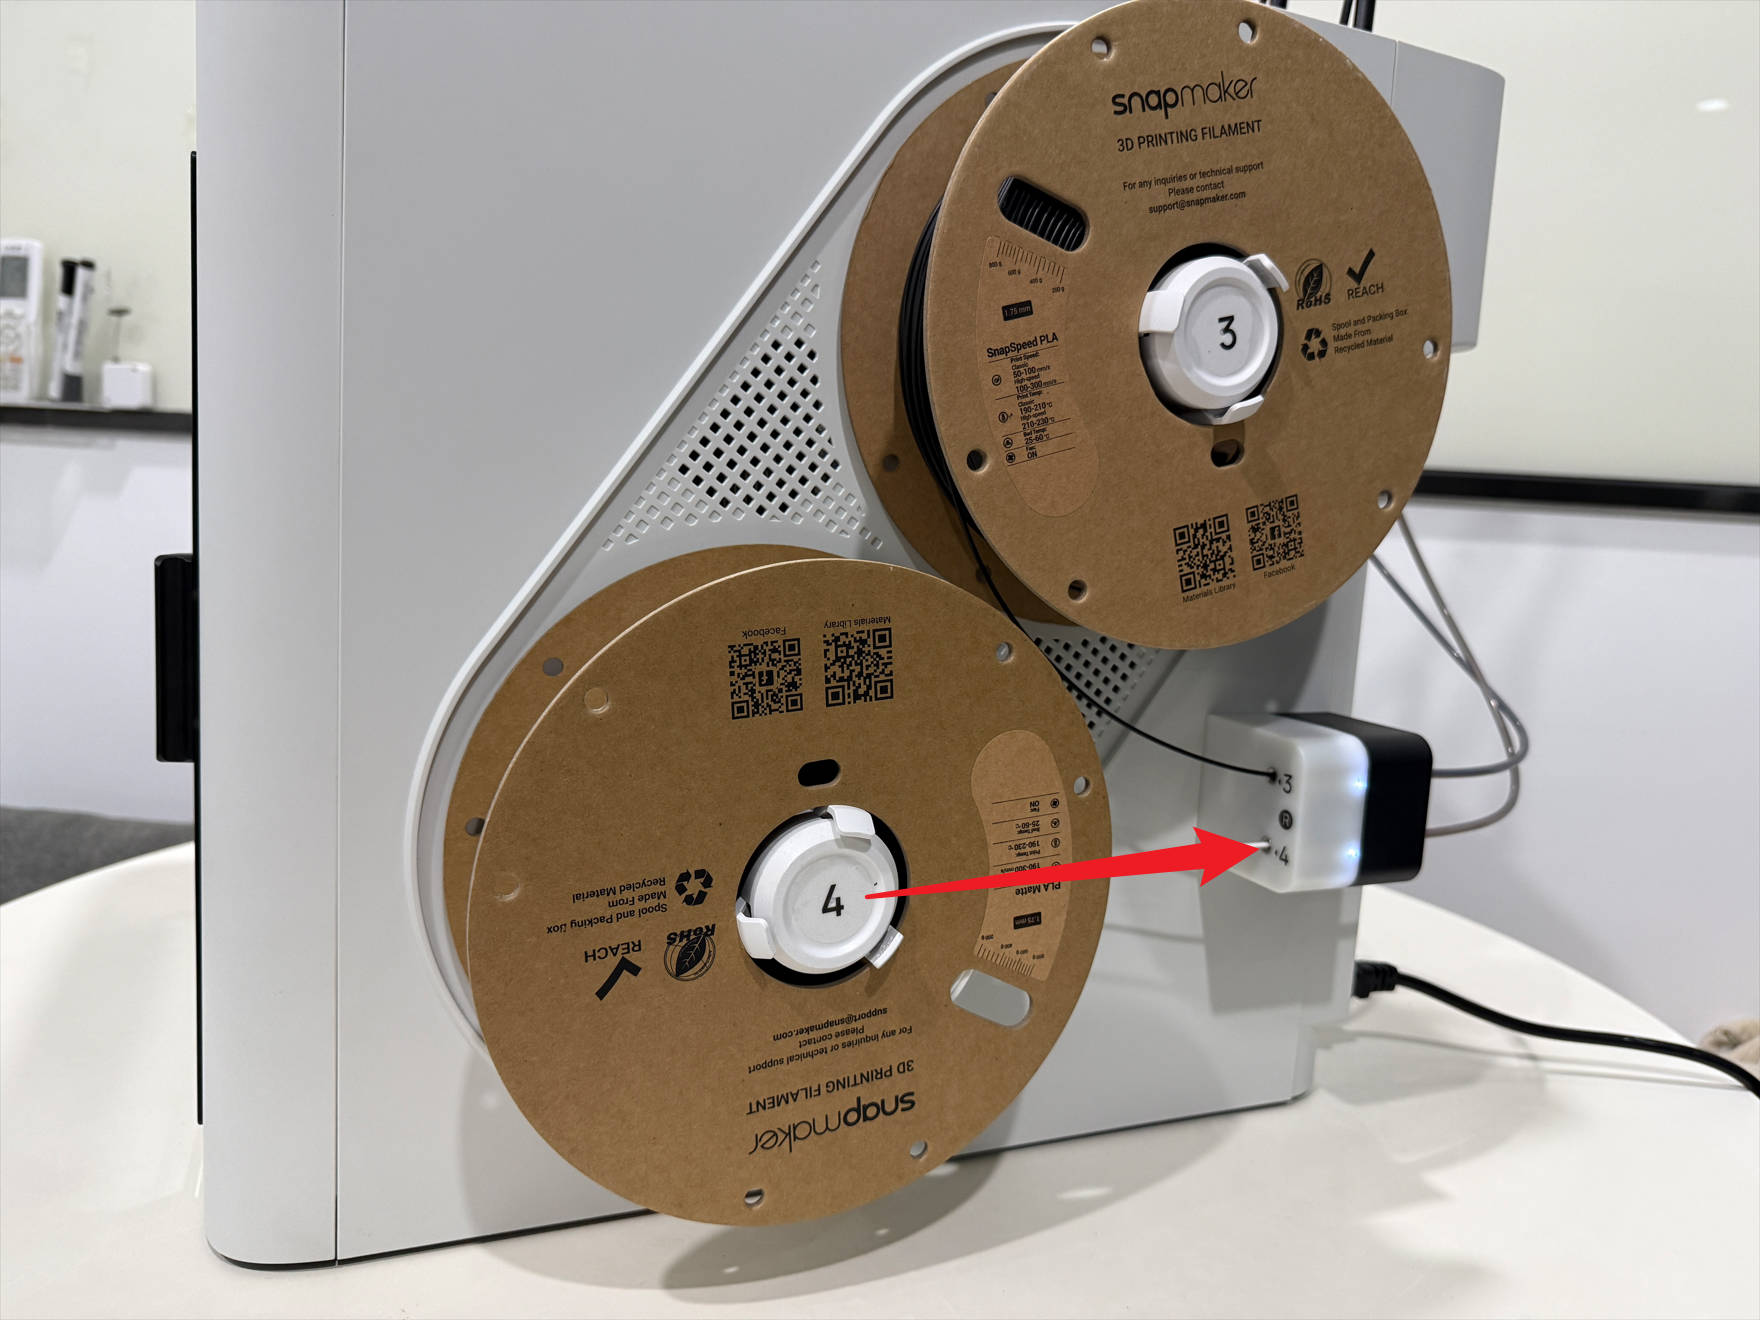 |
 |
 |
¶ 1.2 Spool 1 & 2 filament info reversed
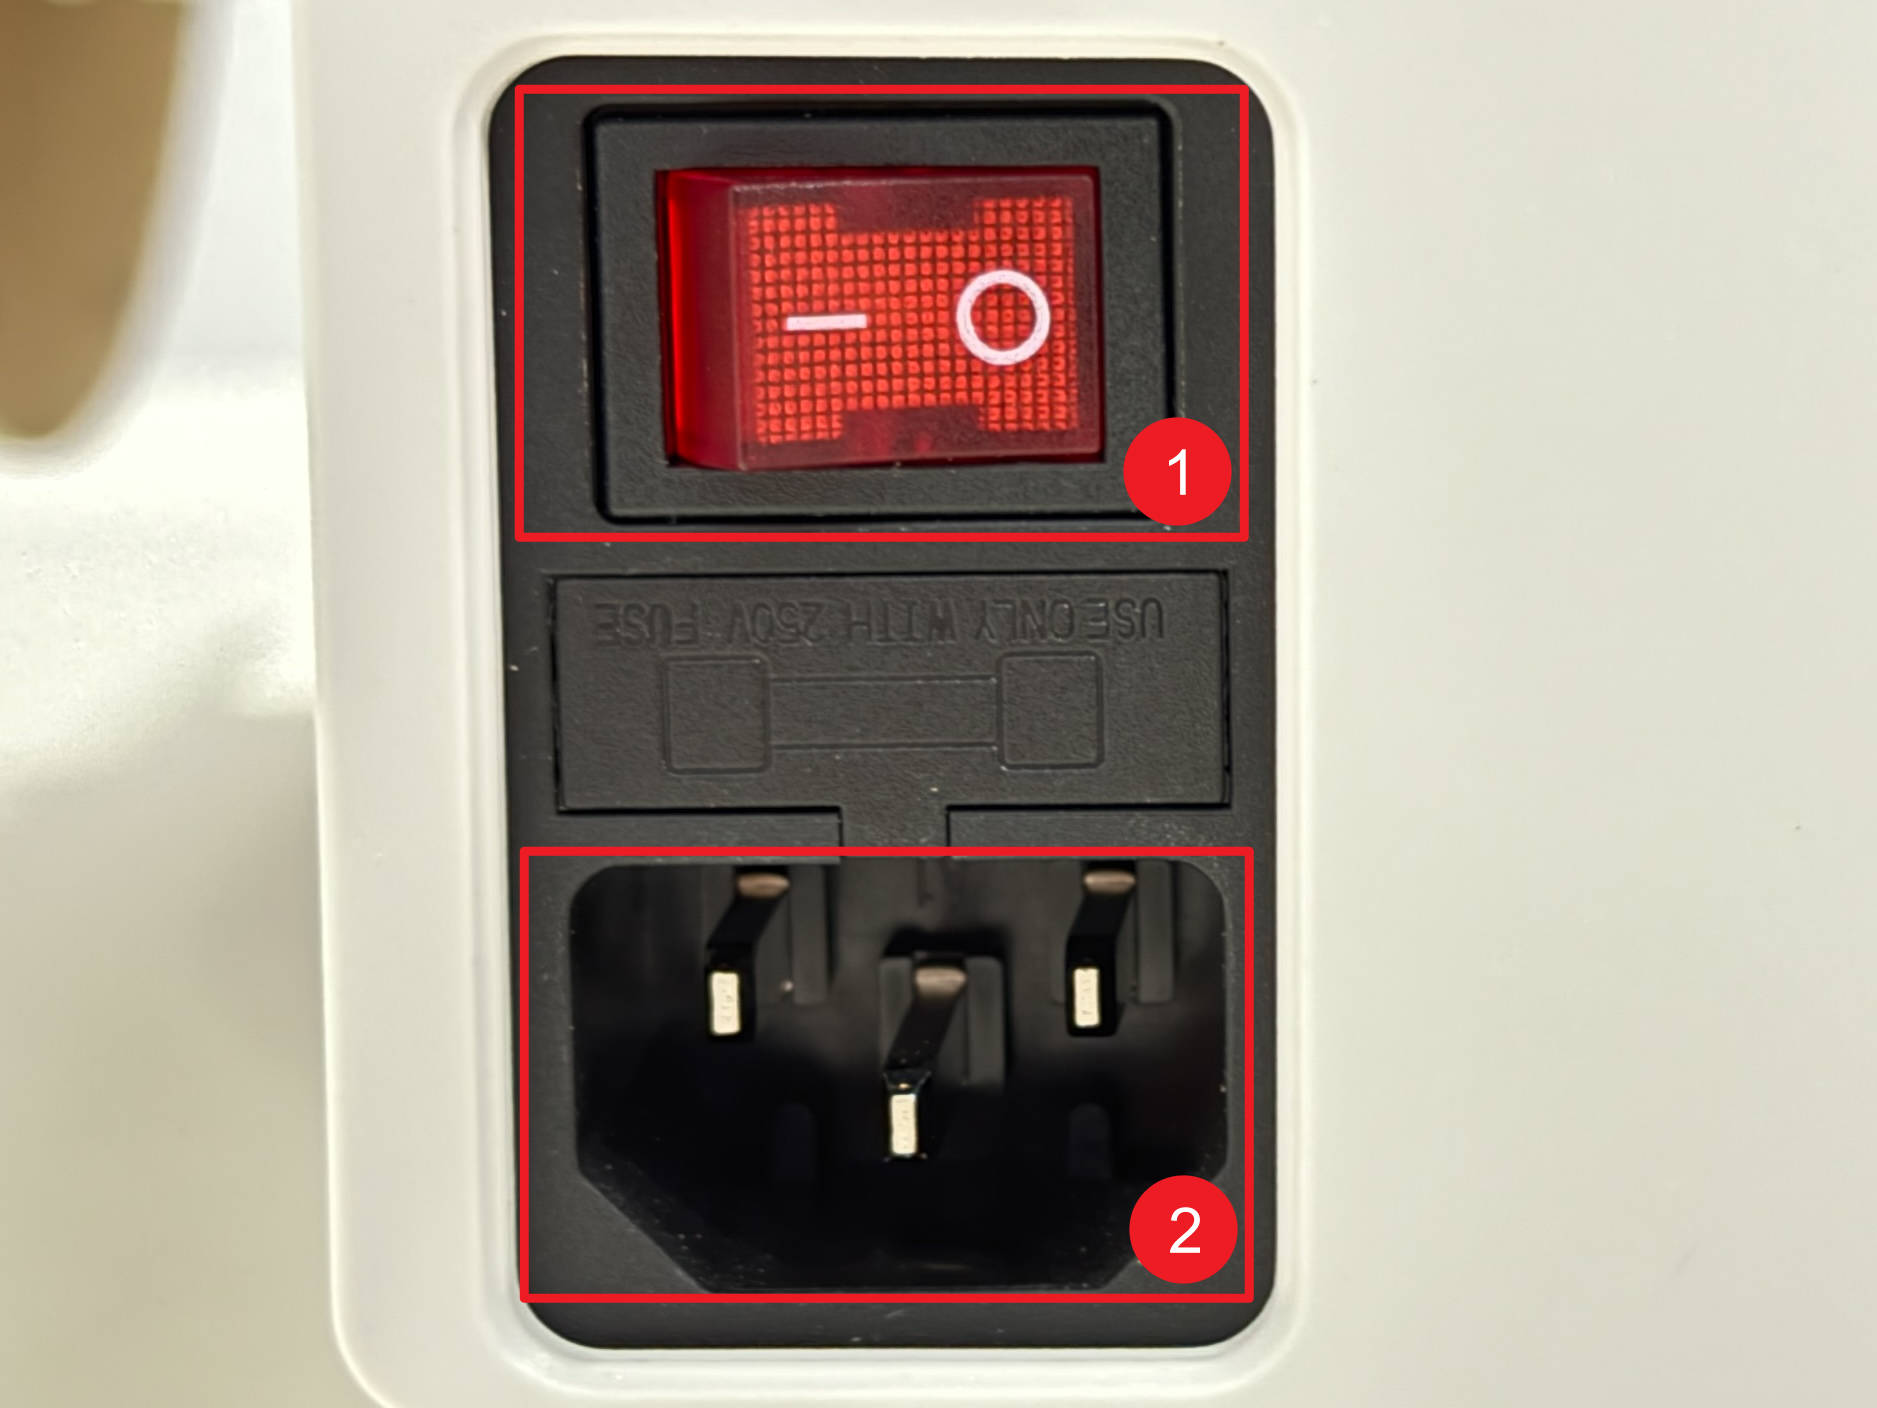
(1) Power off U1 and unplug it.
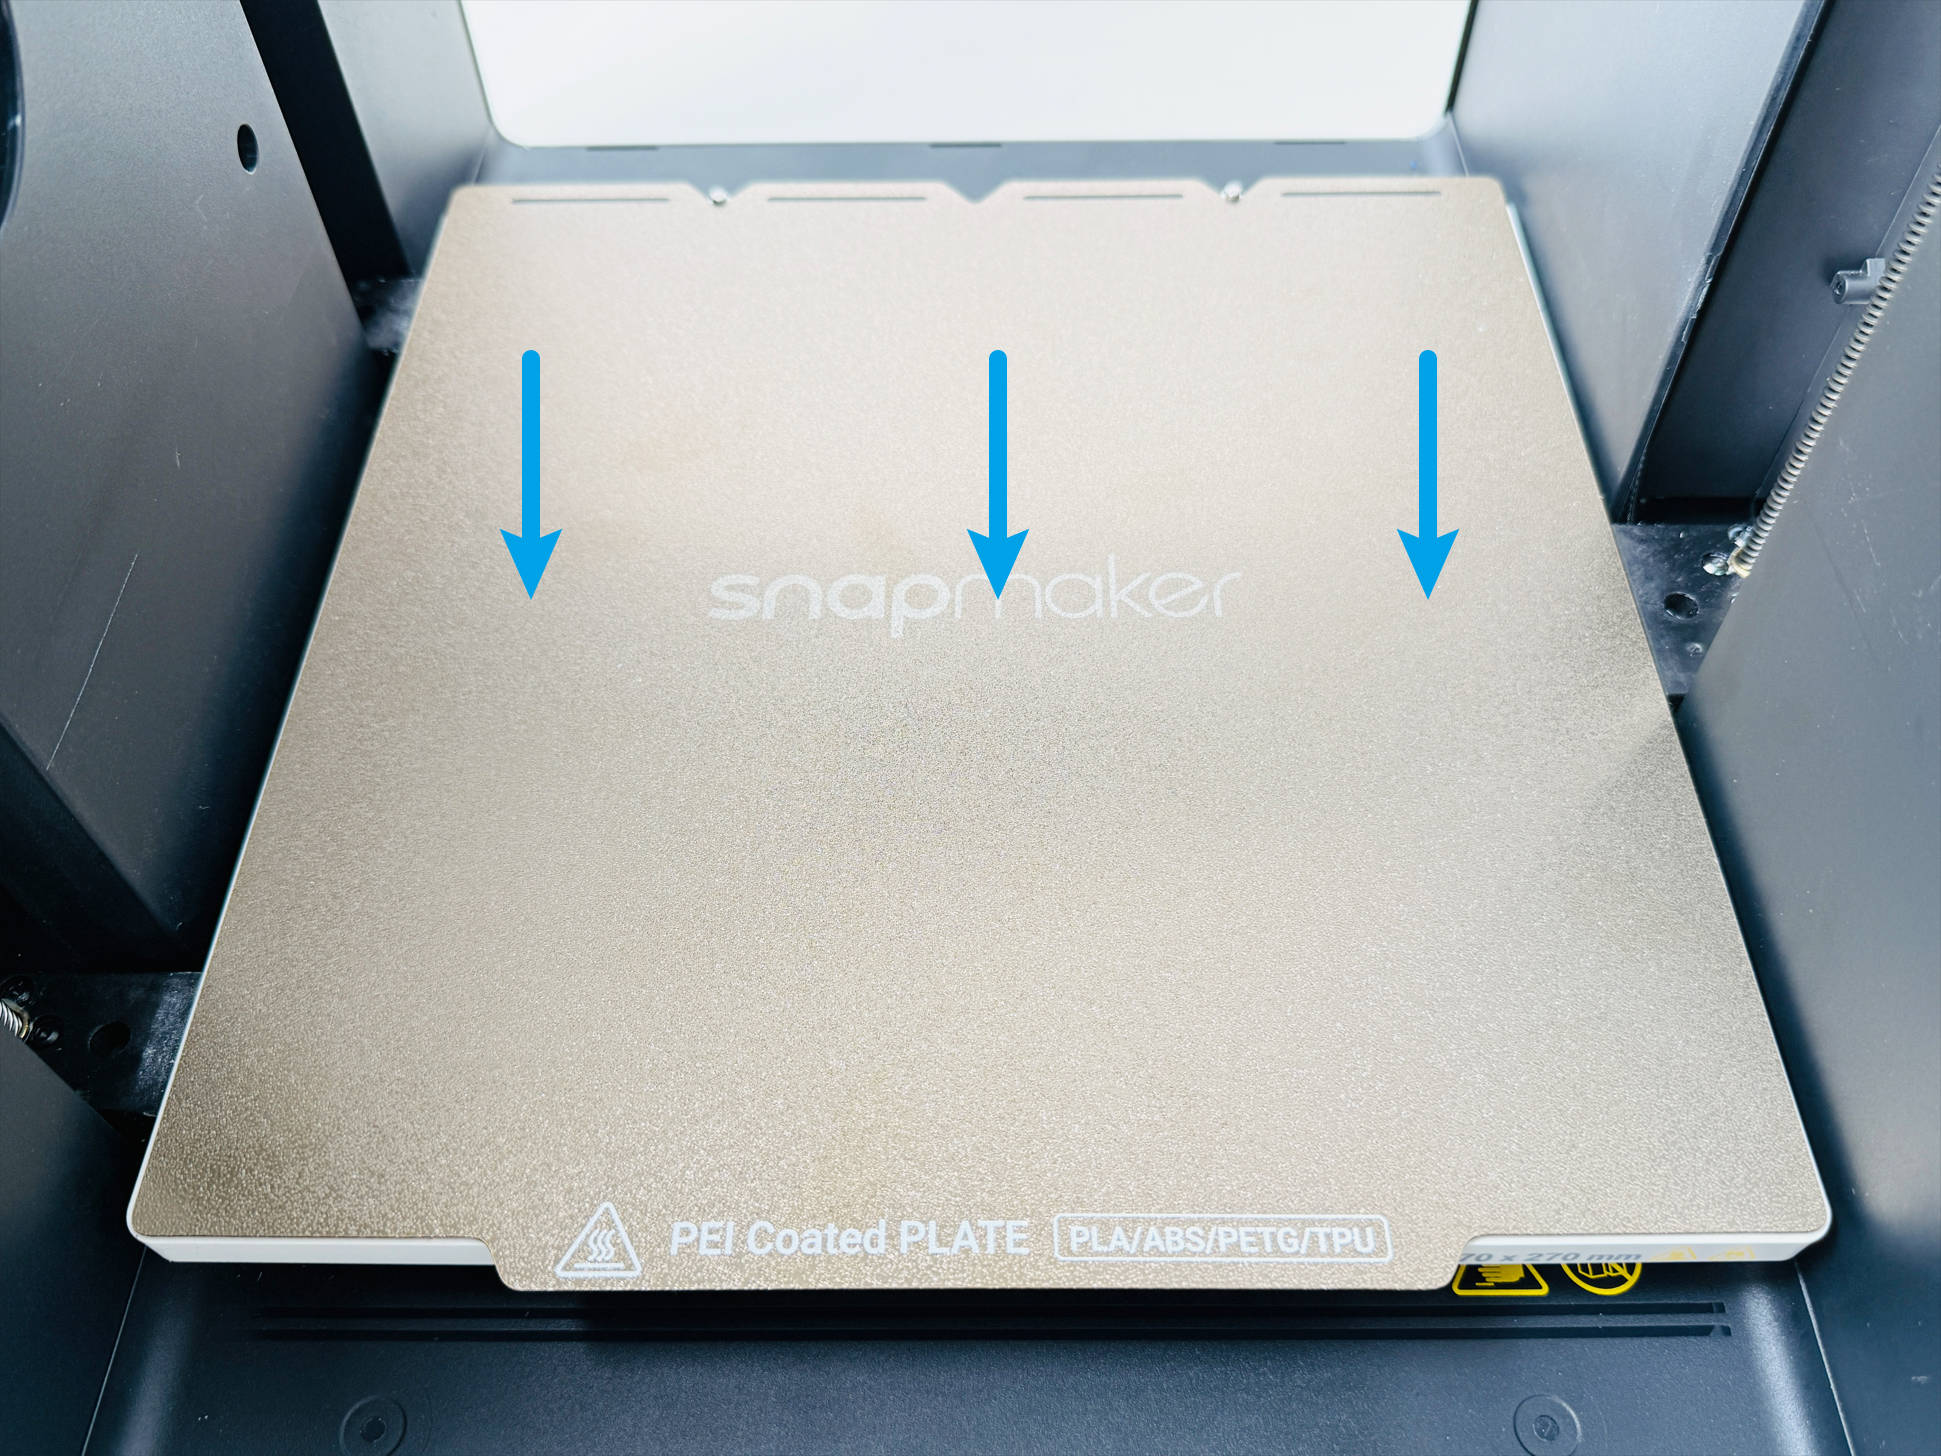
(2) Lower the heated bed to its limit.
(3) Remove filament holders 1 and 2, including spools.

(4) Remove the left filament feeder as follows:
(5) Remove the 8 screws with H2.0 hex key, then disconnect the 4 toolhead cables.
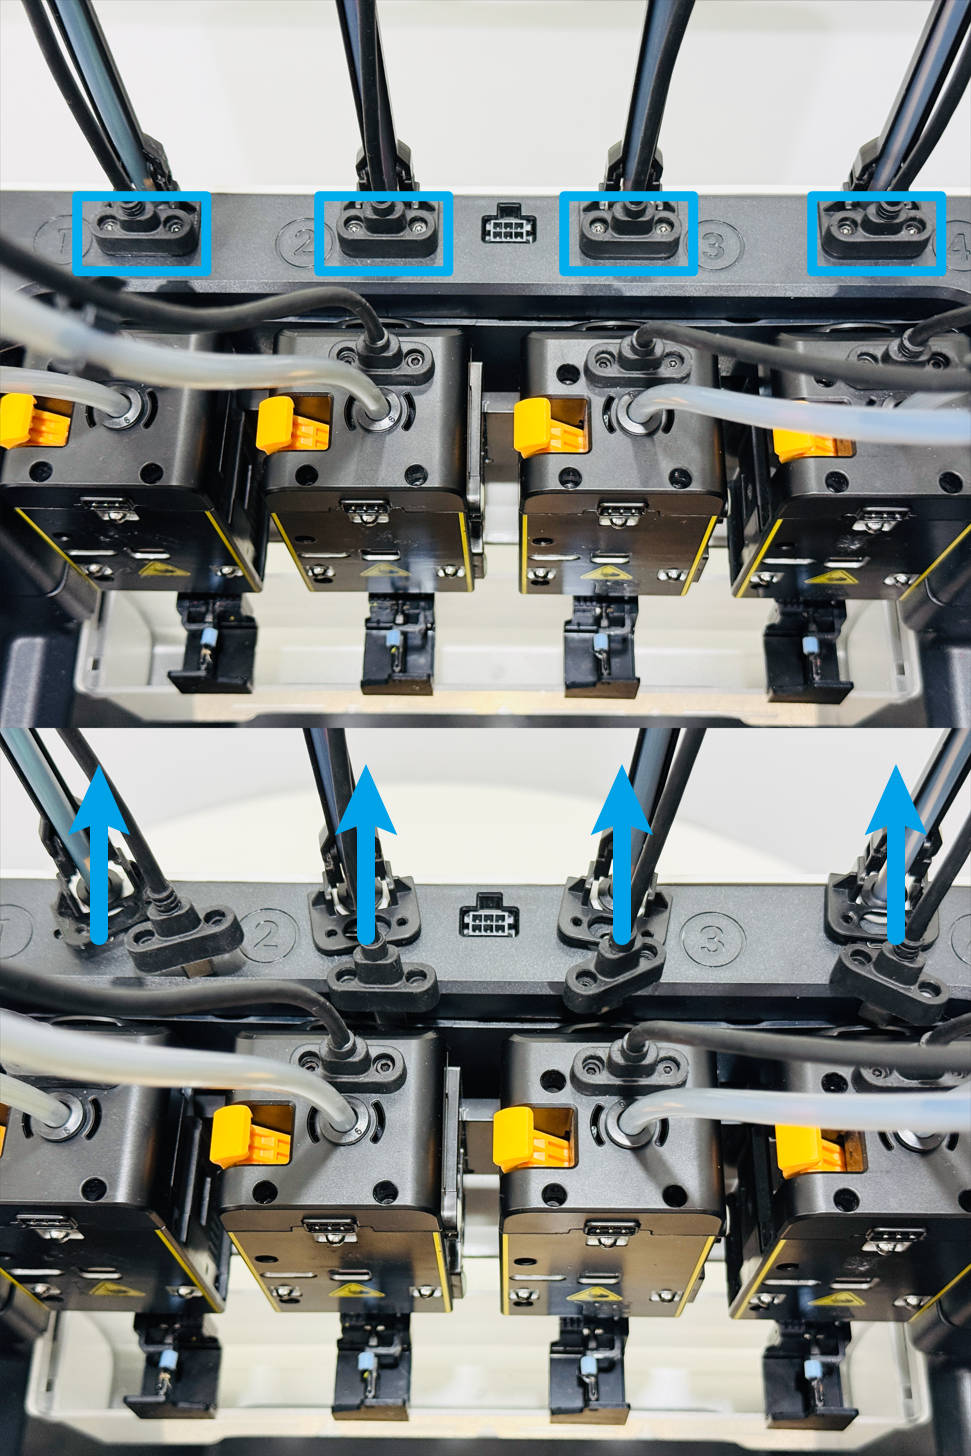
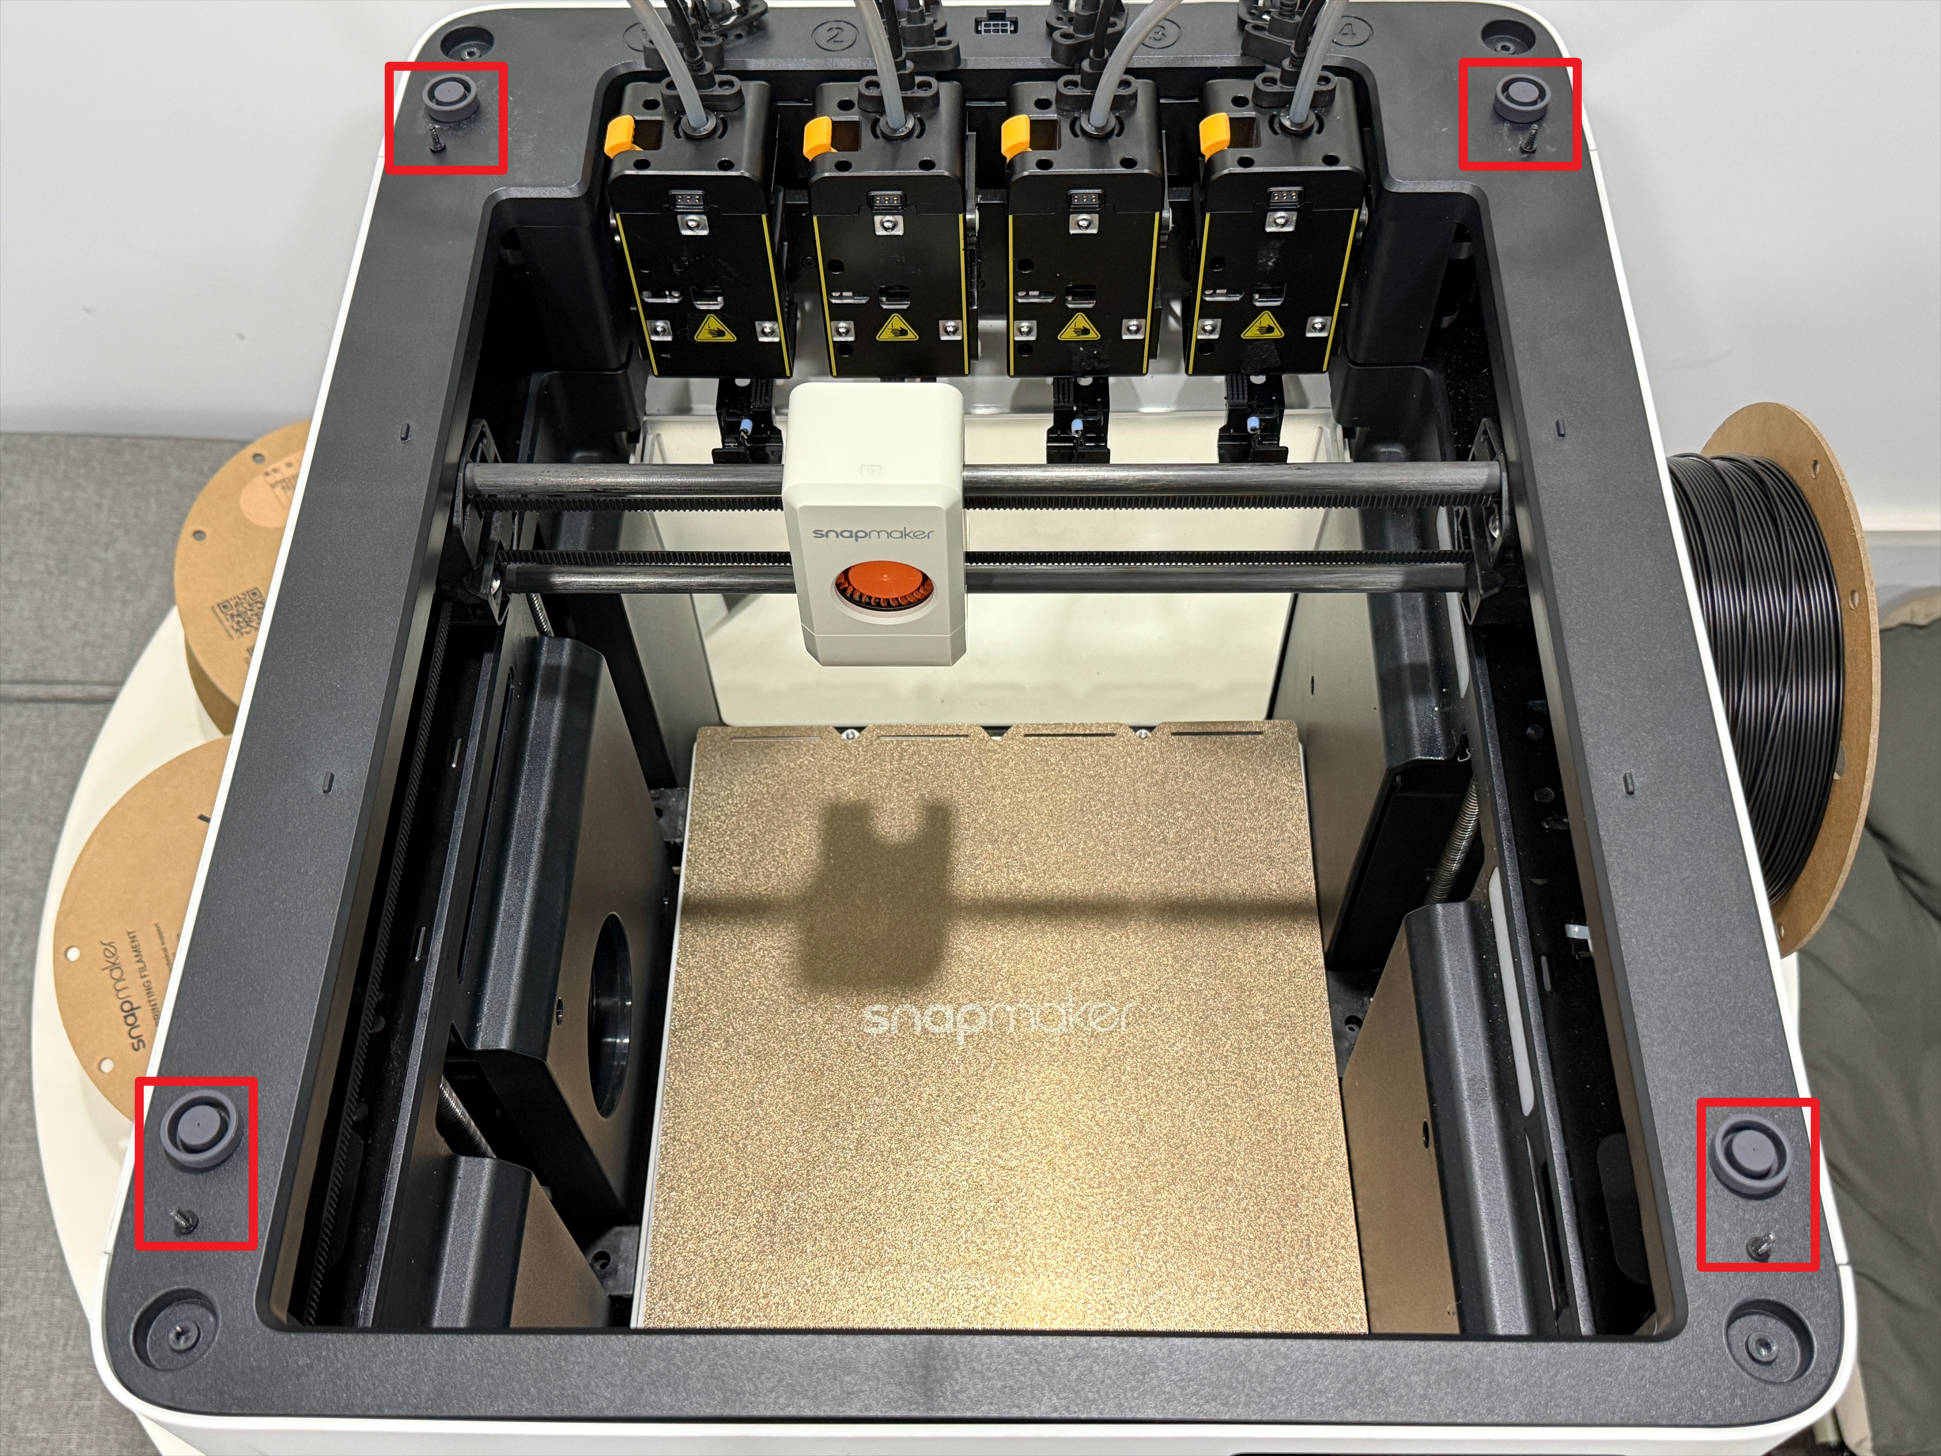
(6) Remove the 4 silicone plugs and screws beneath them at the corners of the top cover panel with H2.0 hex key.
(7) Lift the top cover panel and use an H2.0 hex key to remove the 8 screws of the left plastic panel.
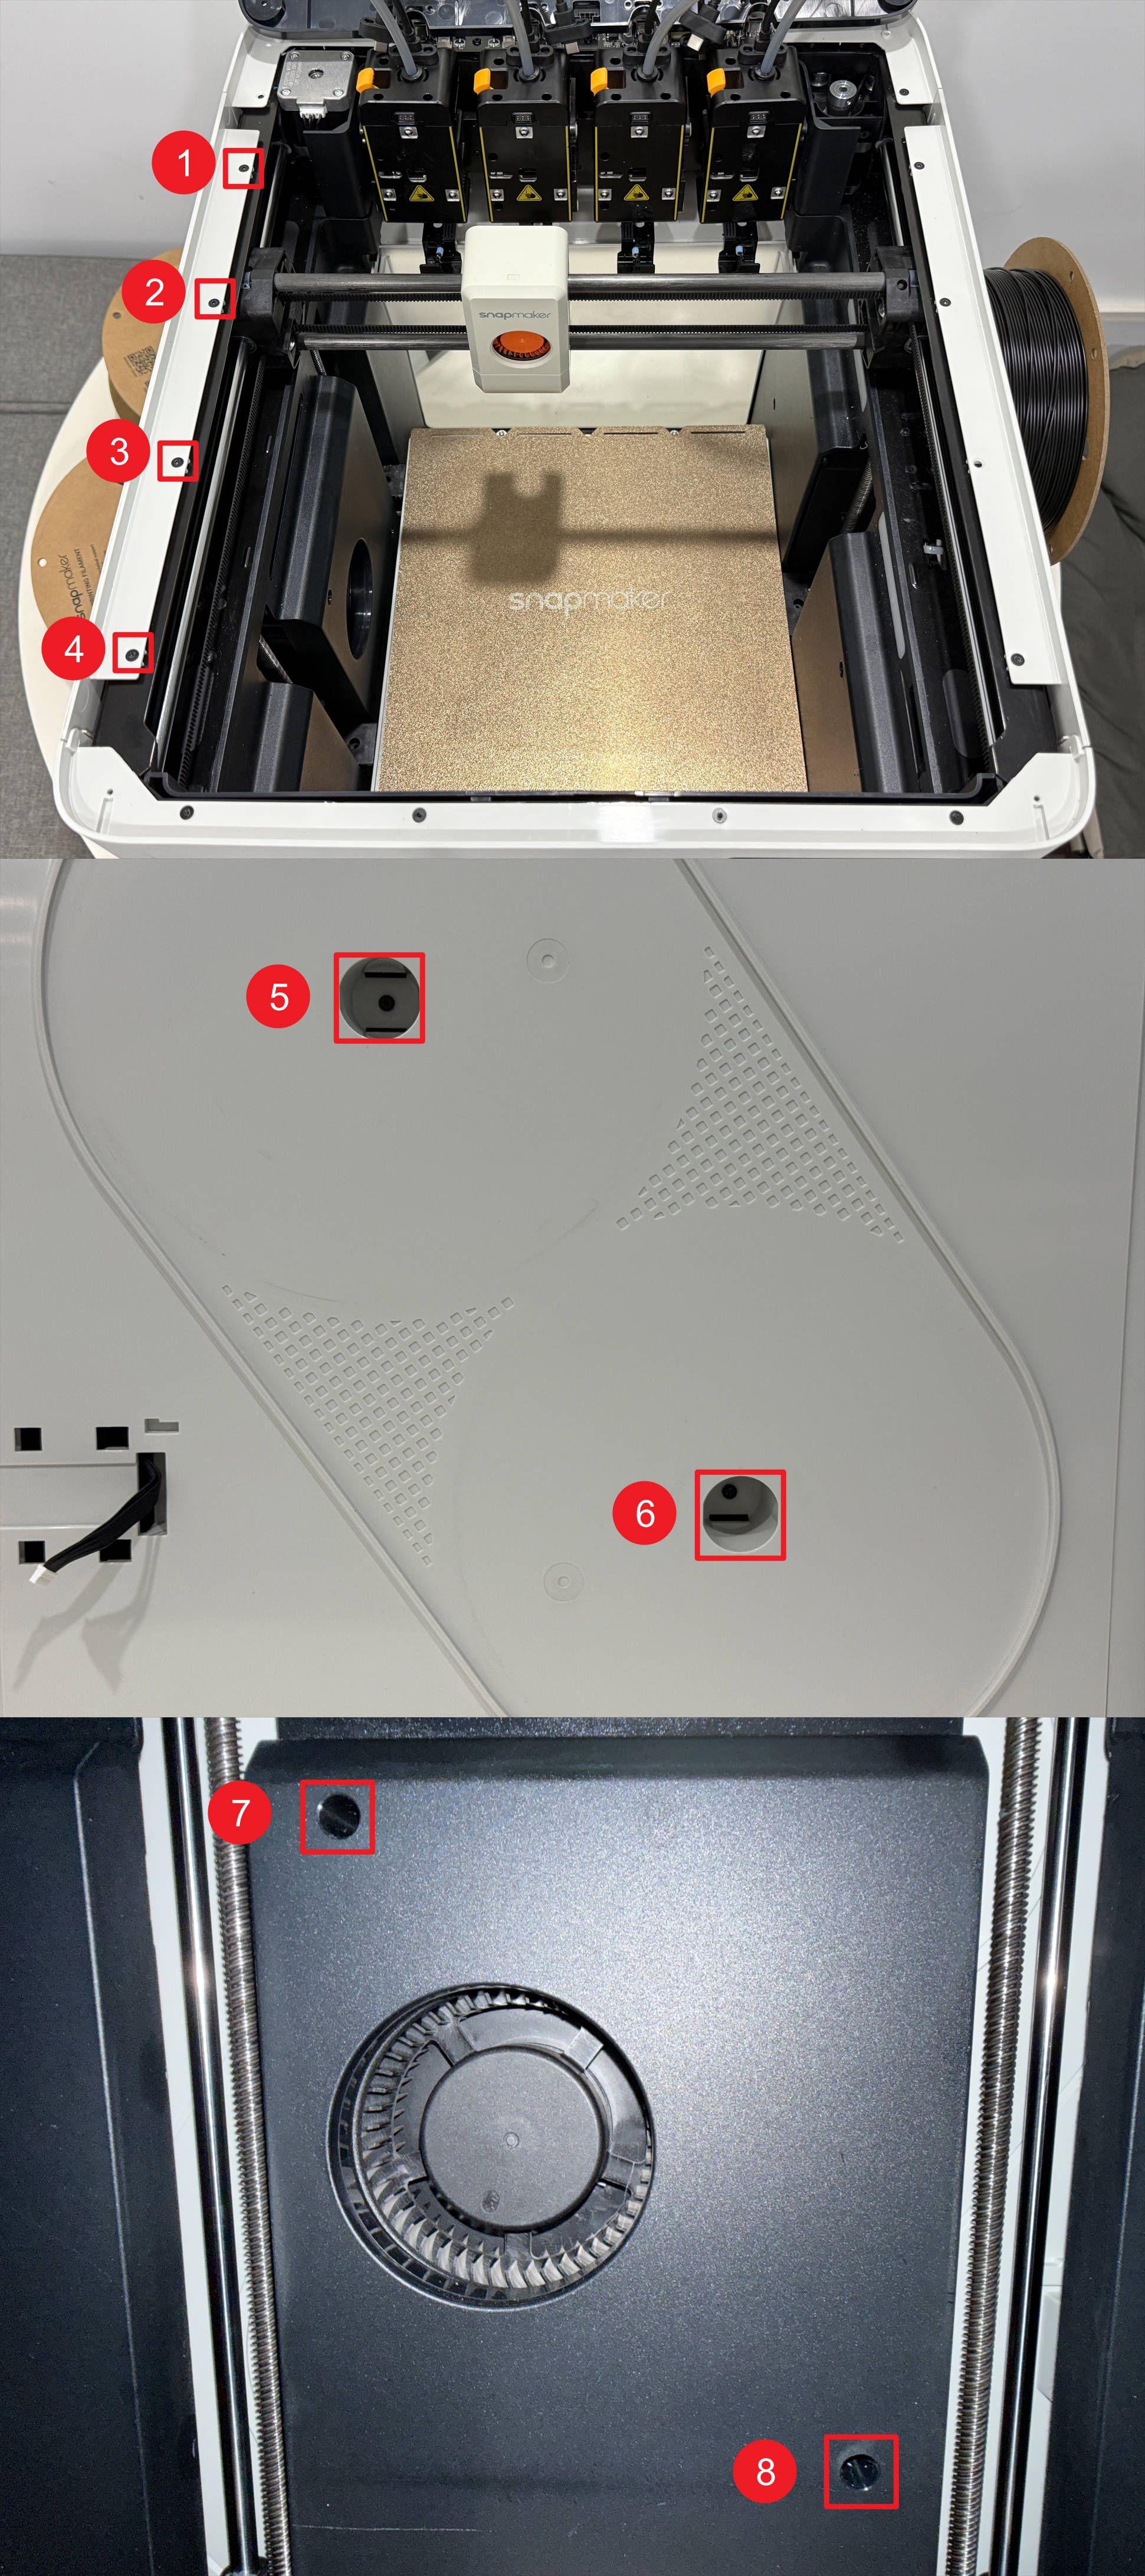
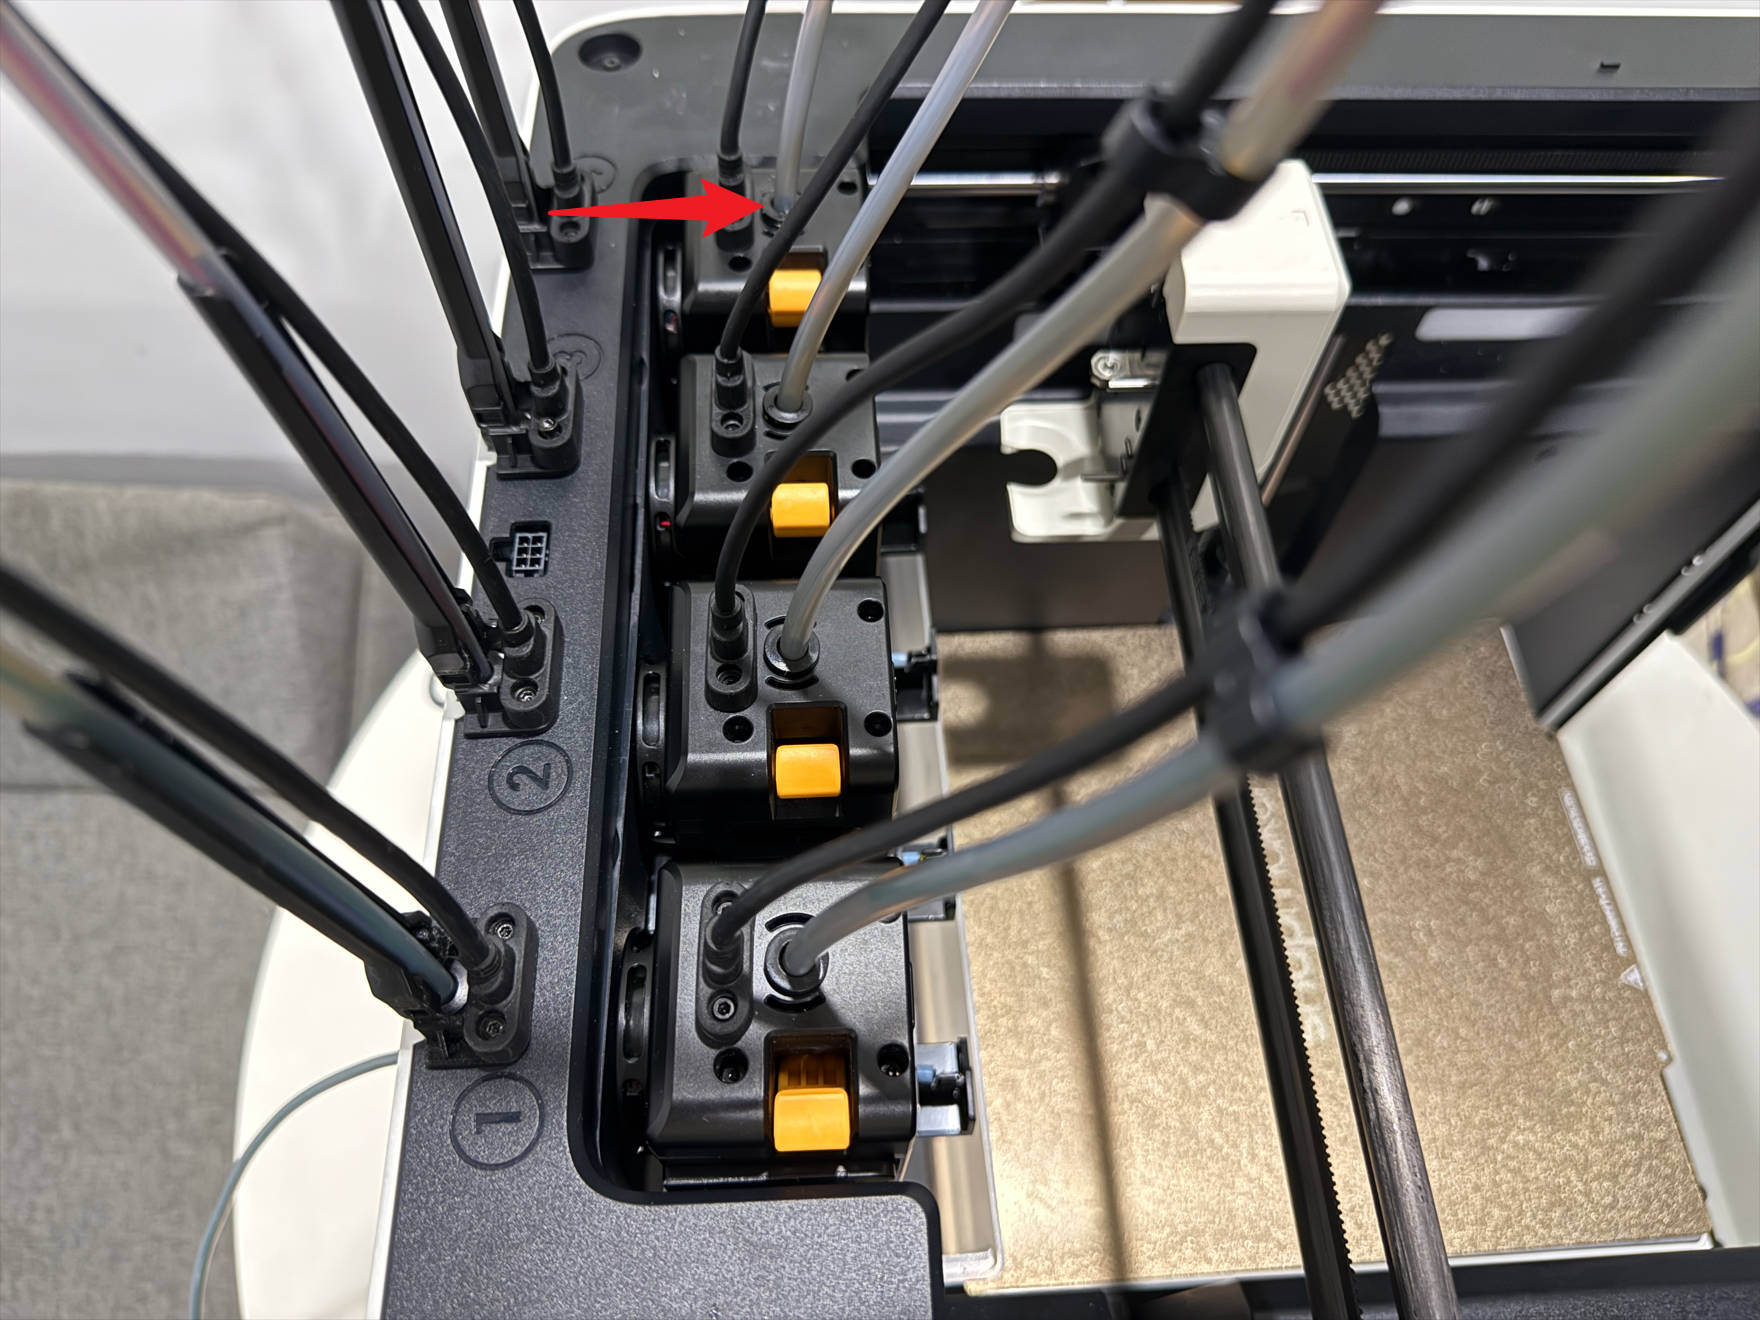
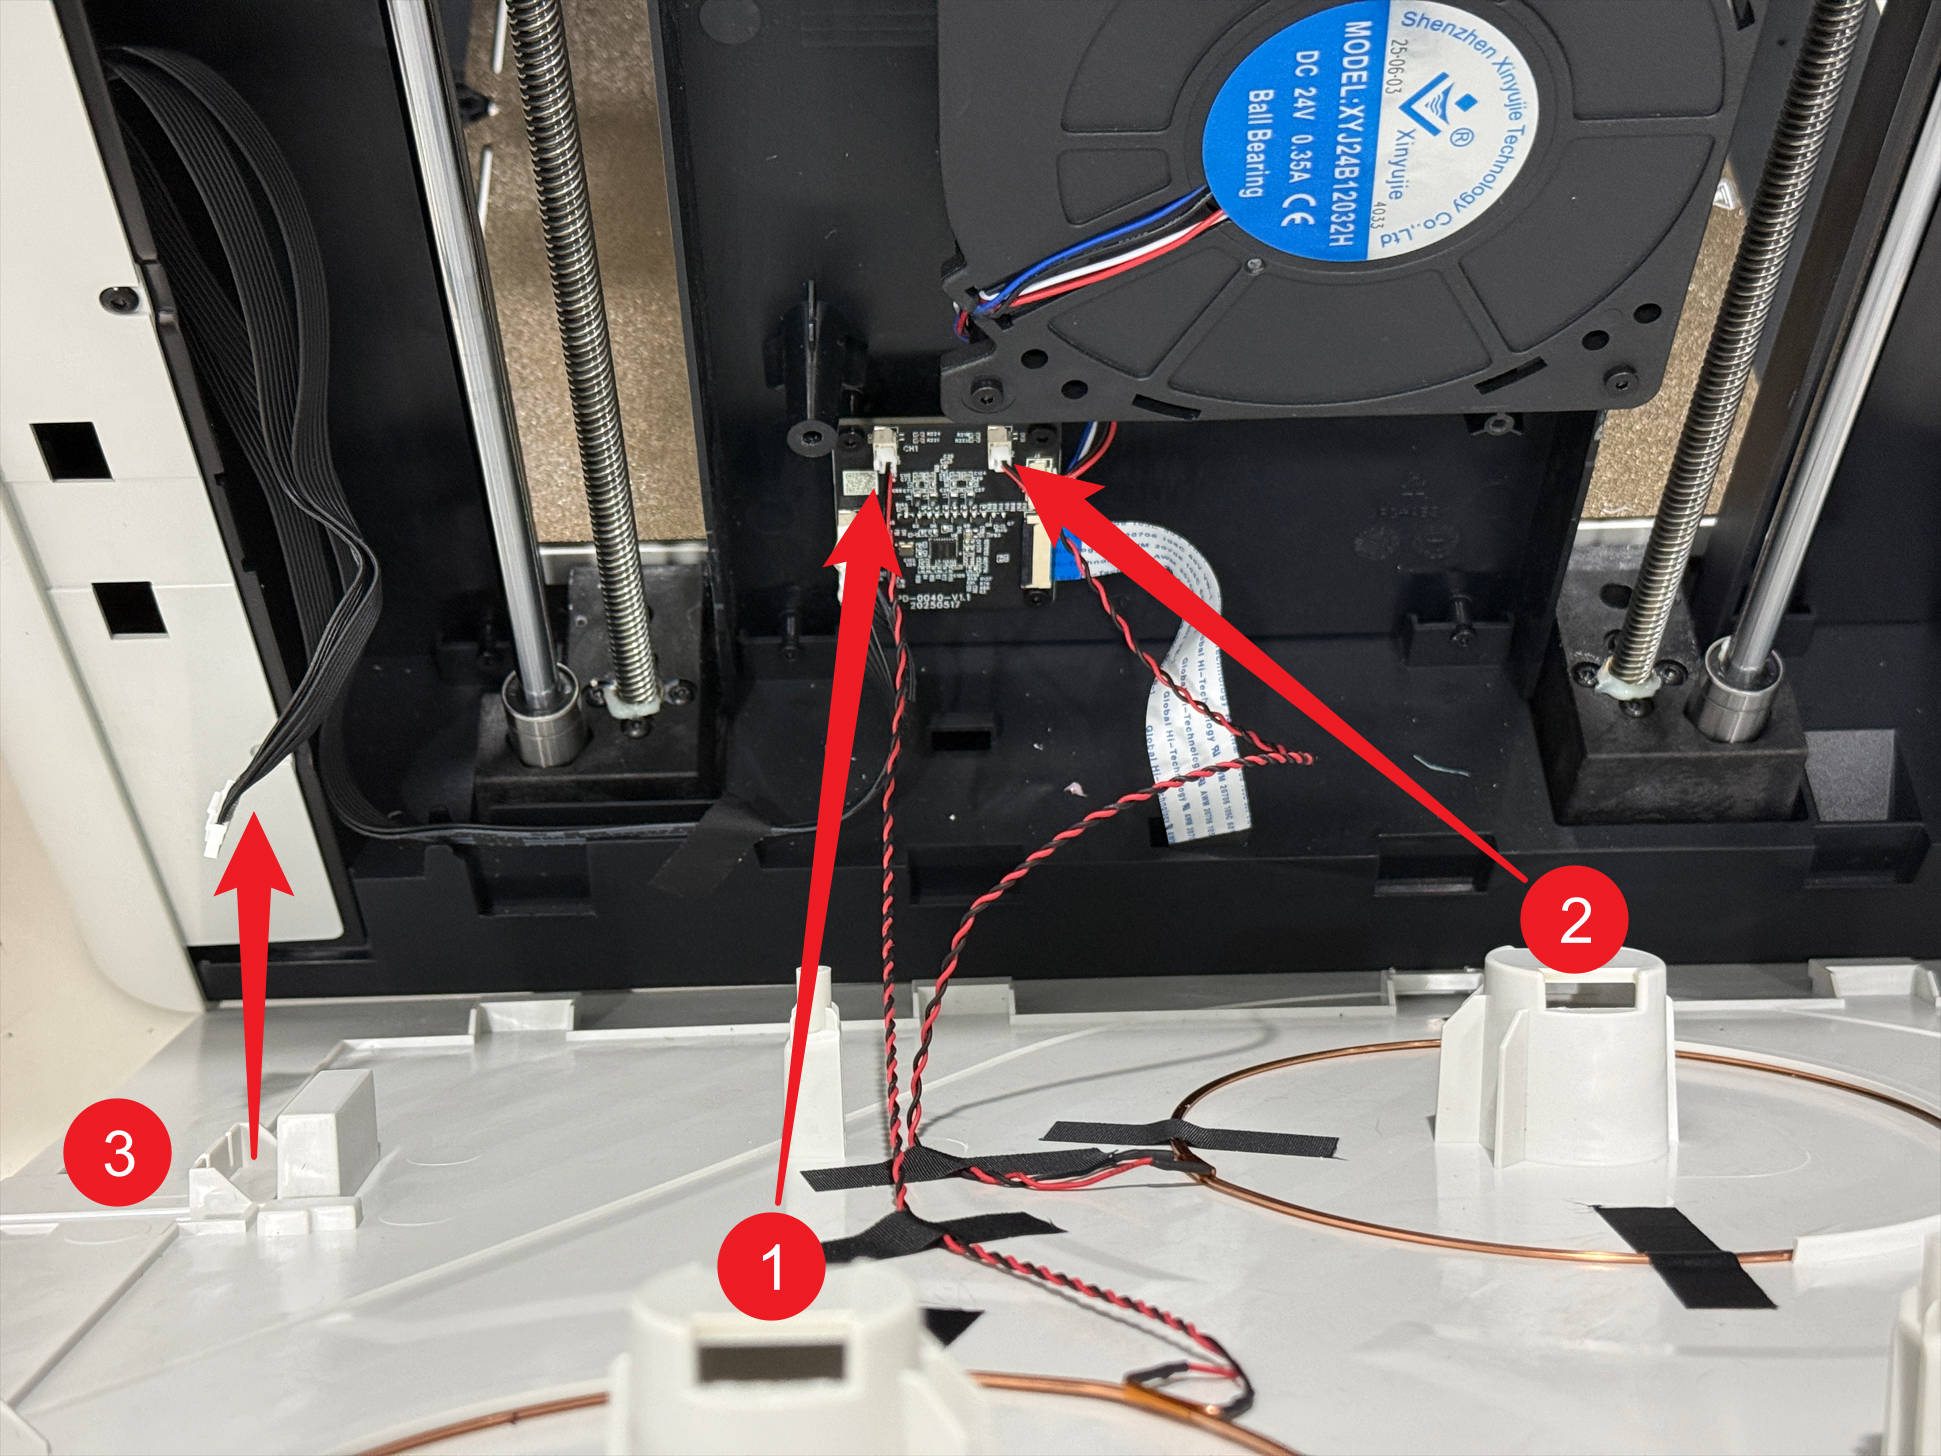
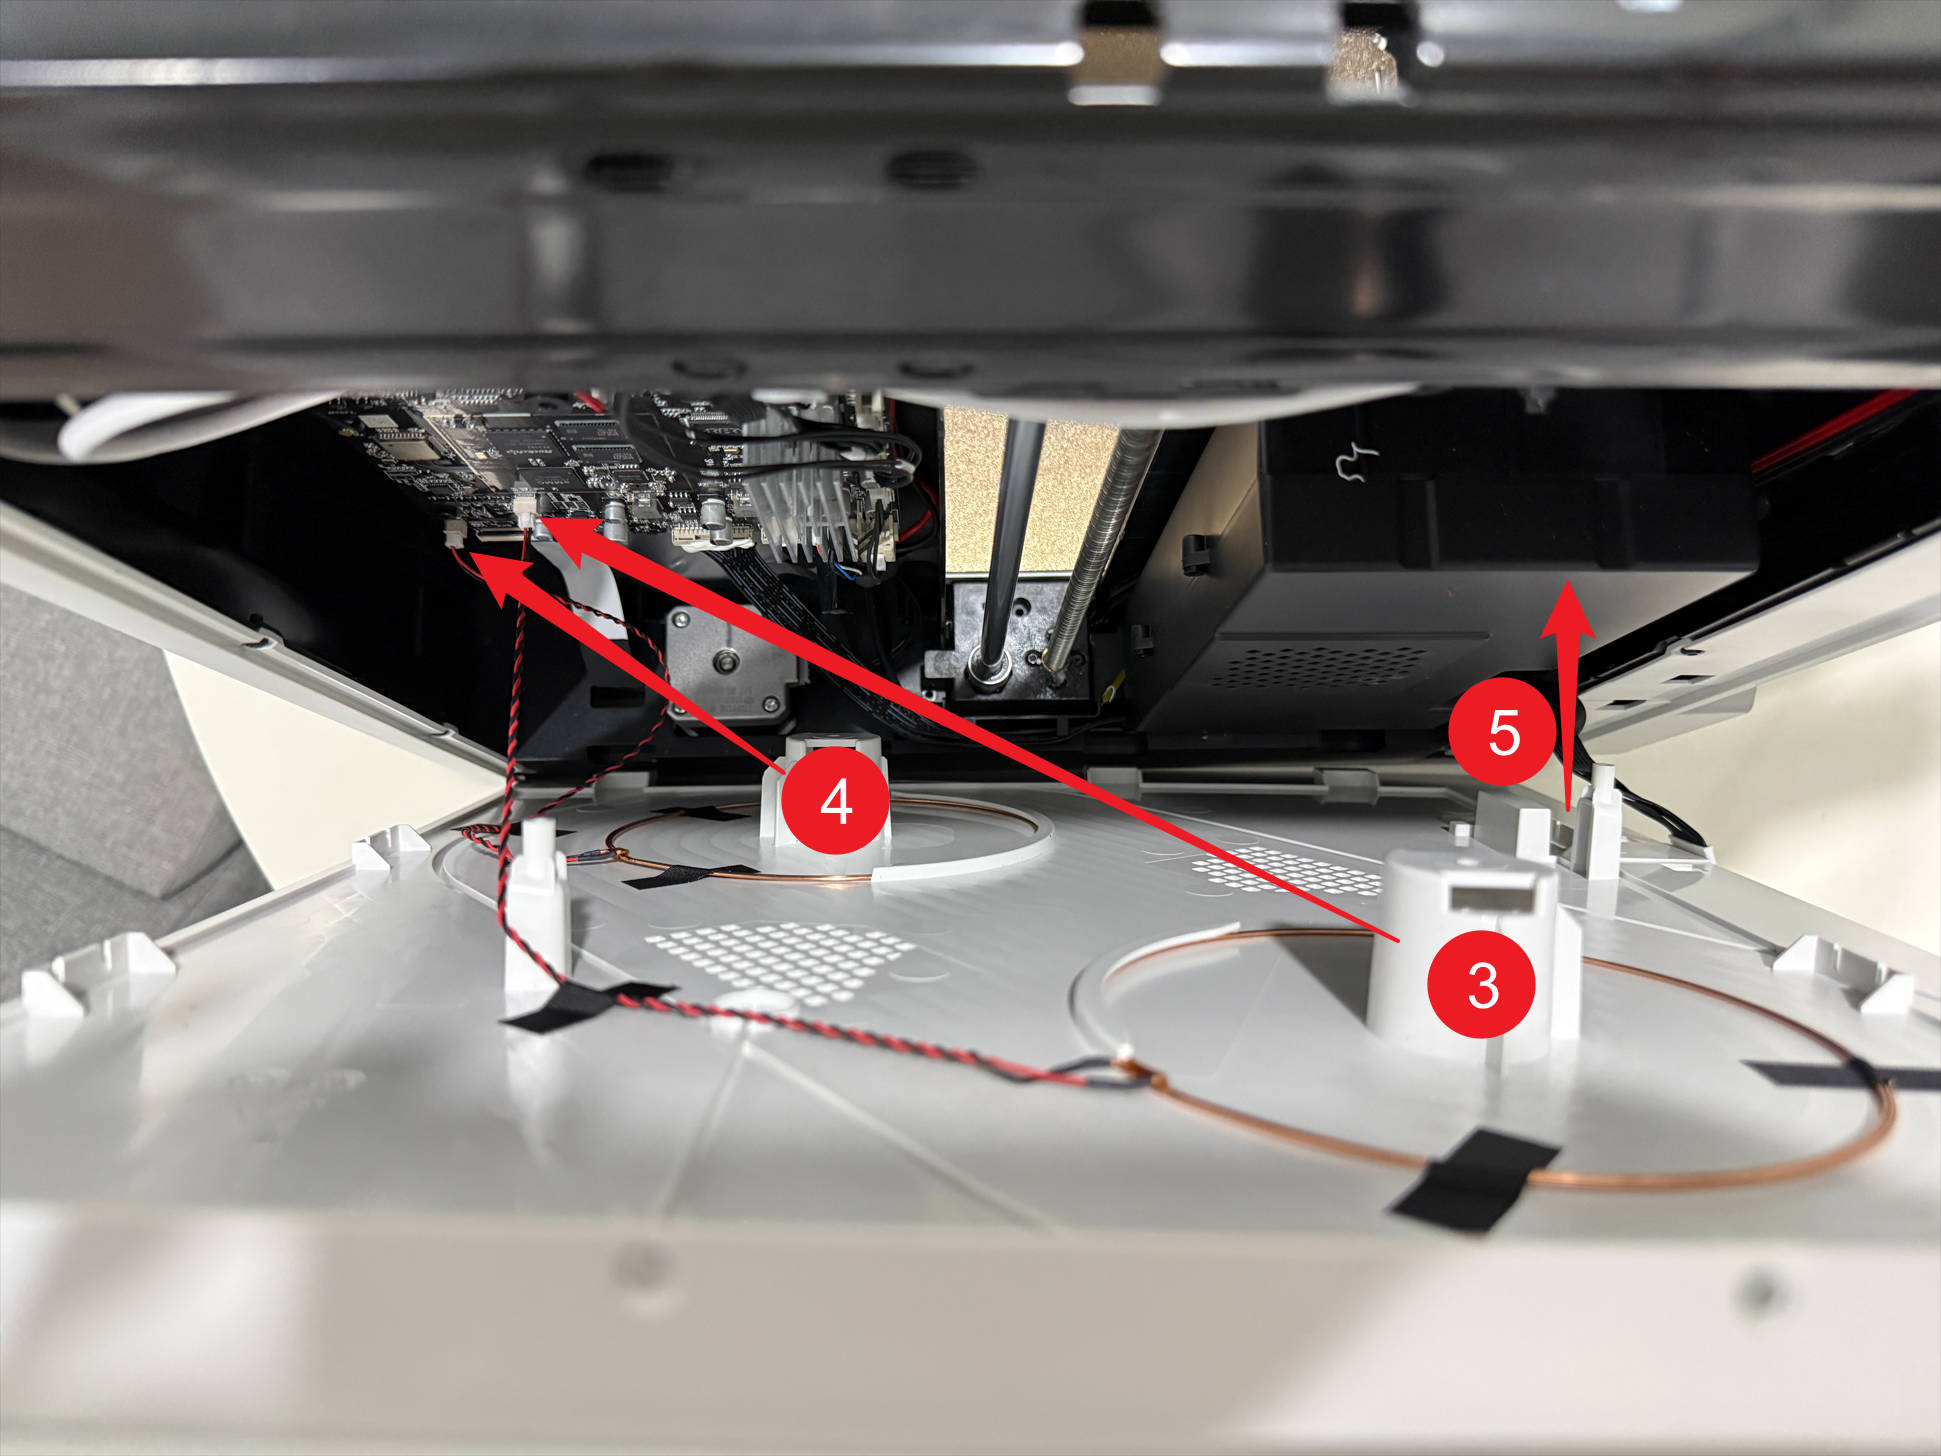
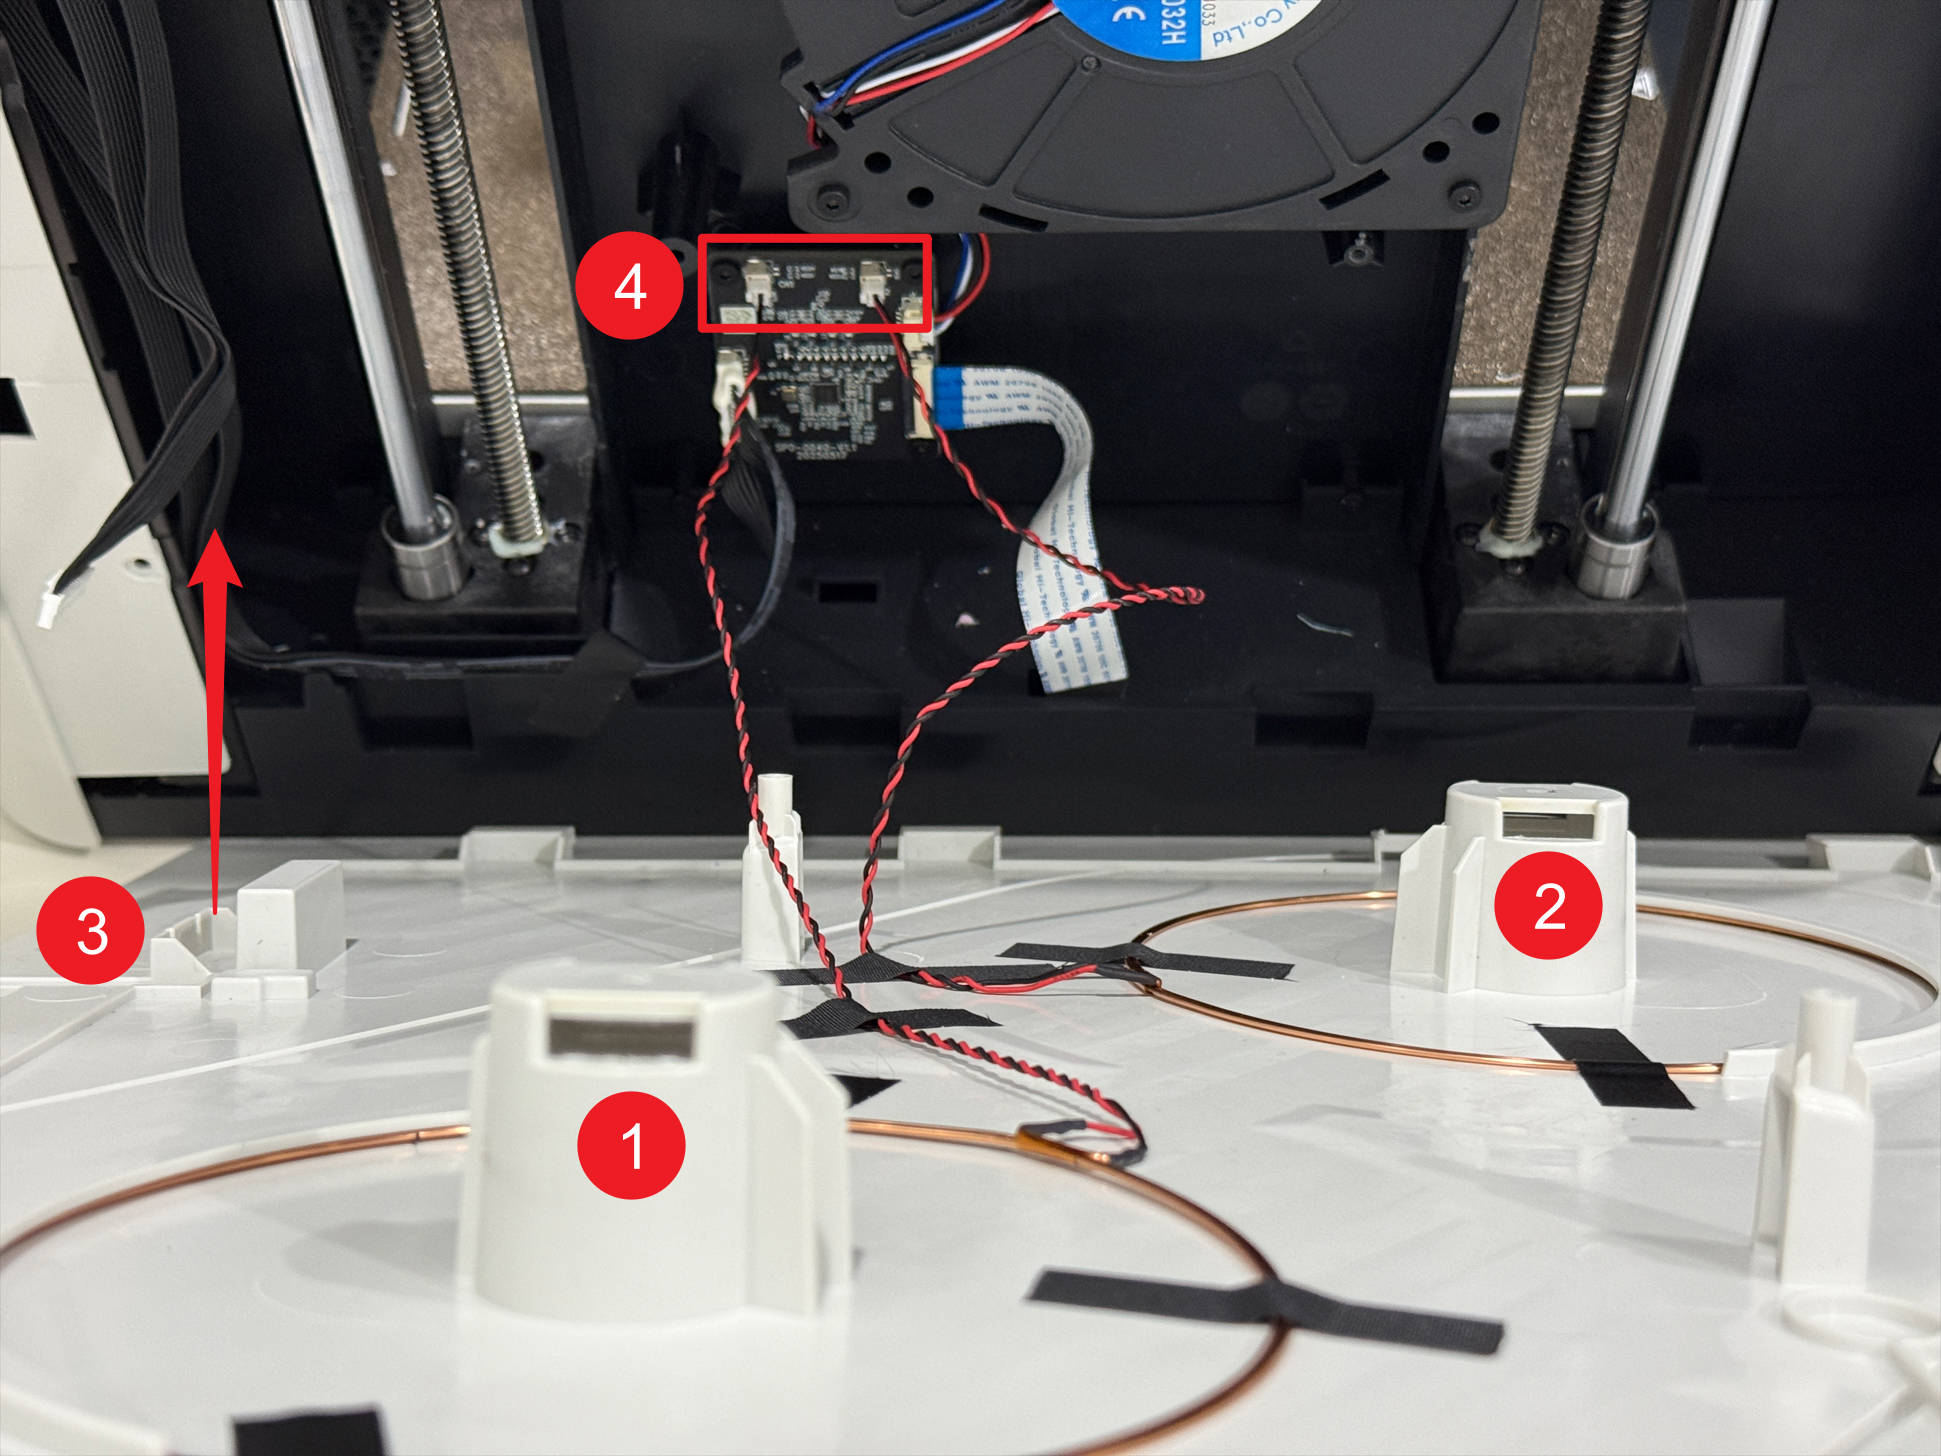
(8) Route the filament feeder cable through point-3. Normally, coil 1 connects to the left port of the RFID adapter board, while coil 2 connects to the right.
¶ 1.3 Spool 3 & 4 filament info reversed
(1) Power off U1 and unplug it.
(2) Lower the heated bed to its limit.
(3) Remove filament holders 3 and 4, including spools.
(4) Remove the right filament feeder as follows:
(5) Remove the 8 screws with H2.0 hex key, then disconnect the 4 toolhead cables.
(6) Remove the 4 silicone plugs and screws beneath them at the corners of the top cover panel with H2.0 hex key.
(7) Lift the top cover panel and use an H2.0 hex key to remove the 8 screws of the right plastic panel.
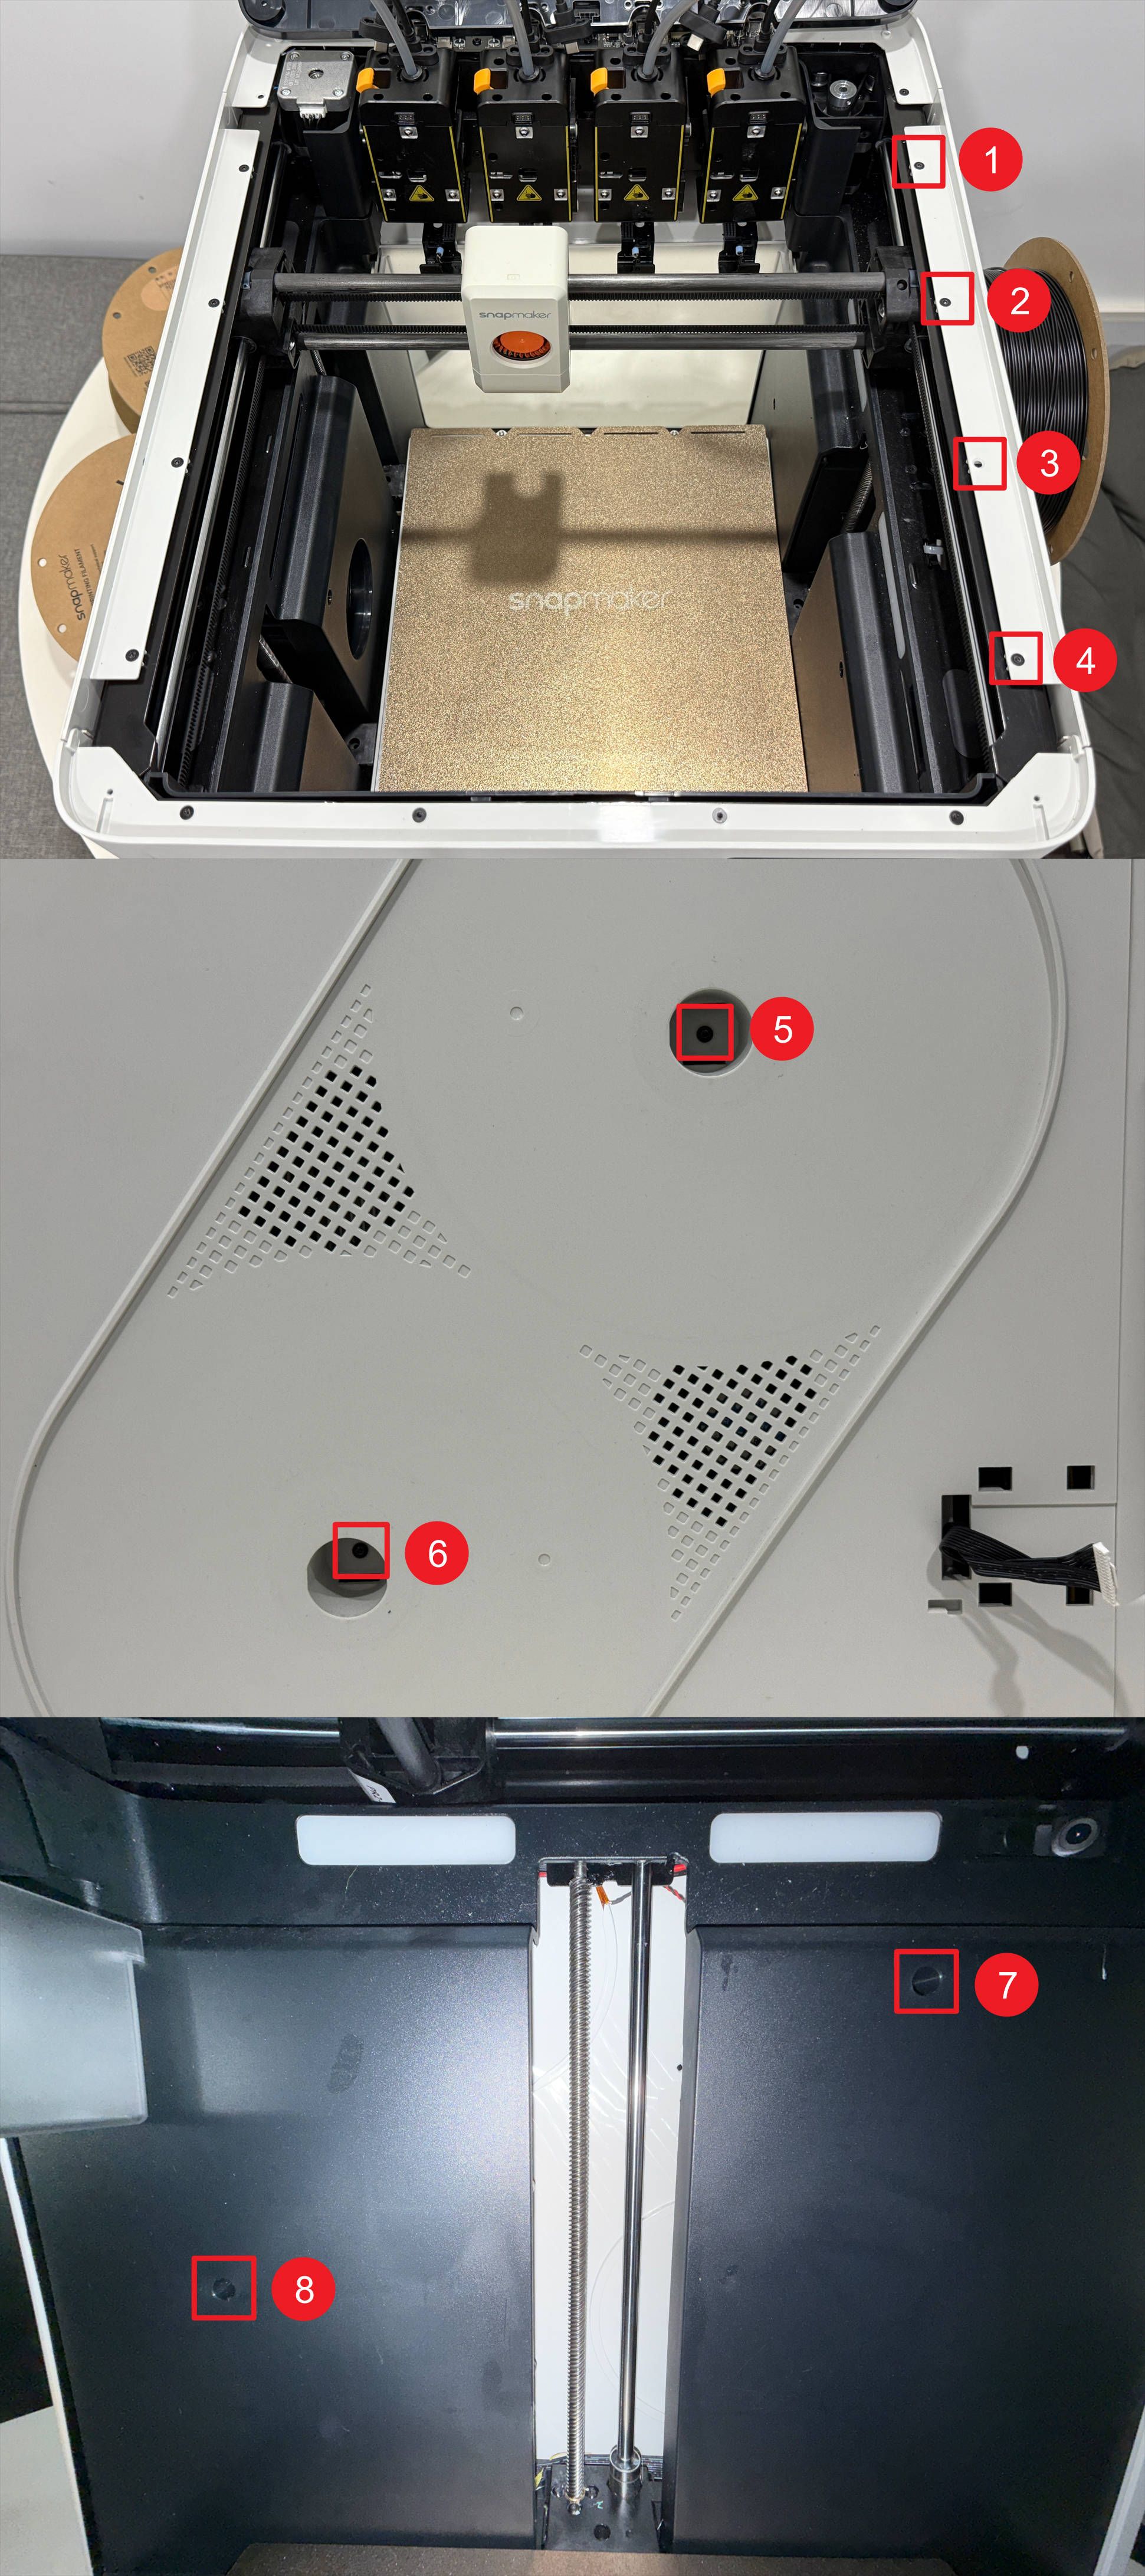
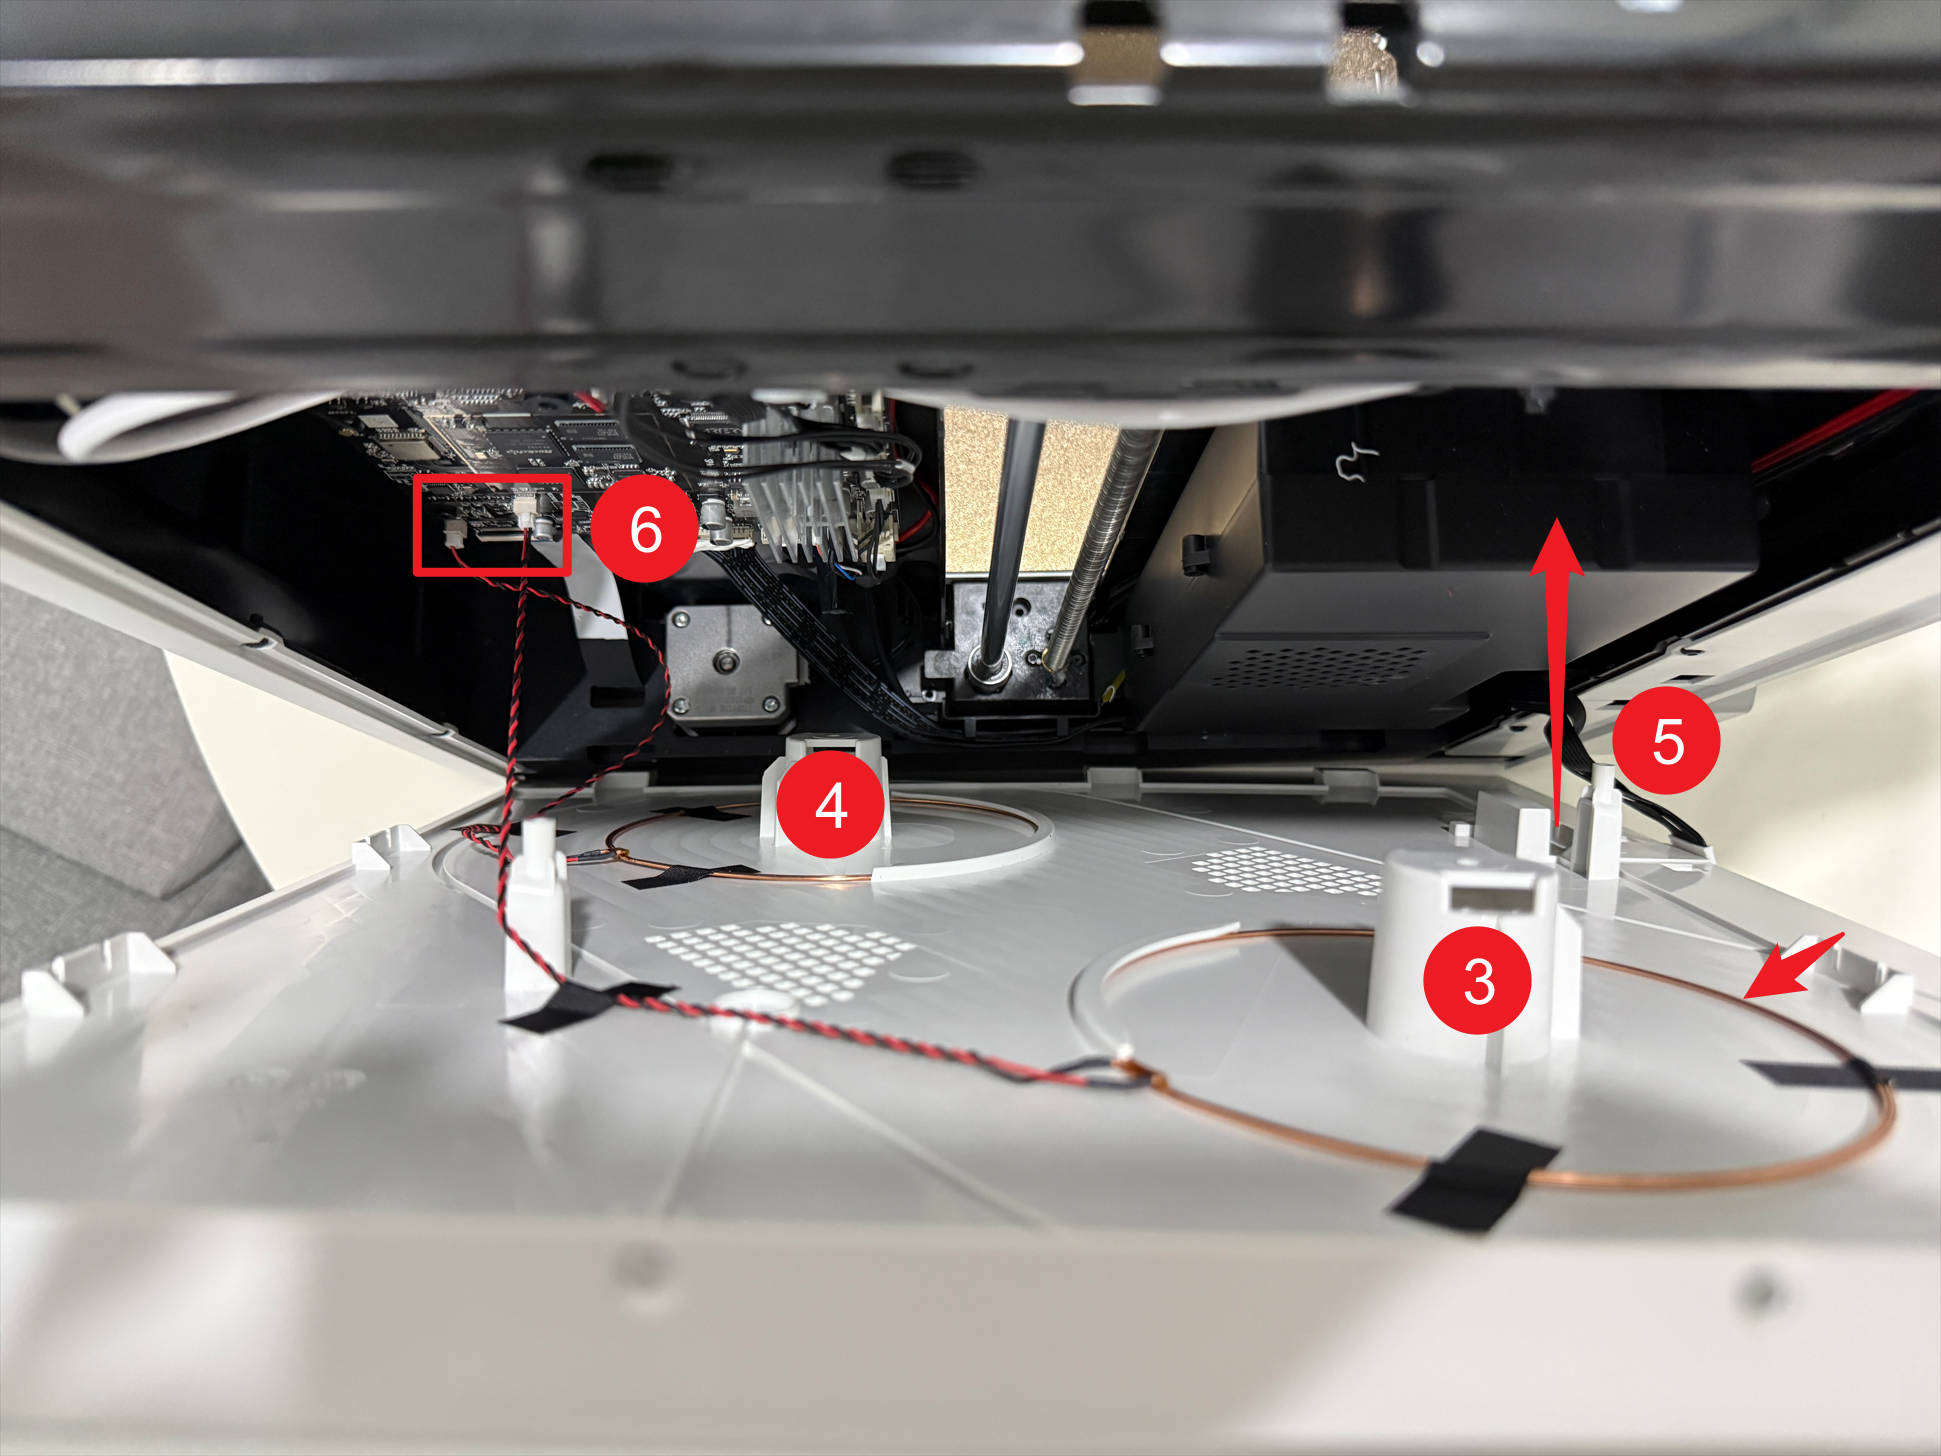
(8) Route the filament feeder cable through point-5. Normally, coil 4 connects to the left port of main control board, while coil 3 connects to the right.
¶ 2. Filament not detected after loading
¶ 2.1 Check the spool position
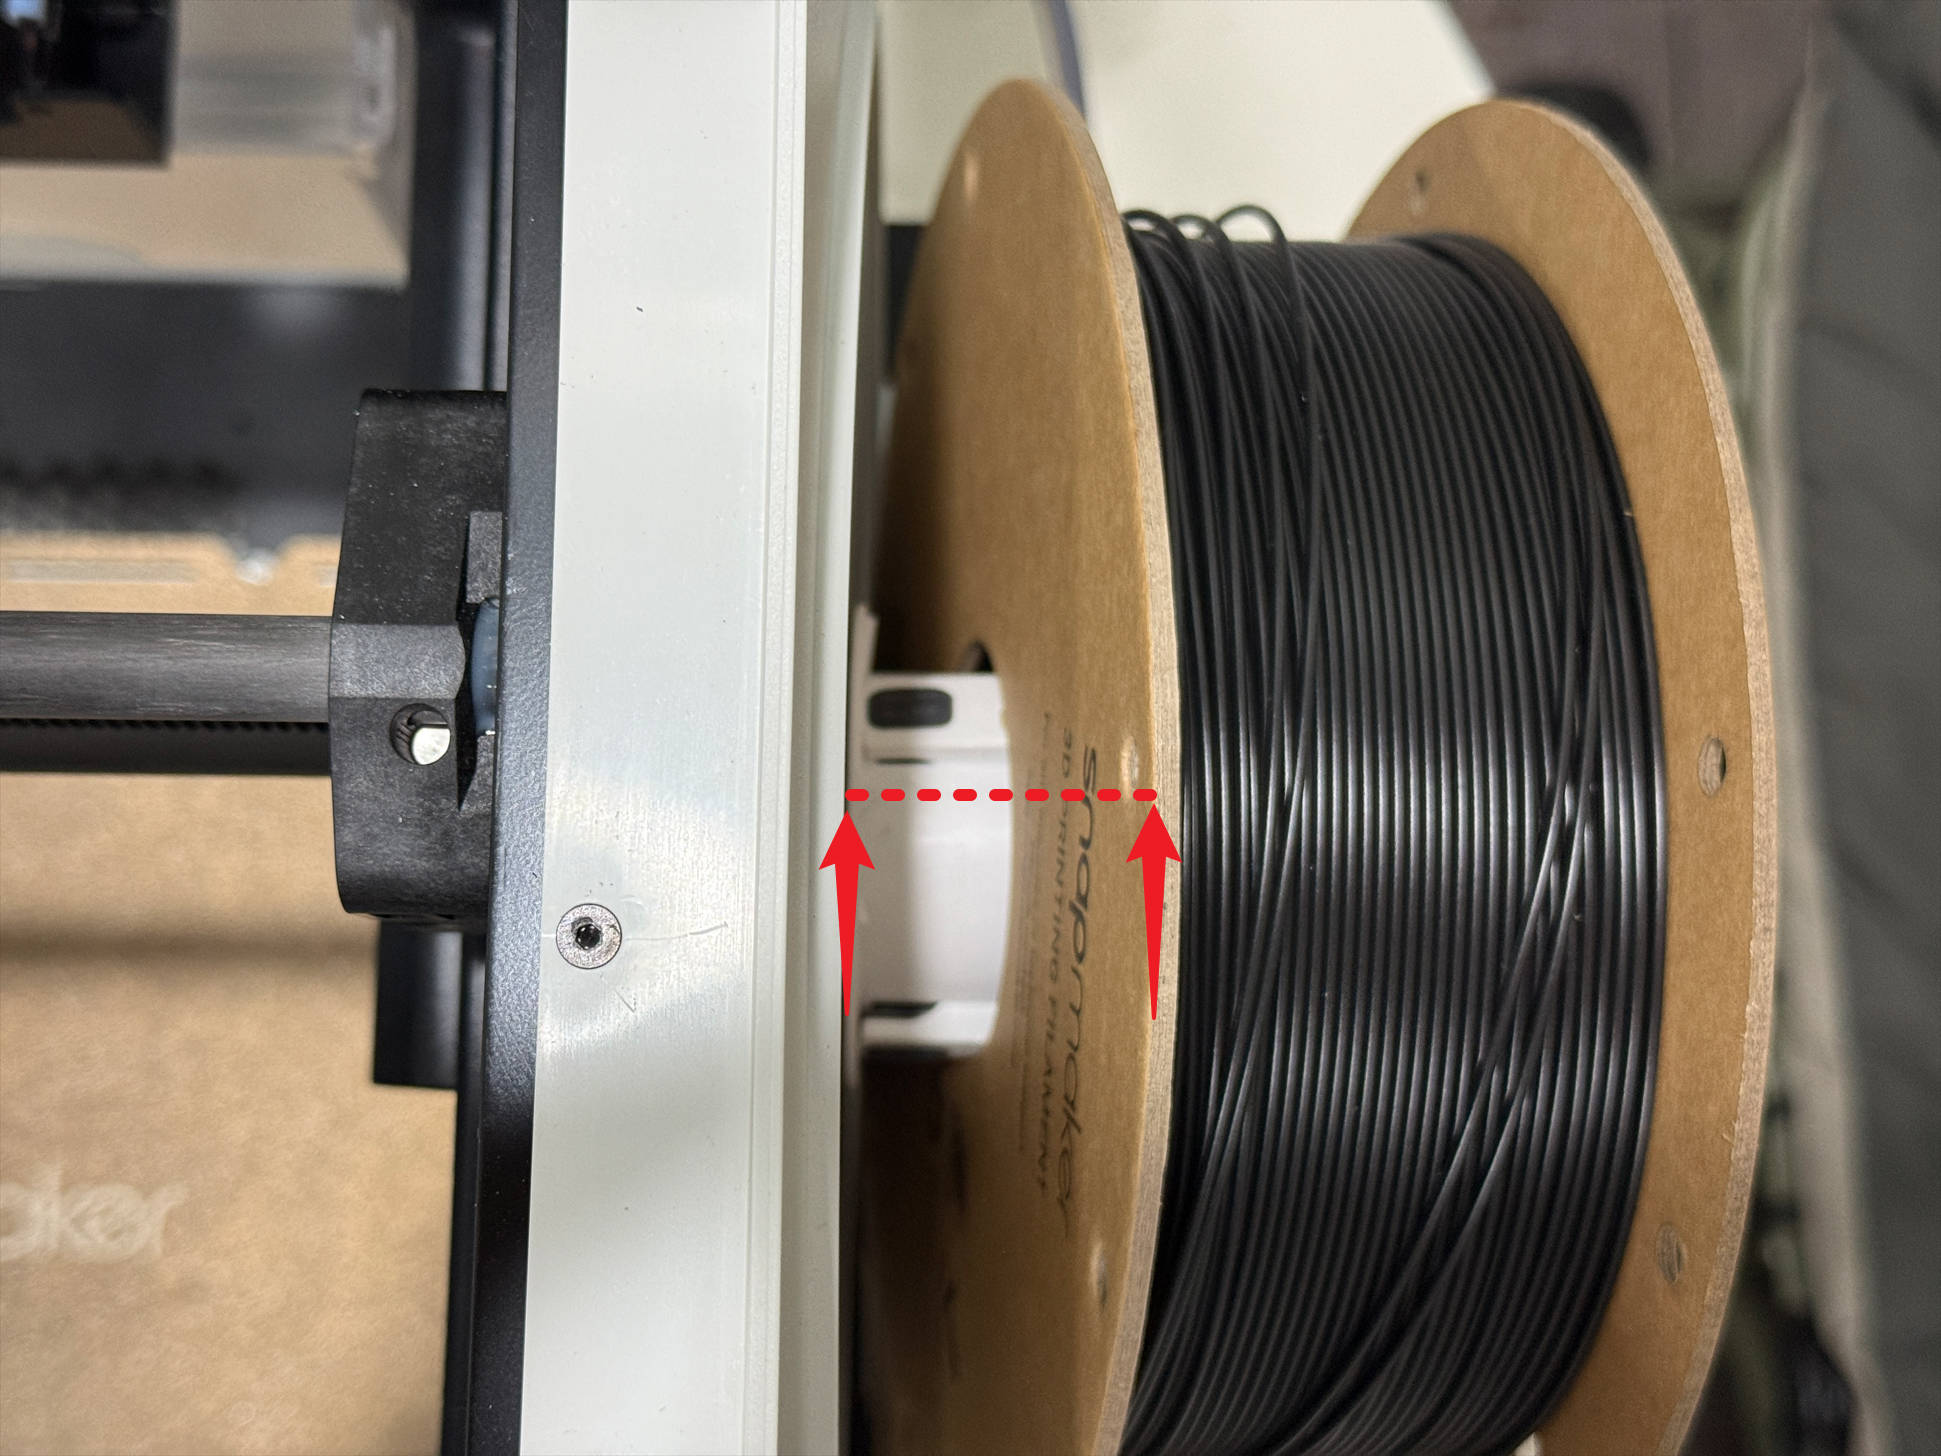
(1) Check if the distance between the spool and the side panel is too large; normally, it should be less than 10 mm.
(2) If you have other filaments purchased from our official store that are successfully recognized by U1, install them on the spool holder with the problematic filament info.
(3) If the new filament is recognized, it indicates the original filament’s RFID was not programmed. You can manually set its type and color. If it still cannot be recognized, continue with the troubleshooting steps below.
¶ 2.2 Filament of spool 1 or 2 not detected after loading
(1) Power off U1 and unplug it.
(2) Lower the heated bed to its limit.
(3) Remove filament holders 1 and 2, including spools.
(4) Remove the left filament feeder as follows:
(5) Remove the 8 screws with H2.0 hex key, then disconnect the 4 toolhead cables.
(6) Remove the 4 silicone plugs and screws beneath them at the corners of the top cover panel with H2.0 hex key.
(7) Lift the top cover panel and use an H2.0 hex key to remove the 8 screws of the left plastic panel.
(8) Route the filament feeder cable through point-3, check whether coils 1 and 2 are properly secured with tape, and whether the 2 cables at point-4 are loose.
¶ 2.3 Filament of spool 3 or 4 not detected after loading
(1) Power off U1 and unplug it.
(2) Lower the heated bed to its limit.
(3) Remove filament holders 3 and 4, including spools.
(4) Remove the right filament feeder as follows:
(5) Remove the 8 screws with H2.0 hex key, then disconnect the 4 toolhead cables.
(6) Remove the 4 silicone plugs and screws beneath them at the corners of the top cover panel.
(7) Lift the top cover panel and use an H2.0 hex key to remove the 8 screws of the right plastic panel.
(8) Route the filament feeder cable through point-5, check whether coils 3 and 4 are properly secured with tape, and whether the 2 cables at point-6 are loose.
¶ Reach out to Snapmaker Support
After following the troubleshooting steps, if you find it difficult to resolve your issue, kindly submit a support ticket through https://snapmaker.formcrafts.com/u1-troubleshooting-request and share your troubleshooting results with some pictures/videos.
Our dedicated support team will be more than willing to assist you in resolving the issue.