¶ 💡 Compatibility
This guide applies to the following machine. Please note when referencing:
- Machine model: U1
¶ ⏰ When to Use This Guide
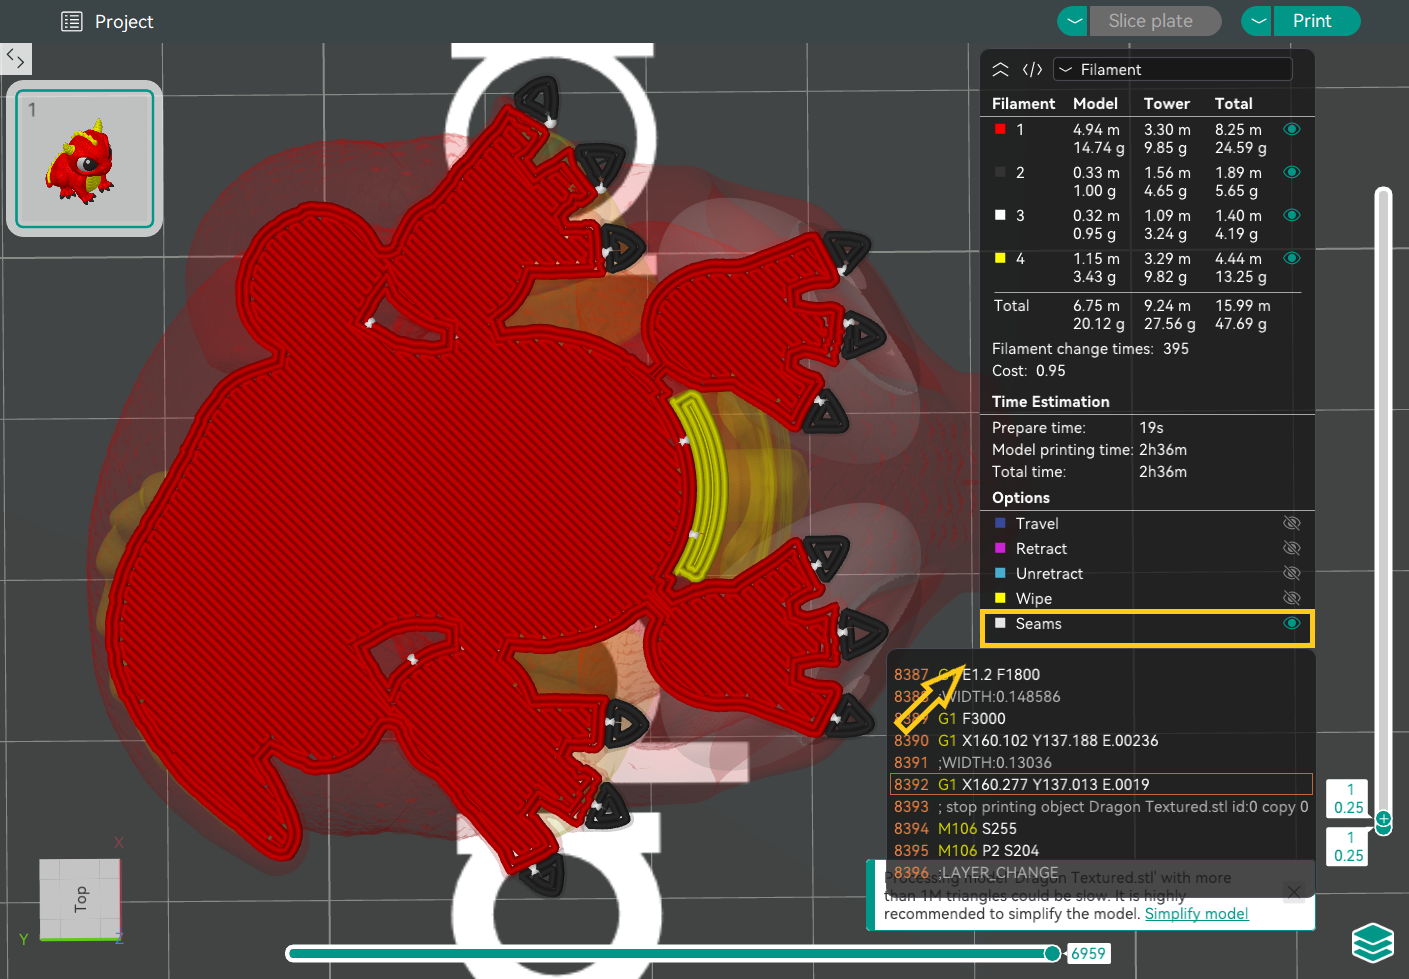
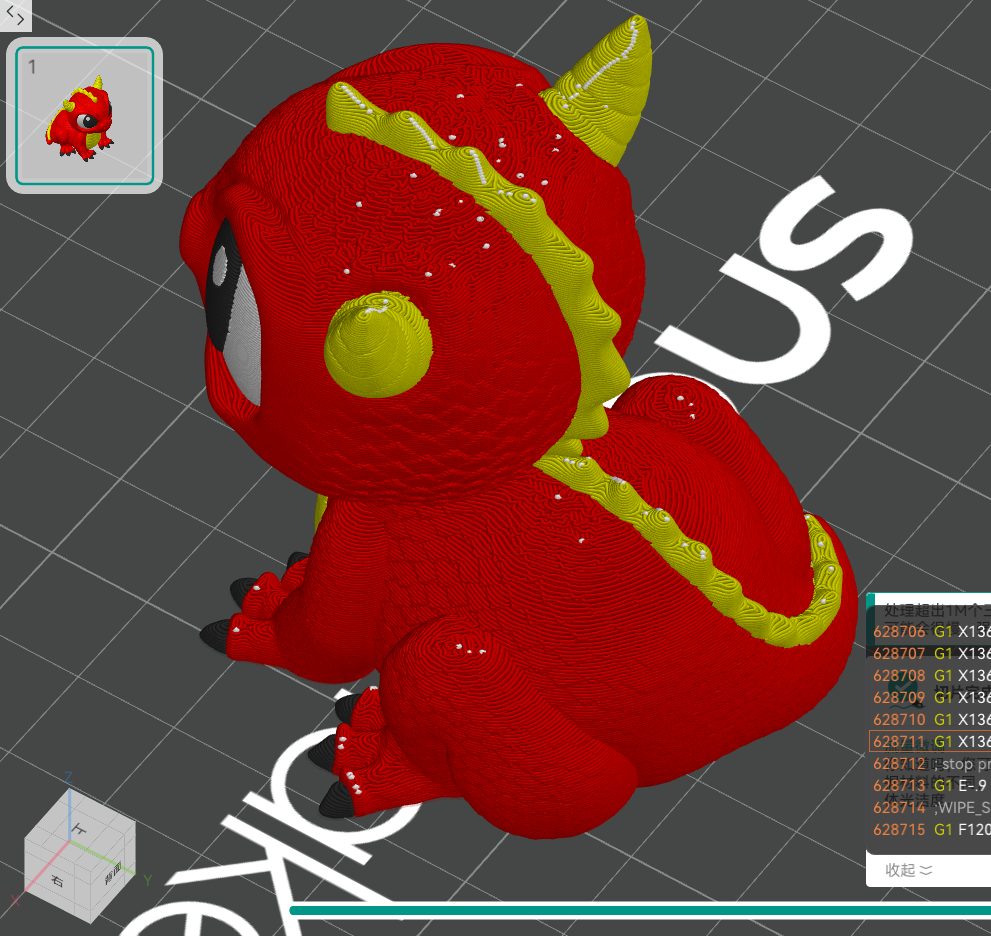
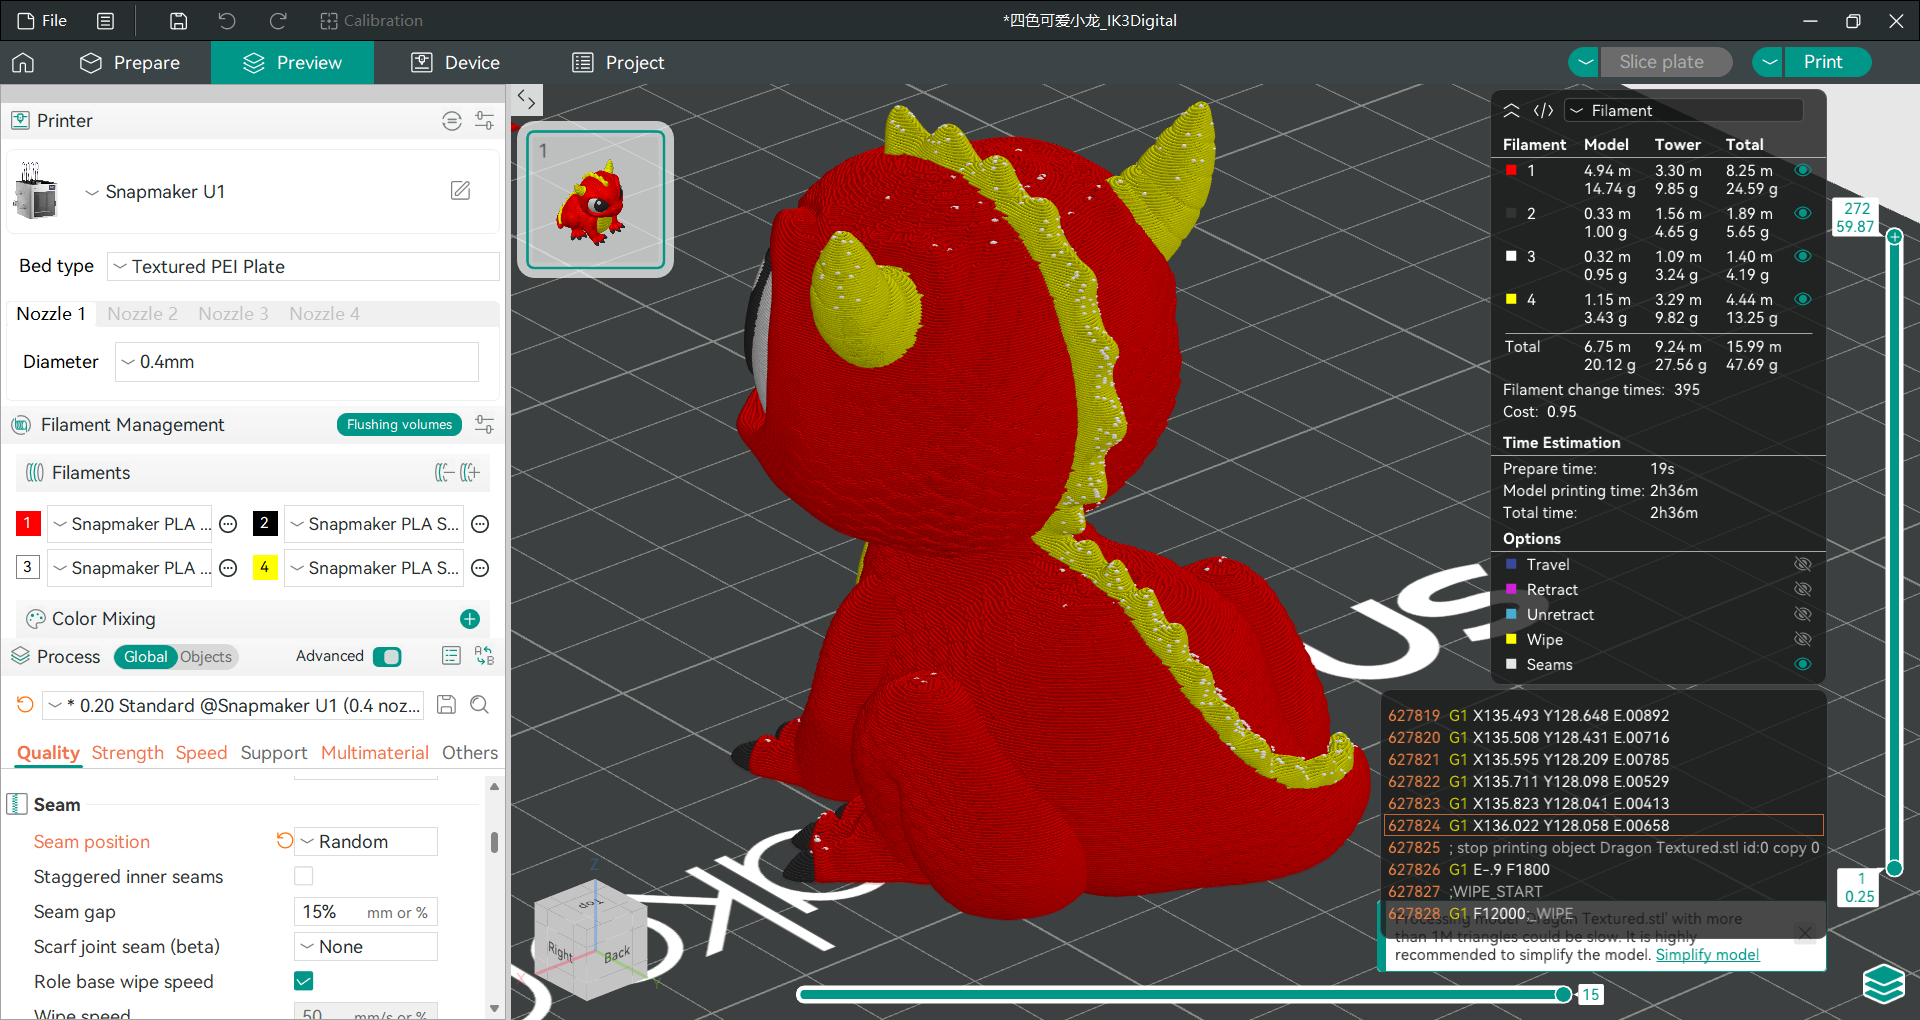
In FDM 3D printing, every layer needs to begin somewhere and end somewhere (unless printed in spiral vase mode). The junction of the start and end points of the extrusion forms a visible seam on the model's surface (the white dots in the image below indicate the seam location for that layer). This is an inherent and unavoidable phenomenon in the FDM process.
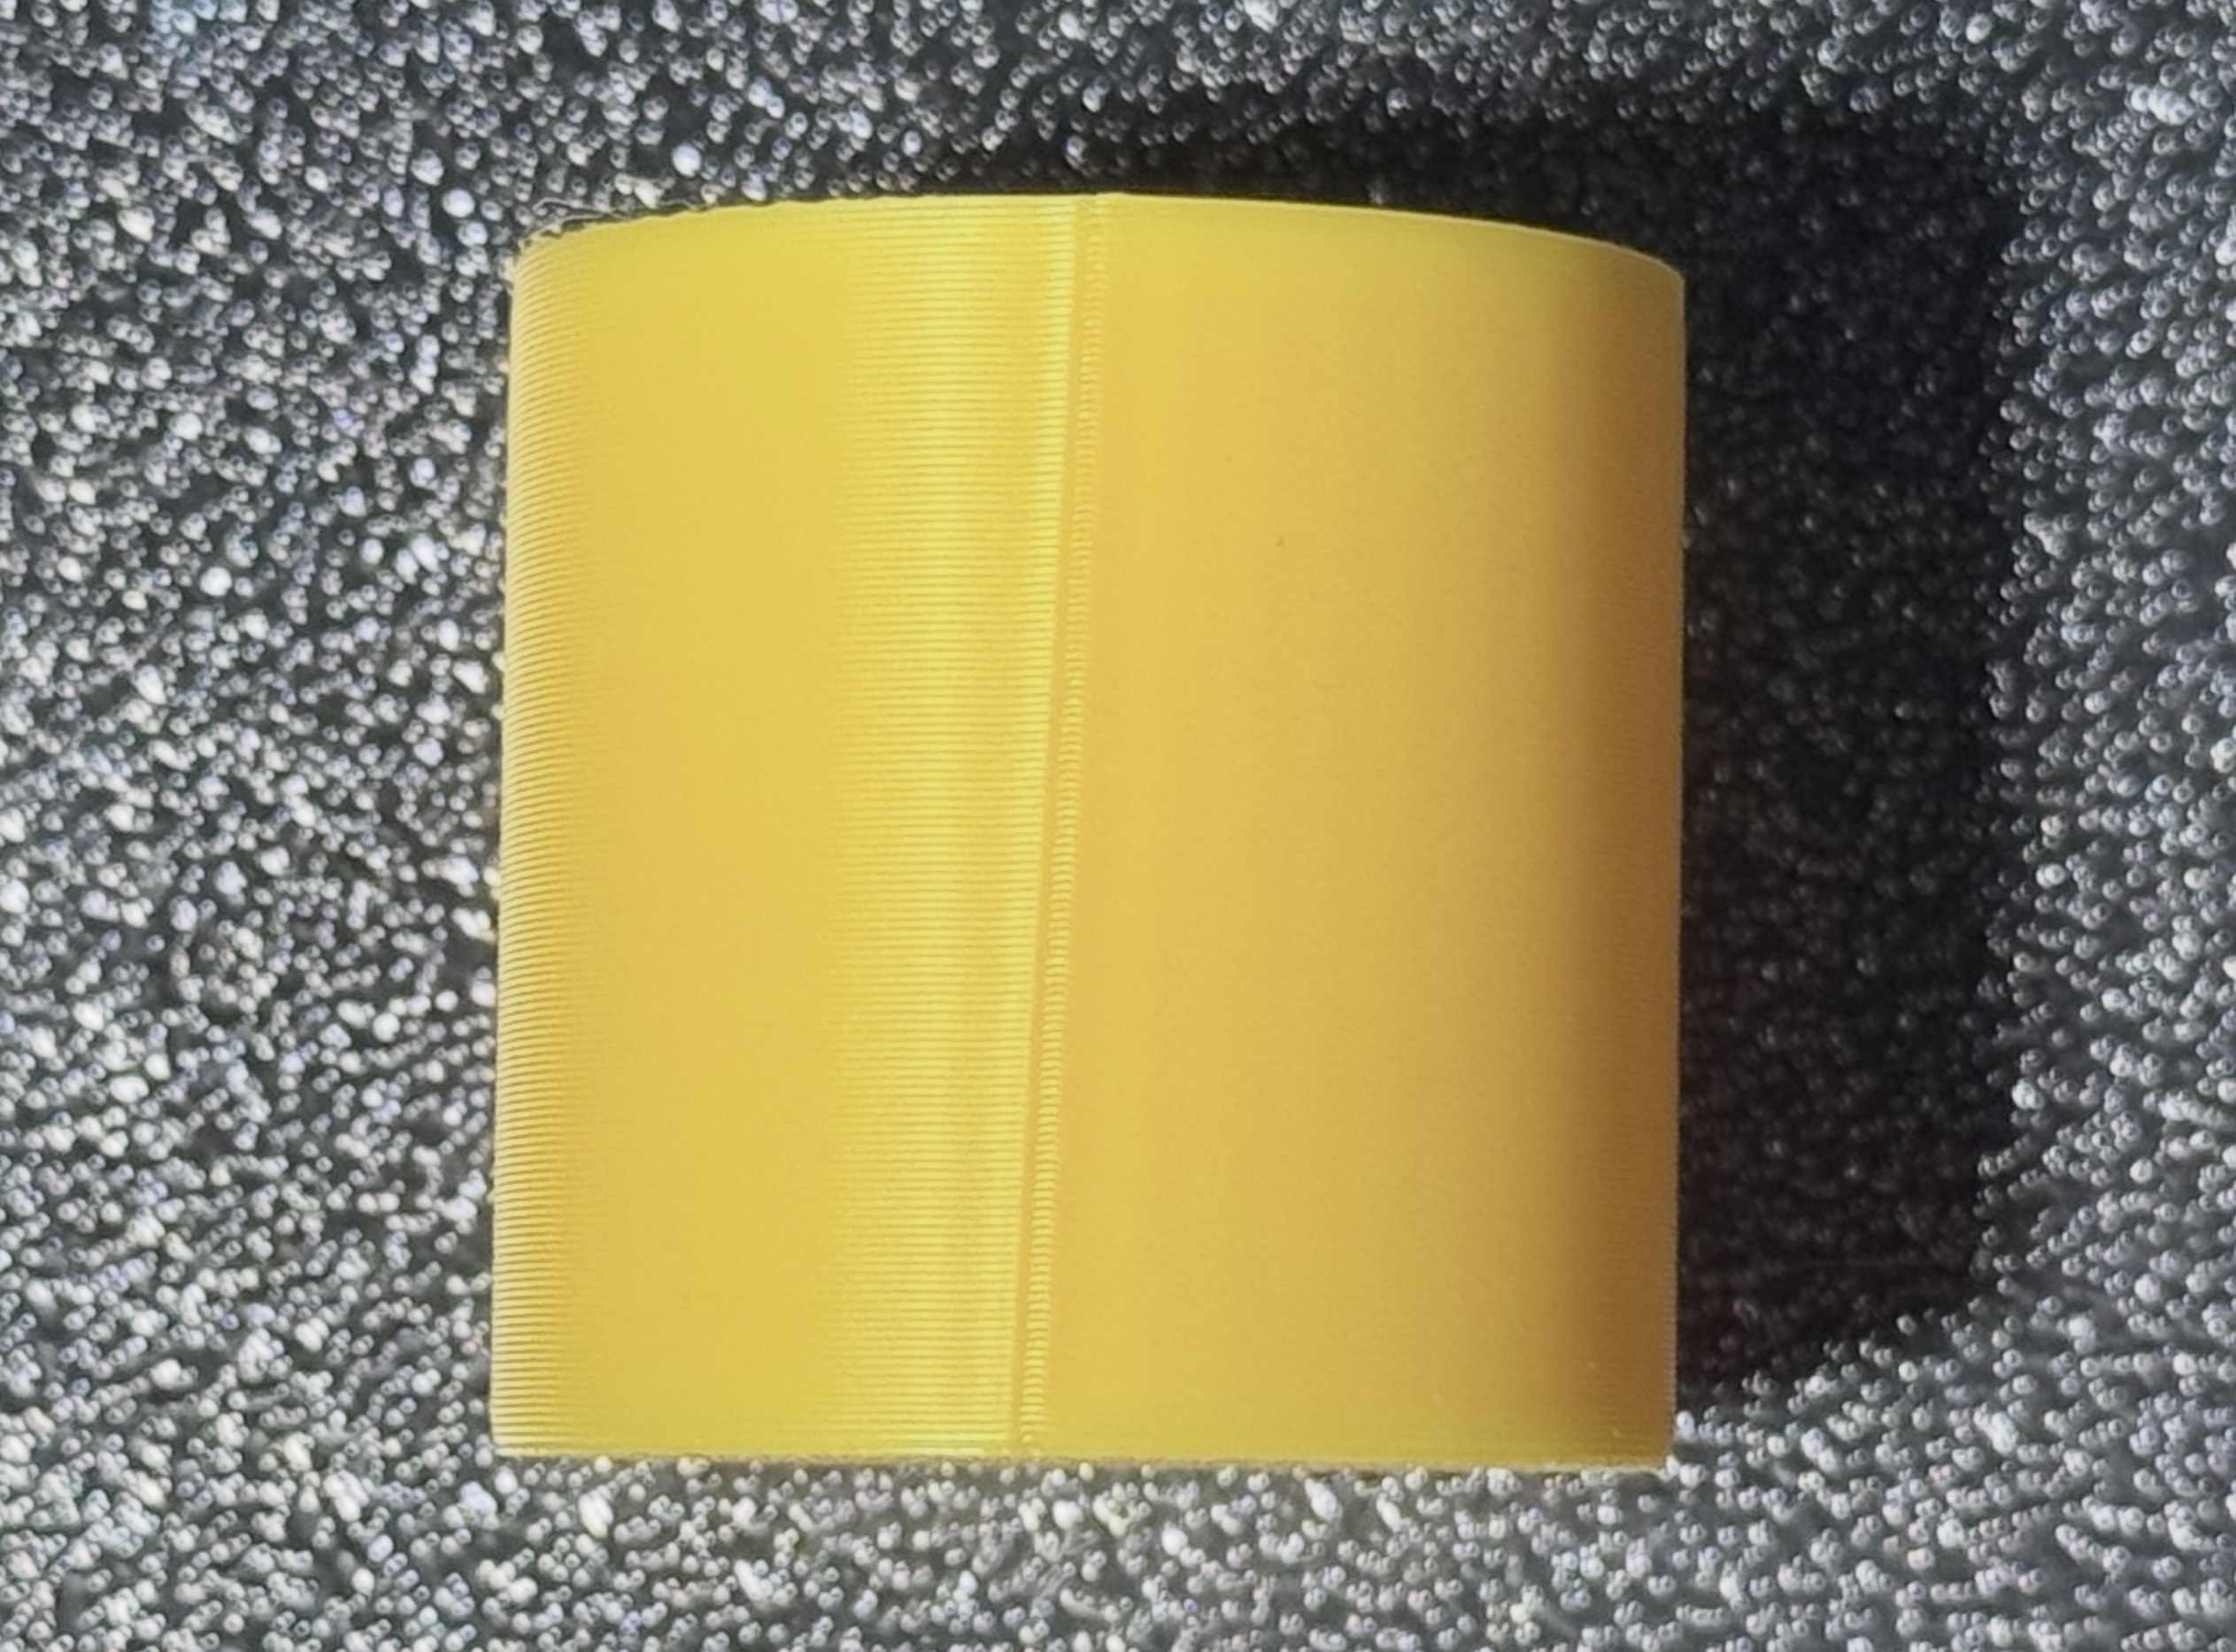
The prominence of the seam largely depends on the geometric features of the model's surface. Seams can be better hidden on surfaces with concave or convex vertices and sharp corners, while they tend to be more visible on curved surfaces like cylinders that lack sharp transitions. Slicing software offers various seam control strategies to help users balance aesthetics and part strength.
¶ 📋 Quick Info Card
- Difficulty: ⭐⭐☆☆☆
- Estimated Time: 10-20 minutes
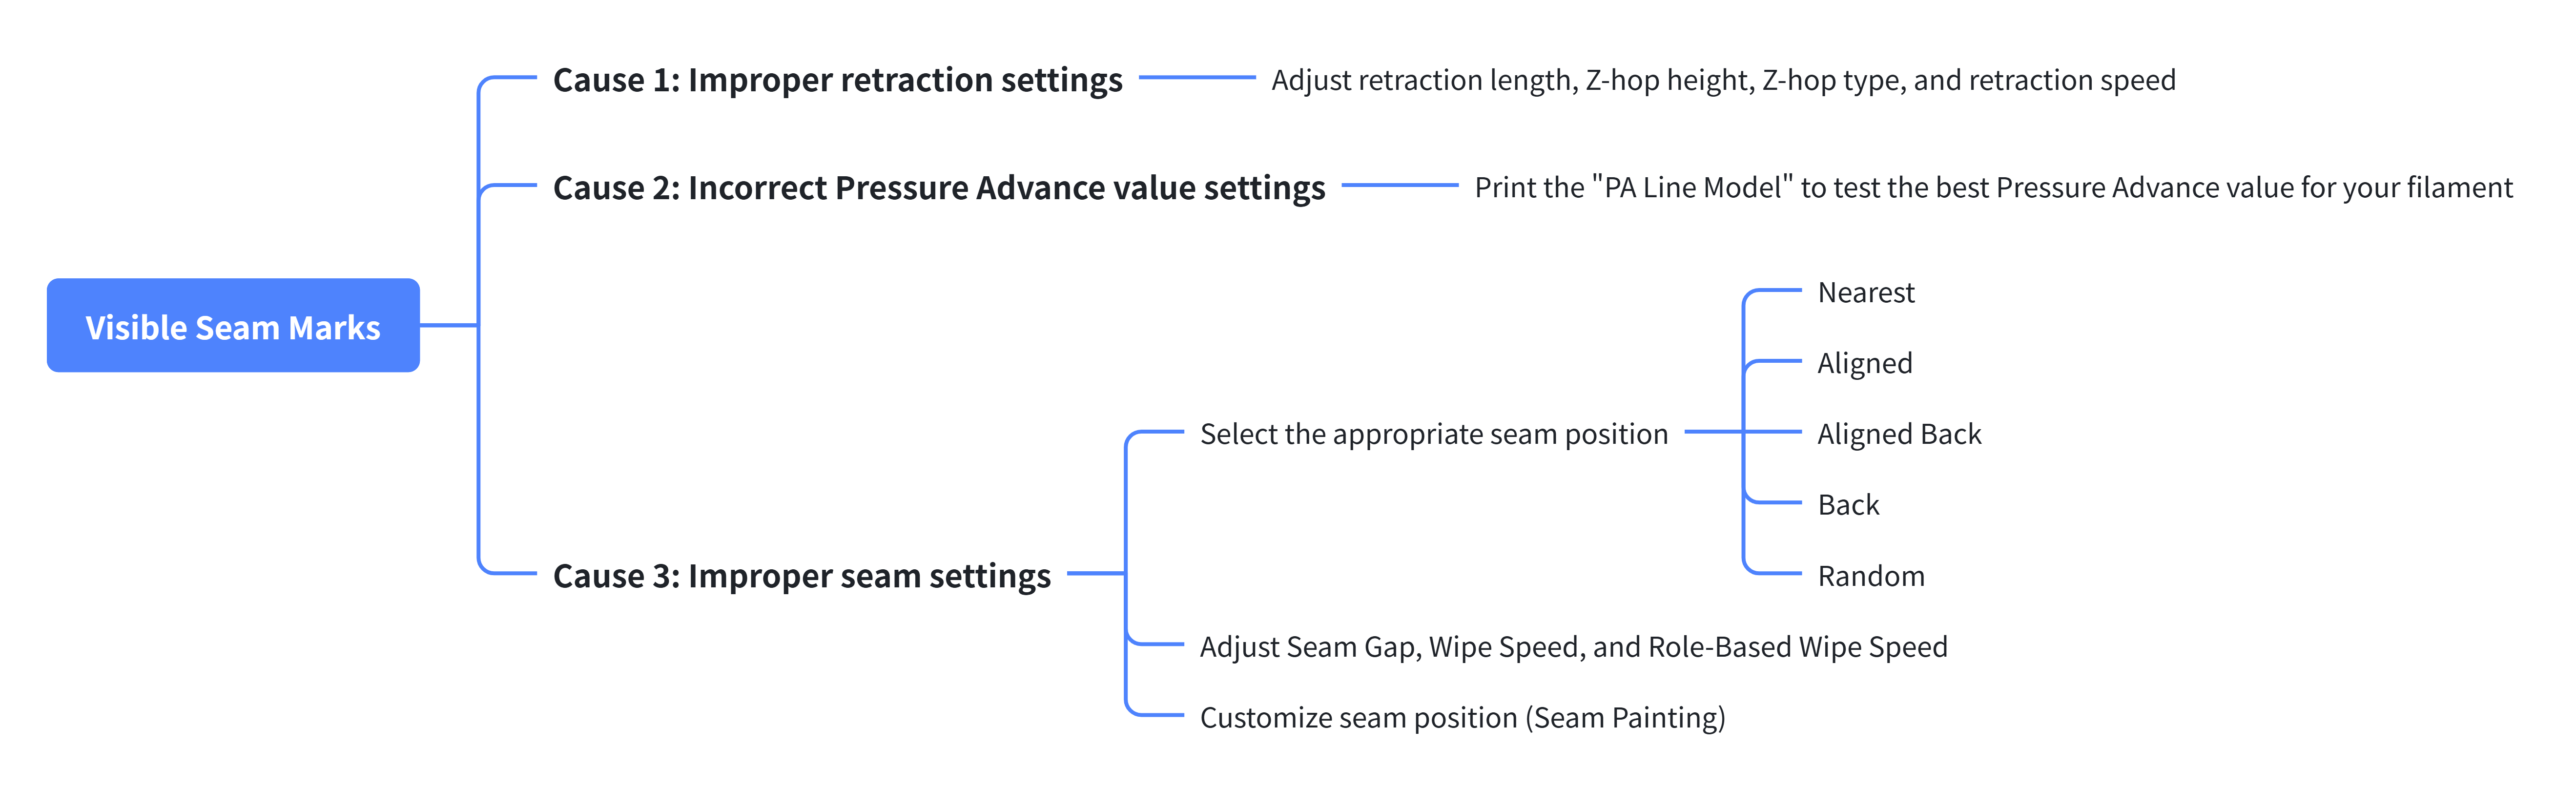
¶ 🔁 Troubleshooting Flowchart
¶ 🛠️ Troubleshooting Steps
¶ Cause 1: Improper Retraction Settings
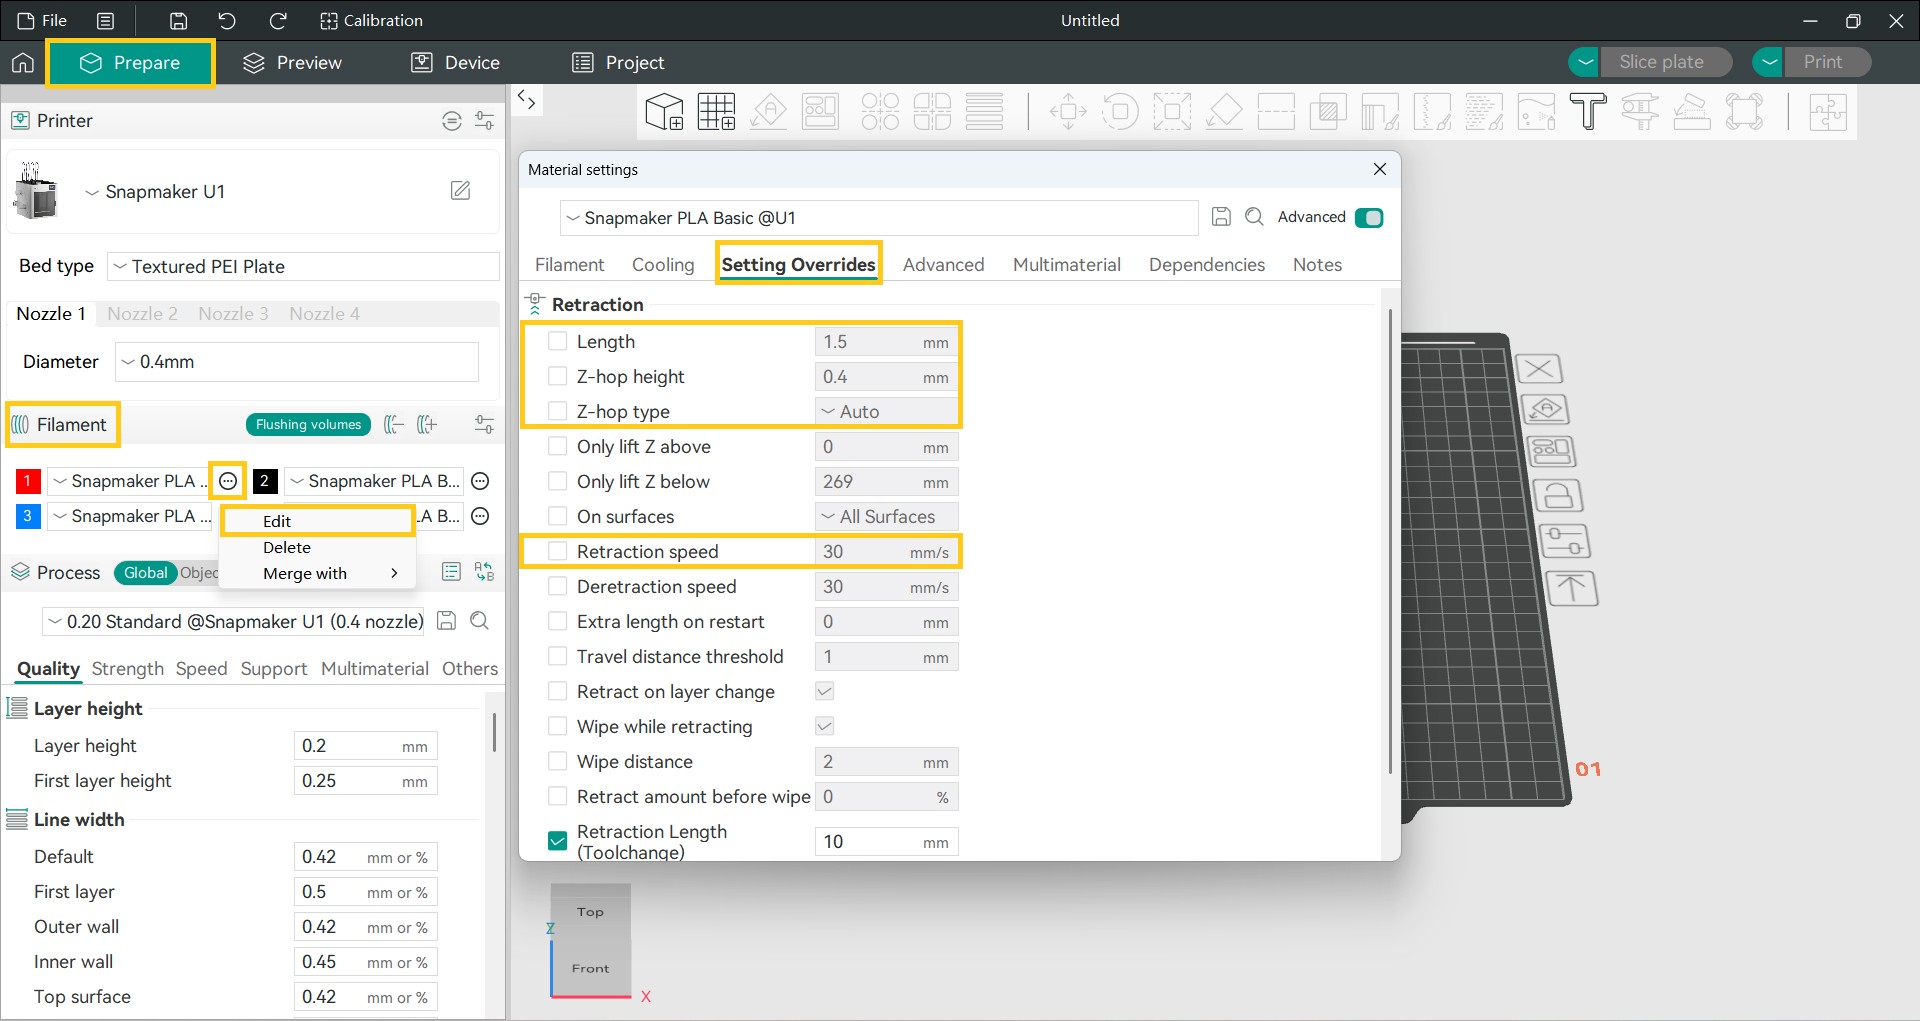
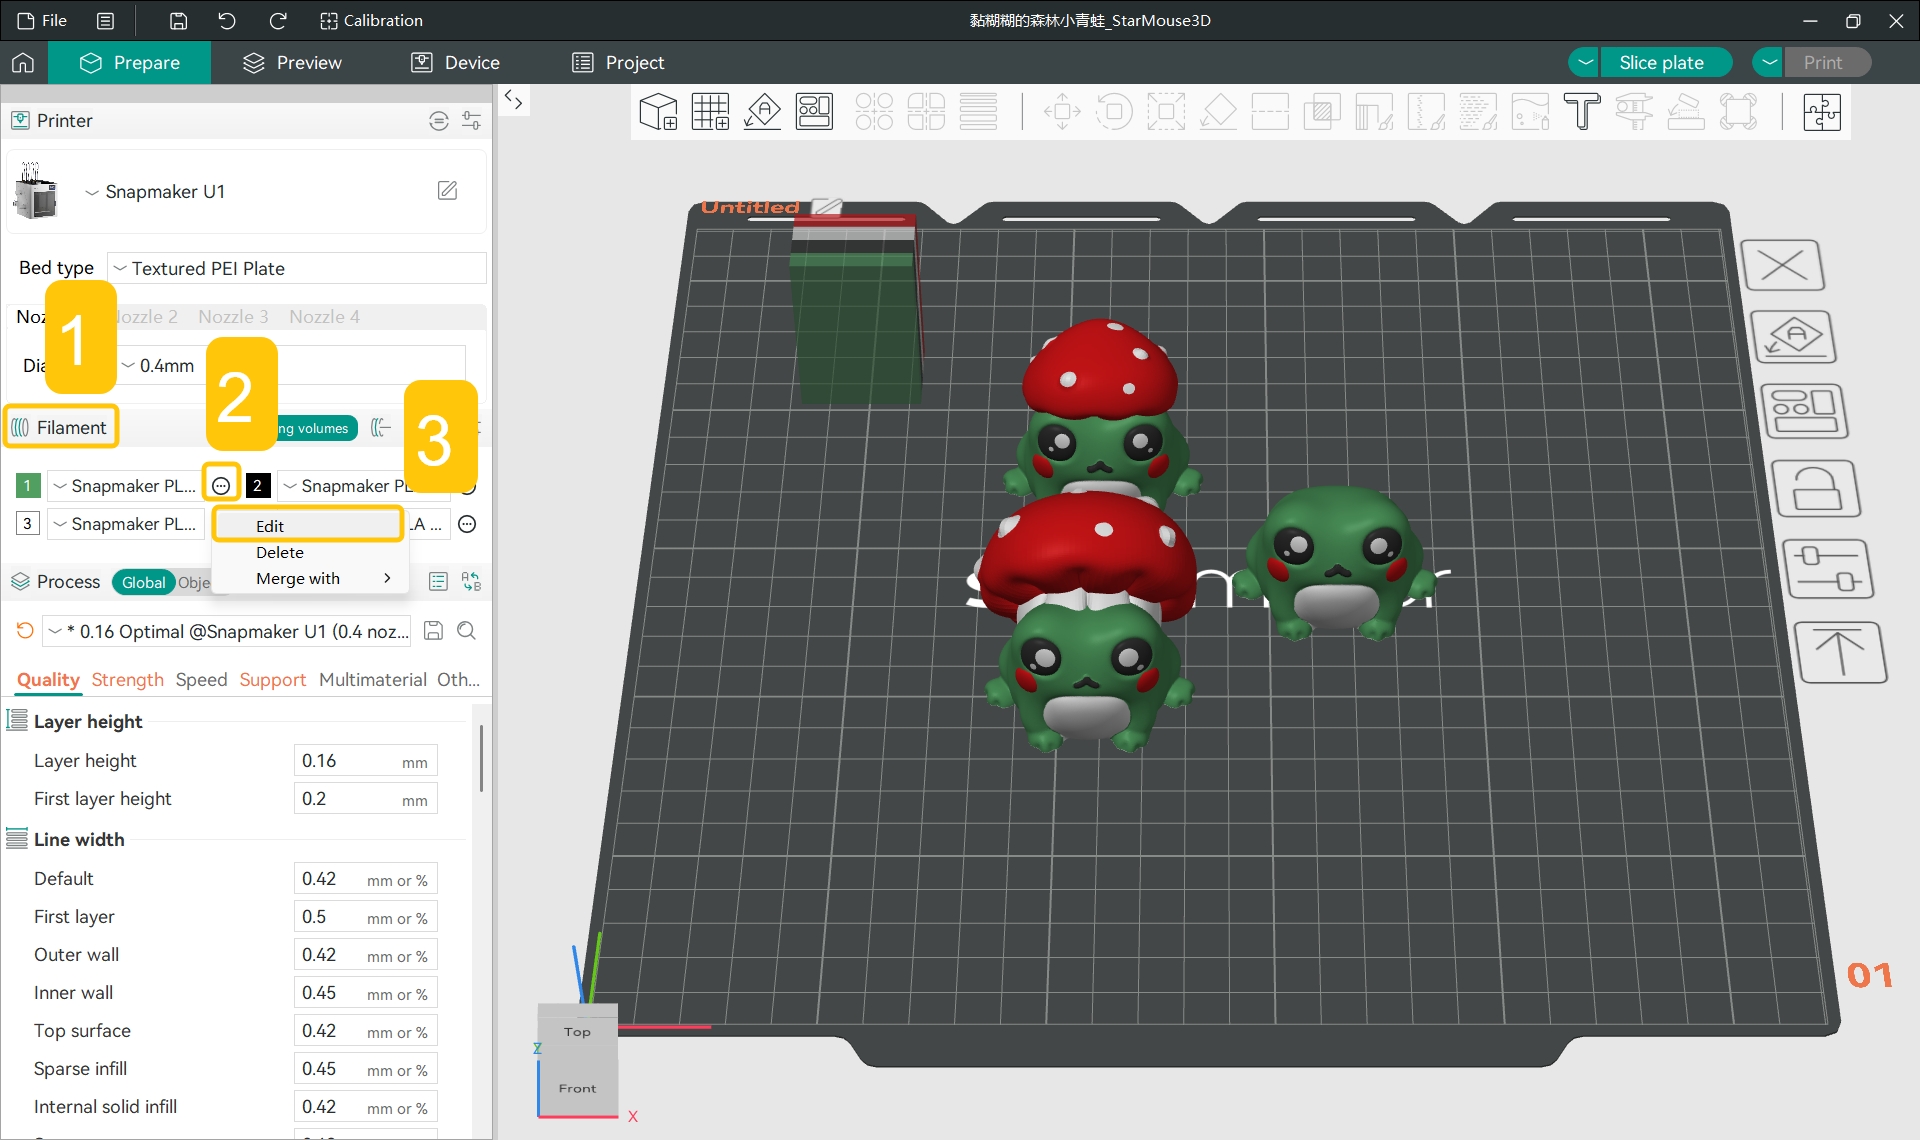
Switch to the Prepare tab > In the Filament section of the left side list, click the ... > Edit next to the specific filament > In the pop-up window, find Setting Overrides > Adjust retraction length, Z-hop height, Z-hop type, and retraction speed.
¶ Cause 2: Incorrect Pressure Advance Value Setting
Pressure advance means that the printer pre-emptively adjusts the extrusion pressure as needed to achieve better print results.
This is often related to the actual moving speed of the nozzle. When the nozzle is about to decelerate, the extrusion pressure should usually be reduced to avoid filament accumulation; when the nozzle is about to accelerate, the extrusion pressure should usually be increased to avoid insufficient extrusion.
¶ 1. Print the "PA Line Model" to Test the Best Pressure Advance Value for Your Filament
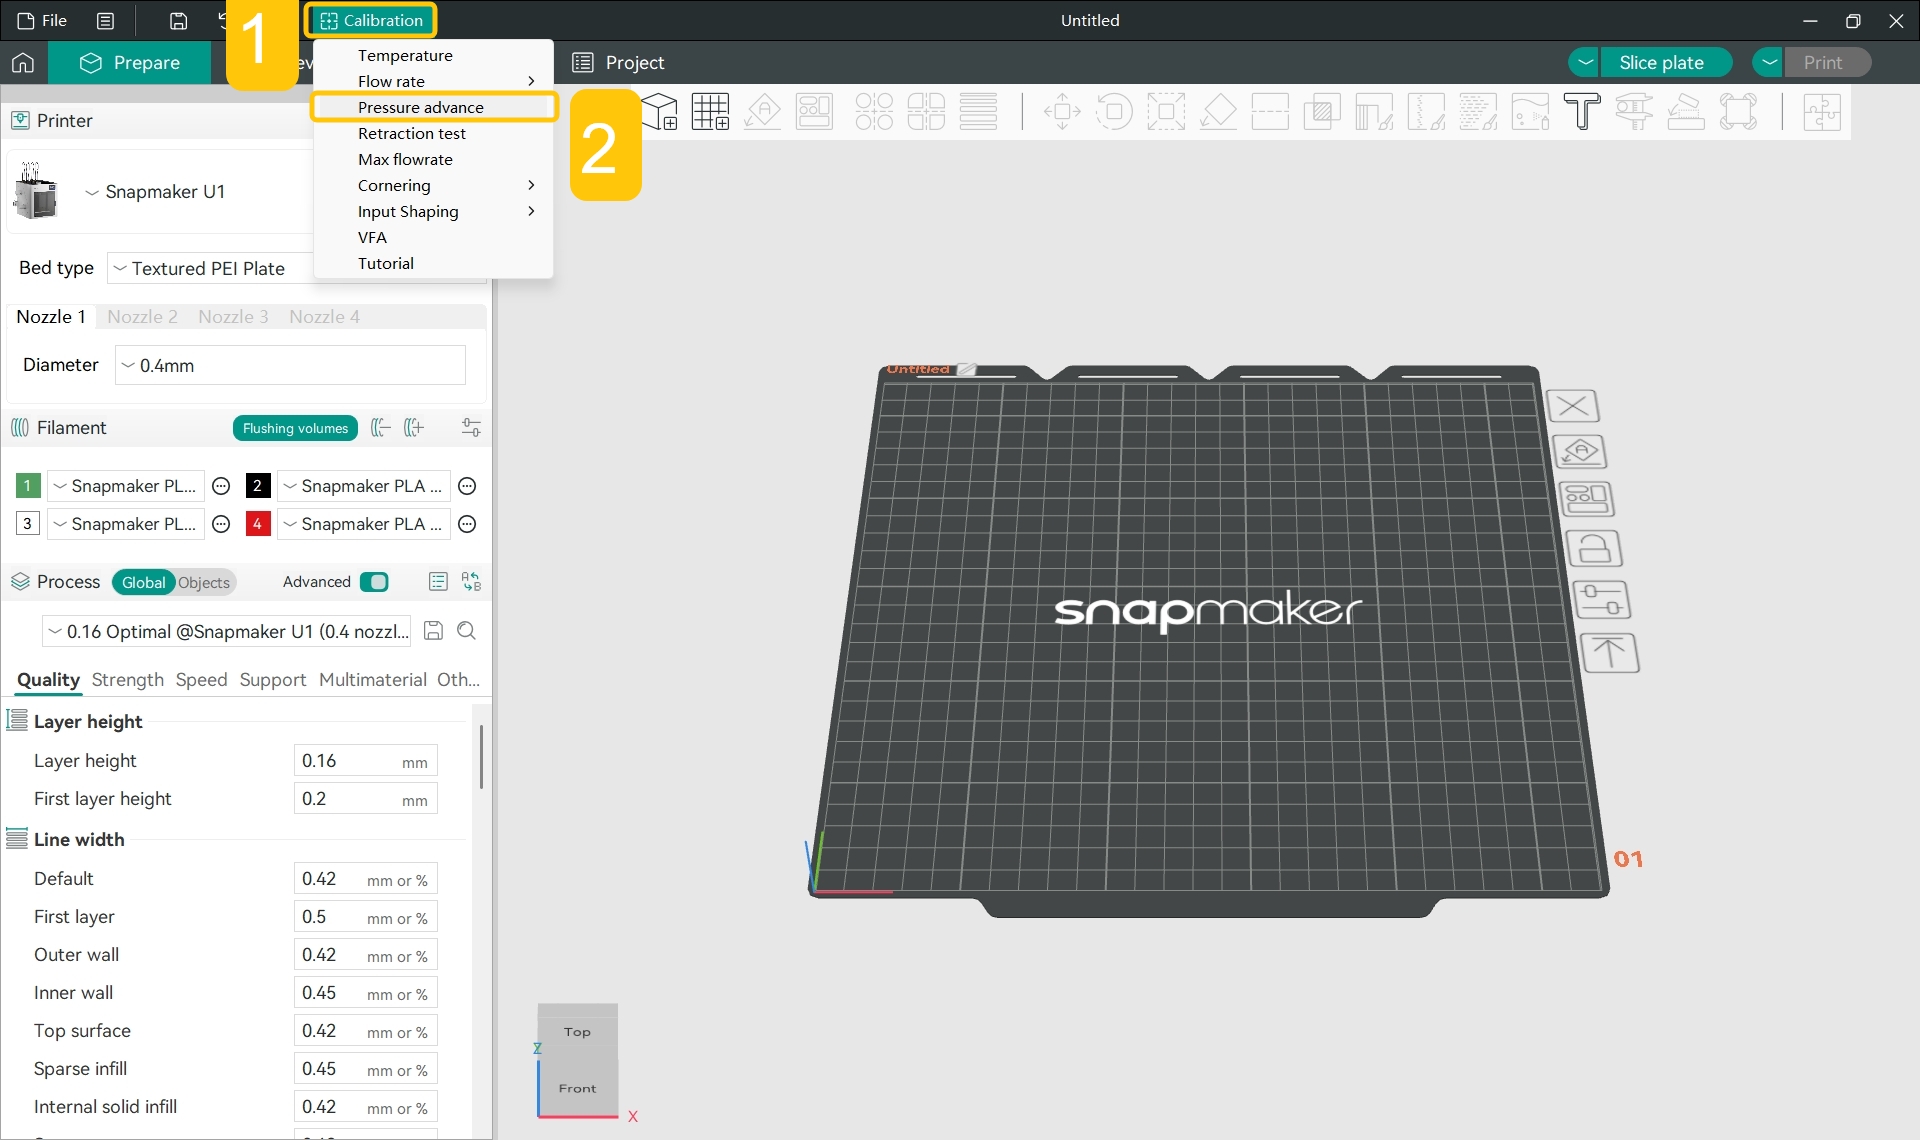
- In the top menu bar, click
Calibration>Pressure Advance.
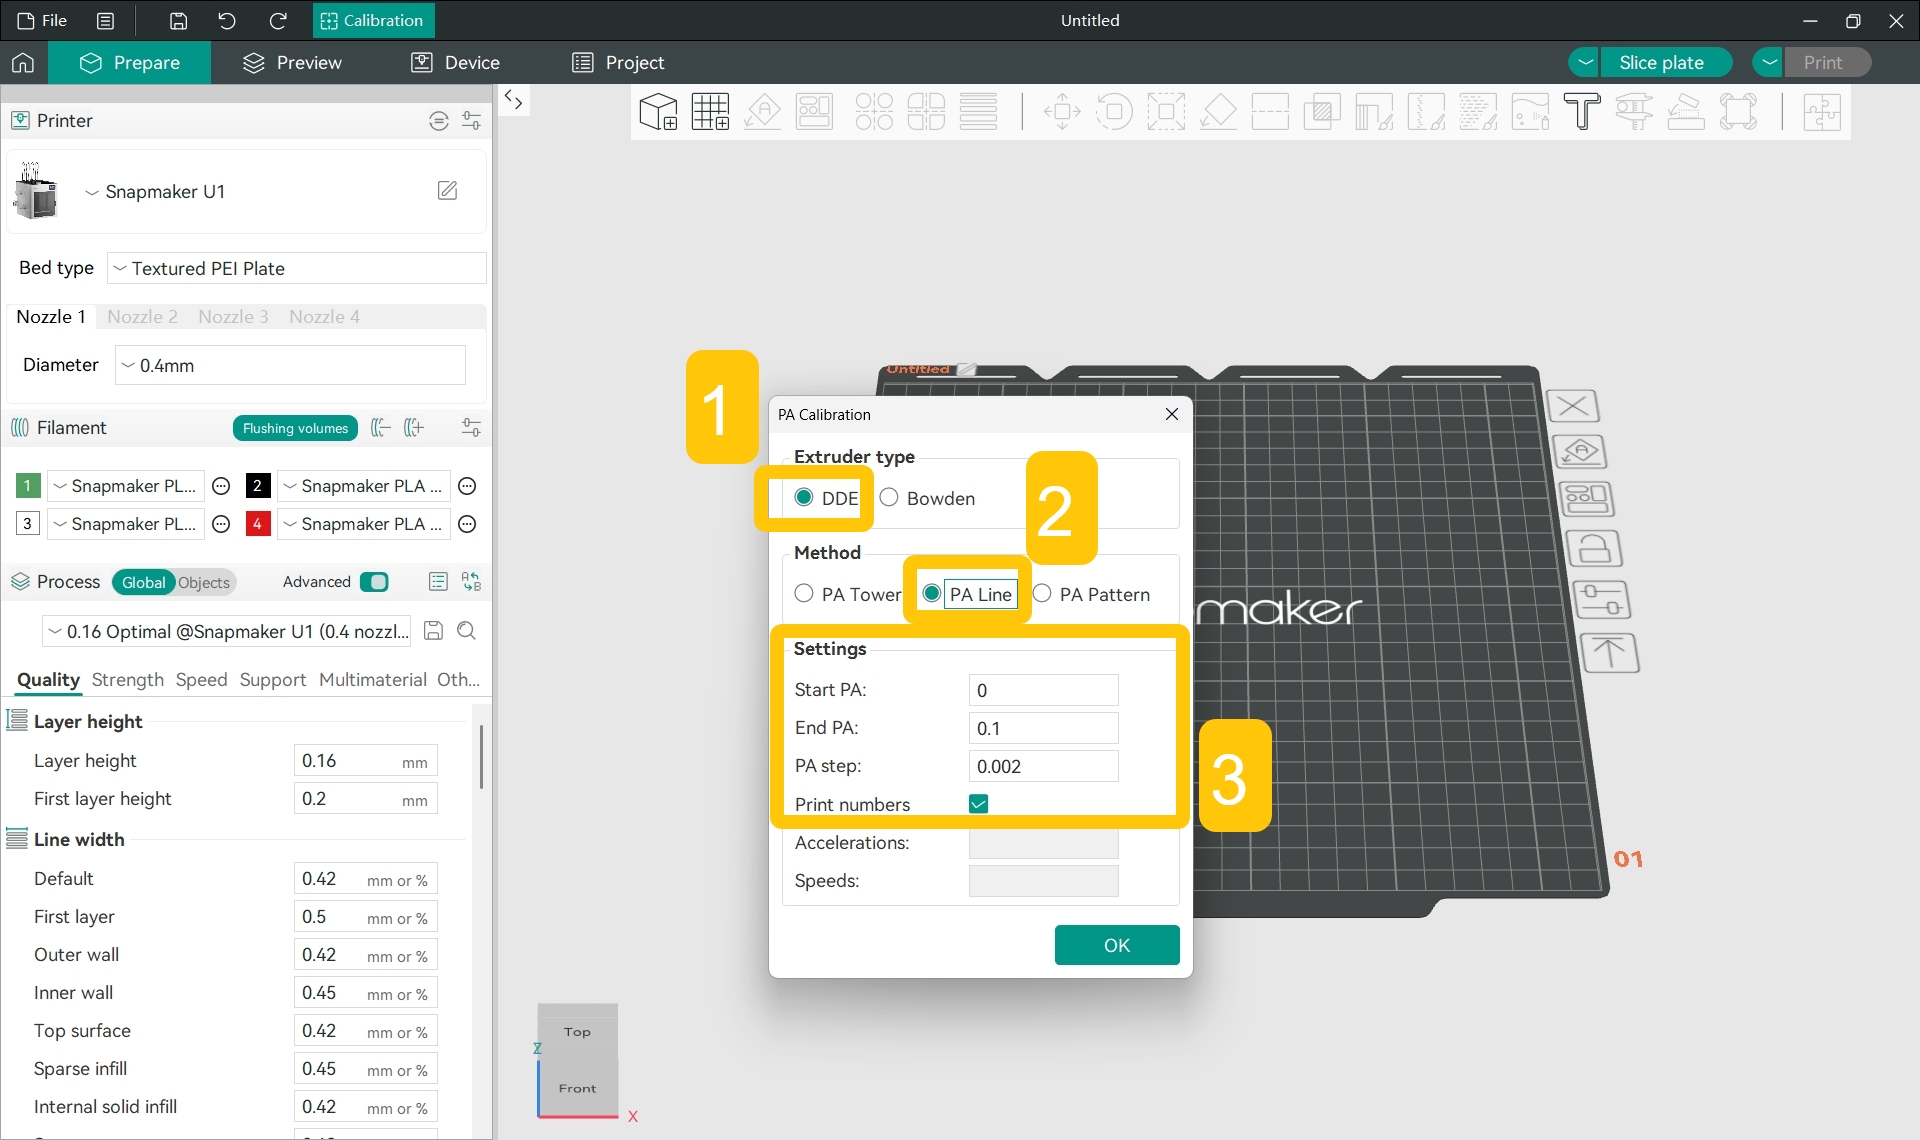
- In the pop-up window, set up the pressure advance test:
- Select DDE (Direct Drive Extruder);
- Select PA Line mode;
- Set start PA, end PA, and PA step;
- Click
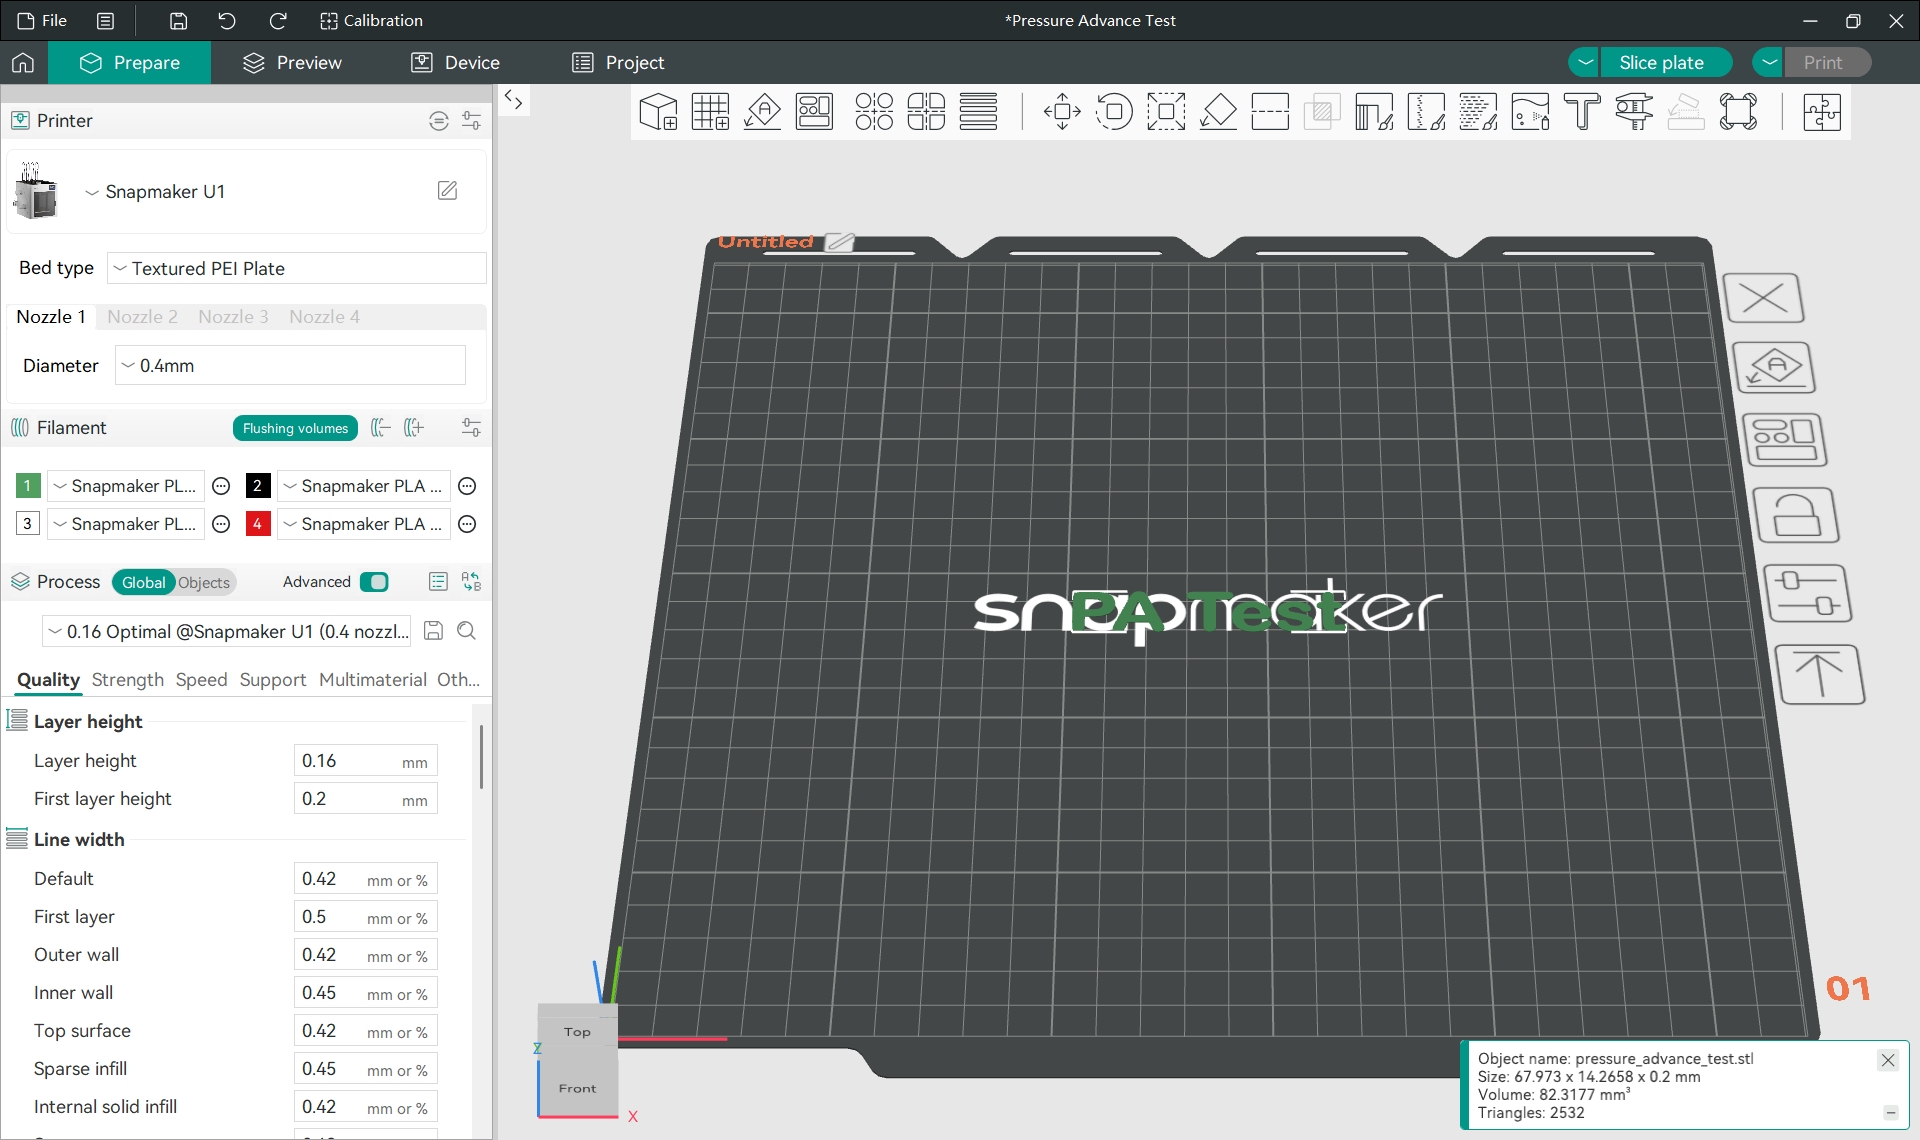
OK, and the software will generate the "PA Test" text.
Snapmaker Orca has default start PA, end PA, and PA step values for PA Line mode, and you can directly use the software's preset values for testing and calibration.
Snapmaker U1 uses a direct drive extruder (DDE).
PA Test stands for Pressure Advance Test.
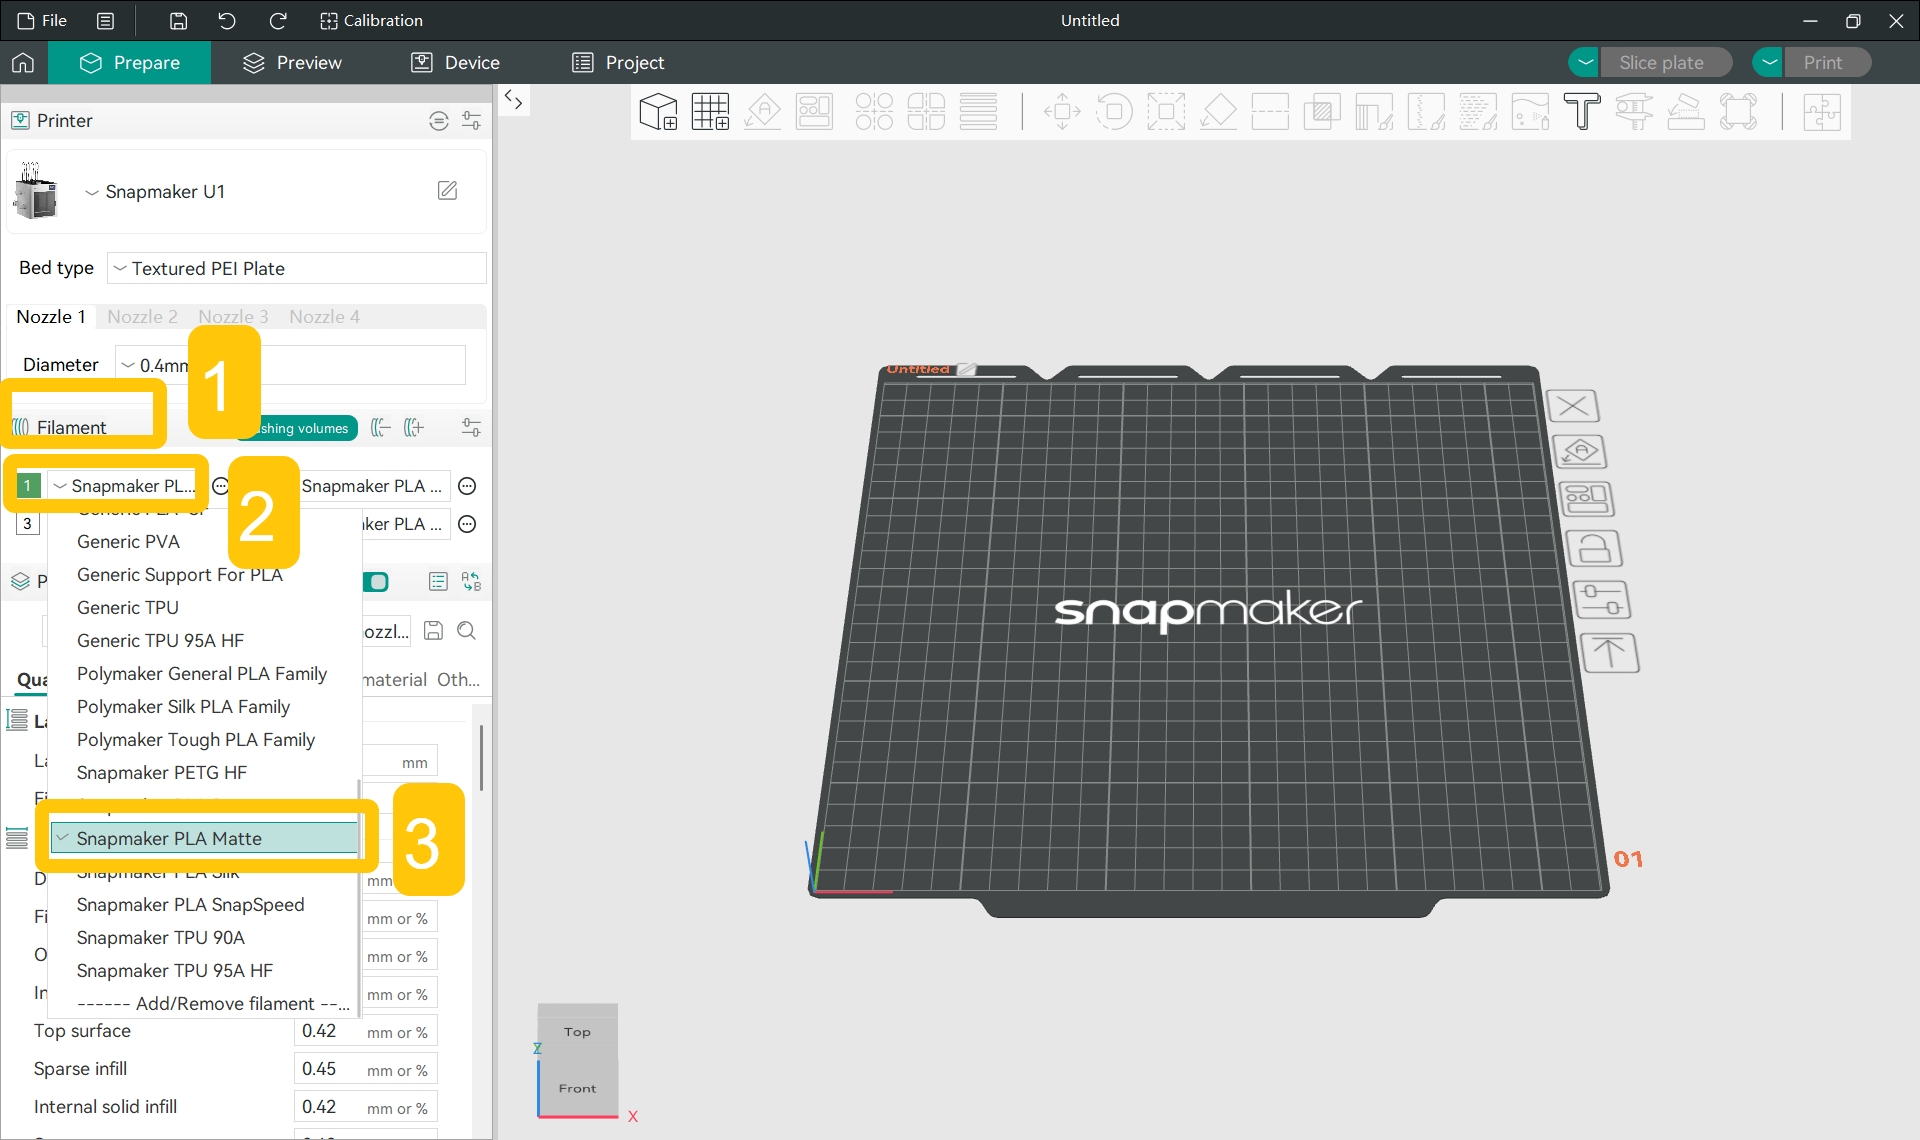
- In the
Filamentsection of the left sidebar, click the specific filament name and select the filament type you used for printing from the drop-down menu.
- In the
Filamentsection of the left sidebar, click the...>Editnext to the specific filament.
- In the pop-up window, find
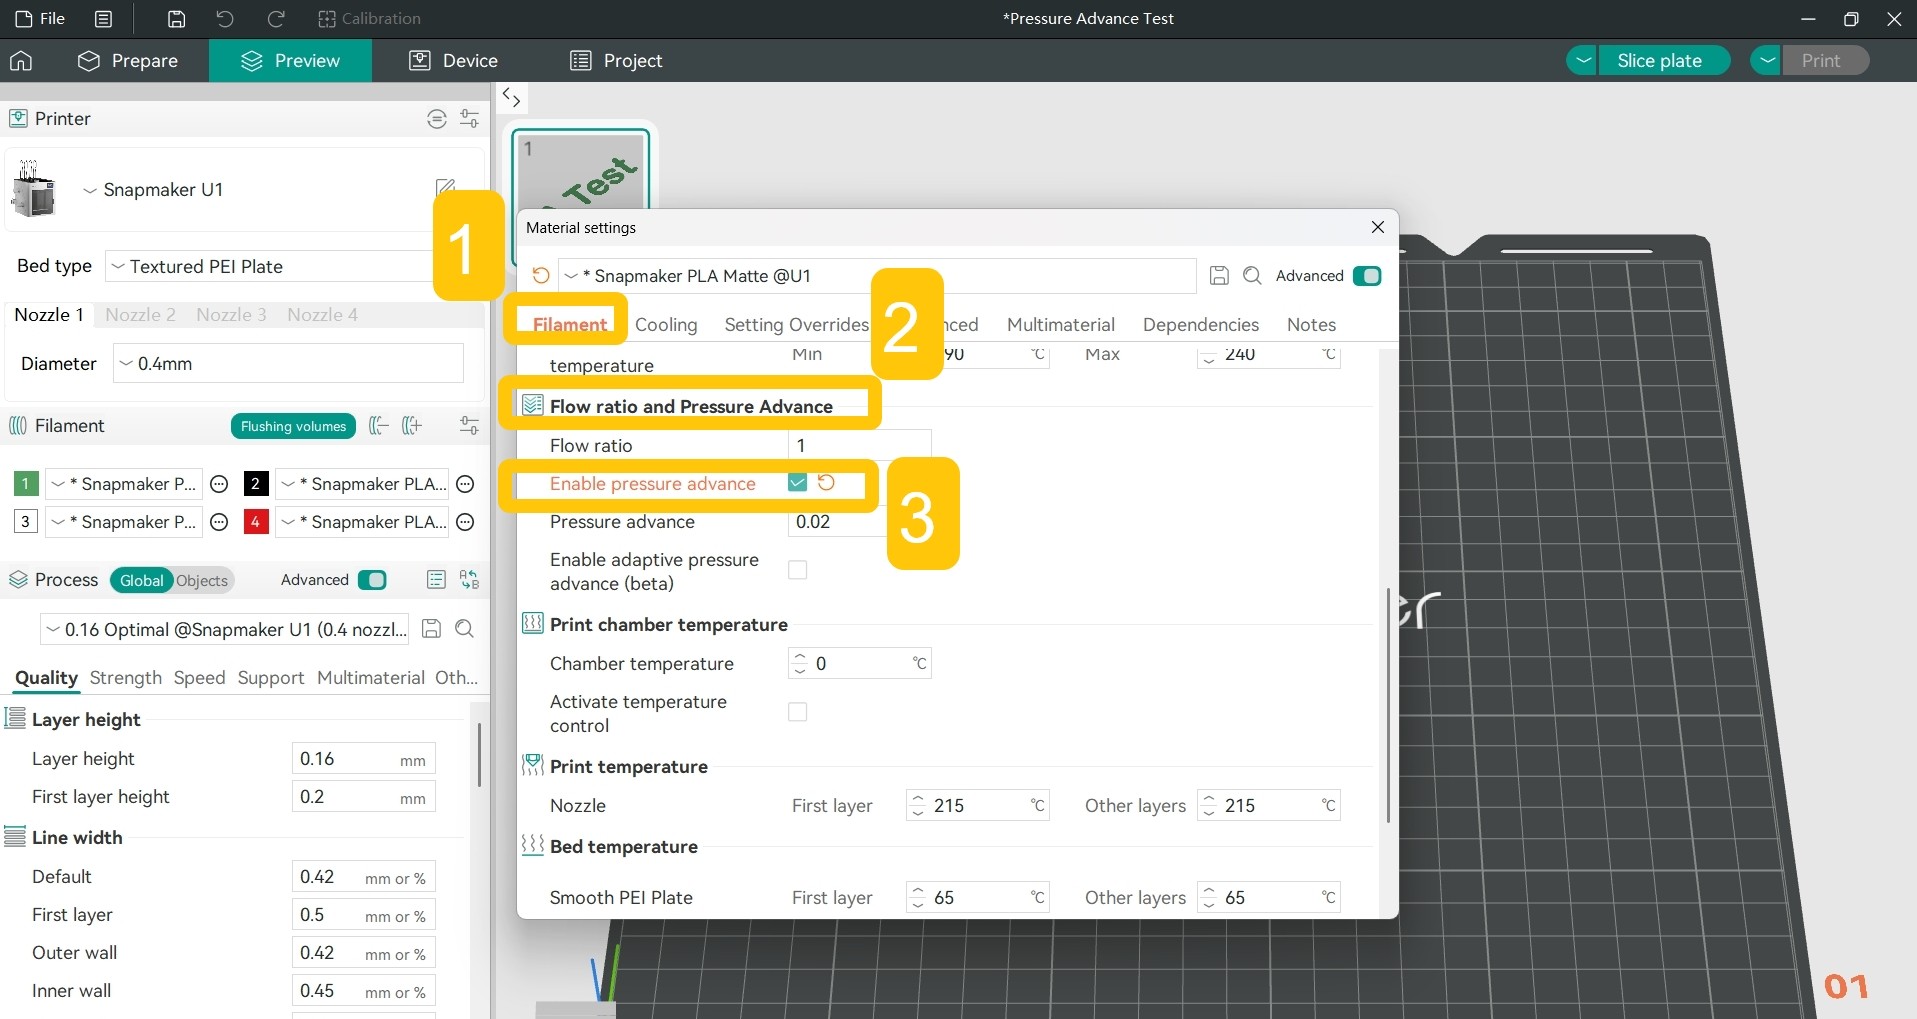
Filament>Flow ratio and Pressure Advance>Enable pressure advance.
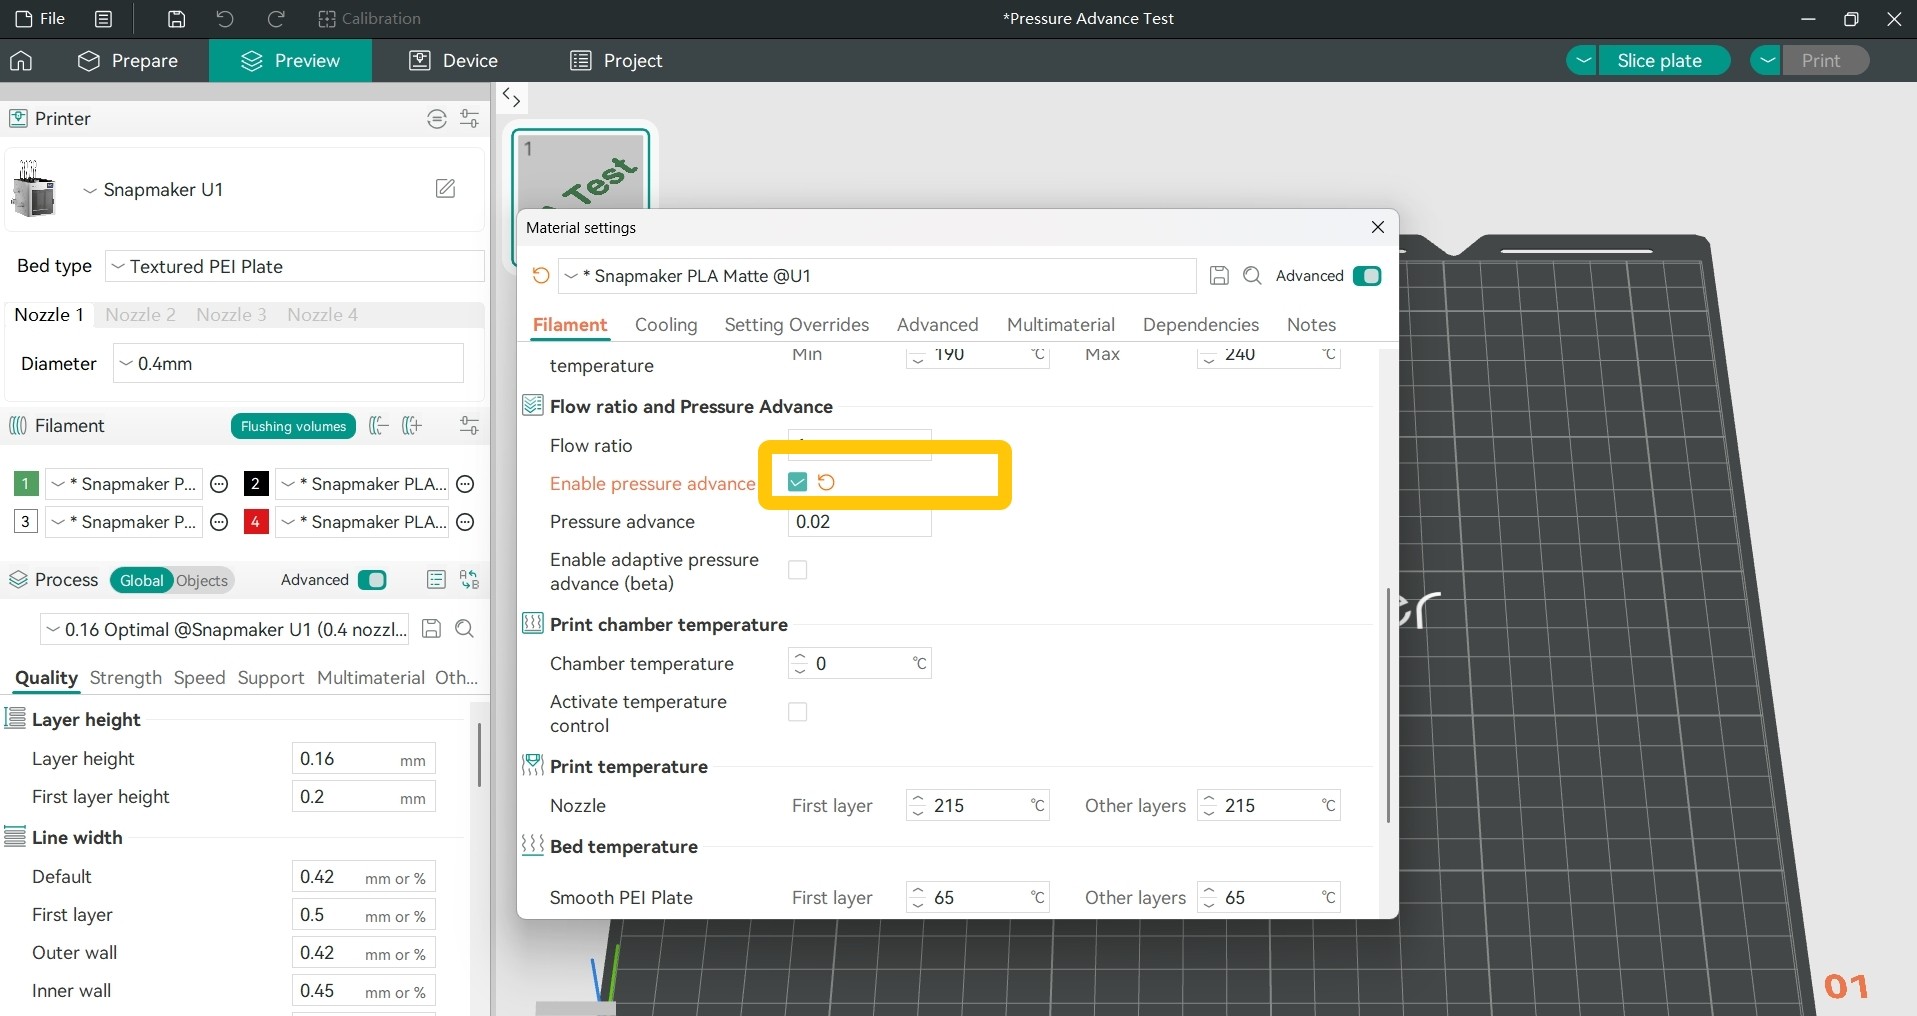
- Click the checkbox to enable pressure advance.
-
Slice the model, and you can see the generated PA line model in the
Previewtab.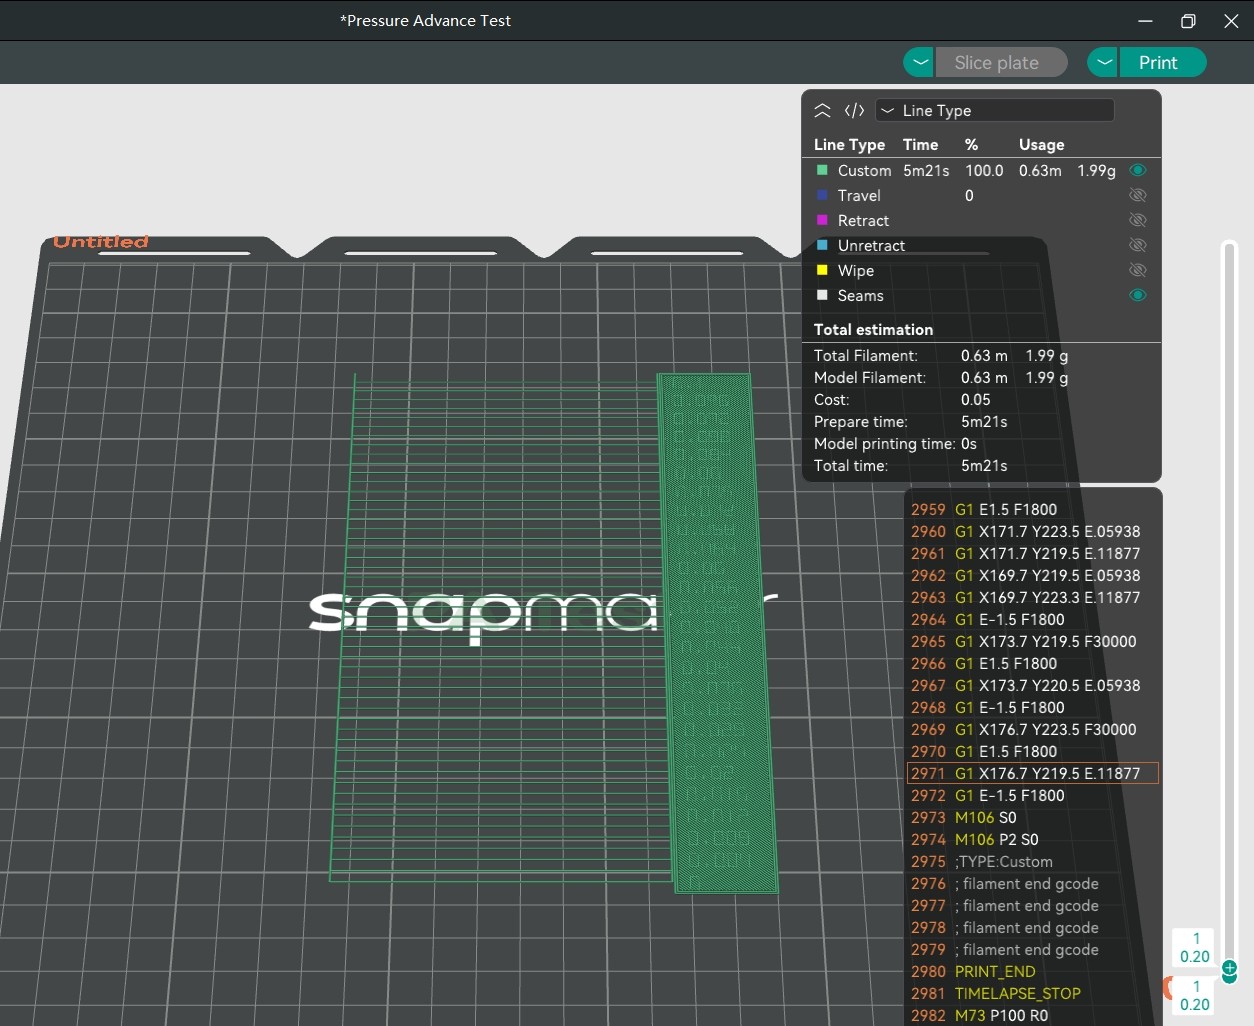
Each line generated by PA Line mode looks the same, but each line has a different pressure advance value. Switch to
Preview>Speed, and you can find that every line accelerates first, then decelerates. Since the pressure advance value is related to the actual moving speed of the nozzle, the acceleration and deceleration lines can be used to calibrate the pressure advance effect.
Just observe which printed line is the most uniform to determine the appropriate pressure advance value.
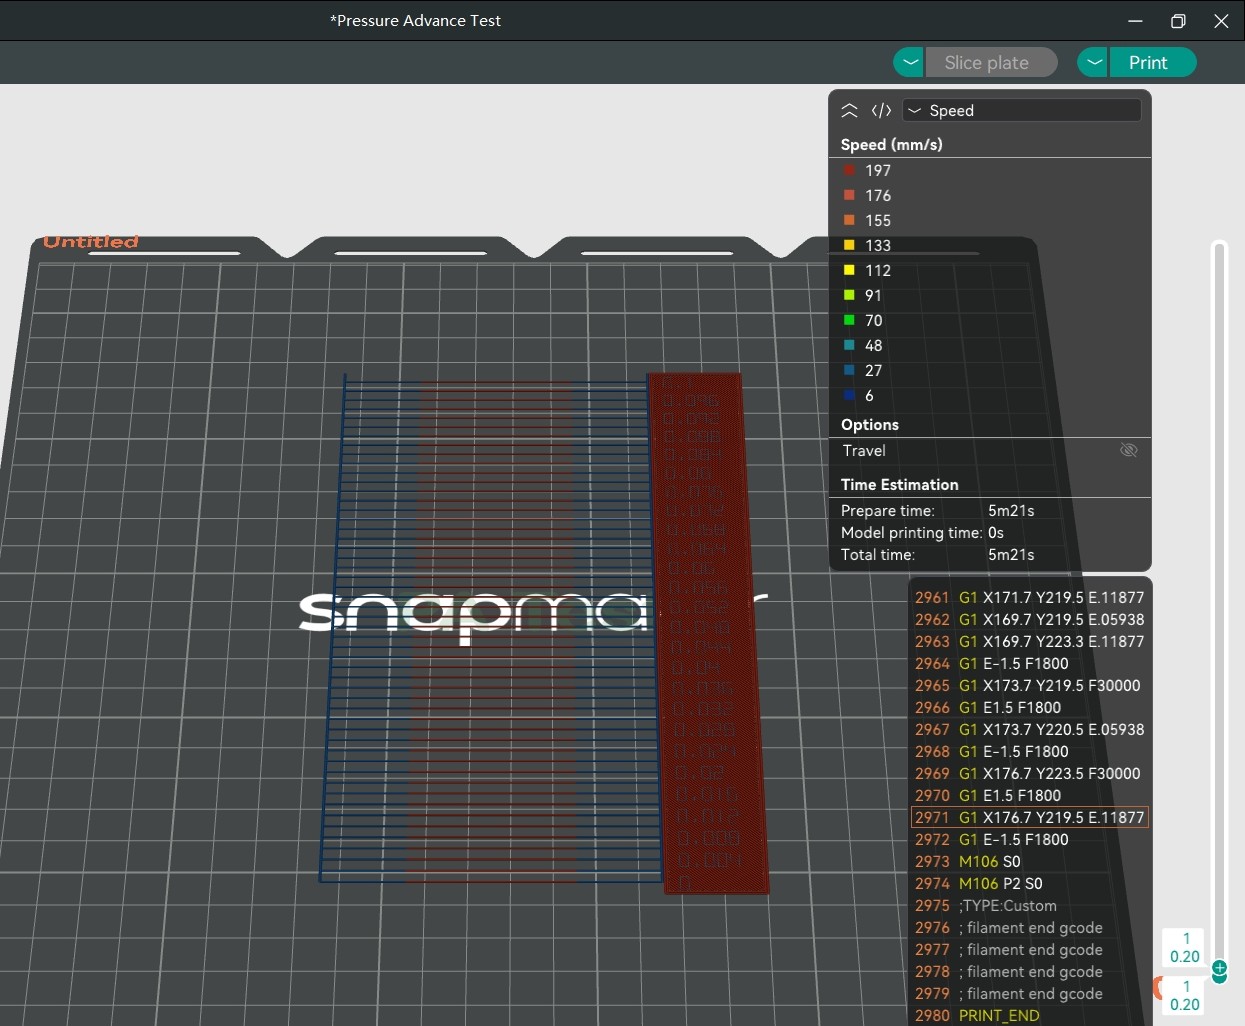
-
Use the U1 to print the PA line model.
-
Observe the printed PA line model. Select the line with a uniform thickness from start to end, and the number corresponding to its right side is the best pressure advance value.
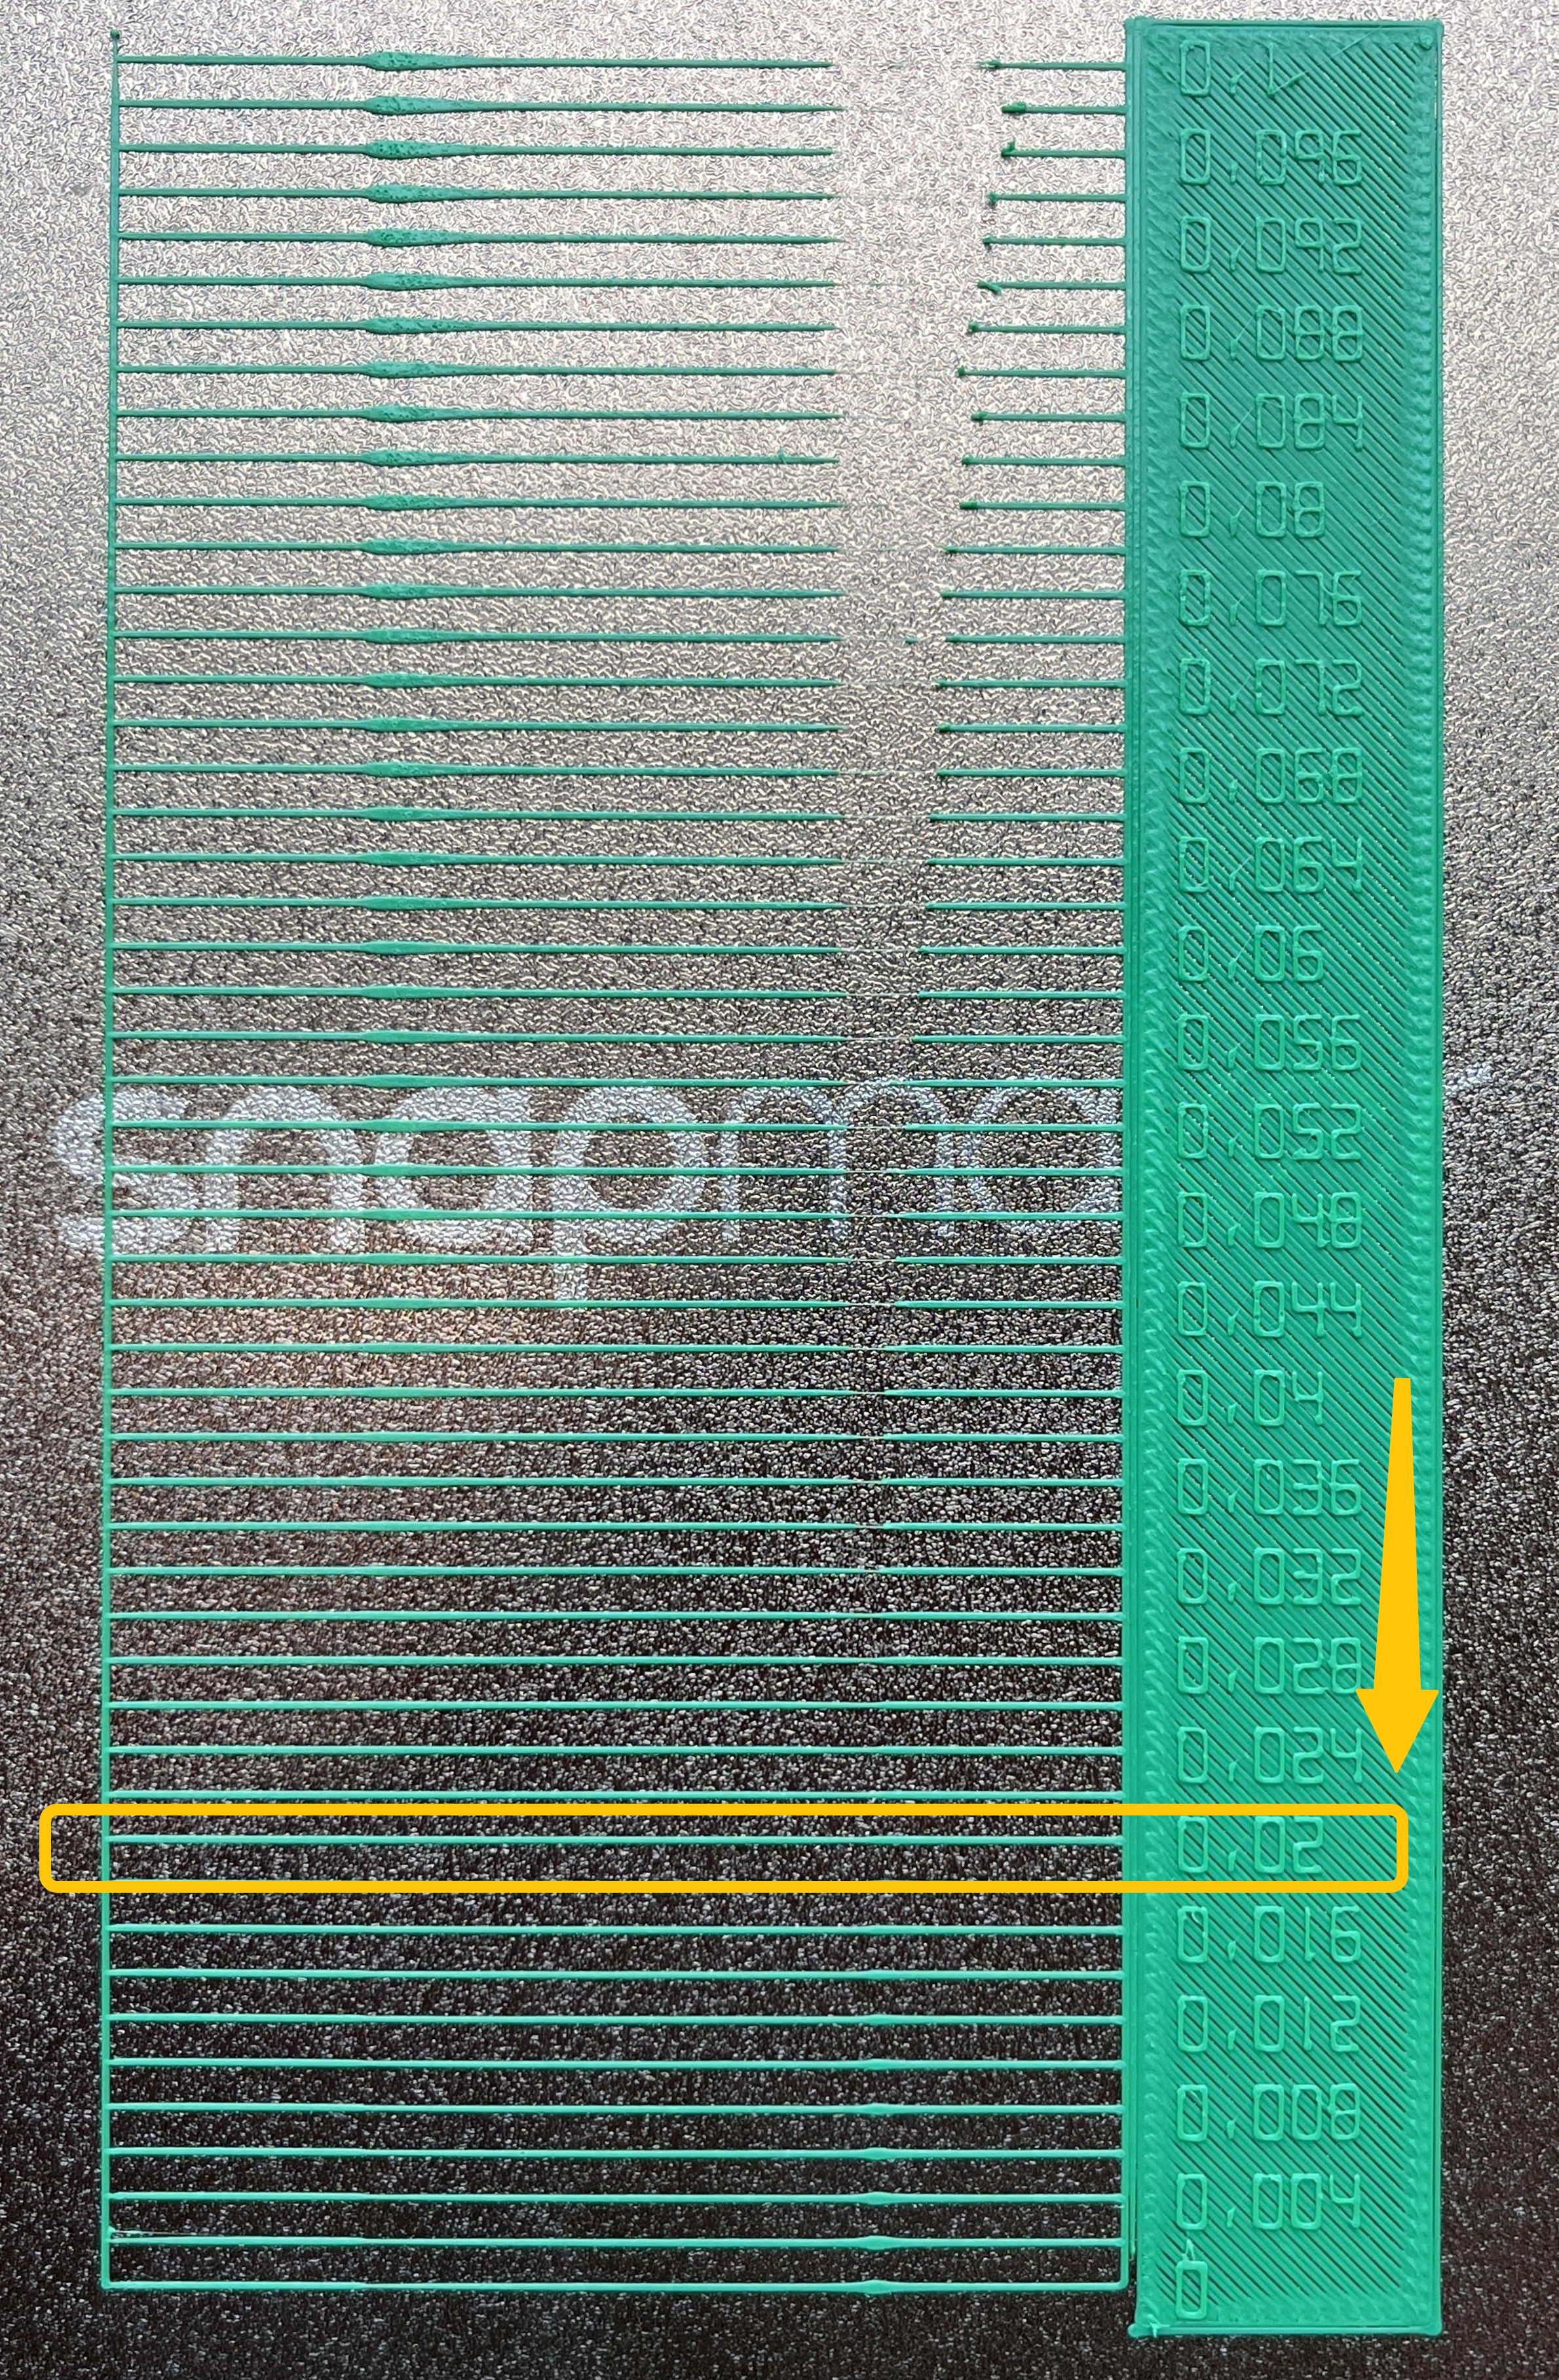
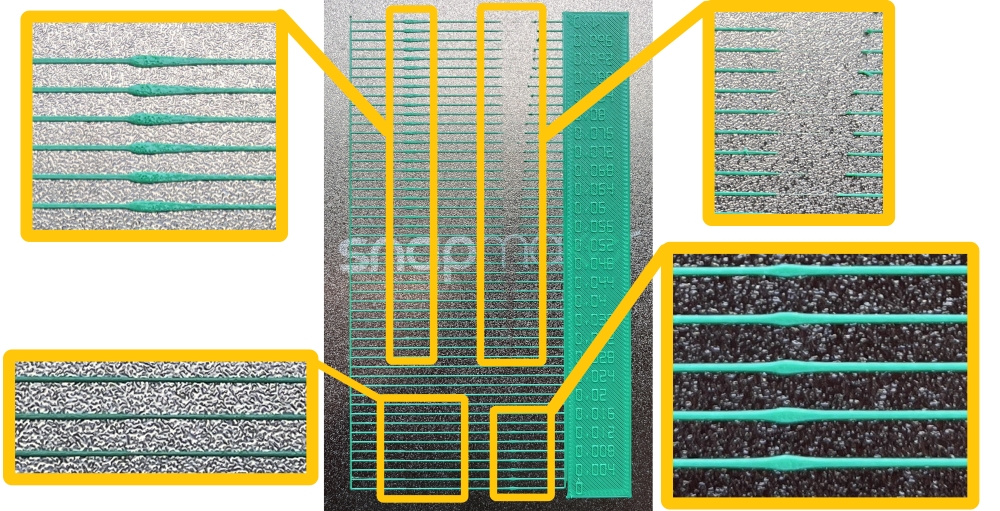
You can see that when the pressure advance value is too small, the line is too thin at the acceleration point and too thick at the deceleration point; when the pressure advance value is too large, the line is too thick at the acceleration point and too thin at the deceleration point.
¶ 2. Set the Best Pressure Advance Value for Your Filament
- In the
Filamentsection of the left sidebar, click the...>Editnext to the specific filament.
- In the pop-up window, find
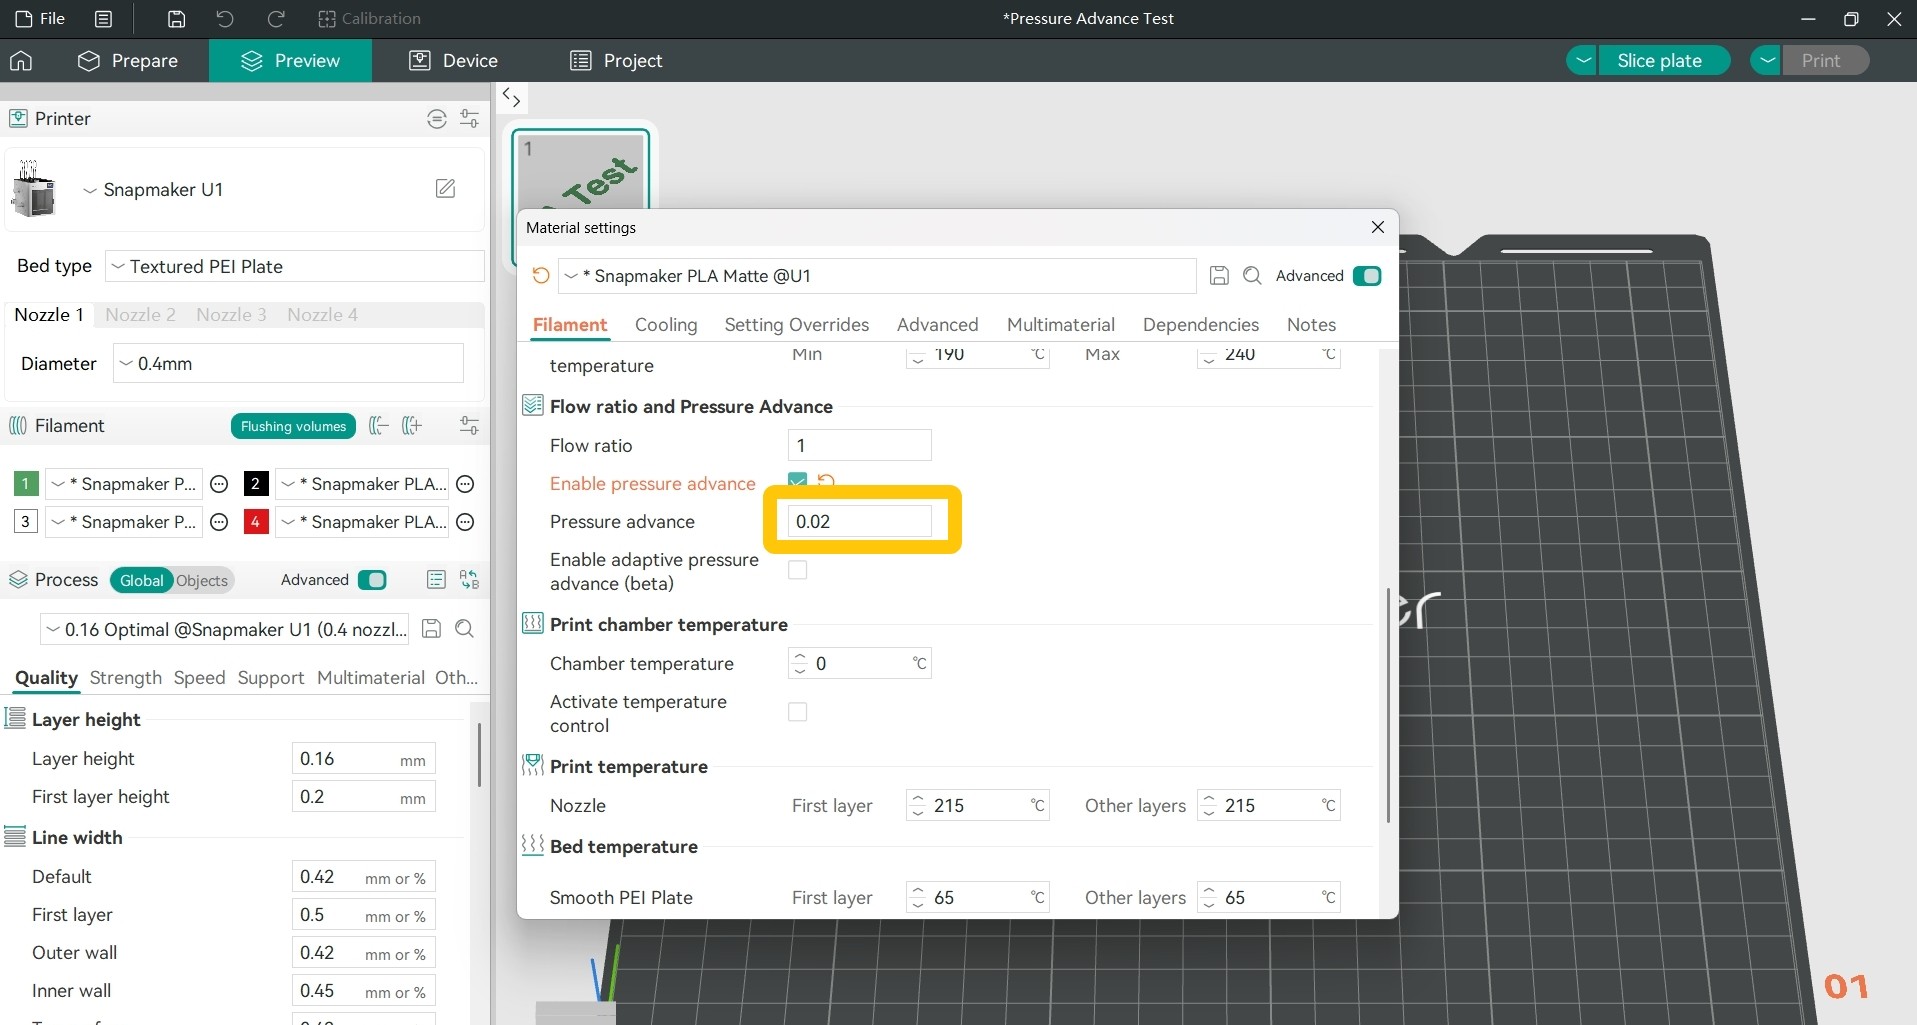
Filament>Flow ratio and Pressure Advance>Pressure Advance.
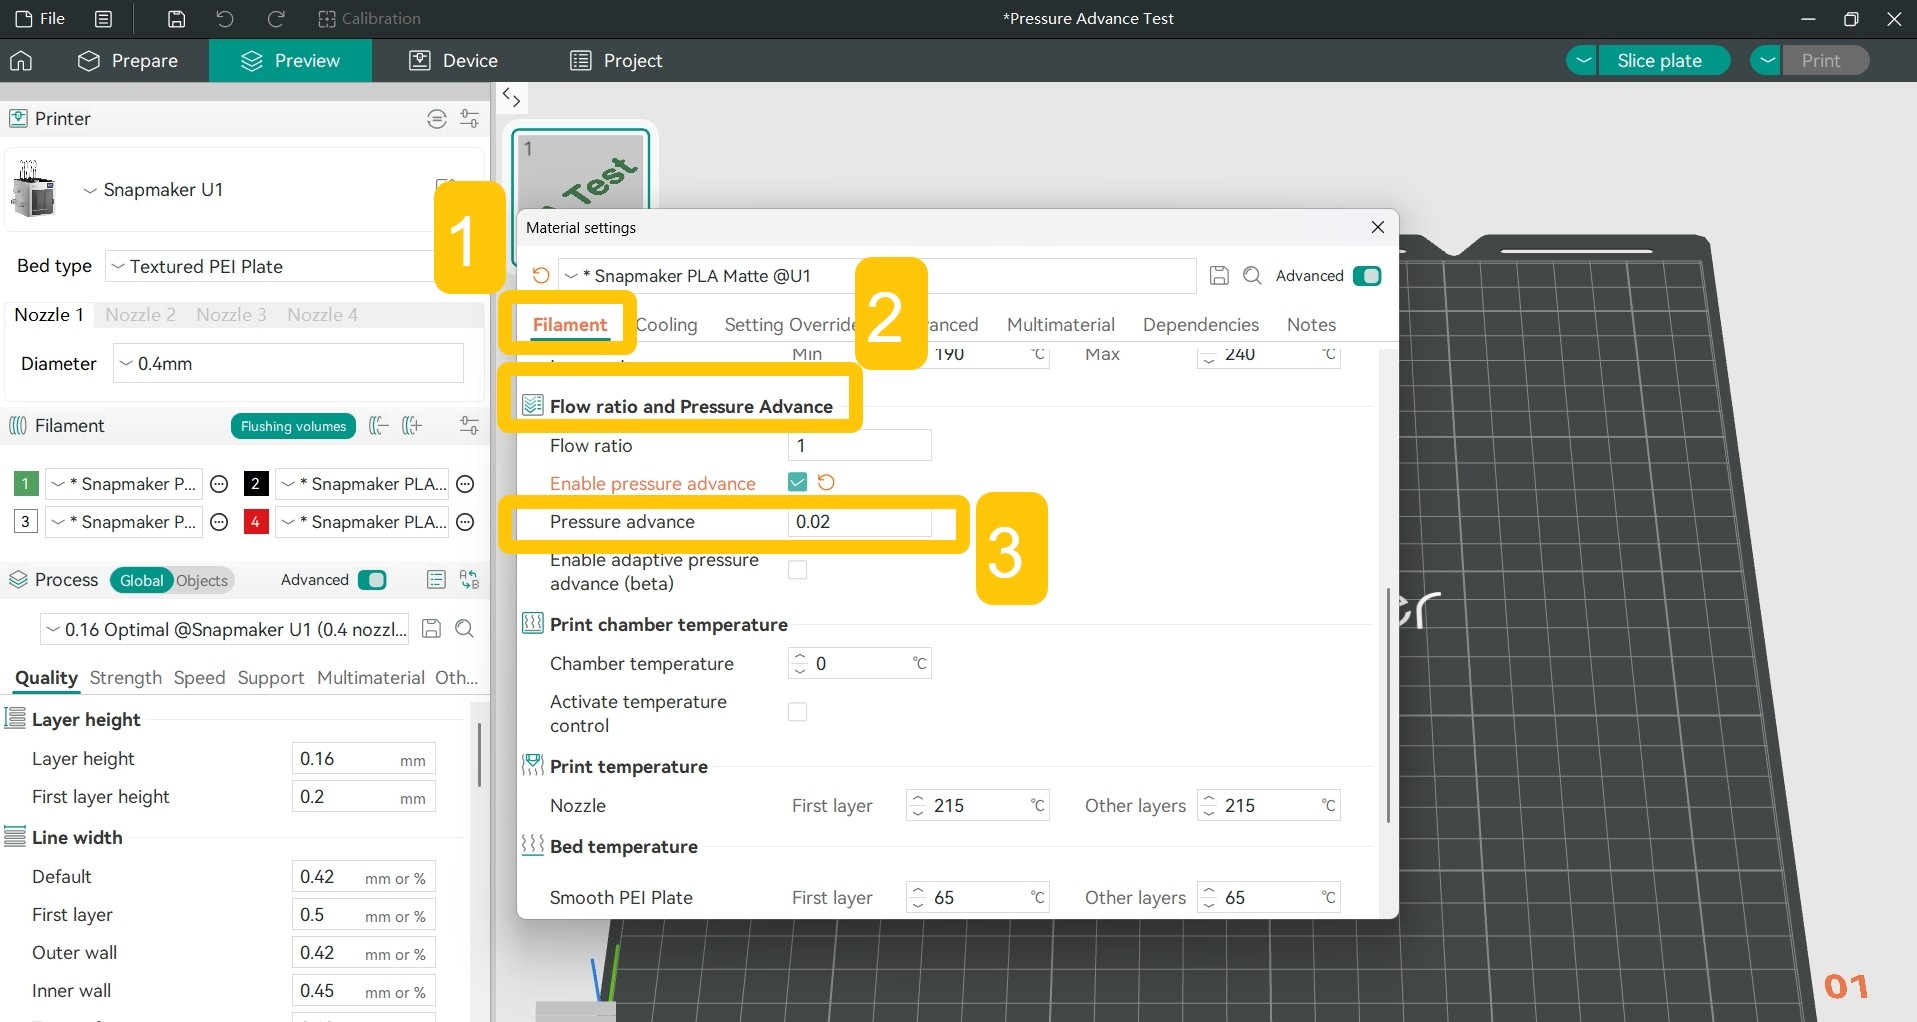
- Set the pressure advance value based on the test result.
¶ Cause 3: Improper Seam Settings
¶ 1. Select the Appropriate Seam Position
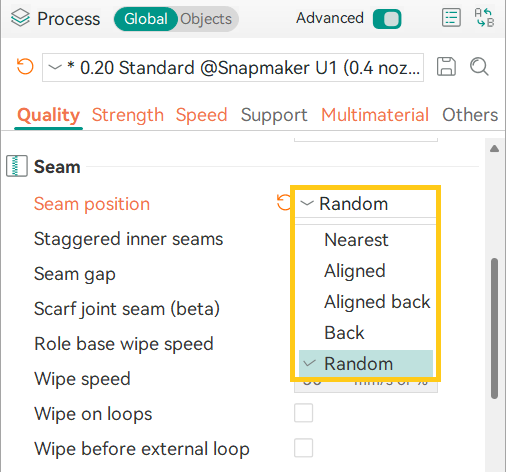
Switch to the Prepare tab > Enable Process > Advanced > Find Quality > Seam > Seam position. There are five types of seam positions available: Nearest, Aligned, Aligned Back, Back, and Random.
Controlling the position of seams can help improve the appearance and strength of the final print.
Typically, Aligned Back, Aligned, or Back work the best, especially in combination with seam painting.
However, as seams create weak points and slight surface "bulges" or "divots", Random seam placement may be optimal for parts that need higher strength as that weak point is spread to different locations between layers.
¶ Nearest
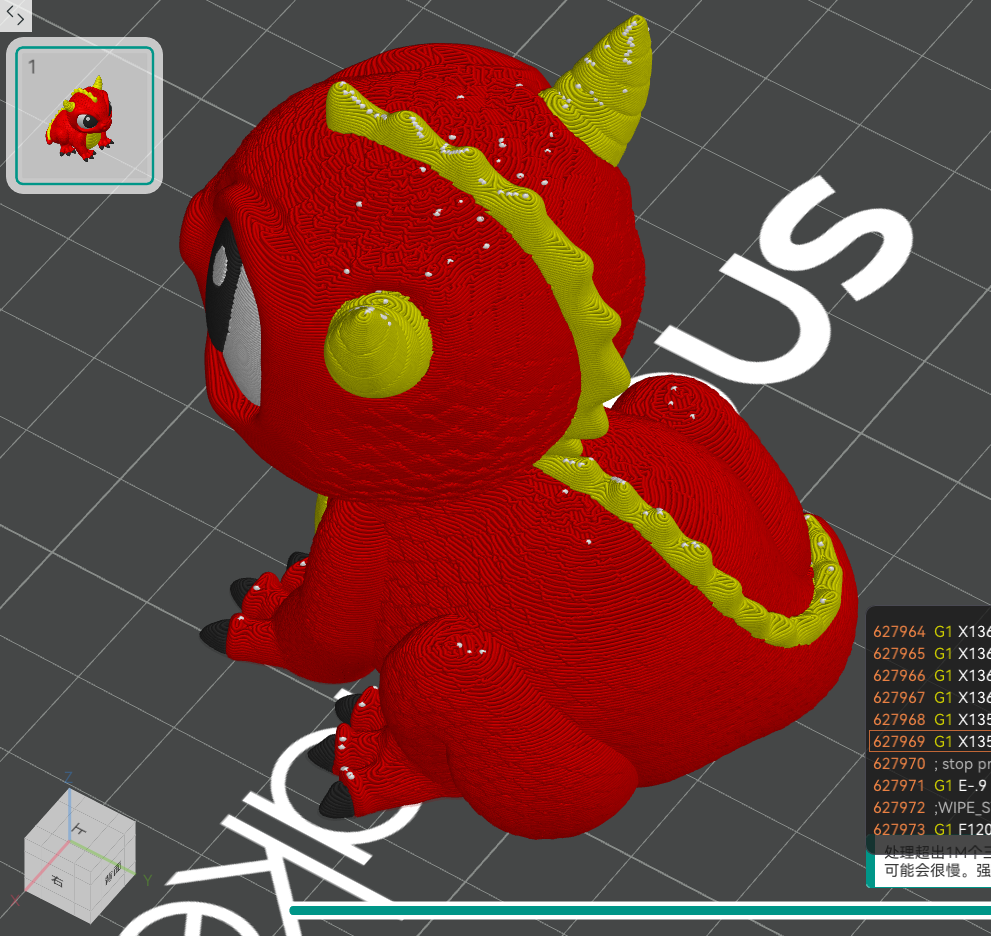
Will place the seam at the nearest starting point compared to where the nozzle stopped printing in the previous layer. This is optimized for speed, low travel, and acceptable strength.
¶ Aligned
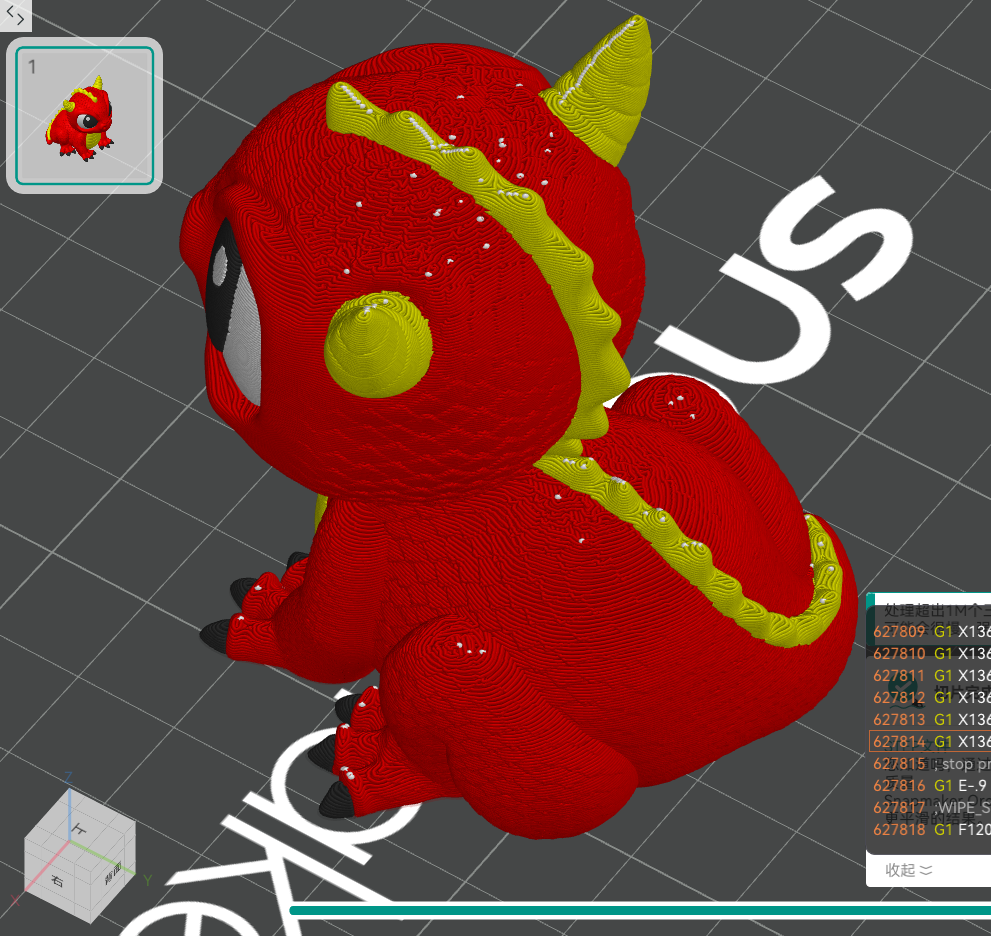
Will attempt to align the seam to a hidden internal facet of the model.
¶ Aligned Back
Combines Aligned and Back strategies by prioritizing seam placement away from the front-facing side while still finding optimal hidden locations for other orientations.
This is particularly useful for directional models like sculptures or figurines that have a clear front view.
Unlike Back which always places seams at the rearmost position, Aligned Back uses intelligent positioning that avoids the front while maintaining sophisticated seam hiding capabilities.
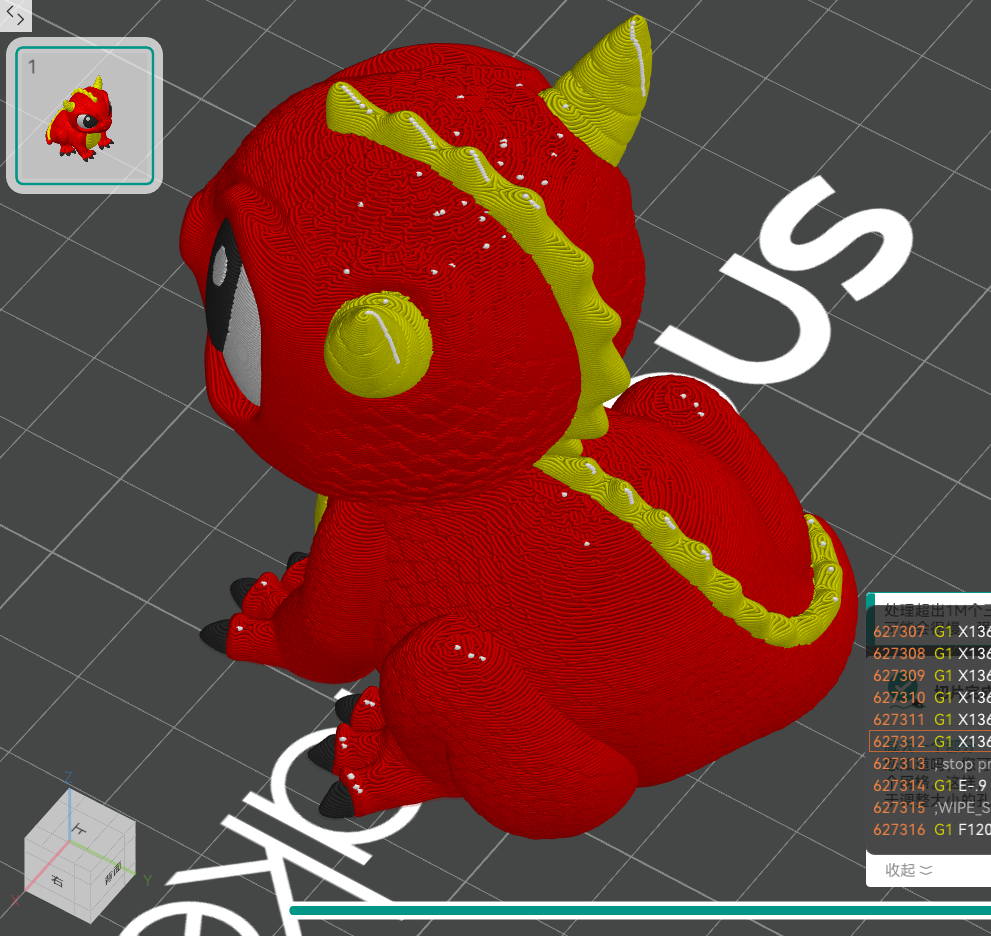
¶ Back
This option places the seam on the back side (Min Y point in that layer) of the object, away from the view. It is useful for objects that will be displayed with a specific orientation.
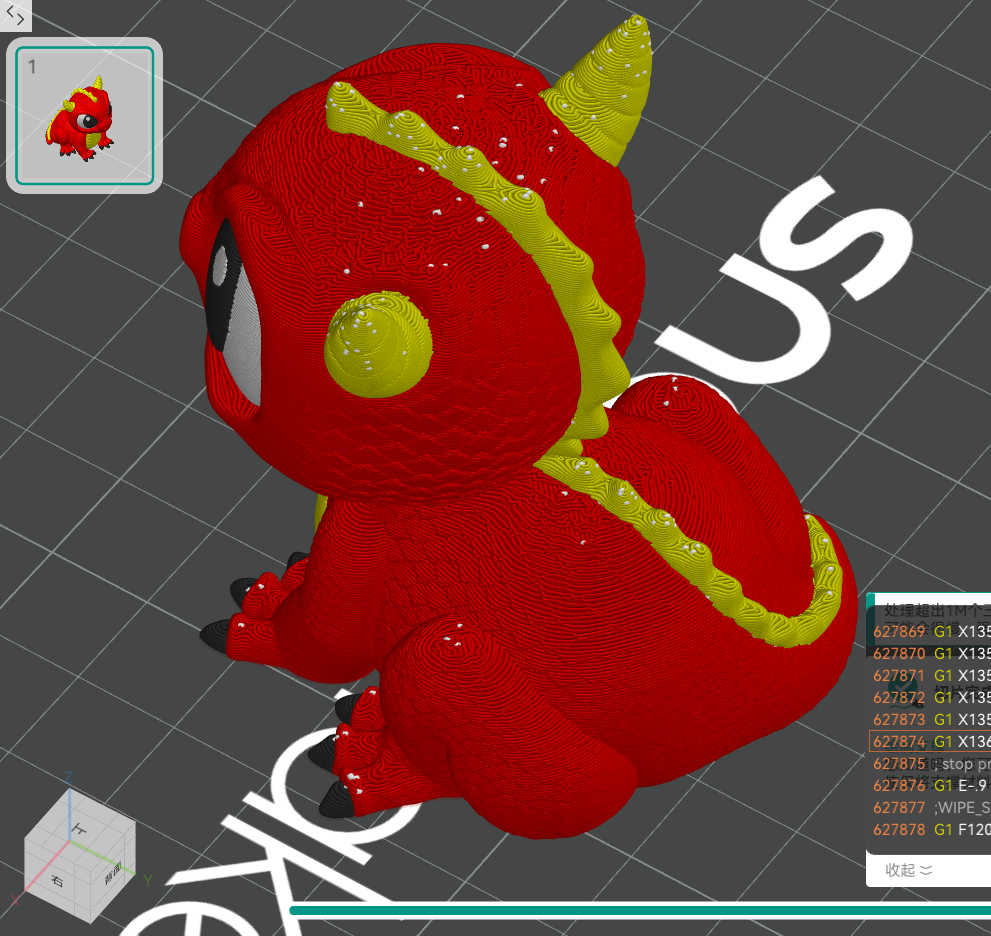
¶ Random
This option places the seam randomly across the object, which can help to distribute the seam points and increase the overall strength of the print.
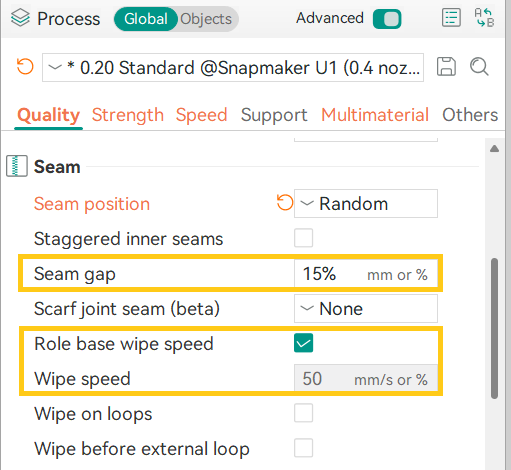
¶ 2. Adjust Seam Gap, Wipe Speed, and Role-Based Wipe Speed
Switch to the Prepare tab > Enable Process > Advanced > Find Quality > Seam > Adjust Seam gap, Wipe speed, and Role base wipe speed.
¶ Seam Gap
Controls the gap in mm or as a percentage of the nozzle size between the two ends of a loop starting and ending with a seam.
For a well-tuned printer with pressure advance and filament retraction, a value of 0-15% is typically optimal.
- A larger gap will reduce the bulging seen at the seam.
- A smaller gap reduces the visual appearance of a seam.
¶ Role-Based Wipe Speed
Controls the speed of a wipe motion, i.e., how fast the nozzle will move over a printed area to "clean" it before traveling to another area of the model.
It is recommended to turn this option on, to ensure the nozzle performs the wipe motion with the same speed that the feature was printed with.
¶ Wipe Speed
If Role-Based Wipe Speed is disabled, set this field to the absolute wipe speed or as a percentage over the travel speed.
¶ 3. Customize Seam Position (Seam Painting)
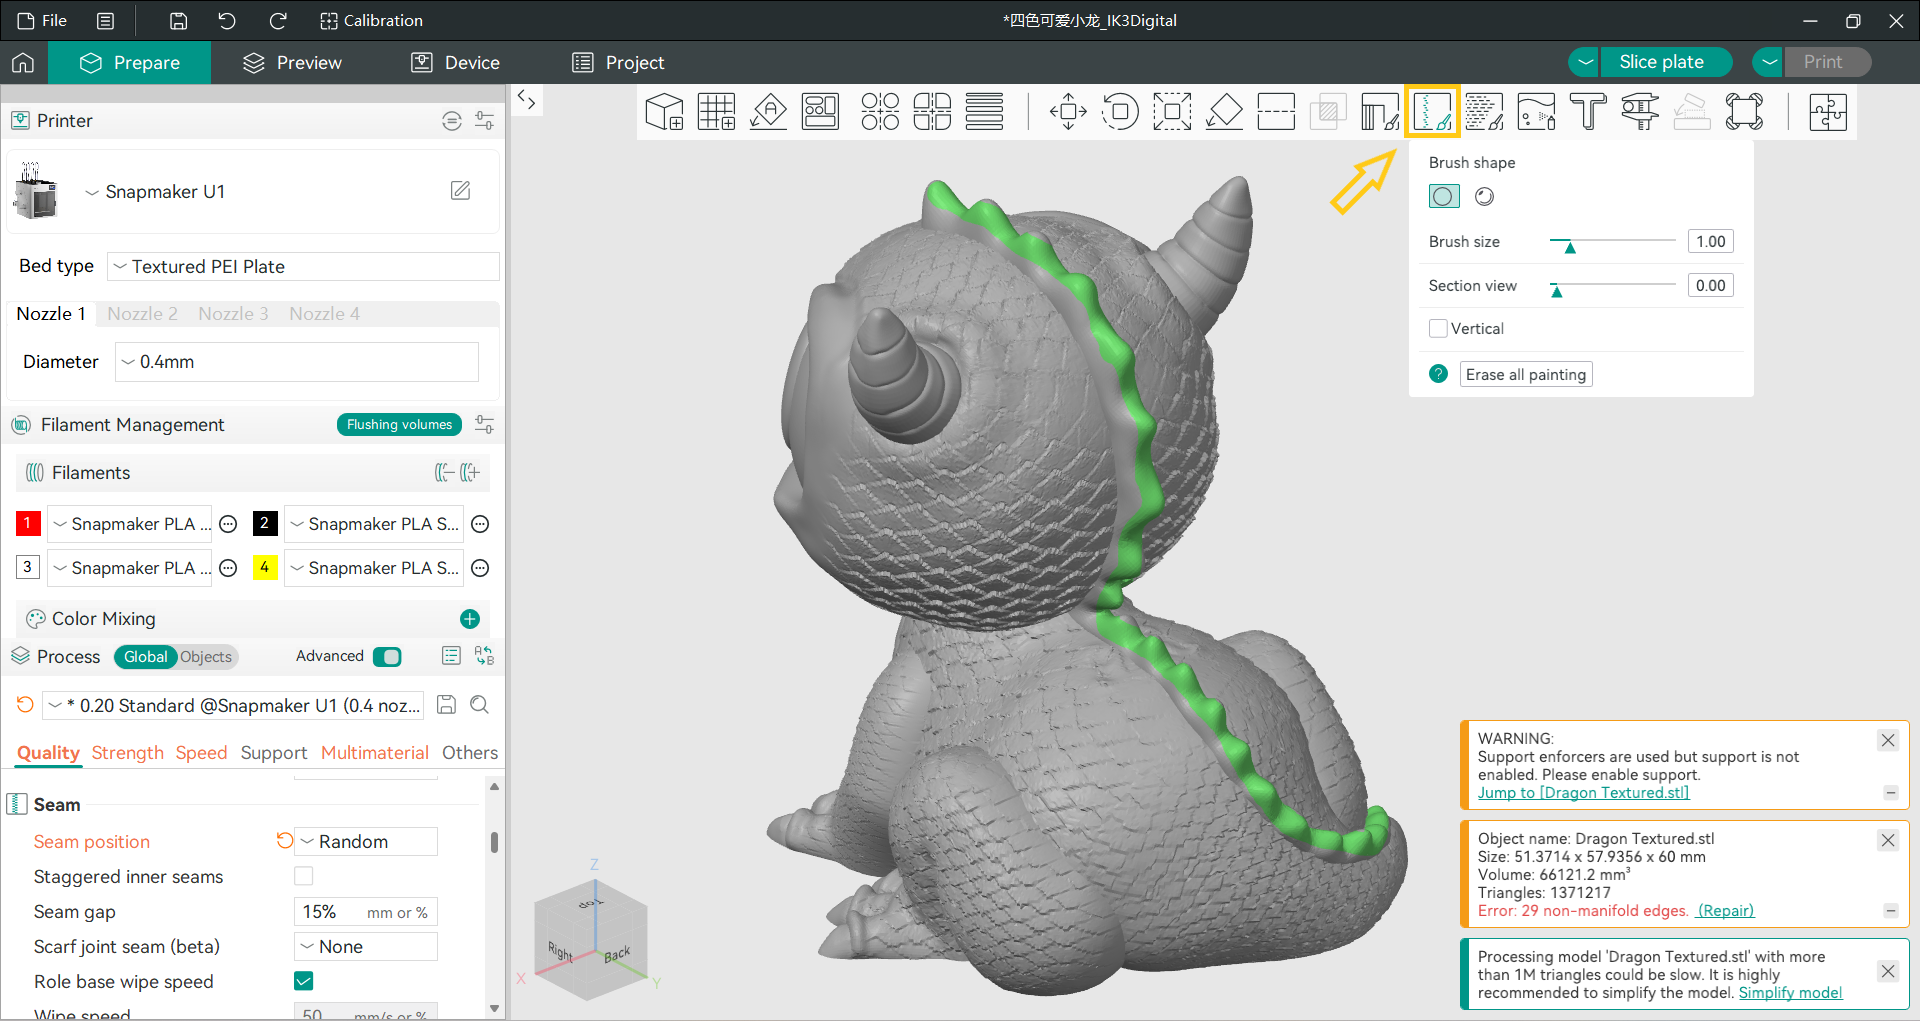
If the auto seam position is not ideal, you can enable the Seam Painting feature at the location shown below to manually paint the seam position on the model.
¶ ✅ Verification
If the seam marks on your printed part are not obvious, or you have found a balance between aesthetics and strength, you have successfully identified the root cause and resolved the issue.
¶ 💬 Reach out to Snapmaker Support
After following the troubleshooting steps, if you find it difficult to resolve your issue, kindly submit a support ticket through https://snapmaker.formcrafts.com/u1-troubleshooting-request and share your troubleshooting results with pictures or videos. Our dedicated support team will be more than willing to assist you in resolving the issue.