¶ 💡 Compatibility
This guide applies to the following machine. Please note when referencing:
- Machine model: U1
¶ ⏰ When to Use This Guide
If the power switch is not lit after the machine is connected to power and switched on, please refer to this guide for recovery or hardware troubleshooting.
Please eliminate these simple causes first:
1. Either end of the power cable is not plugged into the socket;
2. The power strip connected to the power cable is not powered on or not turned on;
3. The machine is not powered on or the switch is not turned on.
¶ 📋 Quick Info Card
- Difficulty: ⭐⭐⭐☆☆
- Estimated Time: 10-40 minutes
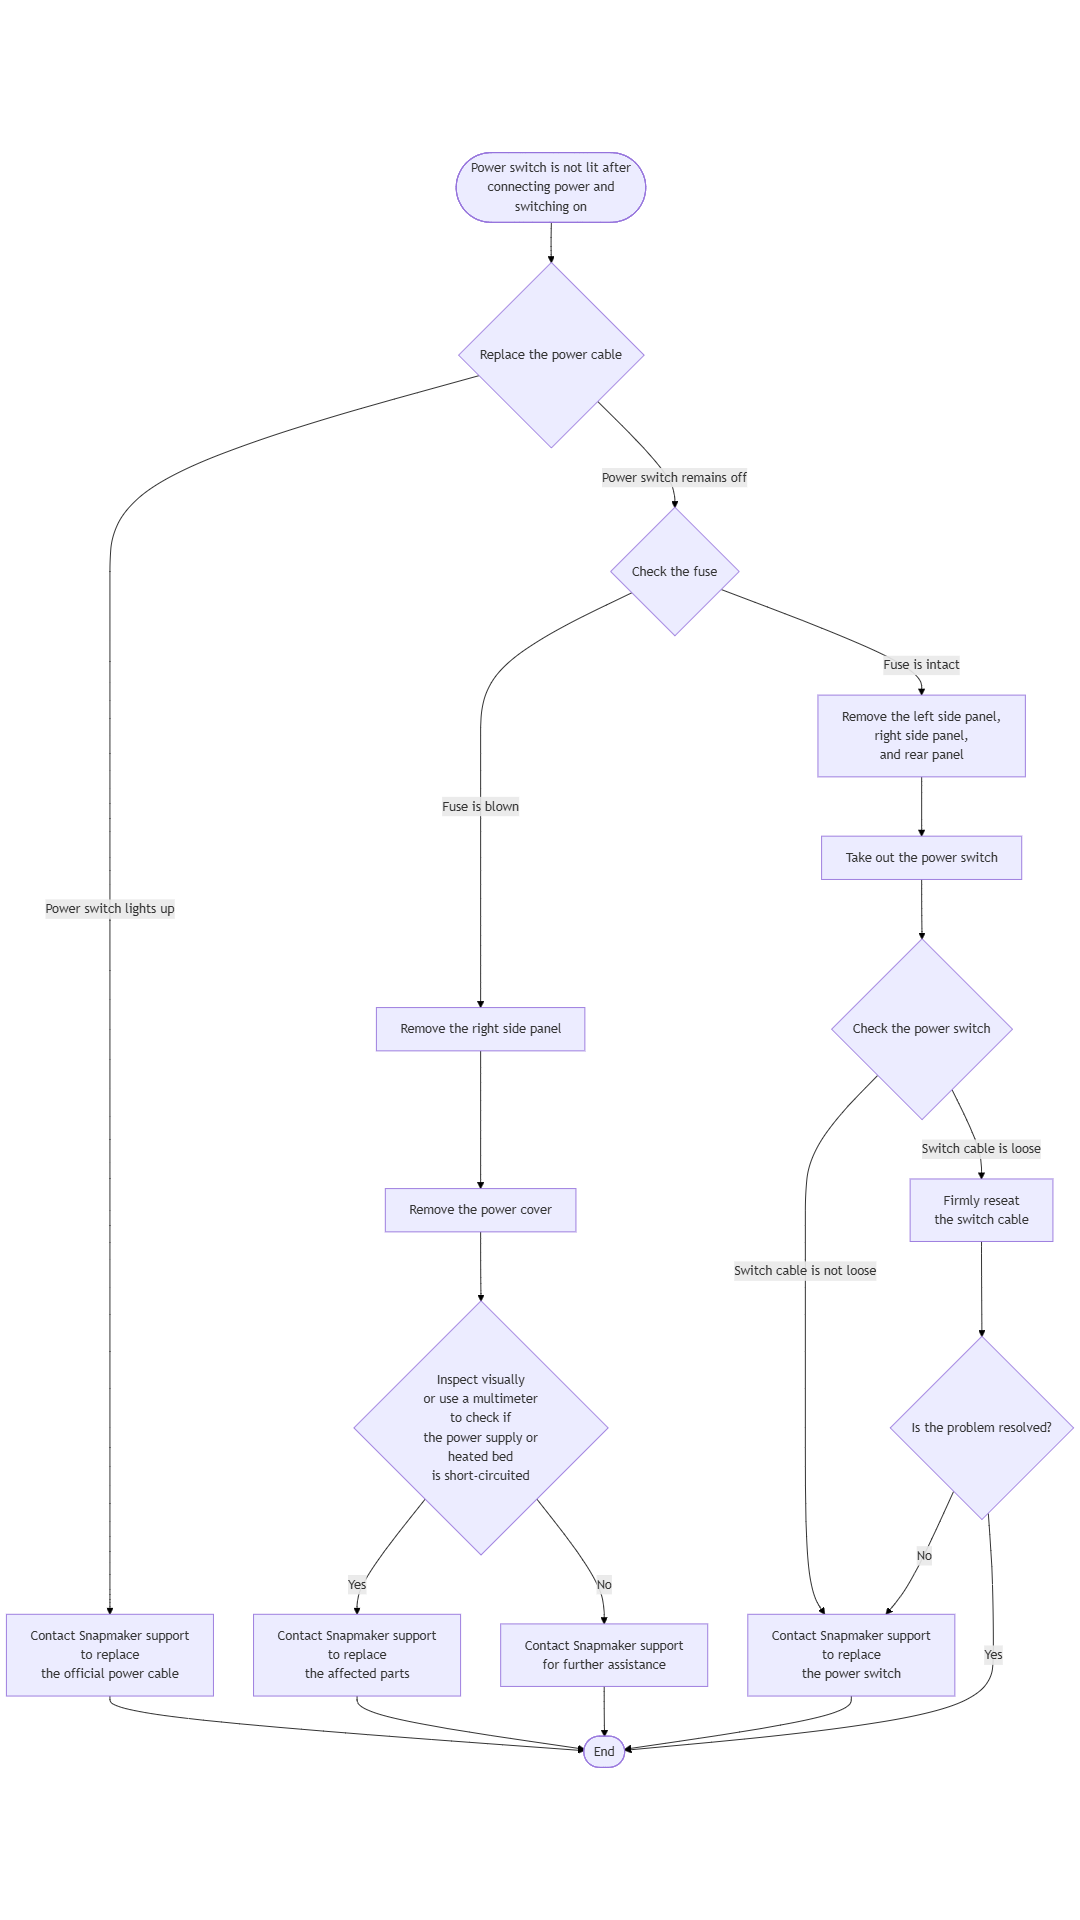
¶ 🔁 Troubleshooting Flowchart
¶ ⚠️ Important Notes
Always turn off the machine and disconnect the power before disassembling the machine.
¶ 🪄 Preparation
¶ Tools Needed
- H2.0 hex key
- Diagonal pliers
- Multimeter (as needed)
¶ 🛠️ Troubleshooting Steps
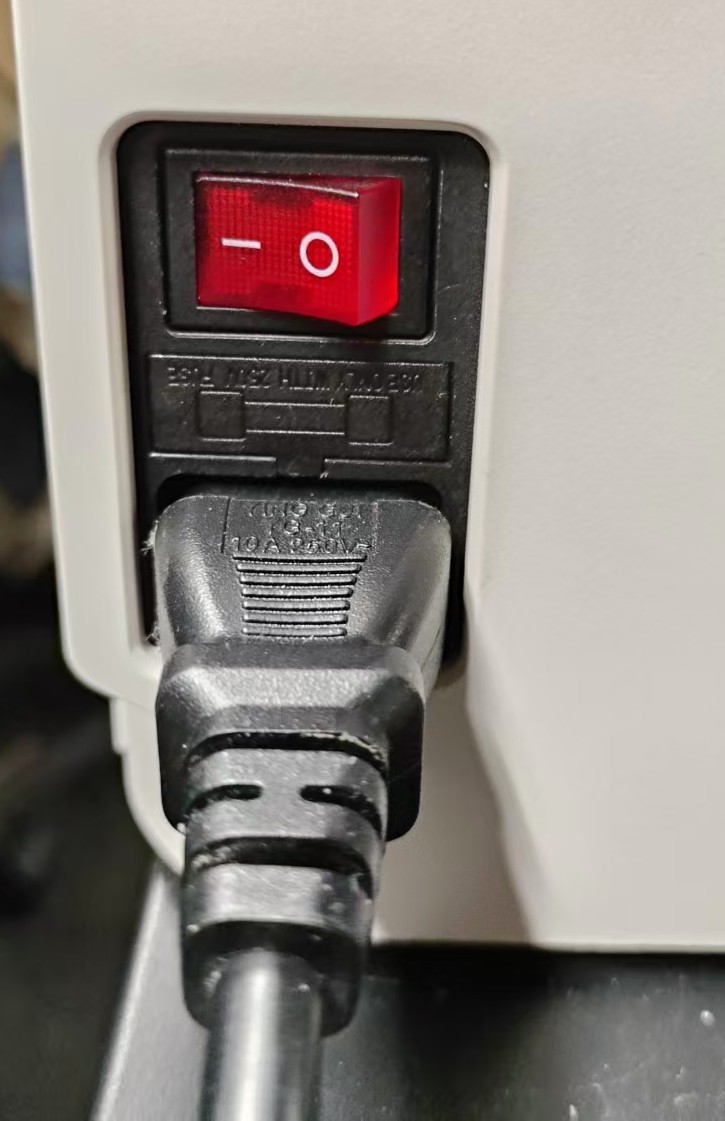
¶ Scenario 1: Power Cable Fault
- Turn off the machine and unplug the power cable.
- Find a power cable from another household appliance that is compatible with the U1 interface, and use it to connect the U1 to power.
This type of power cable is commonly found on appliances such as desktop computers, monitors, and many kitchen appliances.
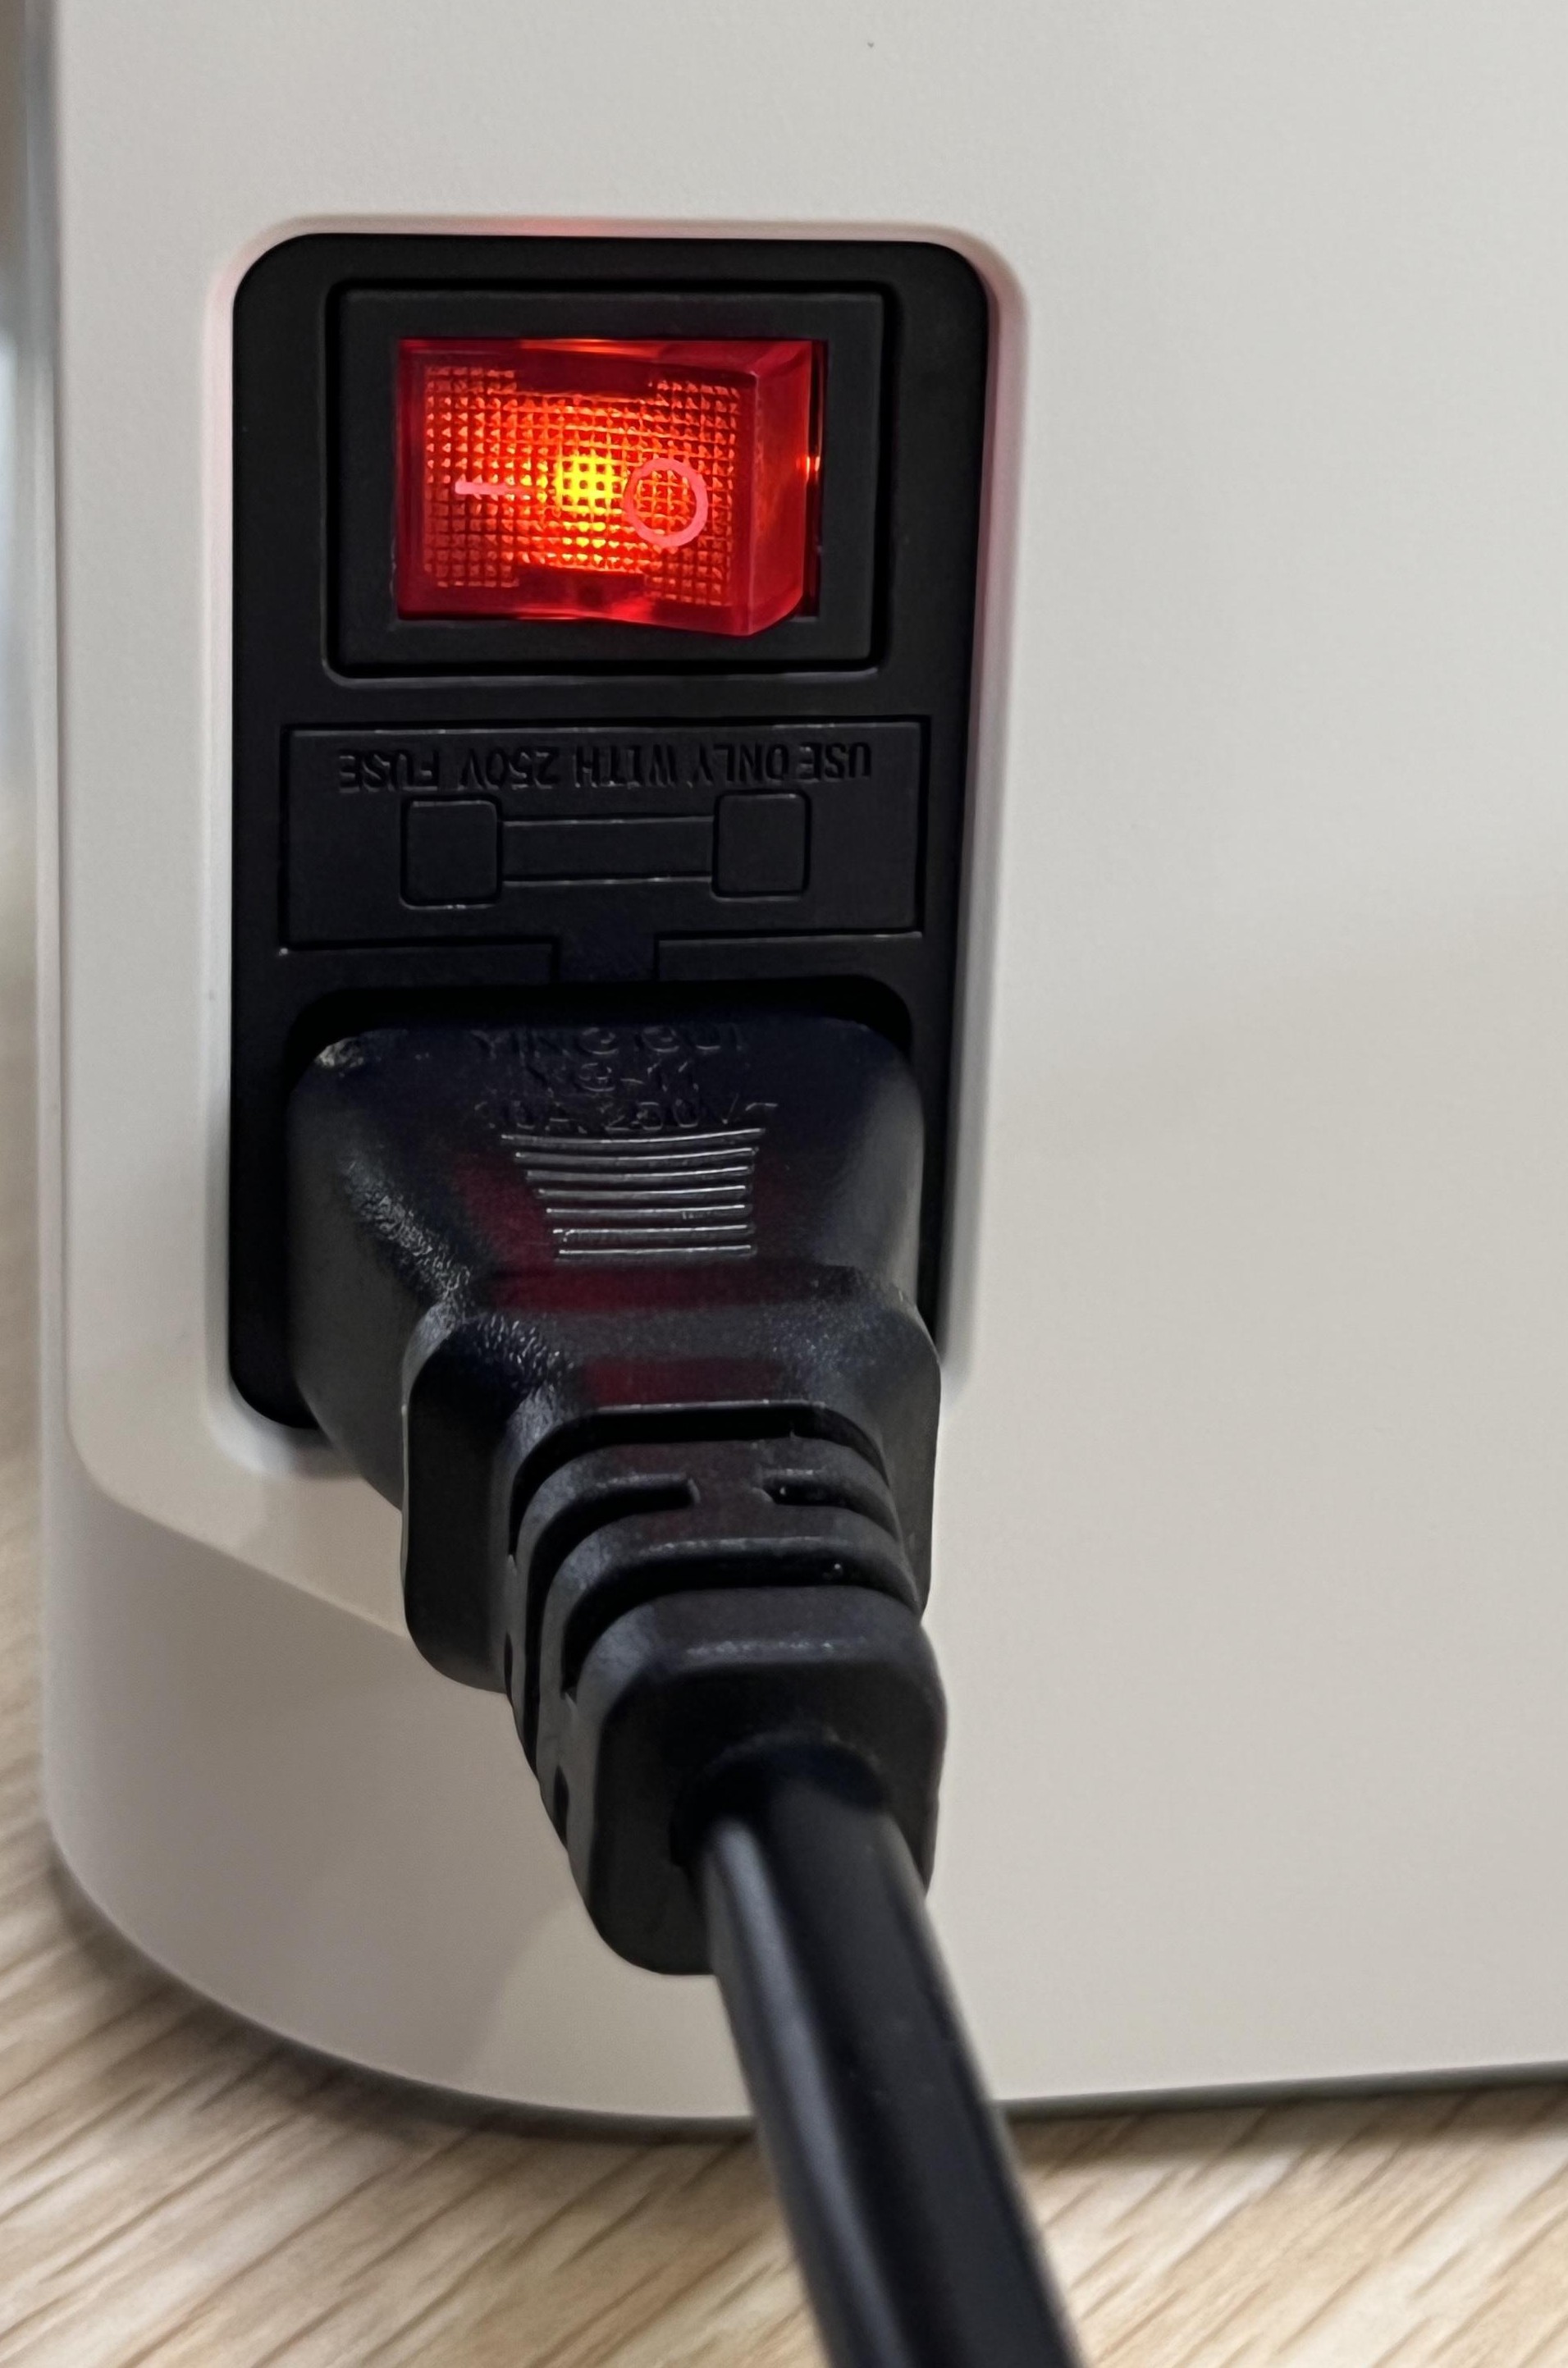
- Restart the machine and observe whether the power switch lights up:
- If the power switch lights up normally, you can contact Snapmaker support for a replacement official power cable.
- If the power switch remains off, please continue to Scenario 2.
¶ Scenario 2: Power Supply or Heated Bed Short Circuit
Please turn off the machine and disconnect the power before proceeding.
- Use the tip of the diagonal pliers to pry out the fuse holder from under the power switch.
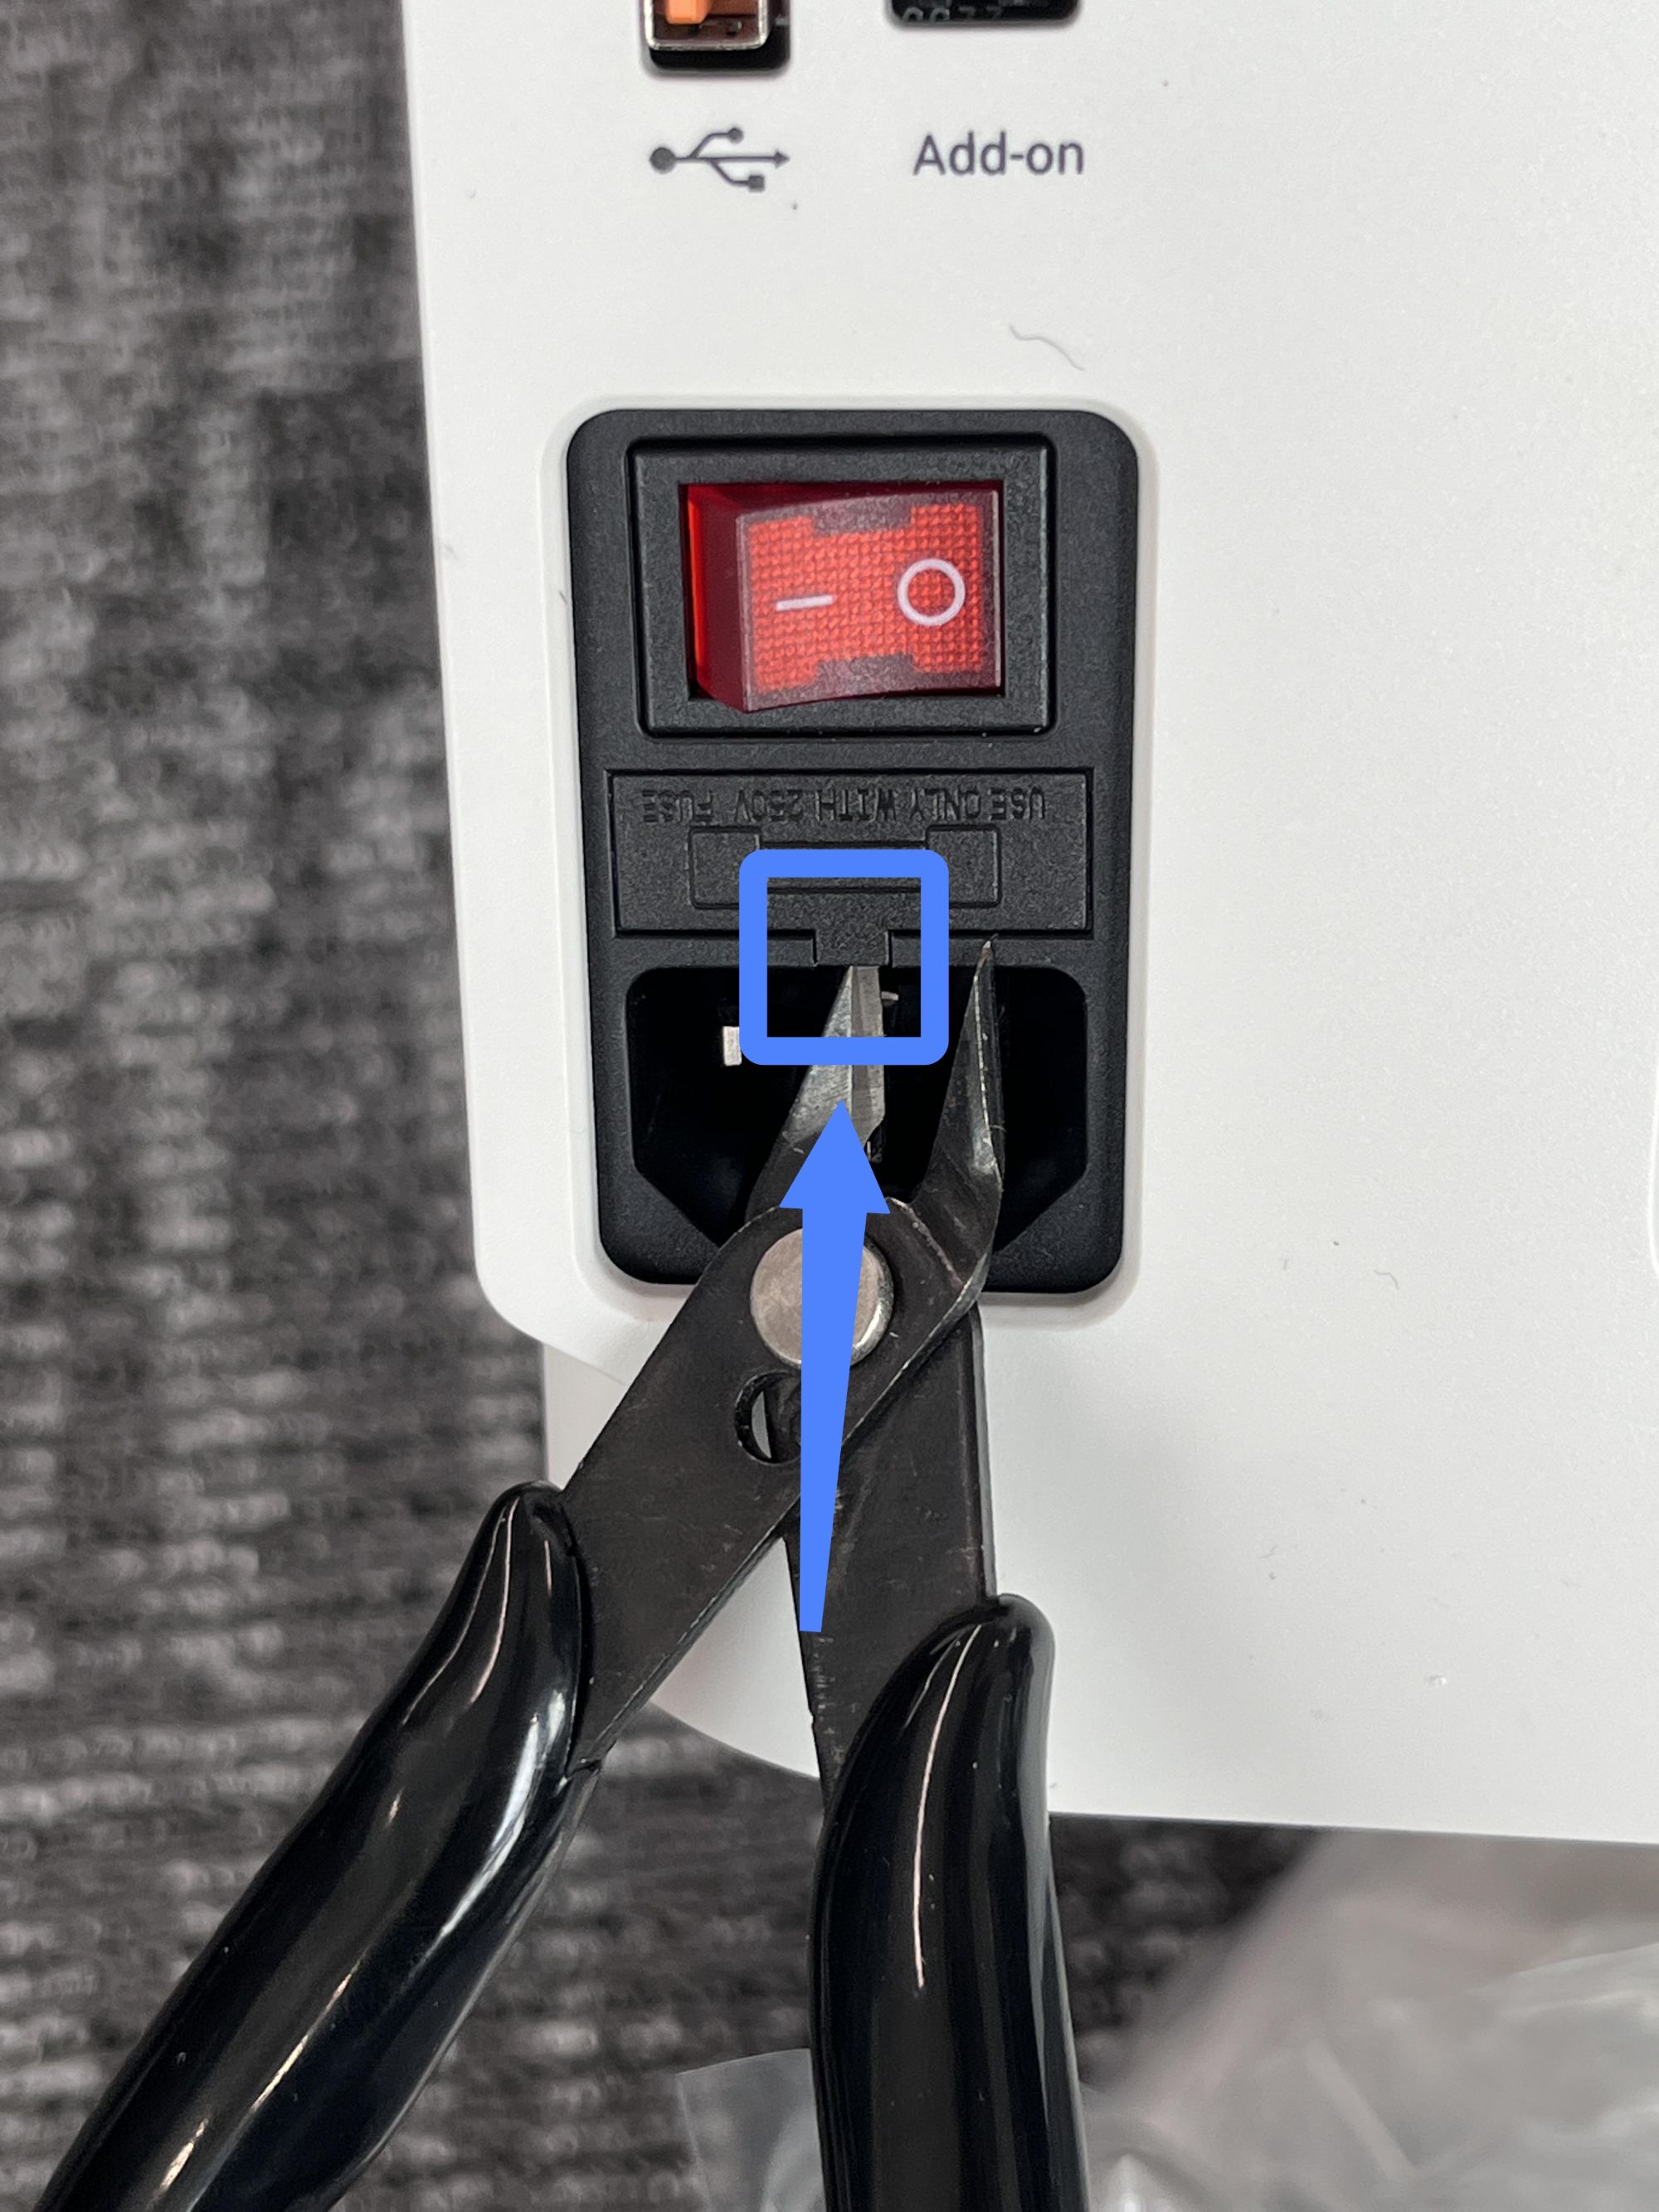
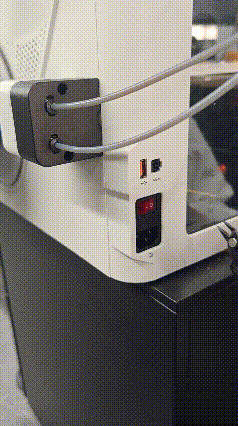
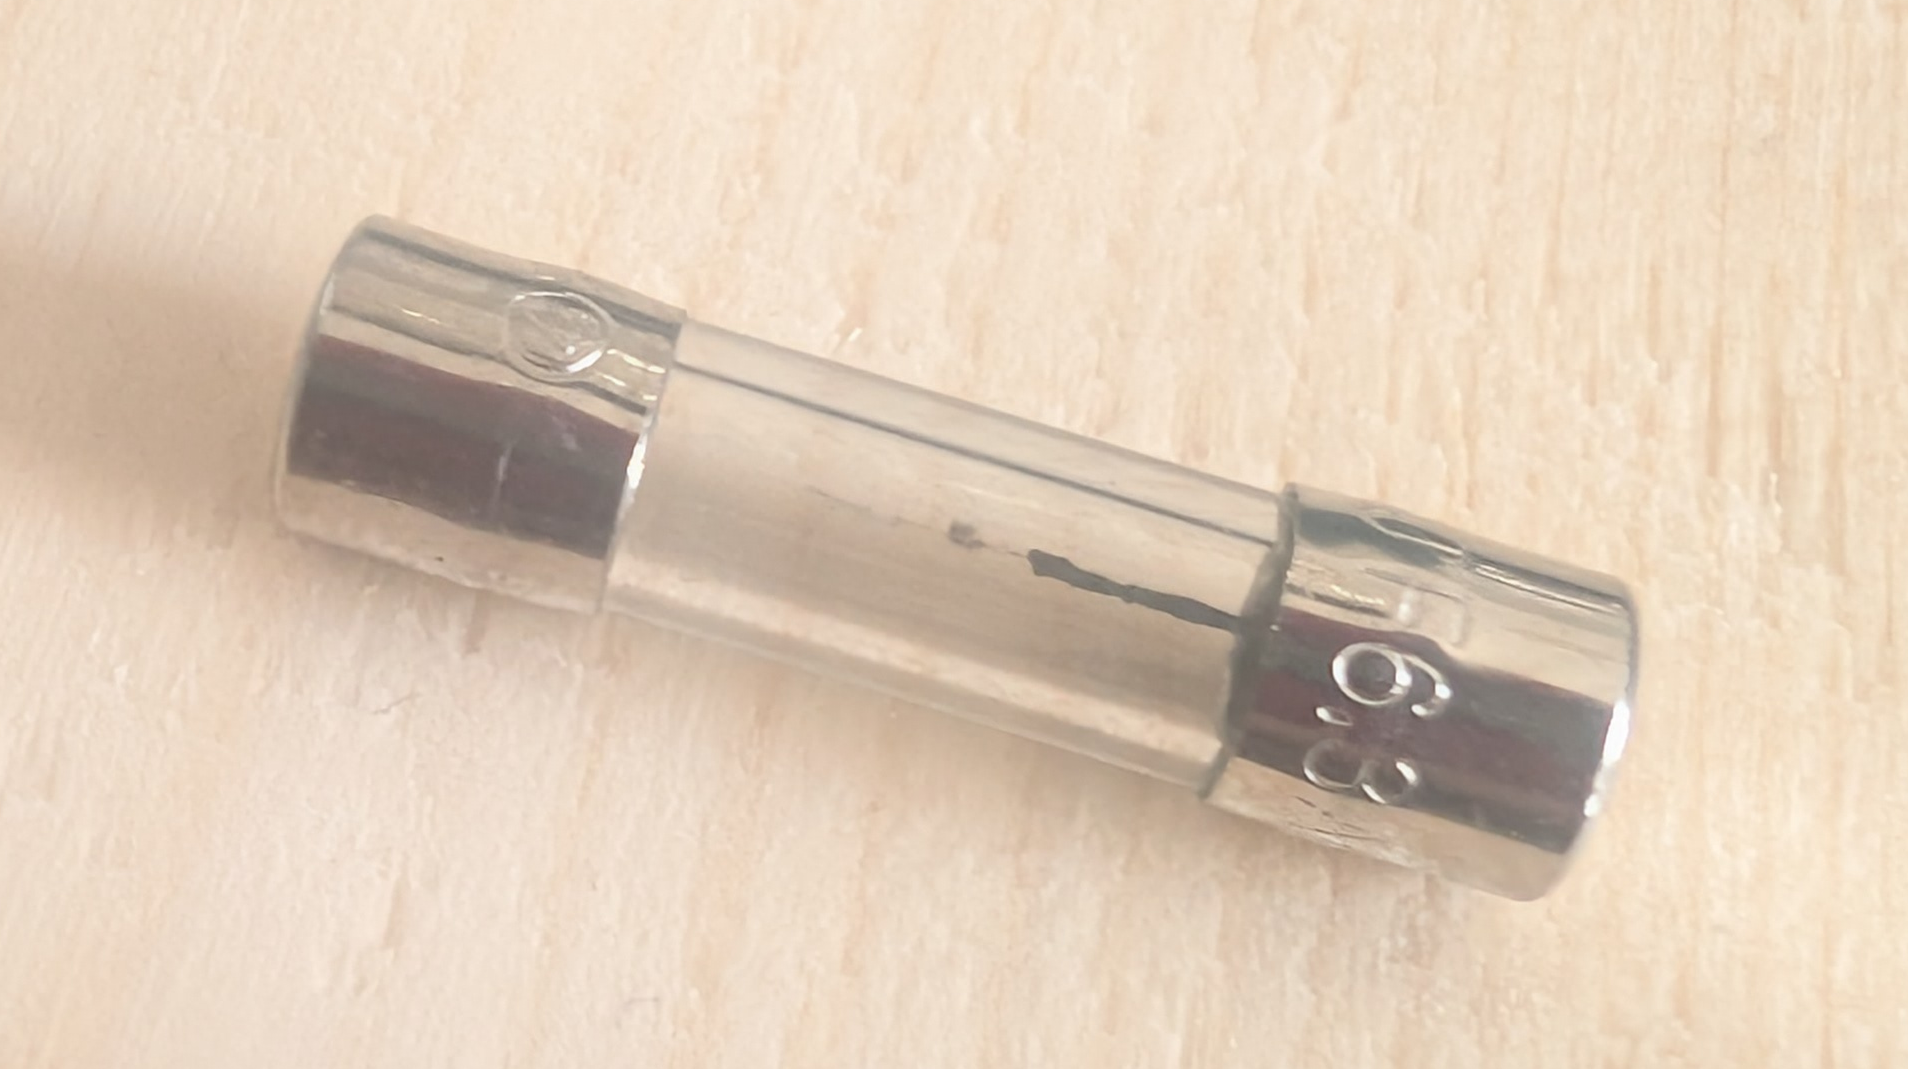
- Check whether the fuse inside the fuse holder is blown.
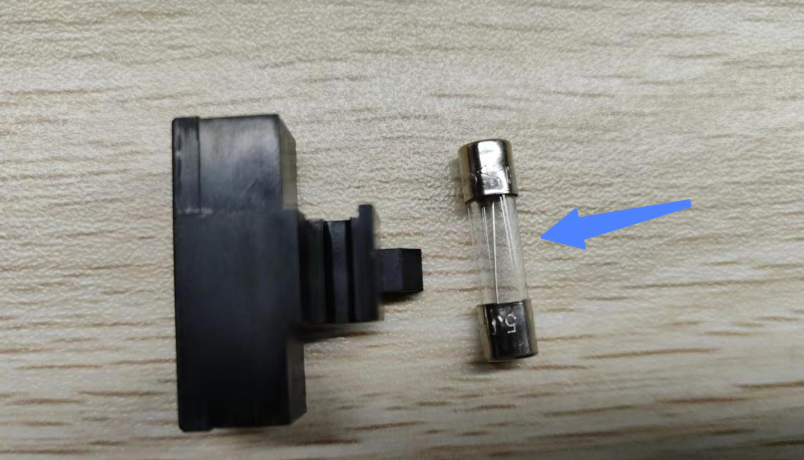
- If the fuse is intact, there is no power supply or heated bed short circuit fault. Please skip to Scenario 3.
- If the fuse is blown, the fault may be caused by a short circuit in the power supply or heated bed. Continue with the current troubleshooting steps.
-
Use an H2.0 hex key, and refer to the U1 Video Guide: How to Remove the Side Panels to remove the machine's right side panel.
-
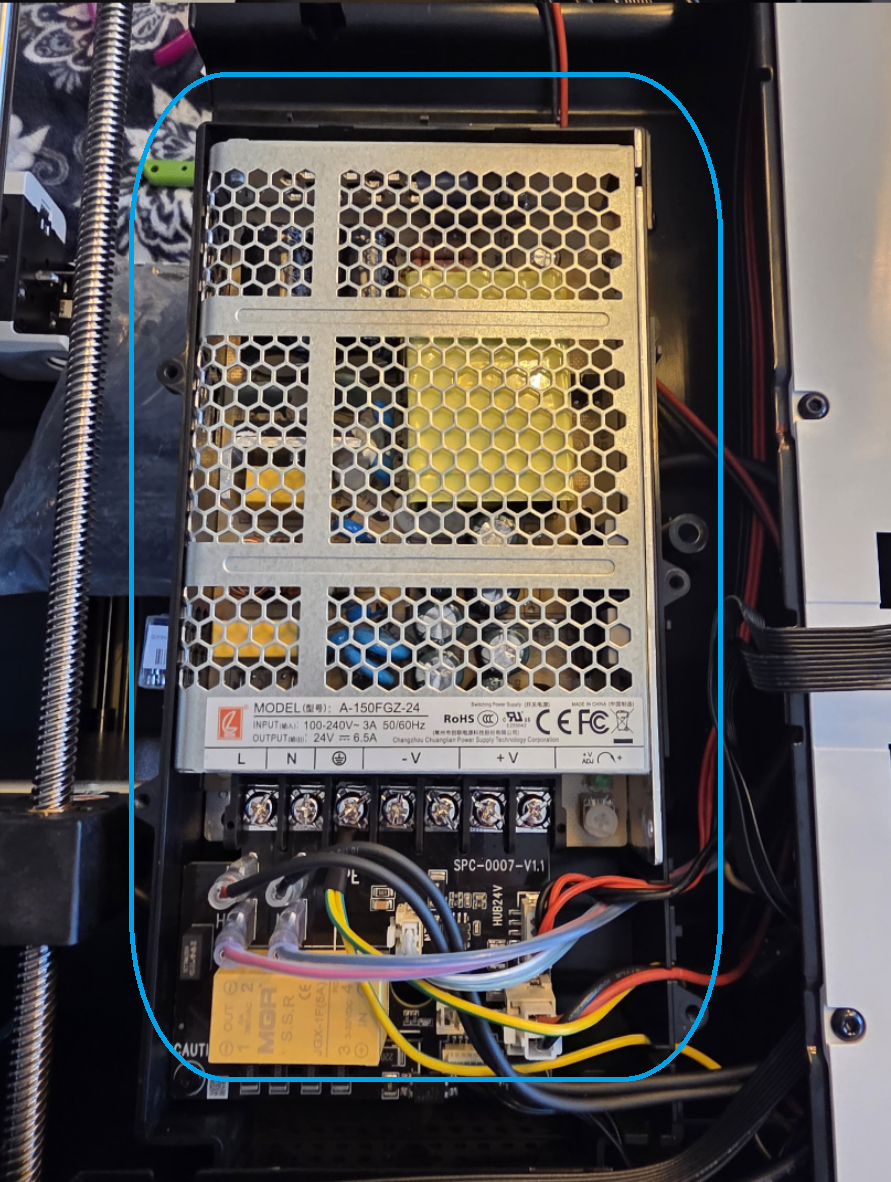
Use an H2.0 hex key to remove the 4 screws on the power cover, disconnect the power supply cooling fan wire, and take off the power cover.
- Choose a suitable method to check if the machine's power supply or heated bed is short-circuited:
I can't use a multimeter (click here to expand details)
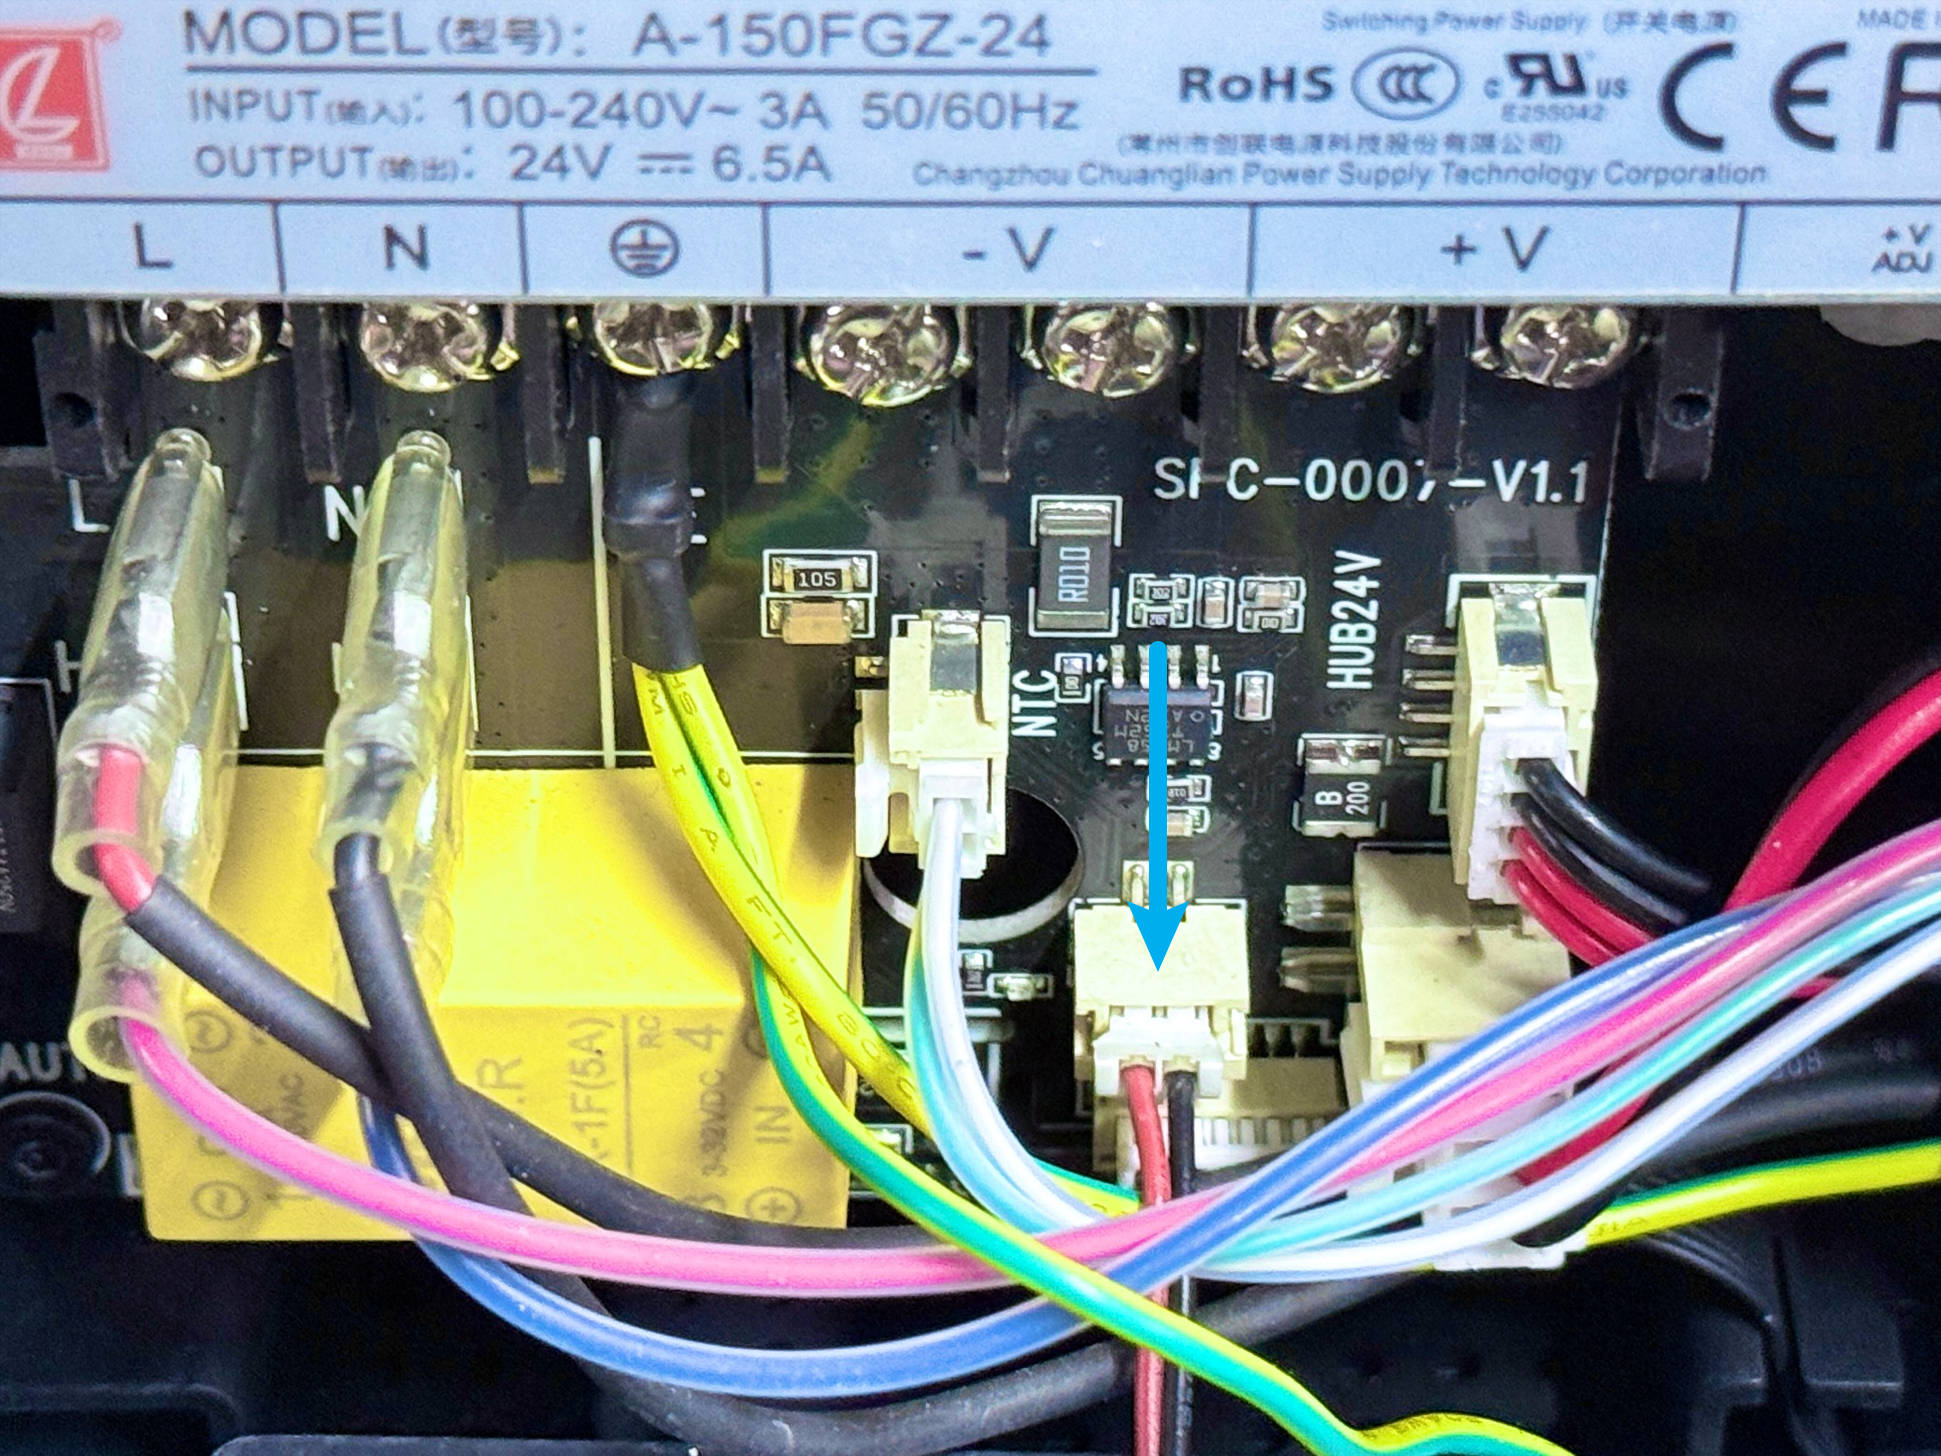
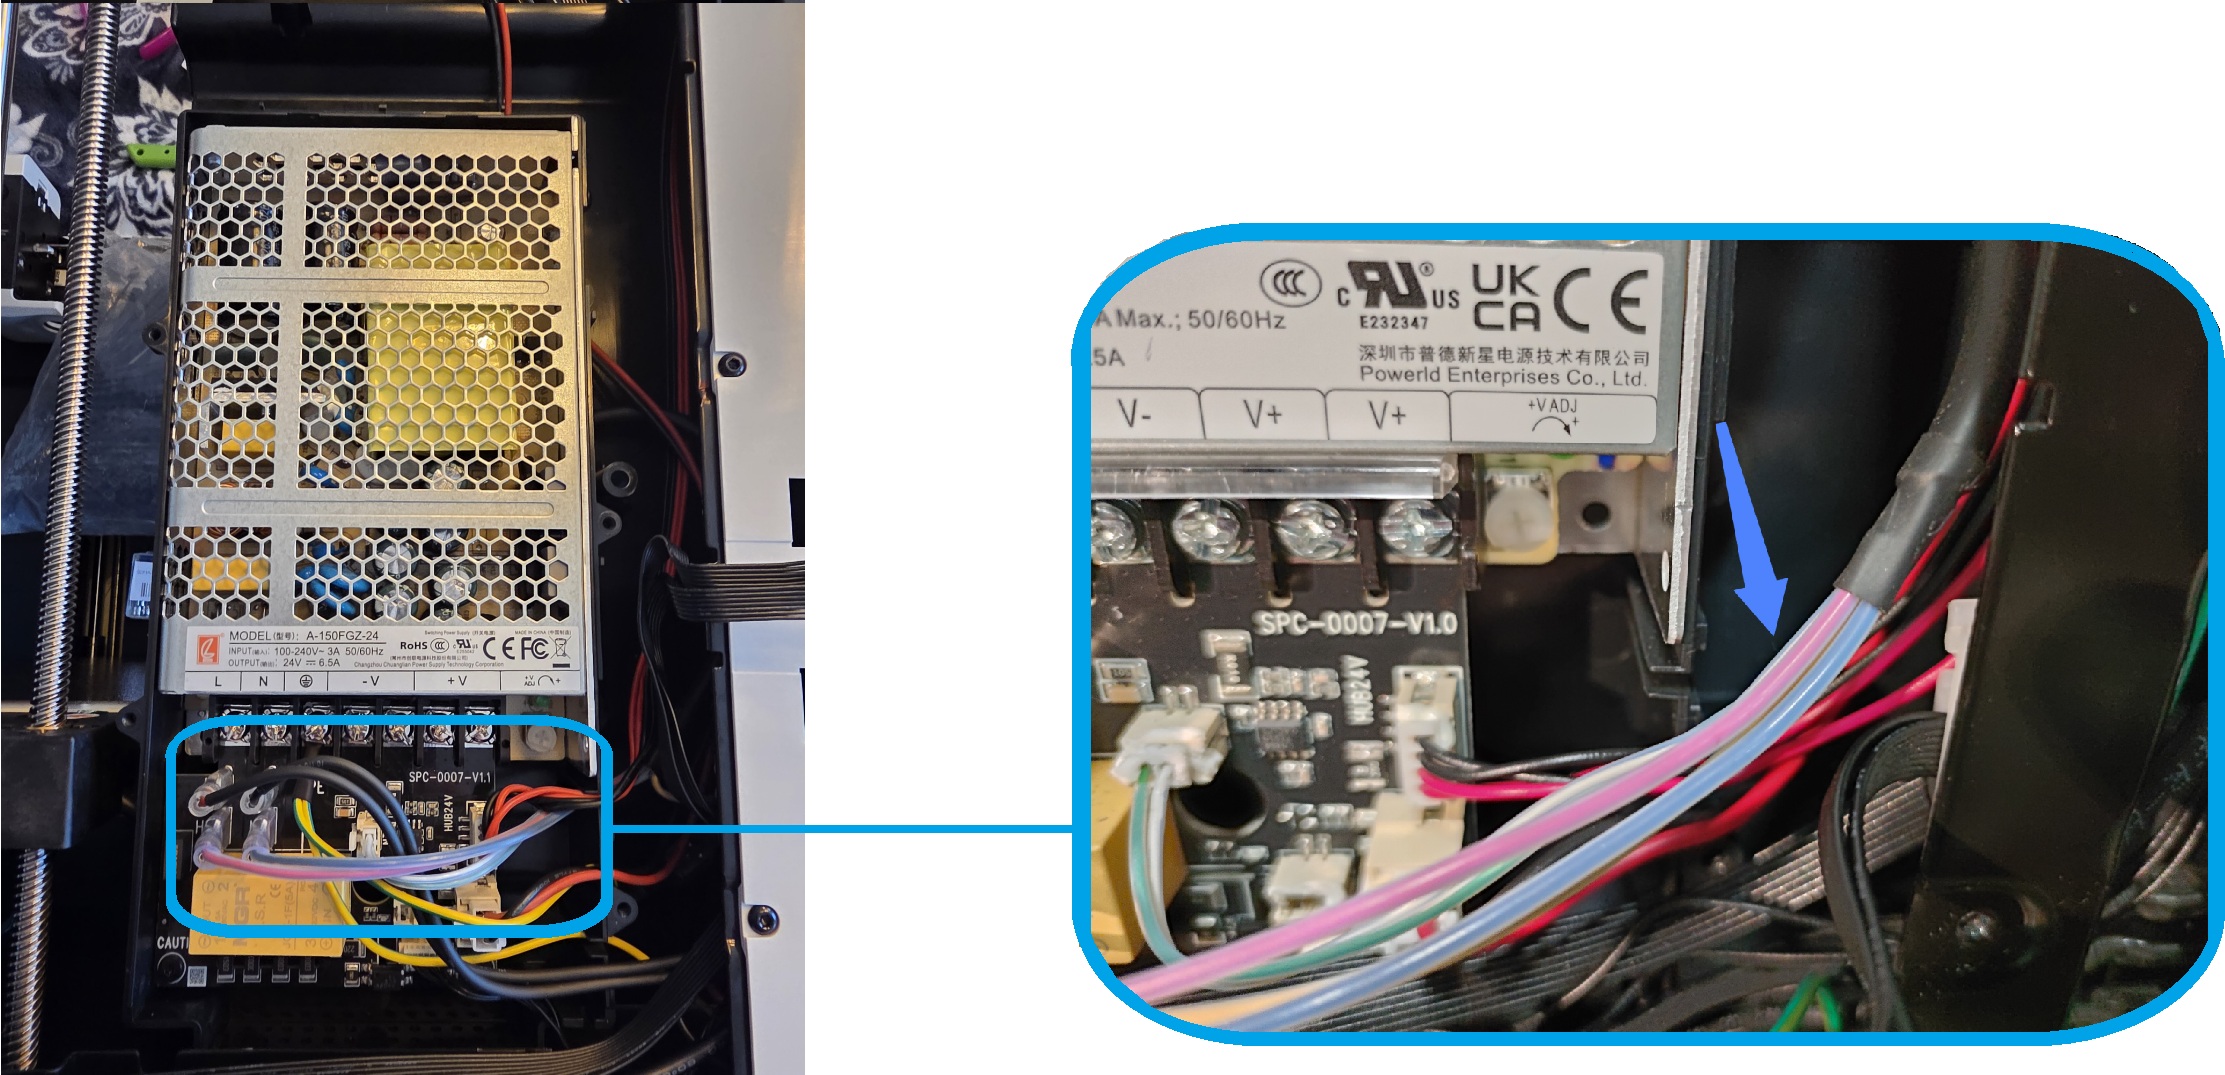
(1) Observe the power supply area indicated in the image for any signs of burning or burnt smell.
- If there are signs of burning or a burnt smell from the power supply, it indicates a power supply short circuit. You can contact Snapmaker support to replace the fuse and power supply.
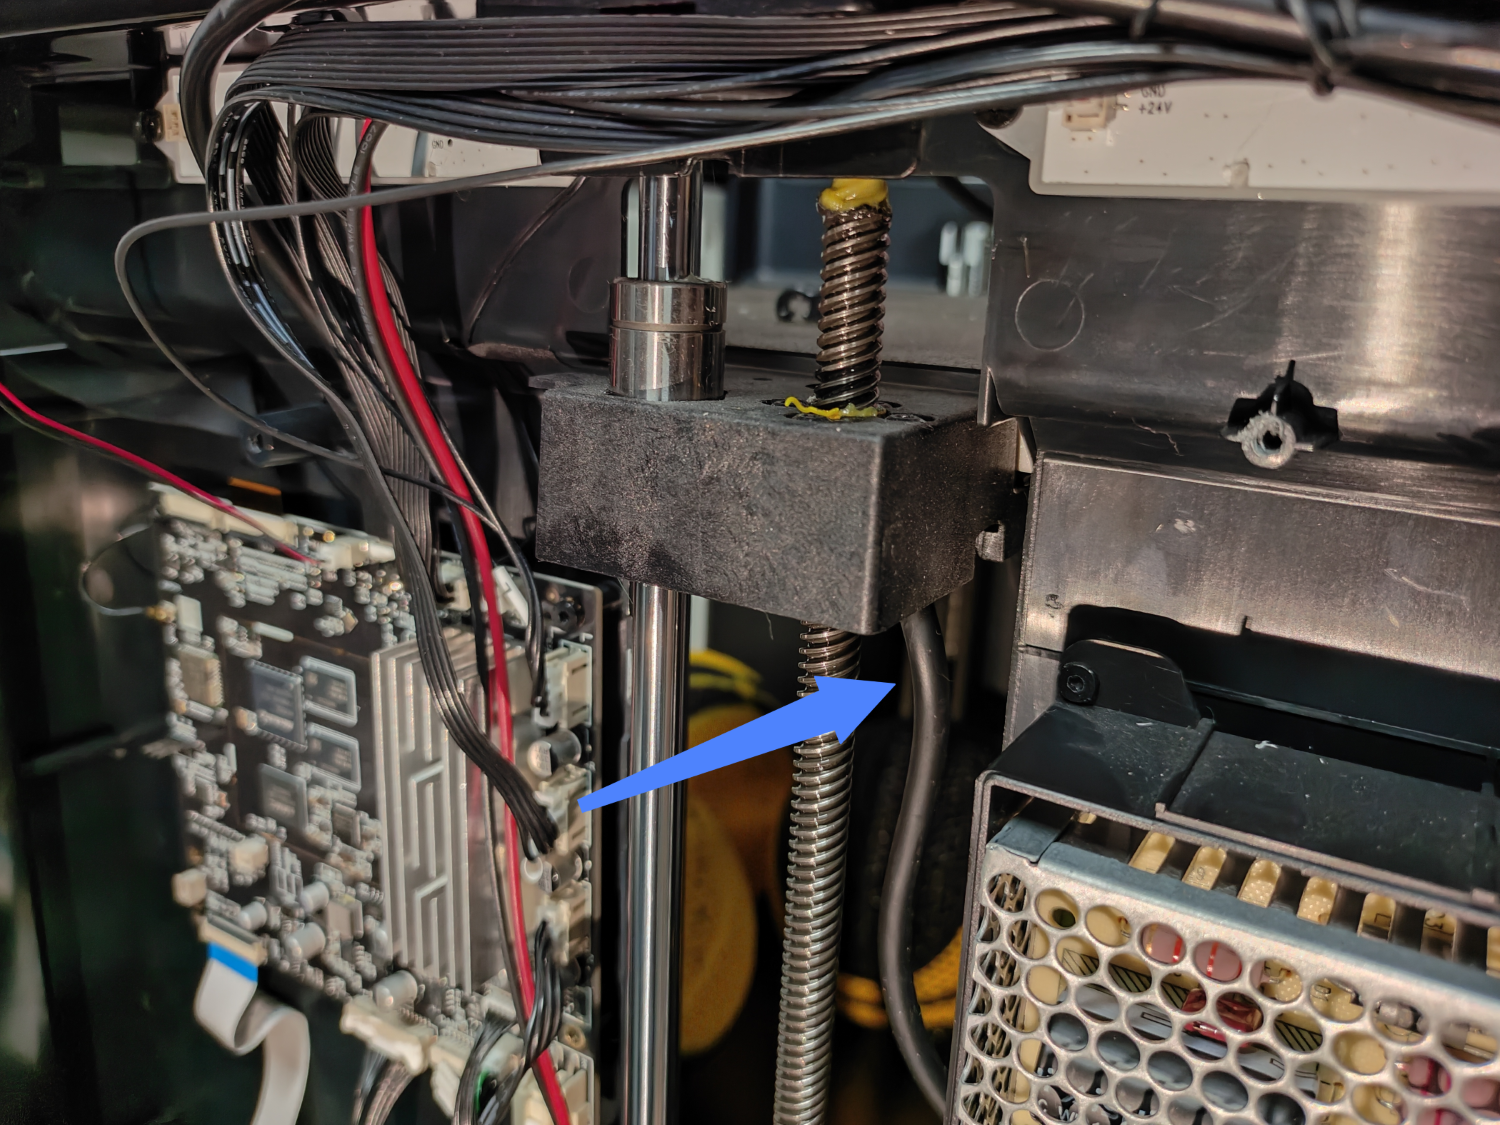
(2) Check the heated bed cables for any visible damage or creases. Pay attention to the two heated bed cable areas marked in the image.
- If the heated bed cables have visible damage or creases, it indicates a heated bed short circuit. You can contact Snapmaker support to replace the fuse and heated bed.
I can use a multimeter (click here to expand details)

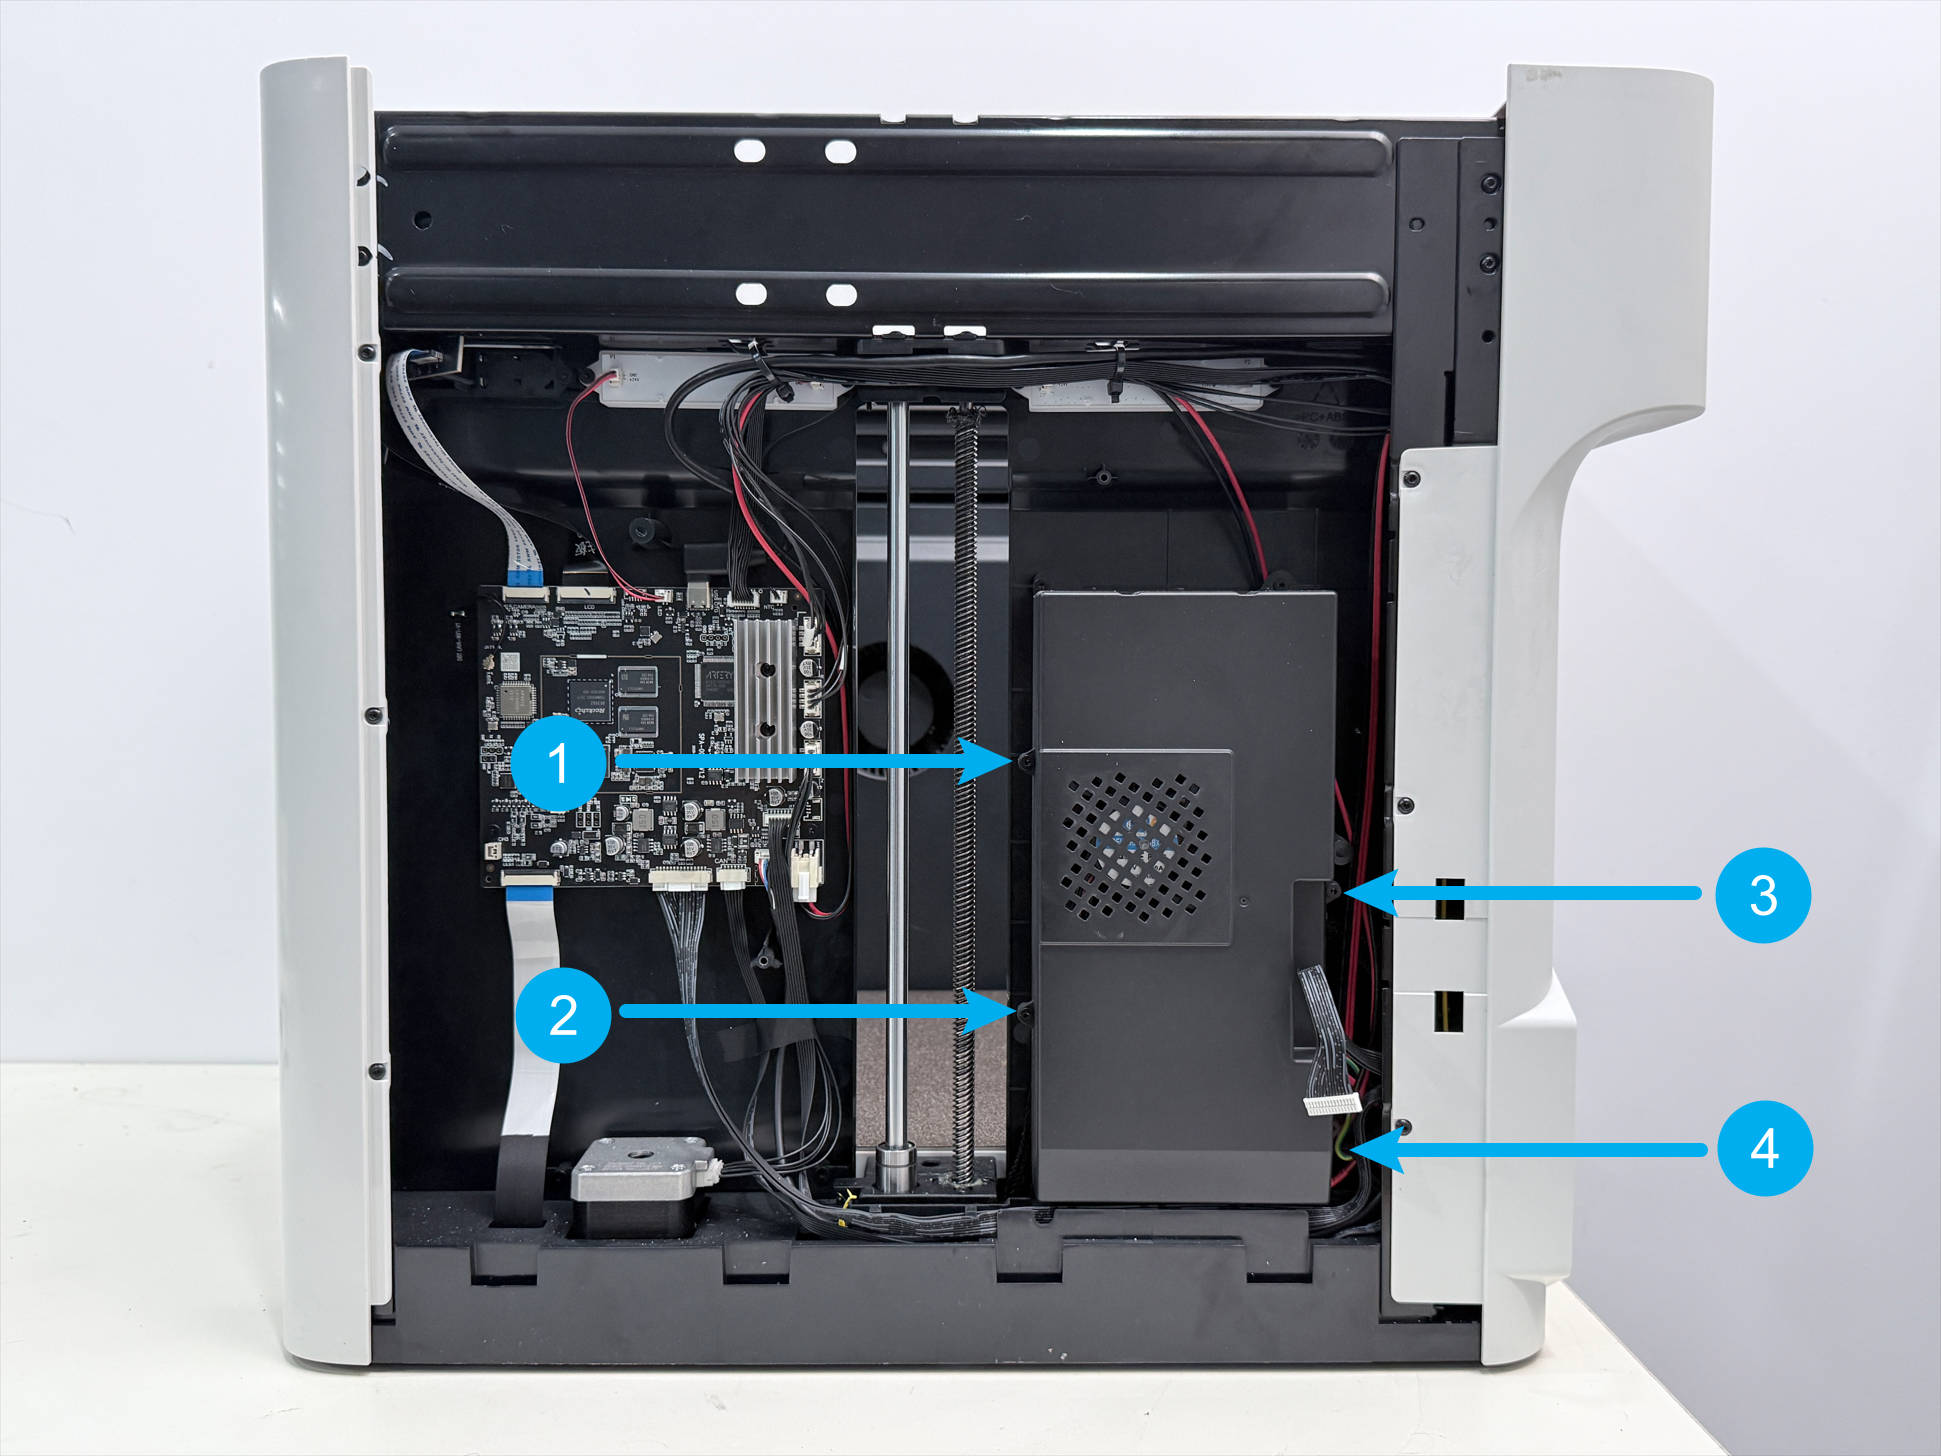
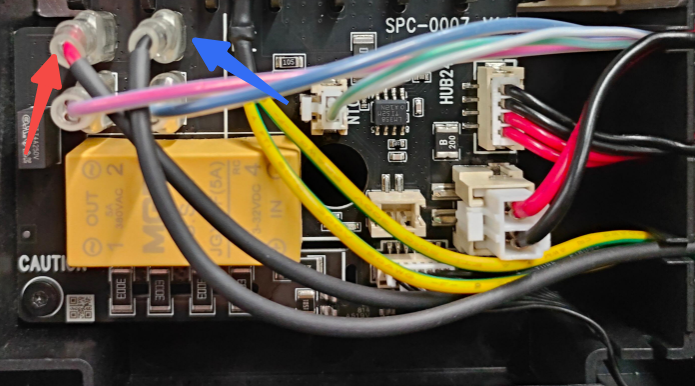
Use a multimeter to measure according to the labels in the image:
(1) Measure the resistance between points 1 and 2. The normal resistance is approximately 84 kΩ.
(2) Unplug the heated bed cables at points 4 and 5. Measure the resistance between points 1 and 3, and between points 2 and 3 respectively. The normal resistance for both should be infinite.
- If the measurement result for step (1) is significantly less than 84 kΩ, or the measurement result for step (2) is not infinite, it indicates a power supply short circuit. You can share the measurement results with Snapmaker support to replace the fuse and power supply.
(3) Plug in the heated bed cables at points 4 and 5. Measure the resistance between points 4 and 5. The normal resistance is approximately 50 Ω.
(4) Measure the resistance between points 4 and 3, and between points 5 and 3 respectively. The normal resistance for both should be infinite.
- If the measurement result for step (3) is significantly less than 50 Ω, or the measurement result for step (4) is not infinite, it indicates a heated bed short circuit. You can share the measurement results with Snapmaker support to replace the fuse and heated bed.
- If both the power supply and heated bed cables are normal, the short circuit may be located elsewhere. Please contact Snapmaker support for further assistance.
¶ Scenario 3: Power Switch Fault
Please turn off the machine and disconnect the power before proceeding.
-
Use an H2.0 hex key, and refer to the U1 HUB board replacement guide to remove the left and right side panels, and the machine's rear panel.
-
Use an H2.0 hex key to remove the 4 screws on the power cover, disconnect the power supply cooling fan wire, and take off the power cover.
-
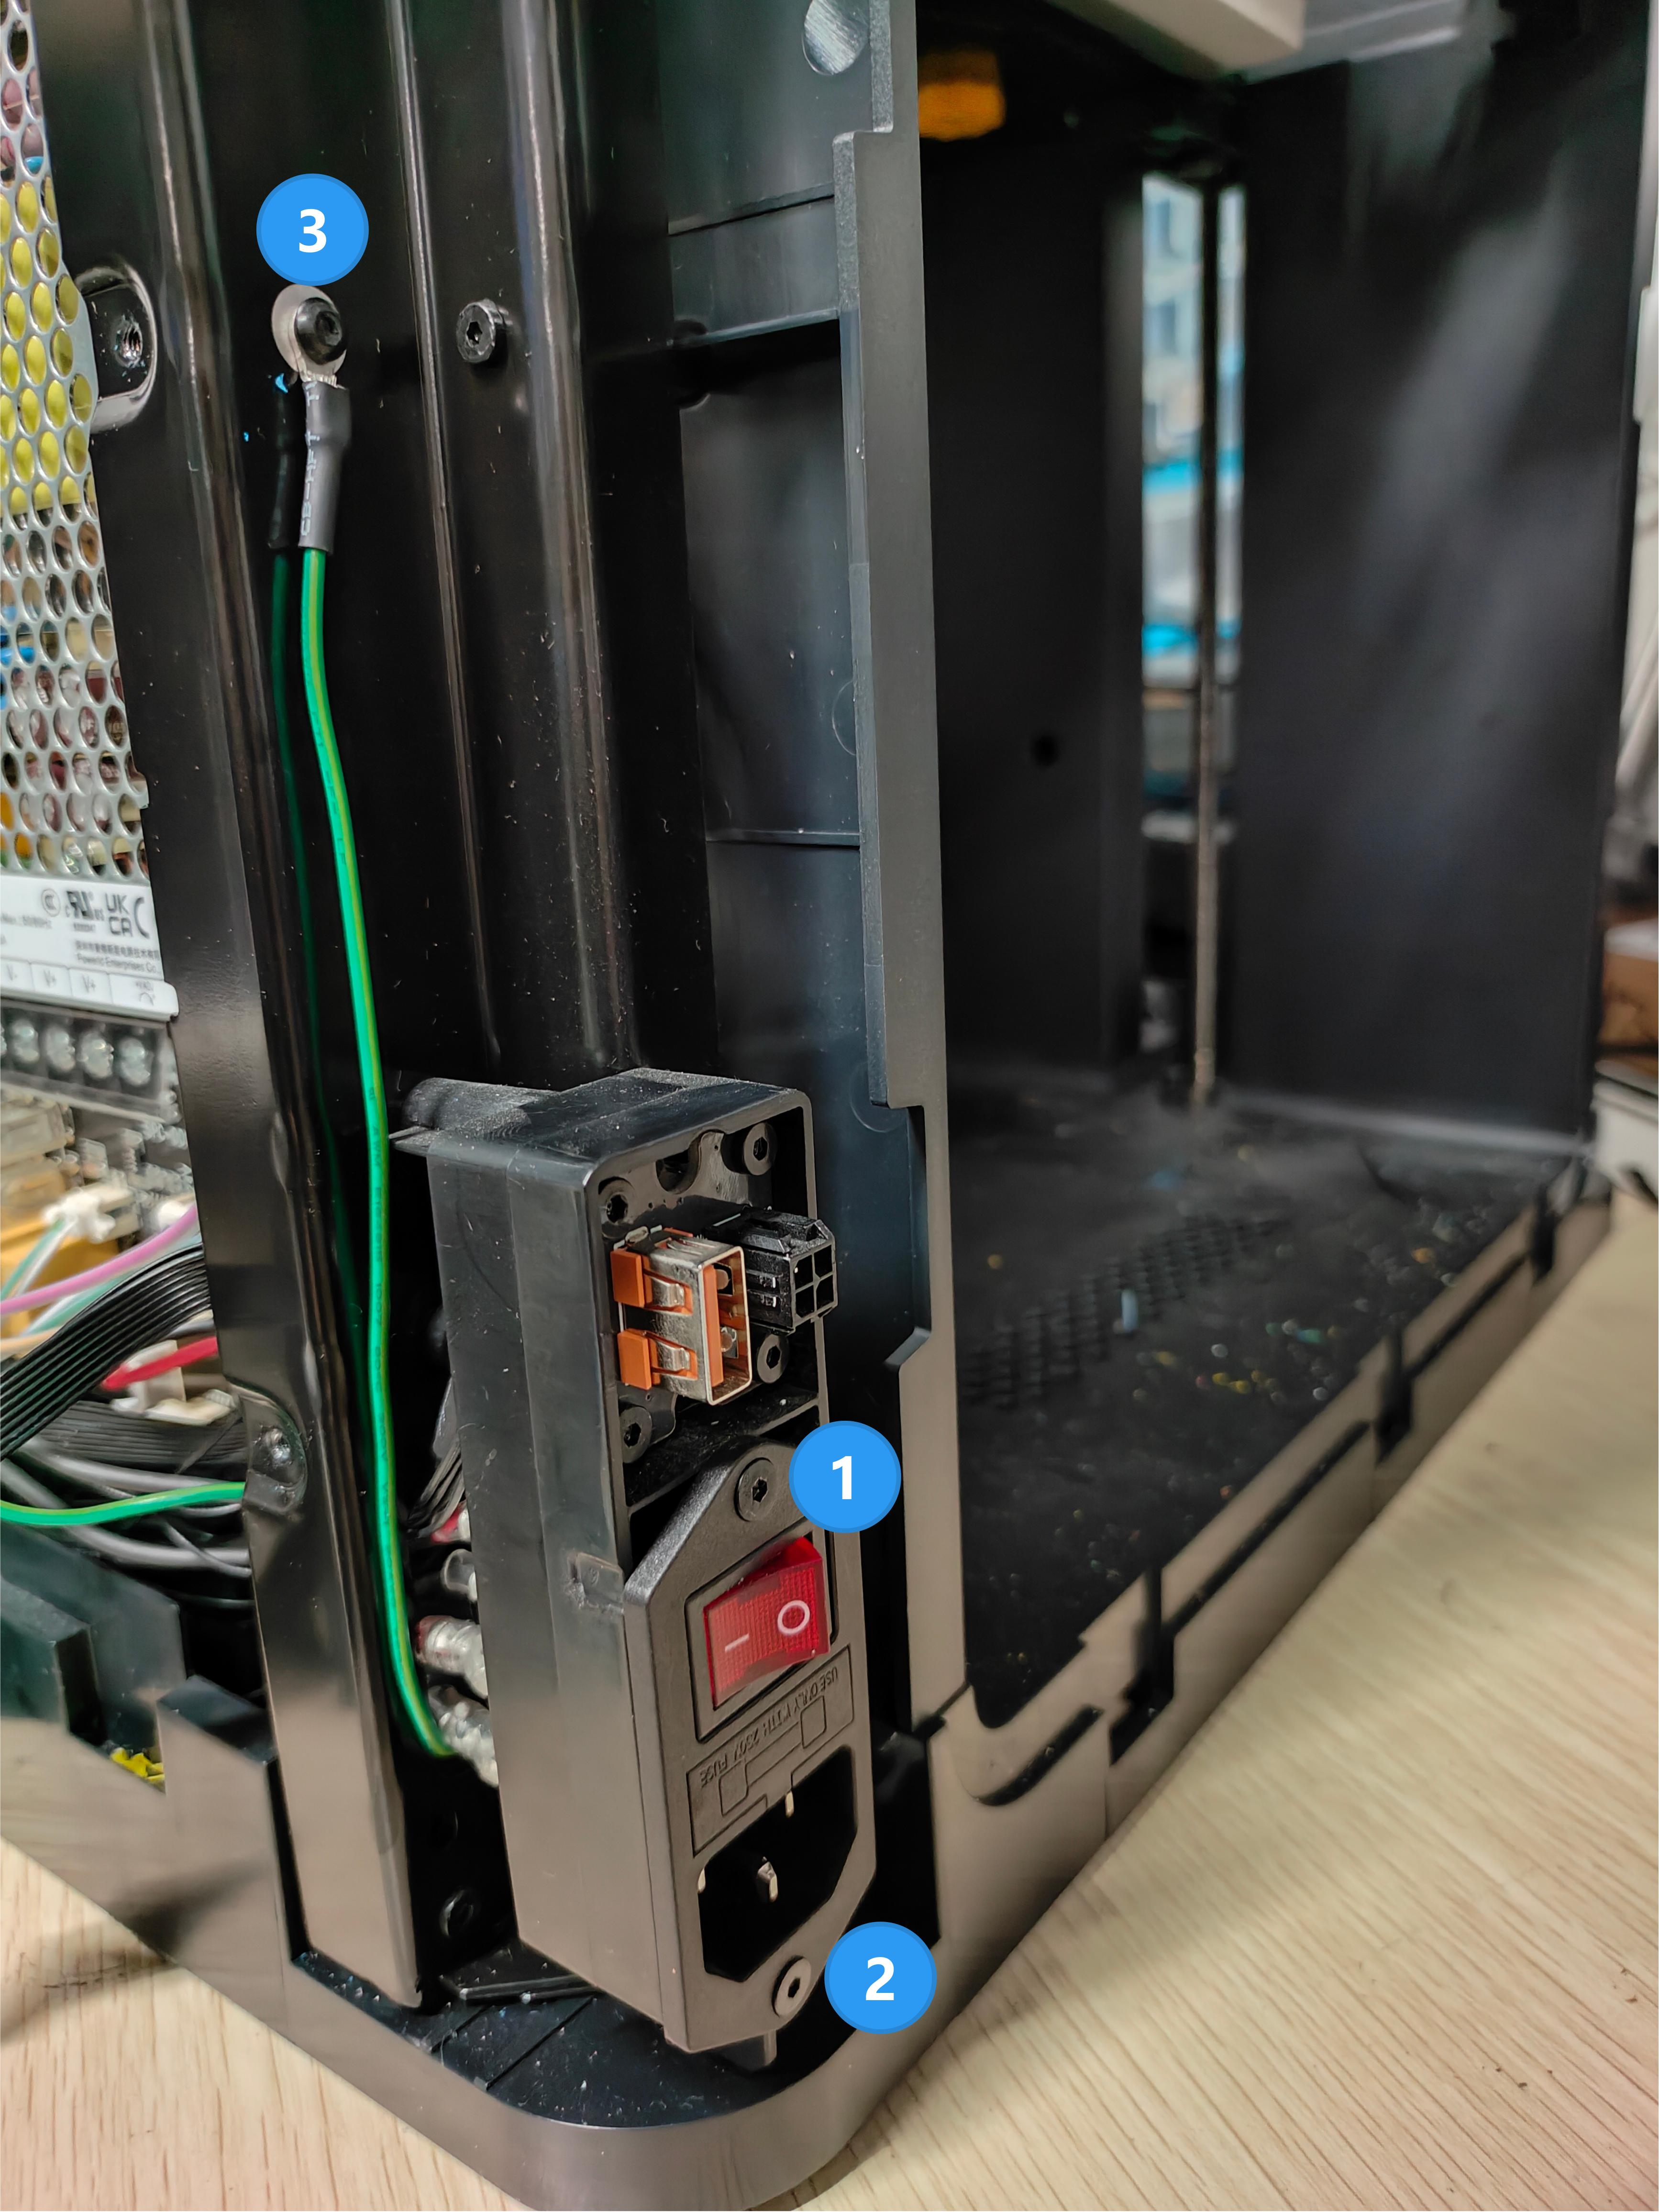
Locate the power switch at the rear of the machine. Then use an H2.0 hex key to remove screw 1, screw 2, and screw 3 near it.
-
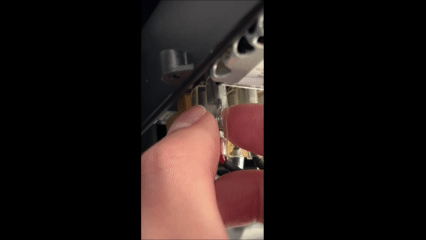
On the right side of the machine, press and unplug the two switch cables with your fingers.
Please refer to the following method to pinch the connector and unplug the switch cables.
- Take out the power switch.
- Check if the neutral wire (black) and the line/live wire (red) of the power switch are loose.
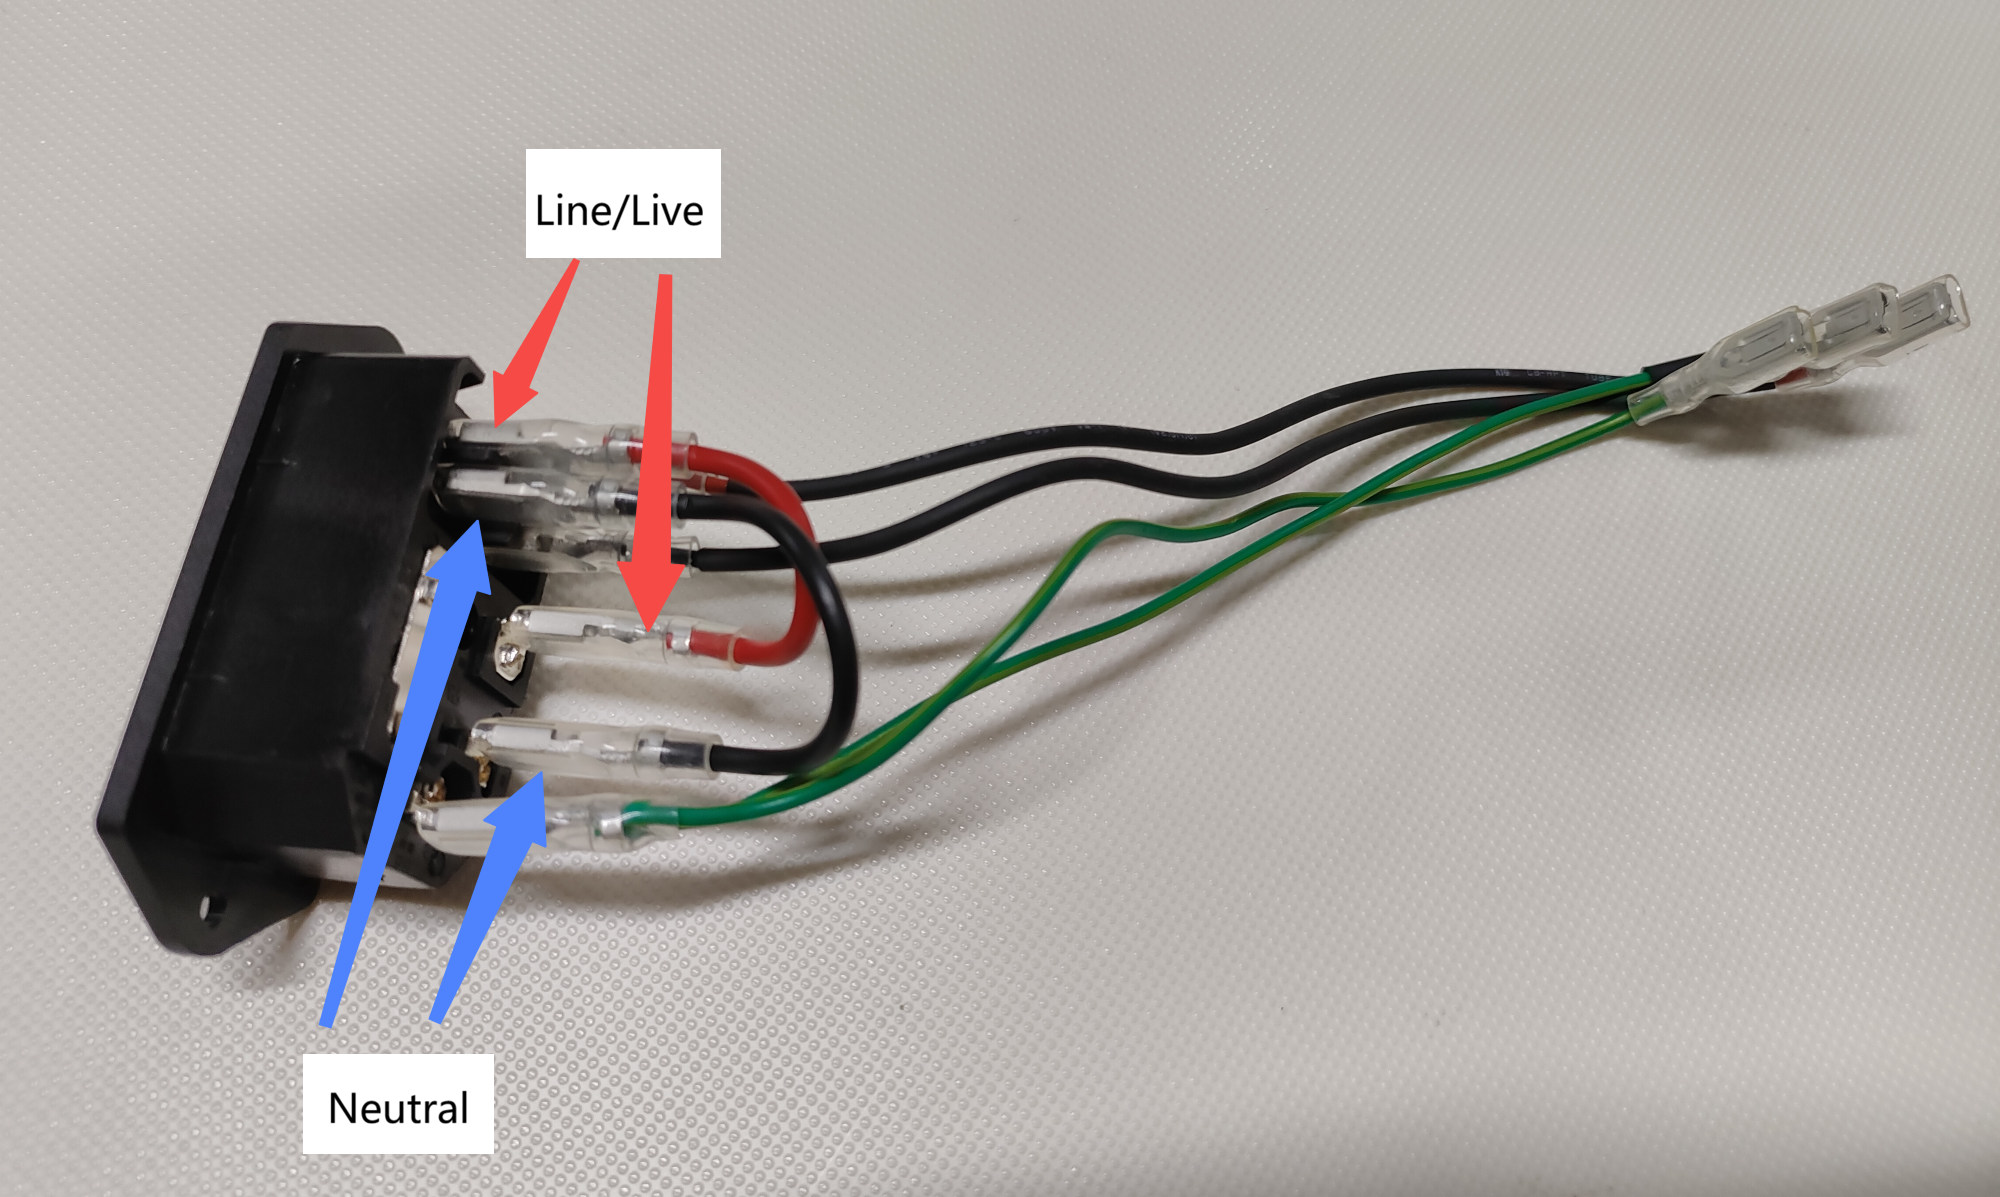
- If the neutral or line/live wire is loose, firmly reseat it and test if the problem is resolved. If the problem persists, please contact Snapmaker support to replace the power switch.
- If the neutral and line/live wires are not loose, the fault is likely with the power switch itself. You can contact Snapmaker support to replace the power switch.
¶ ✅ Verification
If the power switch lights up normally after the machine is connected to power and the power switch is pressed, you have found the root cause and successfully resolved the issue.
¶ 📚 Related Resources
¶ 💬 Reach out to Snapmaker Support
After following the troubleshooting steps, if you find it difficult to resolve your issue, kindly submit a support ticket through https://snapmaker.formcrafts.com/u1-troubleshooting-request and share your troubleshooting results with pictures or videos. Our dedicated support team will be more than willing to assist you in resolving the issue.