¶ 💡 Compatibility
This guide applies to the following machine. Please note when referencing:
- Machine model: U1
¶ ⏰ When to Use This Guide
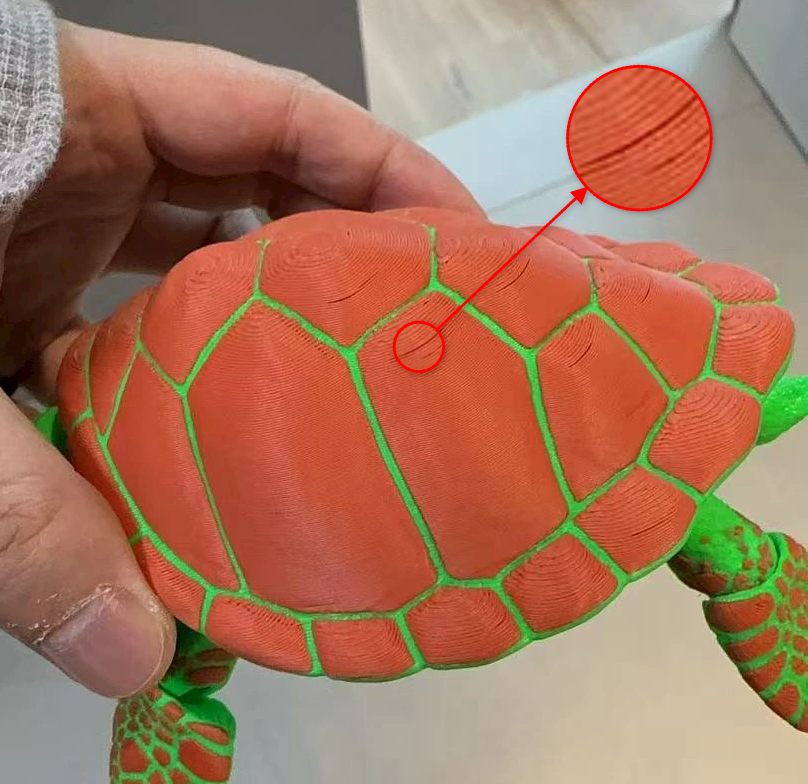
If you observe gaps on the sloped top surfaces of a model while printing with the U1, refer to this guide for troubleshooting.
¶ 📋 Quick Info Card
- Difficulty: ⭐⭐☆☆☆ (Easy)
- Estimated Time: 15 minutes
¶ 🔁 Troubleshooting Flowchart

¶ 🔍 Quick Diagnosis
Gaps on sloped top surfaces are typically caused by a combination of insufficient top-layer extrusion, weak wall structure, and the inherent stair-stepping effect of inclined surfaces.
- Under-Extrusion or Unstable Extrusion → Go to Cause 1
- Weak Wall Structure → Go to Cause 2
- Improper Top Surface Infill Pattern → Go to Cause 3
- Large Stair-Stepping on Sloped Surfaces → Go to Cause 4
- Excessive Overhang Angle on Sloped Surfaces → Go to Cause 5
¶ 🪄 Preparation
To ensure optimal user experience, we recommend updating your Snapmaker Orca to the lastest version. Click here to view Snapmaker Orca release notes.
¶ 🛠️ Troubleshooting Steps
¶ Cause 1: Under-Extrusion or Unstable Extrusion
¶ Method 1. Perform Flow Calibration
YOLO is a simplified method that adjusts the flow rate in a single pass using the formula Old Flow Ratio ± modifier. For YOLO Recommended Mode, the calibration range is [-0.05, +0.05], and the flow rate step is 0.01.
- Launch Snapmaker Orca. From the homepage header, navigate to
Calibration>Flow rate>YOLO (Recommended). The software will automatically generate 11 calibration blocks, each printed with a different flow ratio setting. - Click
Slice platein the top-right corner, then clickPrint>Upload and Print. The printer will execute the print job.
- Carefully examine the printed blocks and identify the one with the smoothest surface finish.
.jpg)
- Calculate the new flow ratio using the formula: New Flow Ratio = Current Flow Ratio ± Value of the Smoothest Block. For example, if the current flow ratio in your material settings is 0.98 and the smoothest block corresponds to -0.1, the new flow ratio would be 0.97.
- Enter the new flow ratio in the material settings for the corresponding filament and save the changes.

¶ Method 2. Increase Line Width
In addition to adjusting the flow ratio, you can also slightly increase the line width for outer wall and top surface.
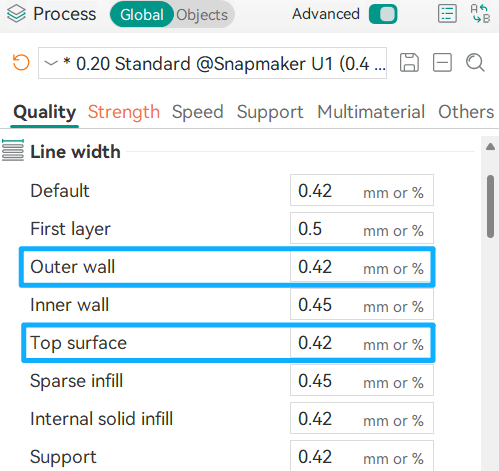
¶ 1. Outer wall
It is typically set to 105%–120% of the nozzle diameter. Taking the U1 standard 0.4mm nozzle as an example, the recommended range for the outer wall line width is 0.42-0.48mm. Increasing the value slightly within this range can help overhangs achieve a smoother surface.
¶ 2. Top surface
The top surface line width affects the print quality of the top layers and is generally set to 100%–105% of the nozzle diameter. Taking the U1 standard 0.4mm nozzle as an example, the recommended range for the top surface line width is 0.4-0.42mm. Adjusting within this range helps achieve a smooth finish without causing over-extrusion.
¶ Cause 2: Weak Wall Structure
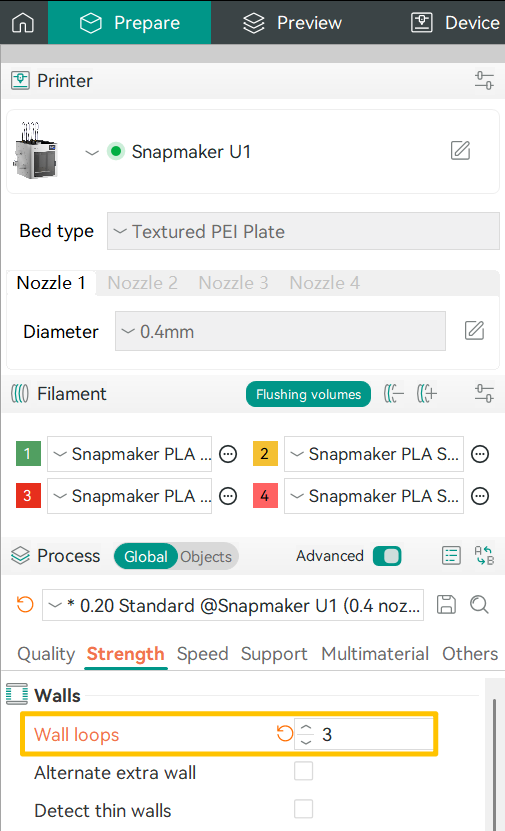
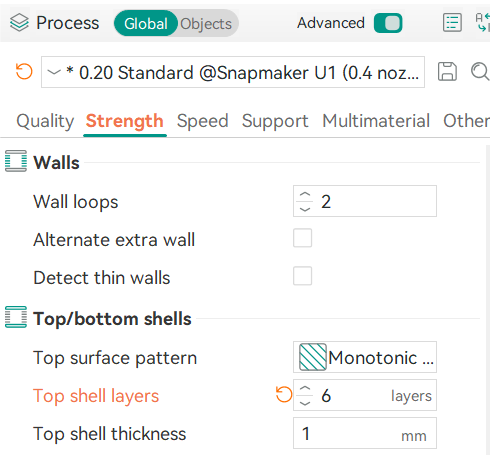
¶ Method 3. Increase Wall Loops
You can increase the number of wall loops in Process > Strength > Walls to achieve a stronger top surface.
The image below illustrates the difference in the top structure when the wall loop count is set to 1 versus 2:
.png)
You can also try increasing the number of top shell layers to further improve the print quality of the top surface.
¶ Method 4. Adjust Infill Density and Pattern
The primary purpose of infill is to provide internal structural support for the model. Insufficient infill can lead to large internal voids, which may cause visible gaps on the top layers.
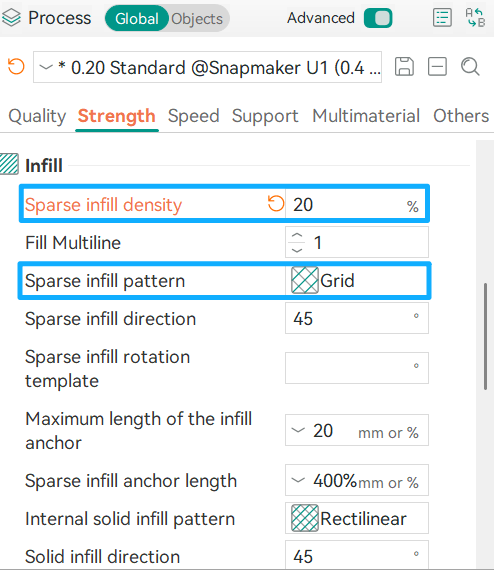
¶ 1. Sparse infill density
Sparse infill density refers to the proportion of material inside a 3D print, expressed as a percentage. Typically:
- Decorative prints: 10%–20%
- Functional parts: 30%–50%
- High-strength components: 60% or higher
You can adjust this value up or down based on your specific needs.
¶ 2. Sparse infill pattern
Even with the same infill density, different patterns can affect strength, flexibility, and printing speed. Snapmaker Orca currently offers 26 sparse infill patterns. While the optimal pattern depends on the print job, some patterns are particularly effective for addressing the gap issue discussed here.
For example, when selecting the Line pattern, the interwoven grid creates a more complex support structure. This provides greater stability than Rectilinear infill, which prints faster and consumes less material but offers lower interlayer adhesion.
.png)
Similarly, patterns such as Adaptive Cubic, Honeycomb and Hilbert Curve can provide stronger support under sloped surfaces, effectively reducing gaps on top layers.
¶ Cause 3: Improper Top Surface Infill Pattern
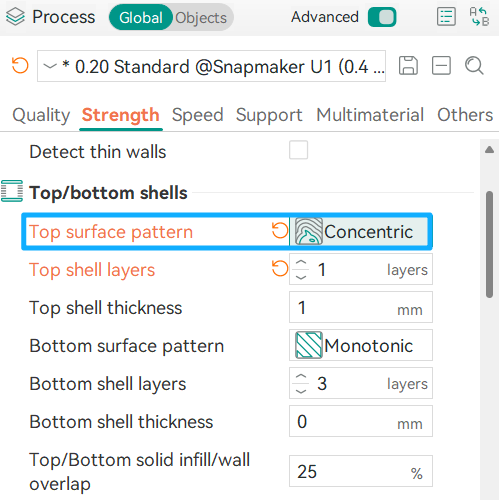
¶ Method 5. Adjust Top Surface Pattern
For the top surface pattern, you can try Concentric, Monotonic, or Monotonic line. These patterns are more effective at filling gaps in small areas and around irregular contours.
¶ Cause 4: Large Stair-Stepping on Sloped Surfaces
¶ Method 6. Enable Variable Layer Height
If slopes or curved surfaces are printed with a uniformly large layer height, the extrusion lines on the top layers must span longer distances. This increases the stair-stepping effect and makes surface gaps more likely.
- To enable
Variable layer heightin Snapmaker Orca, use the option in the top toolbar. - Drag the triangle icon next to the
Quality/Speedslider to select your desired print balance. Then clickAdaptive, and the software will automatically apply smaller layer heights to sloped top surfaces, resulting in a smoother finish and a more closed top layer. - You can also click
Smoothmultiple times to achieve better transitions between different layer heights.

¶ Cause 5: Excessive Overhang Angle on Sloped Surfaces
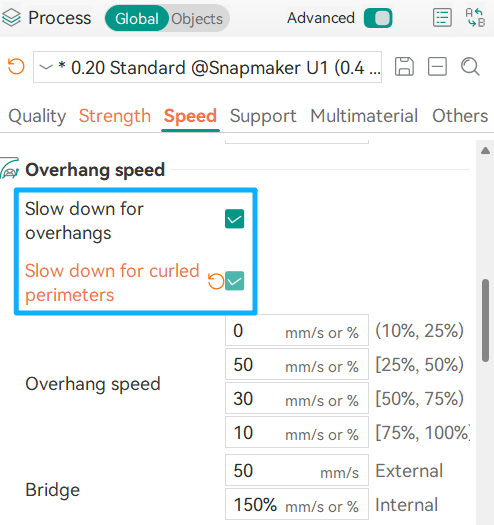
¶ Method 7. Adjust Cooling and Slow Down Settings
When dealing with steep slopes or overhang structures, you can slightly lower the nozzle temperature, increase the part cooling fan and/or auxiliary fan speed, and enable Slow down for overhangs and Slow down for curled perimeters. These adjustments help minimize material sagging caused by gravity, preventing issues where the top layers fail to close properly.
¶ ✅ Verification
After applying the adjustments described above, reprint the model. If there are no visible gaps on the sloped top surfaces, the print quality issue has been successfully resolved.
¶ 📚 Related Resources
¶ 💬 Reach out to Snapmaker Support
After following the troubleshooting steps, if you find it difficult to resolve your issue, kindly submit a support ticket through https://snapmaker.formcrafts.com/u1-troubleshooting-request and share your troubleshooting results with pictures or videos. Our dedicated support team will be more than willing to assist you in resolving the issue.