¶ 💡 Compatibility
This guide applies to the following machine. Please note when referencing:
Machine model: U1
¶ 📝 Issue Description
An error message appears on the touchscreen indicating that the firmware update has failed.
Older firmware versions may not display an error message but can get stuck at a certain stage.
This can also be considered as an error occurring at that stage.
If you are already using firmware version 1.3 or later and it still gets stuck without showing an error message, please restart the machine and try again.
If the issue persists, please contact technical support
¶ 📋 Quick Info Card
Difficulty: ⭐⭐⭐☆☆ (Medium)
Esimated time: 30–50 Minutes
¶ 🔀 Troubleshooting Flowchart
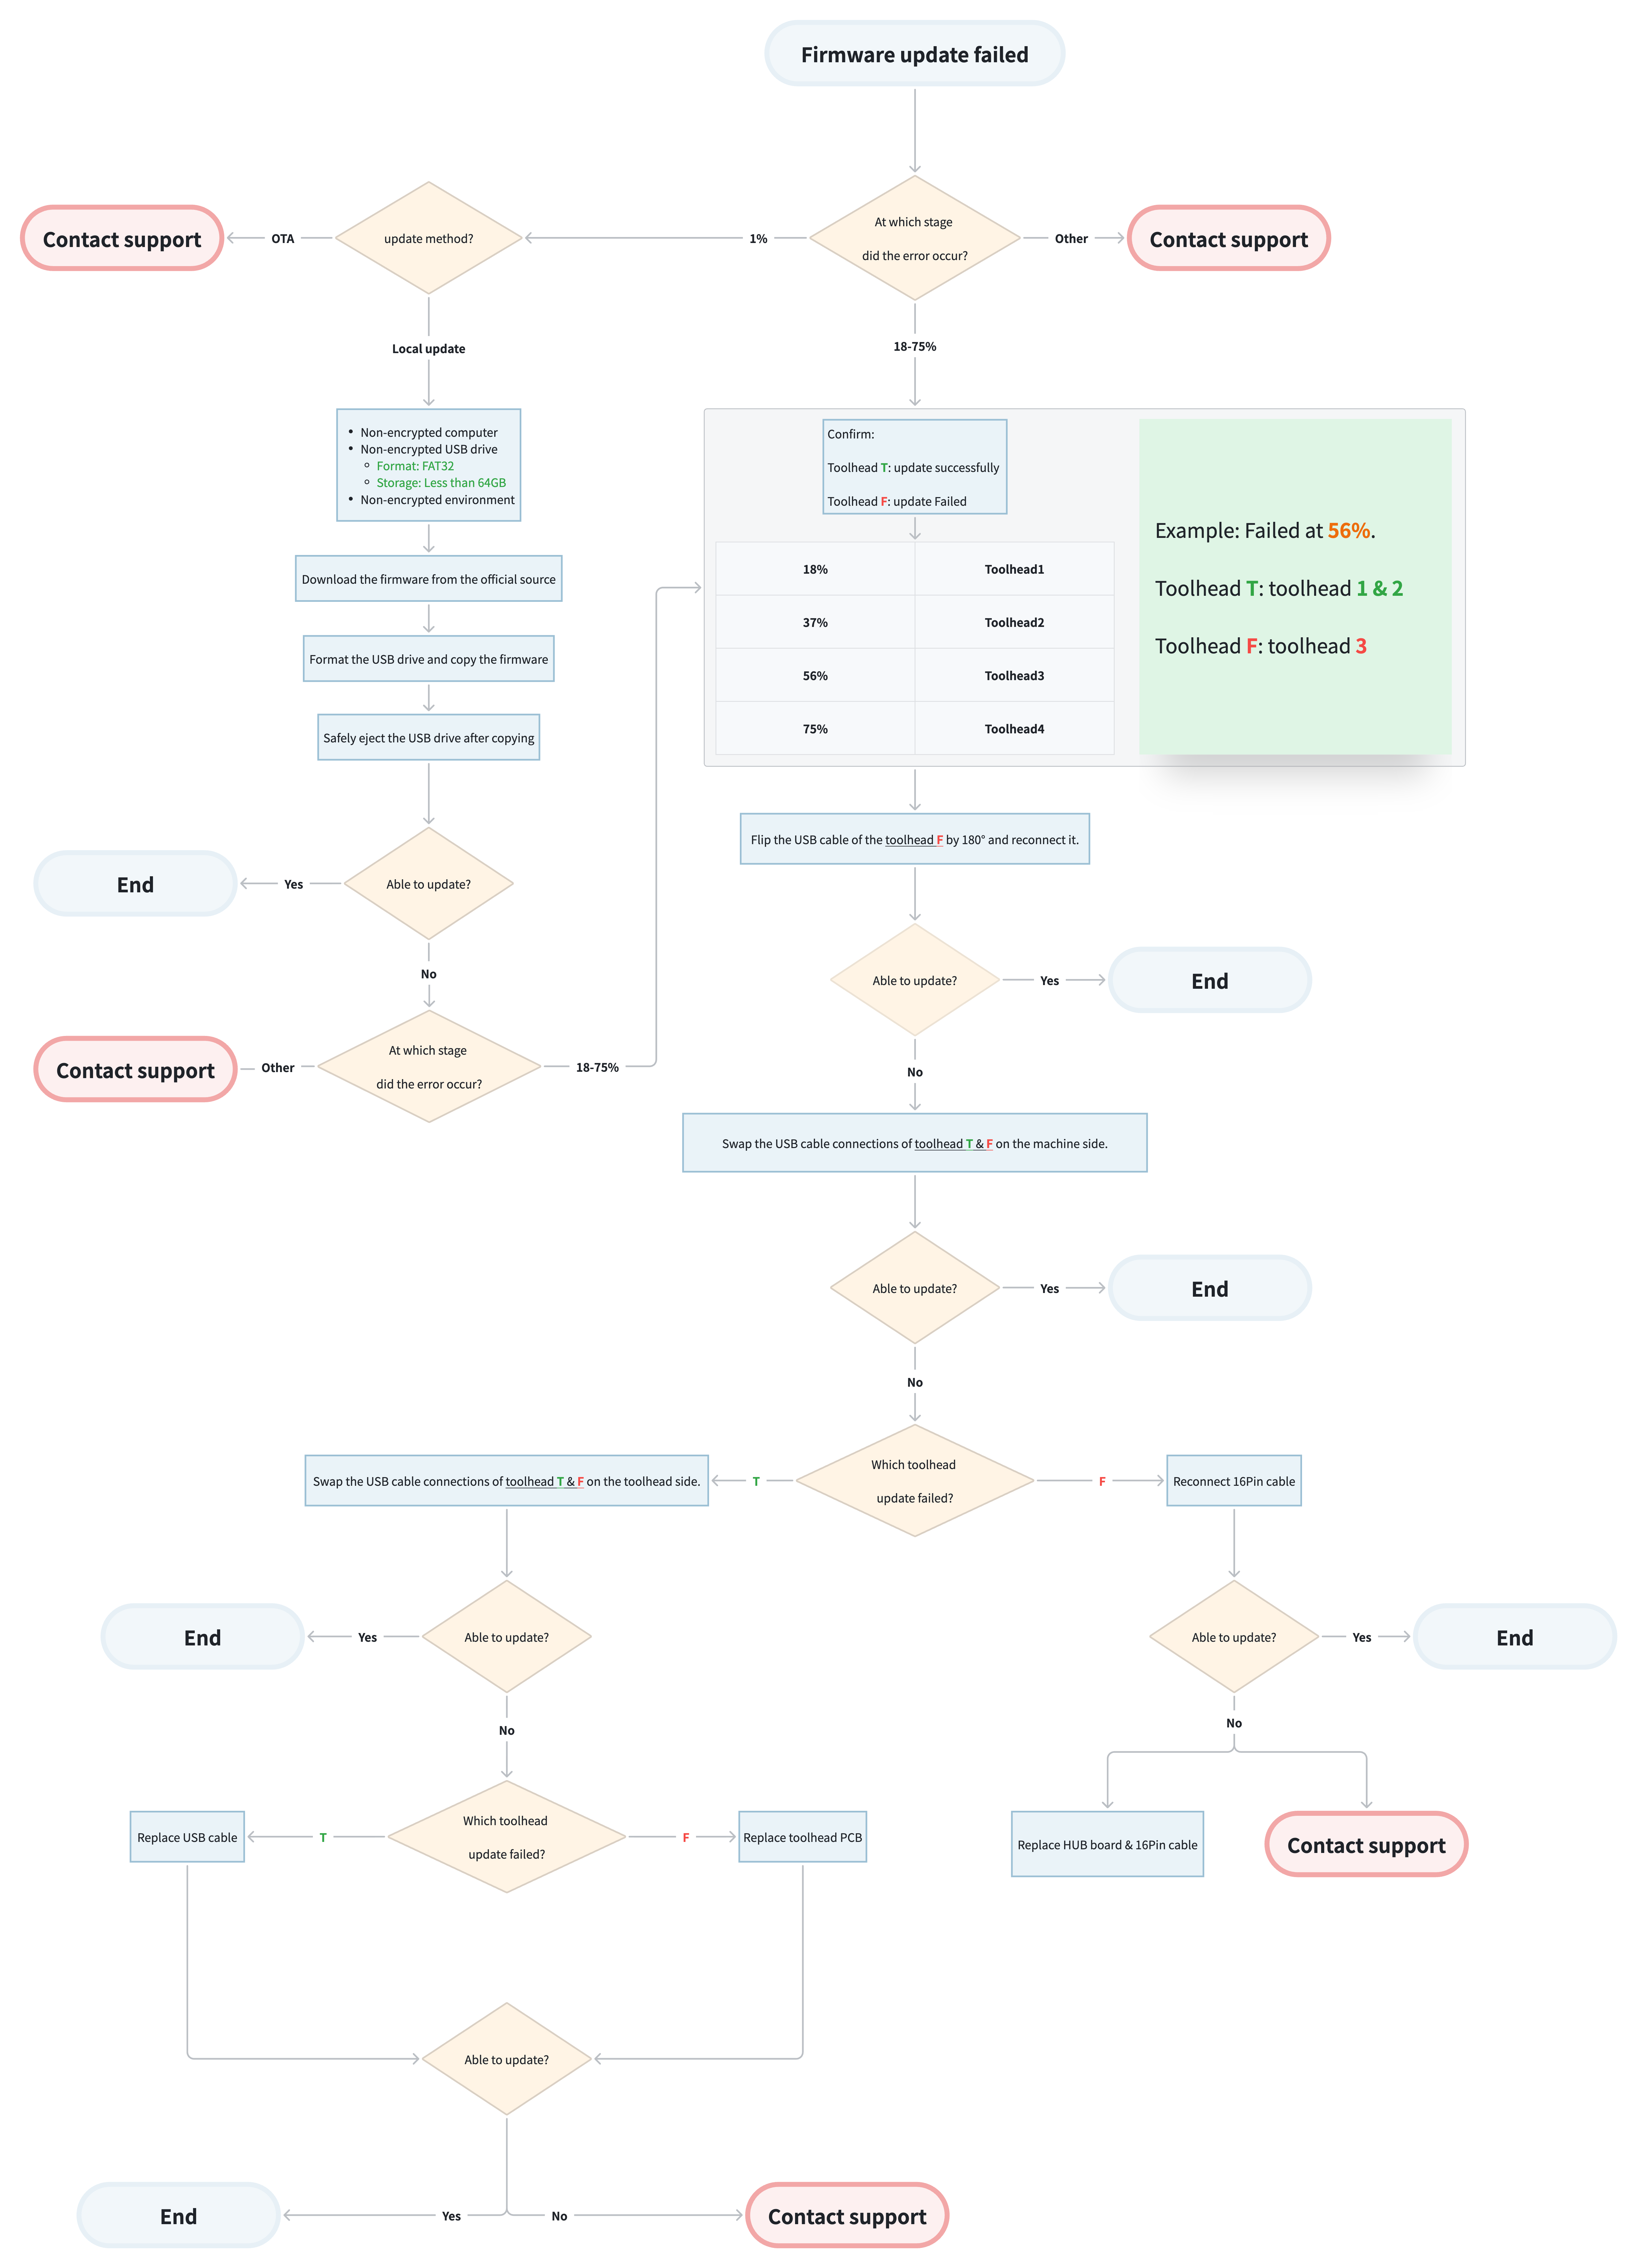
¶ 🛠️ Troubleshooting Steps
¶ 1. Error Stage Confirmation
The complete update process consists of 8 stages. Please confirm at which stage the error message appears.
¶ 2. File unpacking failed
(1) If this issue occurs during OTA, please contact support。
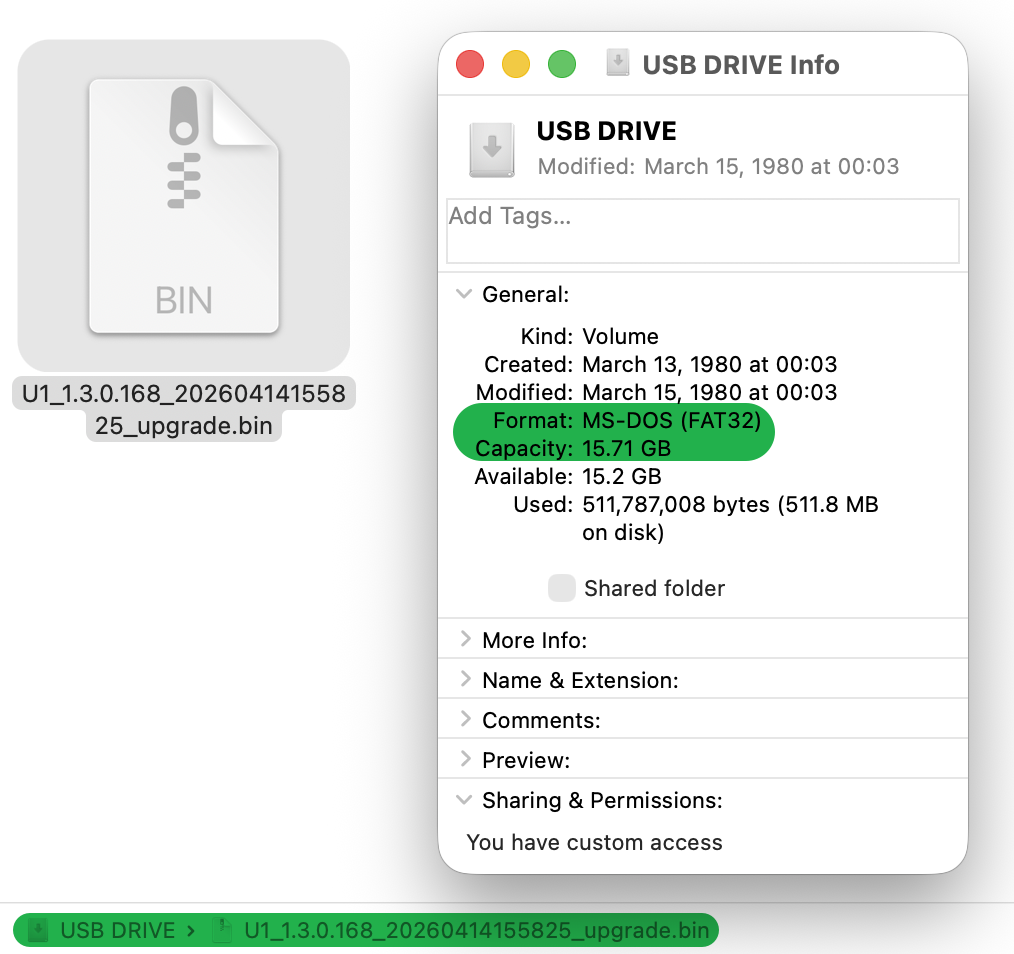
(2) If this issue occurs during a local update, please ensure that the entire upgrade process is performed in a non-encrypted environment, and then:
-
Download the latest official firmware from the Firmware Release Page
-
Format the USB drive to FAT32.
-
Copy the firmware file to the root directory of the USB drive.
-
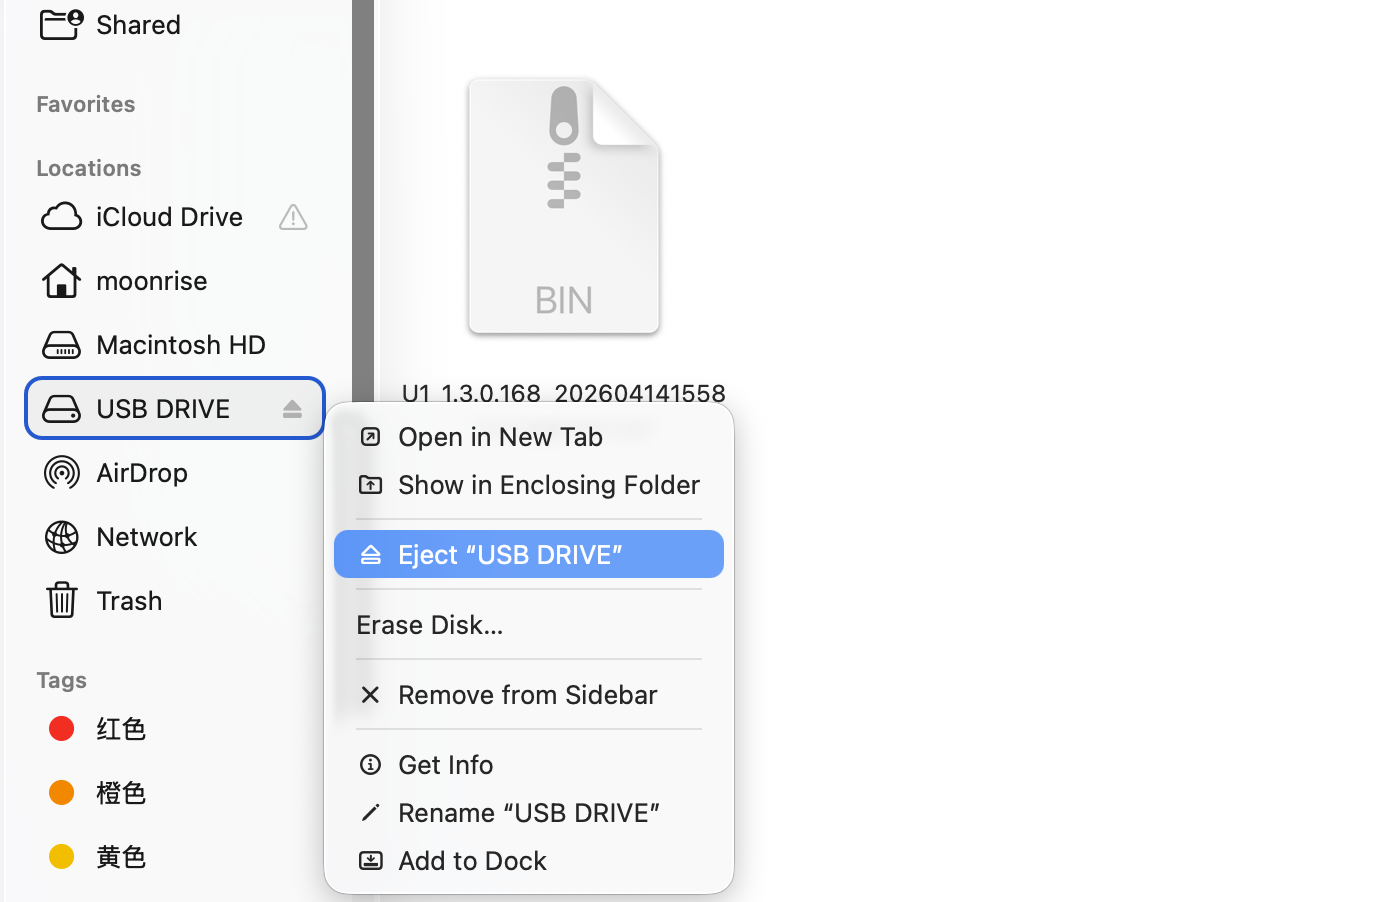
Safely eject the USB drive.
(3) Retry the firmware update. If the update still fails:
-
If the error occurs during the 18–75% stage, please continue troubleshooting under 3. Toolhead update failed.
-
If the error appears at any other stage, please contact support。
¶ 3. Toolhead update failed
(1) Please determine based on the stage at which the error occurs:
-
The successfully updated
Toolhead T
-
The failed updated
Toolhead F
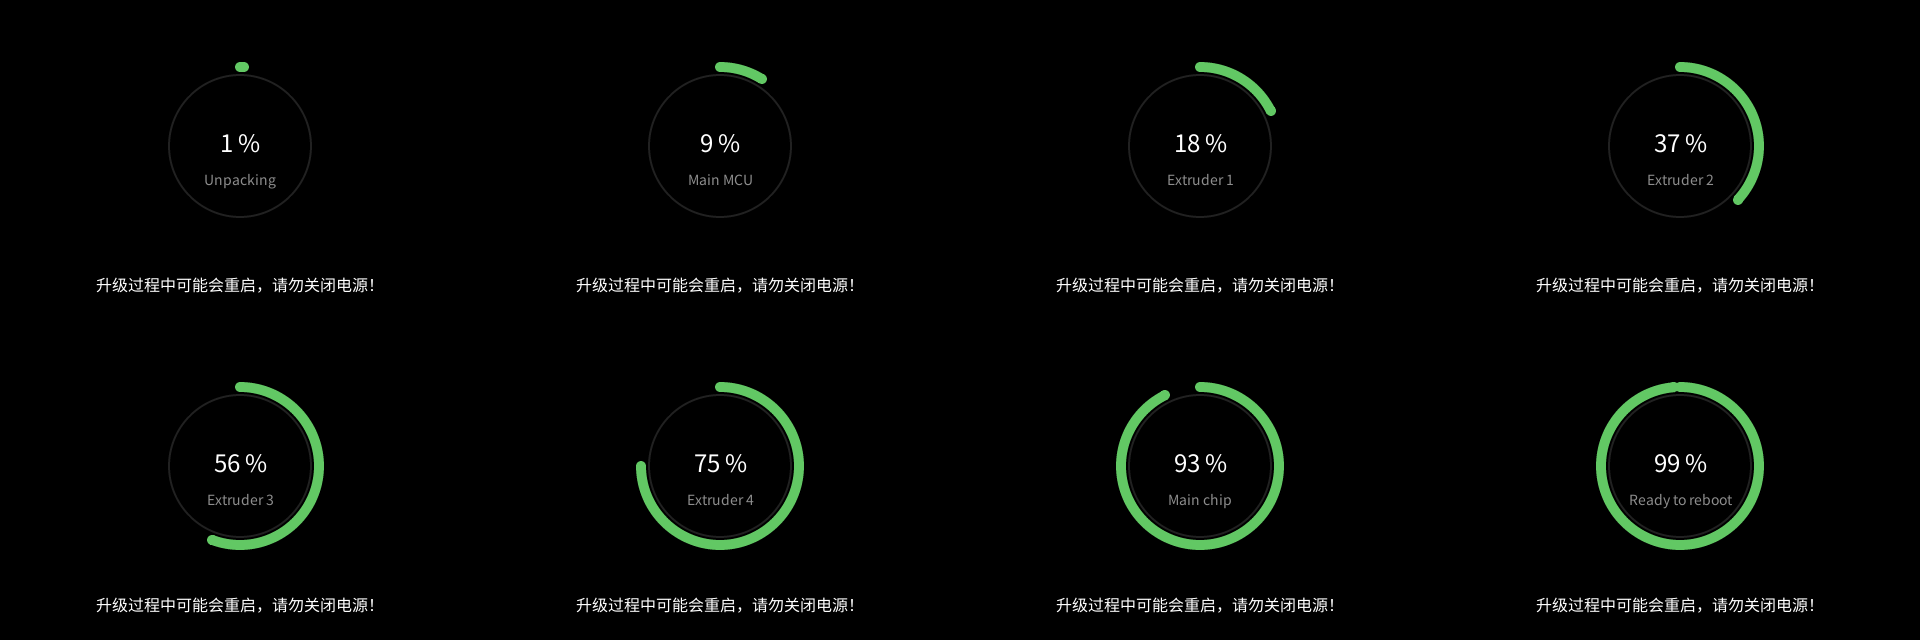
Error stage Toolhead T(successfully updated) Toolhead F(Failed updated) 18% None Toolhead-1 37% Toolhead-1 Toolhead-2 56% Toolhead-1、2 Toolhead-3 75% Toolhead-1、2、3 Toolhead-4
(2) The USB cable has two ends, which are connected to the machine and the toolhead respectively.
-
Connect the end that was originally plugged into the
Toolhead Fto the machine. -
Connect the end that was originally plugged into the machine to the
Toolhead F. -
Retry the firmware update.
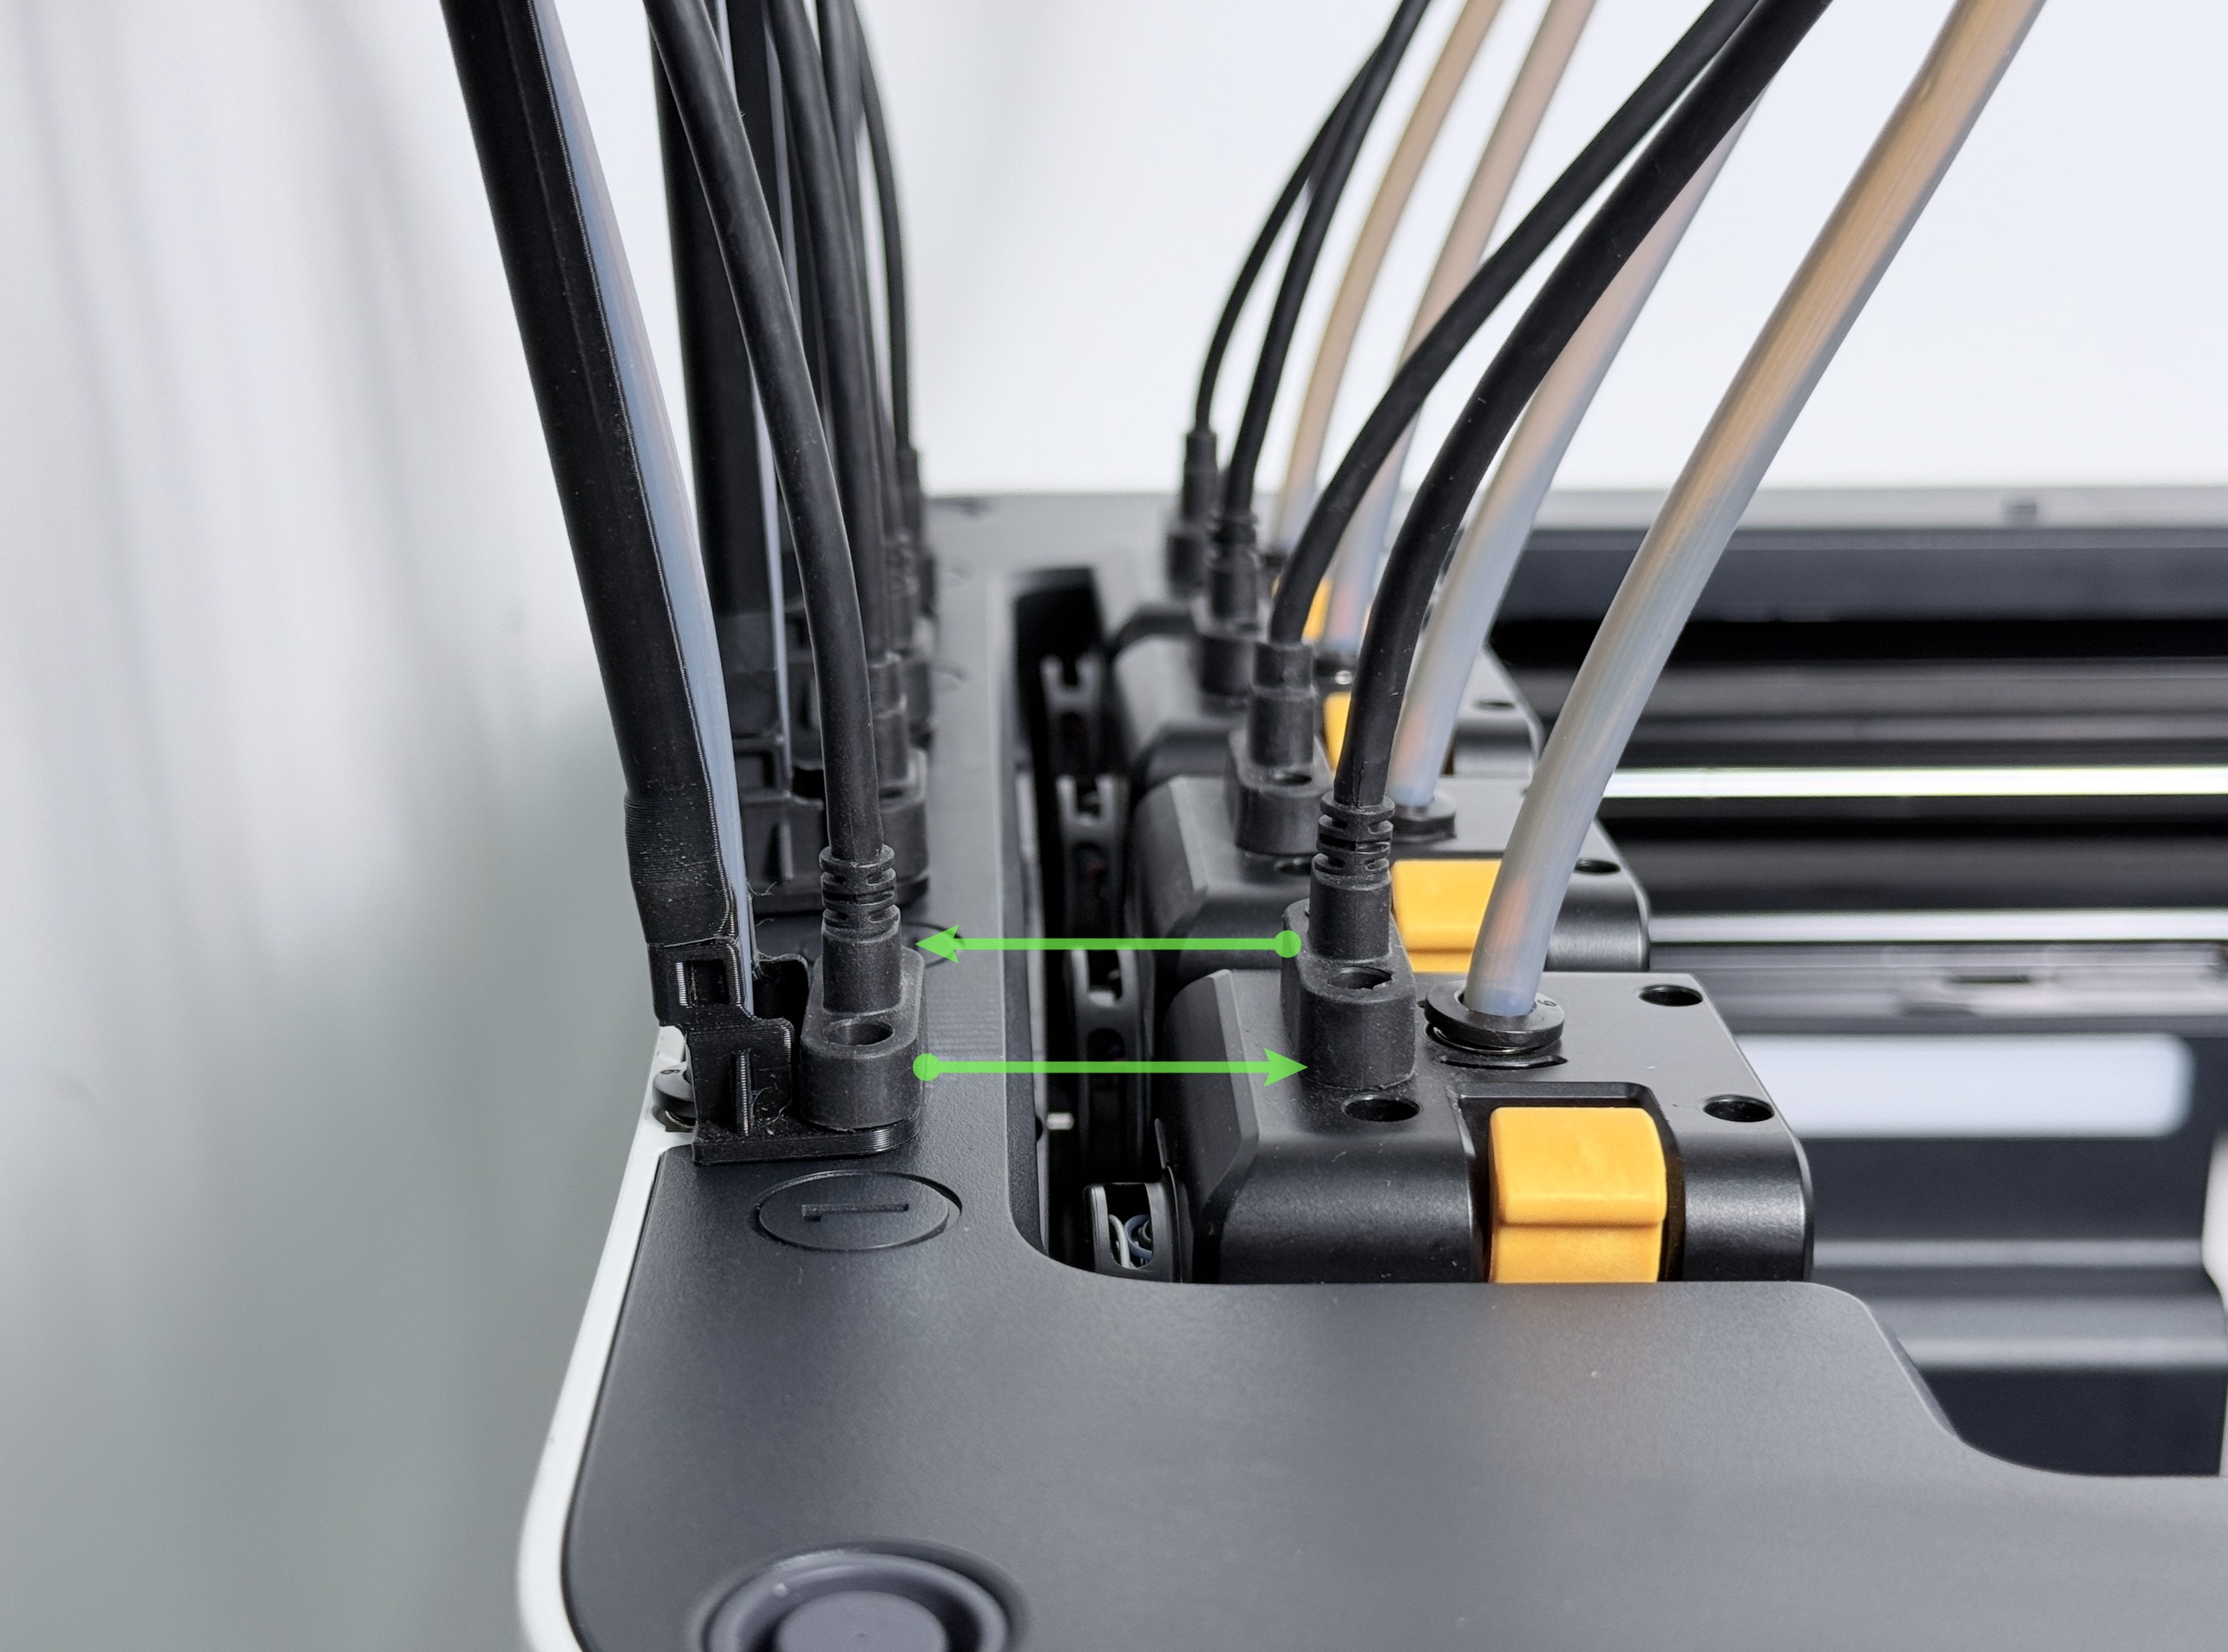
(3) If the error stage remains unchanged, swap the machine-side USB connections of Toolhead F, then retry the firmware update.
When only the machine-side ports are swapped, the machine will recognize Toolhead T as Toolhead F, and vice versa.

(4) If the update fails and:
- The error stage corresponds to
Toolhead F.
This indicates that neither Toolhead can be successfully updated when connected to the machine-side port corresponding toToolhead F.
Click to expand the corresponding troubleshooting steps.
Please refer to U1 Video Guide: How to Remove the Side Panels to remove the right side panel, unplug and reconnect both ends of the 16-pin cable, and then retry the firmware update.
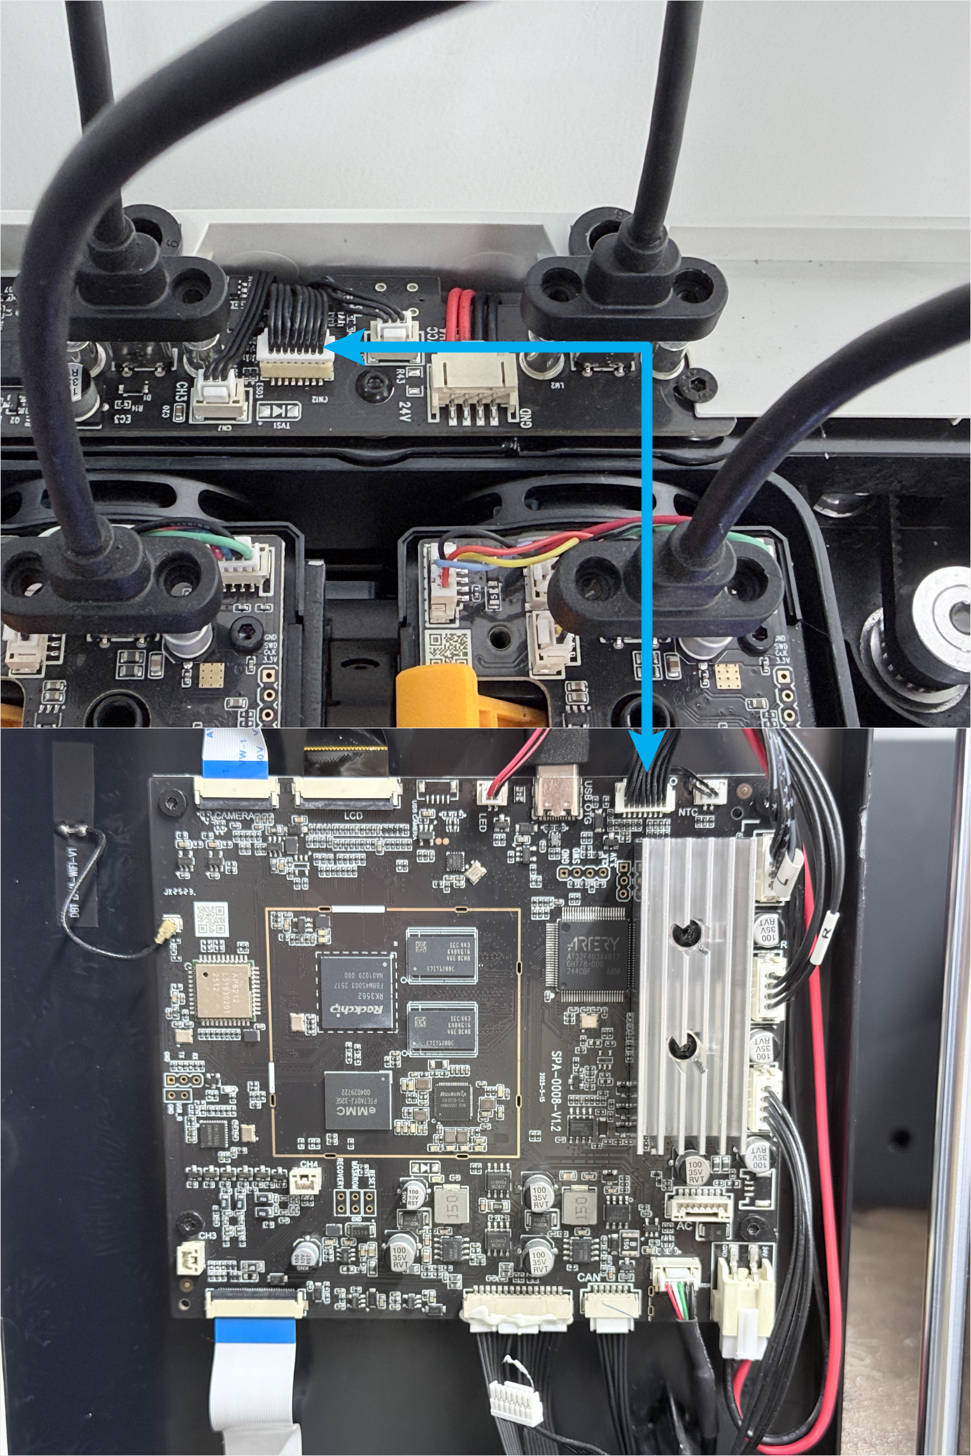
If the update still fails, please replace the 16-pin cable and the HUB board, or contact support。
When restarting the machine for the firmware update, you may keep the side panel and top panel removed. Only reconnect the USB cable.
- The error stage corresponds to
Toolhead T.
This indicates thatToolhead Fitself may be faulty / The connected USB cable is faulty.
Please proceed to the next step for cross-check validation.
(5) Swap the USB cable connections of Toolhead T & F on the other end as well, then retry the firmware update.
At this point, the USB cables of both toolheads are fully swapped, which helps verify whether the issue is related to the USB cables.

-
If the error stage corresponds to
Toolhead T→ replacing the USB cable with a new one will resolve the issue.
-
If the error stage corresponds to
Toolhead F→ replacing the Toolhead PCB with a new one will resolve the issue.
¶ 💬 Reach out to Snapmaker Support
After following the troubleshooting steps, if you find it difficult to resolve your issue, kindly submit a support ticket through https://snapmaker.formcrafts.com/u1-troubleshooting-request and share your troubleshooting results with some pictures/videos.
Our dedicated support team will be more than willing to assist you in resolving the issue.