¶ Compatibility
This article applies to the following model and module. Please take note when referencing:
Model:U1
Filament:Snapspeed
¶ Issue Description
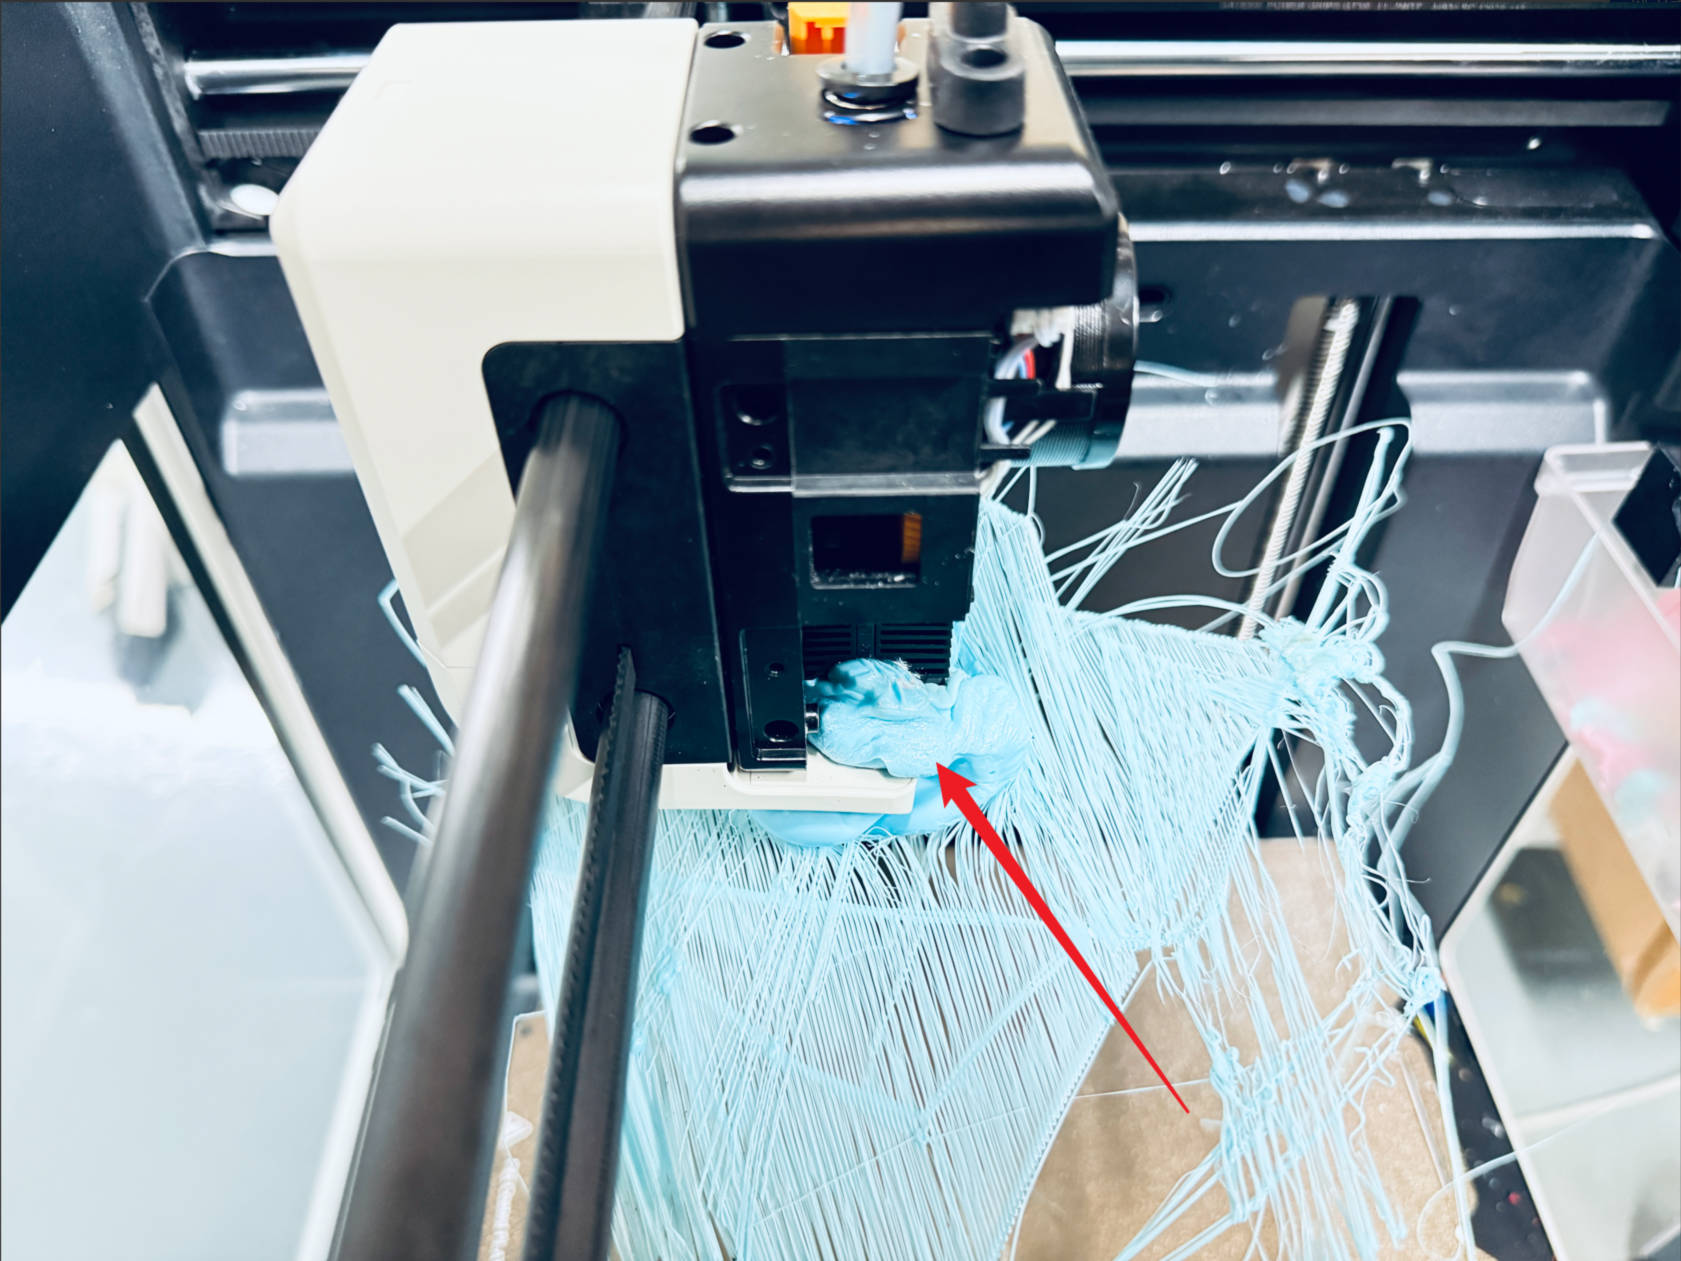
Filament accumulates around the nozzle after extrusion.
¶ Possible Causes
(1) The first layer did not adhere to the build plate.
(2) Leakage from the hot end.
(3) The filament is moisture-affected.
(4) Improper parameter settings, such as printing temperature or retraction distance.
¶ Solution
¶ Tools required
(1) Blow Dryer
(2) Tweezers
(3) Needle-nose pliers
(4) Wire brush
(5) H2.0 hex key
¶ Procedure
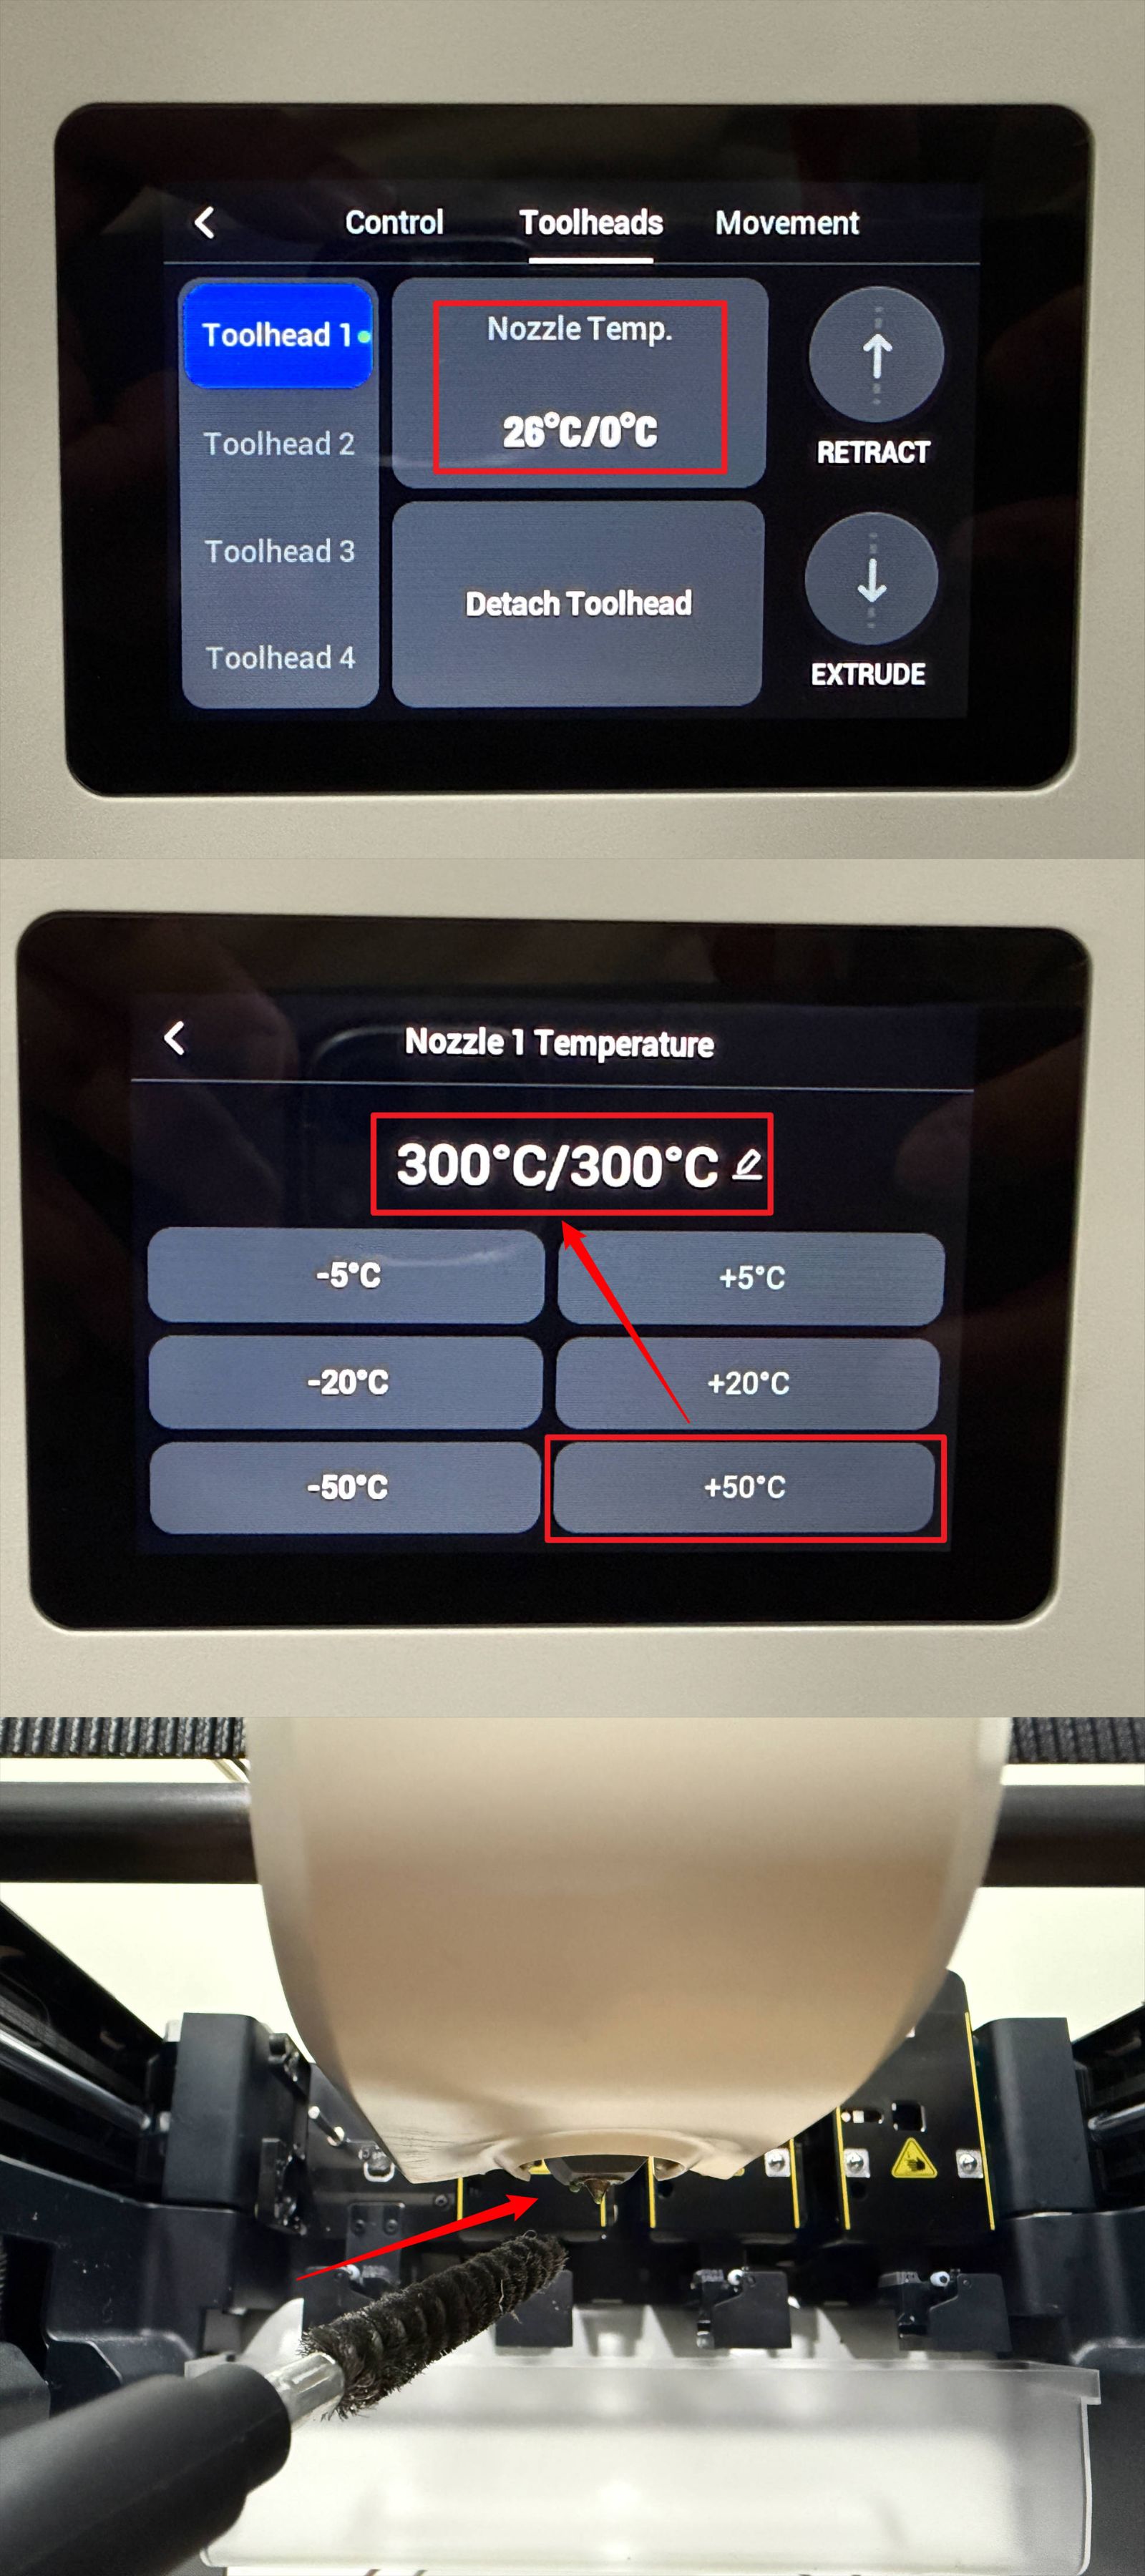
(1) If only a small amount of filament has accumulated, heat the nozzle to 300°C on the control panel. Once the filament softens, remove it using the wire brush.
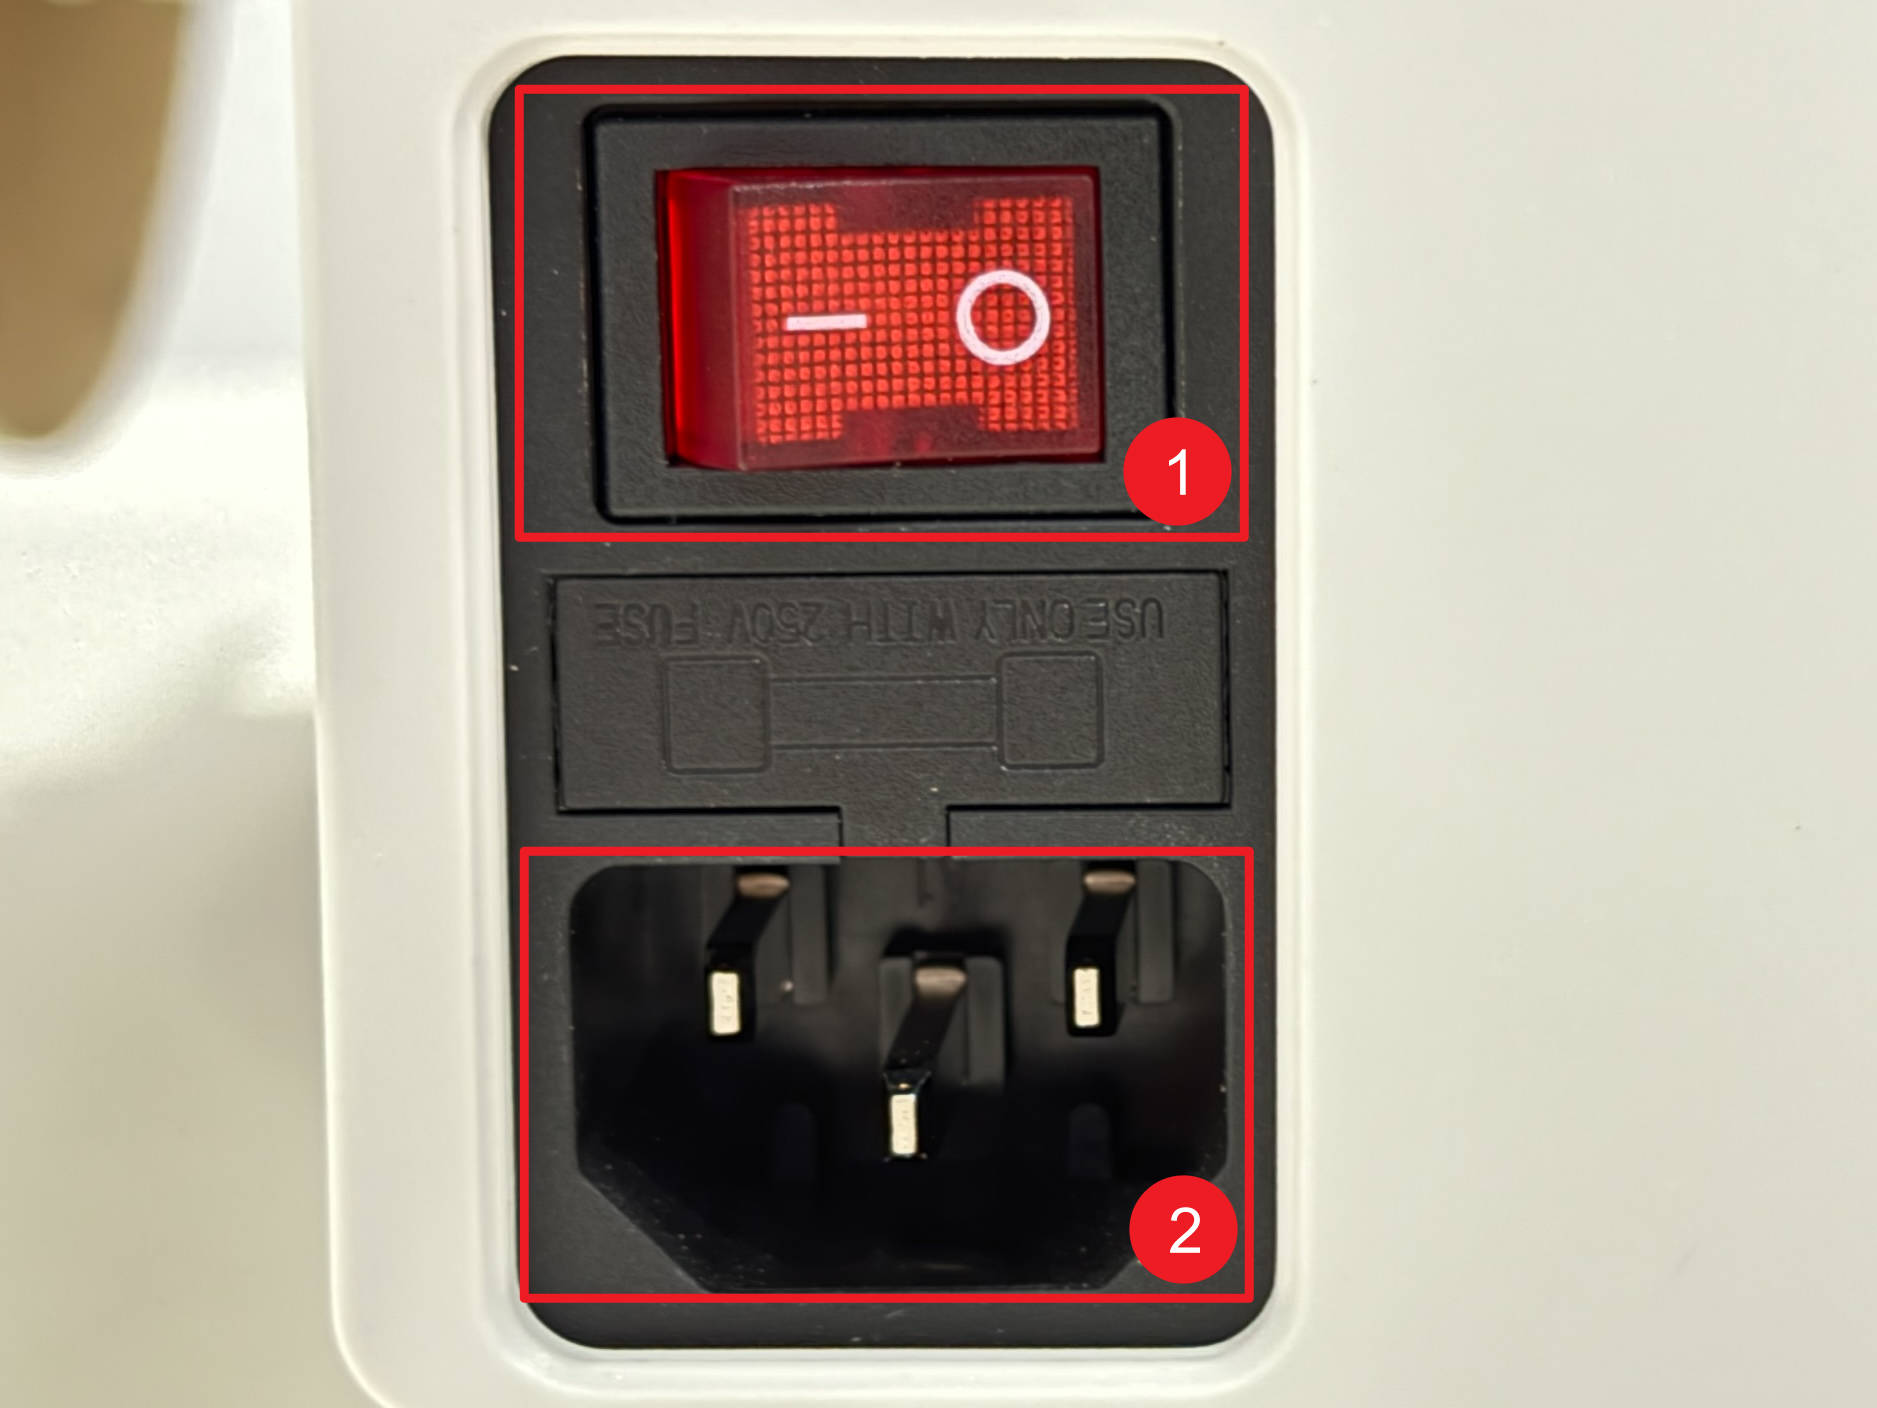
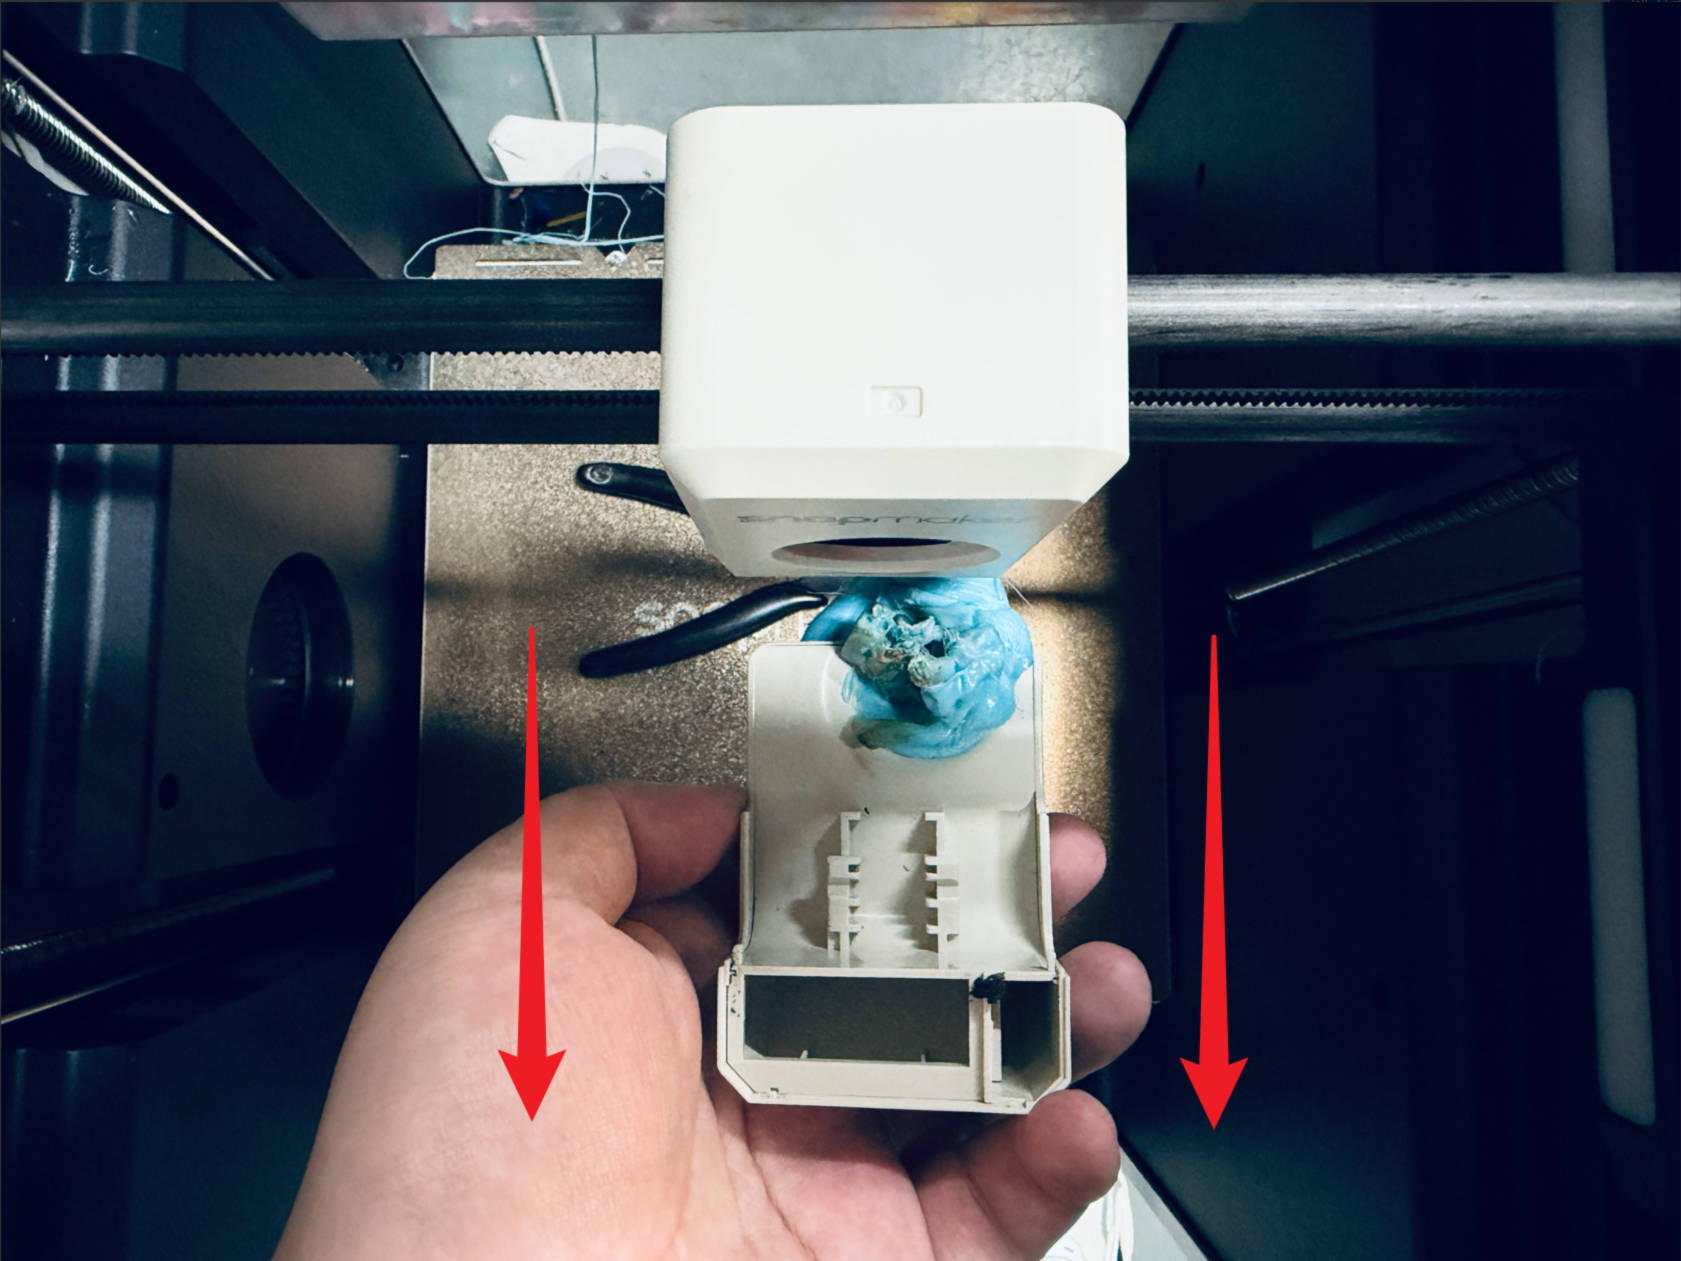
(2) If the blob is large and cannot be softened by heating, additional tools are required for cleaning. Before proceeding, power off and unplug the U1.
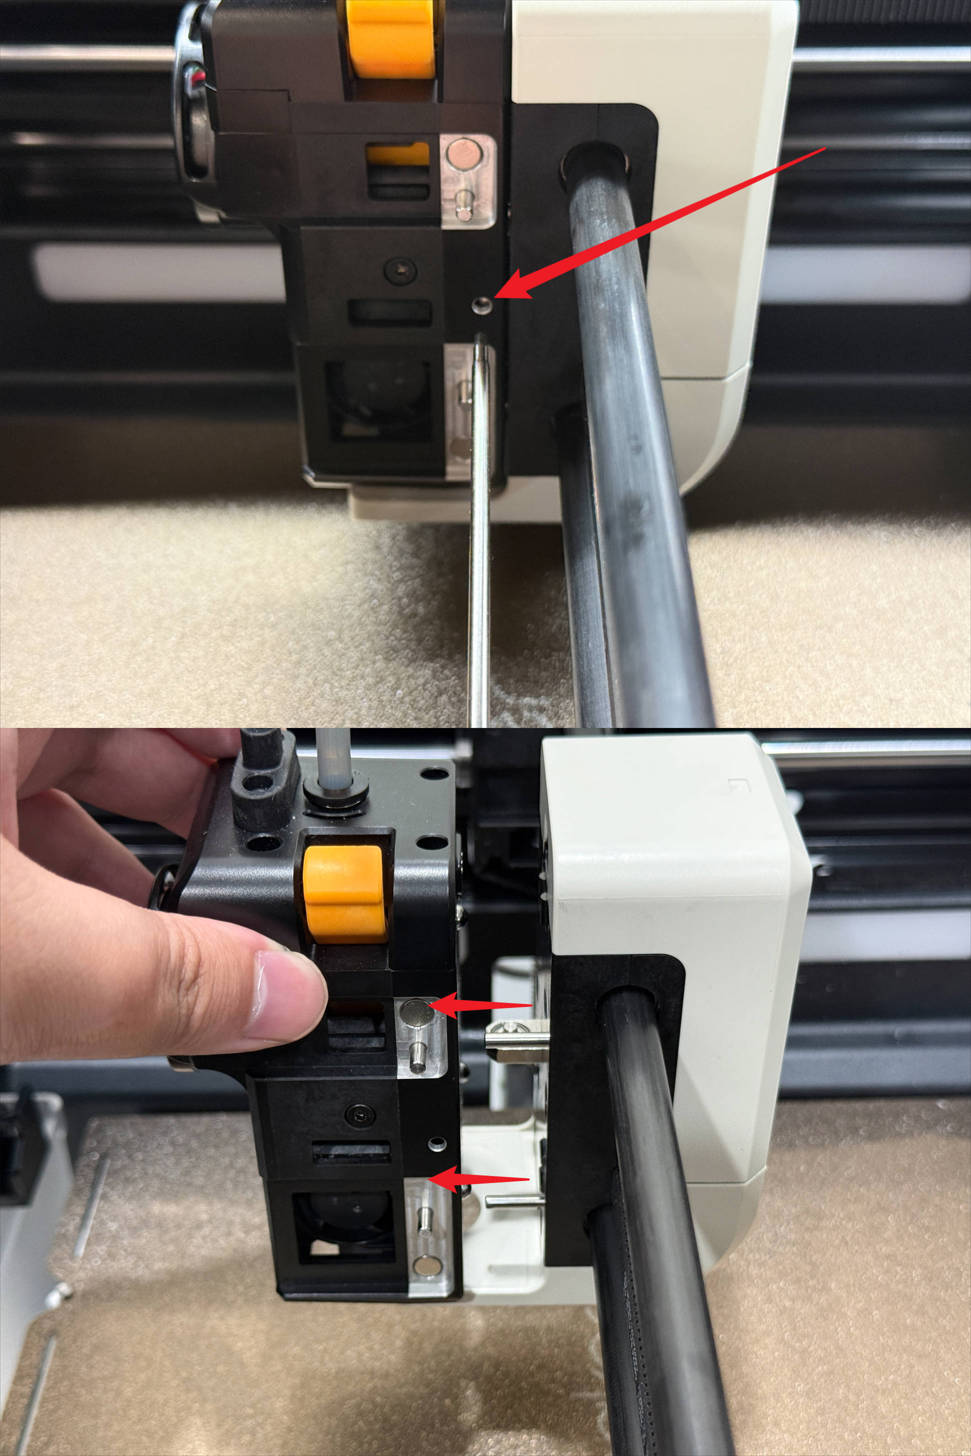
(3) Insert the H2.0 hex key into the hole between the two positioning pins on the toolhead. When you hear a "click" sound, gently detach the toolhead.
(4) If the toolhead is stuck due to the blob, use blow dryer to soften the surrounding filament, then detach the toolhead.
(5) Continue using the blow dryer, tweezers to clean any remaining filament on the cooling duct until it can be removed.
(6) If the filament cannot be completely removed from the cooling duct, or if the duct is damaged during cleaning, purchase the corresponding replacement part.
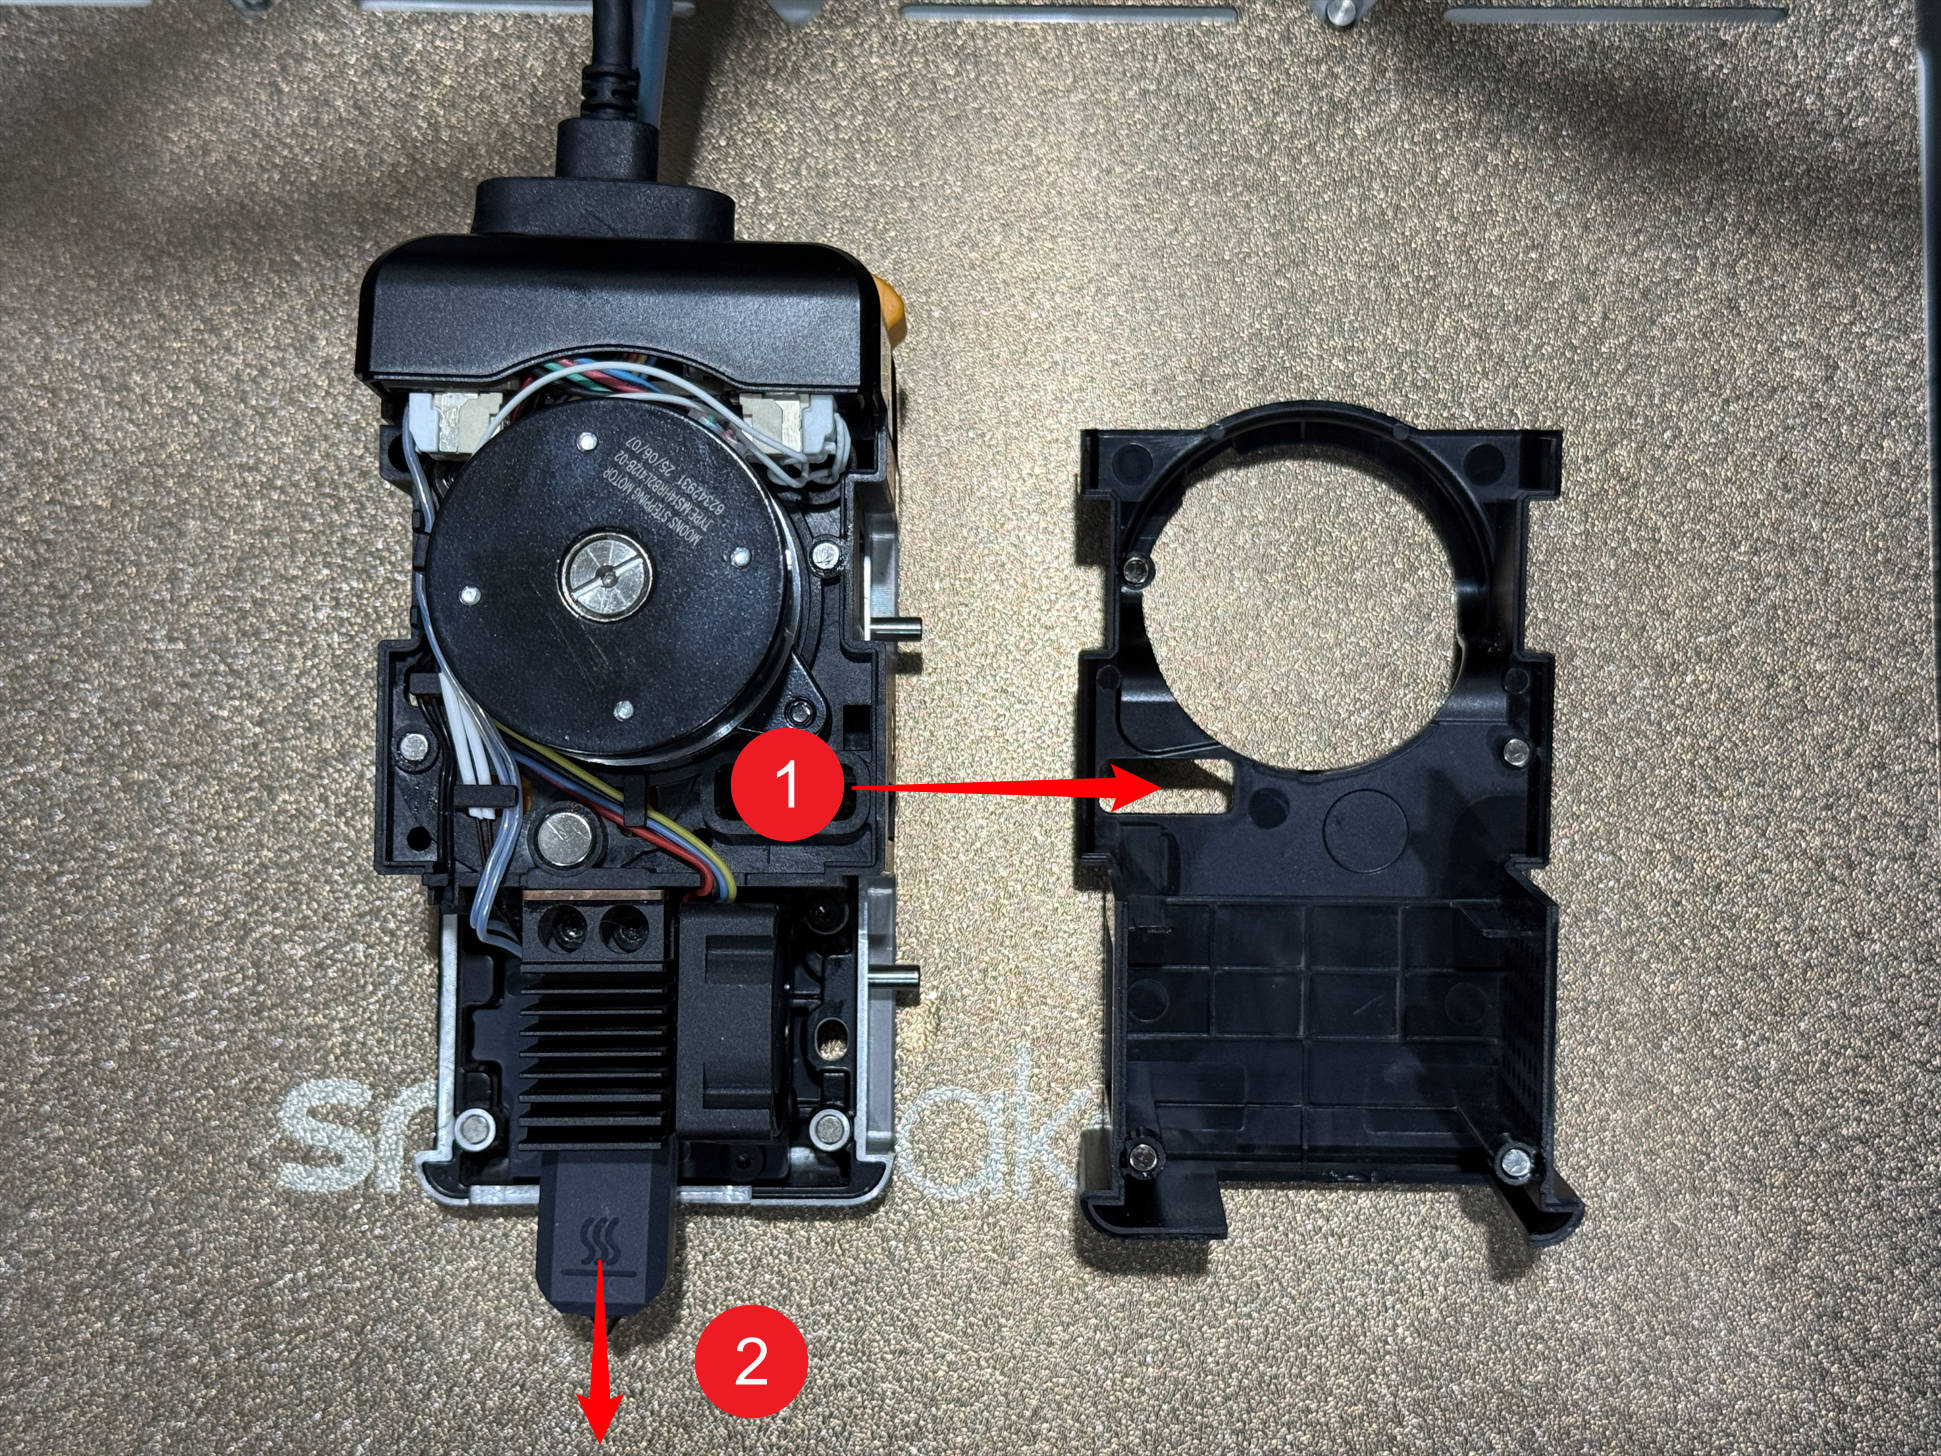
(7) Remove the toolhead rear cover (part 1) and the hot end silicone sock (part 2). If only a small amount of filament remains attached, heat the hot end and clean it using the wire brush.
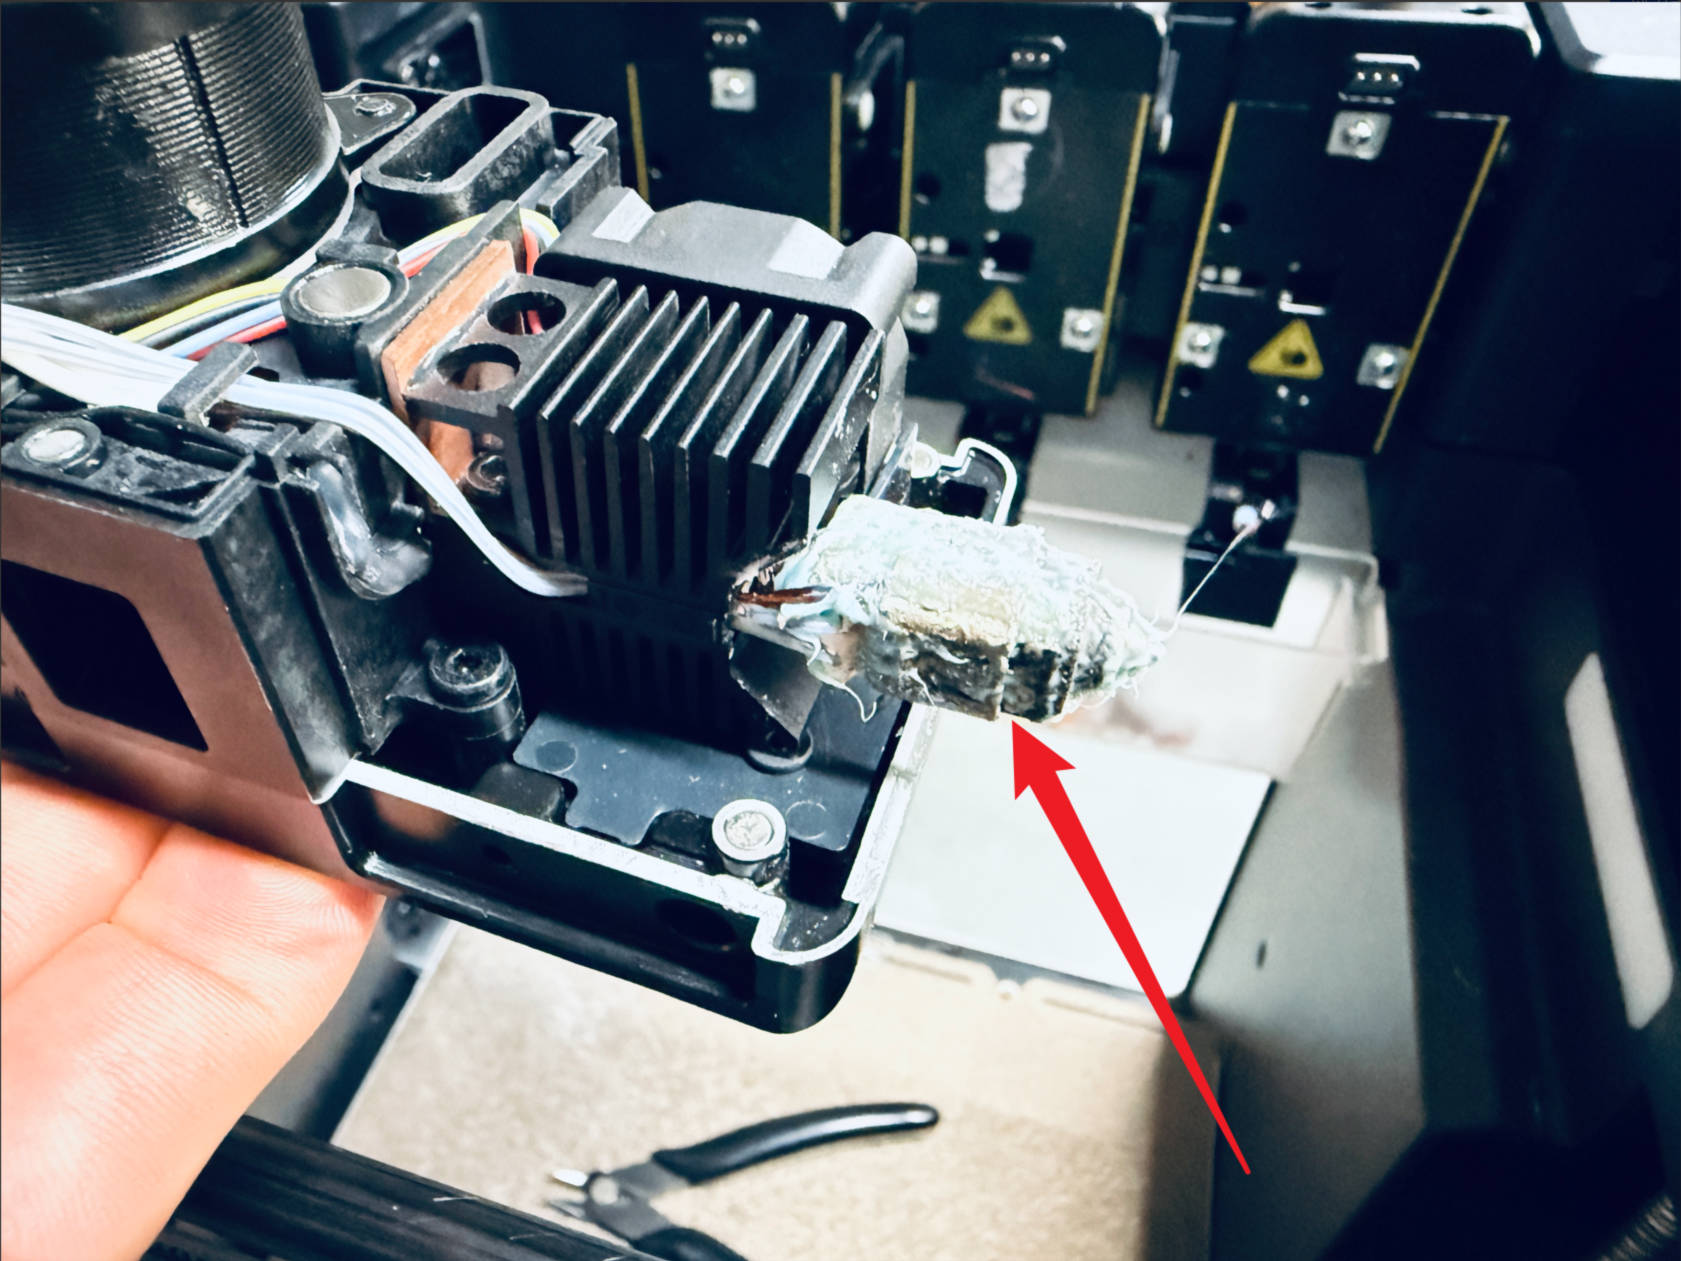
(8) If there is a large amount of filament buildup on the hot end (as shown in the reference image), it is recommended to replace the hot end with a new one.
¶ Reach out to Snapmaker Support
After following the troubleshooting steps, if you find it difficult to resolve your issue, kindly submit a support ticket through https://snapmaker.formcrafts.com/u1-troubleshooting-request and share your troubleshooting results with some pictures/videos.
Our dedicated support team will be more than willing to assist you in resolving the issue.