¶ Overview
¶ Location
The auxiliary cooling fan is located between the left panel and the left inner panel, and replacing it requires removing the left panel.
¶ Difficulty and Time Estimate
- Difficulty:★★☆☆☆ (easy)
- Estimated Time:15 minutes
¶ Where to Buy
US: https://us.snapmaker.com/products/auxiliary-cooling-fan-for-snapmaker-u1
EU: https://eu.snapmaker.com/products/auxiliary-cooling-fan-for-snapmaker-u1
Global: https://shop.snapmaker.com/products/auxiliary-cooling-fan-for-snapmaker-u1
¶ Tools and Parts Required
- H2.0 hex key
- New auxiliary cooling fan
¶ Part 1. Remove the panels
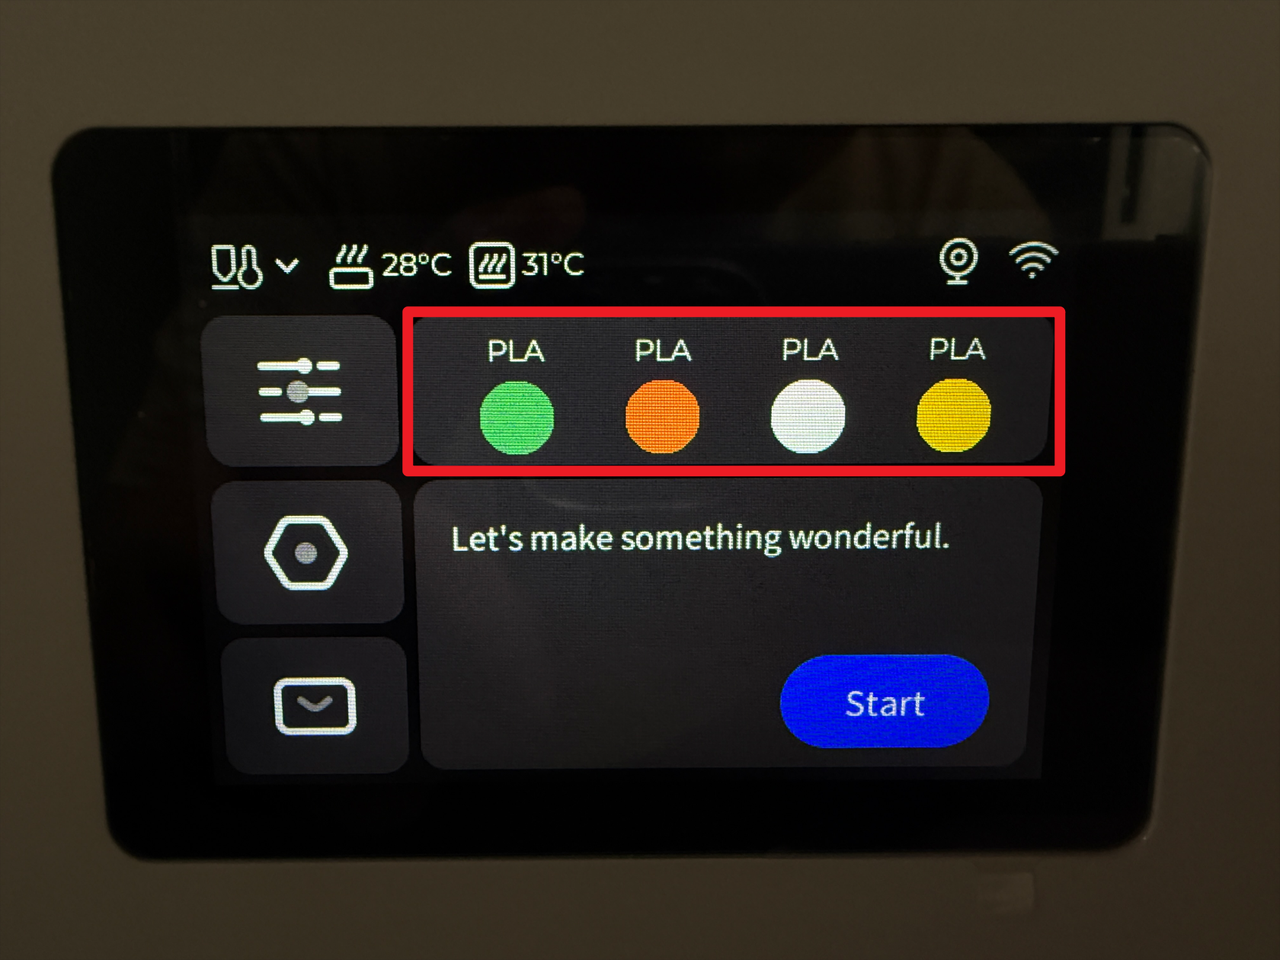
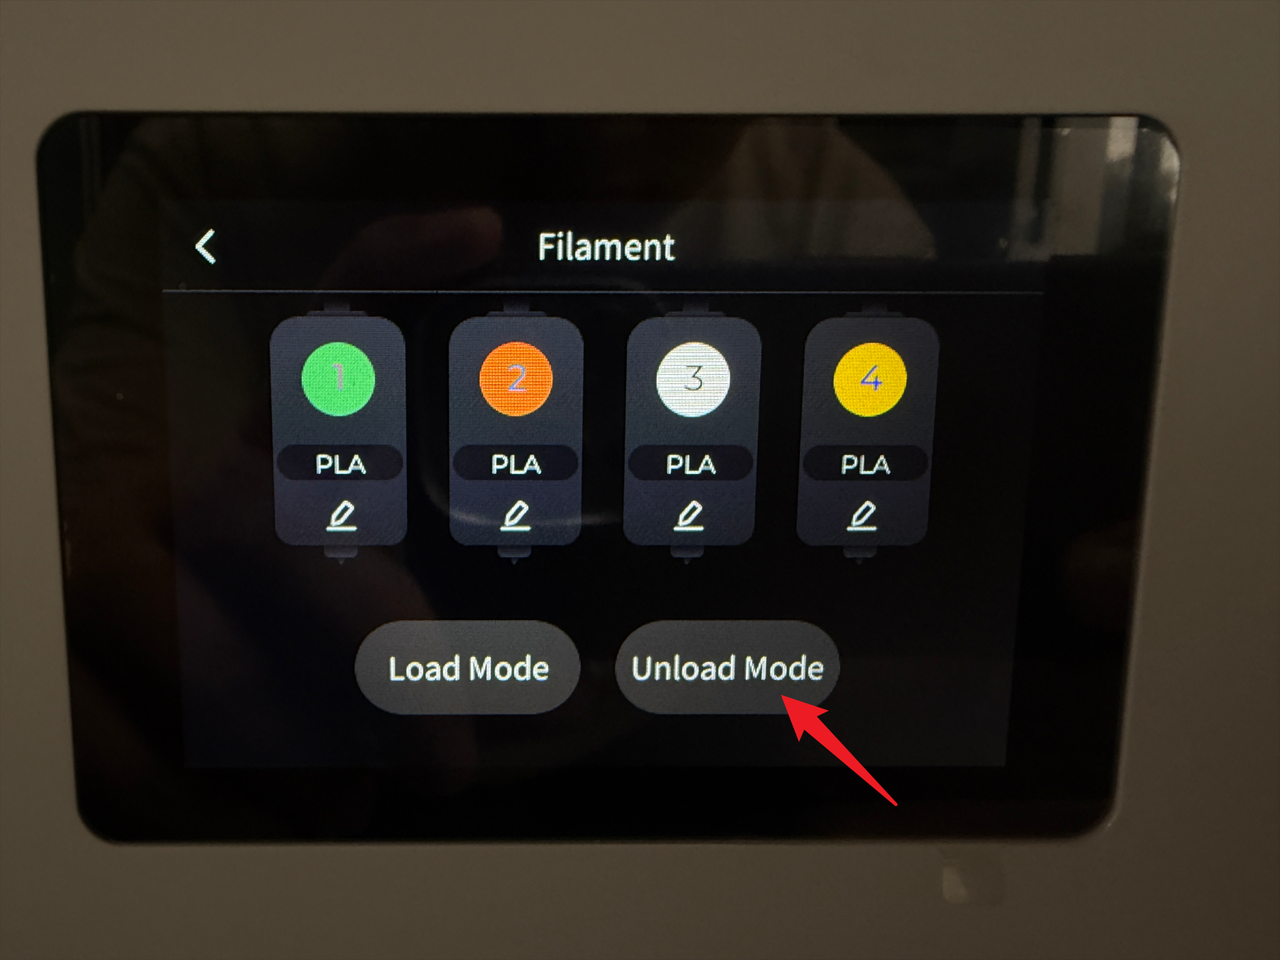
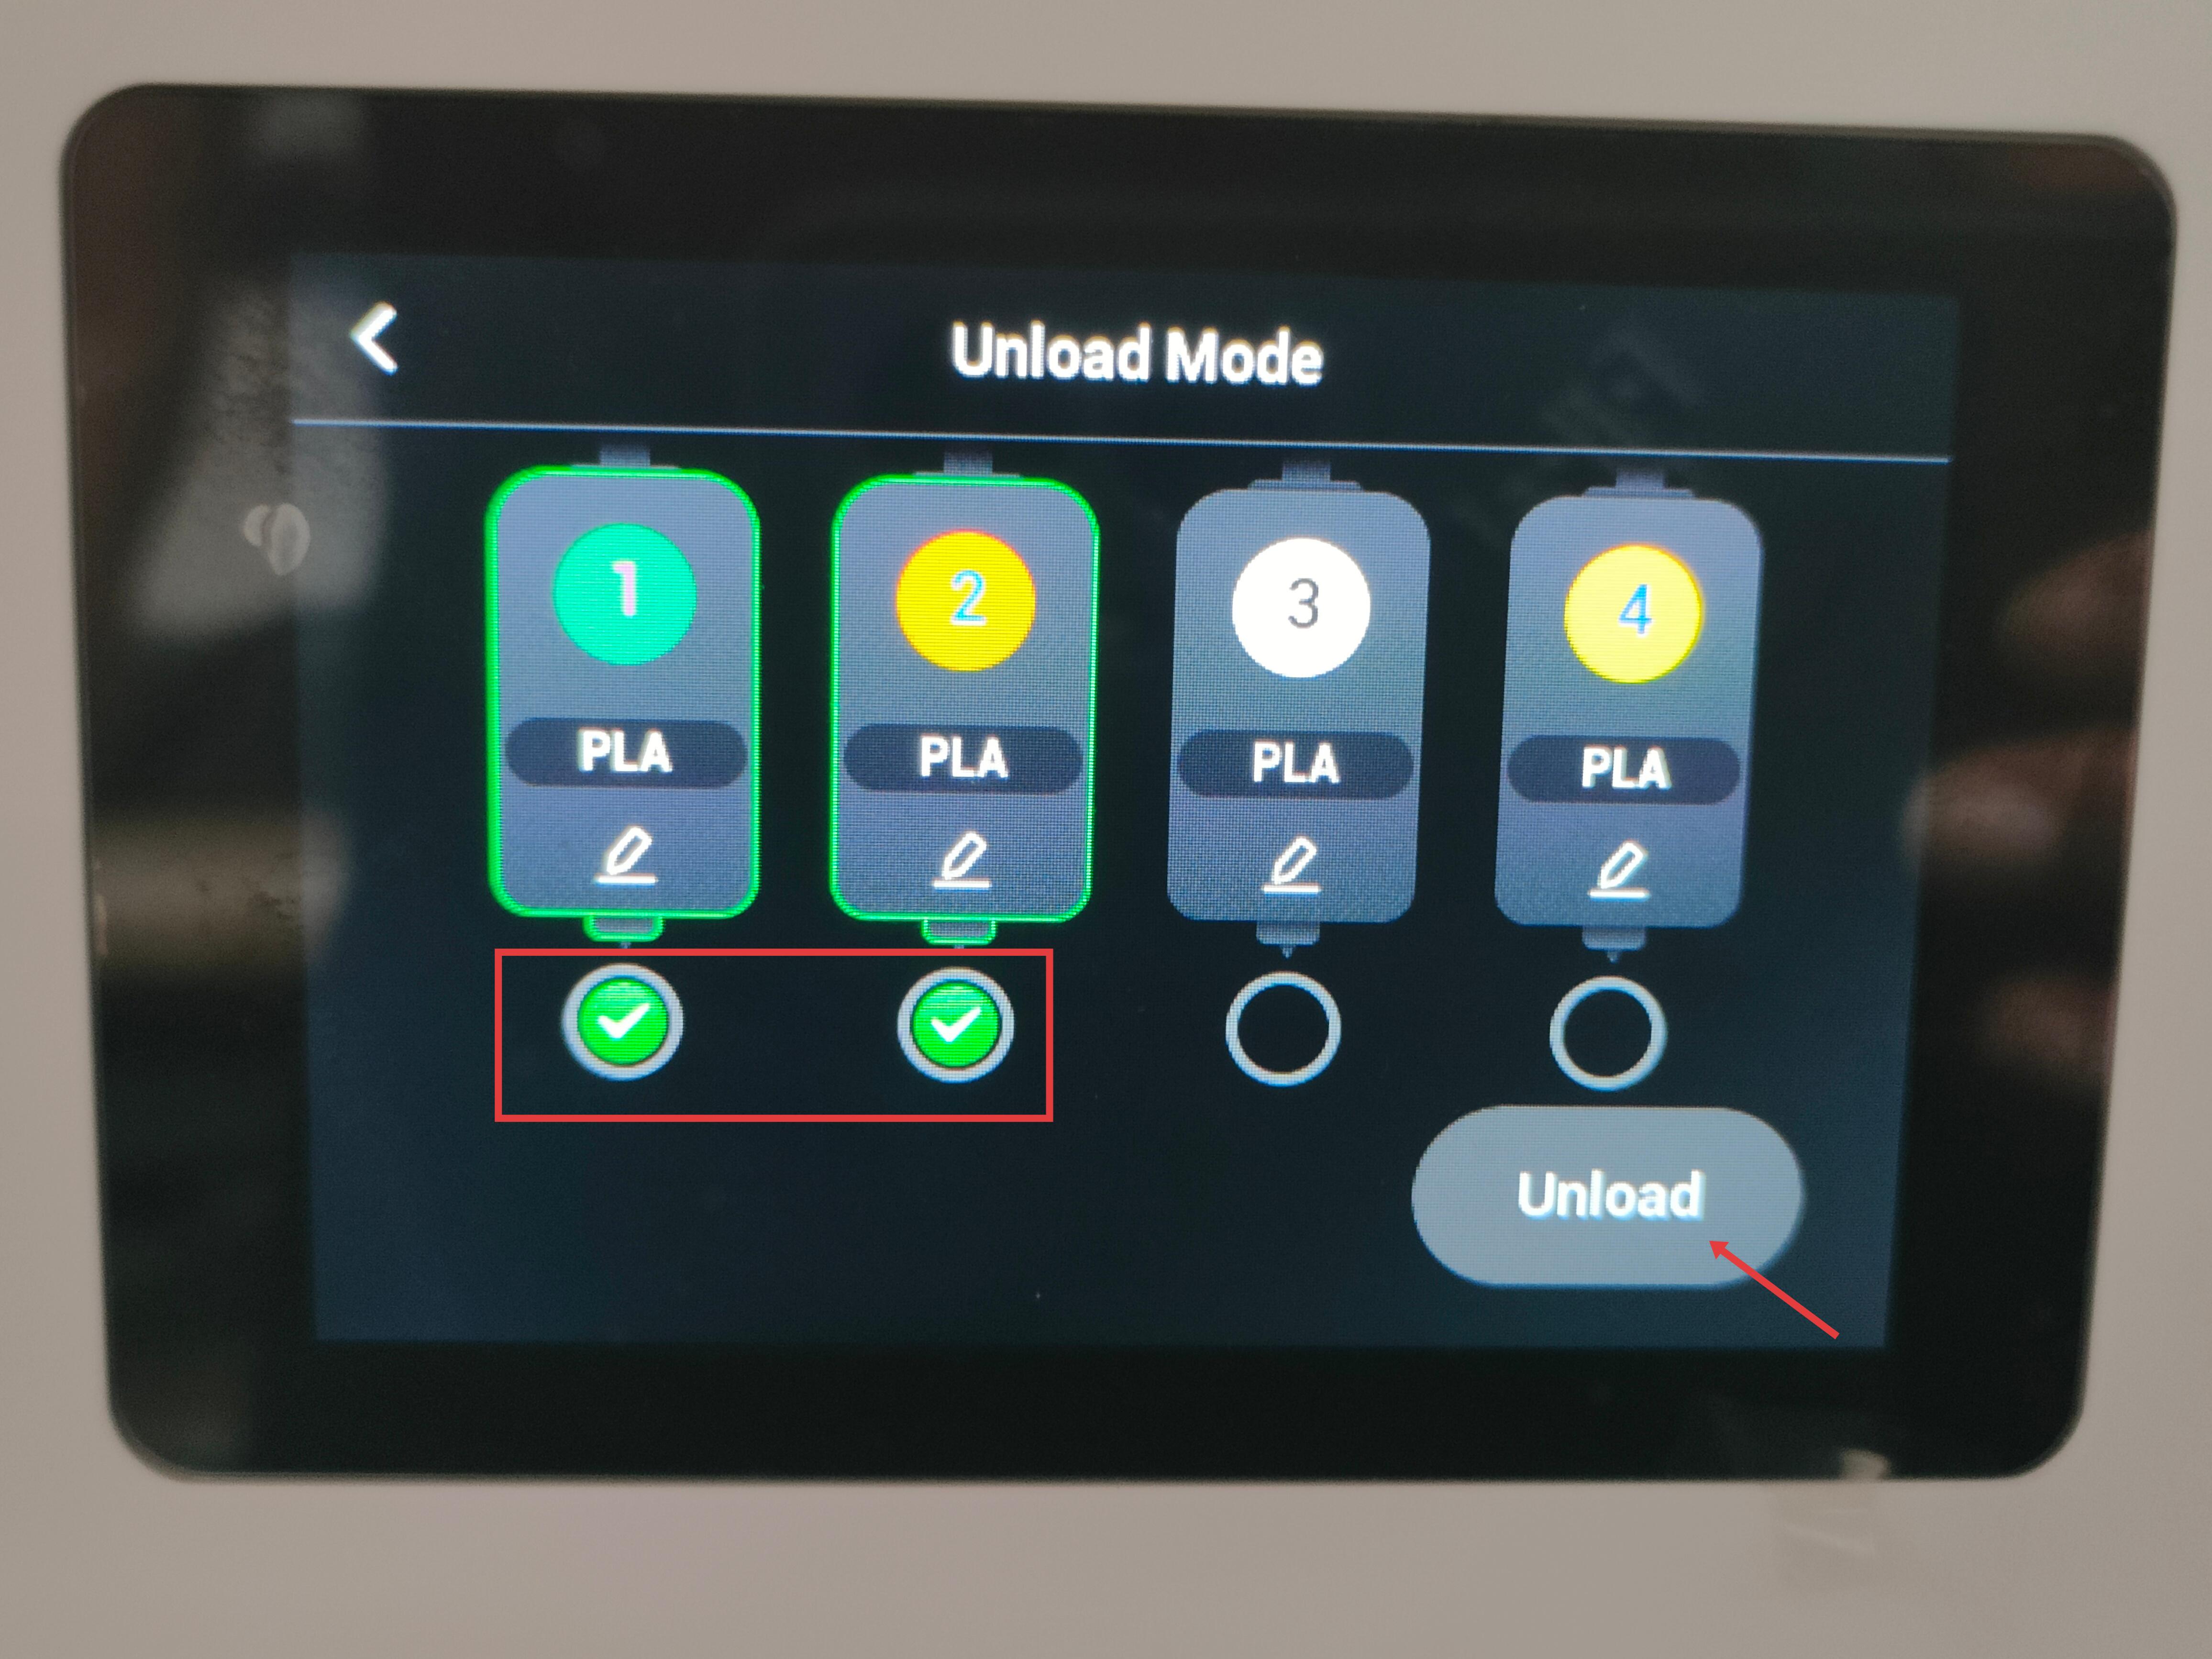
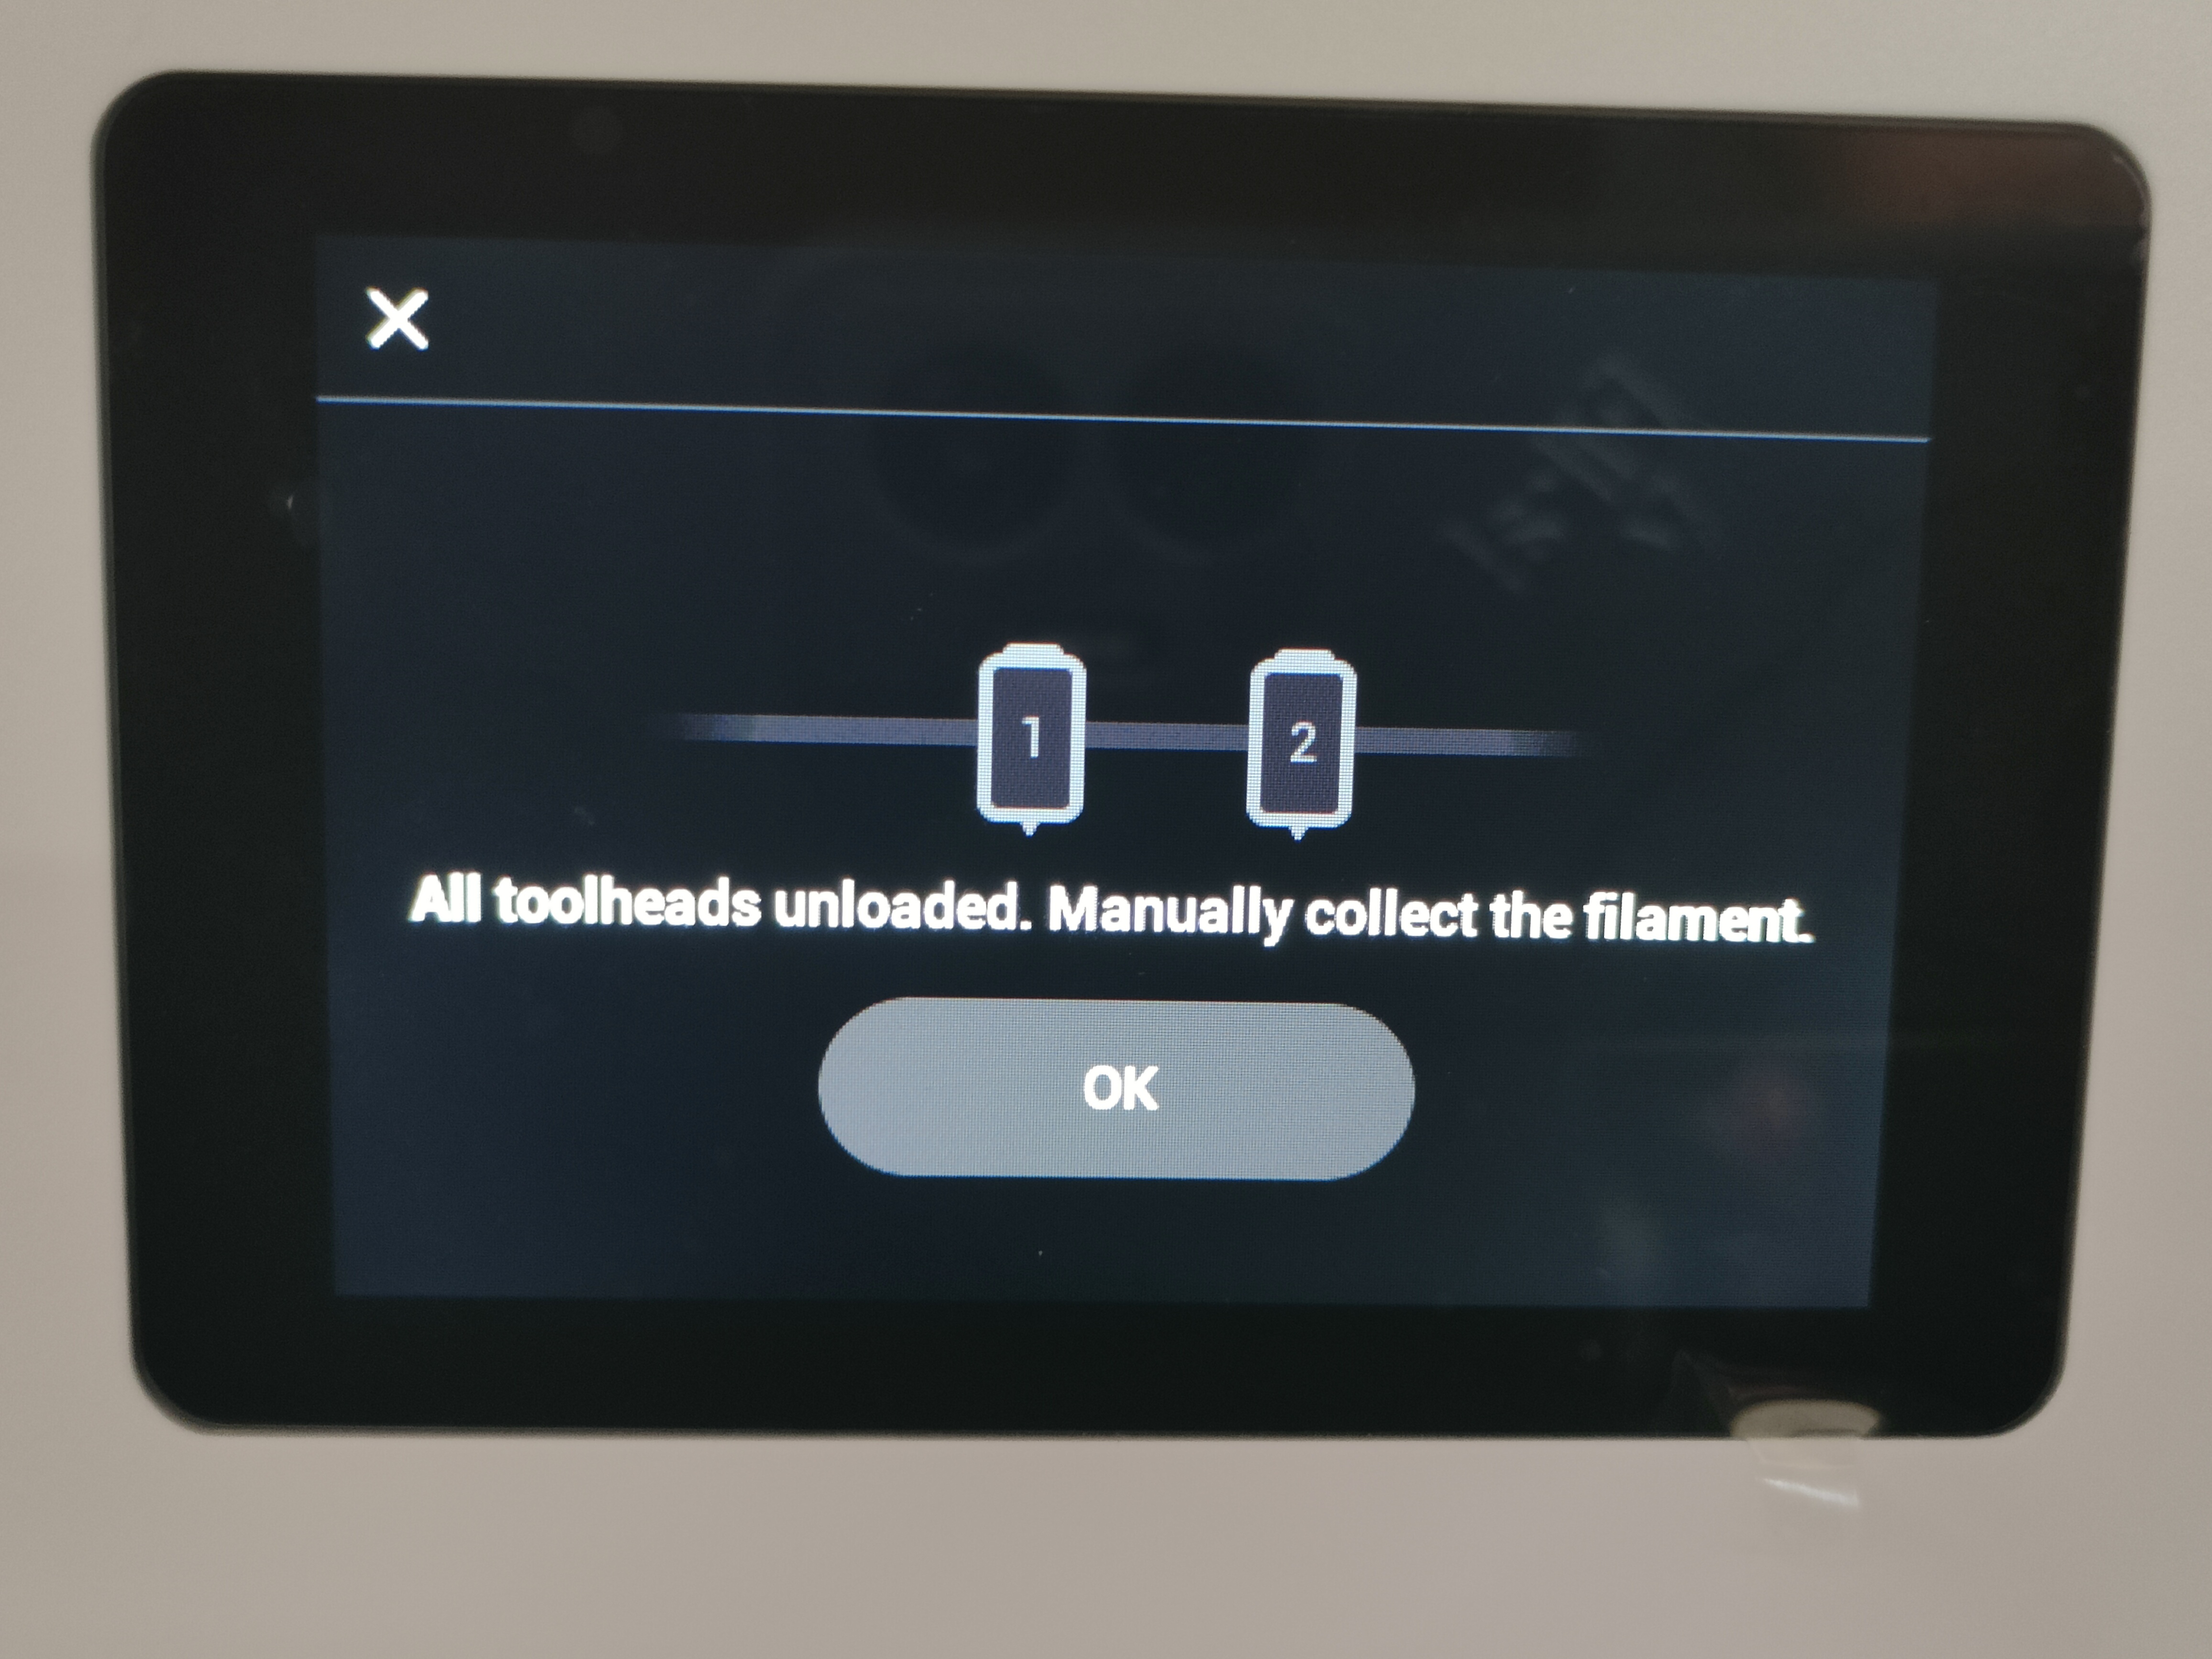
¶ Step 1. Unload filament from toolheads 1 and 2
- Tap the highlighted area on the screen.
- Tap "Unload Mode".
- Select toolheads 1 and 2, then tap "Unload".
- Wait for the machine to complete the unloading.
- Turn the spool to retract the remaining filament.
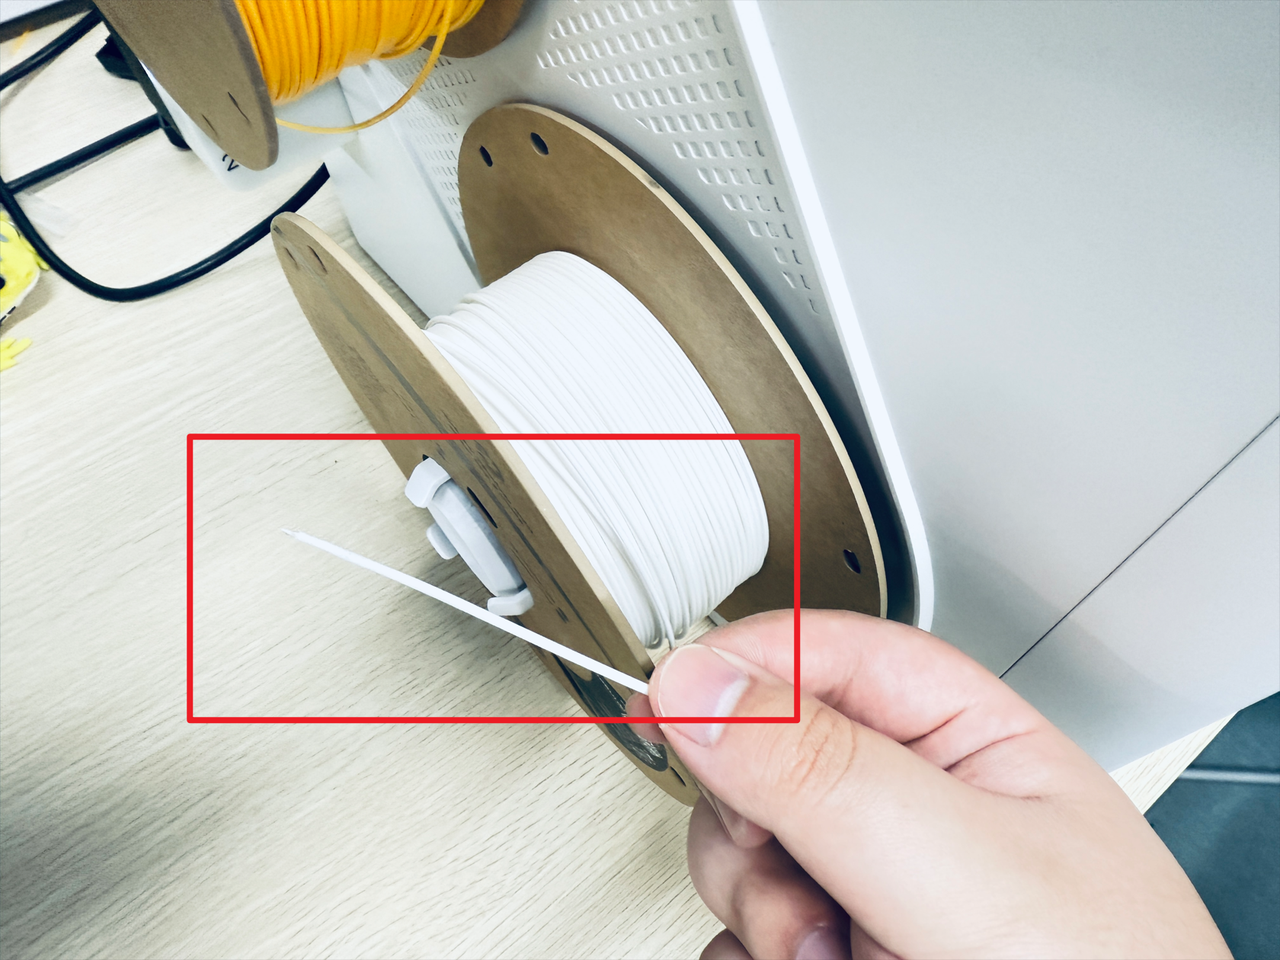
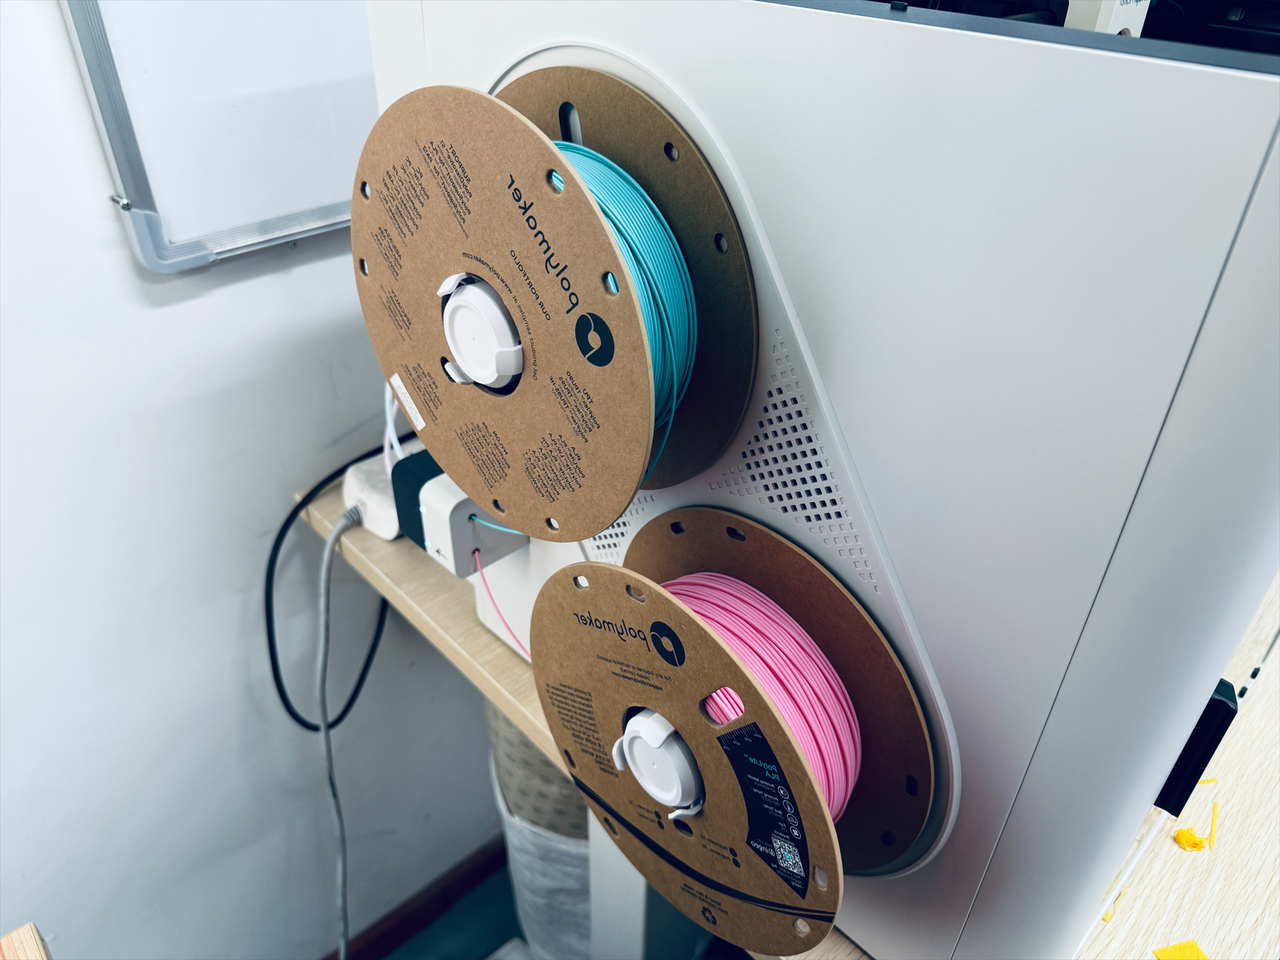
- Remove the spools and spool holders 1 and 2.
¶ Step 2. Power off the machine
- Before proceeding, please turn off the machine and unplug the power cable!

¶ Step 3. Remove the filament feeder on left side
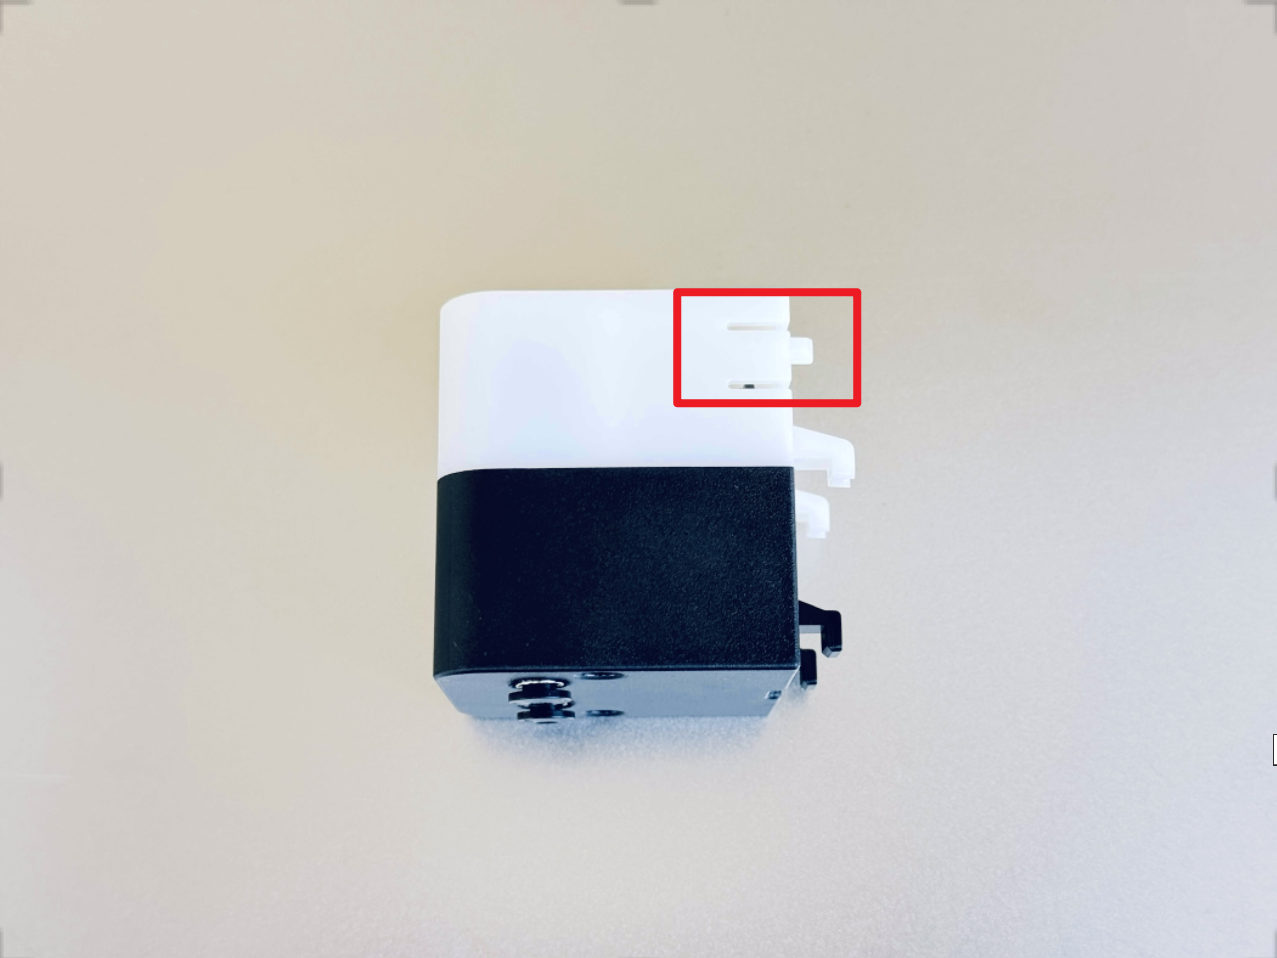
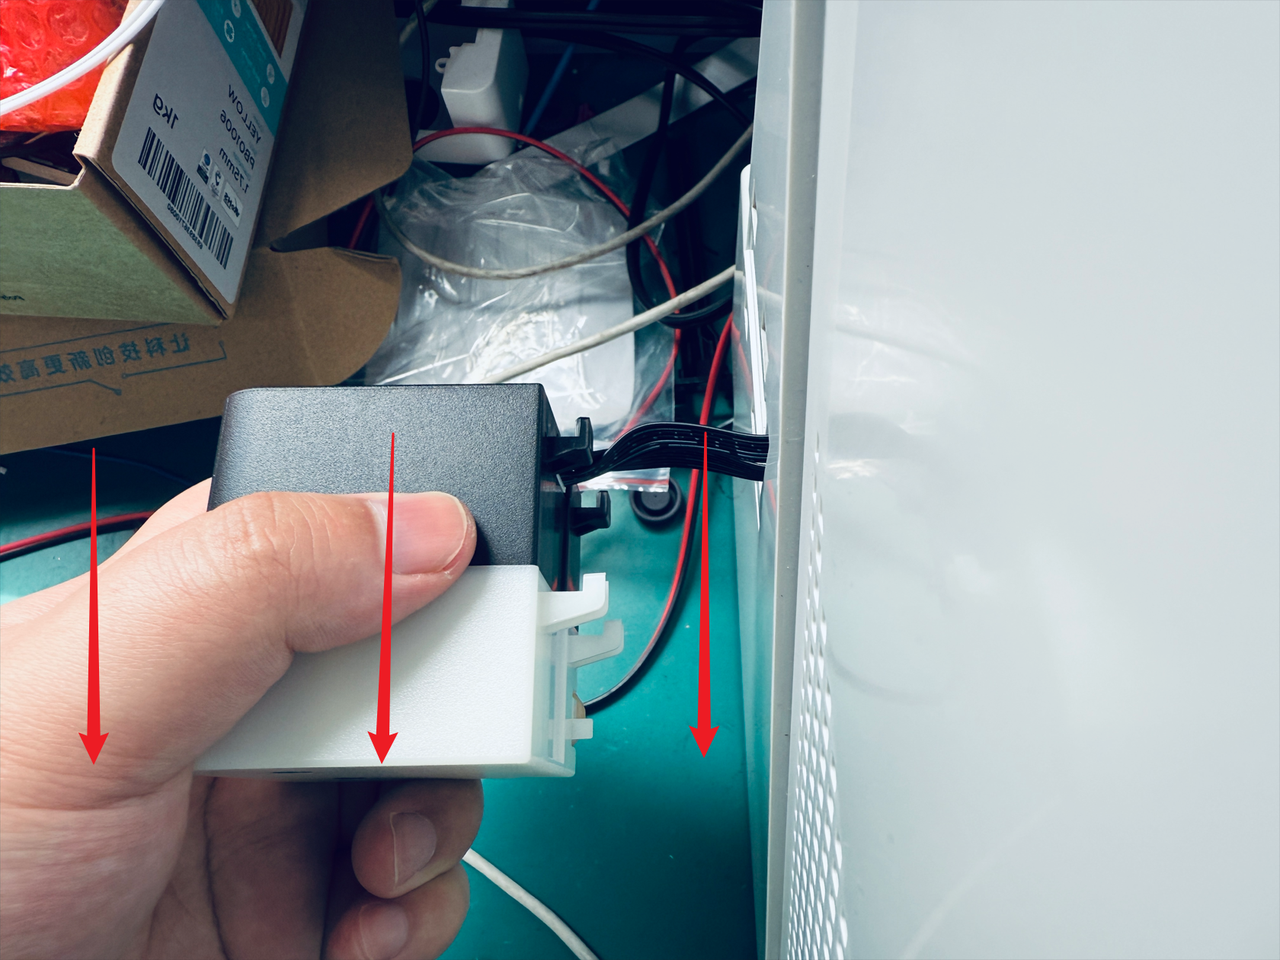
- Press the clip at the marked location.
- While pressing the clip, slide the filament feeder in the indicated direction to remove it.
- Next, disconnect the filament feeder cable.
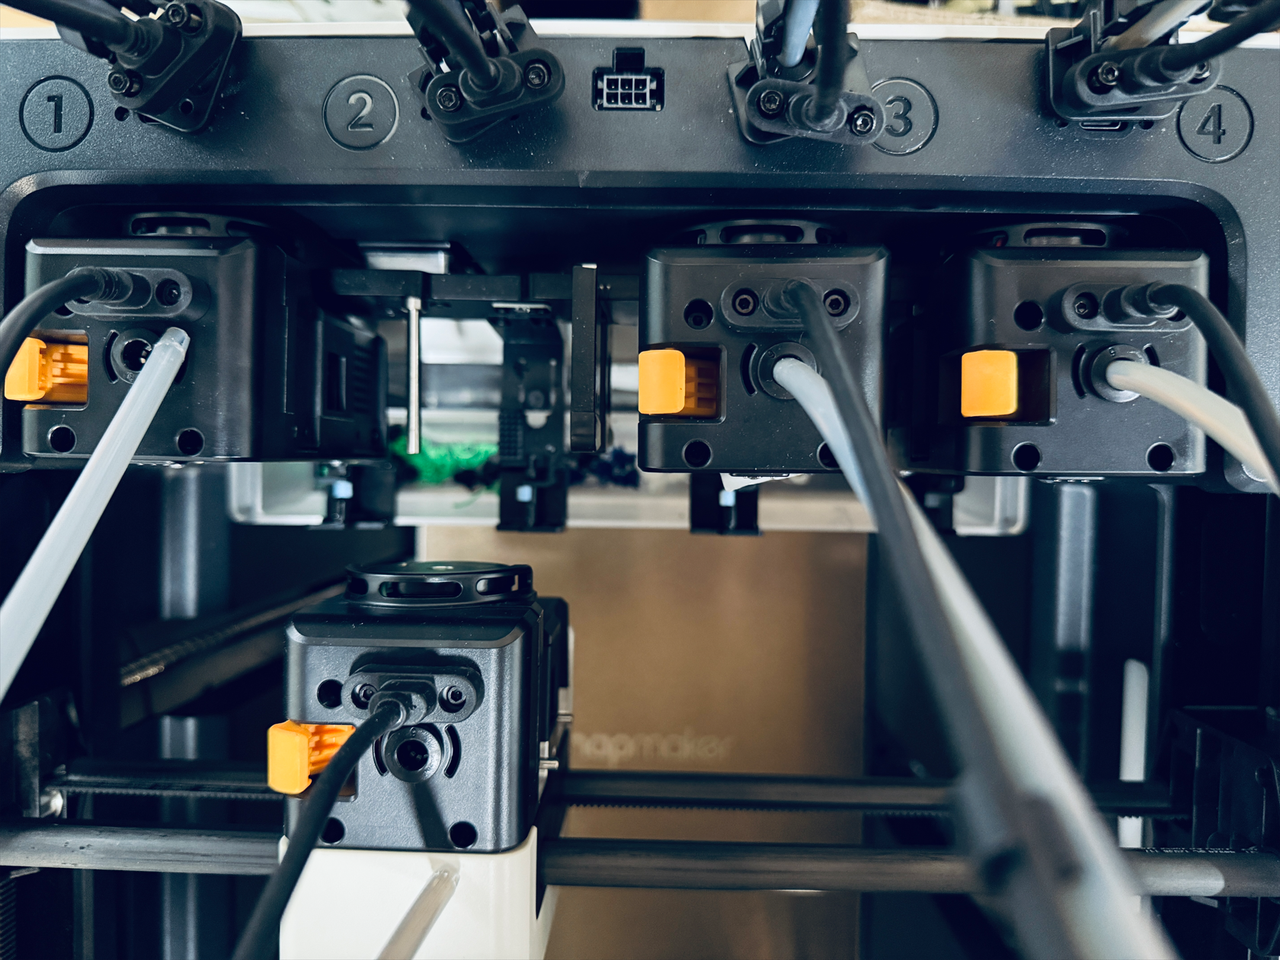
¶ Step 4. Disconnect USB cables
- Use a H2.0 hex key to remove the 8 screws from the 4 USB cables, then unplug the cables.

¶ Step 5. Remove the top cover panel
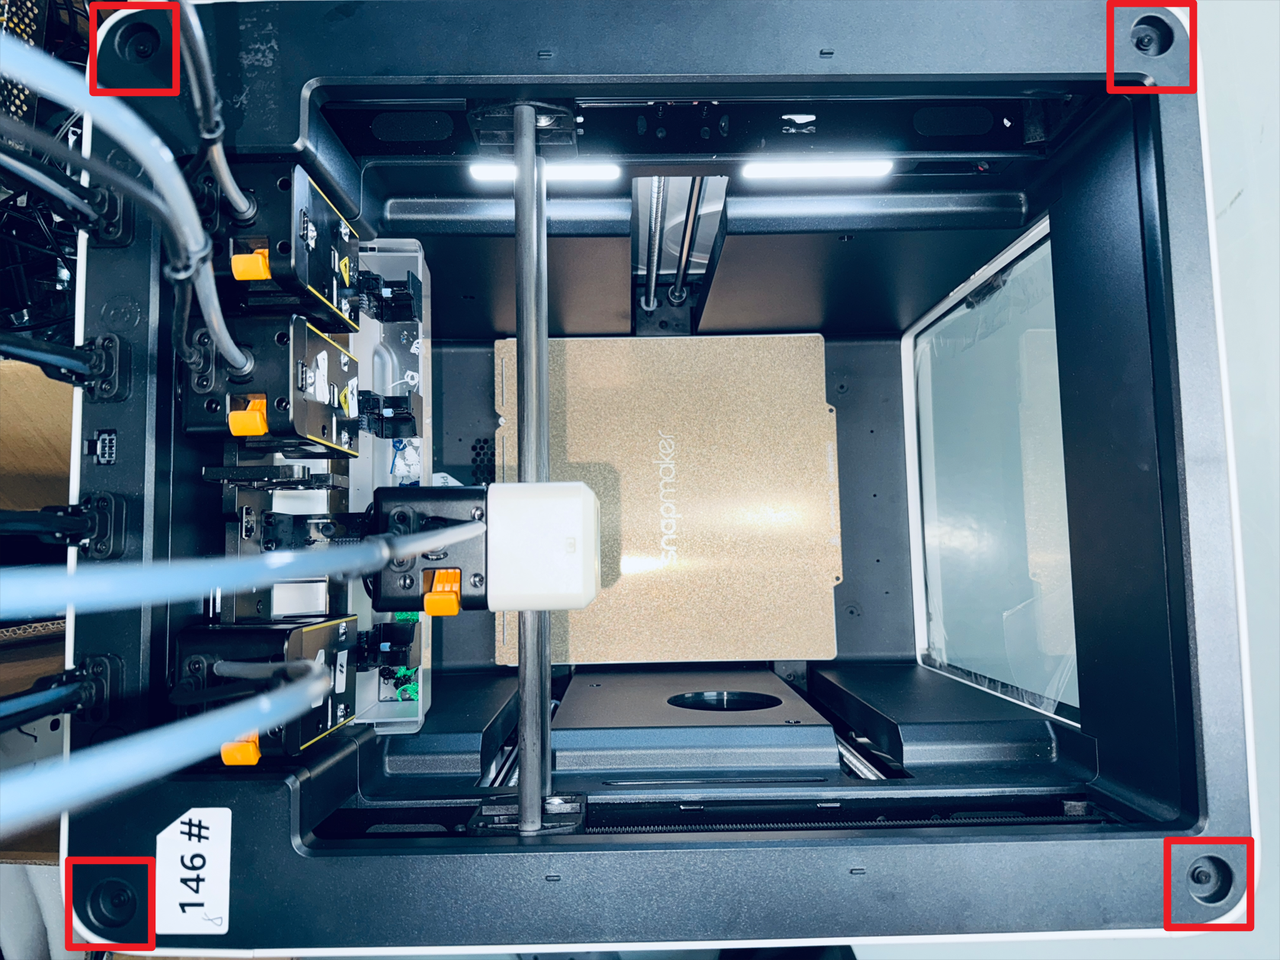
- Take out the silicone plugs from all four corners of the top cover panel.
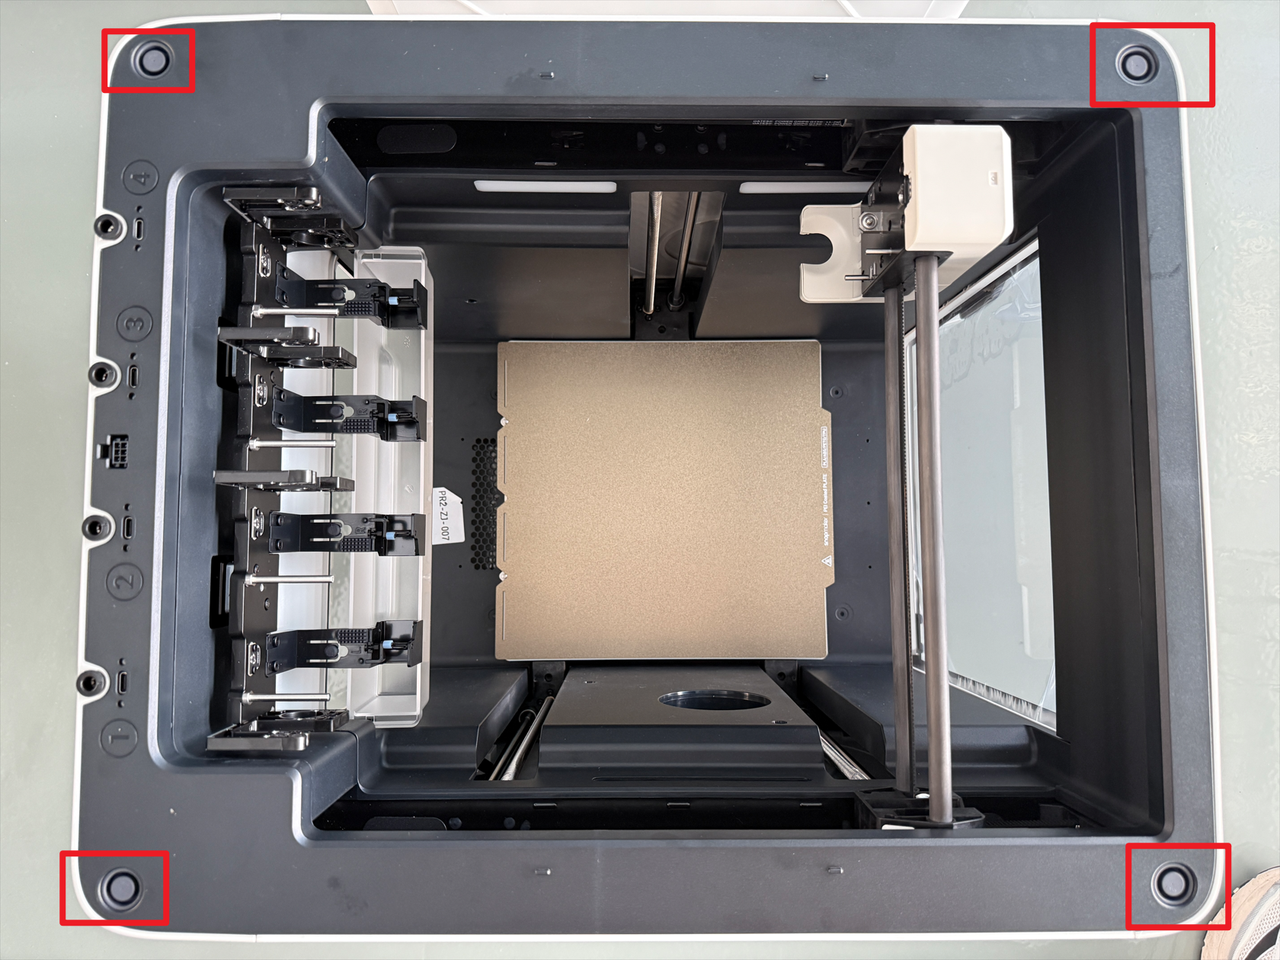
- Use a H2.0 hex key to remove the 4 screws beneath the plugs.
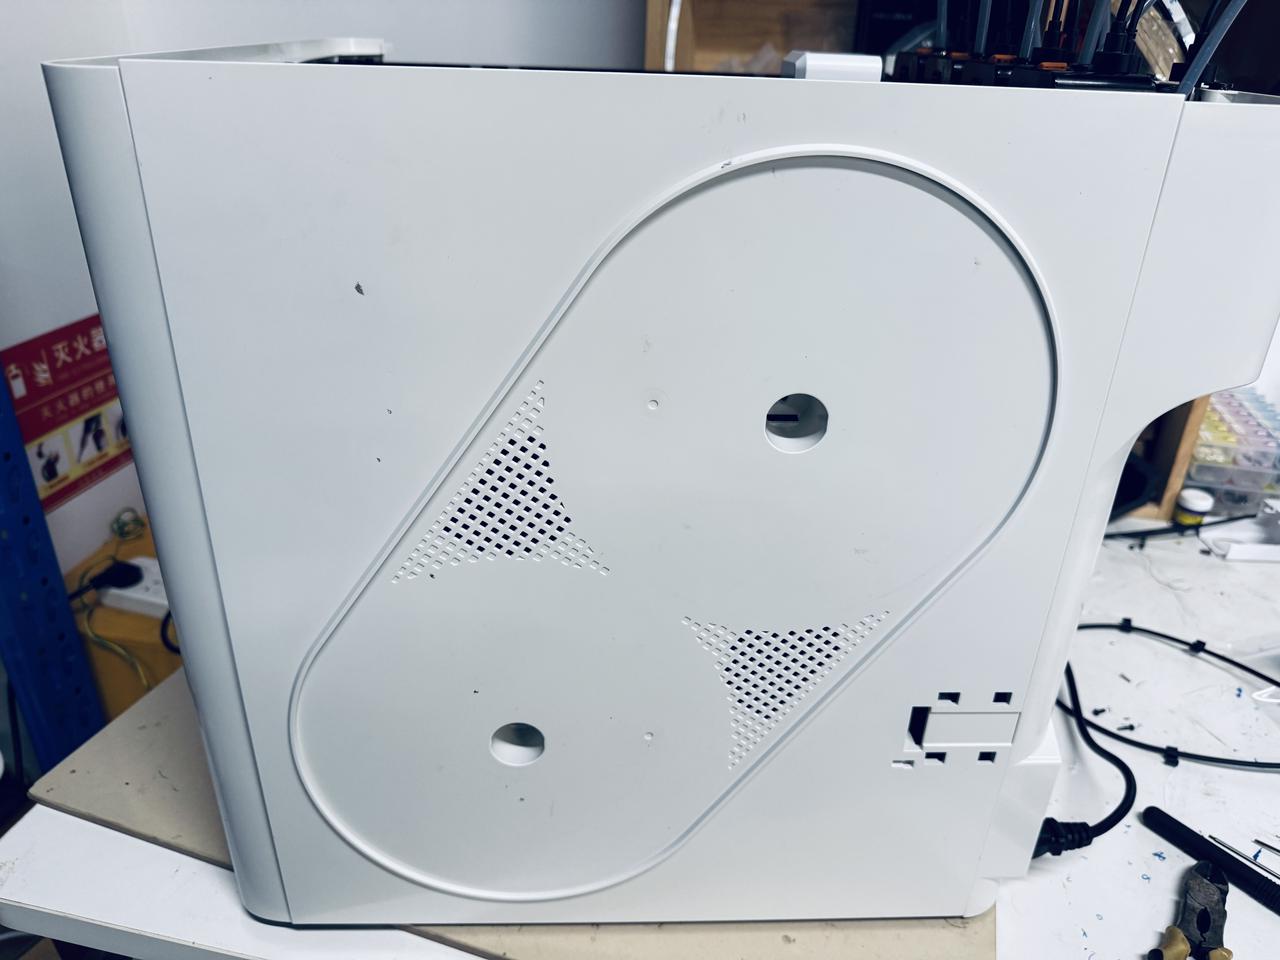
¶ Step 6. Remove the left panel
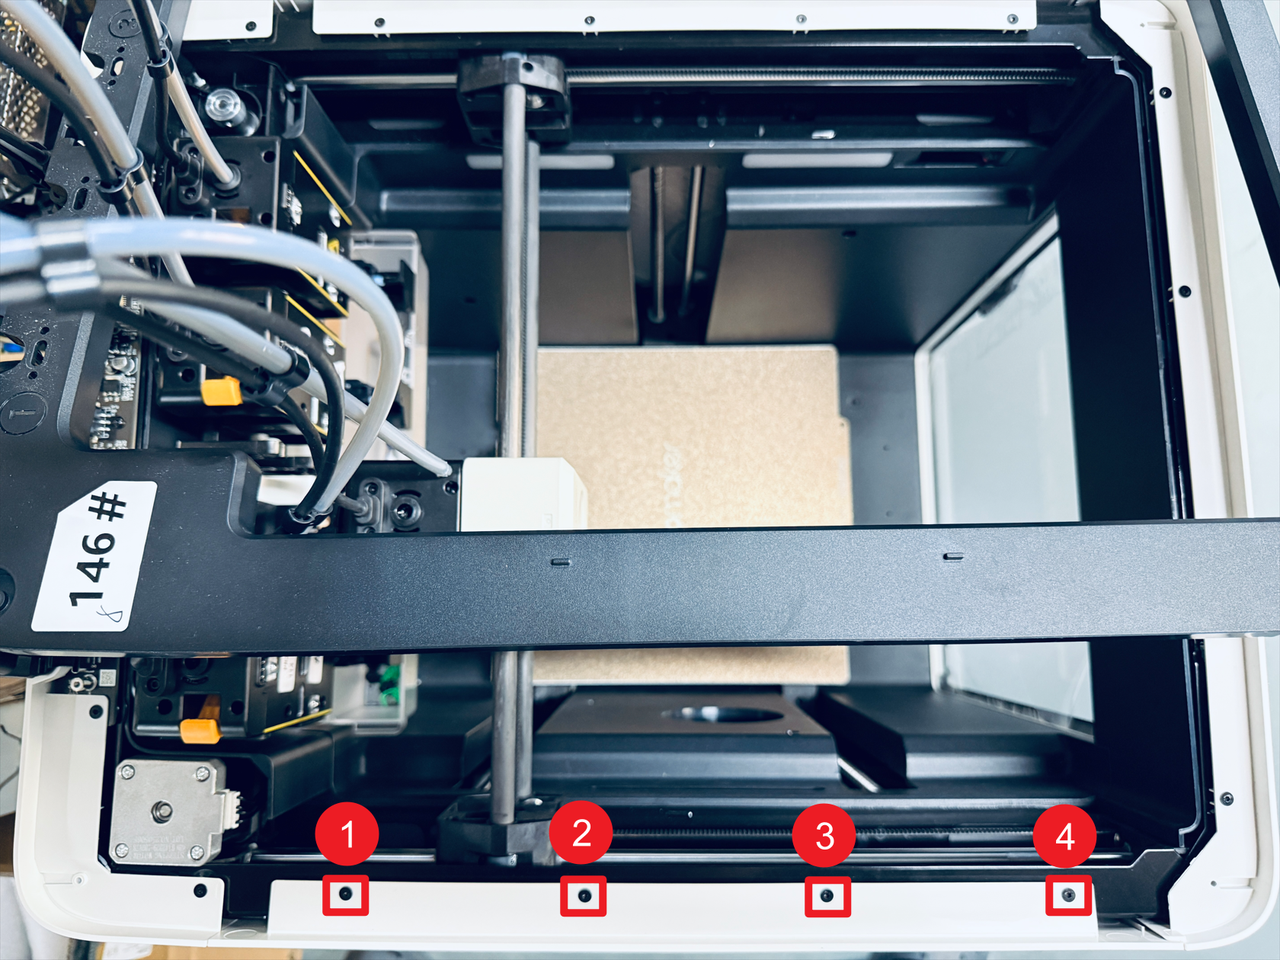
- Slightly shift the top cover panel as shown in the image, then remove the four marked screws.
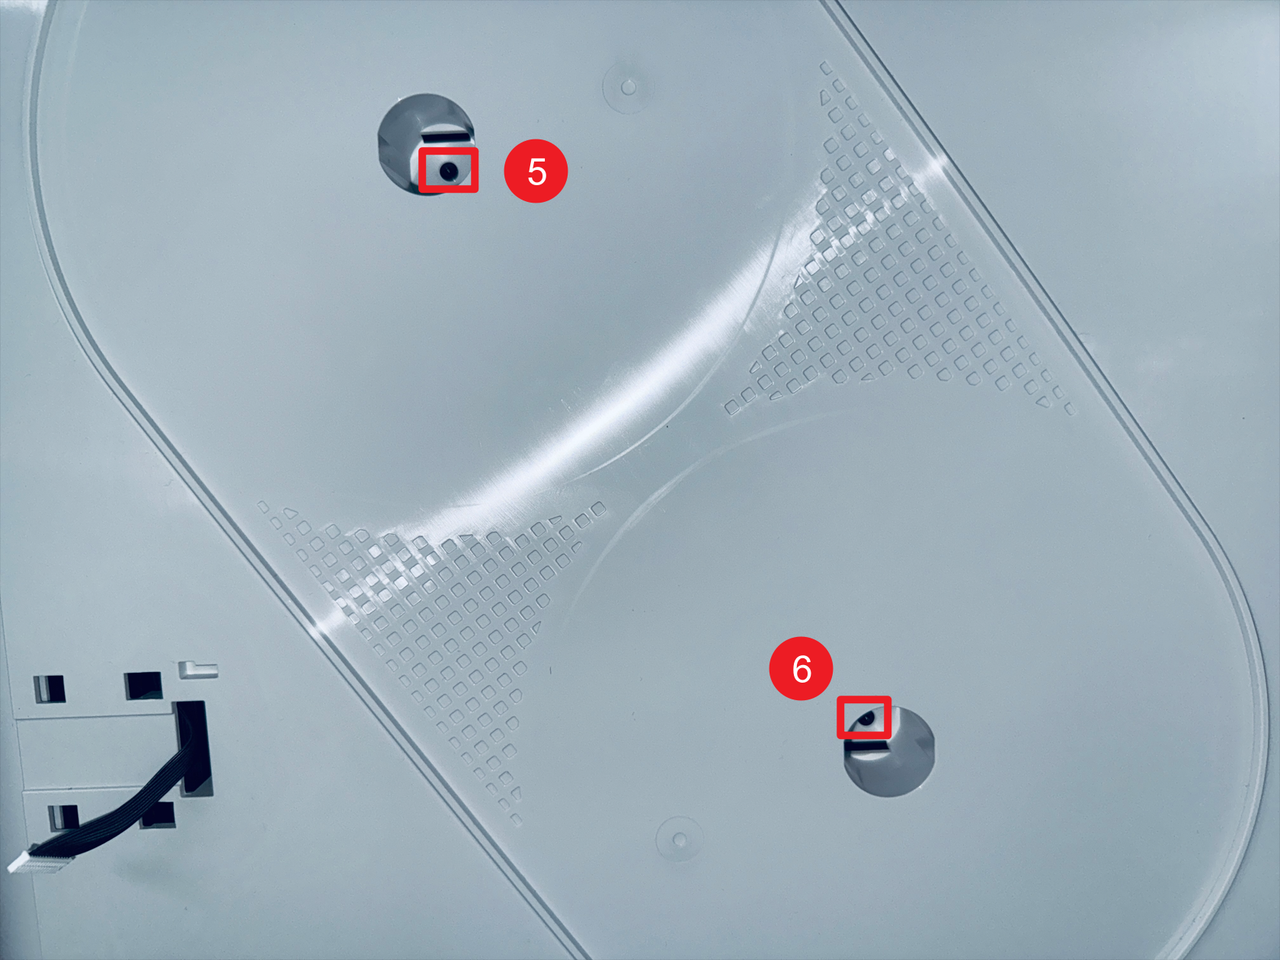
- Remove screws 5 and 6 located inside the spool holder holes.
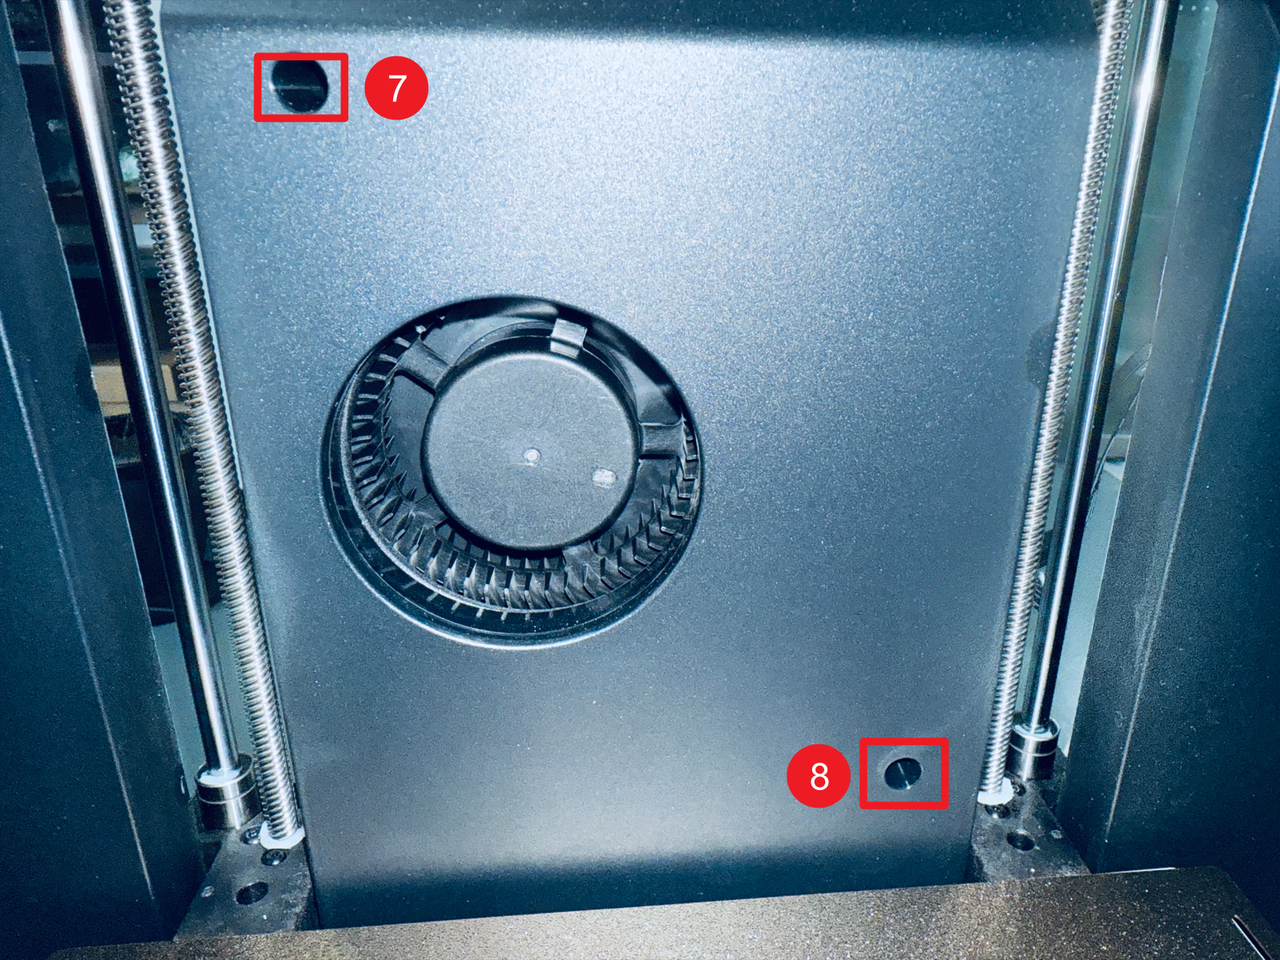
- Then remove screws 7 and 8 on the left panel.
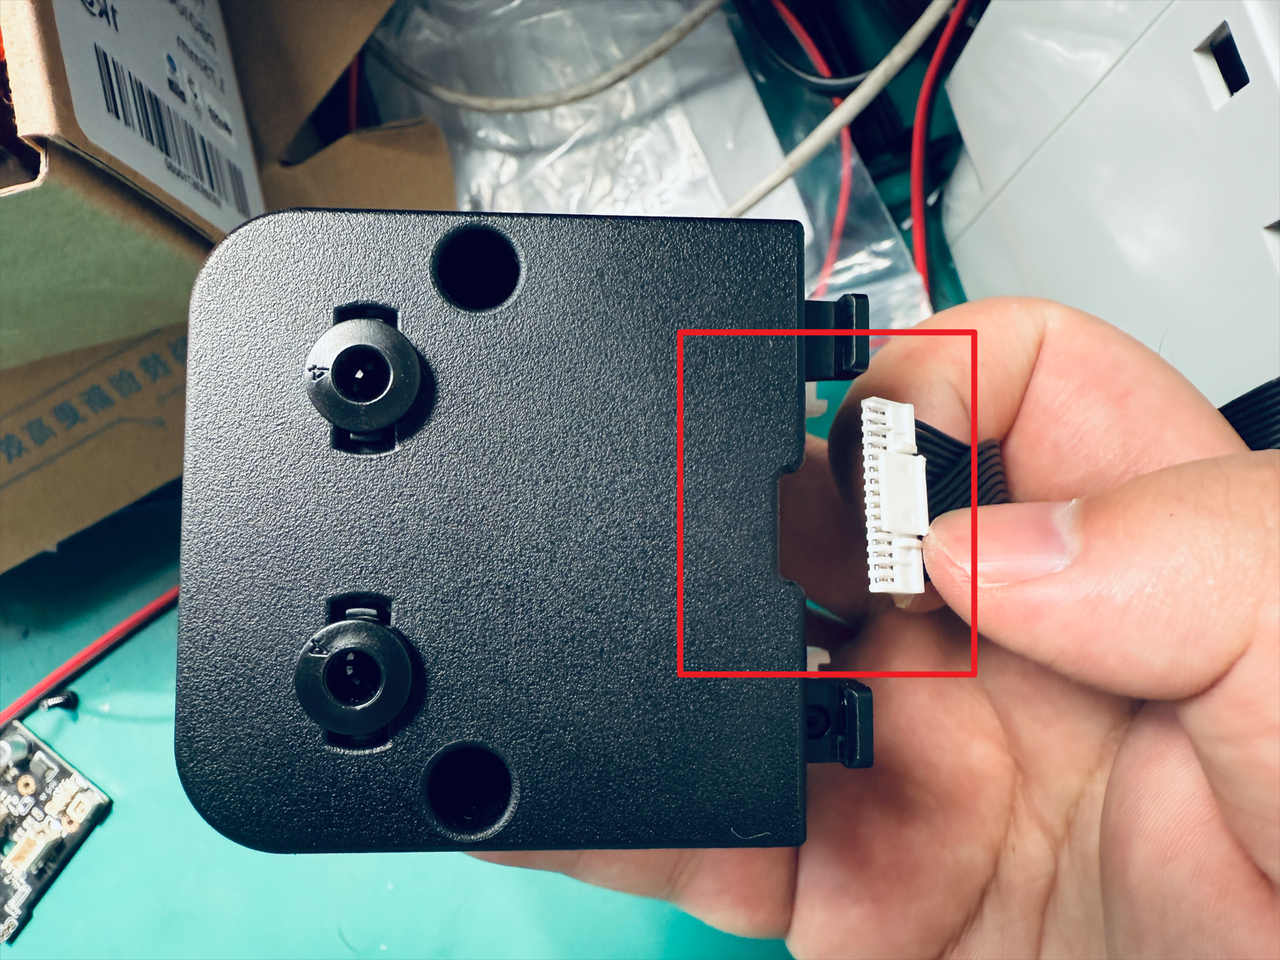
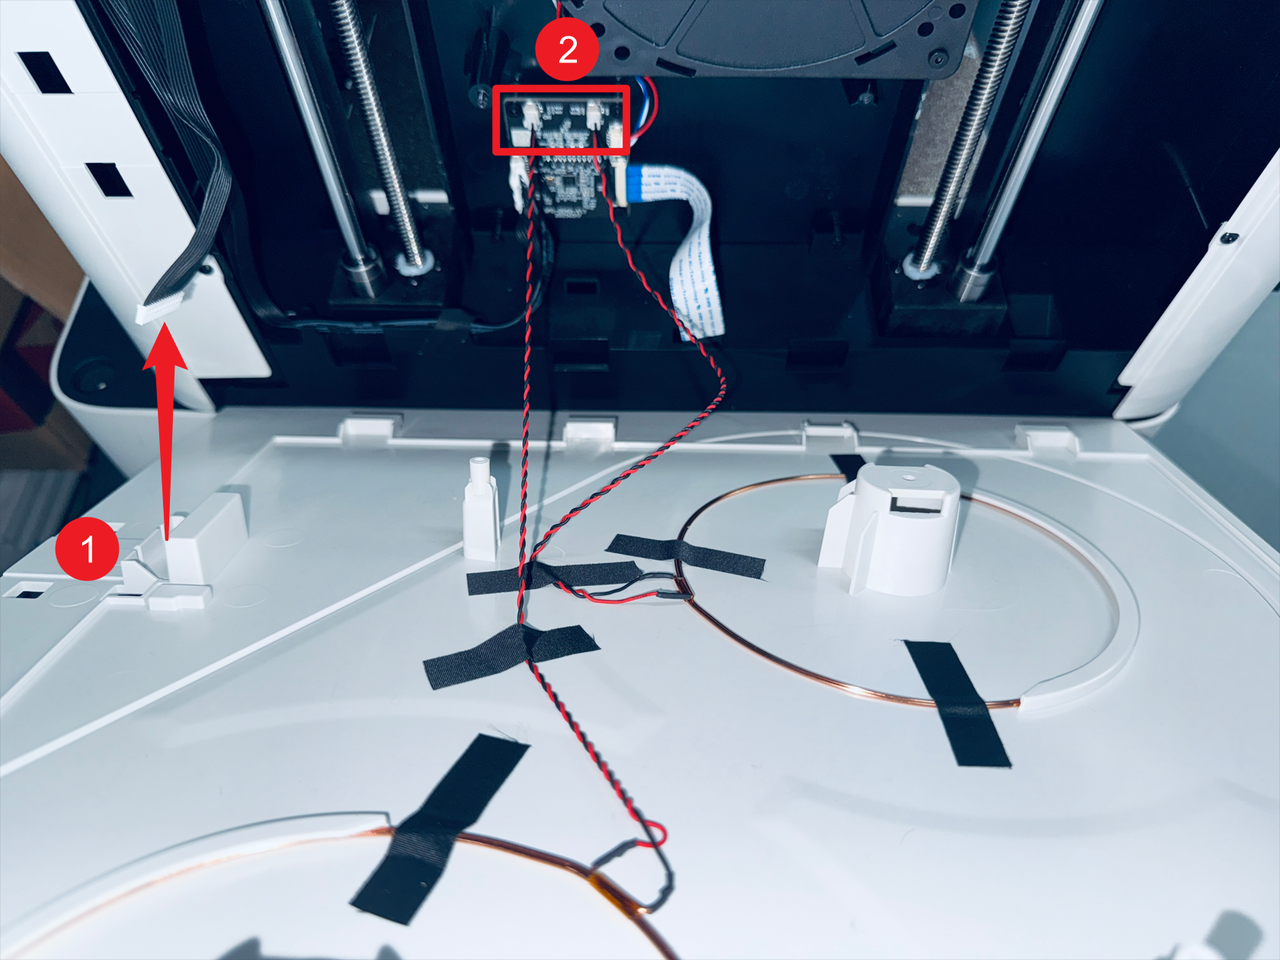
- Pass the filament feeder cable through position 1 and disconnect the two RFID cables at position 2, then remove the left panel.
¶ Part 2. Replace the auxiliary cooling fan
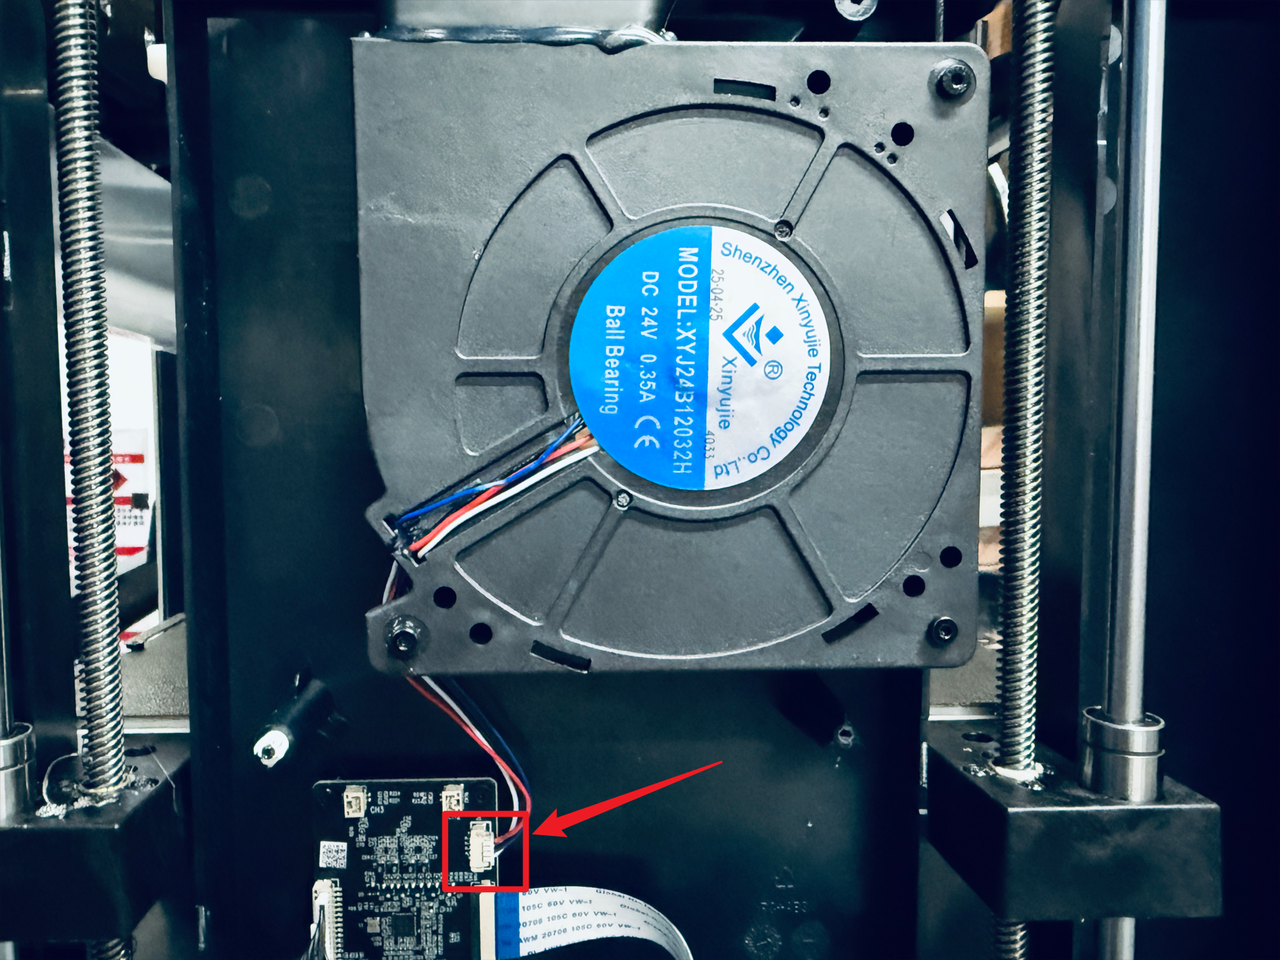
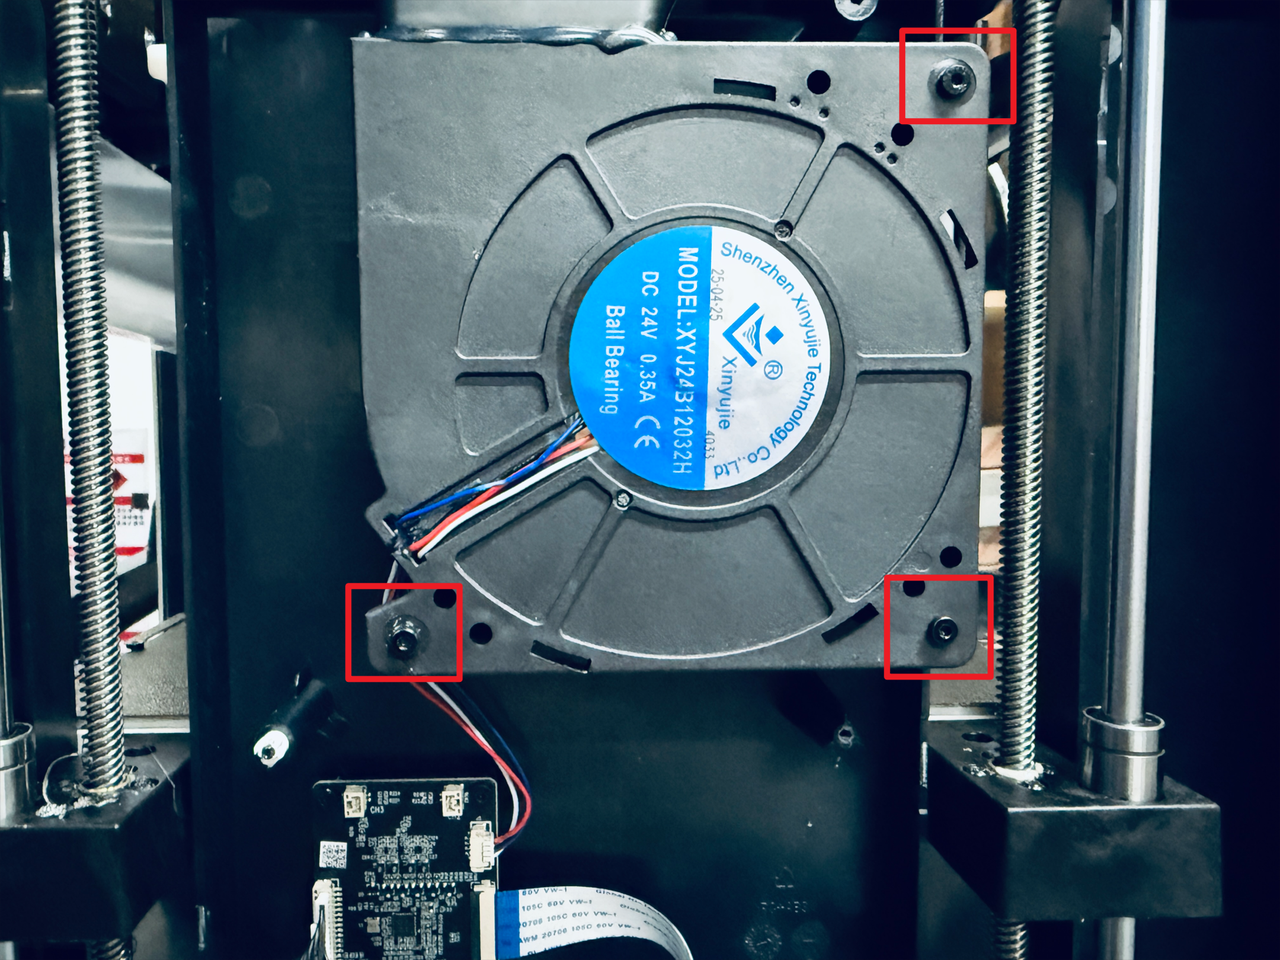
¶ Step 7. Remove the old auxiliary cooling fan
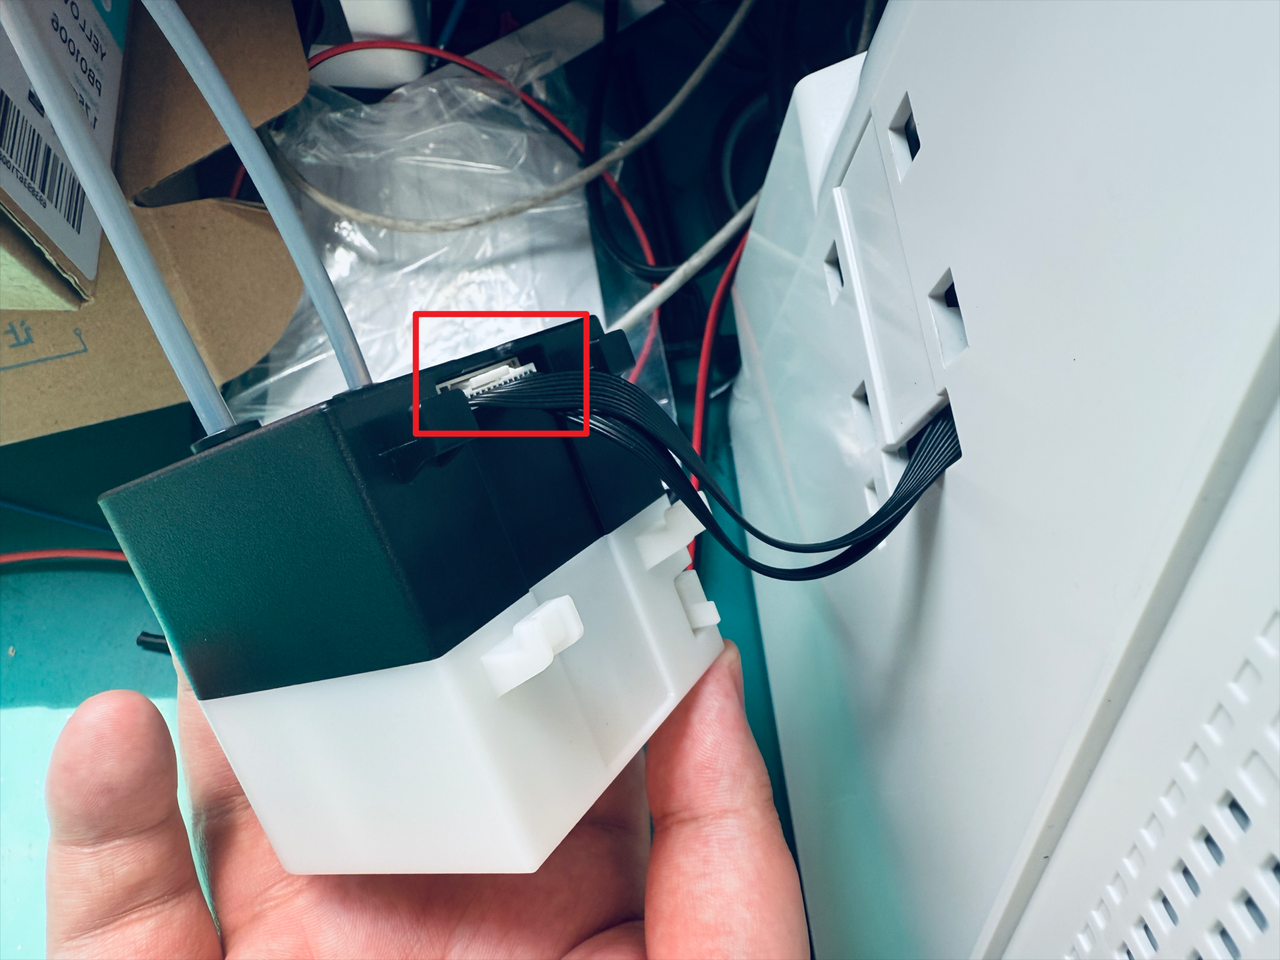
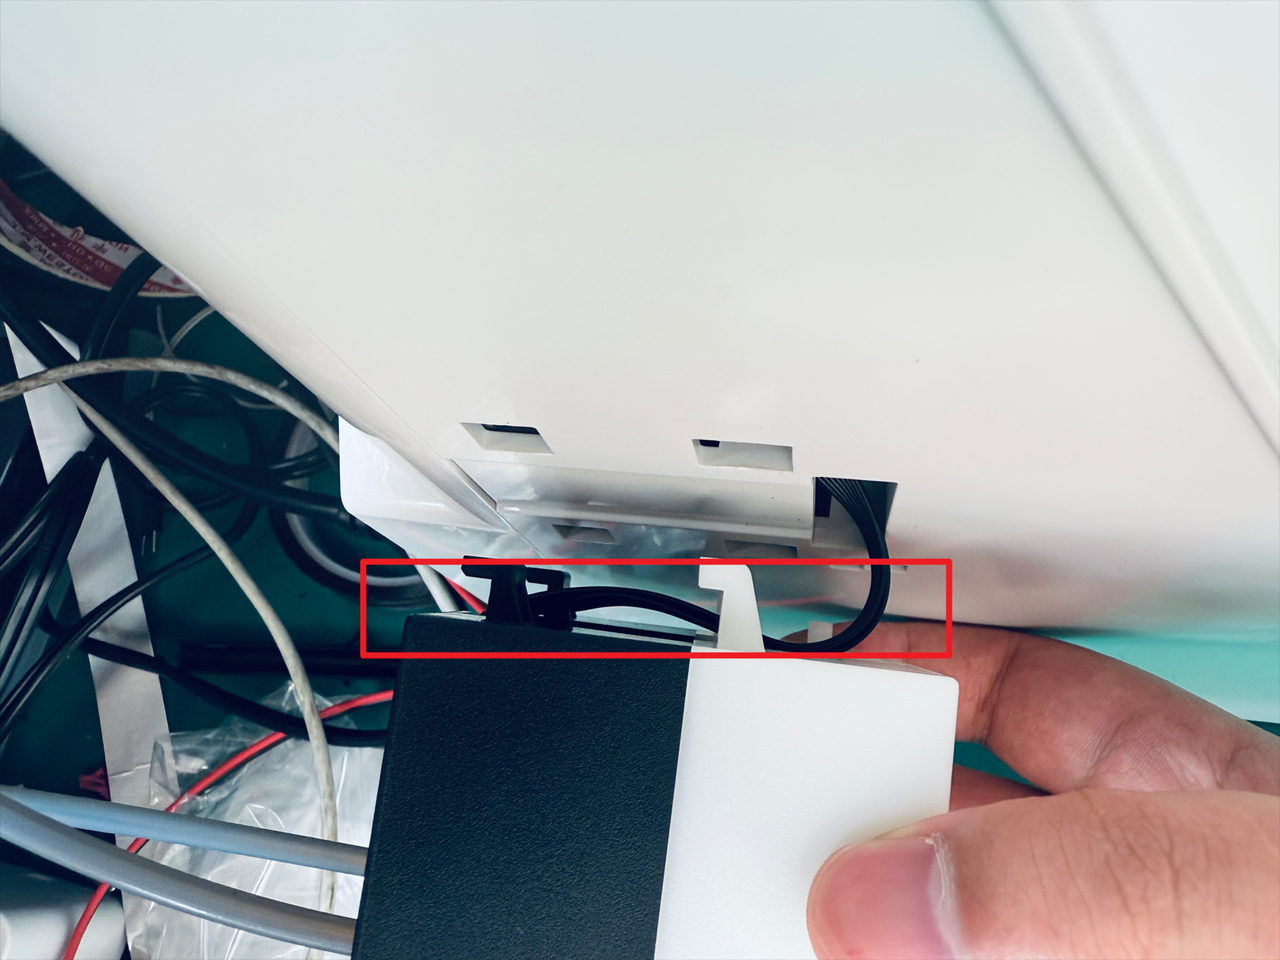
- Disconncet the auxiliary cooling fan cable.
- Use the H2.0 hex key to unscrew the 3 screws, then remove the old auxiliary cooling fan.
¶ Step 8. Install the new auxiliary cooling fan
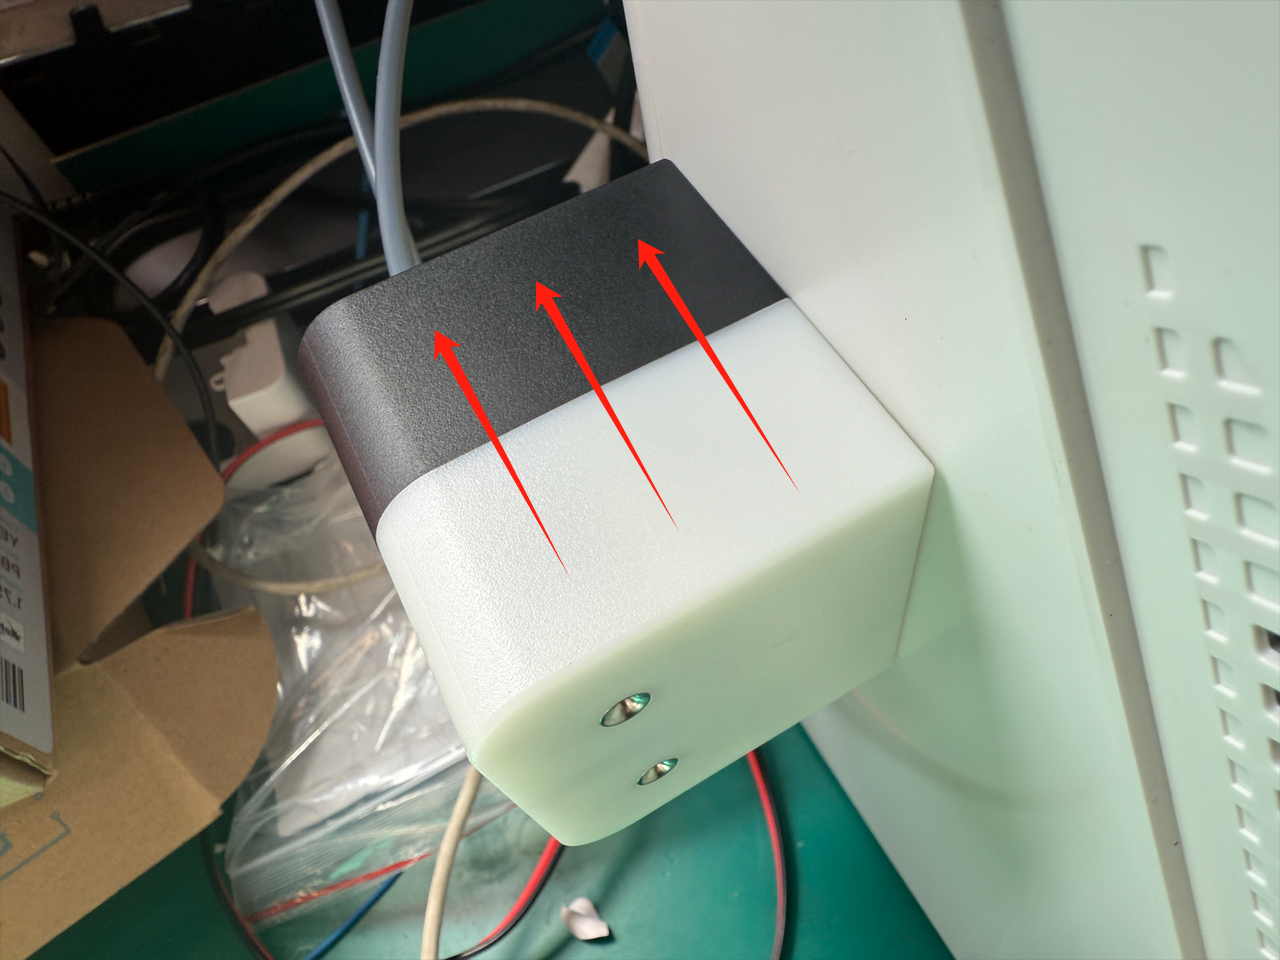
- Install the new auxiliary cooling fan, use the H2.0 hex key to tighten the 3 screws.
- Connect the auxiliary cooling fan cable.
¶ Part 3. Reassemble the machine
¶ Step 9. Reinstall the left panel
- Reconnect the RFID cables at position 2, pass the filament feeder cable through position 1, then install the left panel.
- Use the H2.0 hex key to tighten the 8 screws of the left panel.
¶ Step 10. Reinstall filament feeder and spools
- Reconnect the filament feeder cable and organize it as shown.
- Align the feeder clips with the corresponding positions, then push the feeder into place in the direction shown to complete installment.
- Reinstall the spool holders and spools.
¶ Step 11. Reinstall the top cover panel
- Install the top cover panel, use the H2.0 hex key to tighten the 4 screws.
- Install the silicone plugs.
¶ Step 12. Reconnect USB cables
- Reconnect the USB cables, then use the H2.0 hex key to tighten the 8 screws.
¶ Reach out to Snapmaker Support
After following the troubleshooting steps, if you find it difficult to resolve your issue, kindly submit a support ticket through https://snapmaker.formcrafts.com/u1-troubleshooting-request and share your troubleshooting results with some pictures/videos.
Our dedicated support team will be more than willing to assist you in resolving the issue.