¶ Overview
¶ Location
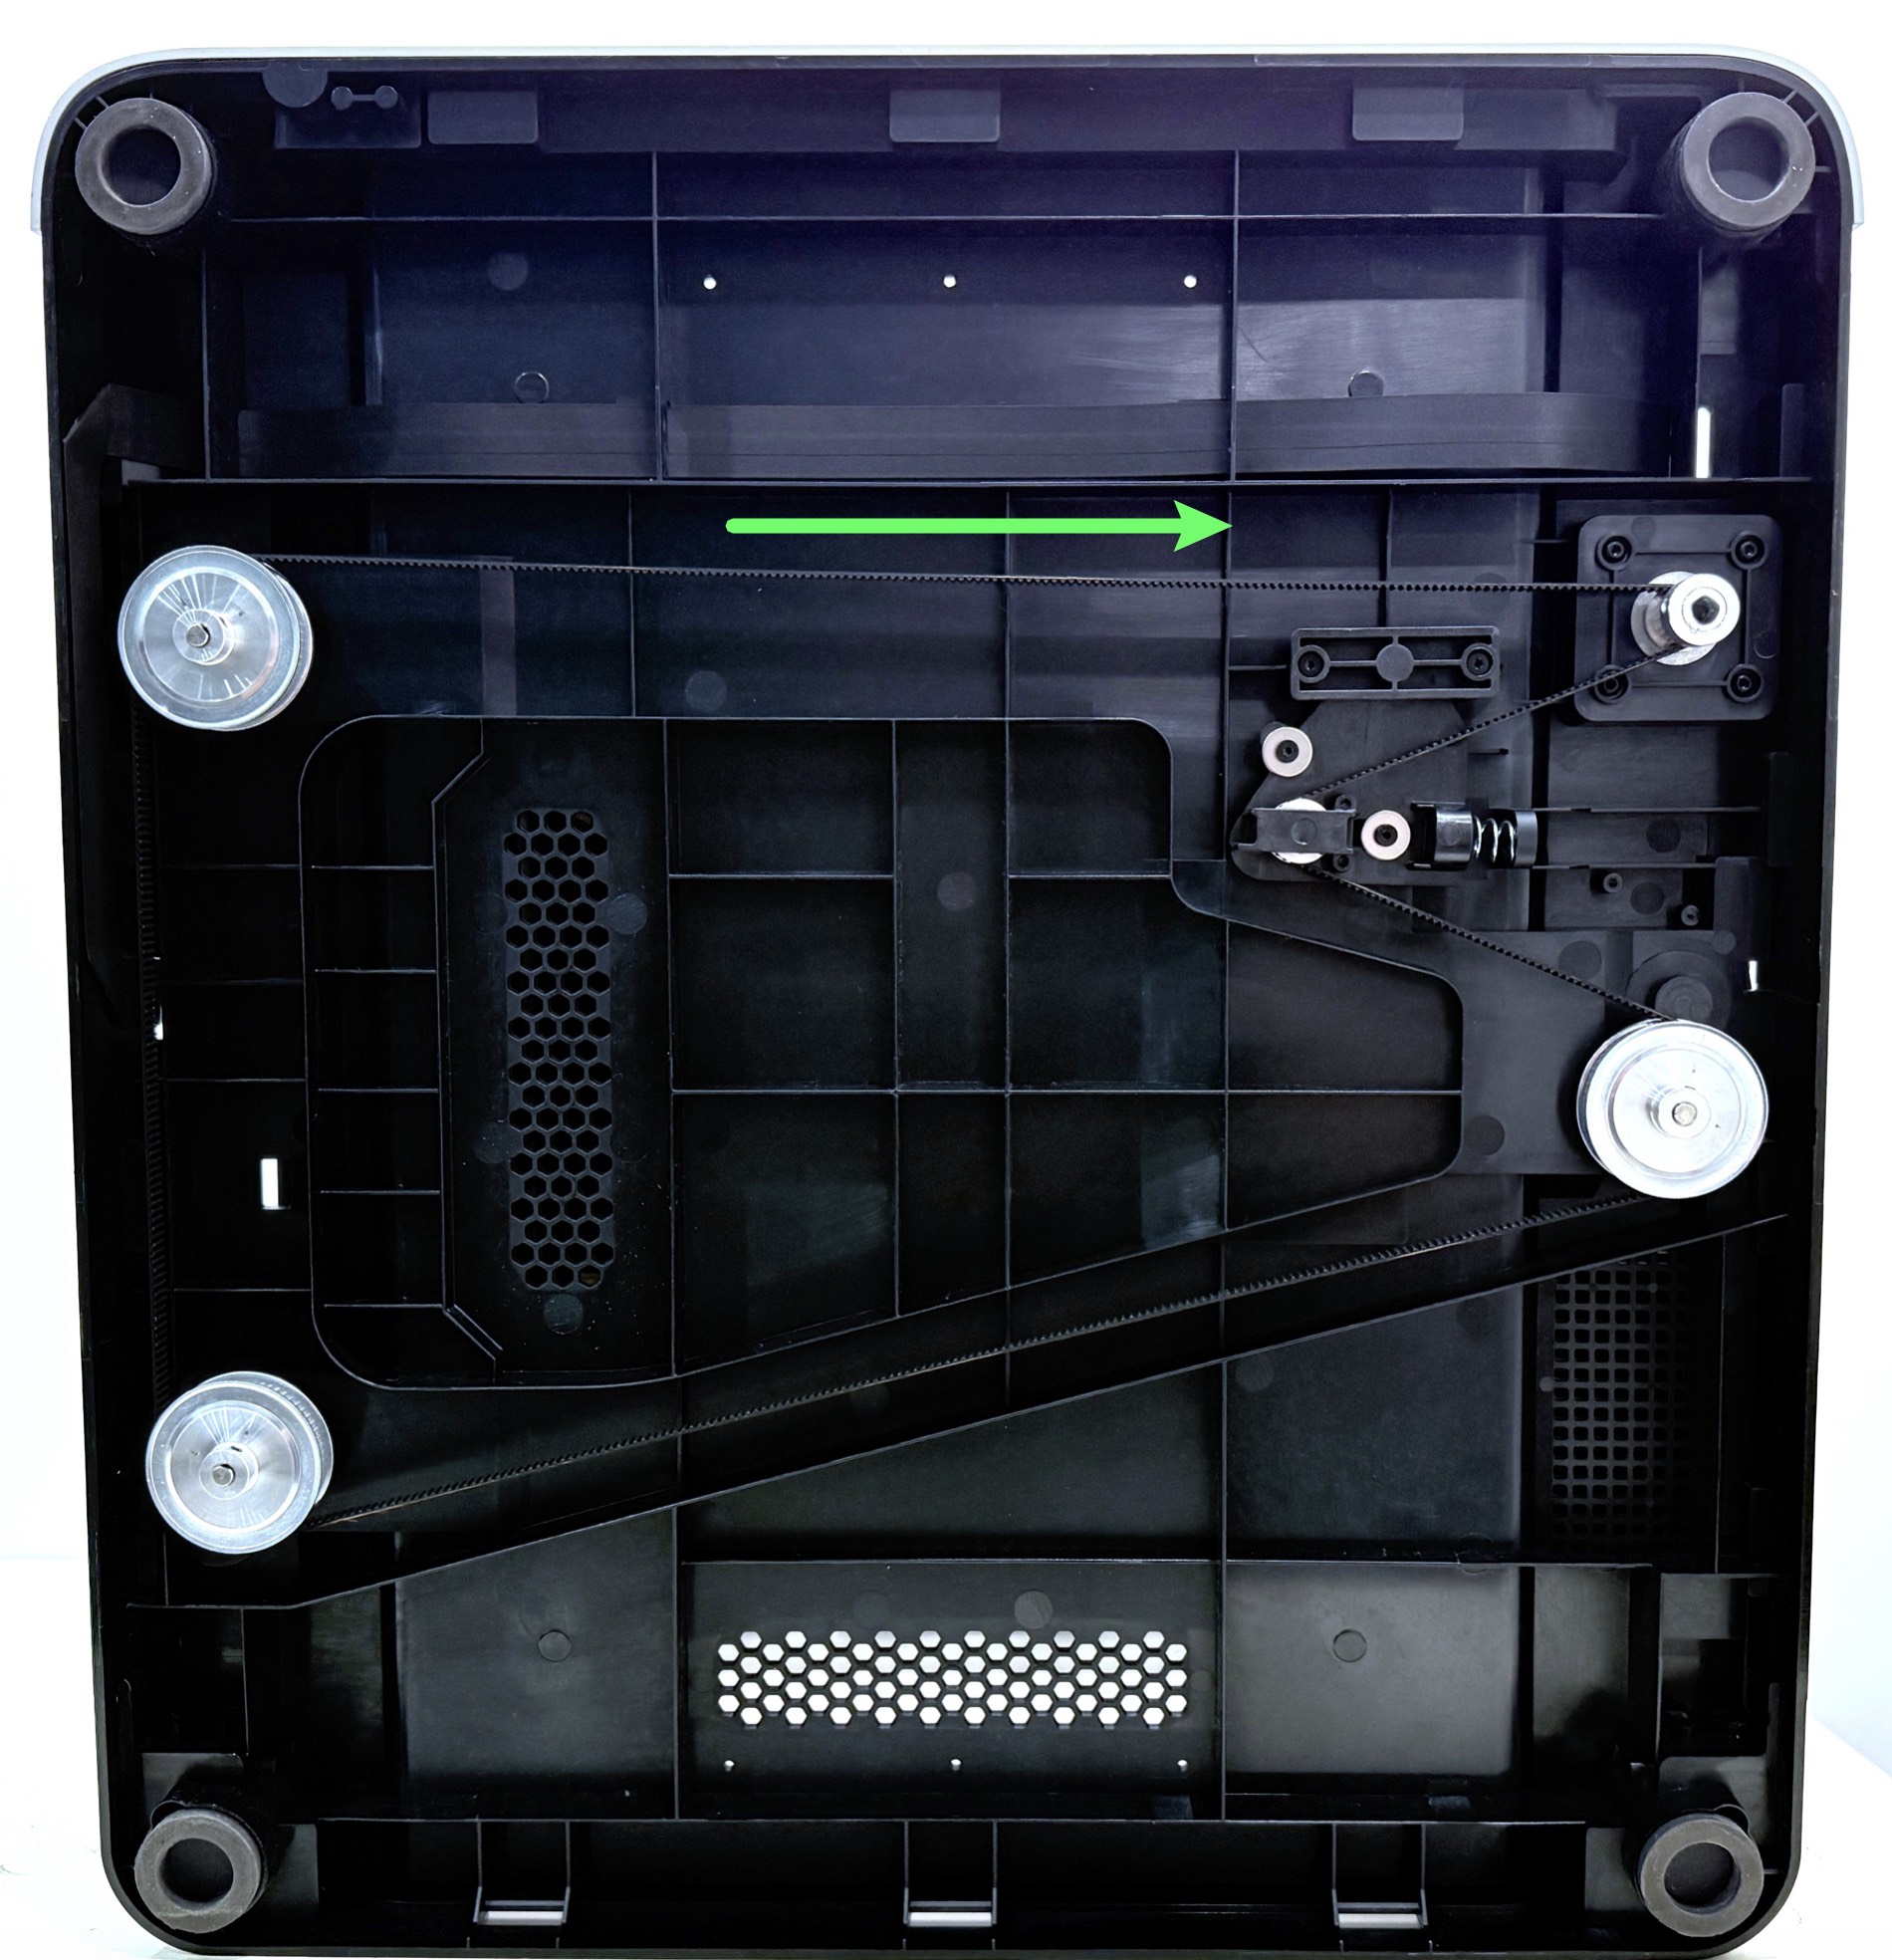
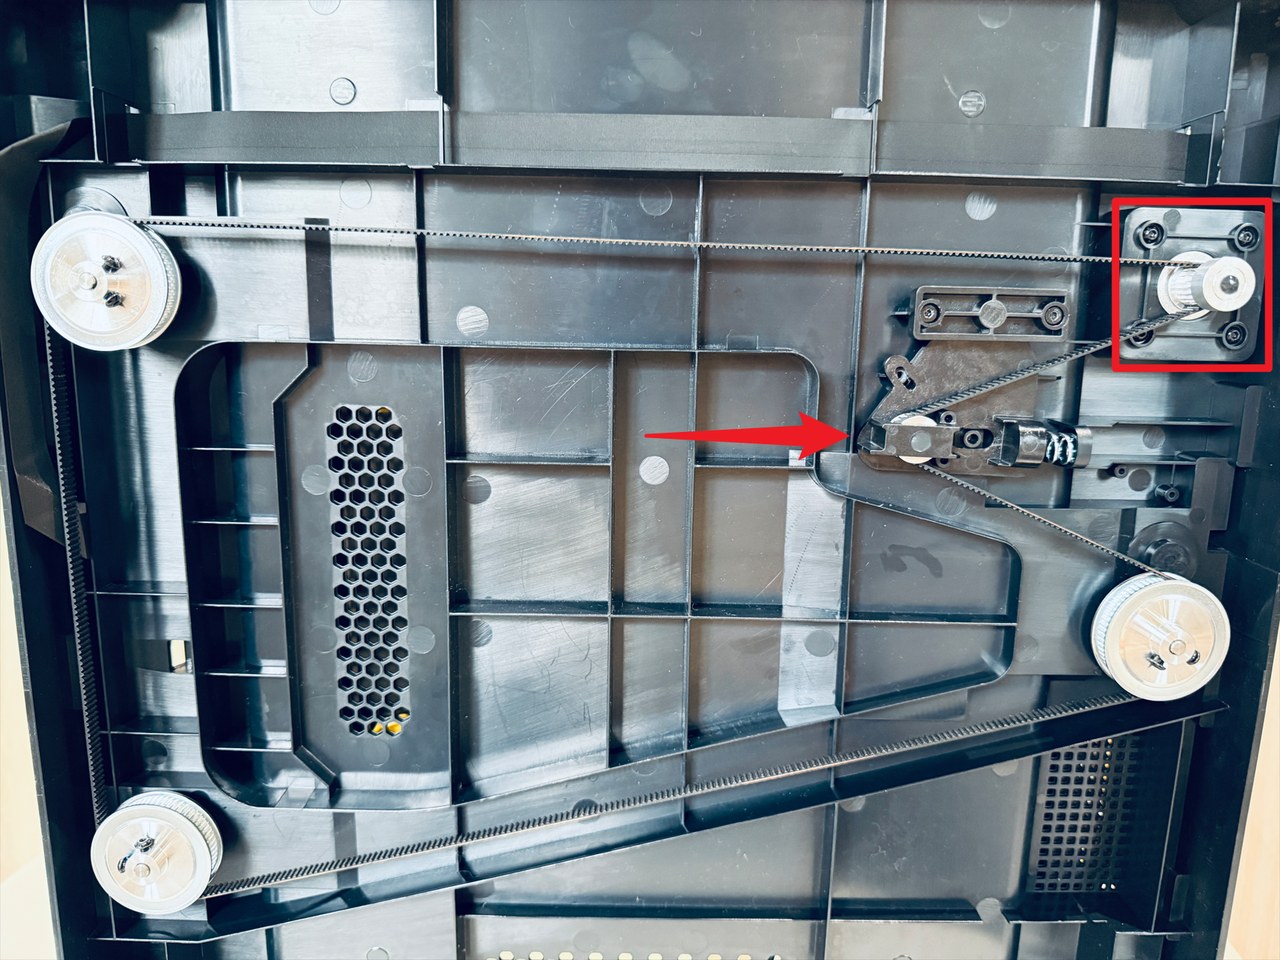
The Z-Axis timing belt is located at the bottom of the machine. For easier replacement, it is recommended to place the machine with its back facing down.
¶ Difficulty and Time Estimate
- Difficulty:★★★★☆ (Difficult)
- Estimated Time:40 minutes
¶ Where to Buy
US: https://us.snapmaker.com/products/z-axis-timing-belt-for-snapmaker-u1
EU: https://eu.snapmaker.com/products/z-axis-timing-belt-for-snapmaker-u1
Global: https://shop.snapmaker.com/products/z-axis-timing-belt-for-snapmaker-u1
¶ Tools and Parts Required
- H2.0 hex key
- New Z-Axis timing belt
¶ Procedure
¶ Step 1. Power off the machine
- Before proceeding, please turn off the machine and unplug the power cable!

¶ Step 2. Lower the heated bed
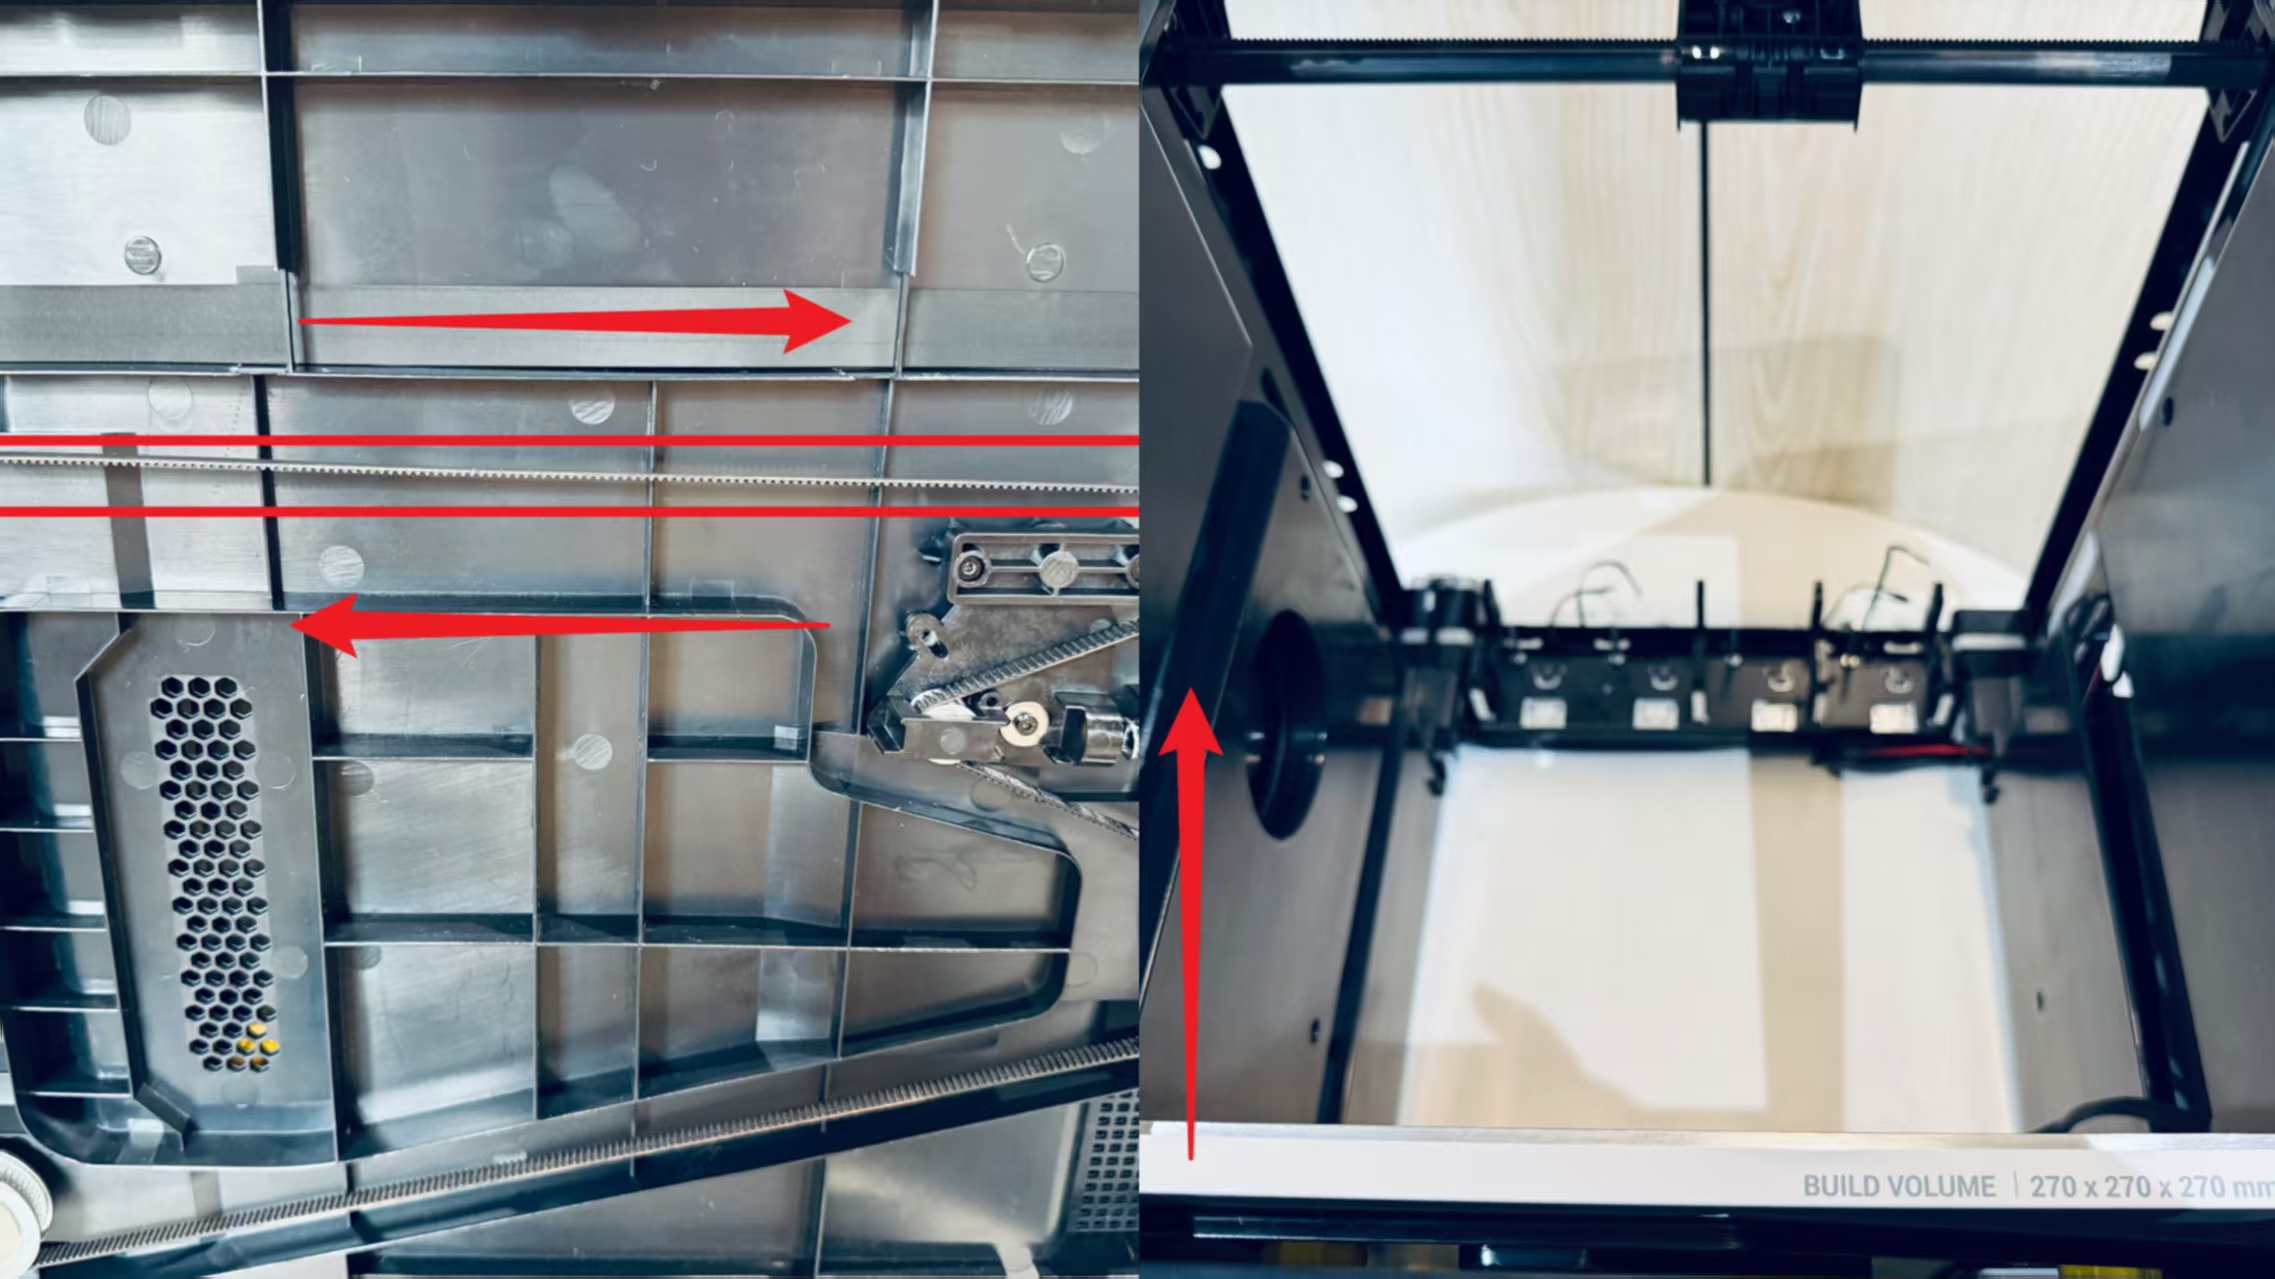
- Pull the timing belt at the bottom of the machine to the right to lower the heated bed to its lowest position.
¶ Step 3. Remove the old Z-Axis timing belt
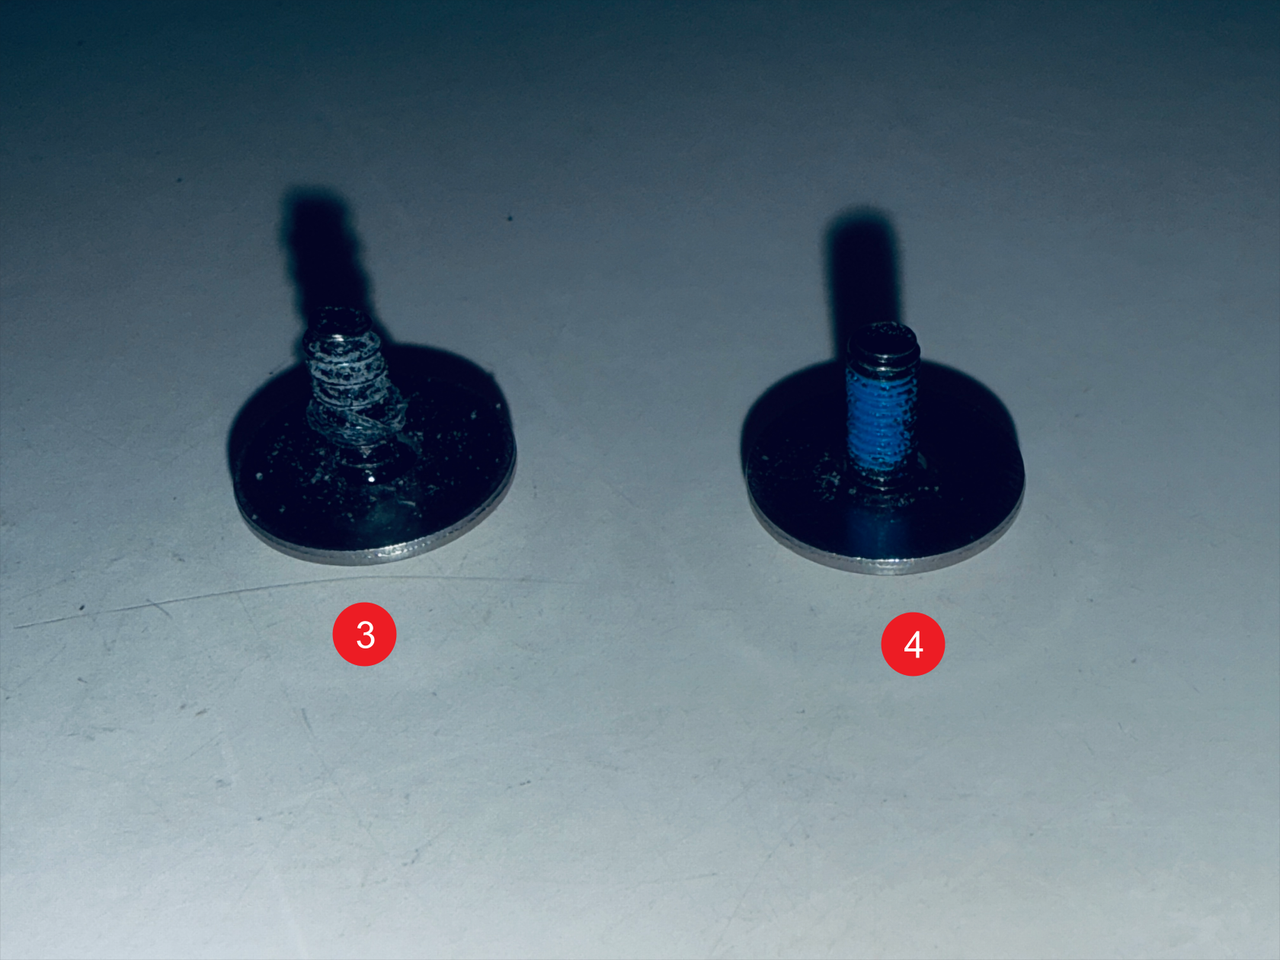
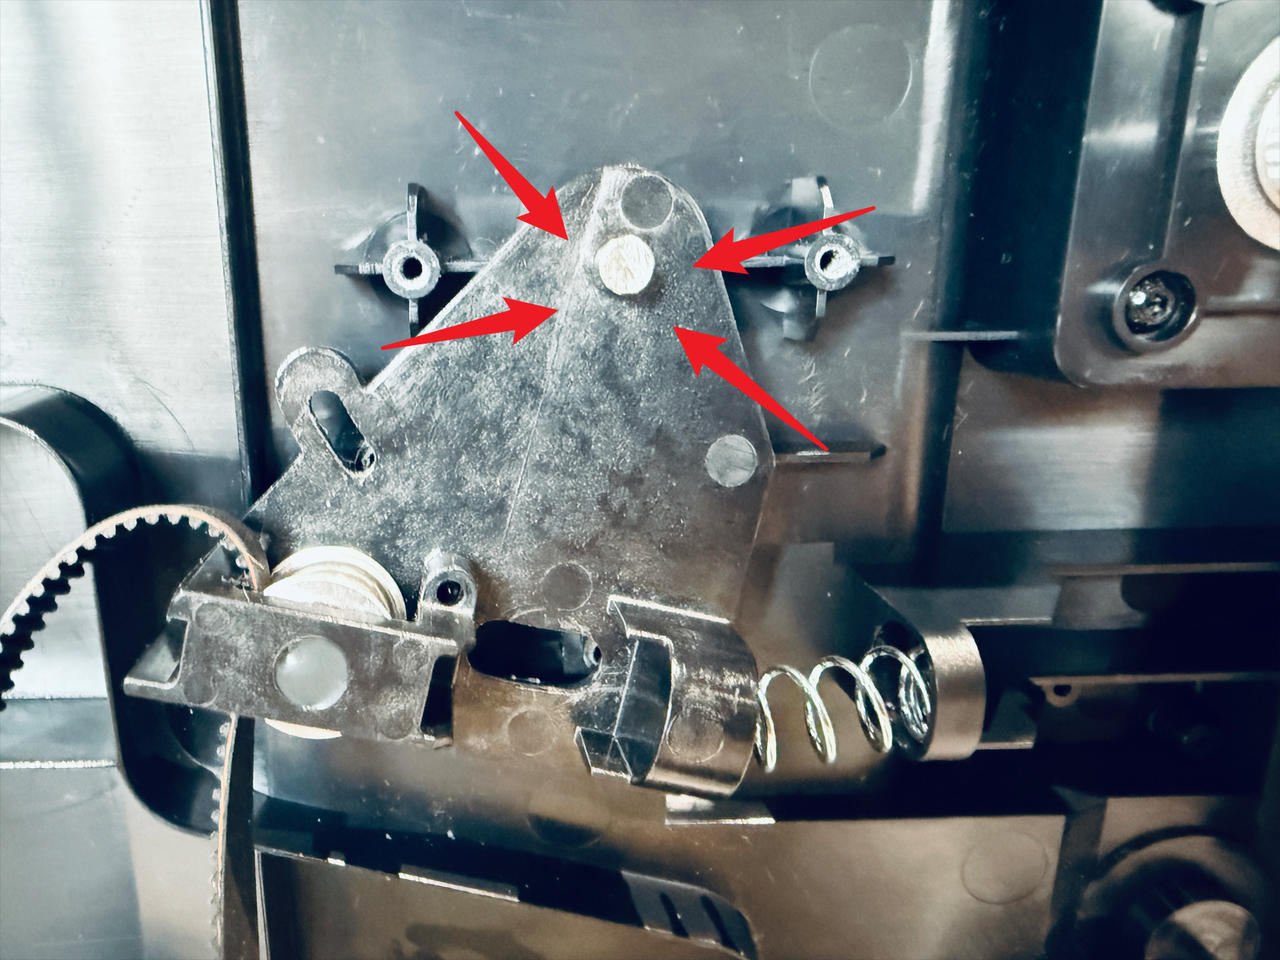
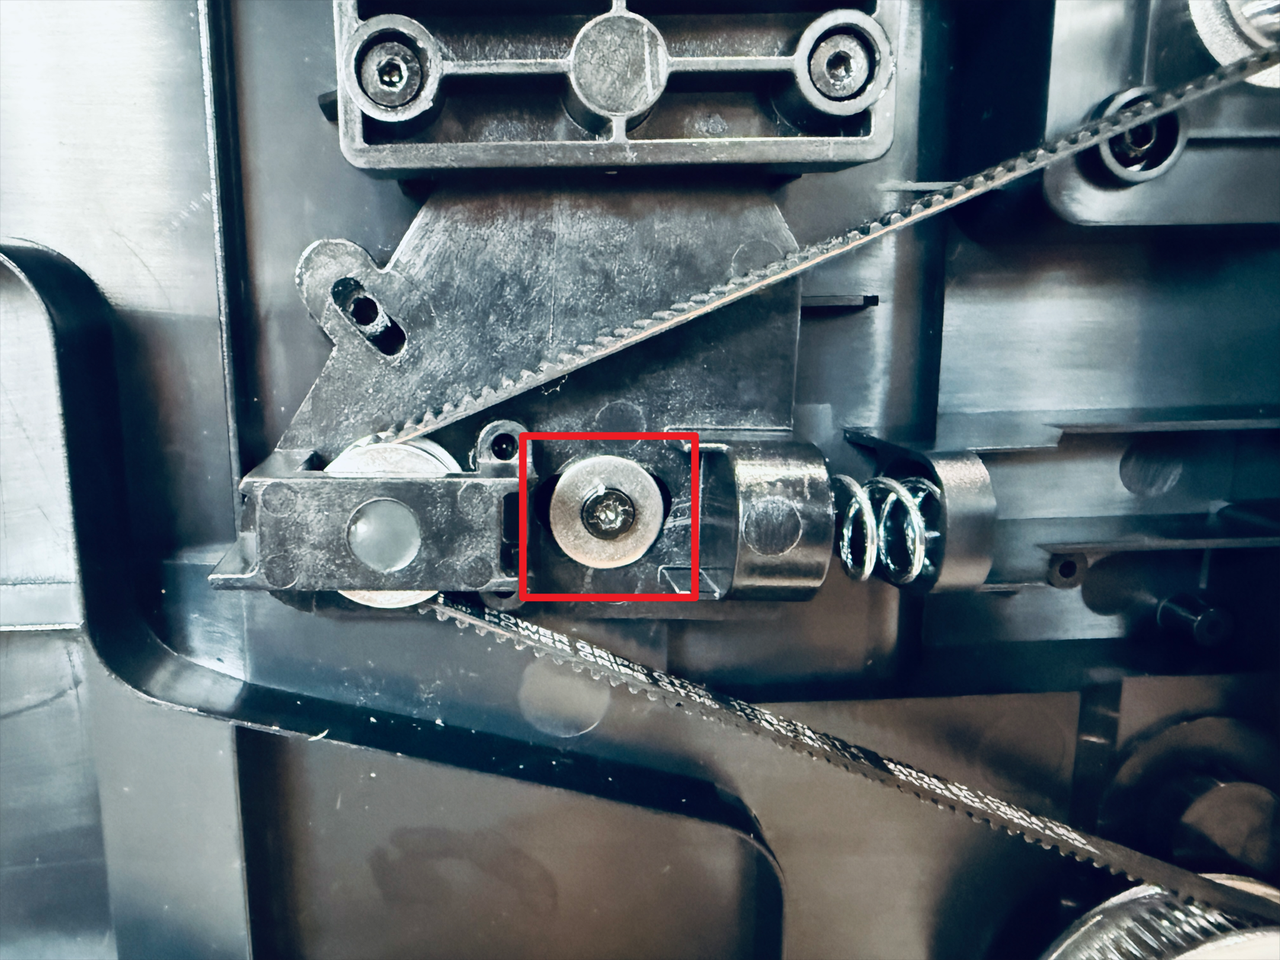
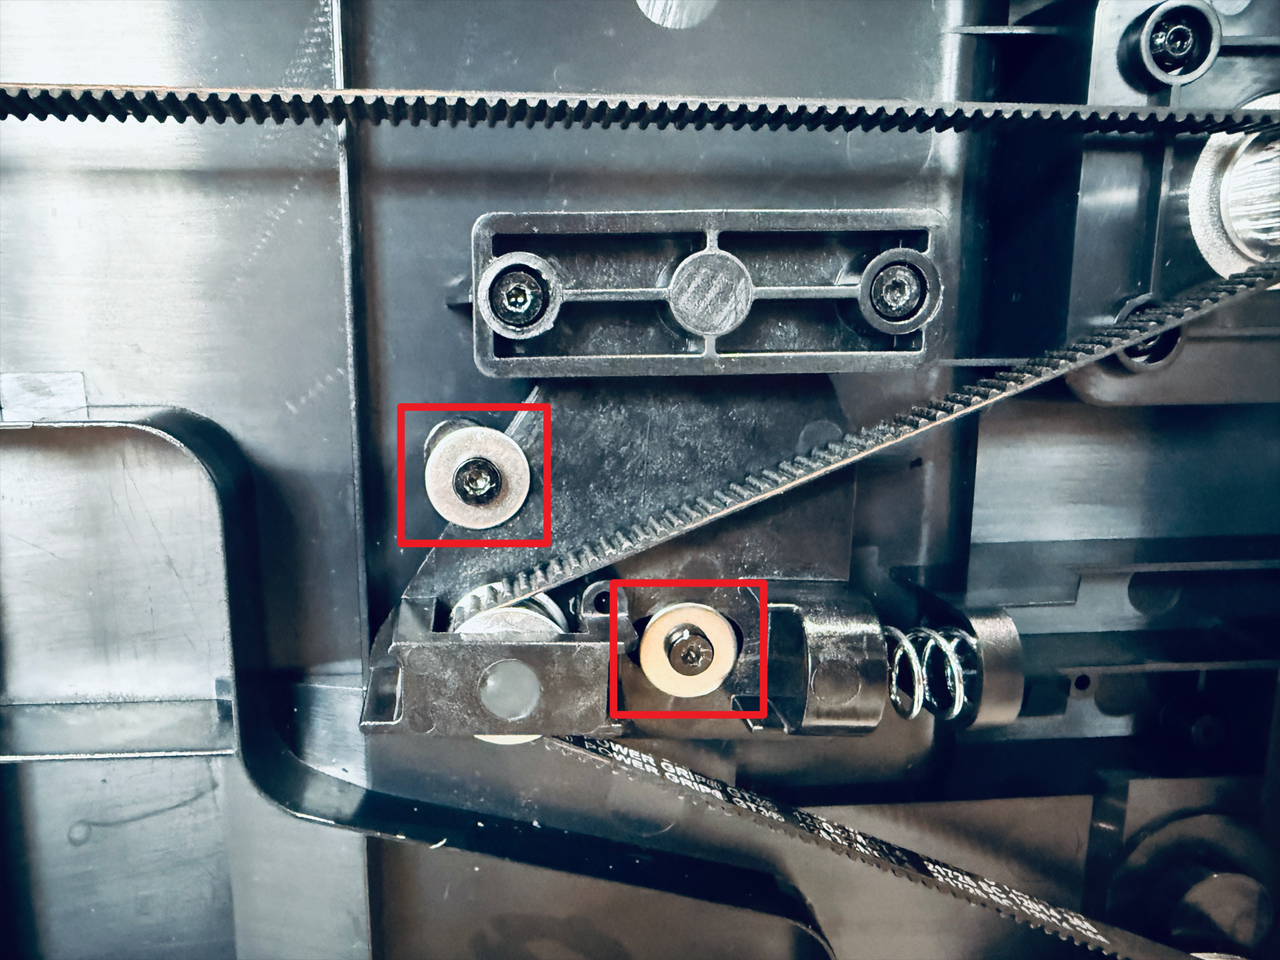
- Use the H2.0 hex key to remove the 4 fixing screws: Screws 1 and 2 (without washers), Screws 3 and 4 (with washers).
Screw 4 is coated with Nylok Adhesive and must not be confused with screw 3.

- Remove the pressure block.
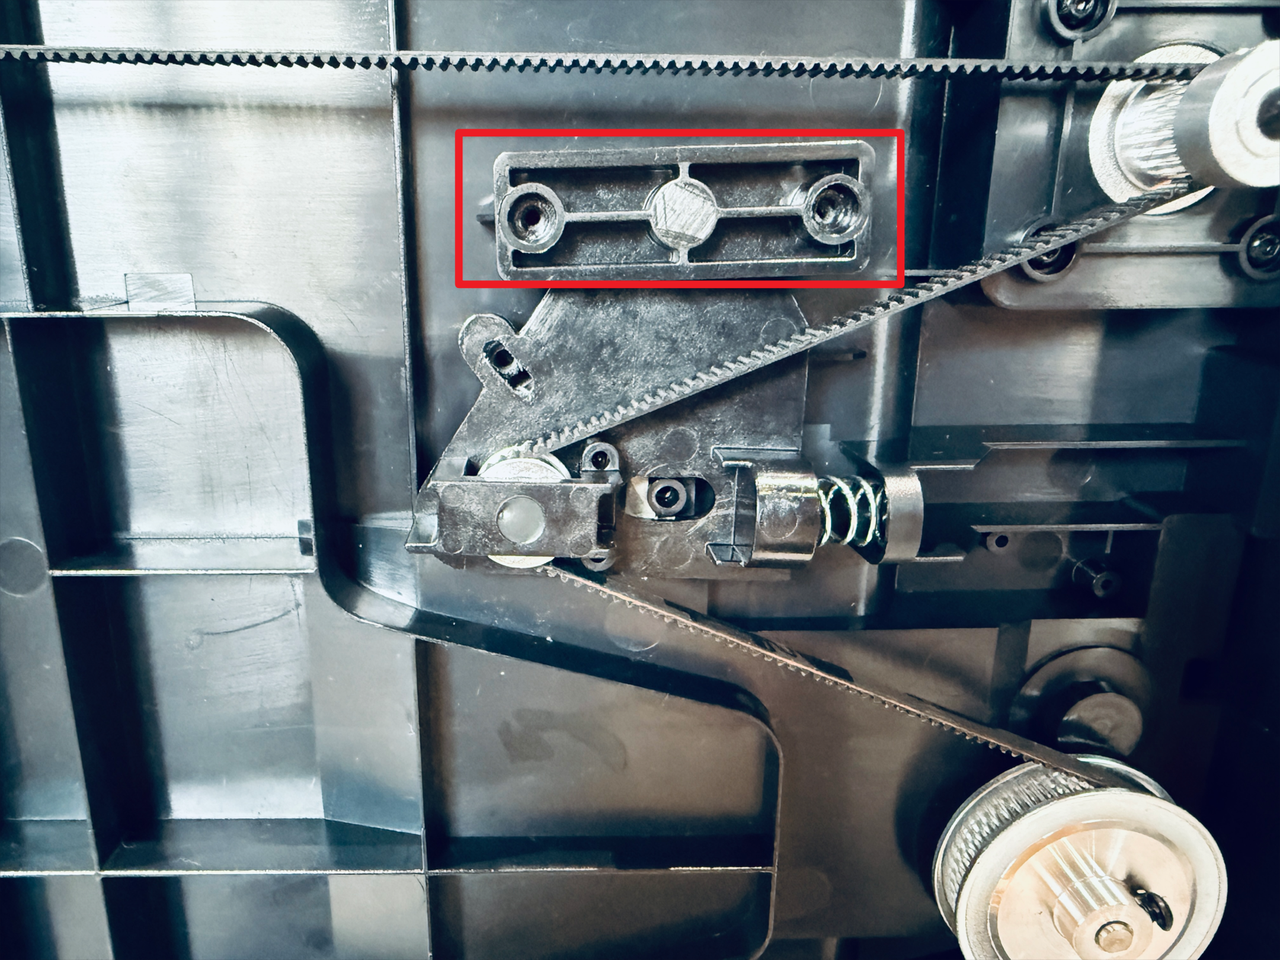
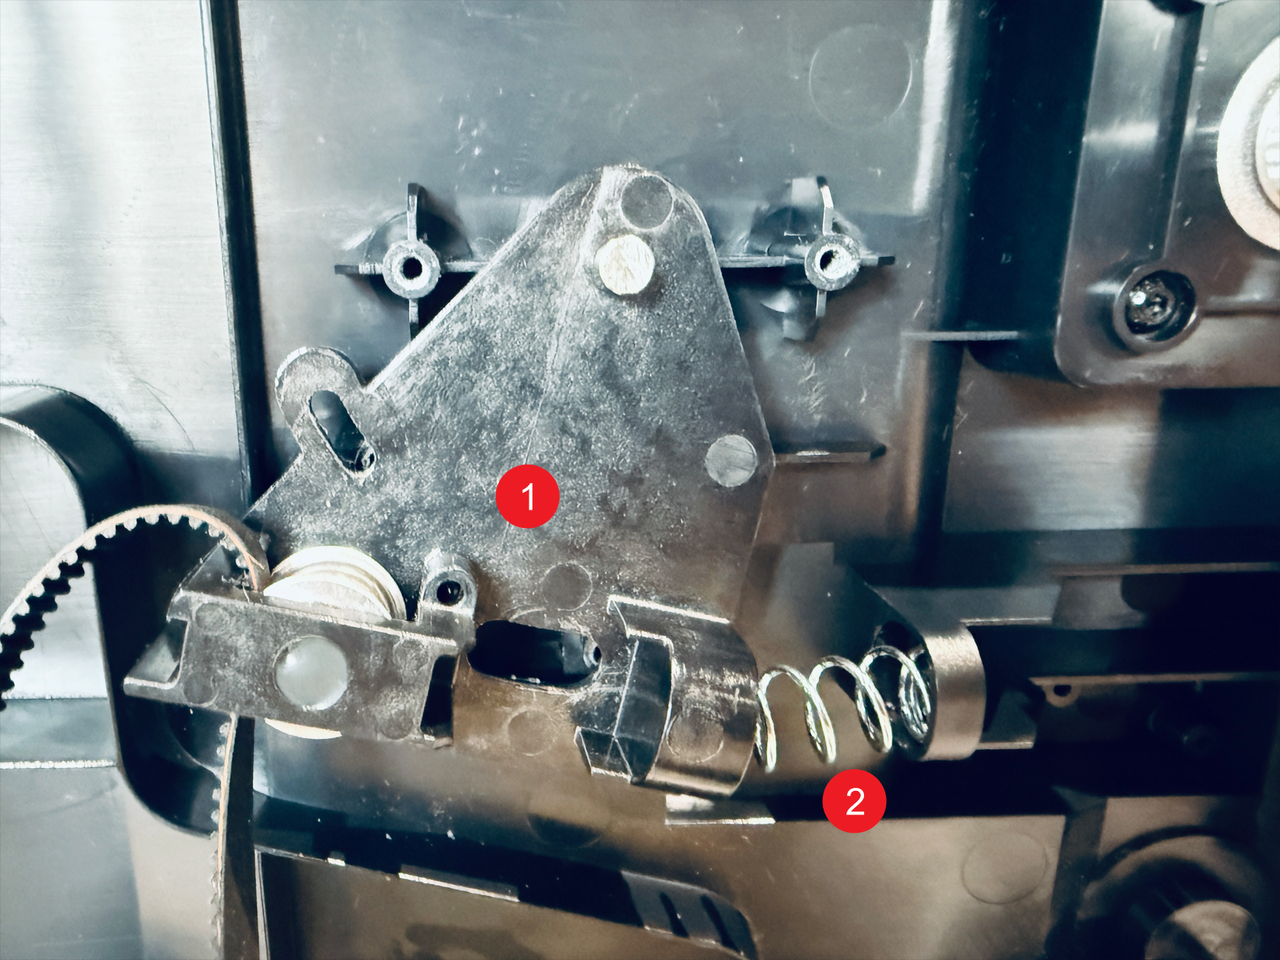
- Slowly remove the timing belt tension swing arm—1 (with timing belt) and the compression spring—2.
The compression spring may pop out quickly; please be careful.
¶ Step 4. Install the new Z-Axis timing belt
¶ 4.1 Install timing belt tension swing arm and ompression spring
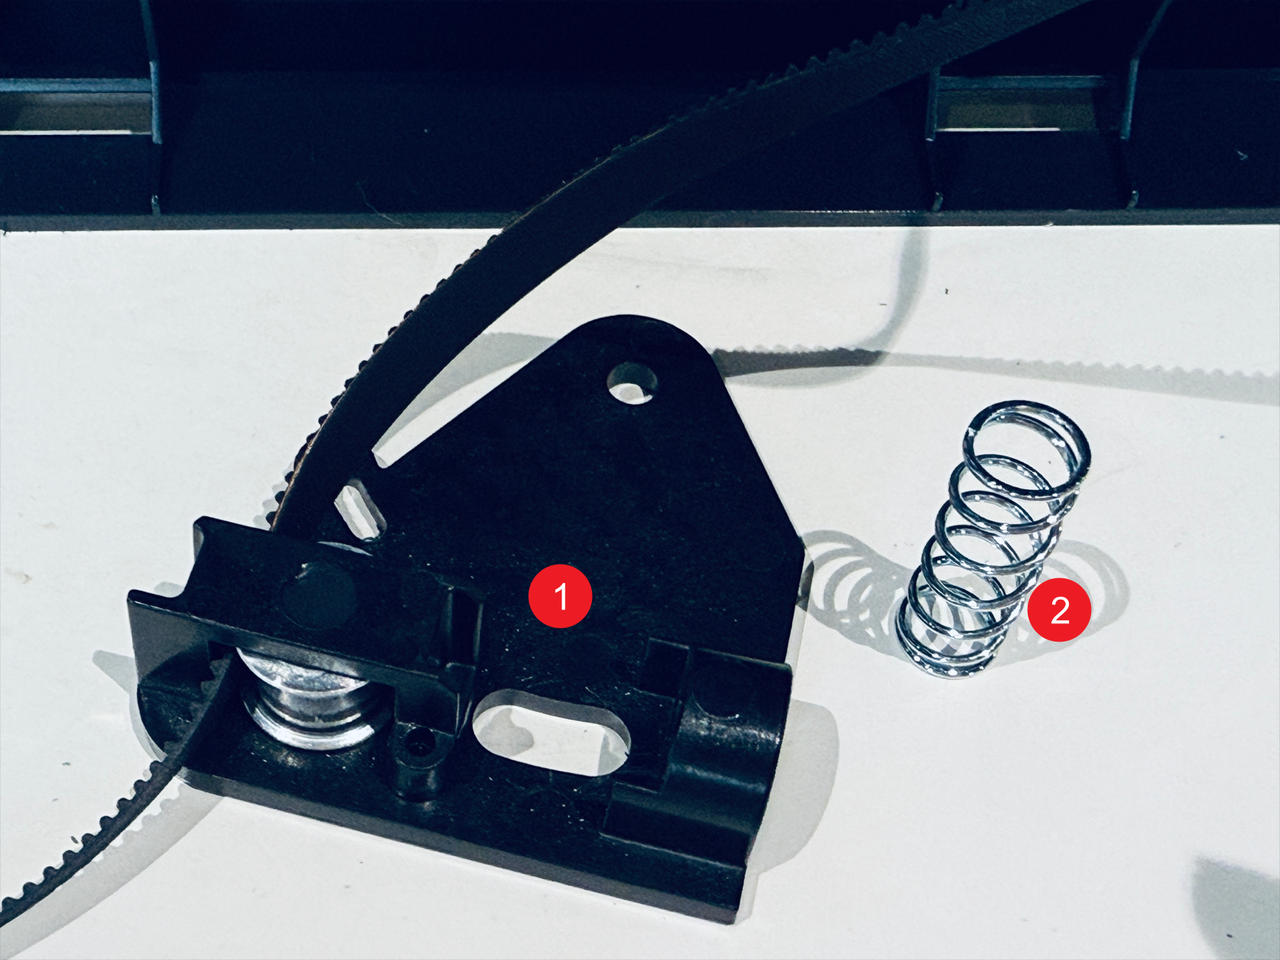
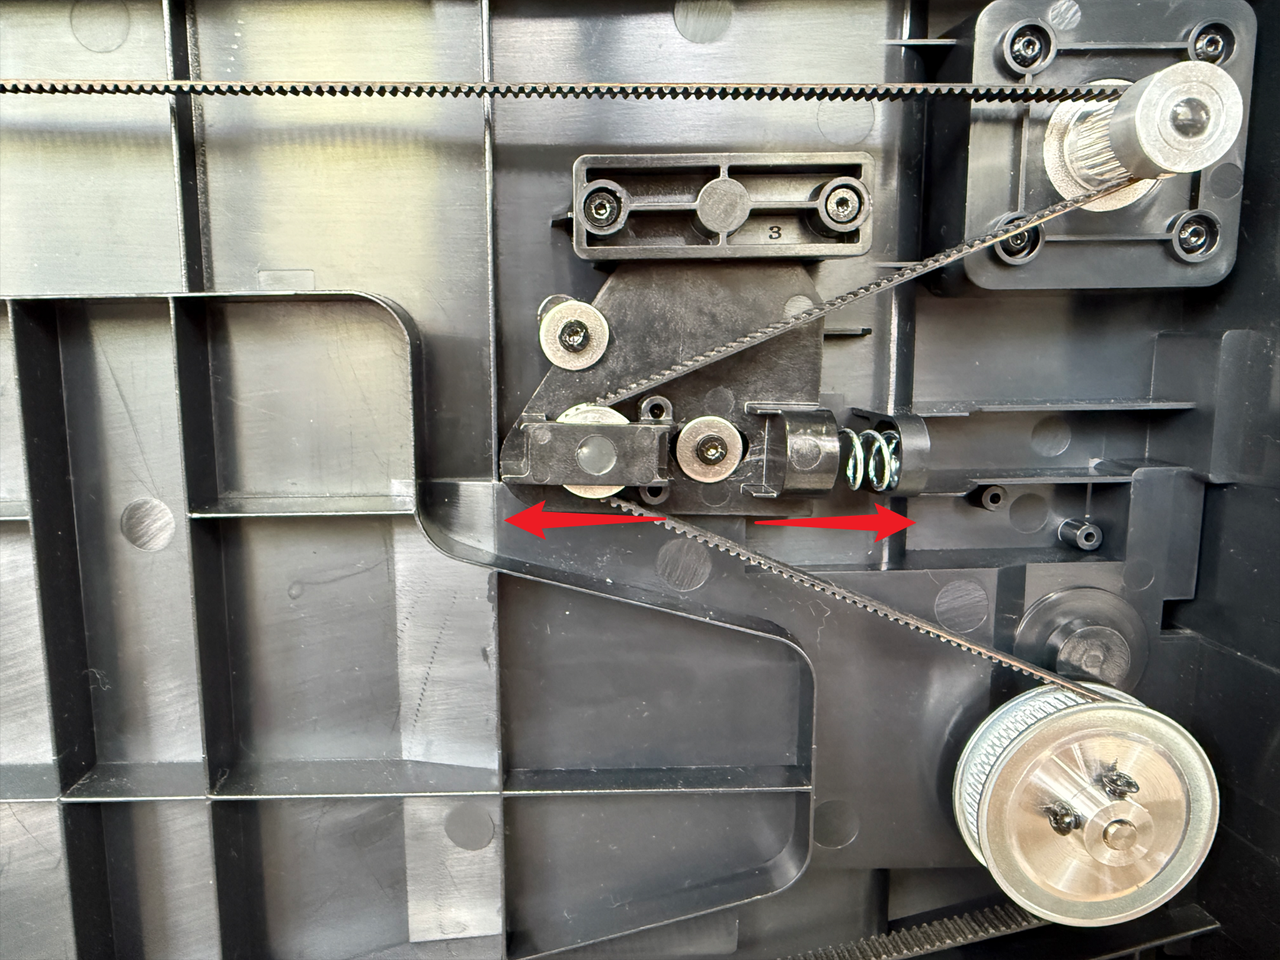
- Install the new timing belt tension swing arm (with new timing belt) and compression spring in the position shown in the image. Press the timing belt tension swing arm all the way down.
¶ 4.2 Route the timing belt
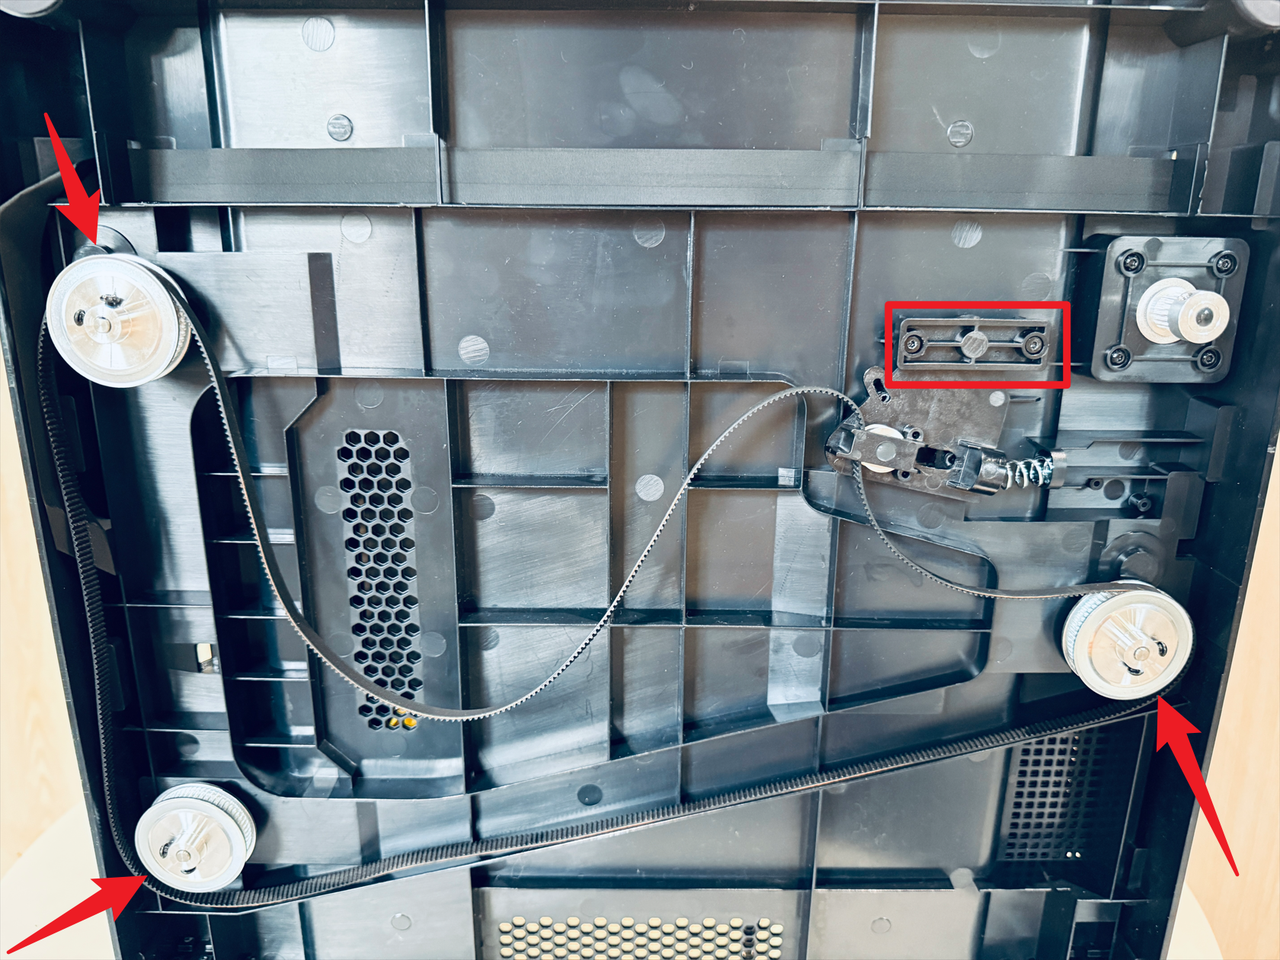
- Install the pressure block and use the H2.0 hex key to tighten its two fixing screws. Route the timing belt around the 3 timing pulleys as shown in the image.
Note: When routing the timing belt around the timing pulley, the pulley may rotate. Turn the timing pulley fully clockwise until it stops, then keep it in position while routing the belt to prevent it from rotating counterclockwise.
- Press the timing belt tension swing arm and compression spring in the direction shown in the image, then route the timing belt around the motor timing pulley.
- Pre-tighten screw 4 (do not fully tighten it).
- Pull the timing belt left and right to check if the heated bed moves up and down smoothly.
- Fully tighten screws 3 and 4.
¶ 4.3 Adjust the timing belt tension
- Loosen screws 3 and 4 until the timing belt tension swing arm can move left and right freely.
- The compression spring will automatically adjust the timing belt tension.
- Finally, fully tighten screws 3 and 4.
¶ Reach out to Snapmaker Support
After following the troubleshooting steps, if you find it difficult to resolve your issue, kindly submit a support ticket through https://snapmaker.formcrafts.com/u1-troubleshooting-request and share your troubleshooting results with some pictures/videos.
Our dedicated support team will be more than willing to assist you in resolving the issue.