¶ Overview
¶ Location
The RFID coils are located on the inner surfaces of the left and right panels, and replacing them requires removing the left and right panels.
Notes: This wiki provides replacement instruction for all RFID coils.
If only replacing the left coils, you only need to unload filament from Toolheads 1 and 2, remove the filament feeder on left side, and remove the left panel.
If only replacing the right coils, you only need to unload filament from Toolheads 3 and 4, remove the filament feeder on right side, and remove the right panel.
Left:

Right:
¶ Difficulty and Time Estimate
- Difficulty:★★☆☆☆ (easy)
- Estimated Time:20 minutes
¶ Where to Buy
This accessory is expected to be available on the official Snapmaker online store soon. Please stay tuned.
¶ Tools and Parts Required
- H2.0 hex key
- Scraper
- New RFID coil
- Tape
- Glue
¶ Part 1. Unload Filament and Remove Filament Feeder
¶ Step 1. Unload filament
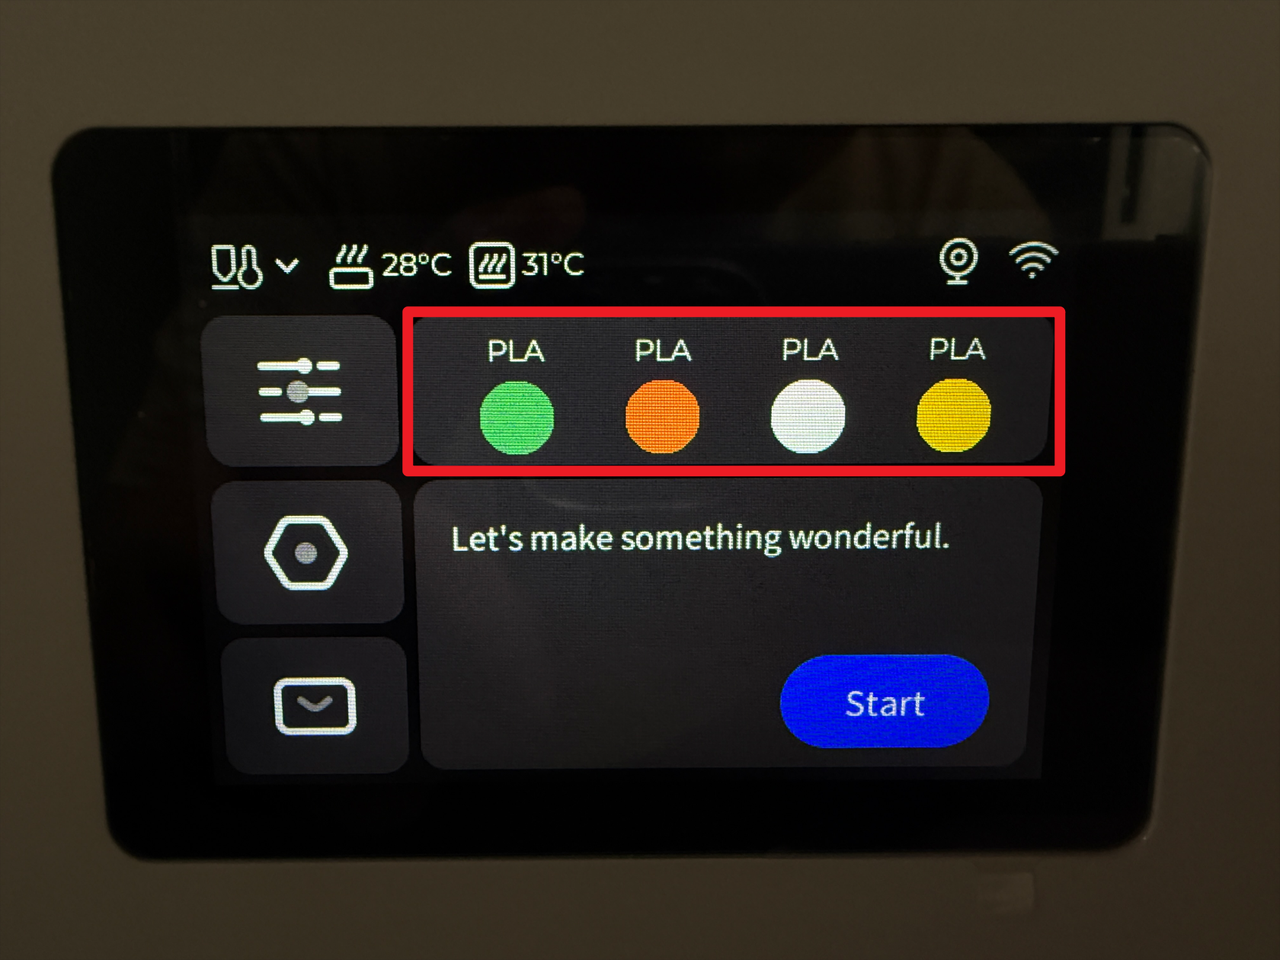
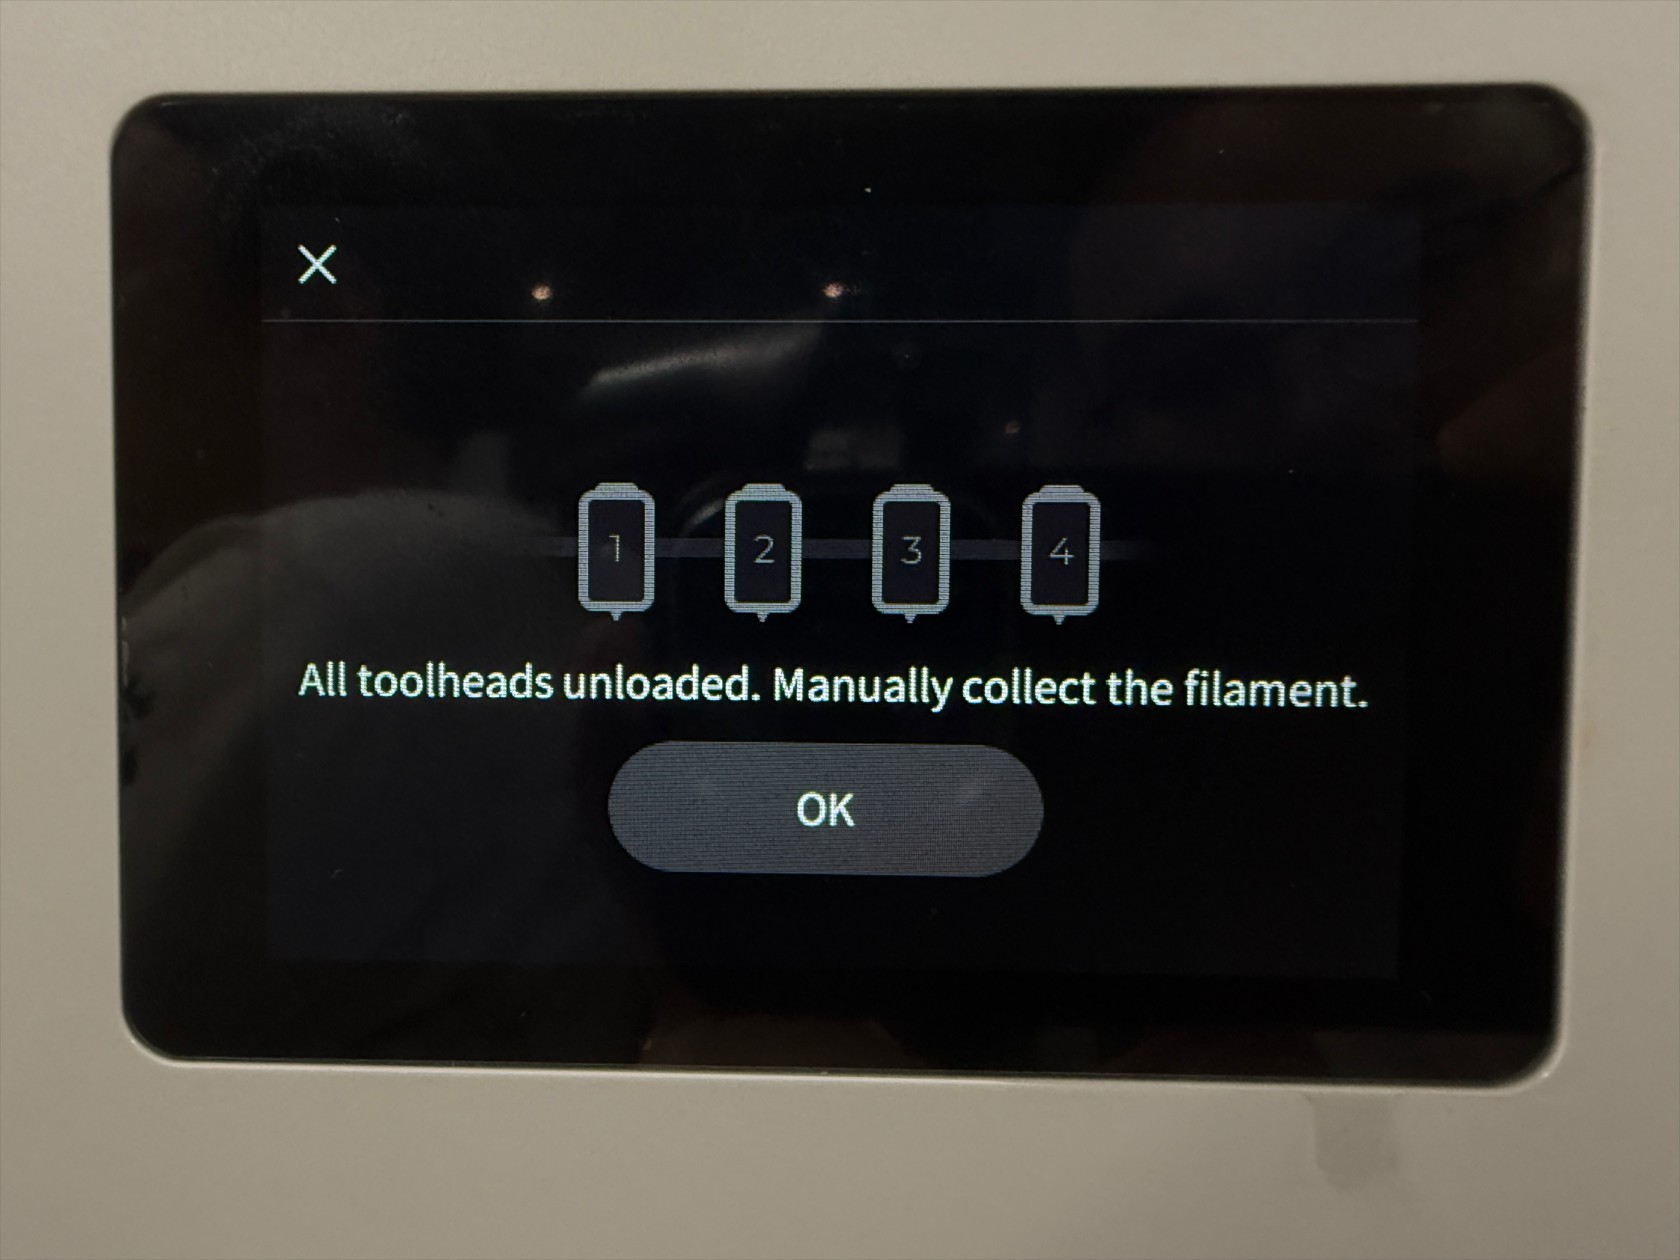
- Tap the highlighted area on the screen.
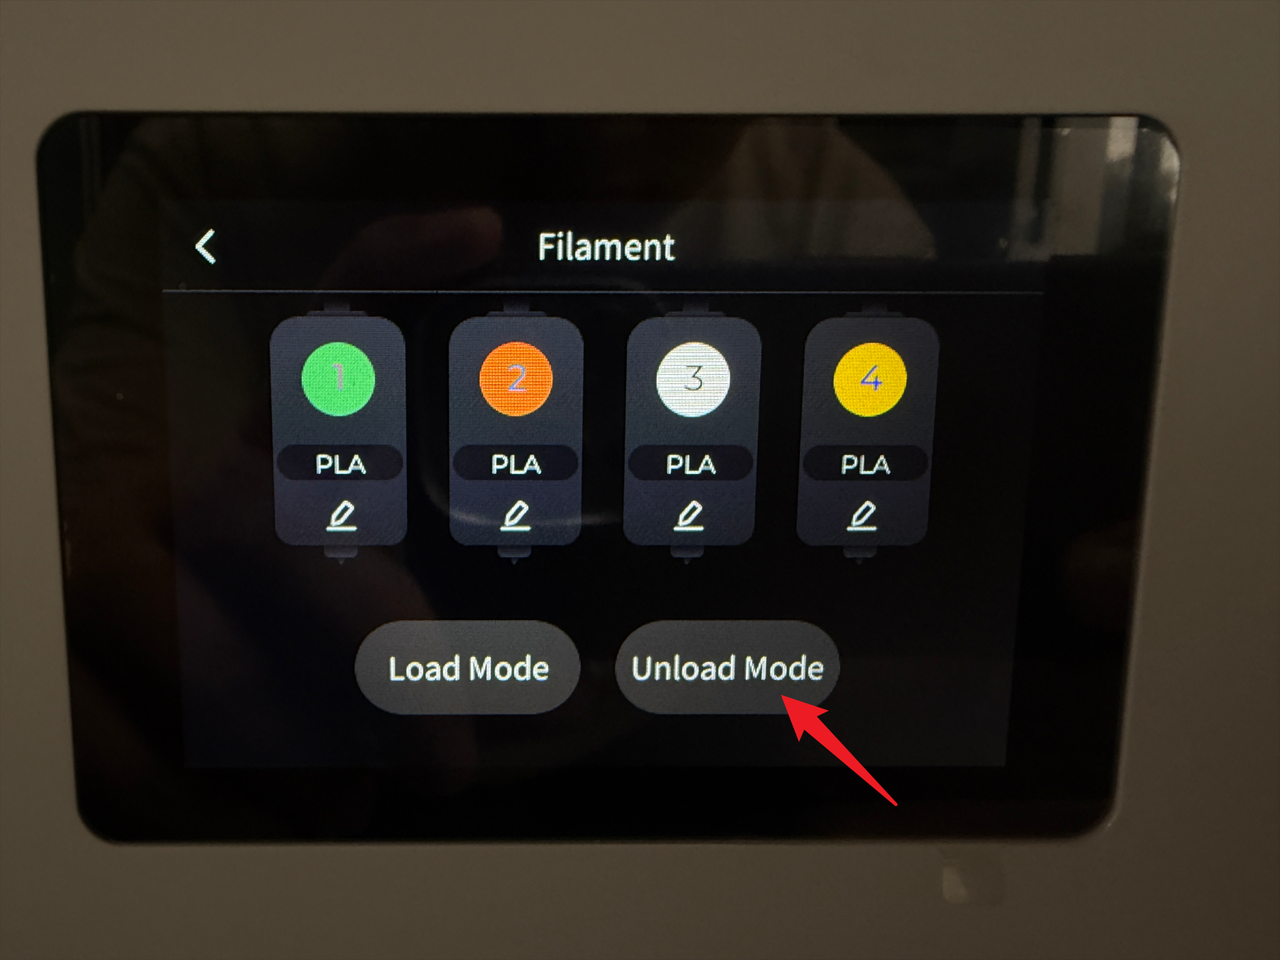
- Tap "Unload Mode".
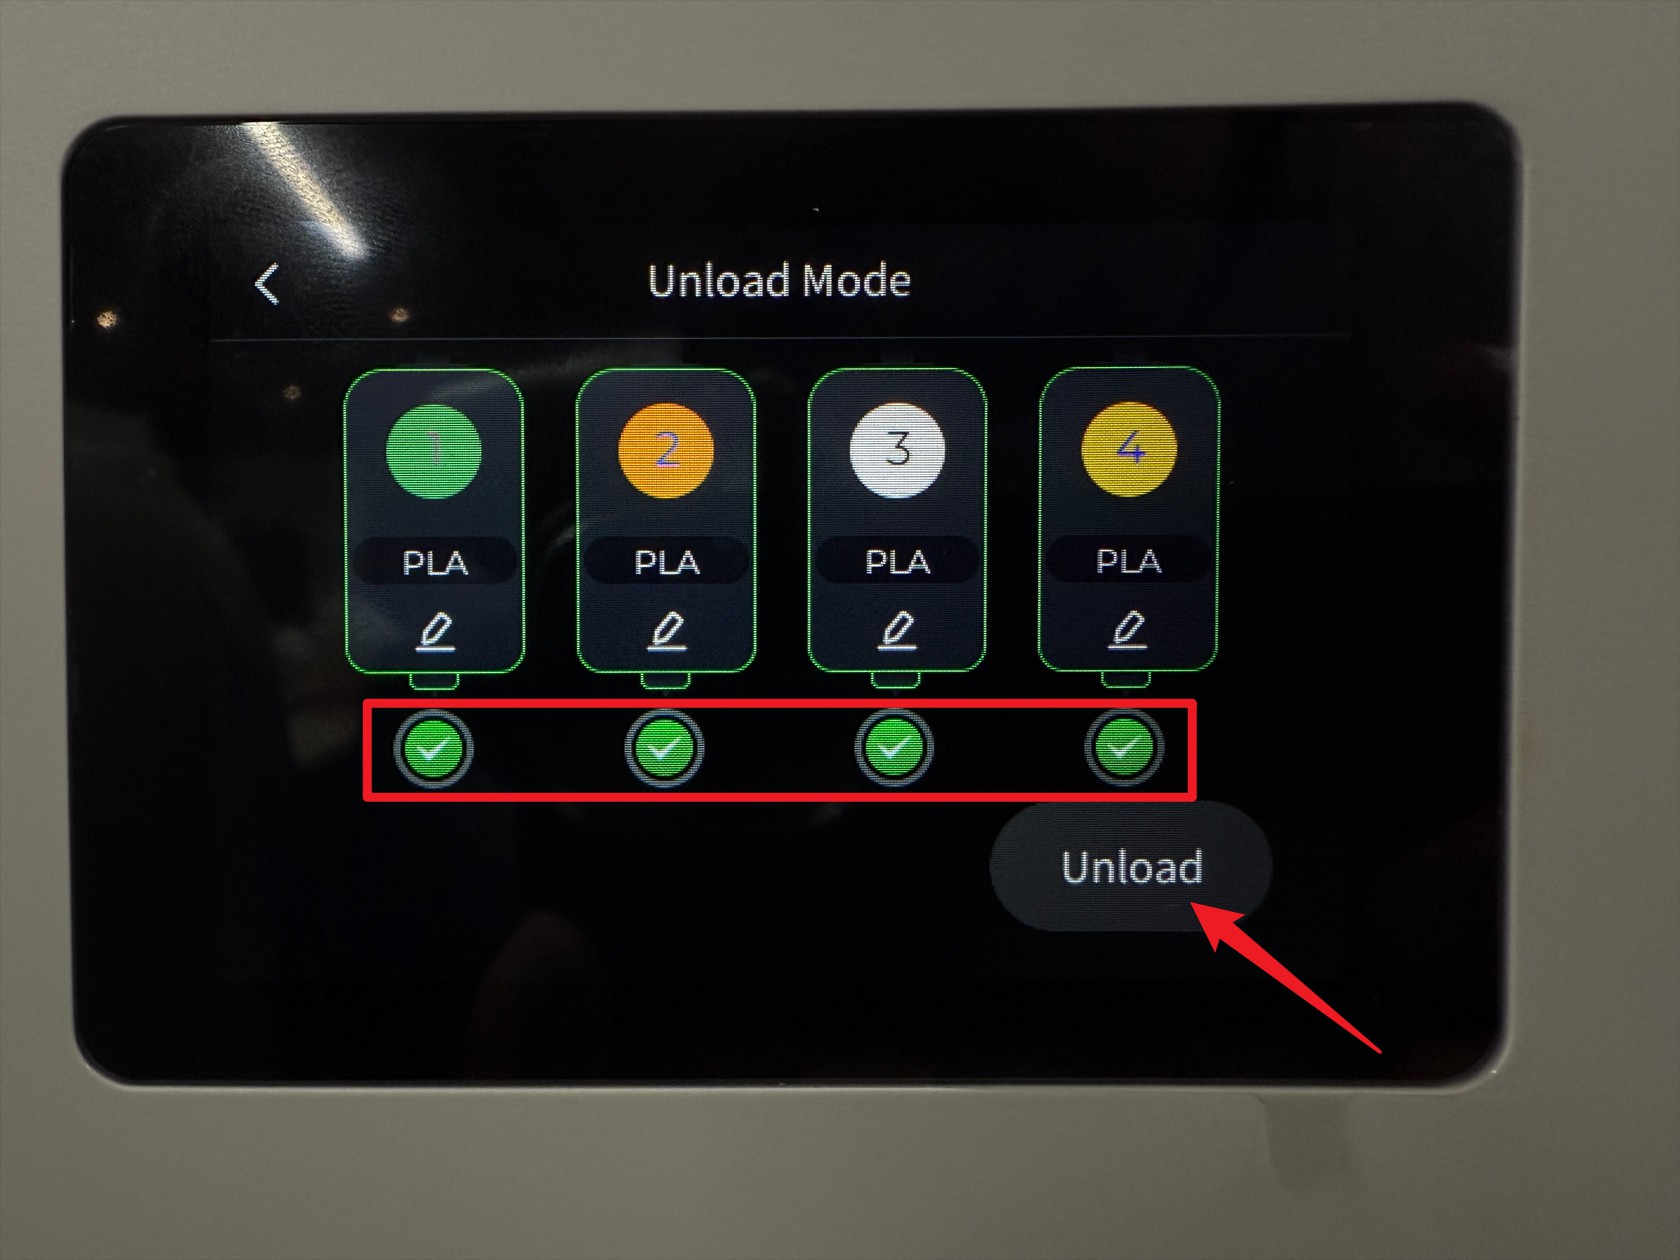
- Select all toolheads, then tap "Unload".
- Wait for the machine to complete the unloading.
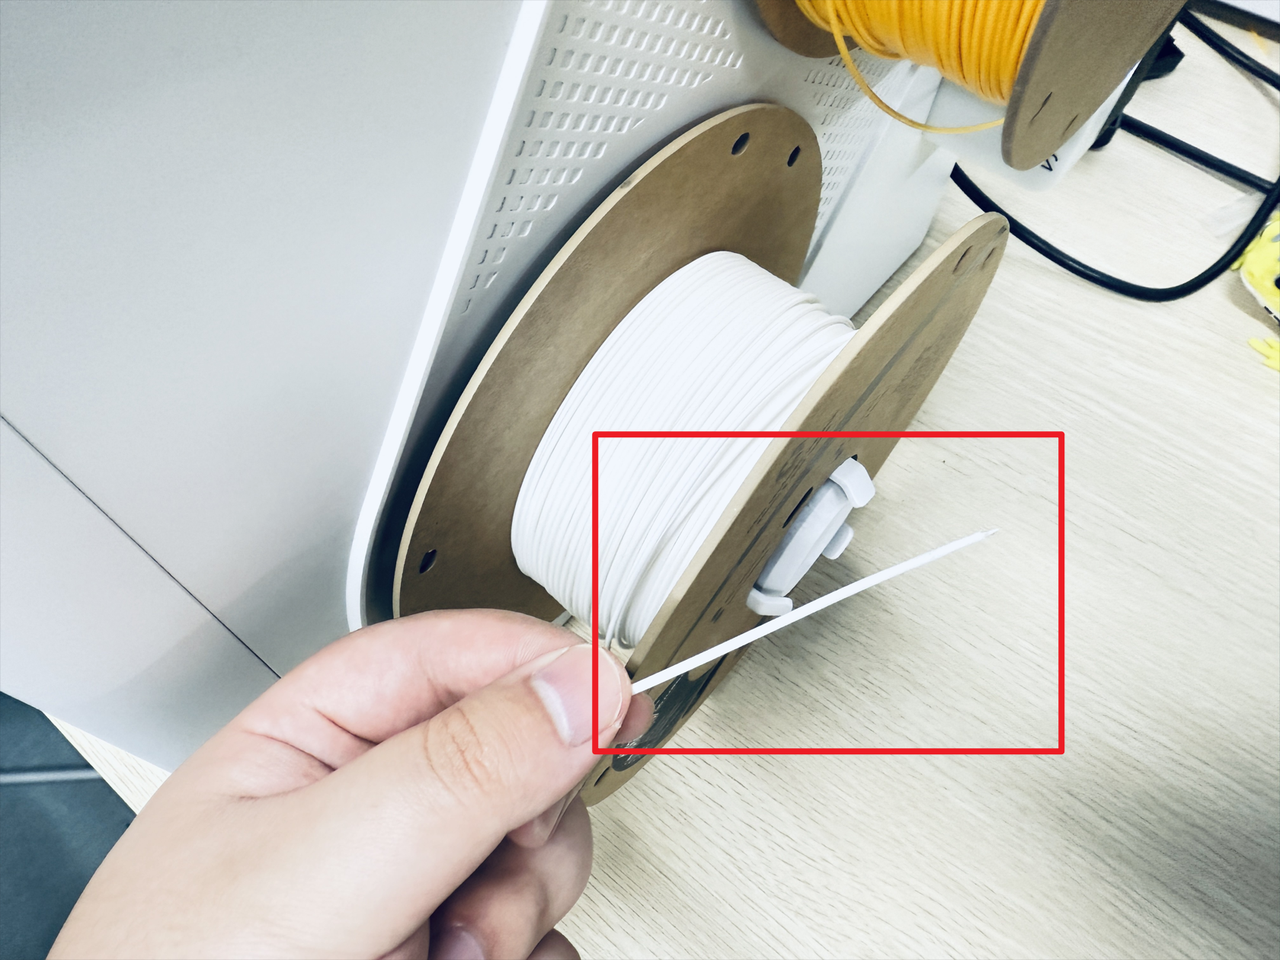
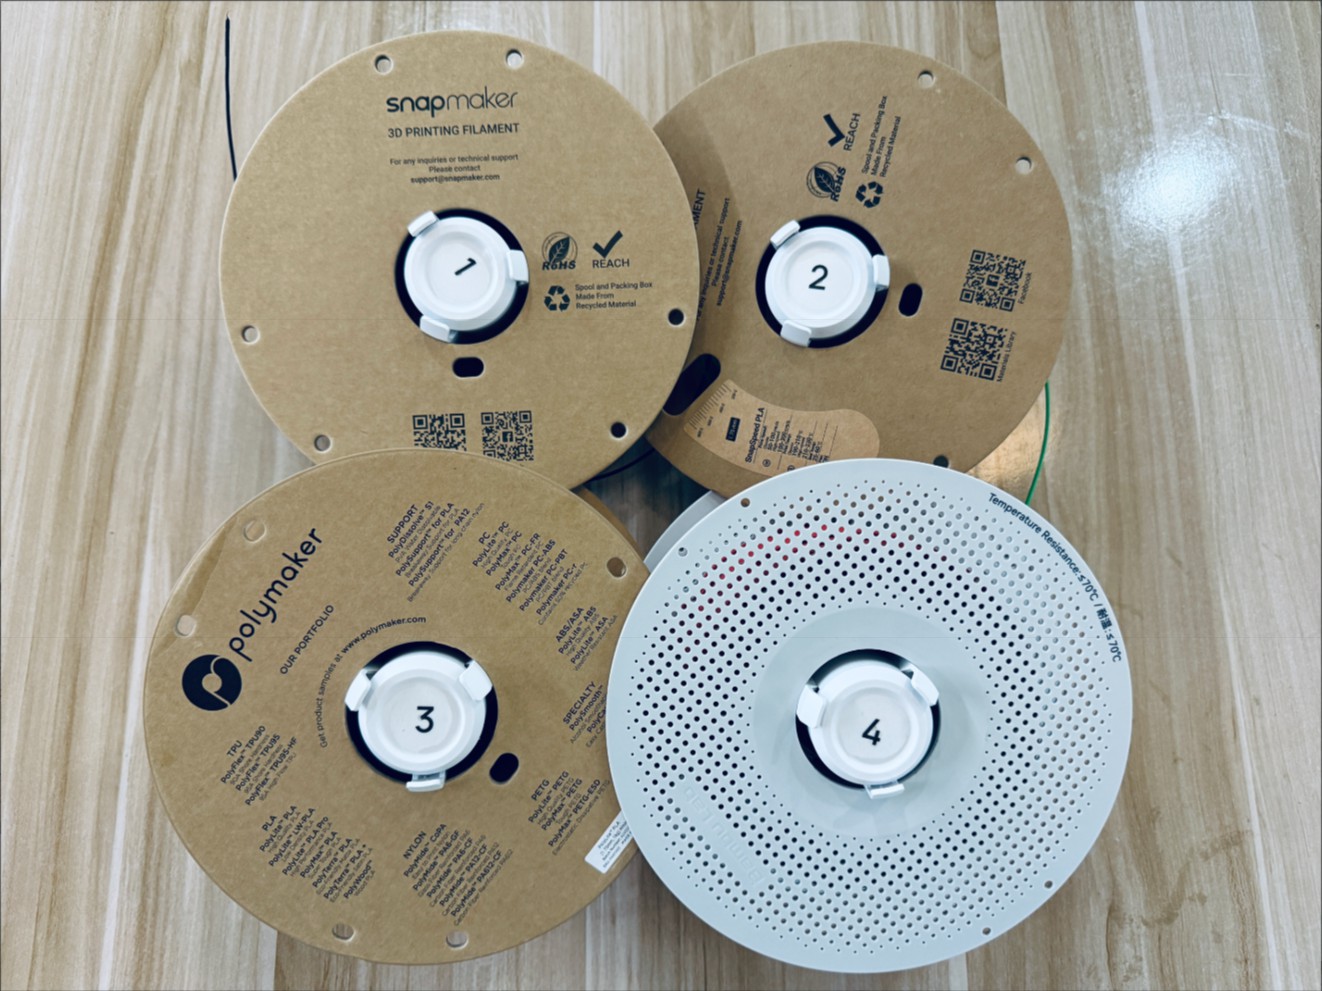
- Turn the spool to retract the remaining filament, then remove the 4 spools (including the spool holders).
¶ Step 2. Power off the machine
- Before proceeding, please turn off the machine and unplug the power cable!

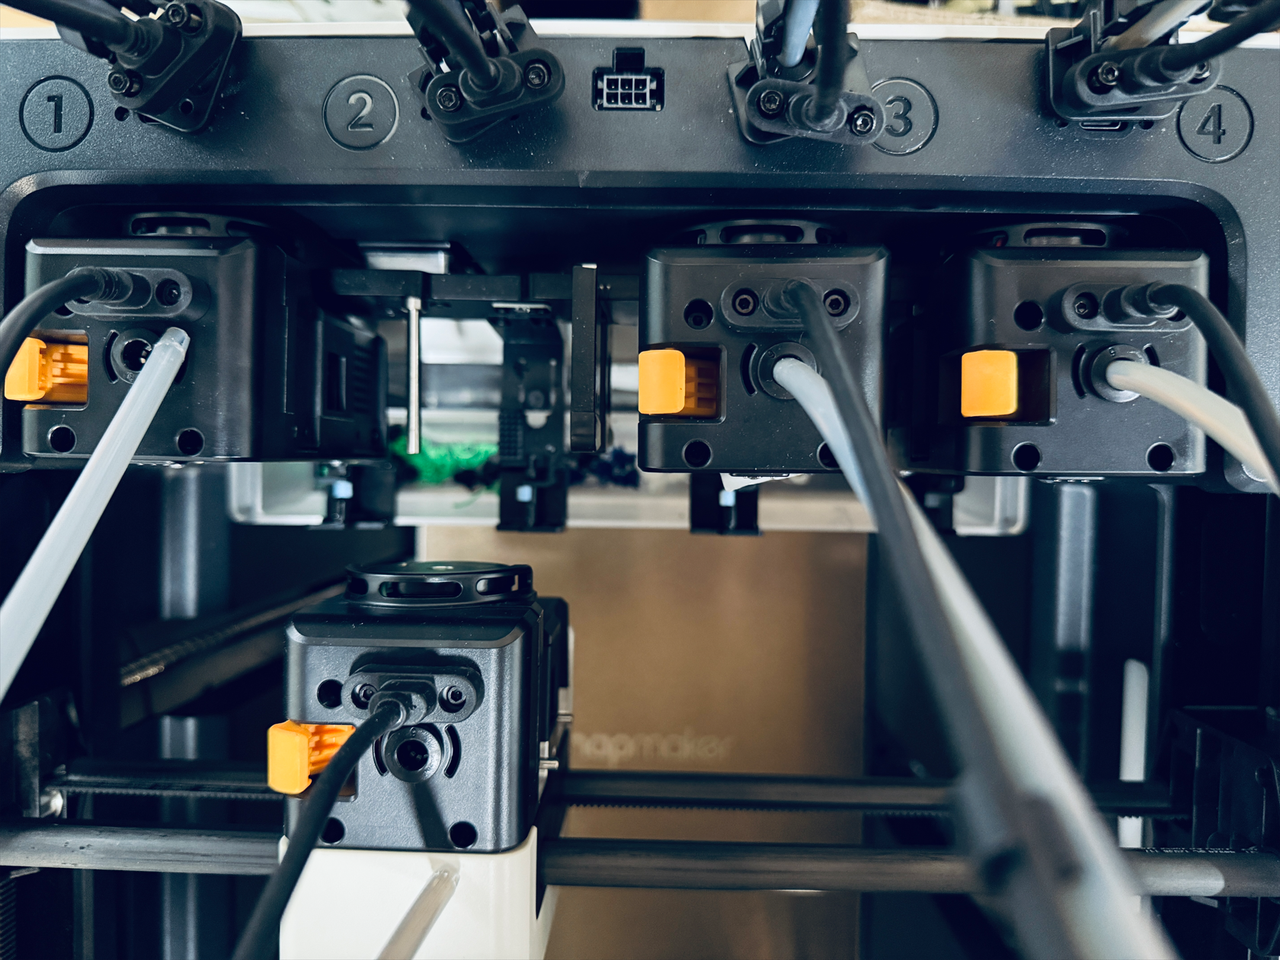
¶ Step 3. Disconnect USB cables
- Use a H2.0 hex key to remove the 8 screws from the 4 USB cables, then unplug the cables.

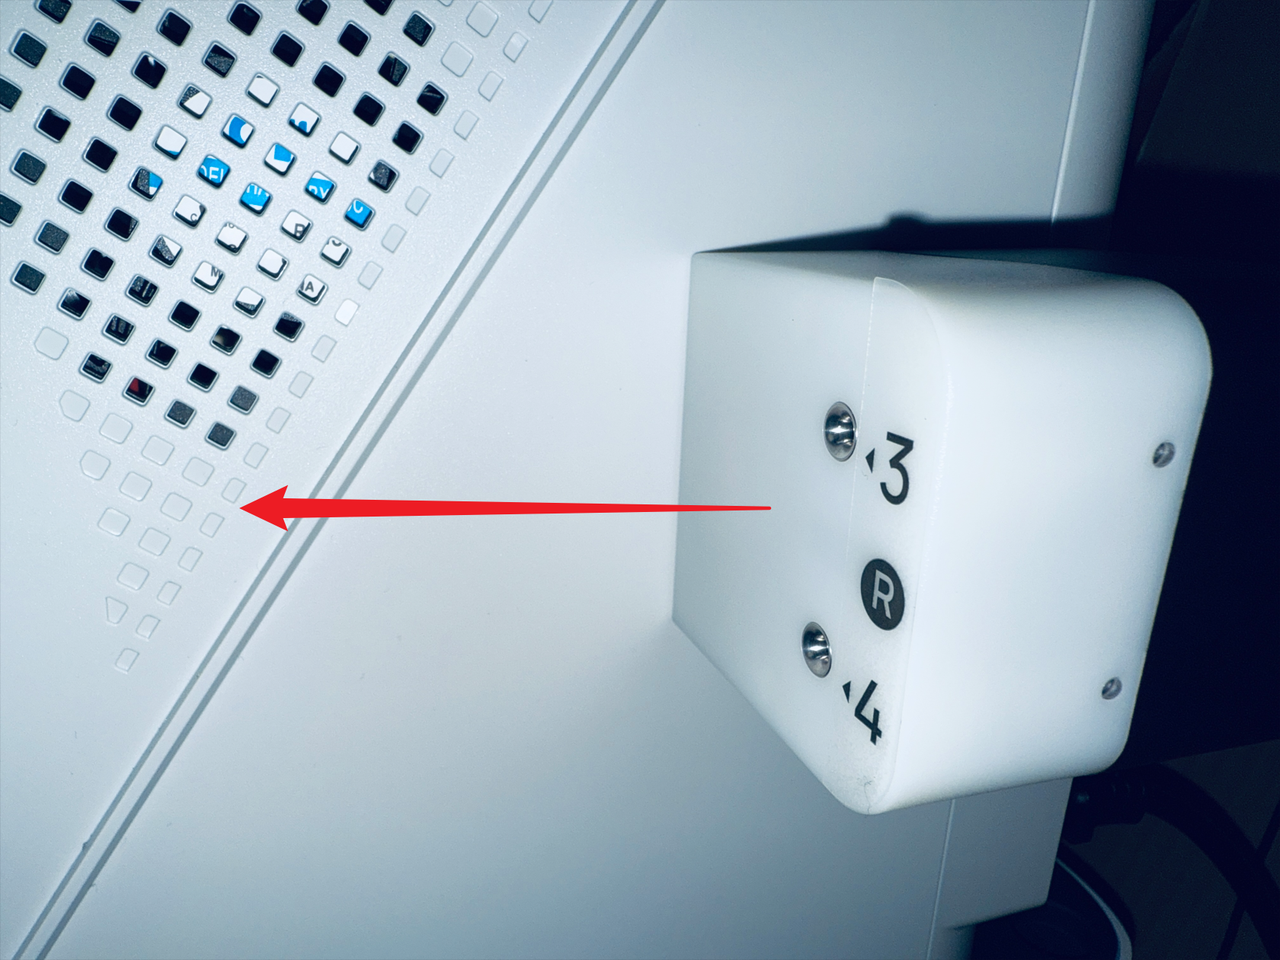
¶ Step 4. Remove the filament feeder on both sides
The images below illustrate the process using the right side as an example.
- Press the clip at the marked location.
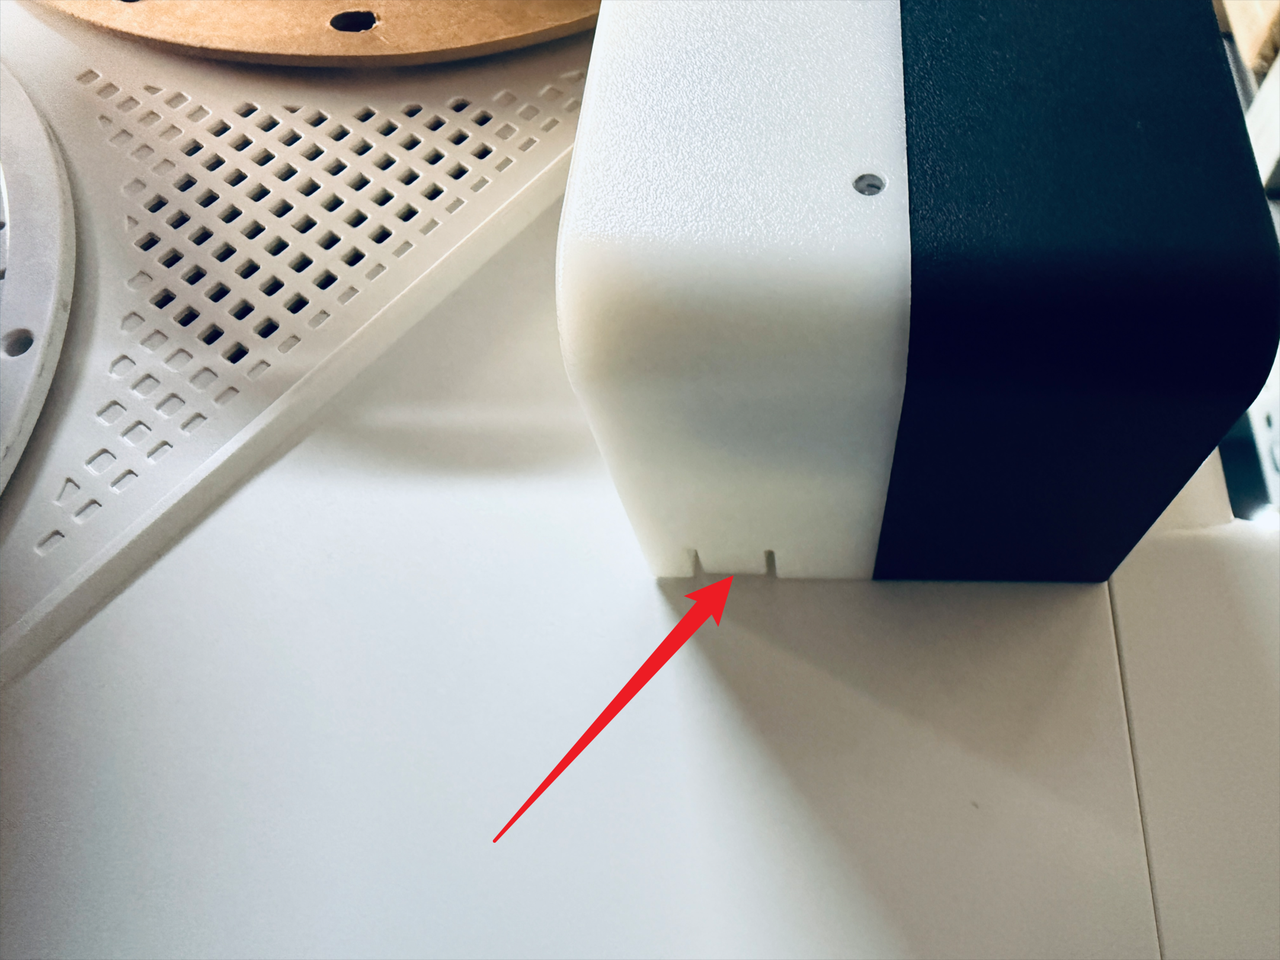
- While pressing the clip, slide the filament feeder in the indicated direction to remove it.
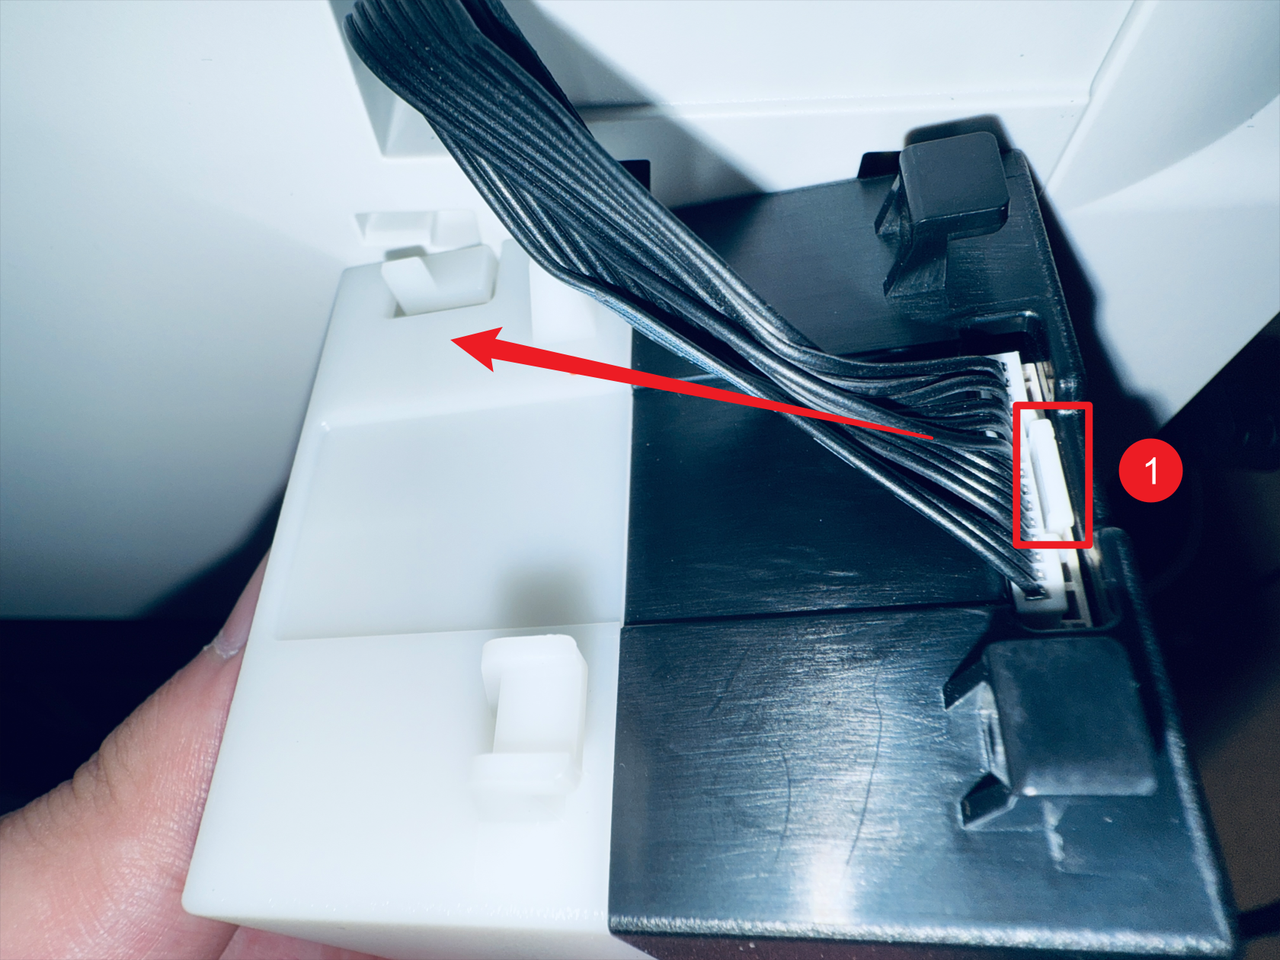
- Next, press point 1 as shown in the image to disconnect the filament feeder cable.
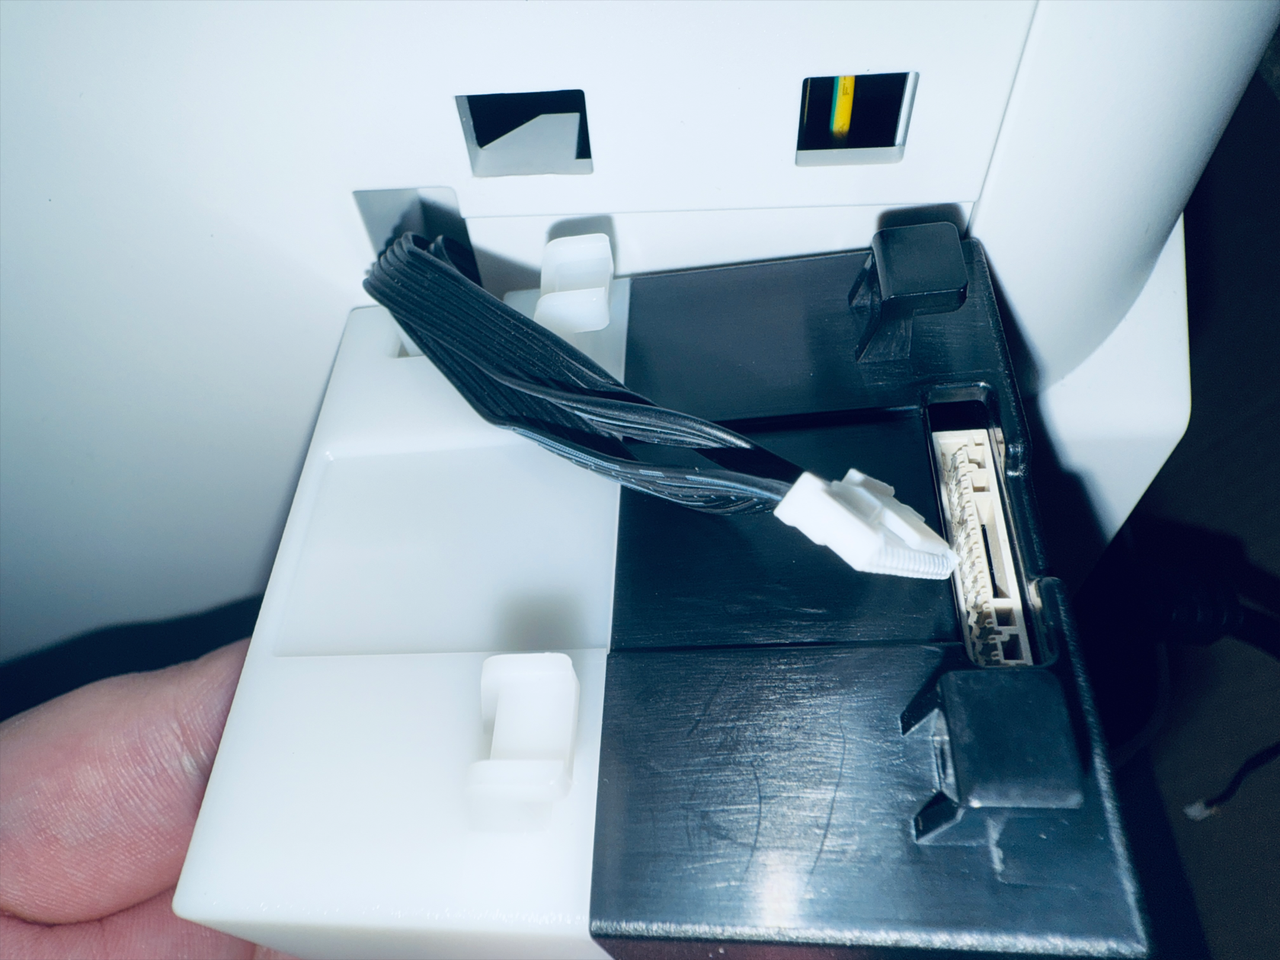
- Completed.
¶ Part 2. Remove the panels
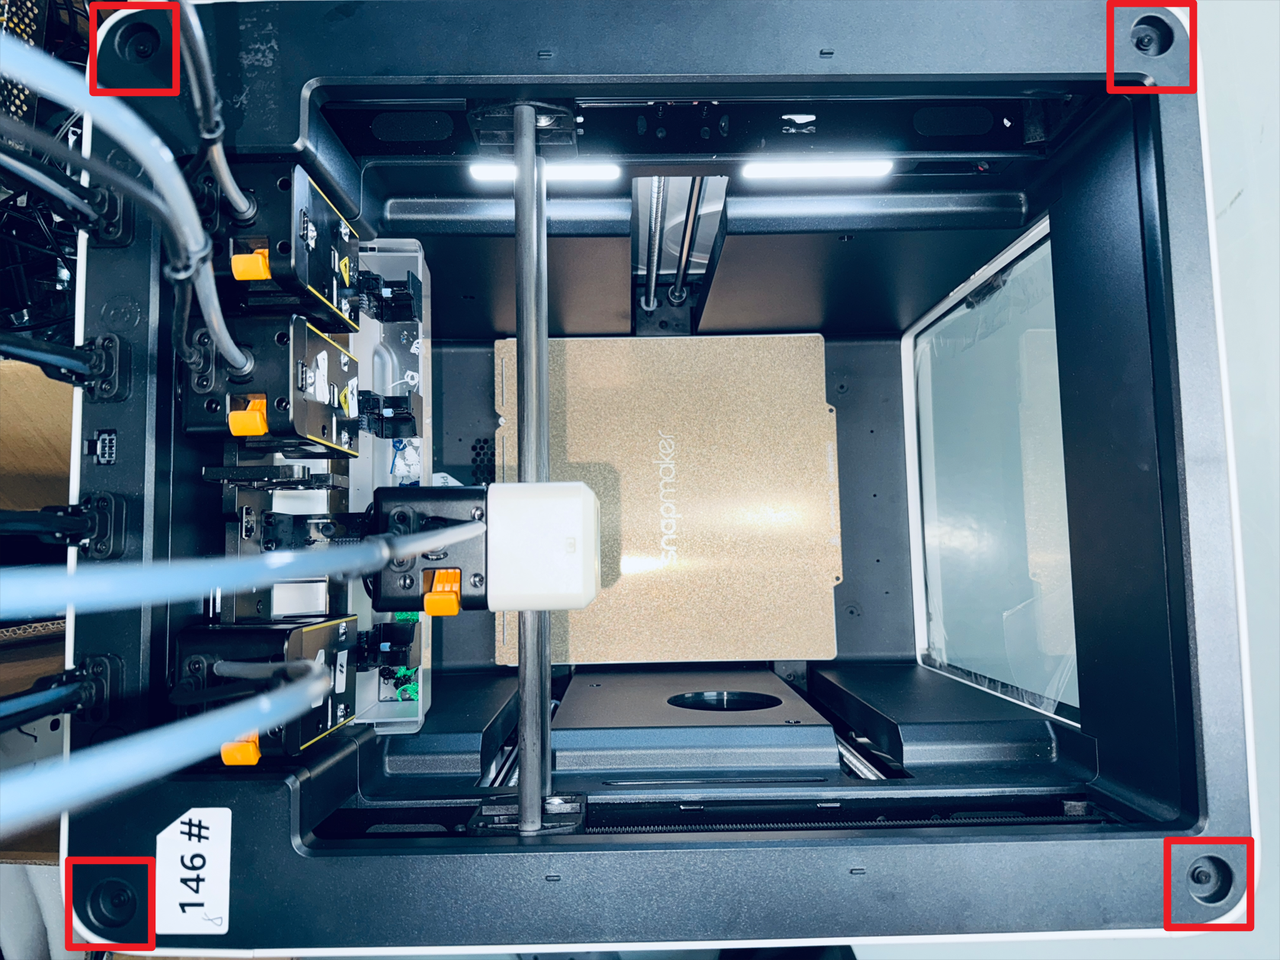
¶ Step 5. Remove the top cover panel
- Take out the silicone plugs from all four corners of the top cover panel.
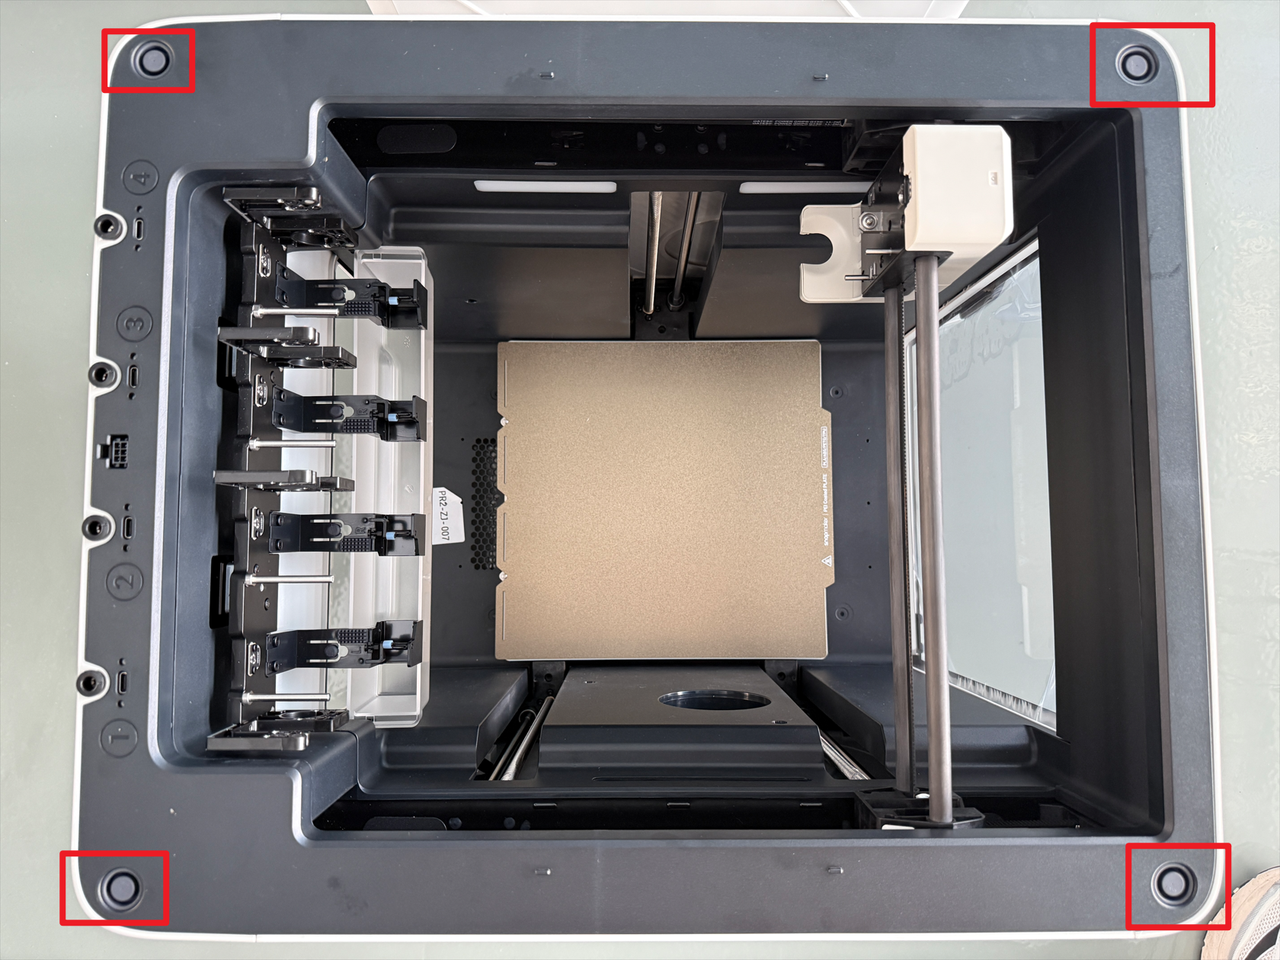
- Use a H2.0 hex key to remove the 4 screws beneath the plugs.
¶ Step 6. Remove the left panel
- Shift the top cover to one side.
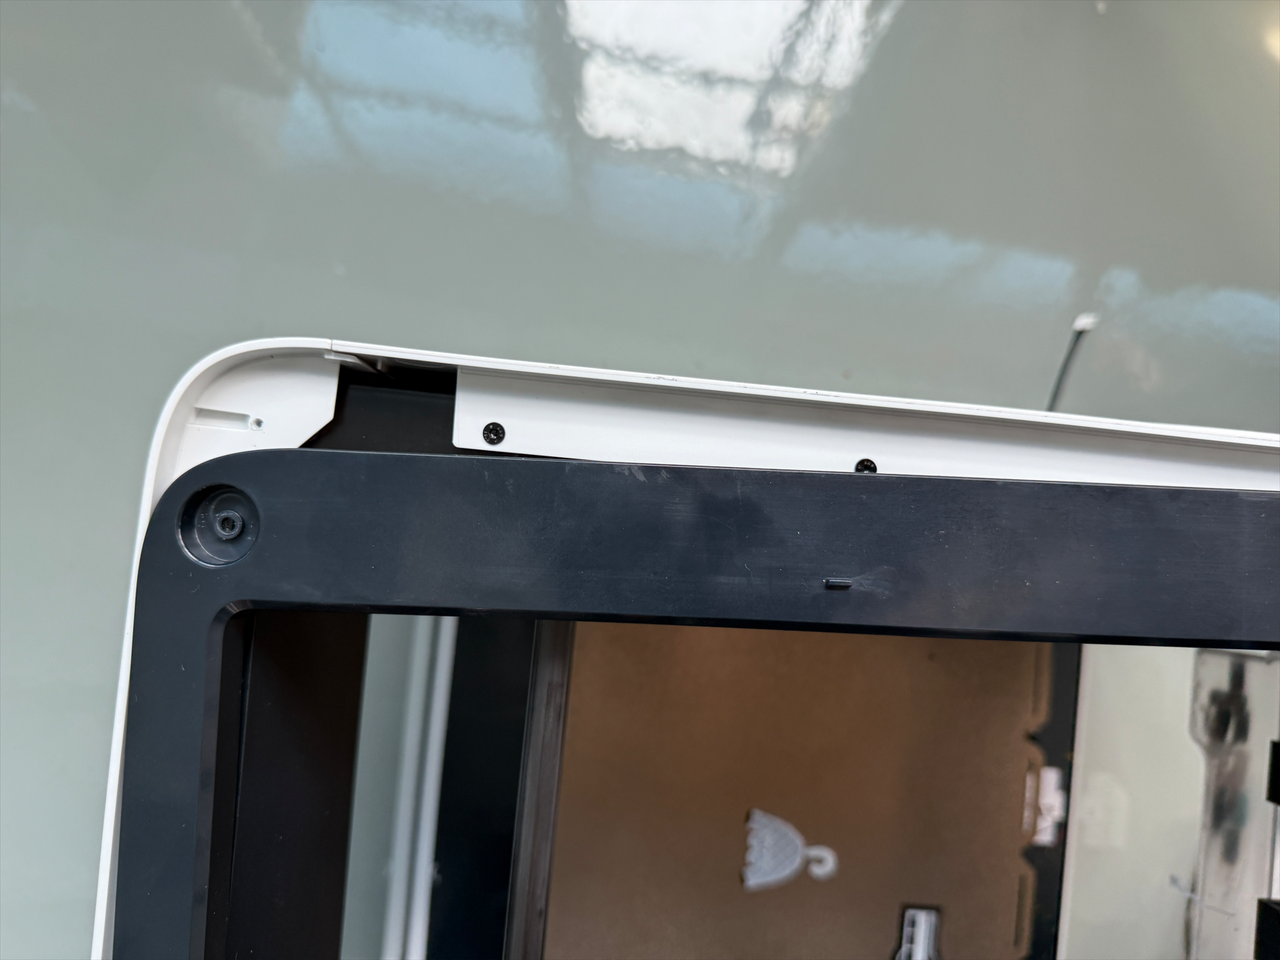
- Use a H2.0 hex key to remove 4 screws securing the left panel.
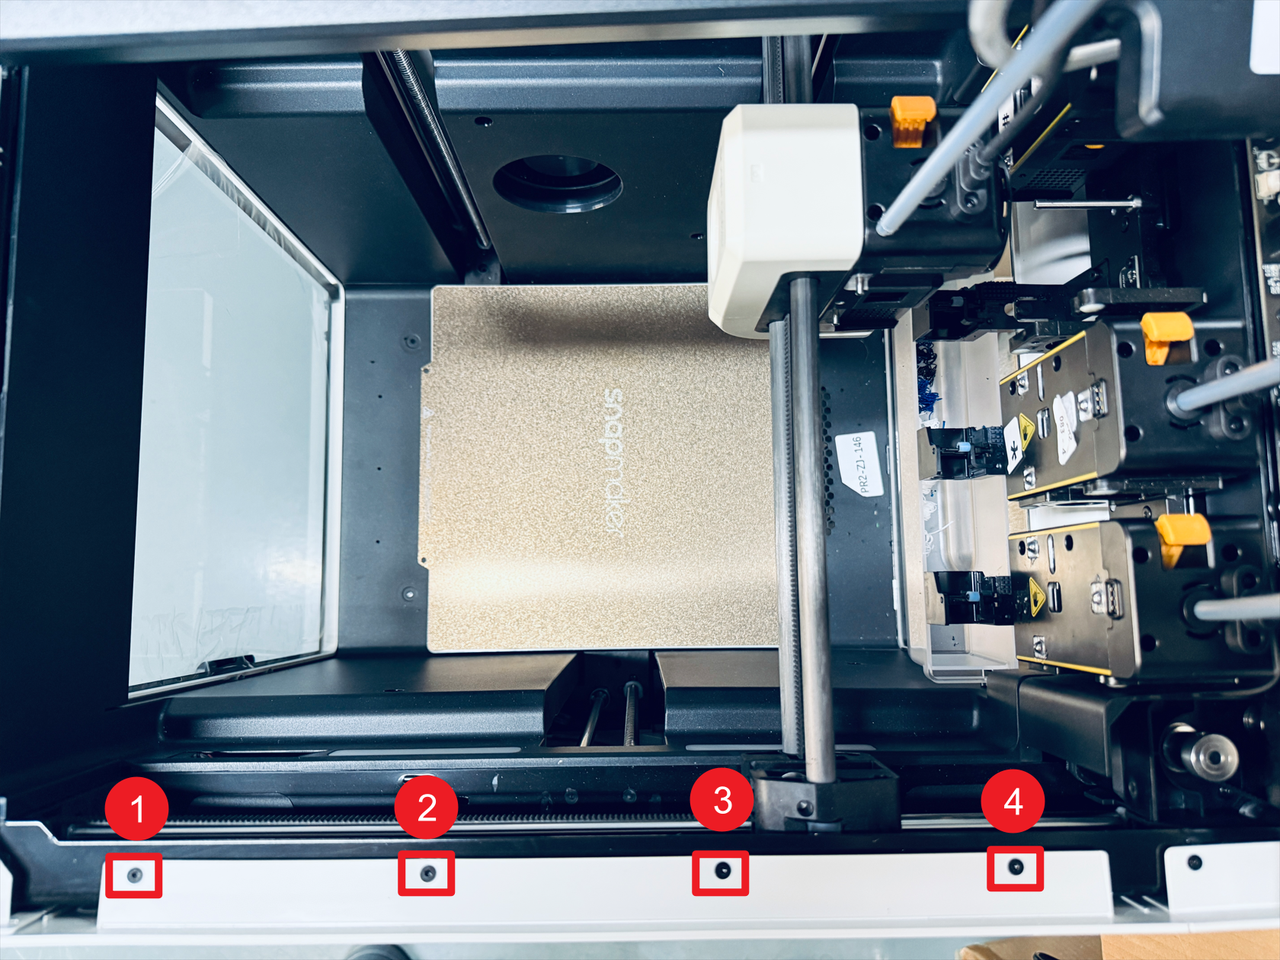
- Use a H2.0 hex key to remove screws 5 and 6.
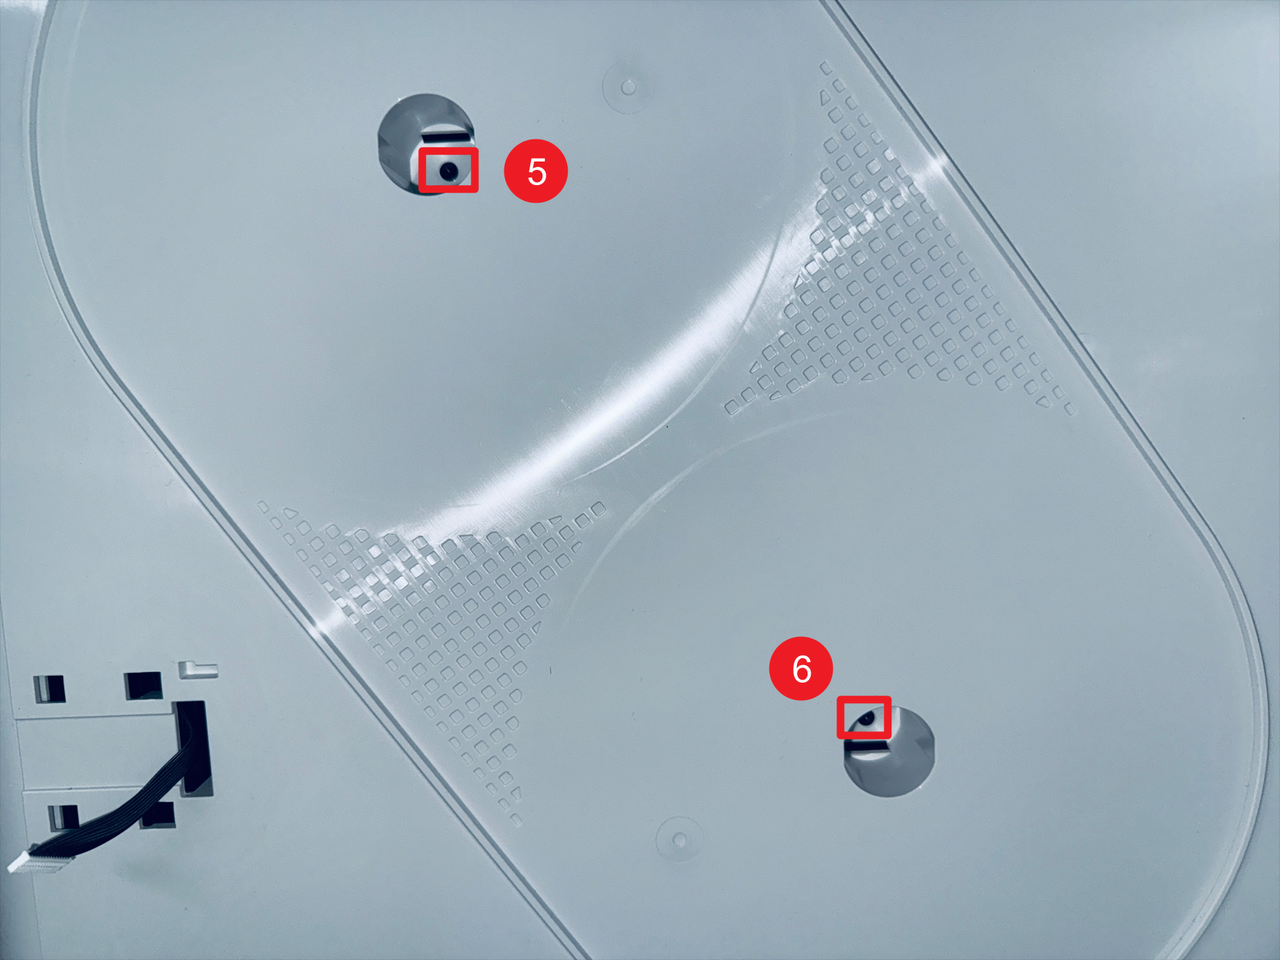
- Use a H2.0 hex key to remove screws 7 and 8.
- Disconnect the RFID cable.
- Remove the left panel.
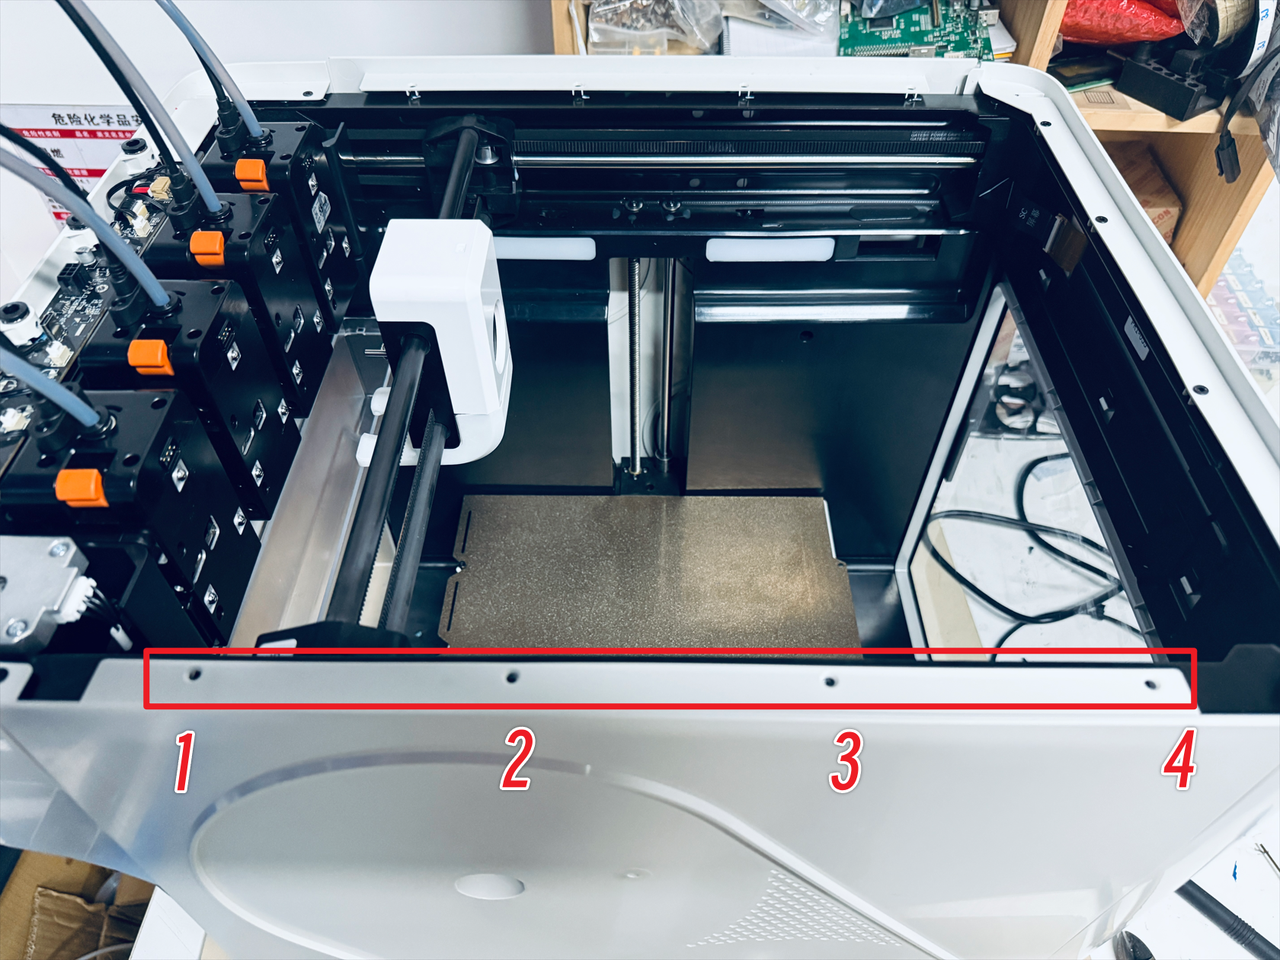
¶ Step 7. Remove the right panel
- Slightly shift the top black cover as shown in the image, then remove the four marked screws.
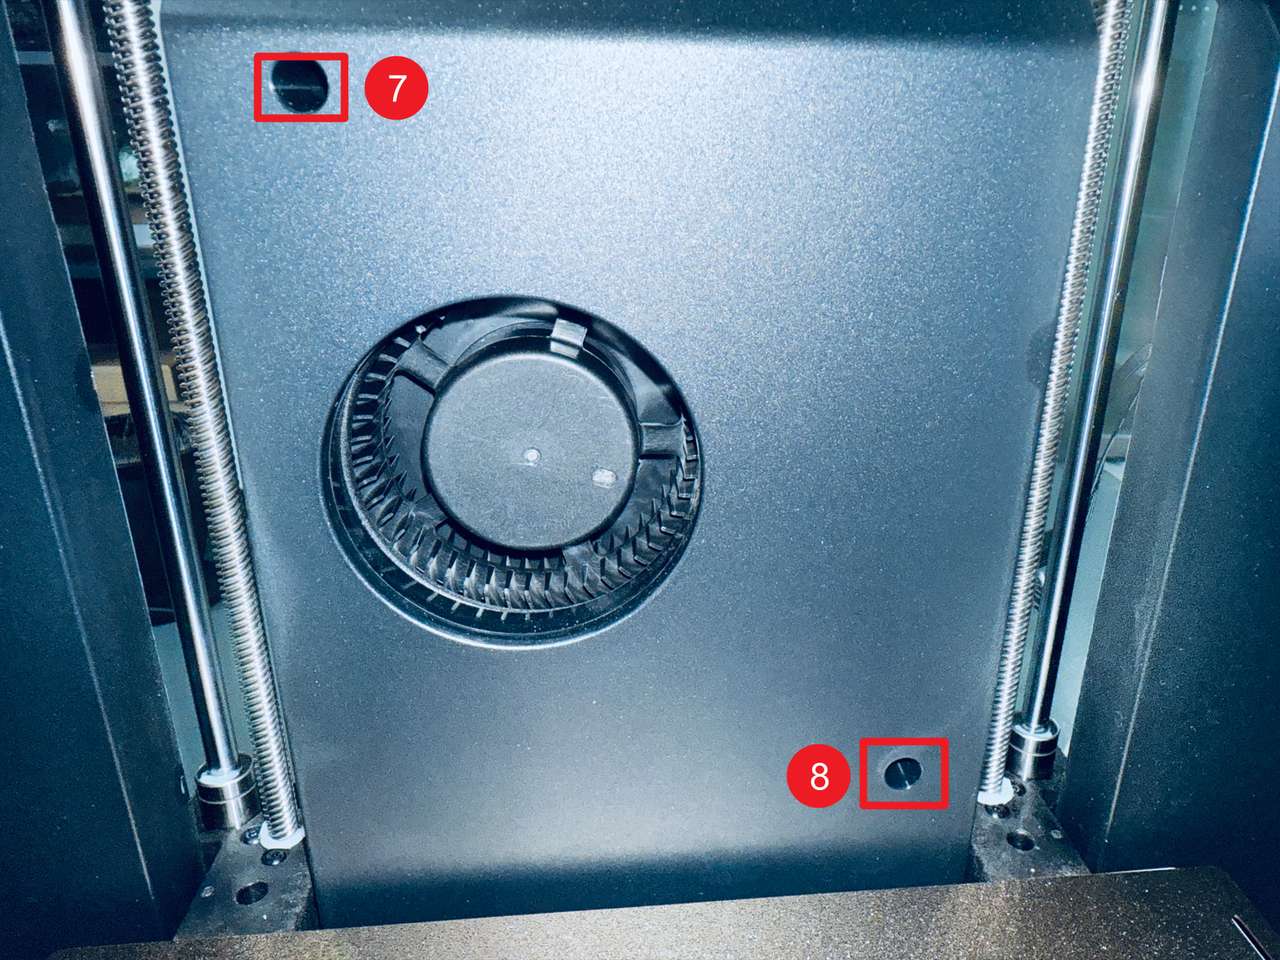
- Remove screws 5 and 6 located inside the spool holder holes.
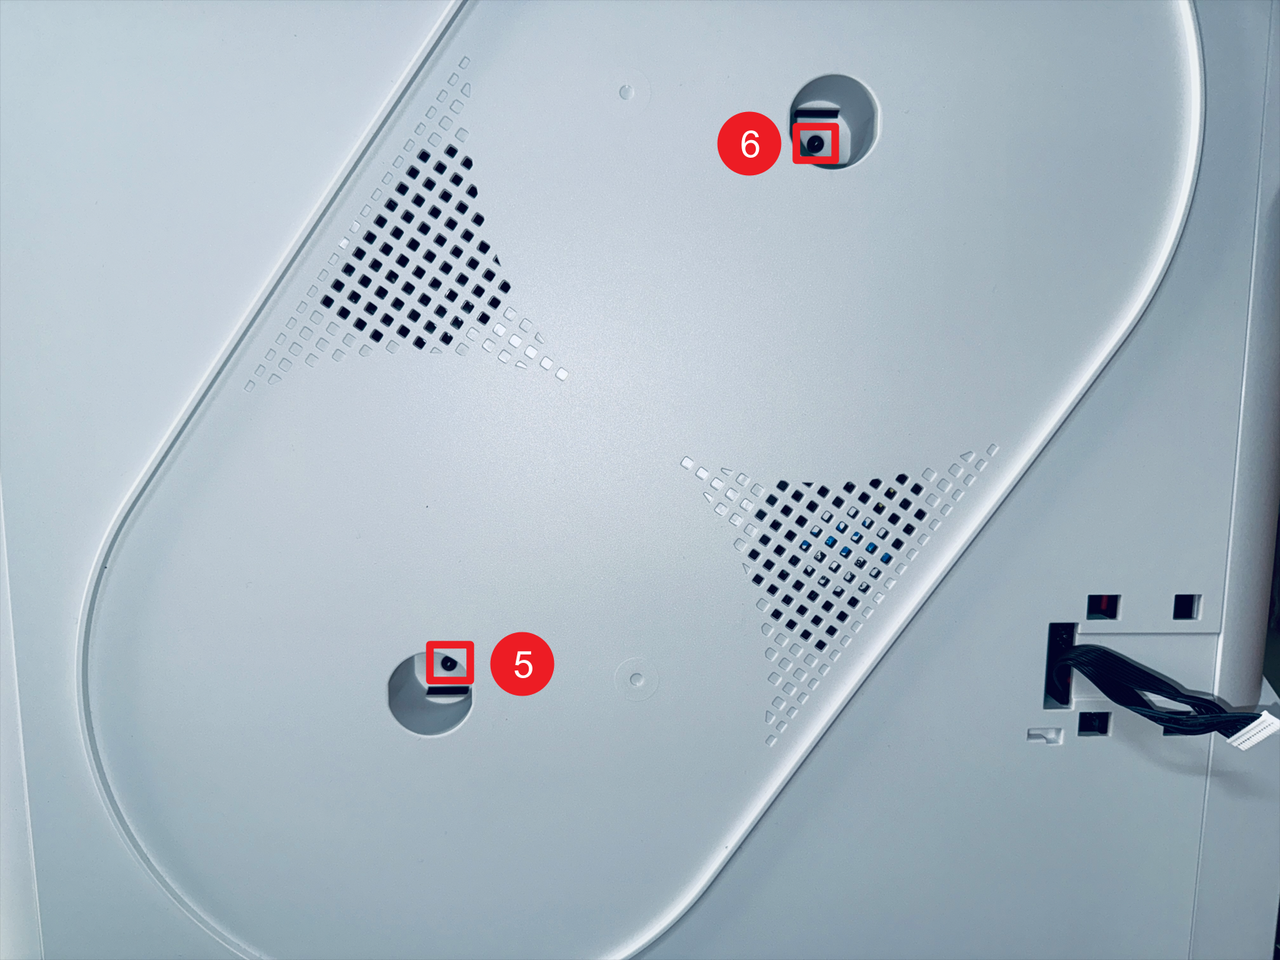
- Then remove screws 7 and 8 on the right inner panel.

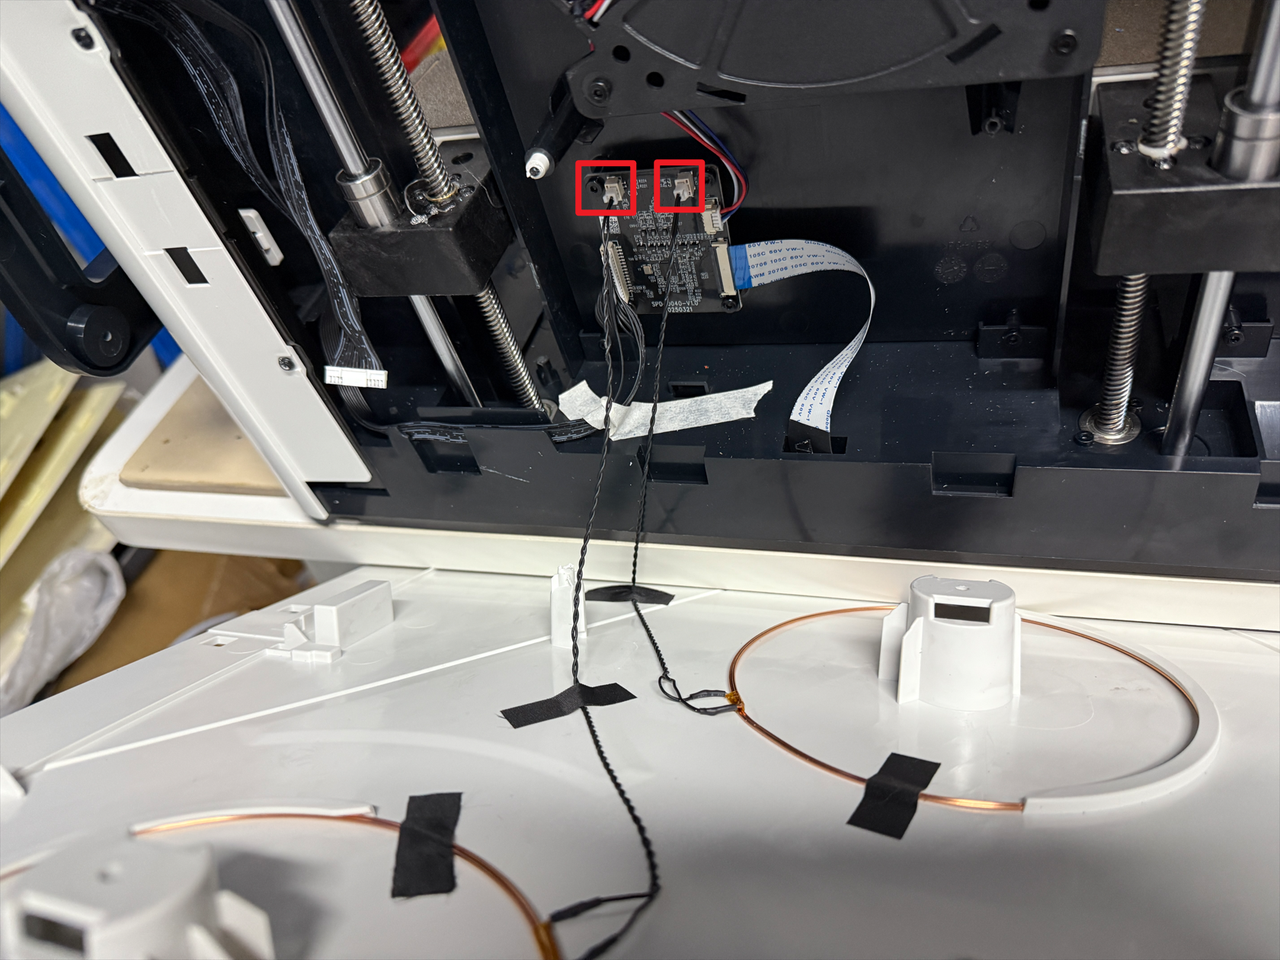
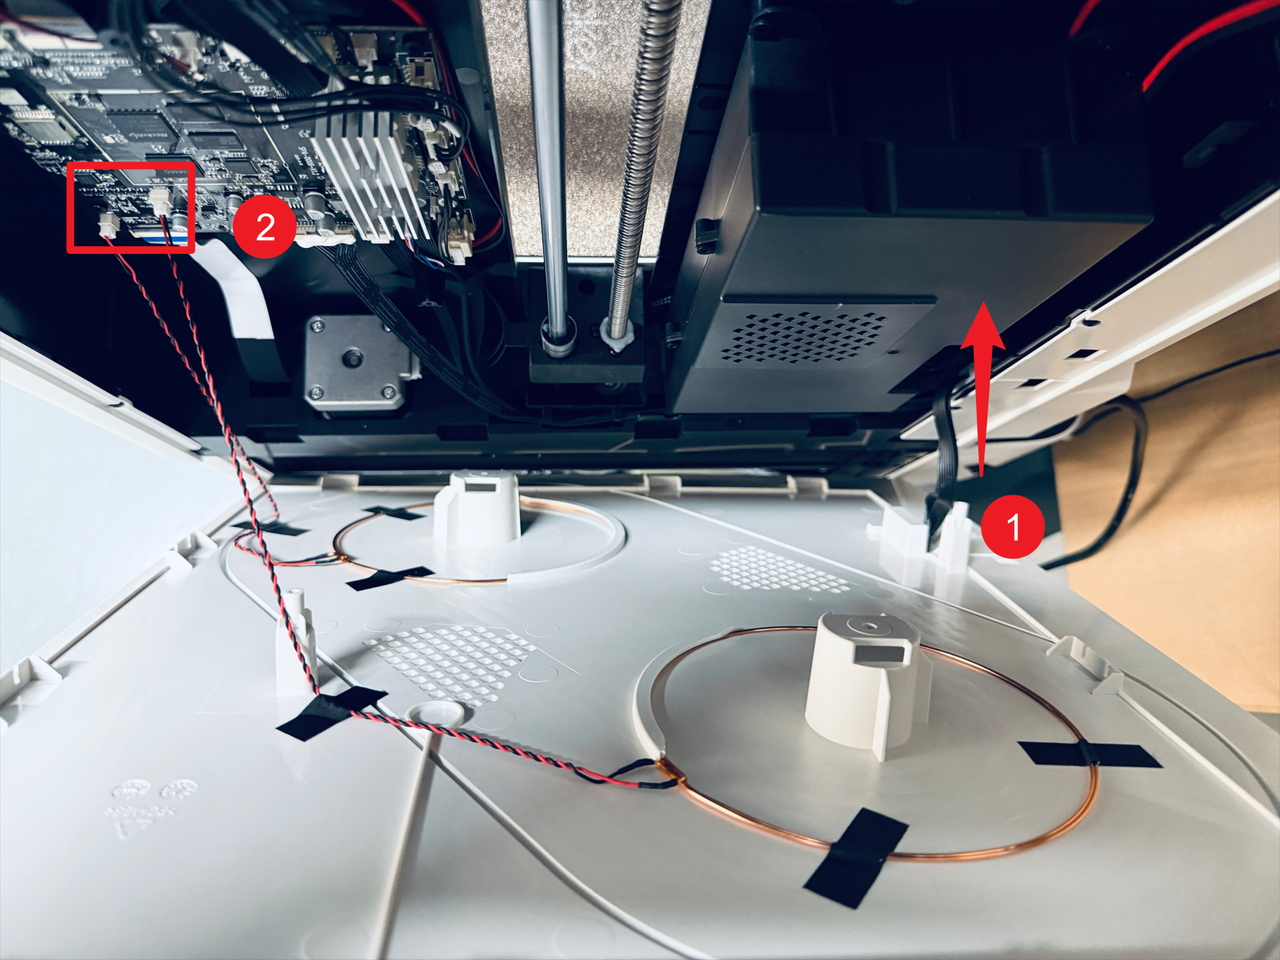
- Pass the filament feeder cable through position 1 and disconnect the two RFID cables at position 2, then remove the right panel.
¶ Part 3. Replace RFID coils
¶ Step 8. Remove the old RFID coils
- Use a scraper (or other tools) to scrape off the glue that fixes the RFID coil.
Left:
Right:

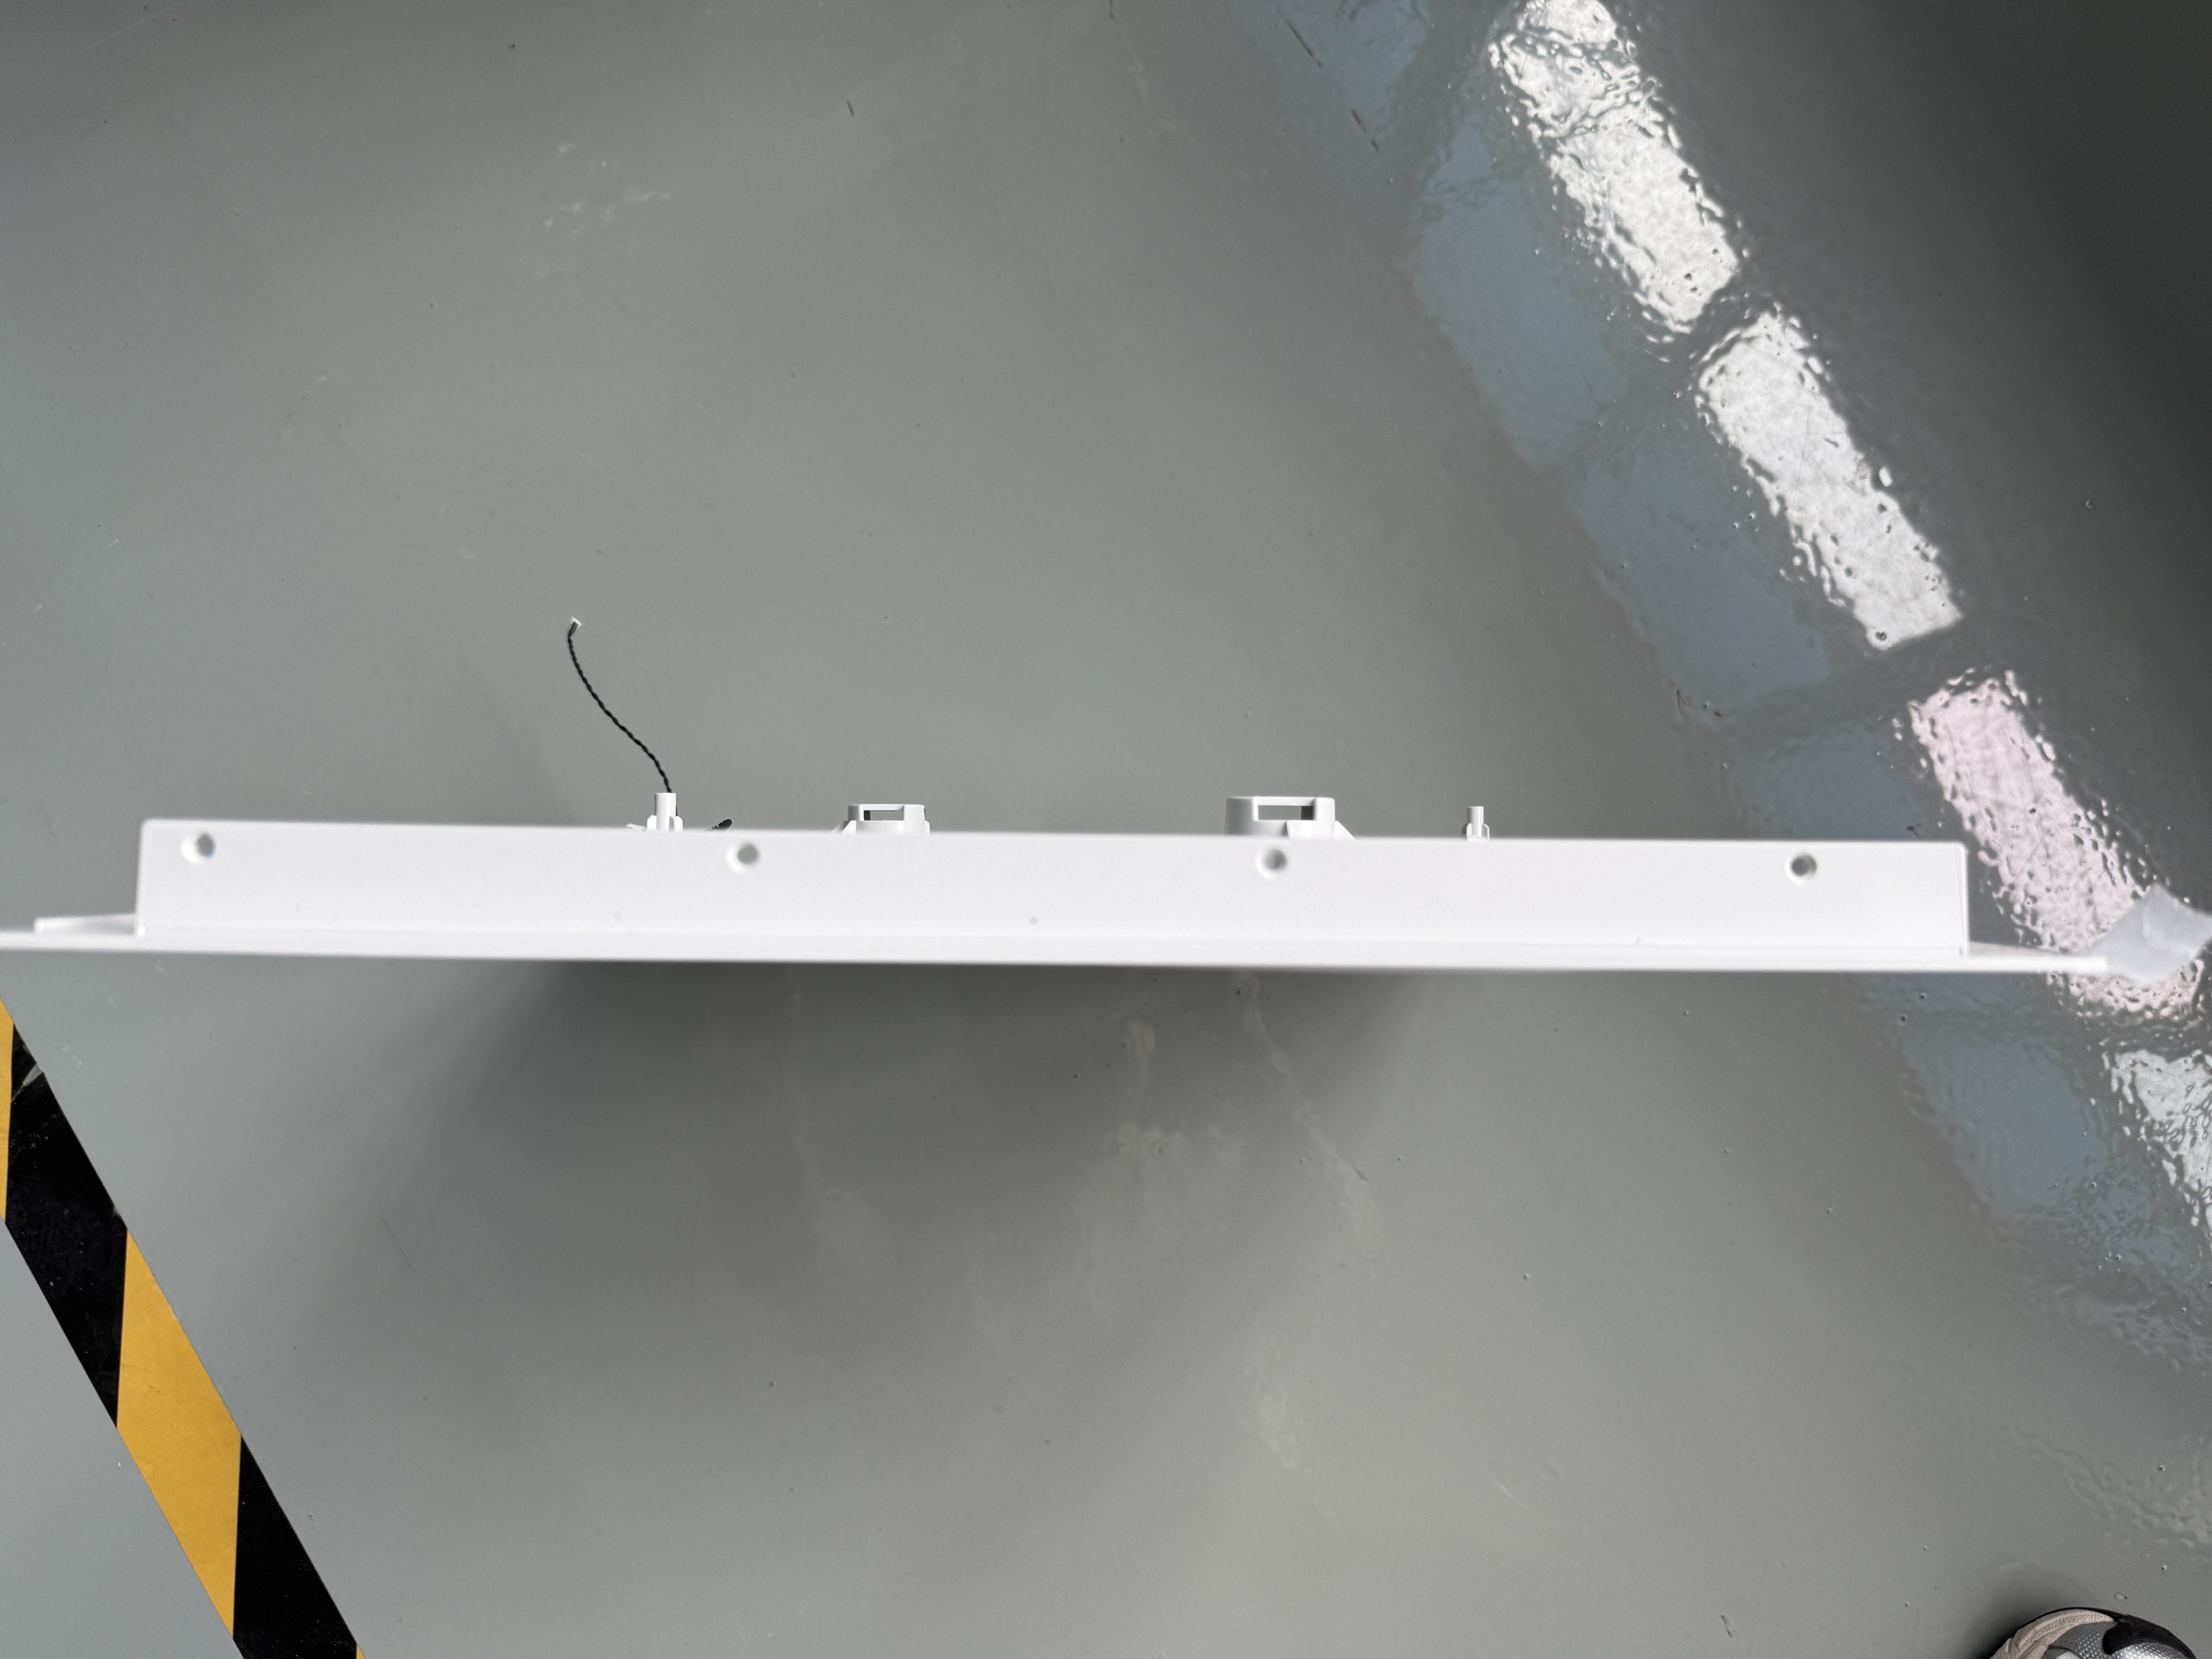
- Tear off the fixing tape on the RFID coils and remove the old RFID coils.
Left:
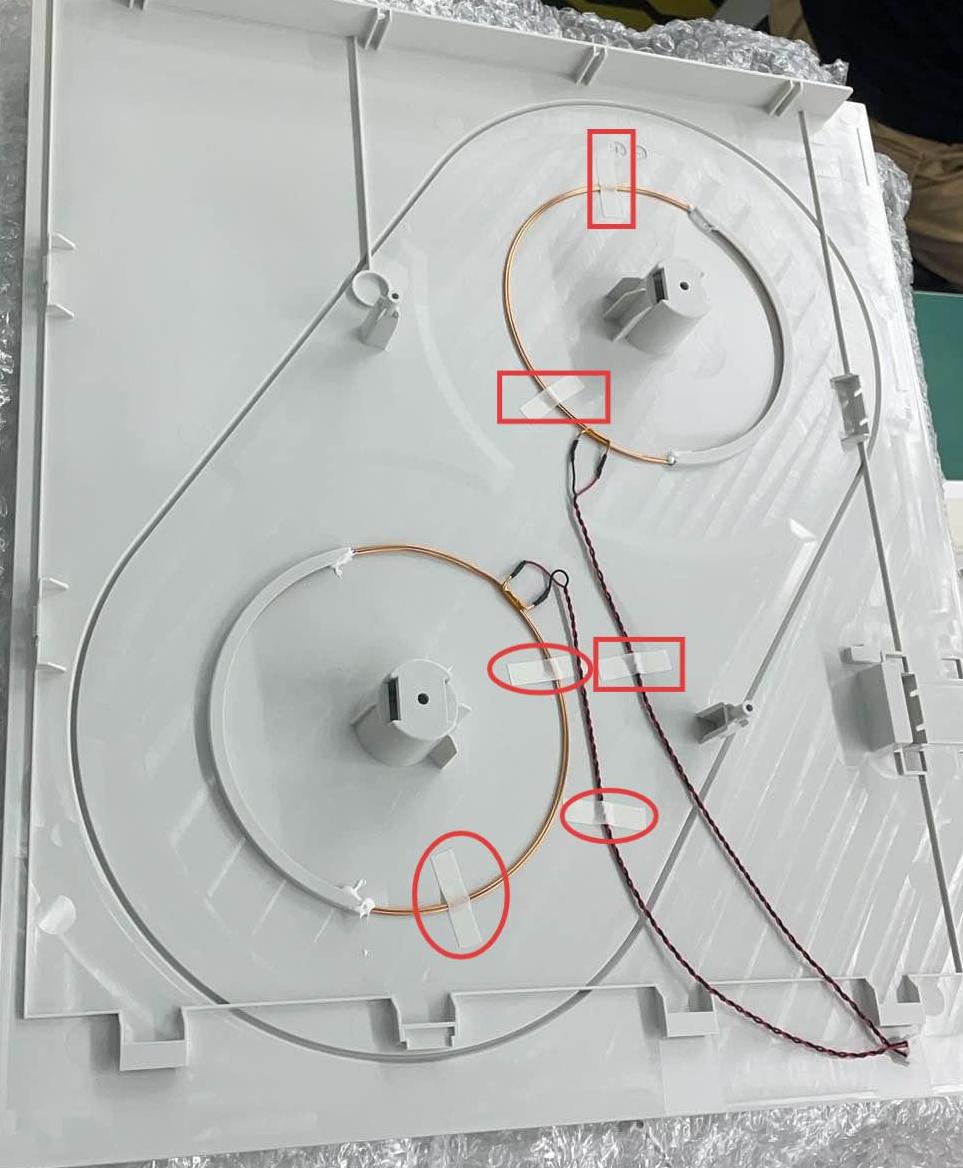
Right:
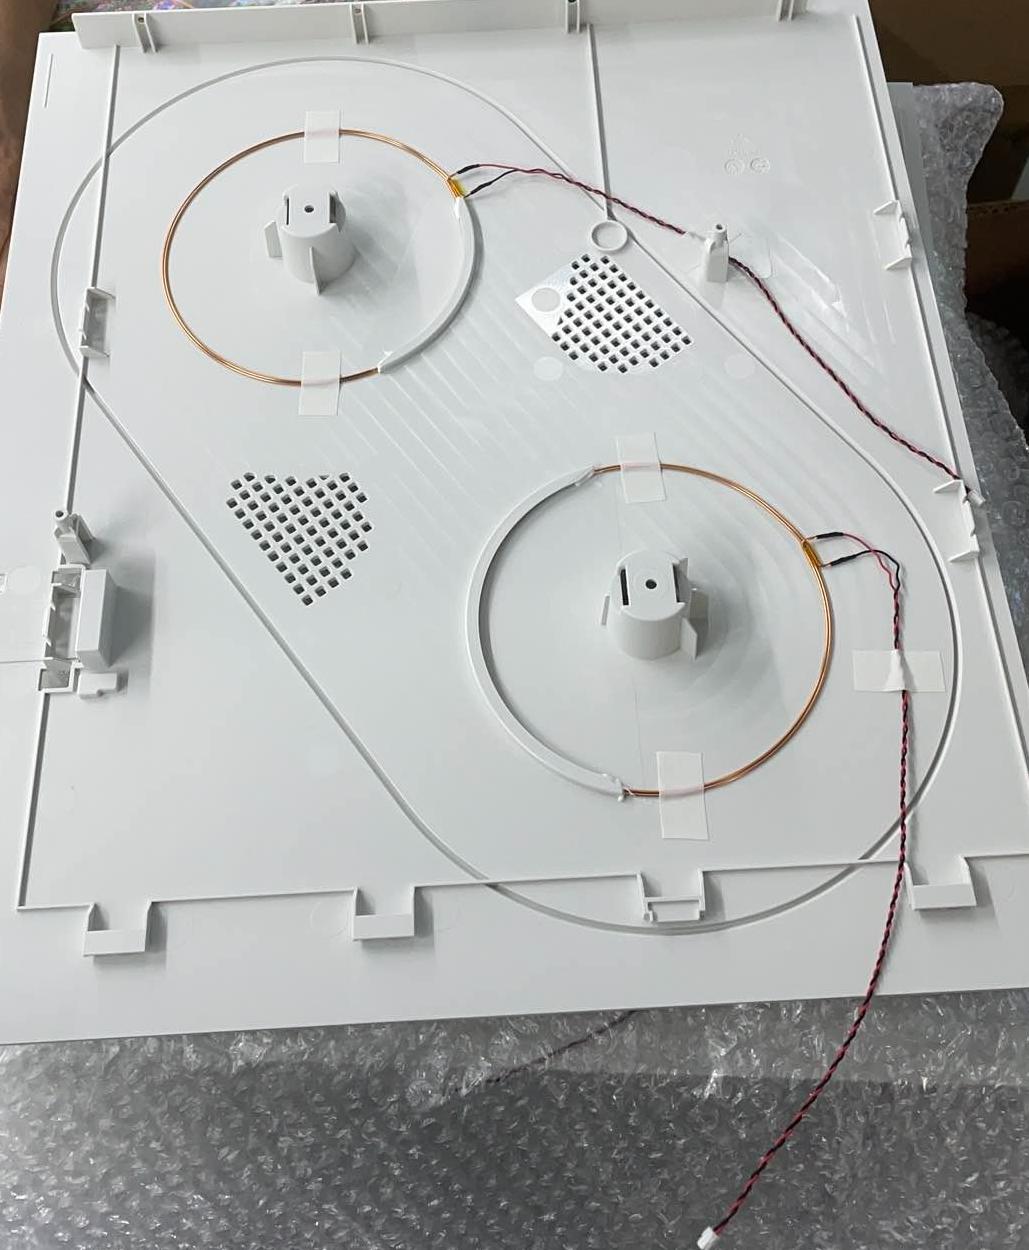
¶ Step 9. Install the new RFID coils
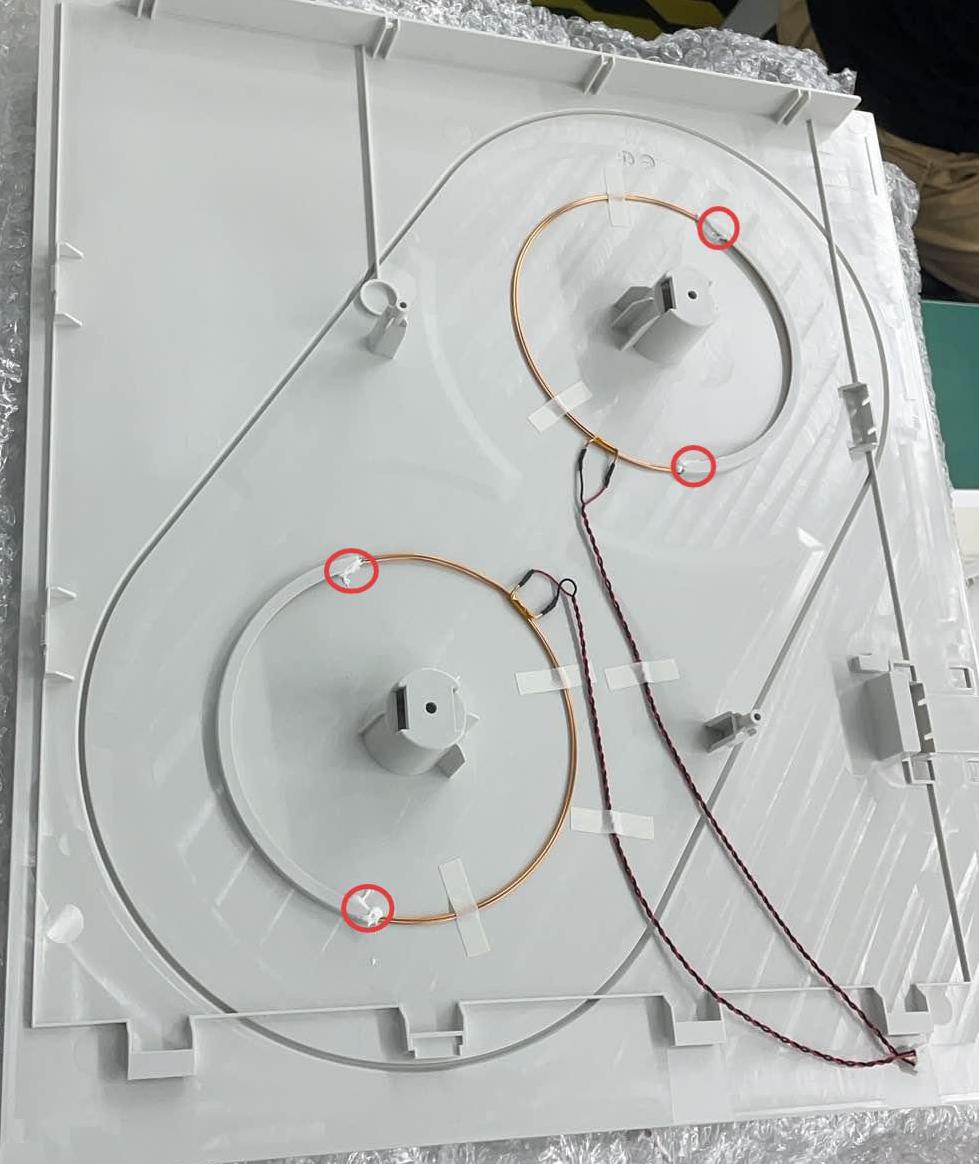
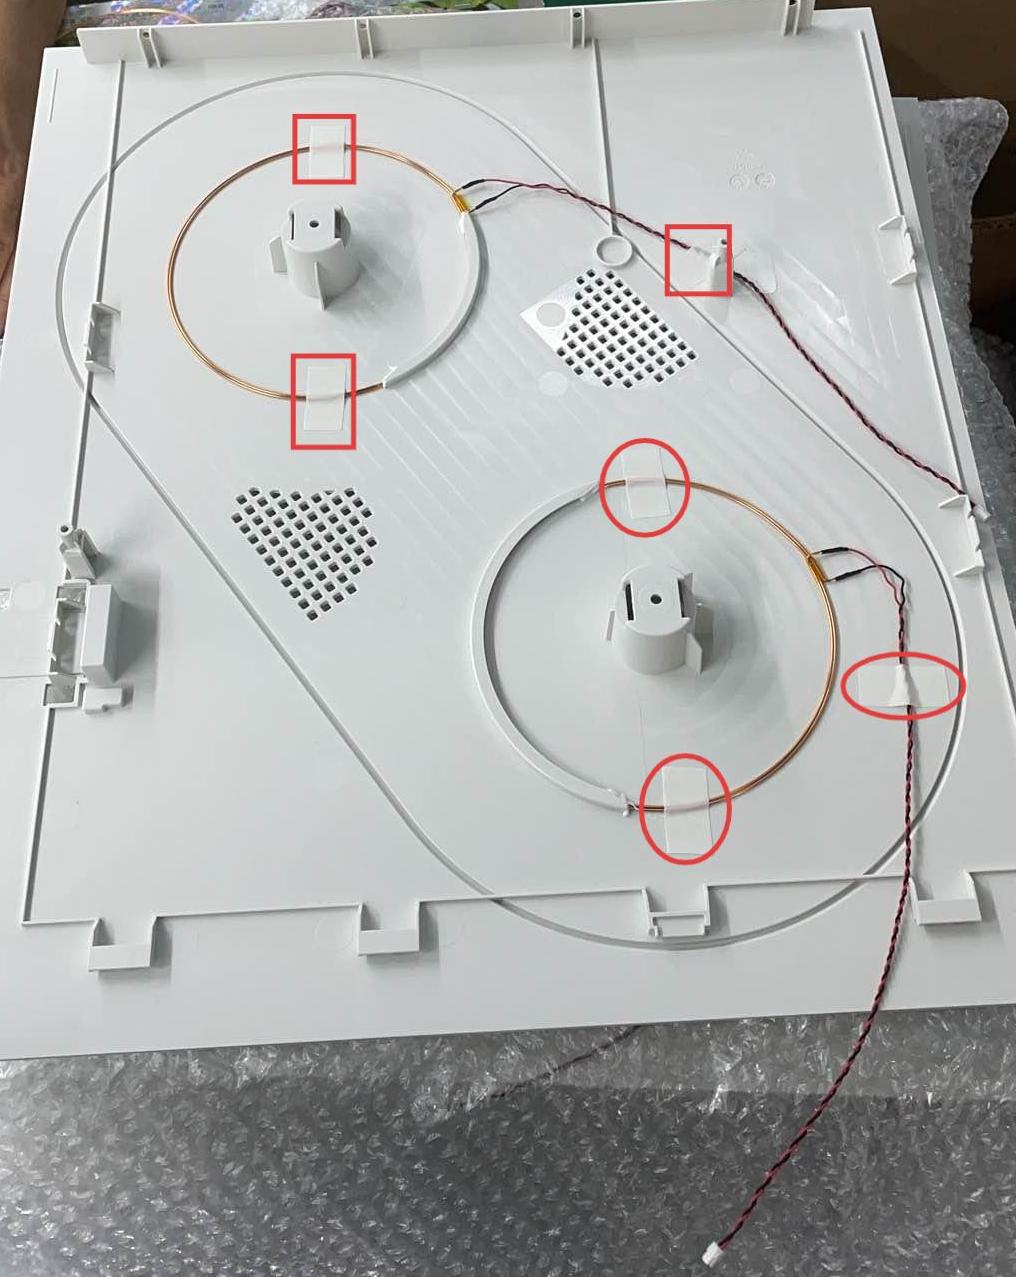
- Install the new RFID coils on the panels. The installation position and routing of the wires should be as consistent as possible with the pictures, then stick on the fixing tape.
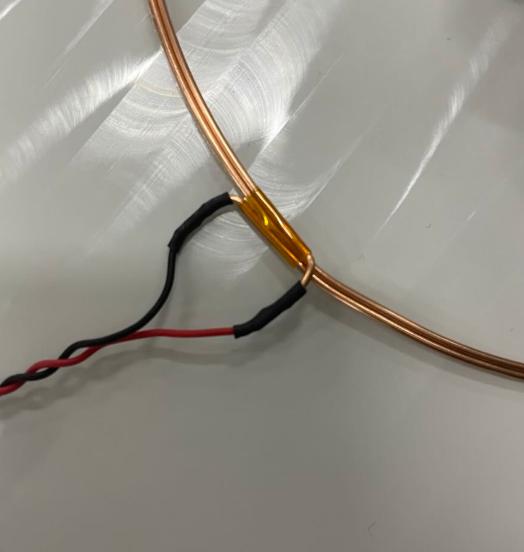
The coil terminal of the red wire should be positioned above that of the black wire.
Left:
Right:
- Apply glue to fix the RFID coils.
Left:
Right:
¶ Step 10. Reinstall the machine panels and accessories
To restore the machine, follow the steps in reverse order of the disassembly process.
- Reinstall the left and right panels, and top cover panel in sequence.
- Reinstall the filament feeders, and filament spools, reconnect the USB cables.
¶ Reach out to Snapmaker Support
After following the troubleshooting steps, if you find it difficult to resolve your issue, kindly submit a support ticket through https://snapmaker.formcrafts.com/u1-troubleshooting-request and share your troubleshooting results with some pictures/videos.
Our dedicated support team will be more than willing to assist you in resolving the issue.