We’ll use PLA plus PETG as an example to show how to print easy‑to‑remove supports on the Snapmaker U1 3D printer. You may follow the instructions below or watch the video tutorial.
¶ Part 1: Preparing Filaments
We'll use two materials with low adhesion to each other, one for the model and the other for the support or support interface.
Choose materials that do not bond strongly with each other.
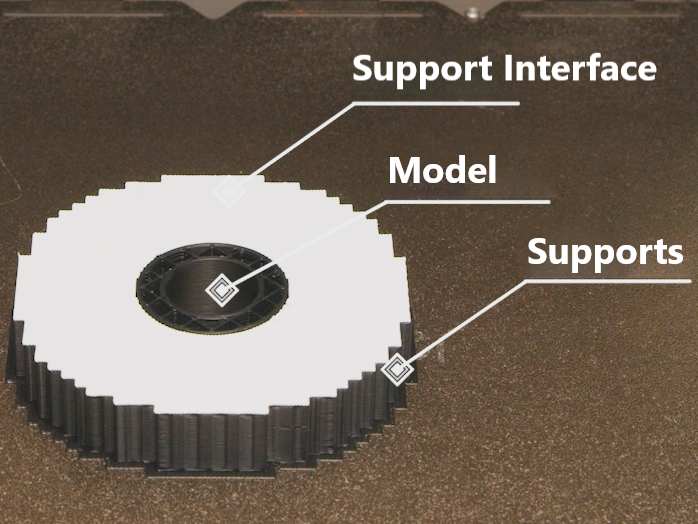
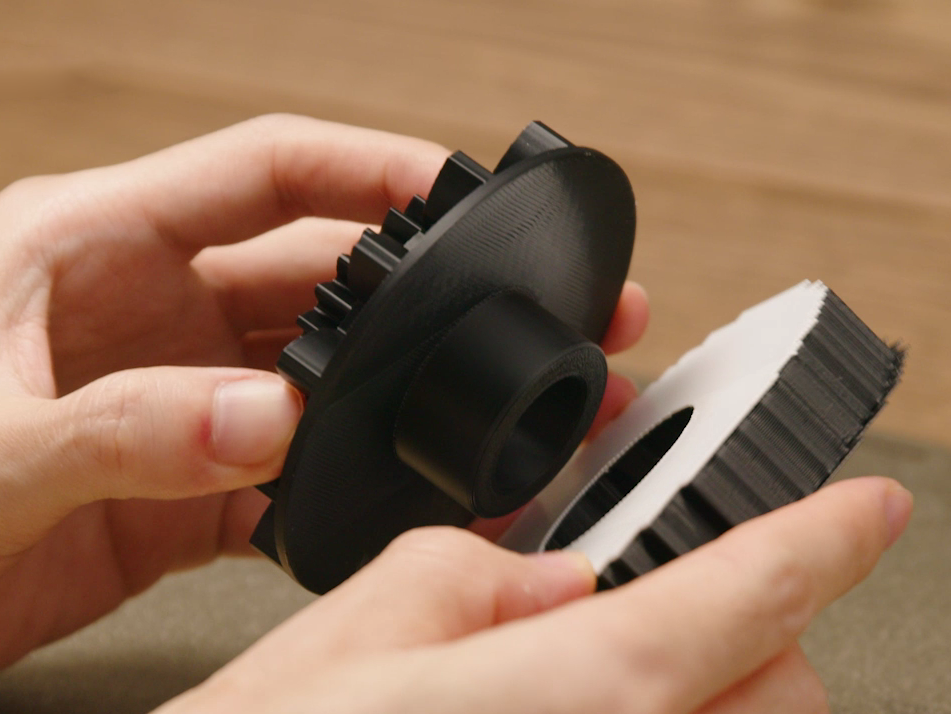
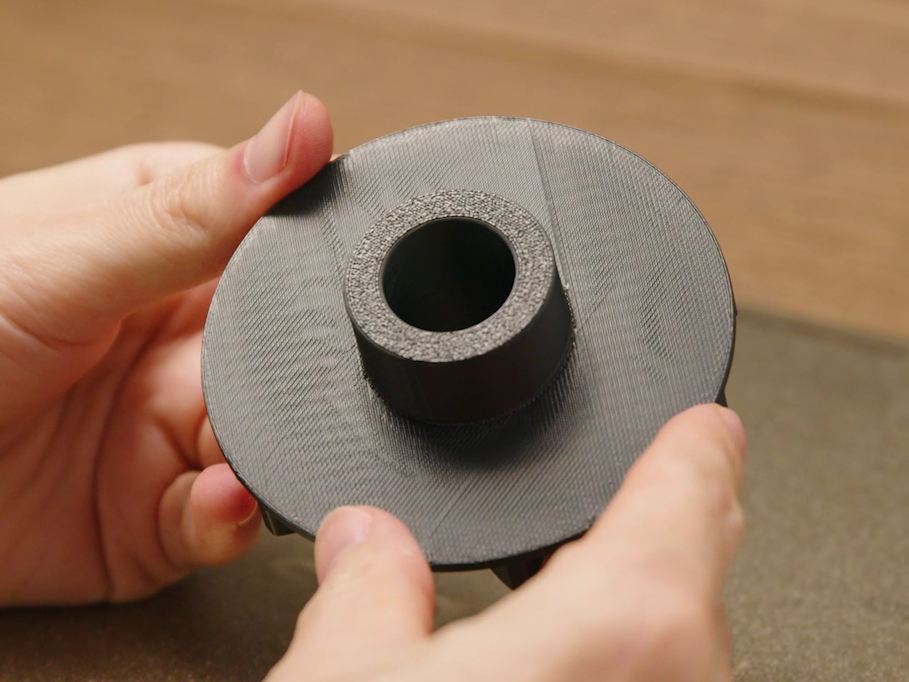
It makes the supports easier to remove while giving you a cleaner, smoother supported surface. PLA with PETG and PLA with TPU are two common and practical combinations.
When the filament has absorbed moisture, extrusion becomes less stable, which can lead to stringing, under‑extrusion, small holes, and rough areas on the final print.
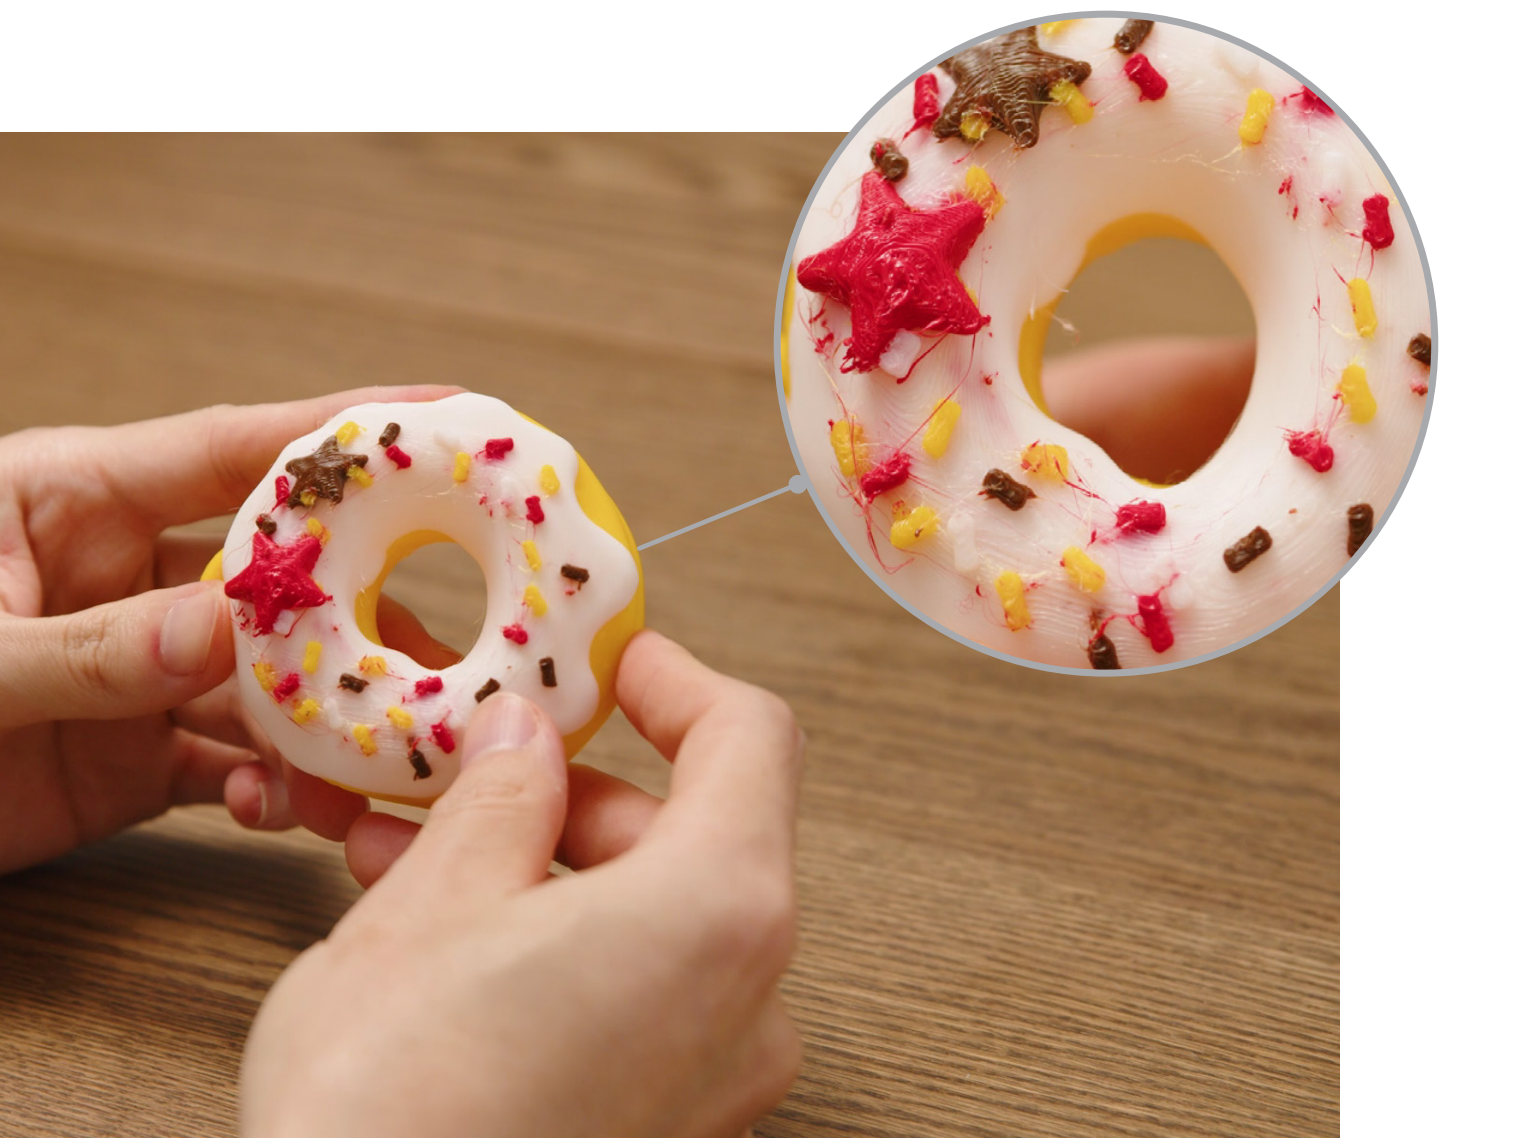
If the support material has absorbed moisture, the two materials may bond either too tightly or not enough, causing issues like support marks or sagging.
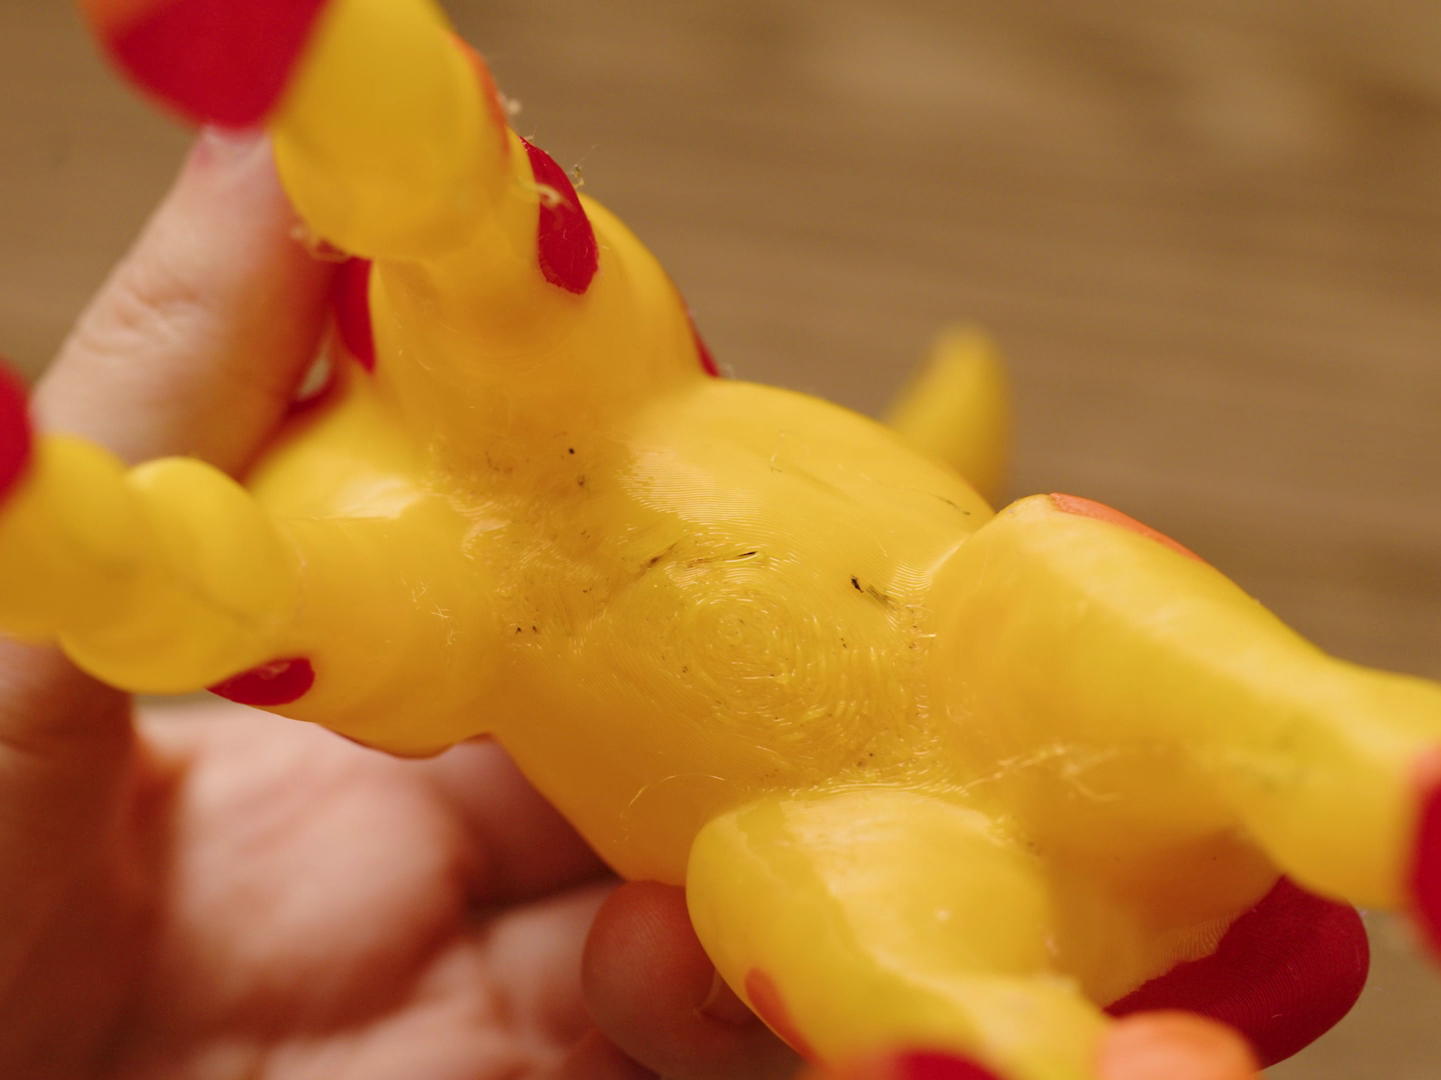
If you are using the official Snapmaker SnapDryer filament dryer, thoroughly dry the filament (especially PETG and TPU which absorb moisture more easily) according to the recommended drying settings before printing and keep it sealed during printing.
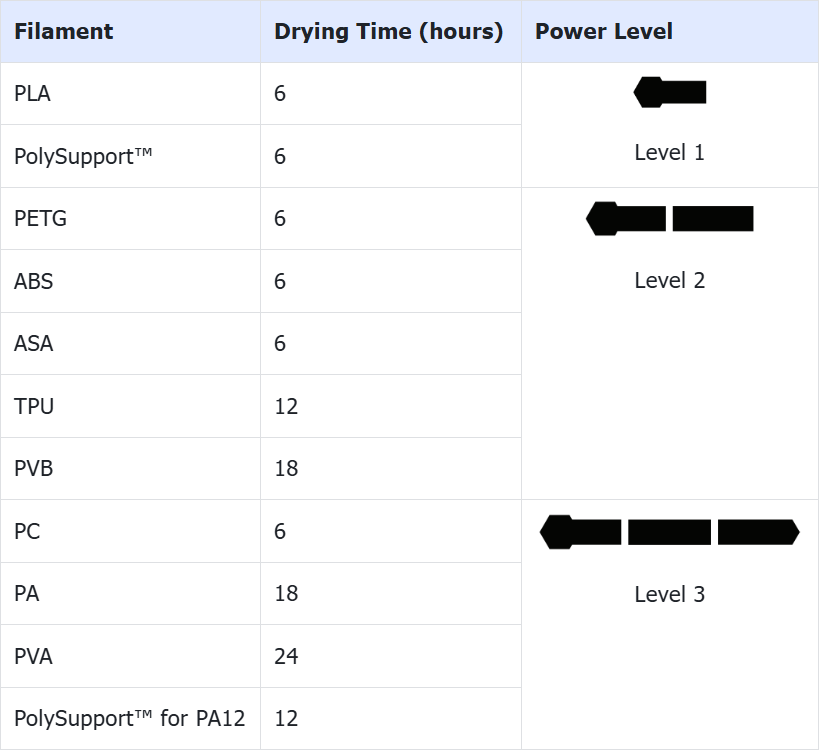
You can purchase the Snapmaker SnapDryer from the official Snapmaker store as needed.
For a video guide on how to use the Snapmaker U1 with the SnapDryer, refer to How to Use the SnapDryer with the Snapmaker U1。
Opened filament should be promptly stored in a sealed bag or dedicated container. Adding desiccant (e.g., silica gel) is recommended to improve moisture protection.
¶ Part 2: Setting Printing Parameters
We’ll use Snapmaker’s PLA Snapspeed and PETG HF filaments as examples to walk through the recommended parameter settings. We’ll start by showing the setup for printing the model and the supports with PETG and using PLA for the support interface.
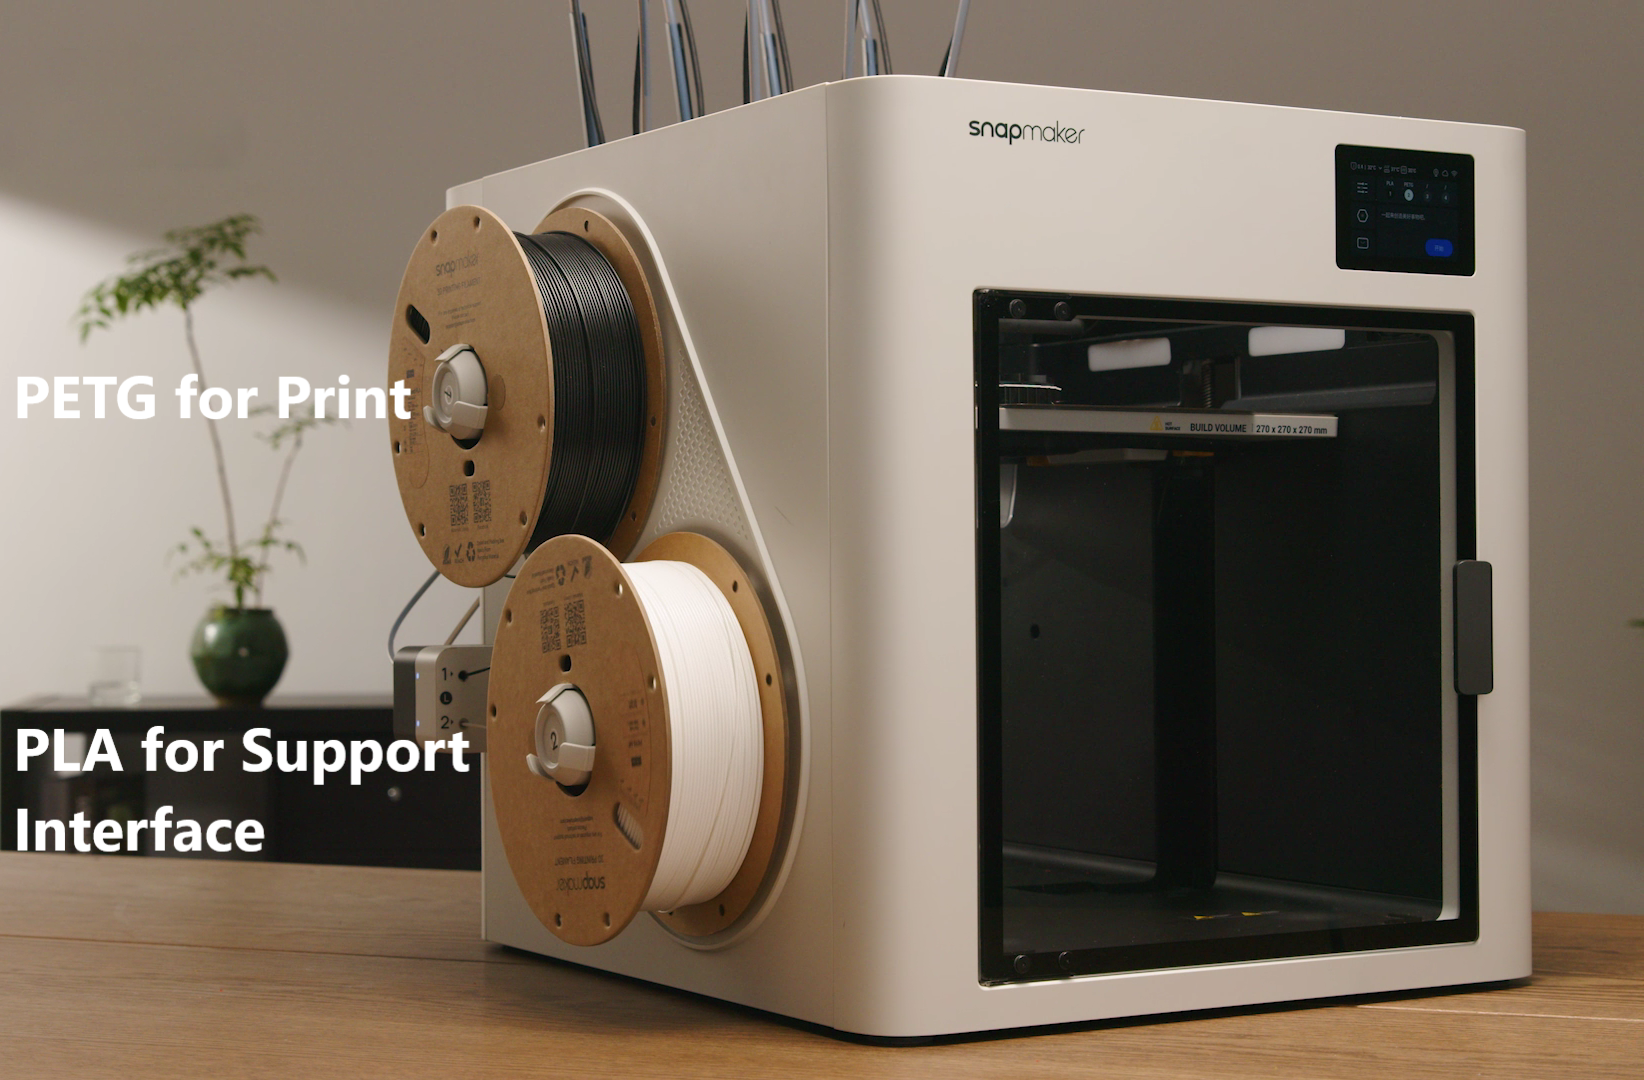
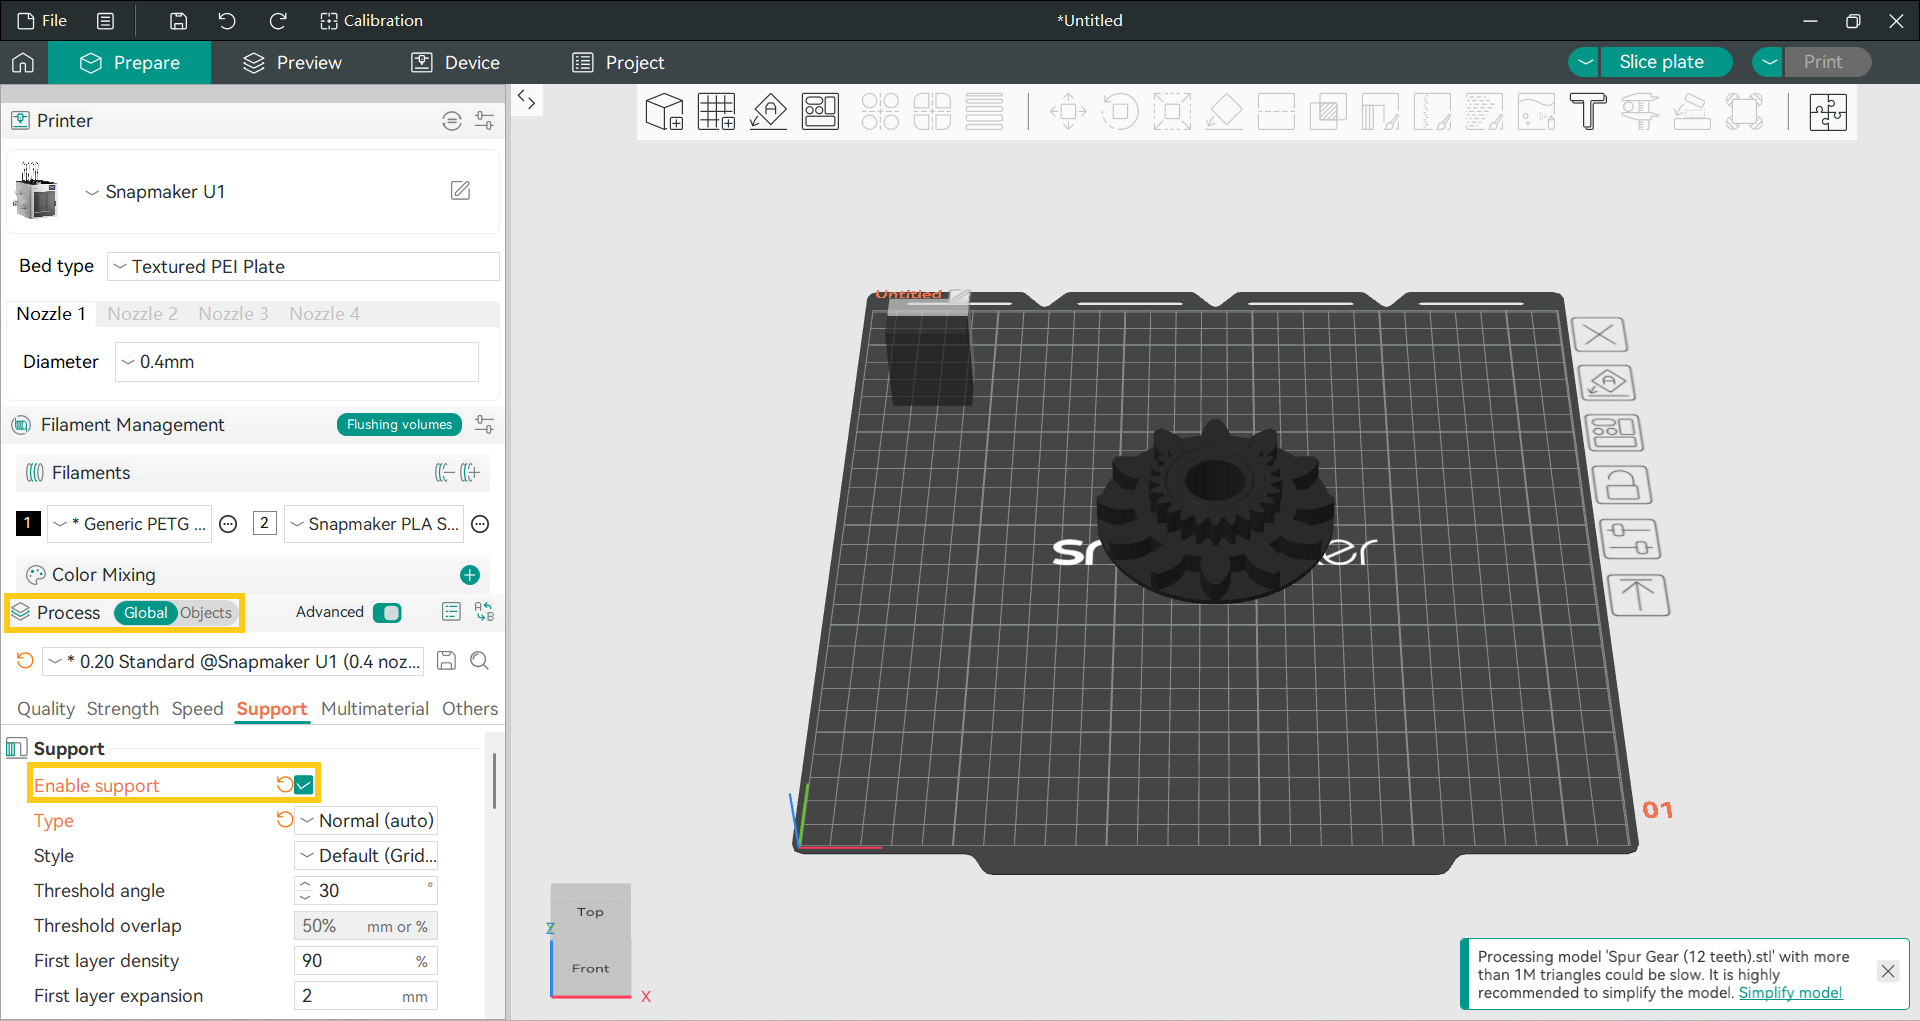
- Set Filament 1 to Generic PETG HF and Filament 2 to Snapspeed PLA.
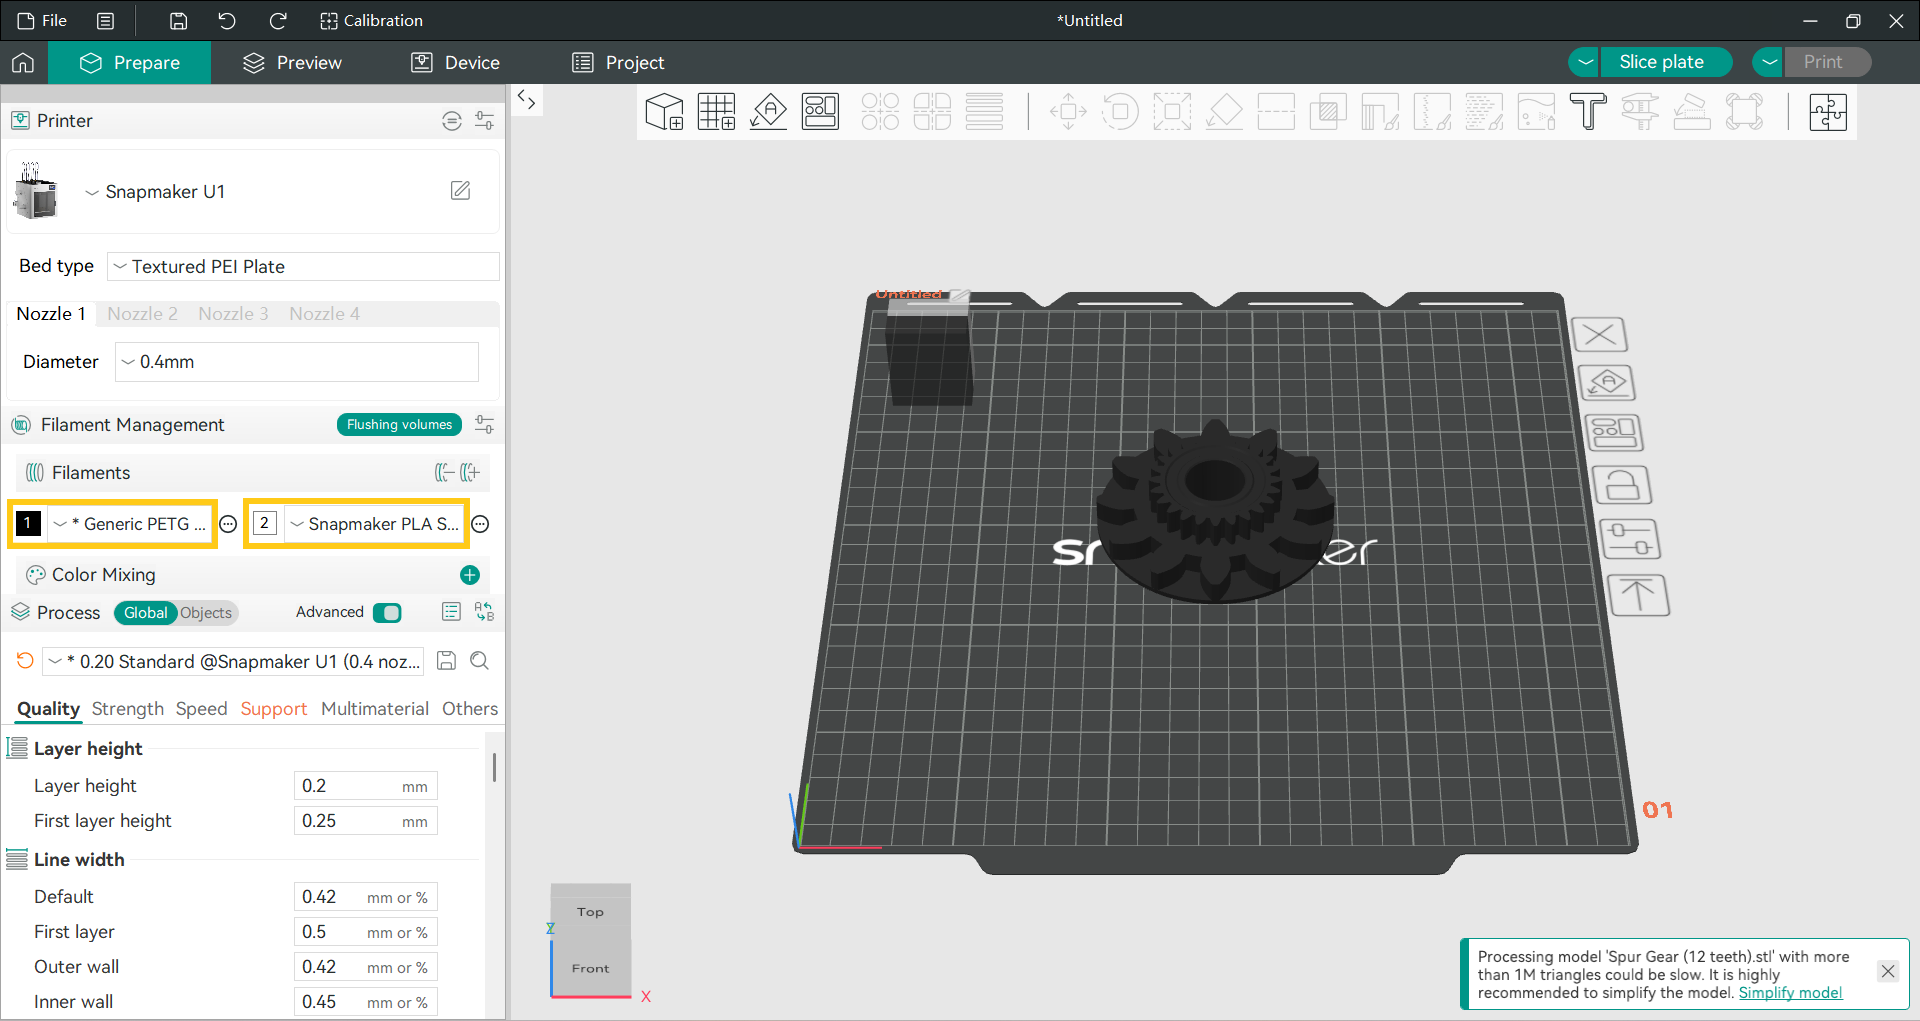
- Enable support under
Process>Supportin the left menu.
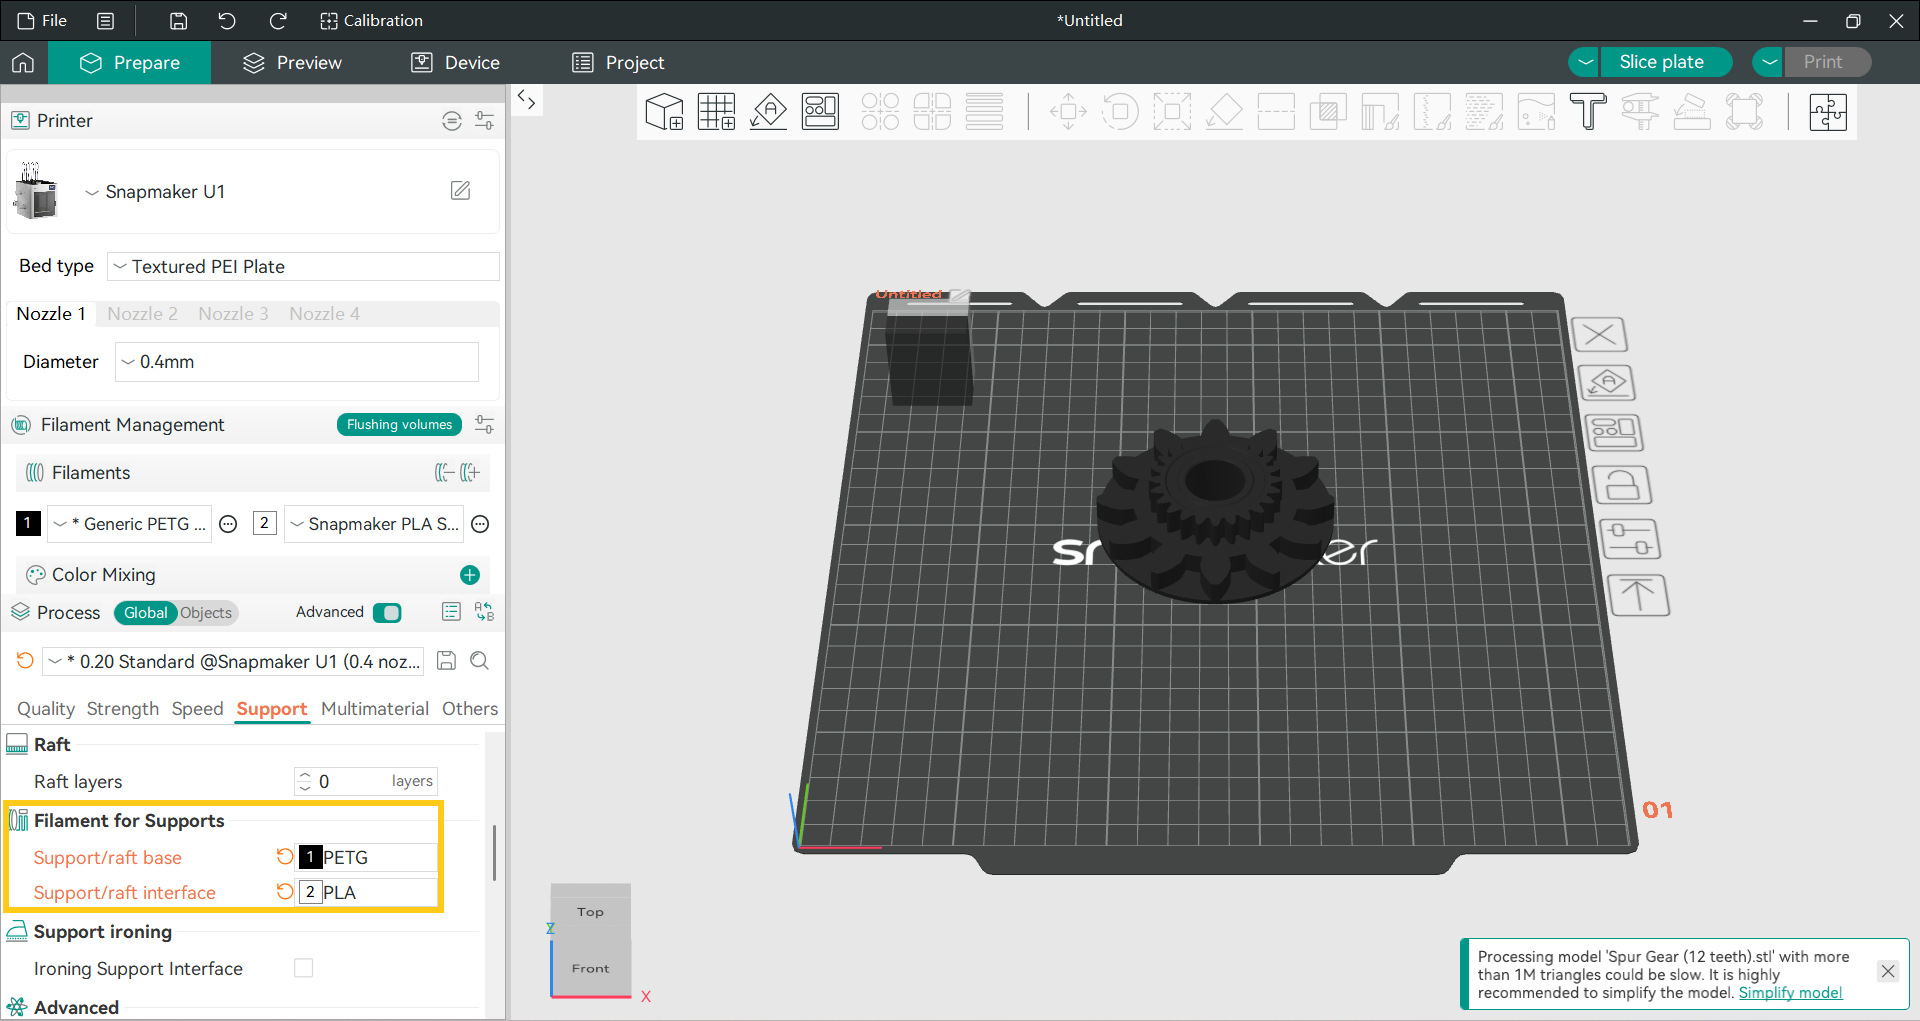
- Because PETG and PLA require different bed temperatures, it’s recommended to print the support base (which touches the build plate) with the same material as the model, PETG, and use PLA only for the support interface.
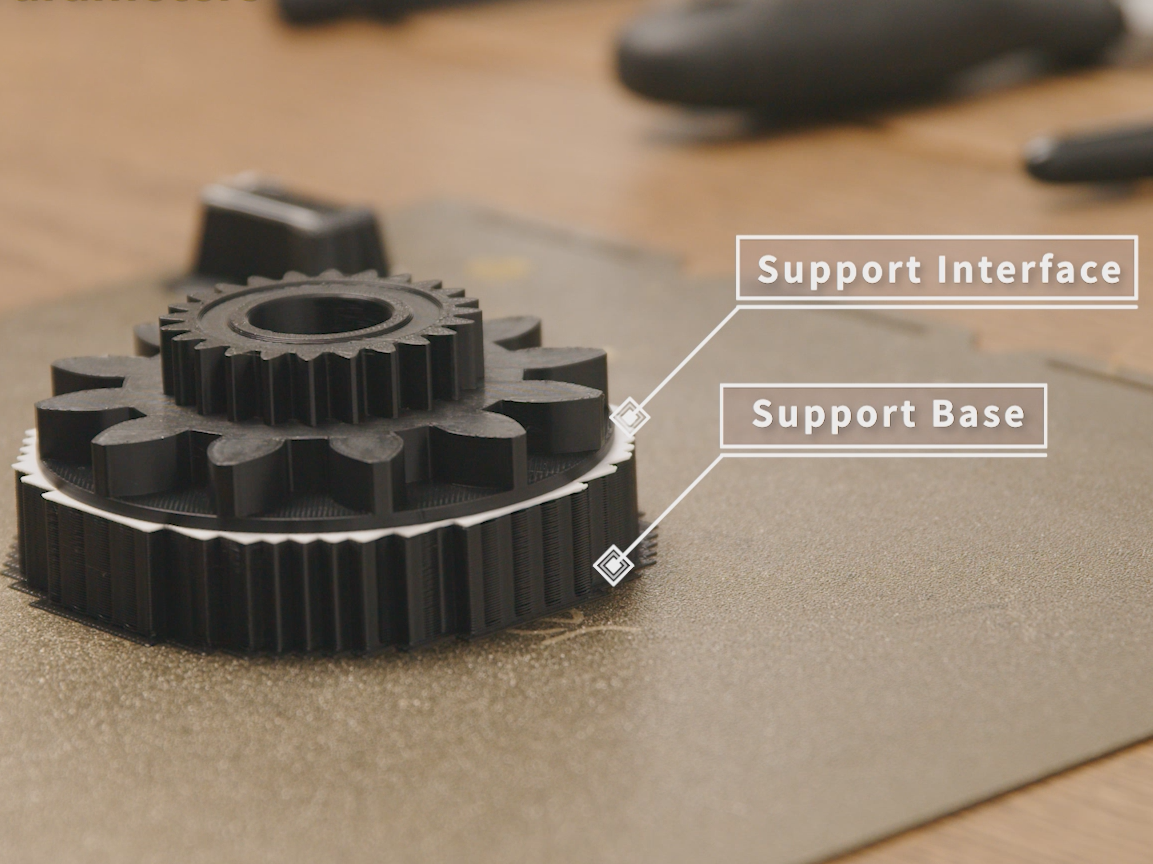
A support structure has two parts—the support base and the support interface, and each of them can be printed with a different filament.
- Set the
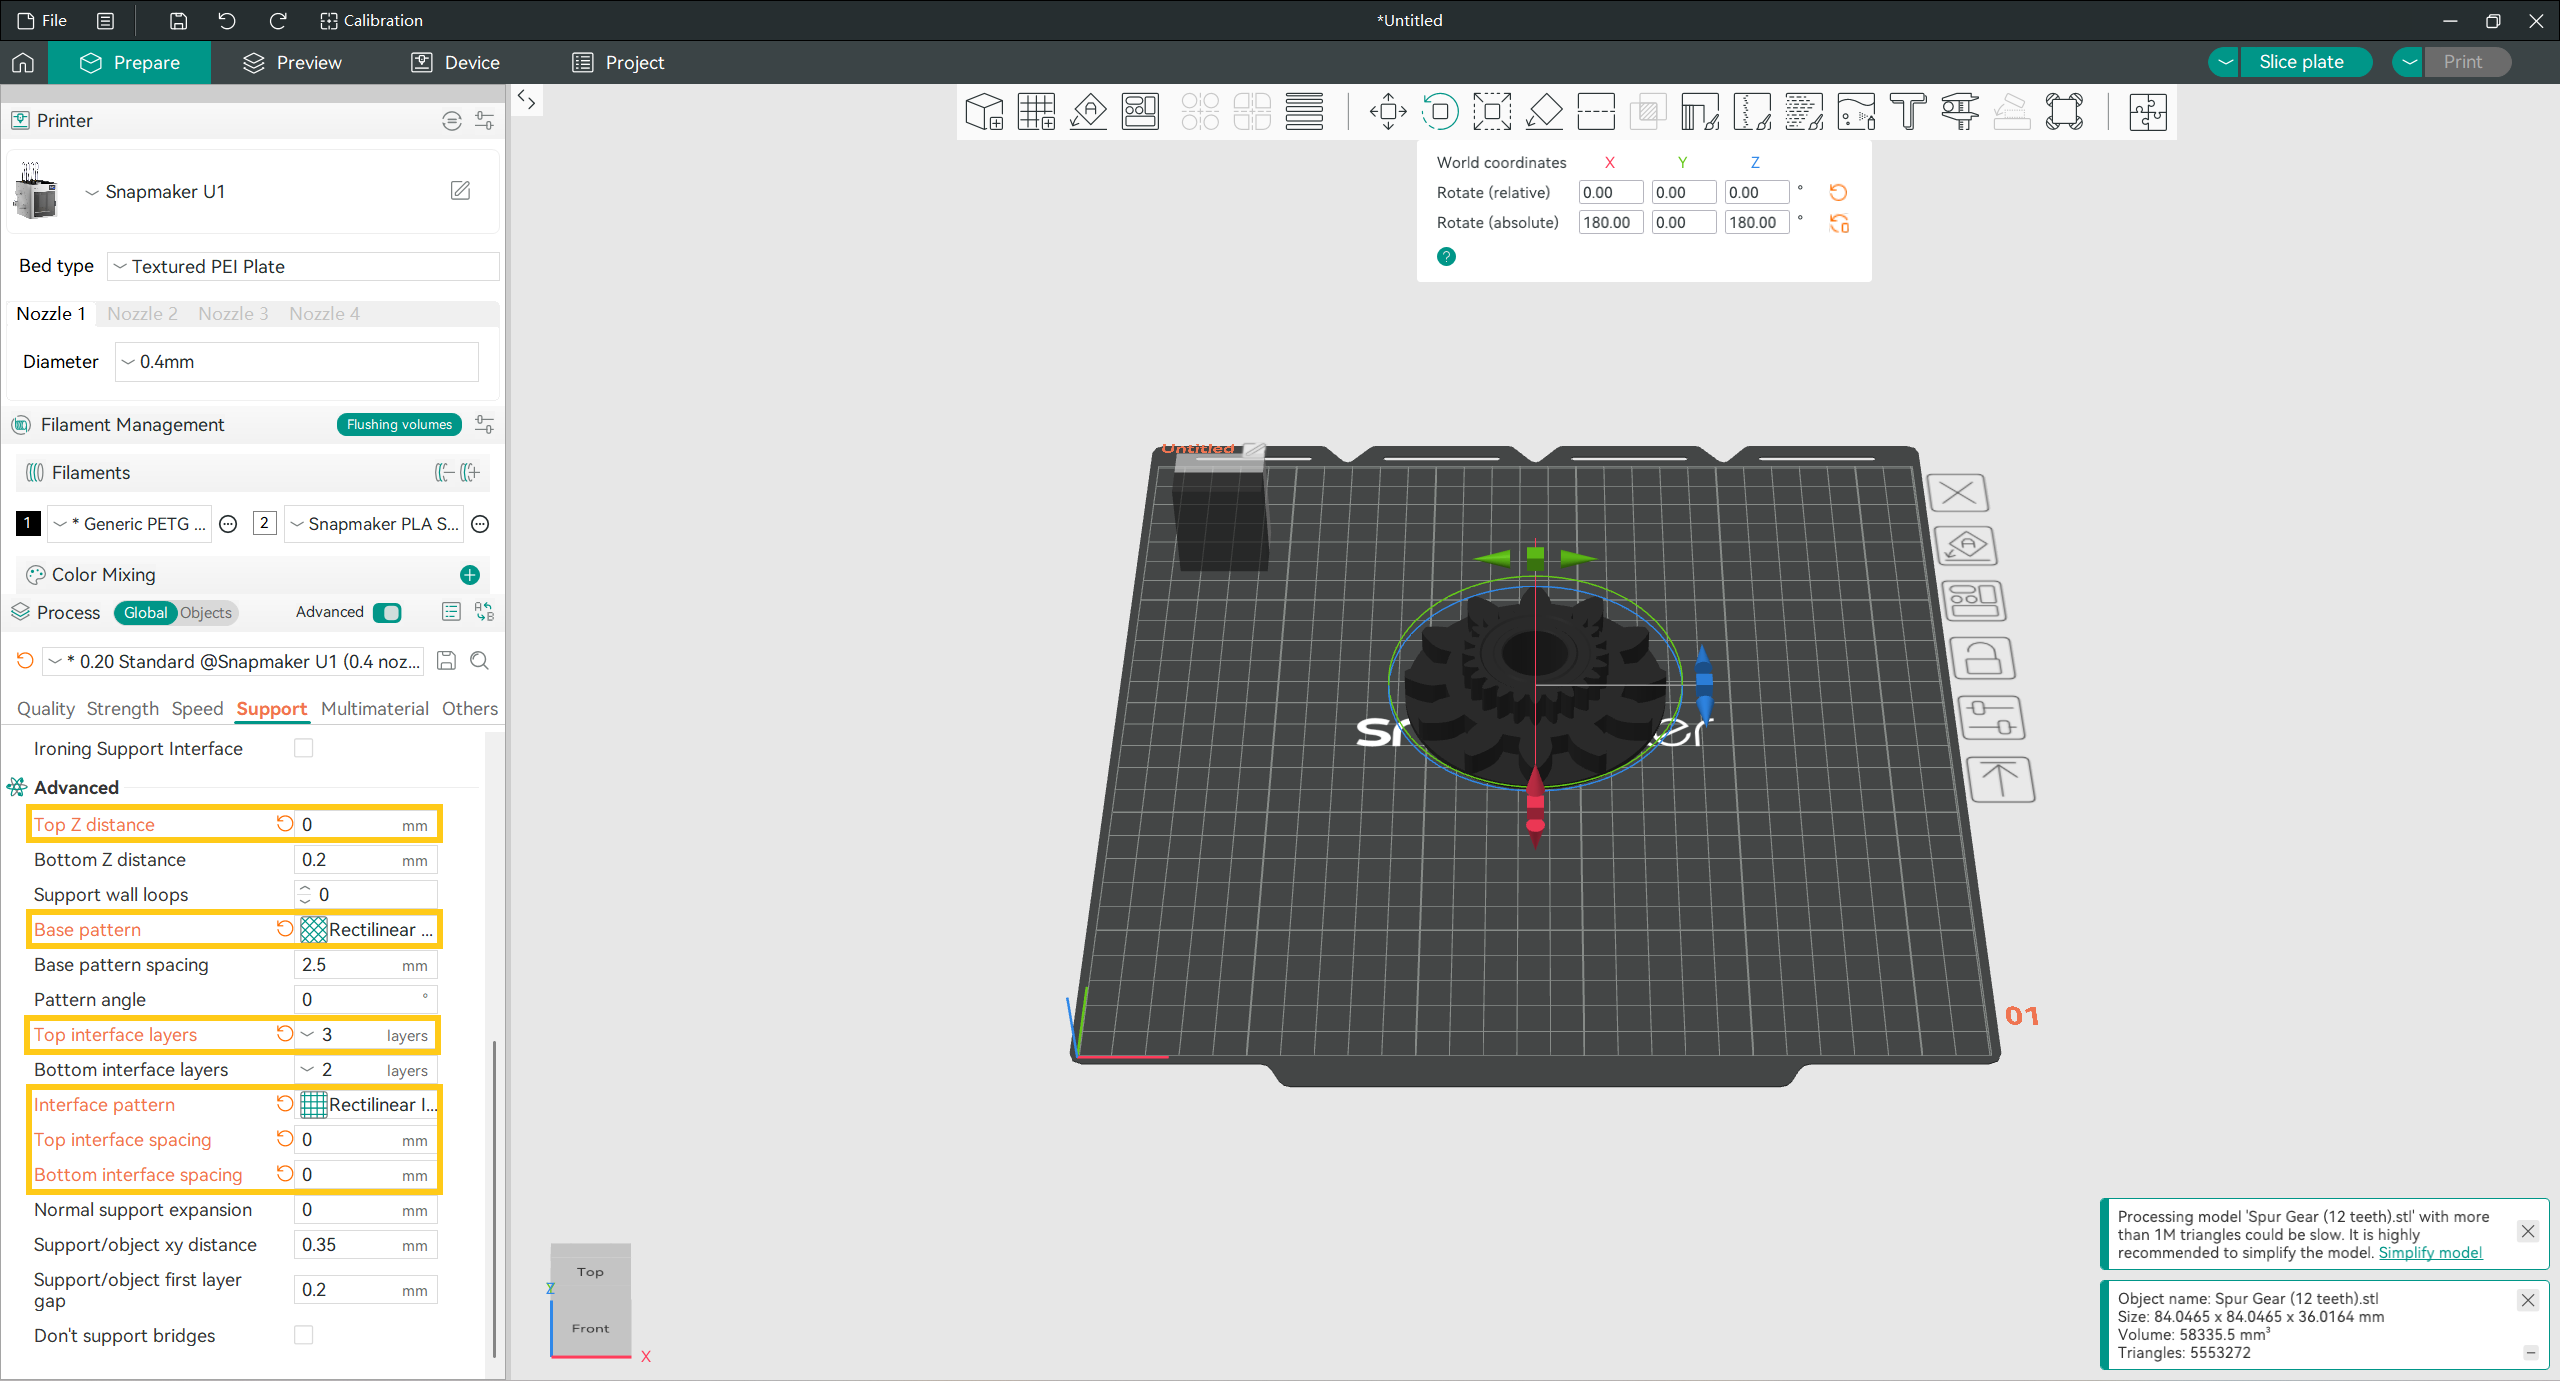
Top Z distanceto 0 to ensure a tighter fit between the support and the model > UseRectilinear gridpattern for the support base, set theTop interface layersto 3, and switch theInterface patterntoRectilinear Interlaced> Set both the top and bottom interface spacing to 0 to make the interface lines more tightly packed.
- In the
Filamentsection of the left sidebar, click the...>Editnext to the specific filament. Based on Snapmaker’s print tests, setting PLA to 230 °C and the PETG bed temperature to 65 °C provides more reliable results.
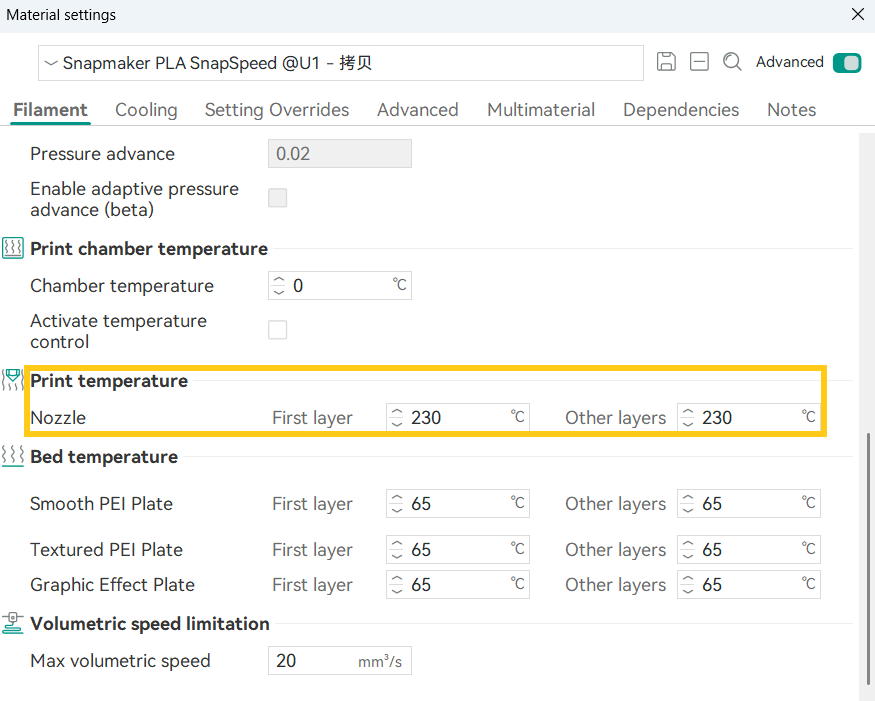
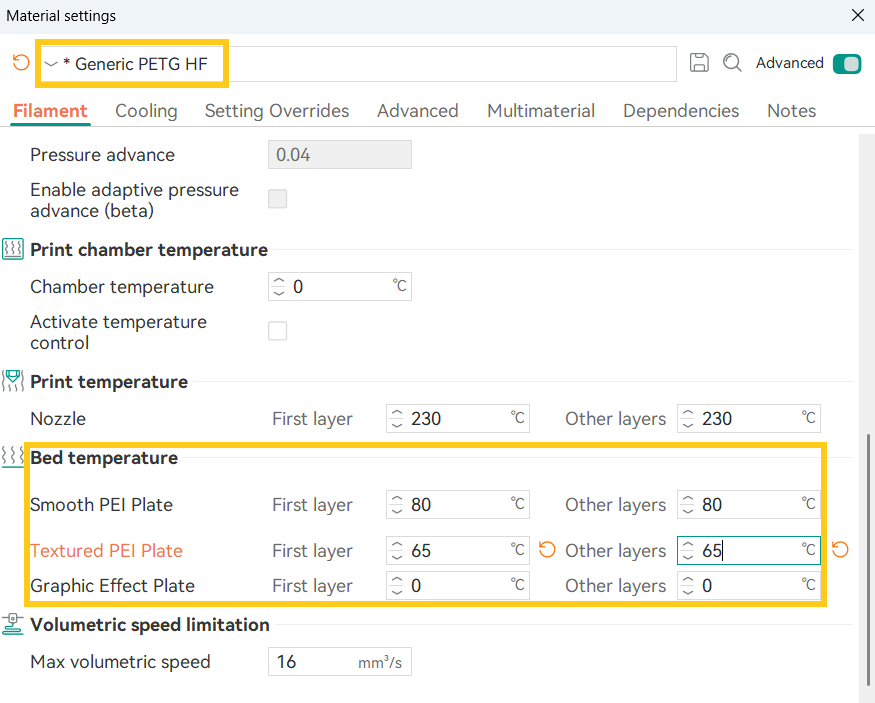
To print the model with PLA and use PETG for the supports or the support interface, you can adjust the filament assignment in the same way. Set PETG to a printing temperature of 265 °C, with the bed temperature at 65 °C, and set the max volumetric speed to 10 mm³/s. Then set PLA to 230 °C while keeping the other settings the same. Finally, load the filaments according to your material assignment, and you’re ready to start printing.
After adjusting the filament assignment, the support base and support interface material selections will update automatically.