¶ Procedure
¶ 1. Print a Temperature Tower to Test the Best Print Temperature for Your Filament
The best print temperature can vary for each filament. It is recommended to perform this test for the specific filament you are using.
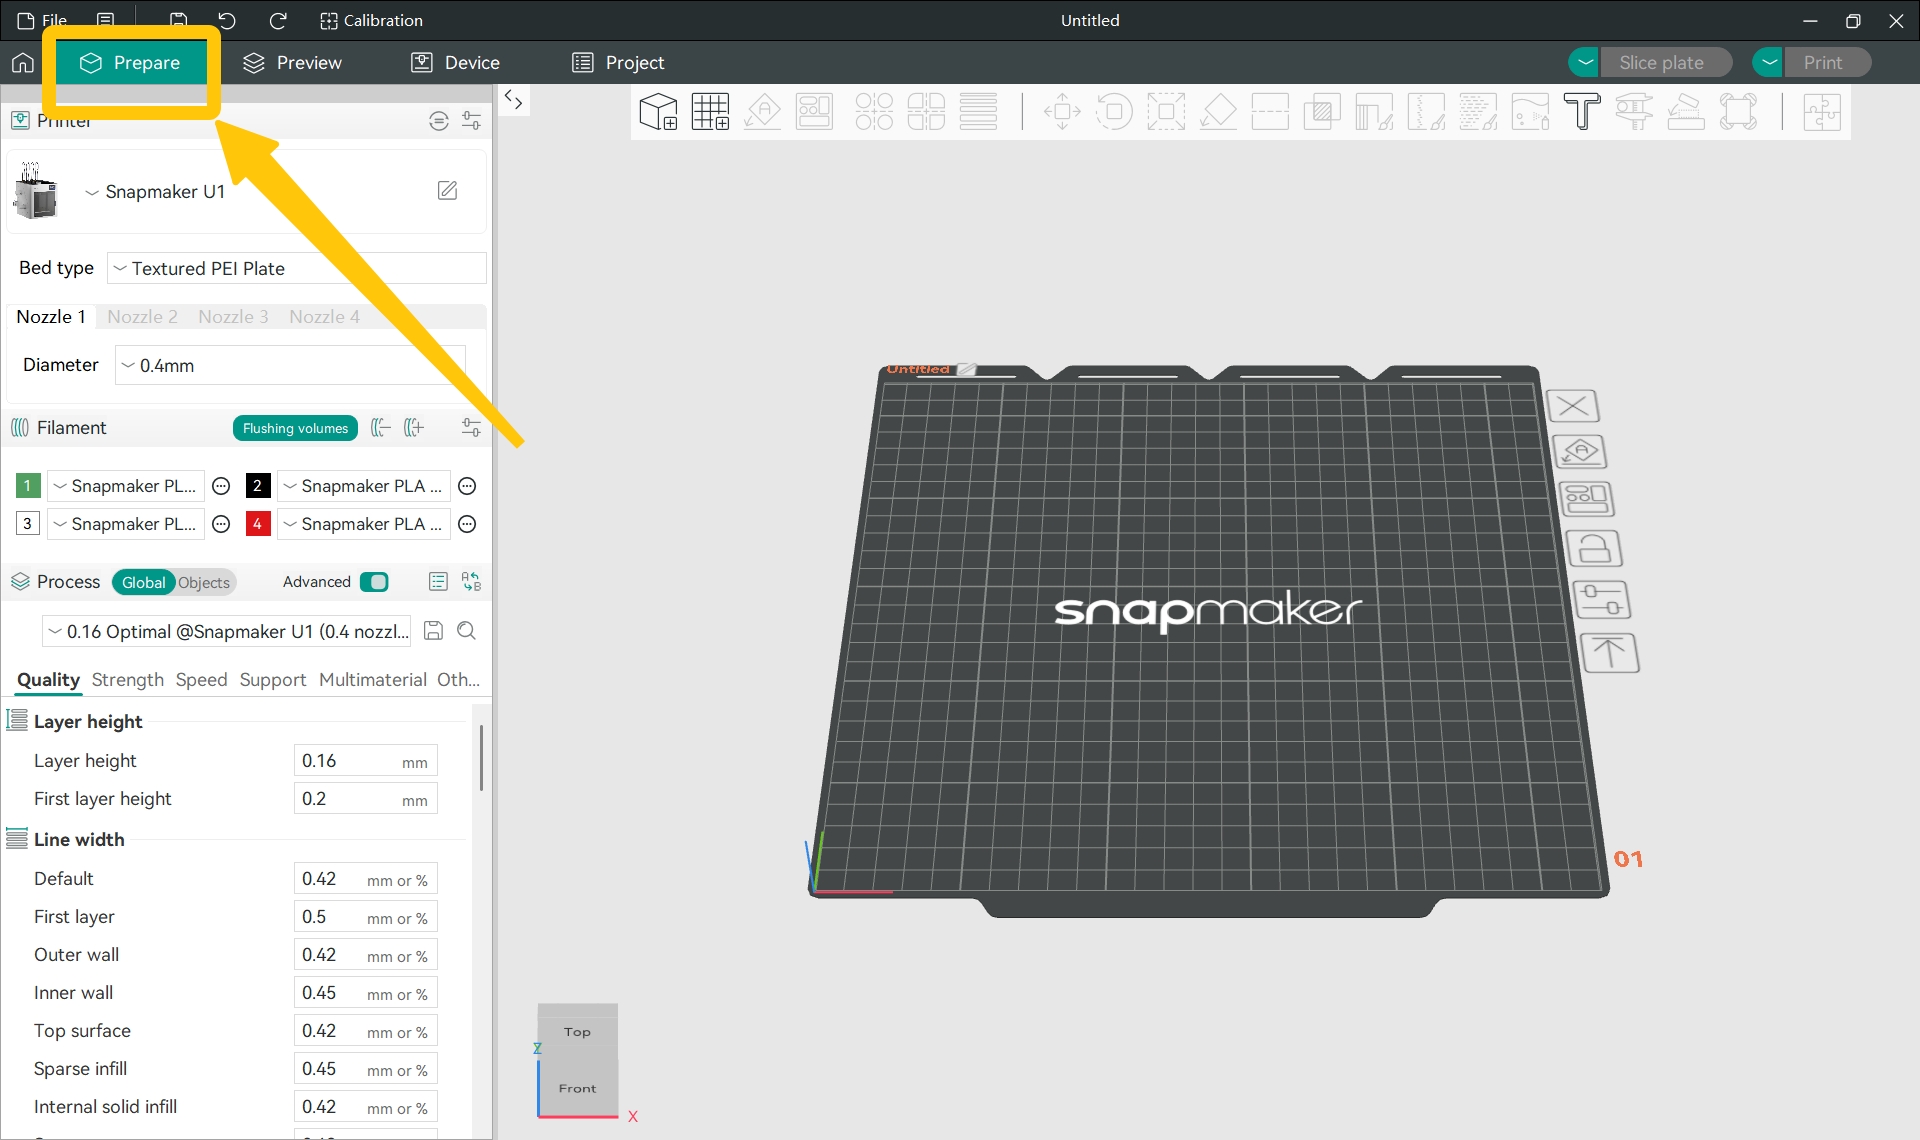
- Open Snapmaker Orca and switch to the
Preparetab.
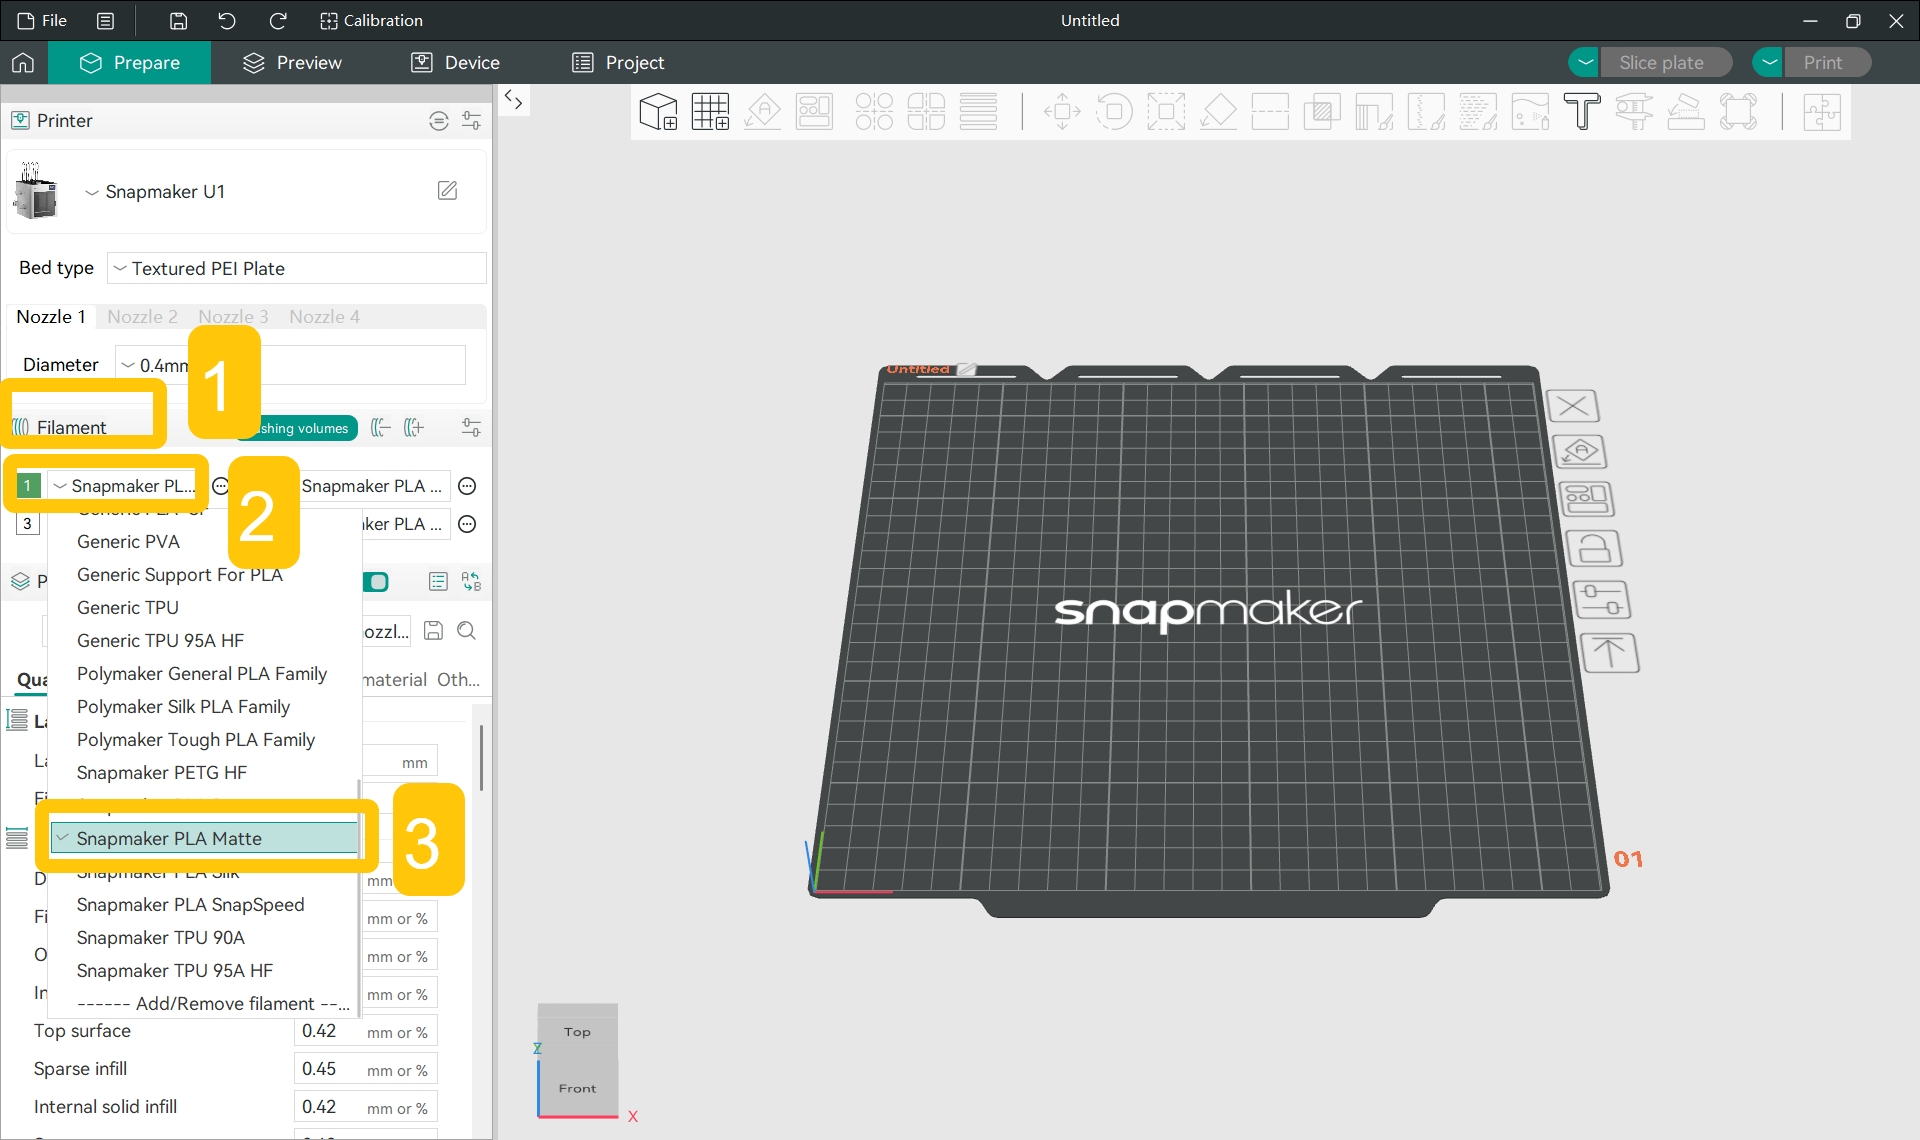
- In the
Filamentsection of the side list, click the filament name and select the filament you used for printing from the drop-down menu.
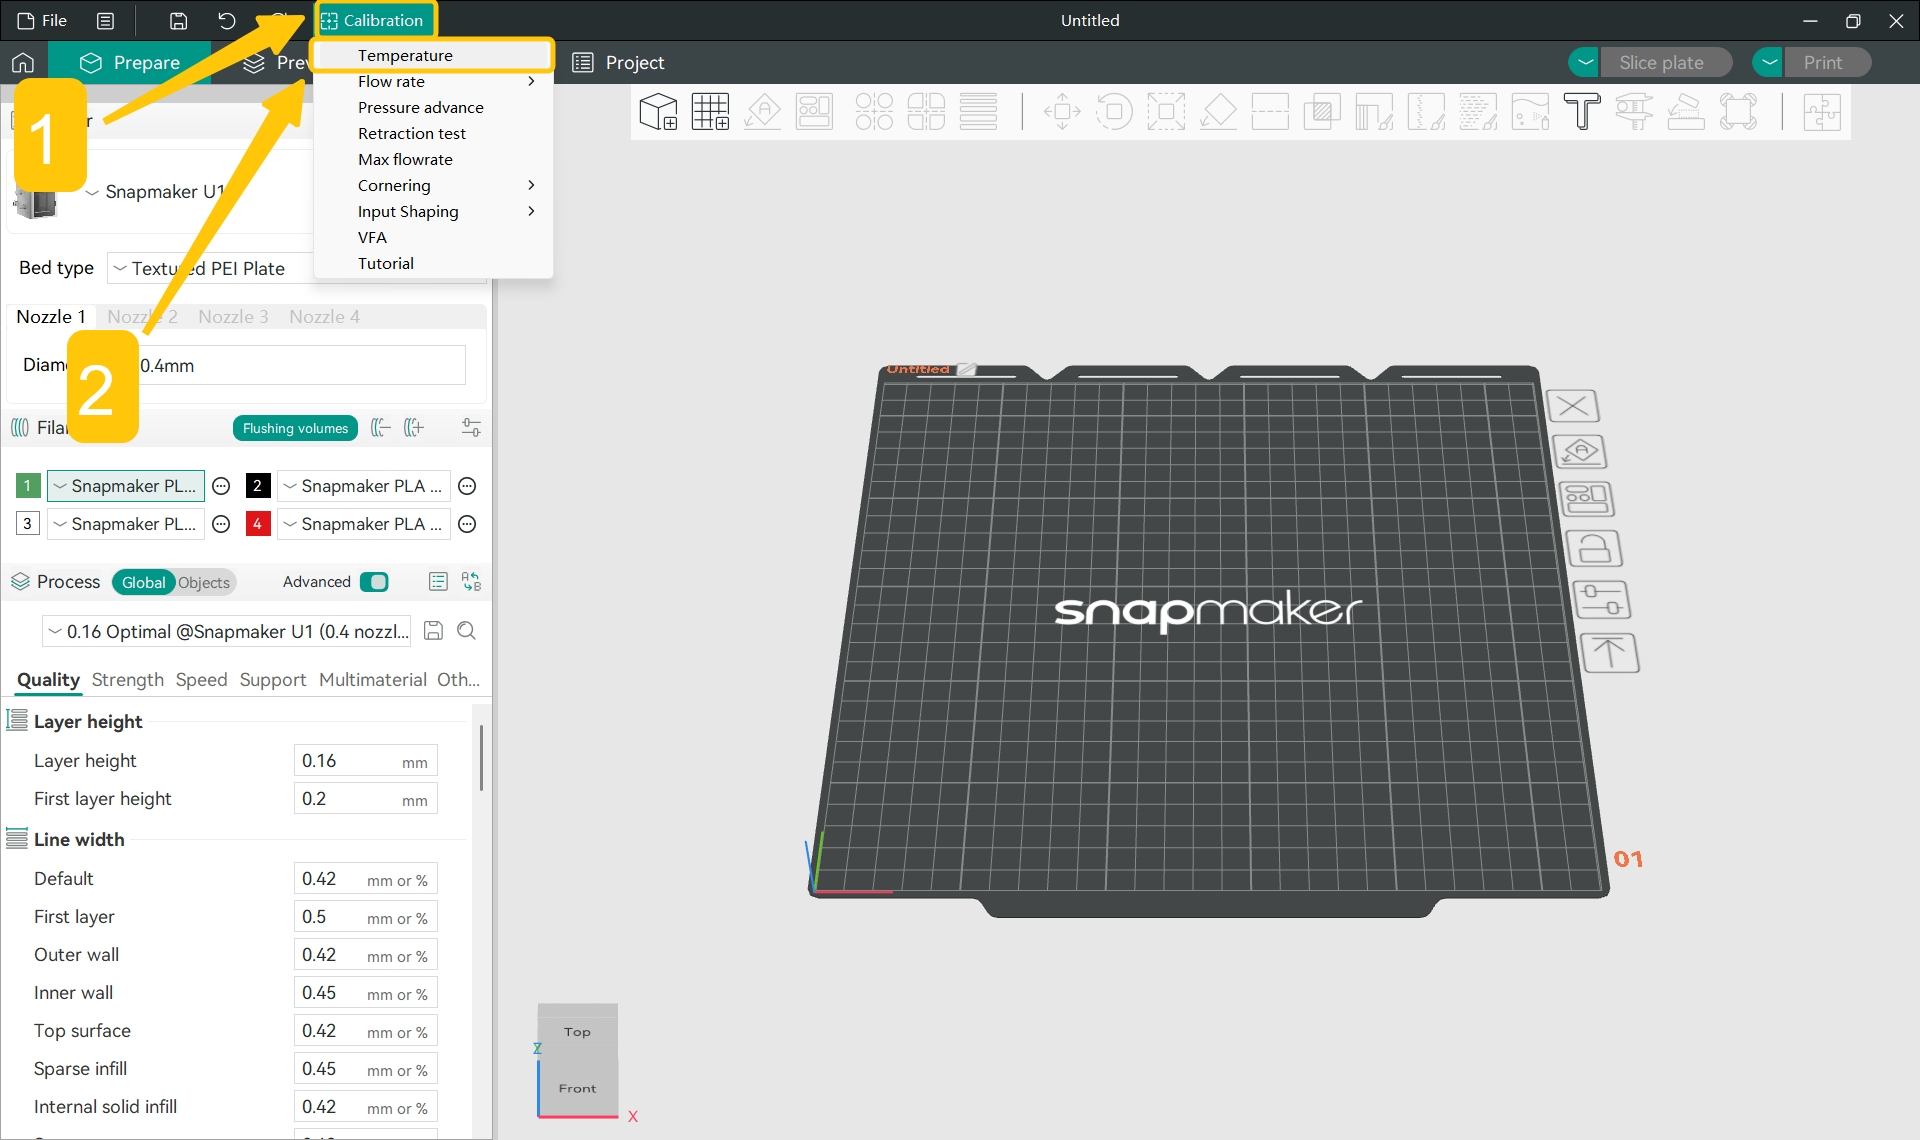
- In the top menu bar, click
Calibration>Temperature.
- In the pop-up window, select your filament type and set the start temperature (
Start temp) and end temperature (End temp).
Snapmaker Orca has different default start and end temperatures for various filament types. You can directly use the software's preset start and end temperatures to test and calibrate your filament.
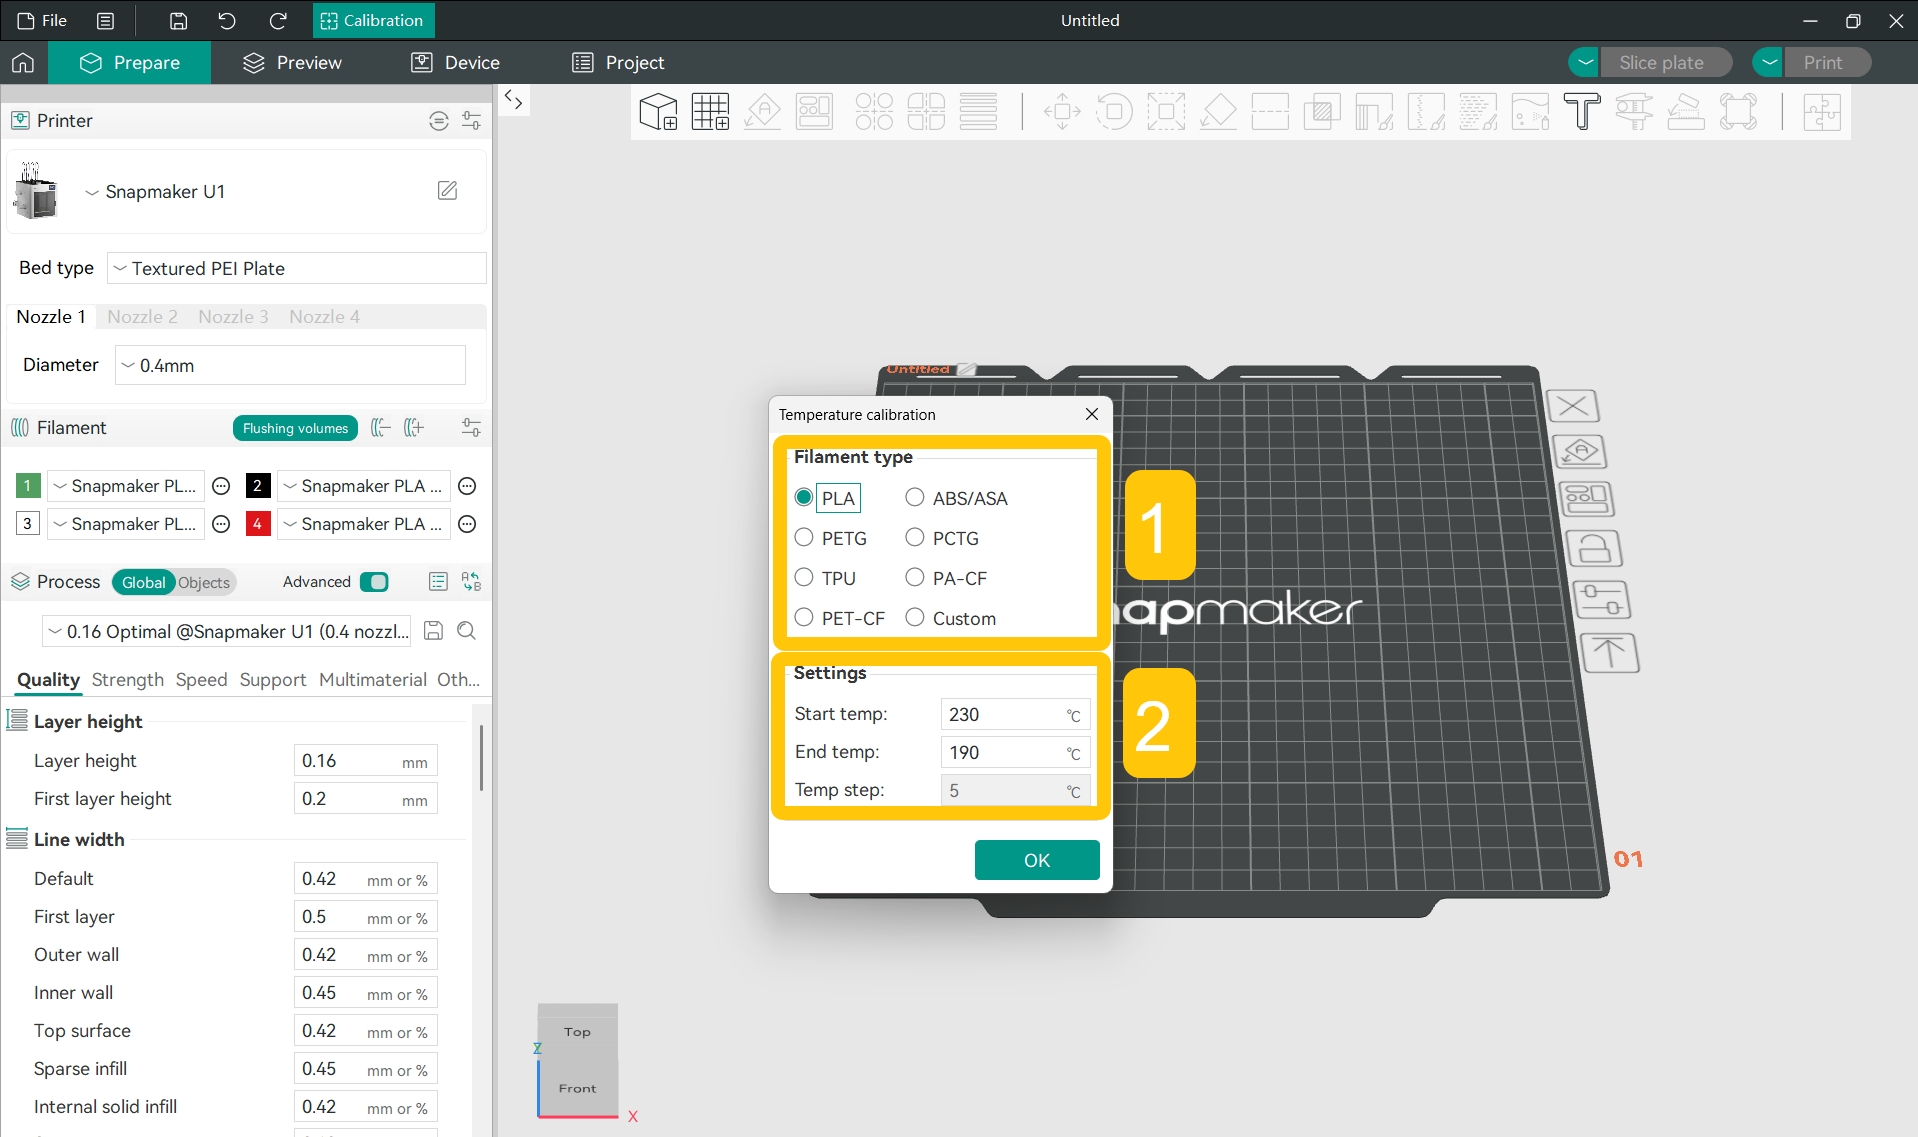
- Click
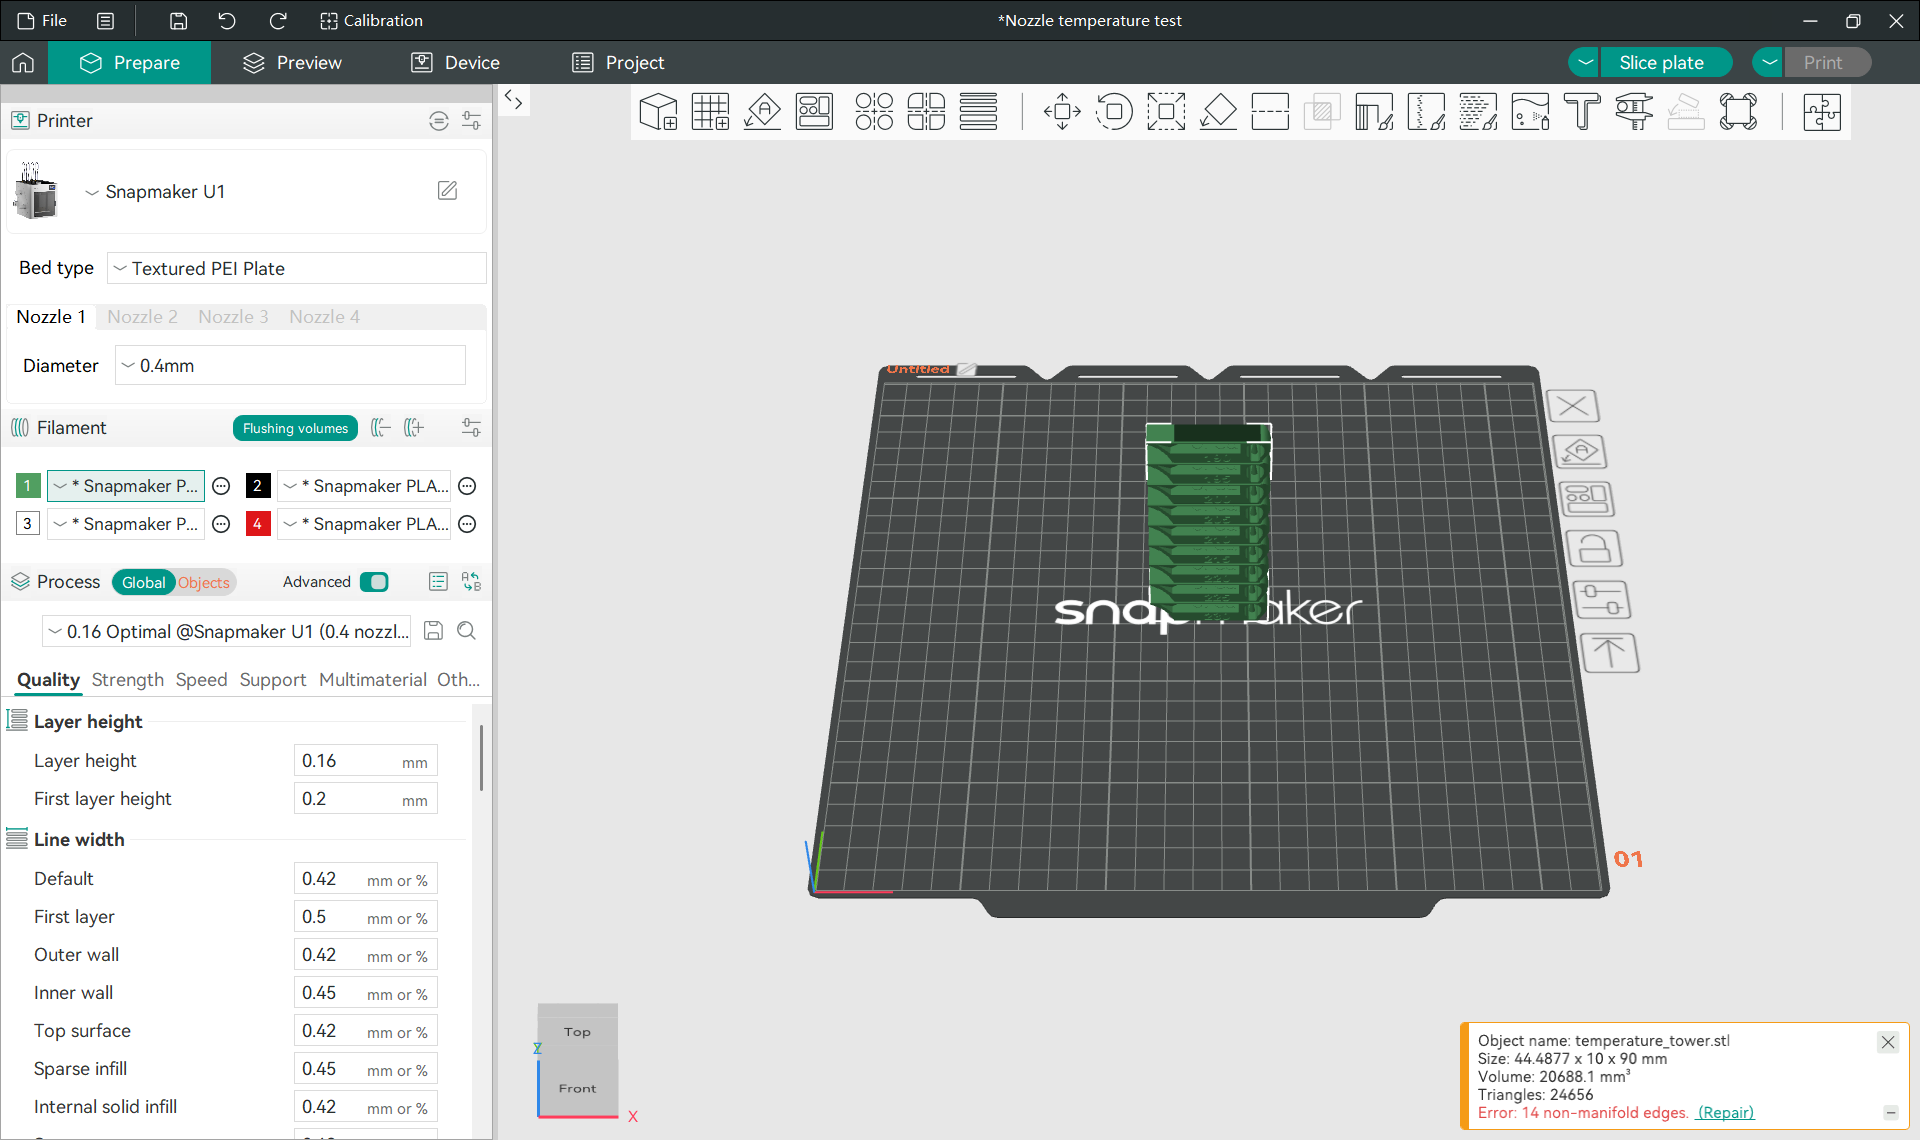
OKand the software will automatically generate a temperature tower model.
Temperature Tower Model: Every layer of the temperature tower looks exactly the same, but each layer is printed at a different temperature. The temperature of each layer is determined by the start and end temperatures set previously and the default temperature step of the software.
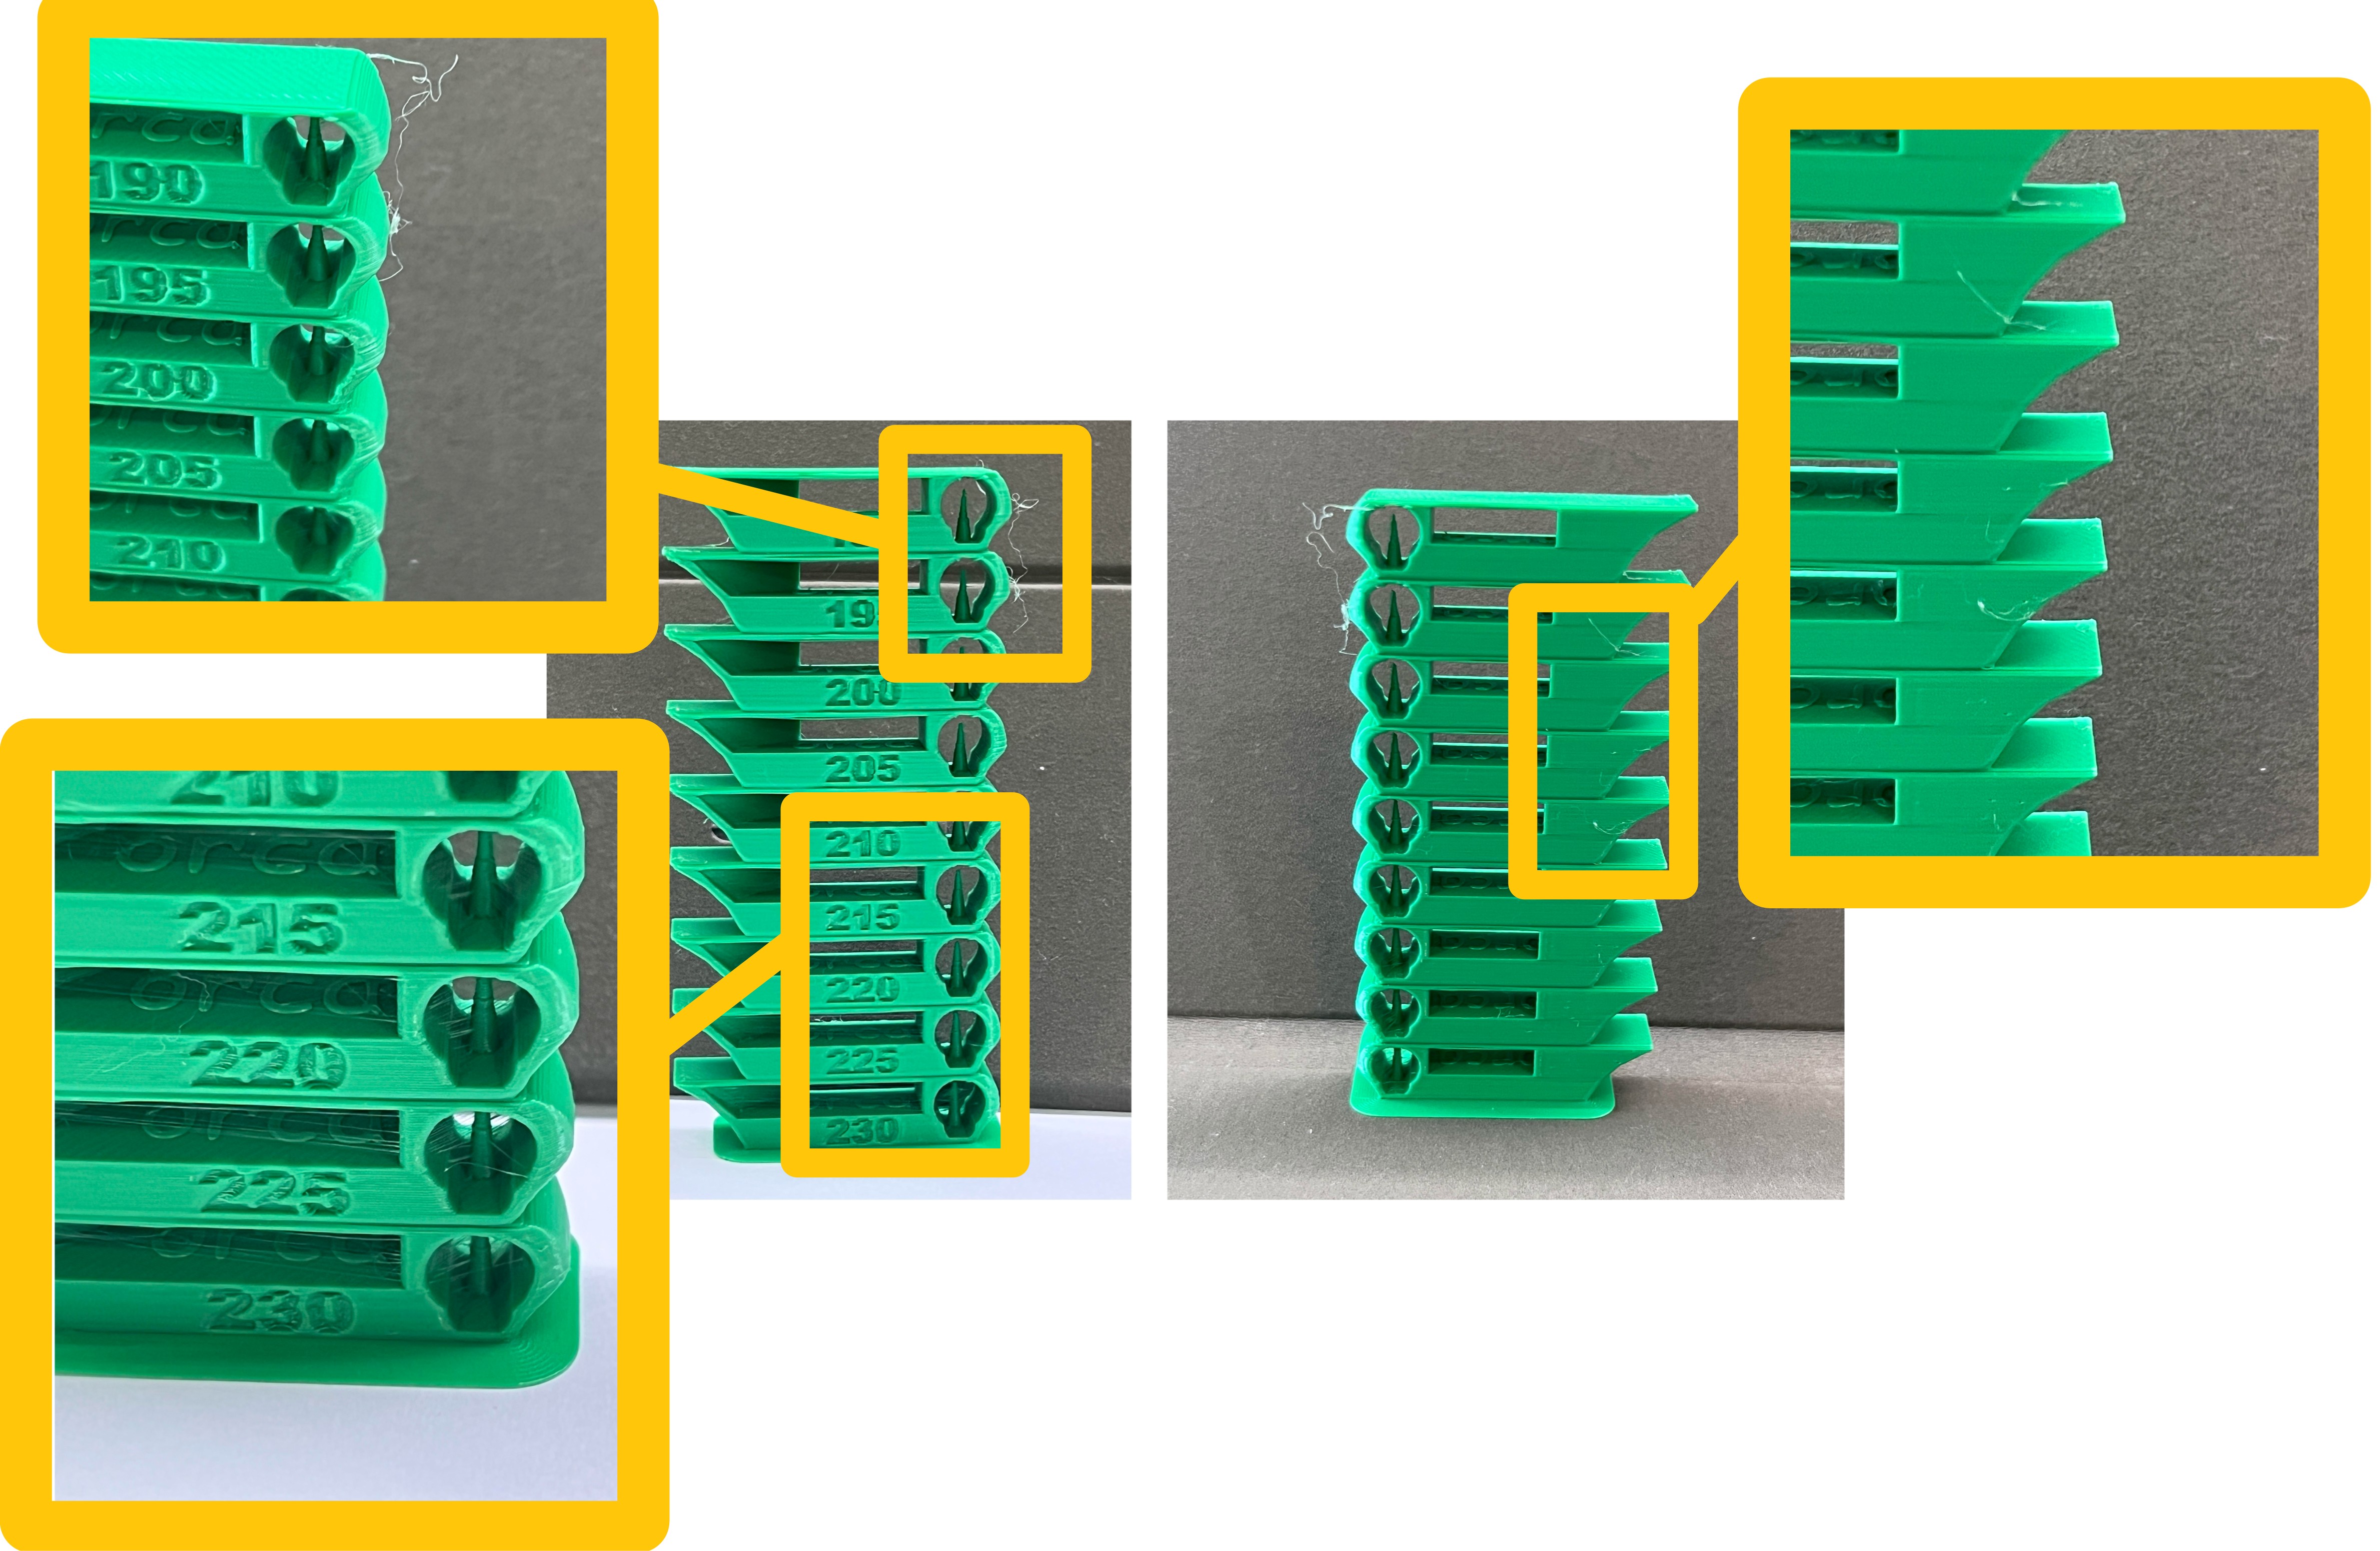
Therefore, a temperature tower is a common calibration tool. You simply need to observe which layer of the printed temperature tower has the best quality to find out the best print temperature for your current filament.
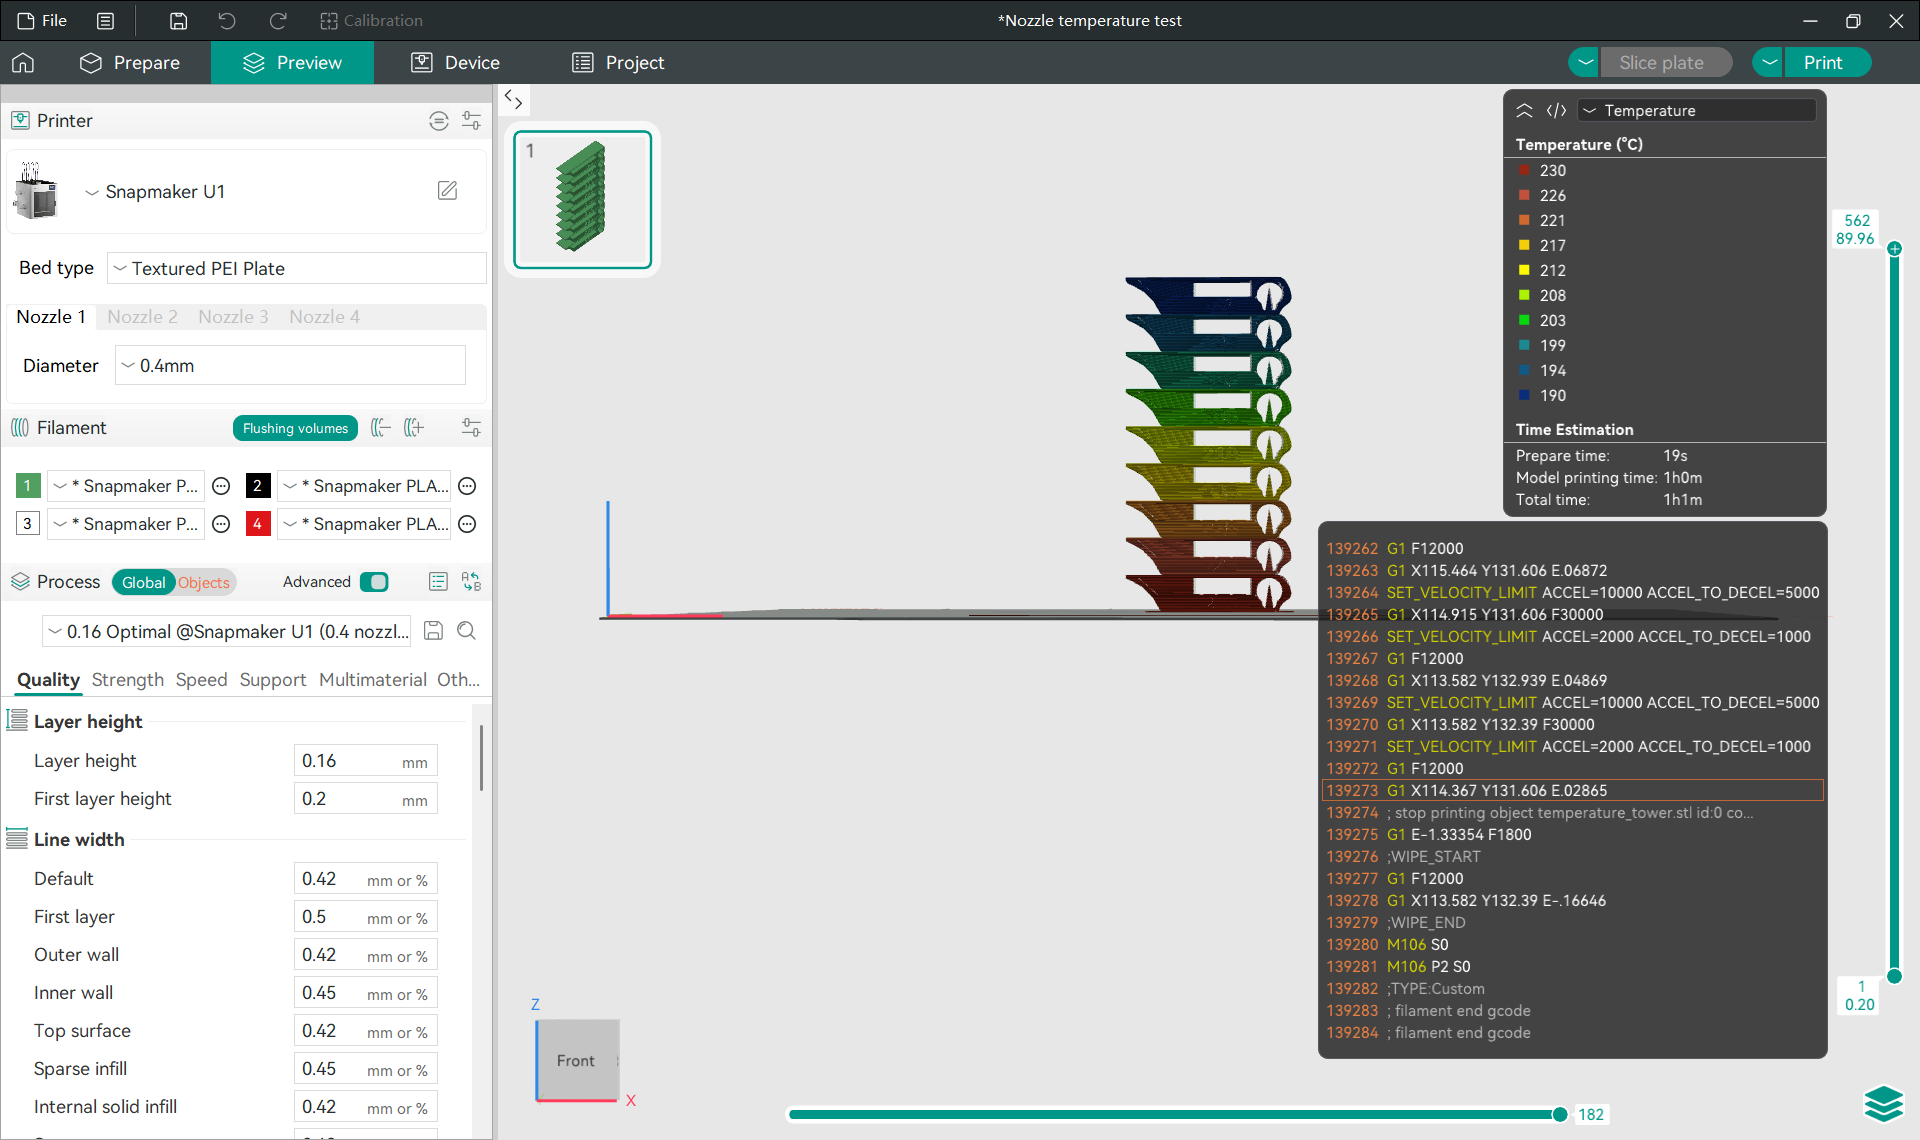
- Use your U1 to print the temperature tower model and examine each layer of the finished part. Eliminate layers with poor print quality and find the layer with the best print quality — the number marked on it is the optimal print temperature (in °C in this example).
For example, if you think the layer marked with 200 has the best print quality, then 200°C is your optimal print temperature.
¶ 2. Set the Optimal Print Temperature for Your Model
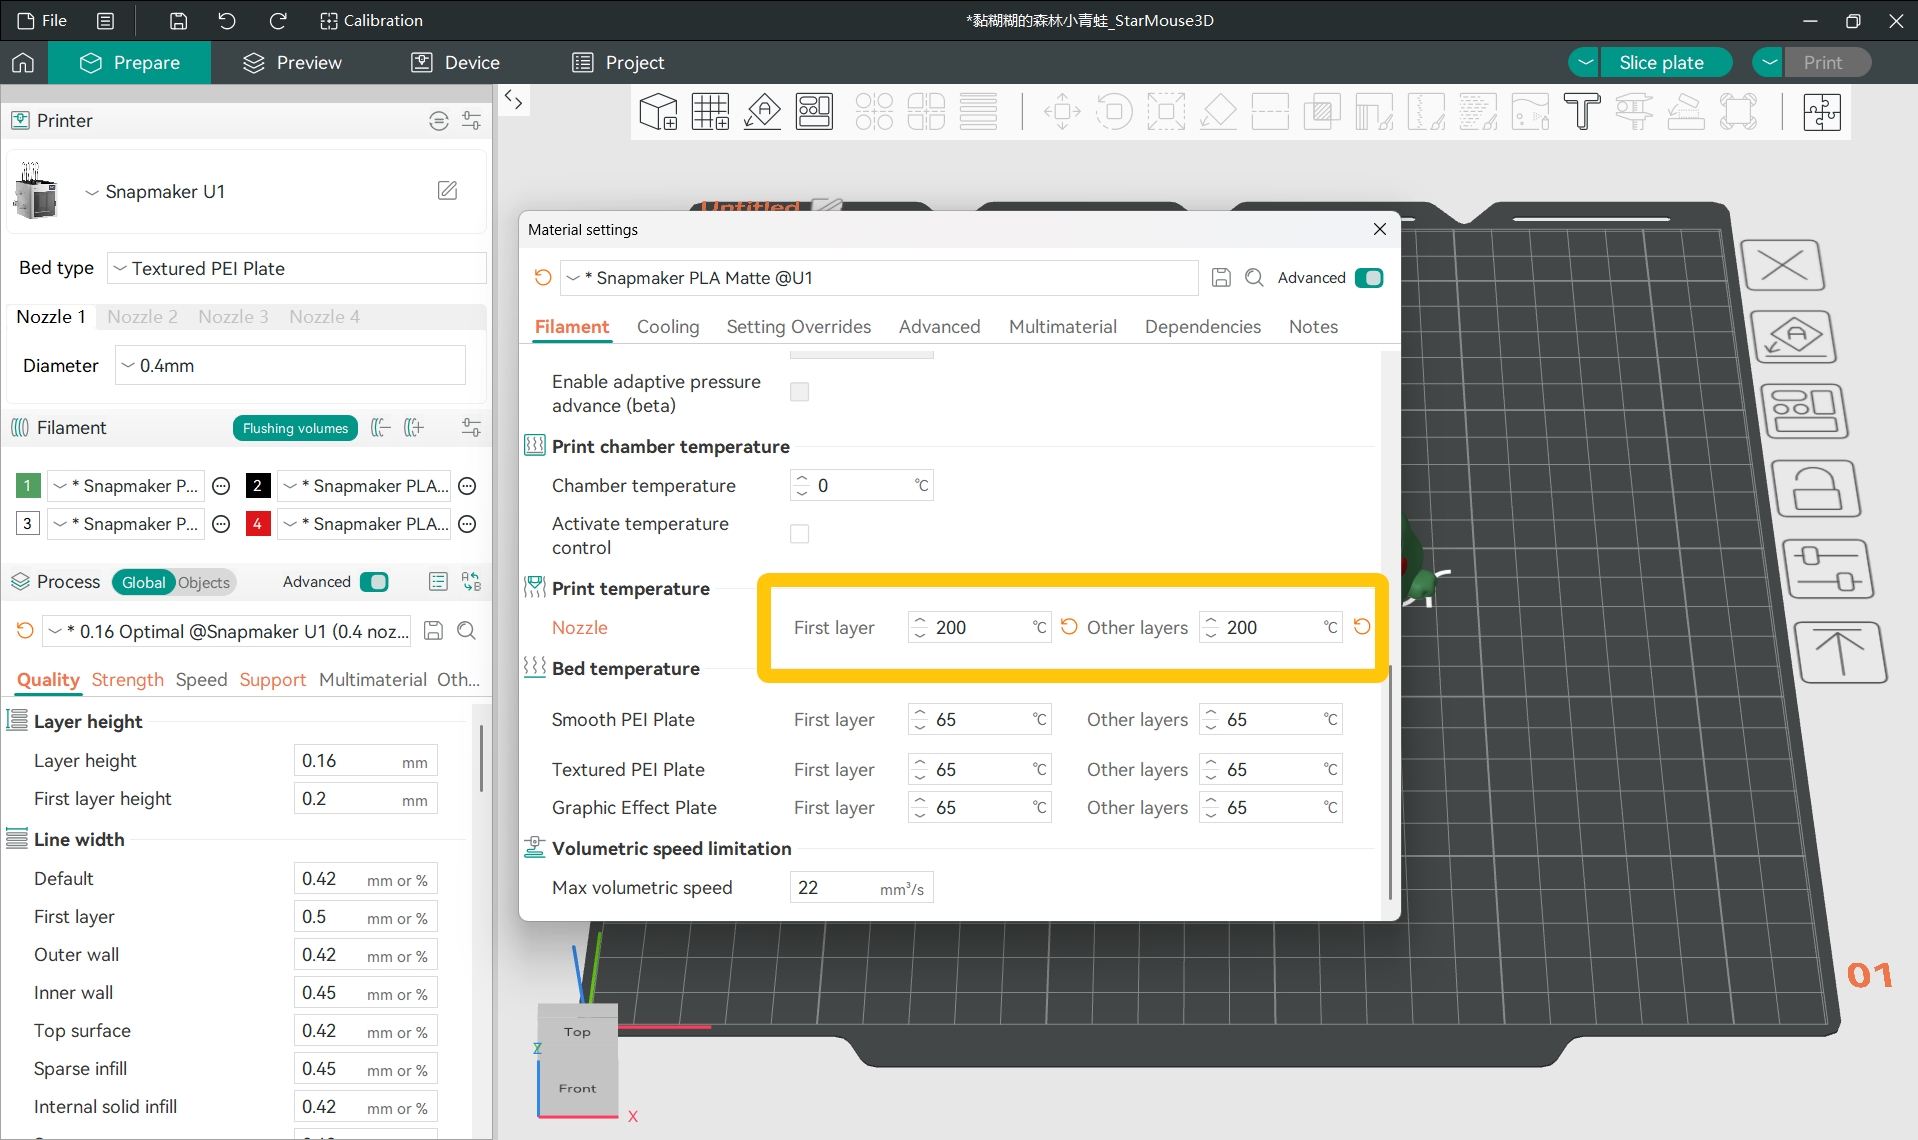
-
Add your project model.
-
In the
Filamentsection of the left side list, click the...>Editnext to the specific filament.
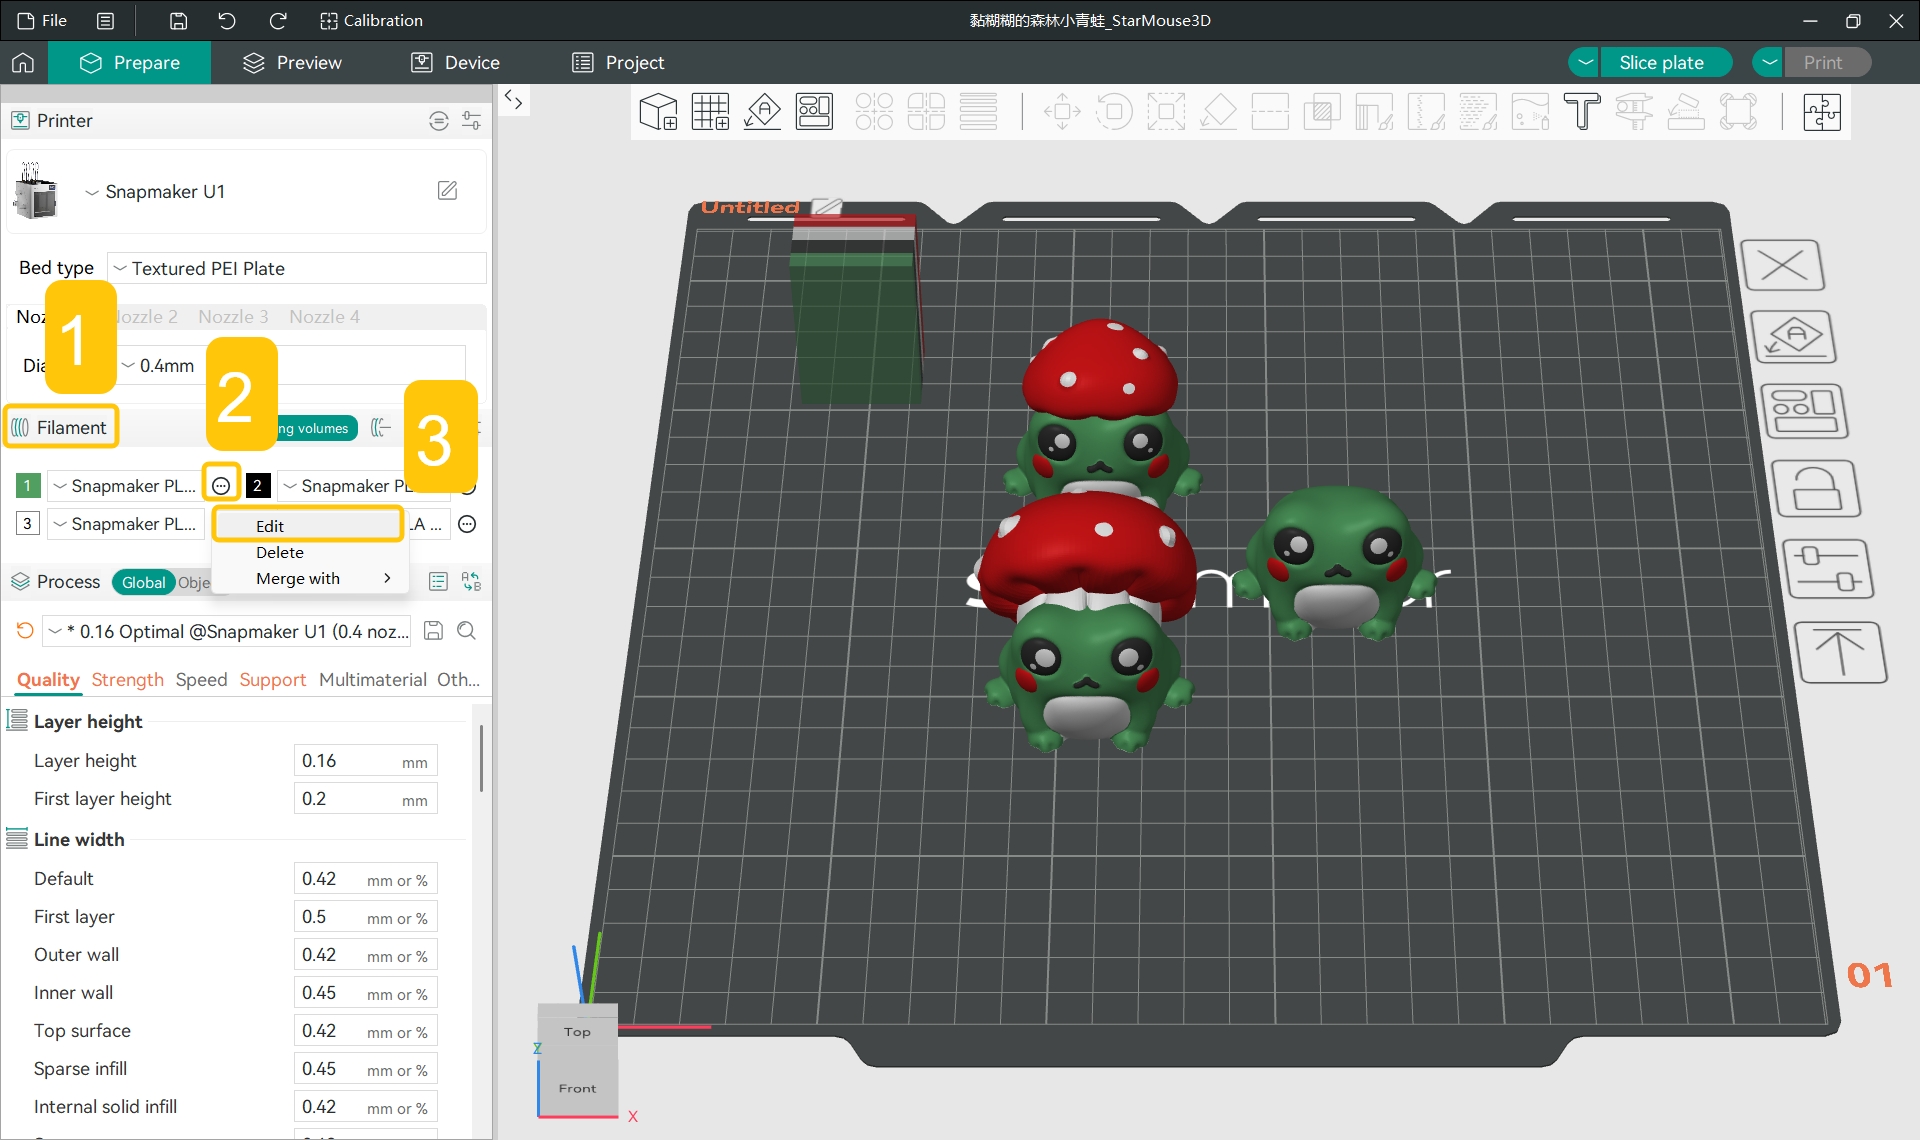
- In the pop-up window, find
Filament>Print temperature>Nozzle.
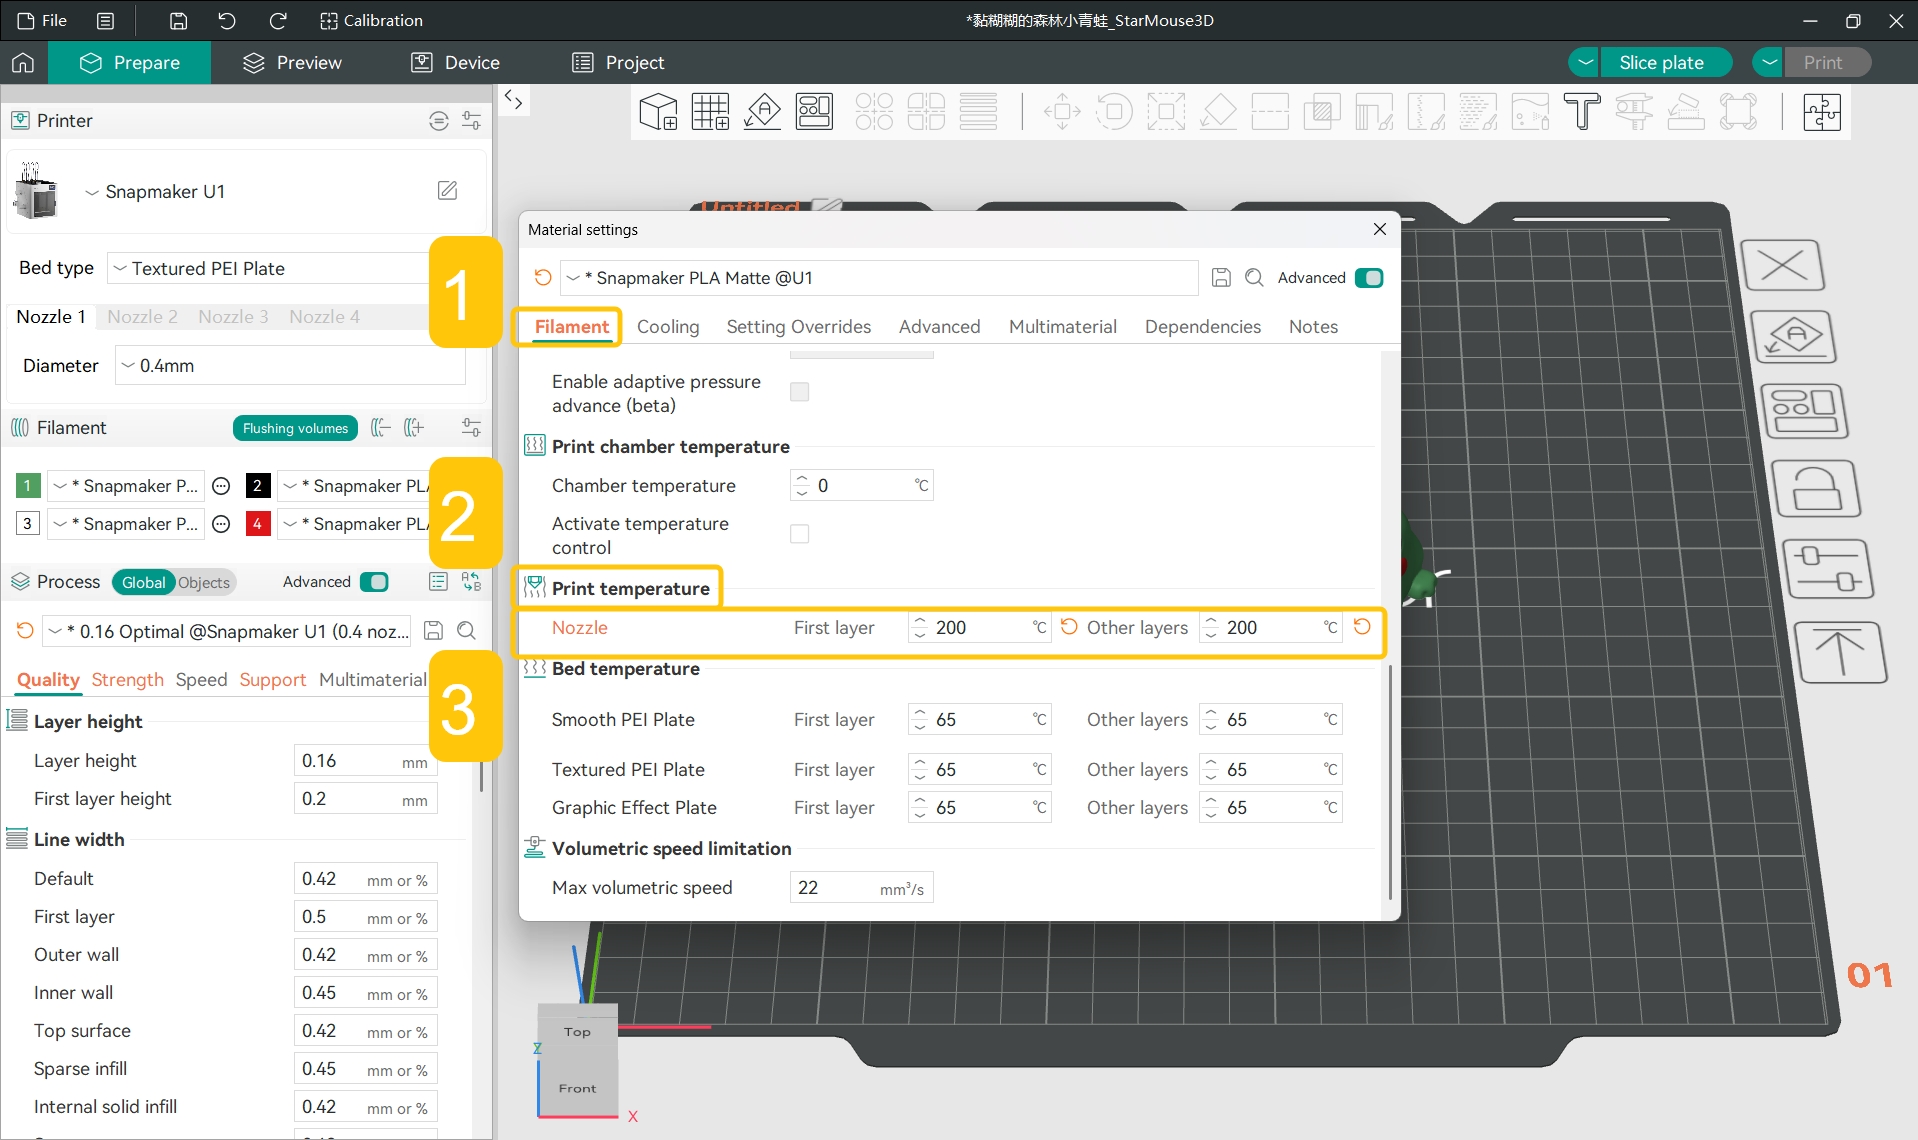
- Set the nozzle's first layer and other layers temperatures to the optimal print temperature.
For example, based on the previous test result, set the first layer and other layers temperature to 200 (in °C in this example).