¶ Introduction
This guide provides a detailed, step-by-step process for replacing the Y motor on the J1/J1s.
There are two versions of the Y motor: 4240 and 4248. The newer 4248 model is slightly larger in size, but there’s no difference in terms of installation.
4240: 42x40mm
4248: 42x48mm
¶ Tools Needed
- New Y motor with bearing
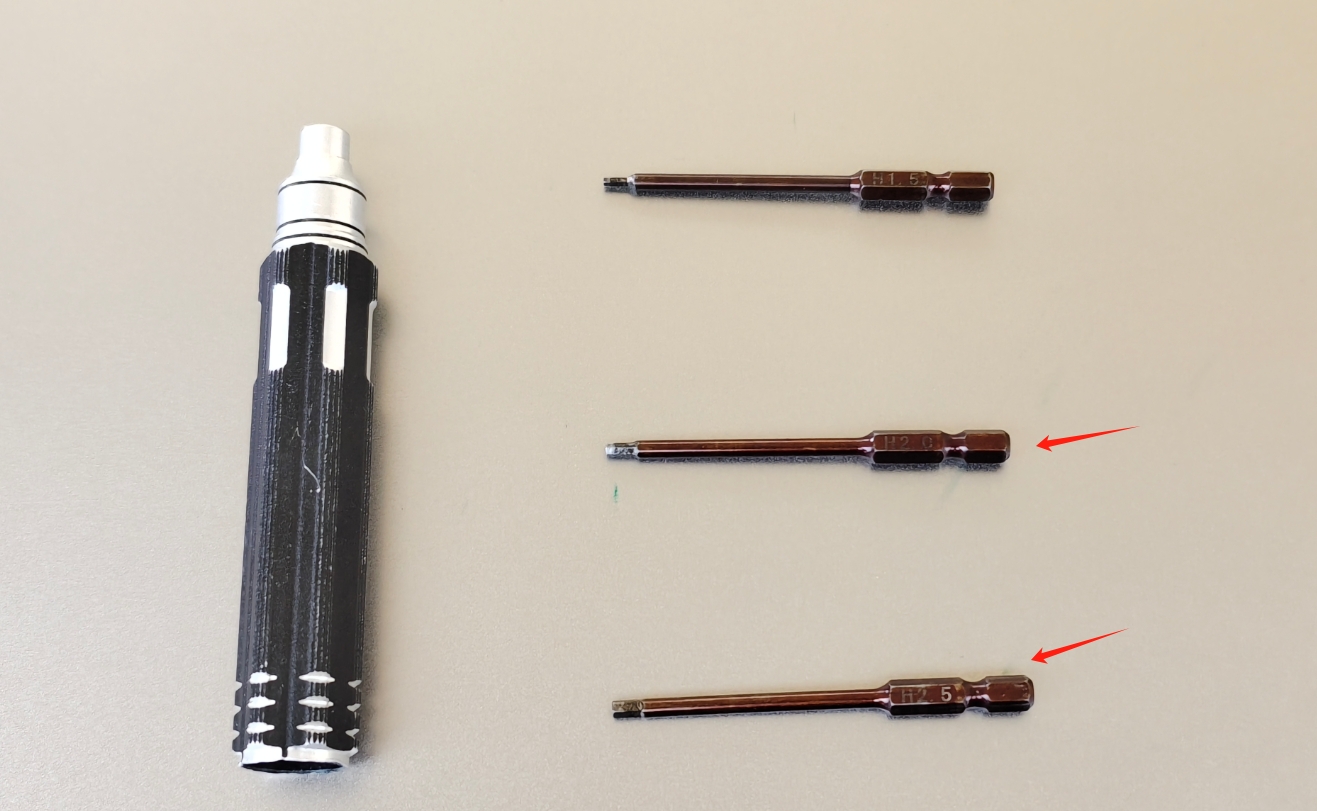
- H2.0 screwdriver
- H2.5 screwdriver
¶ Safety Precautions
When removing or reinstalling the part, please make sure the machine is powered off. To avoid any issues, be careful not to plug or unplug anything while the machine is on or accidentally connect things the wrong way.
¶ Step-by-Step Instructions
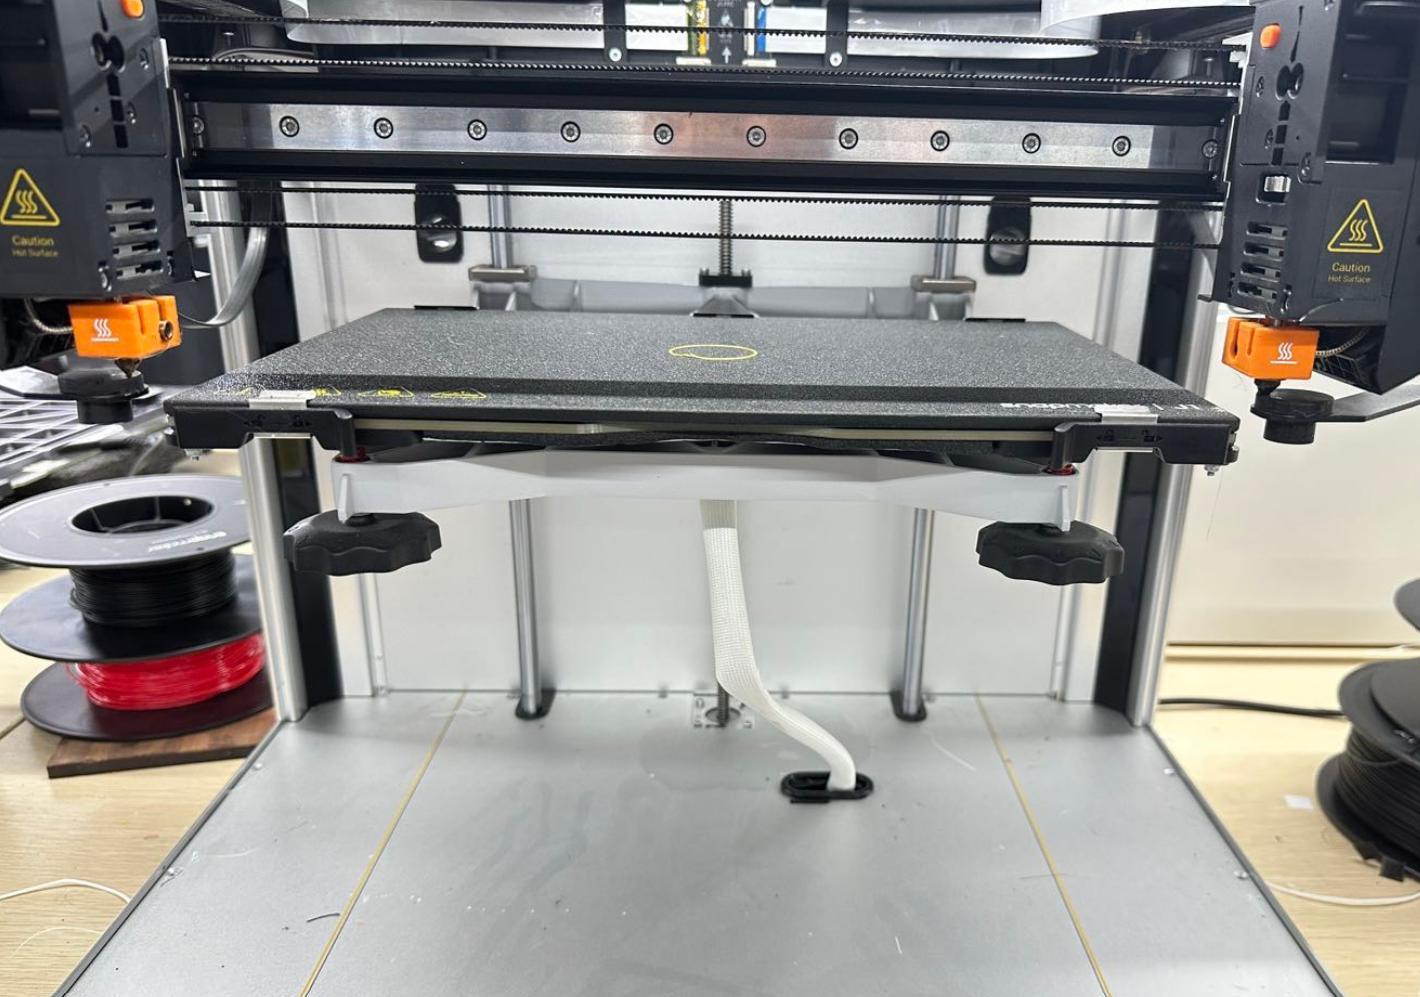
¶ Step 1 Move the heated bed to the top
In the touchscreen control settings, raise the heated bed to its highest position to make it easier to remove the bottom cover.
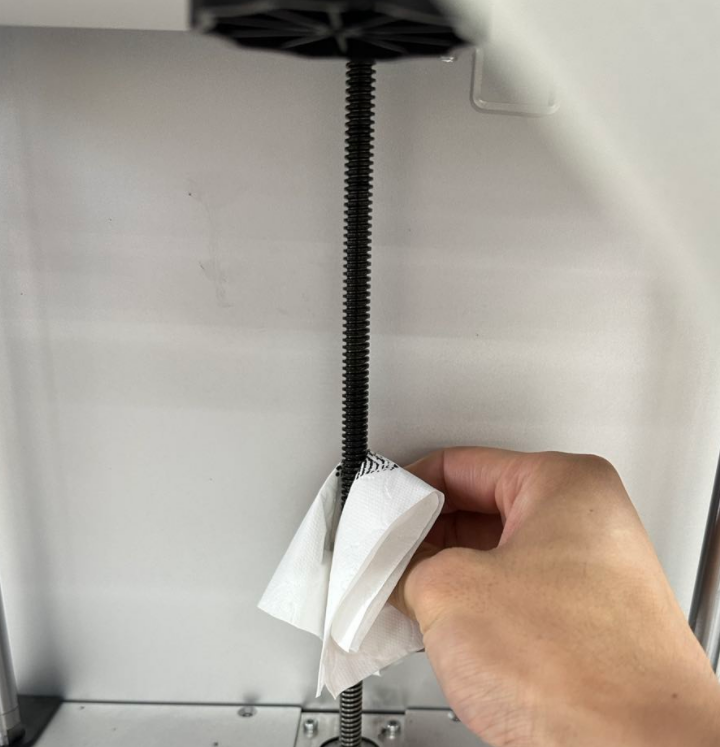
If the heated bed cannot be raised due to other reasons, please power off the machine and manually turn the lead screw clockwise to move the heated bed to the top.
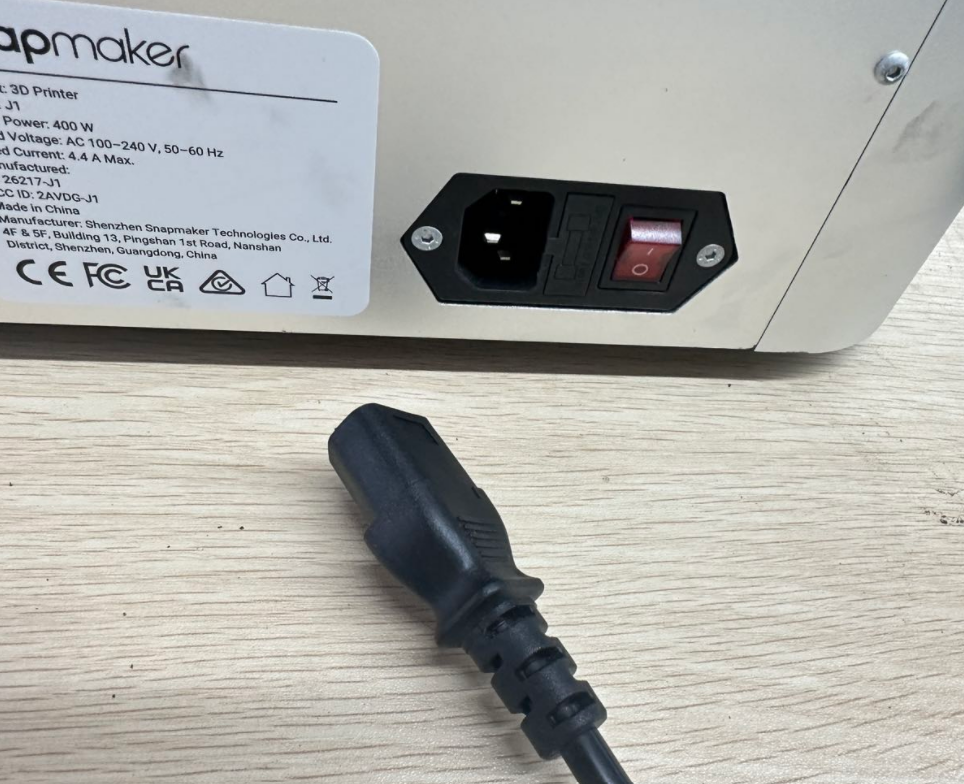
¶ Step 2 Power off and unplug the machine
¶ Step 3 Loosen screws securing the bottom cover
Use an H2.0 screwdriver to loosen the 14 screws securing the bottom cover and then take out the bottom cover.

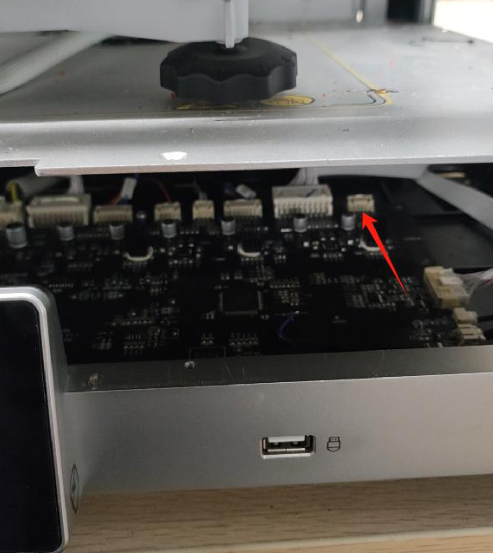
¶ Step 4 Disconnect the cable between the Y motor and the mainboard
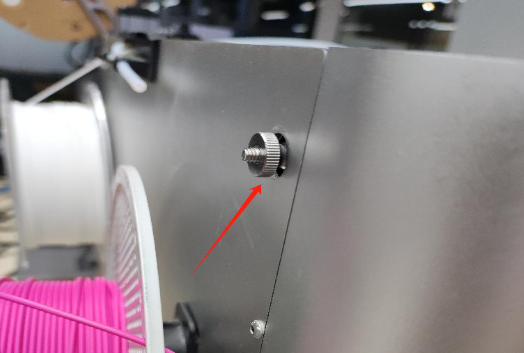
¶ Step 5 Loosen the knurled M4 nut
Loosen the knurled M4 nut located at the back of the machine. If you can't loosen it by hand, please use a wrench or similar tool. This nut is used to tension the belt.
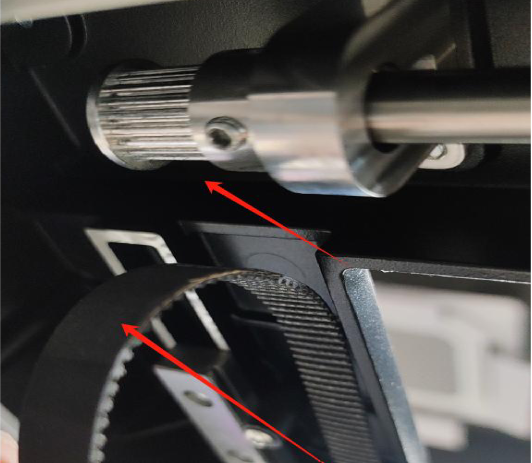
¶ Step 6 Remove the timing belt
Remove the timing belt from the Y-axis idler pulley.
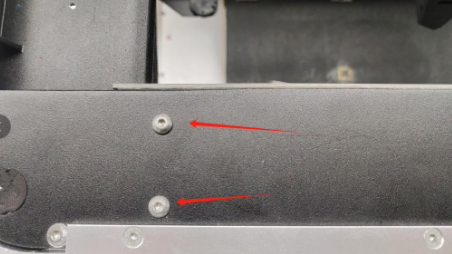
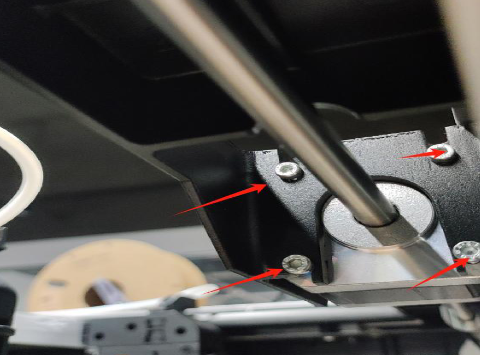
¶ Step 7 Remove the screws securing the bearing blocks
Use an H2.5 screwdriver to remove the screws securing the bearing blocks at both ends.
¶ Step 8 Remove the screws securing the Y motor
Use an H2.5 screwdriver to remove the screws securing the Y motor.
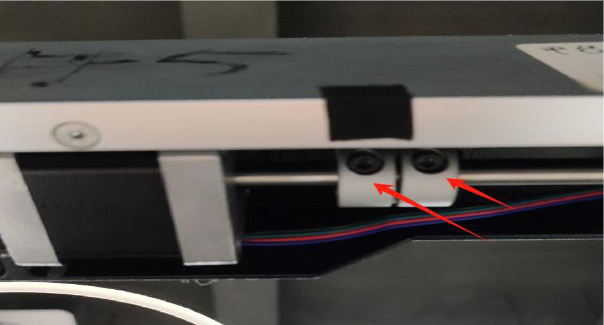
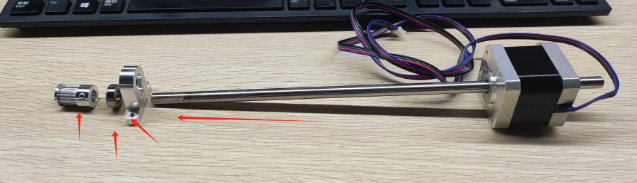
¶ Step 9 Loosen the two screws on the rigid coupling
Use an H2.5 screwdriver to loosen the two screws on the rigid coupling, then slide the coupling to the right.
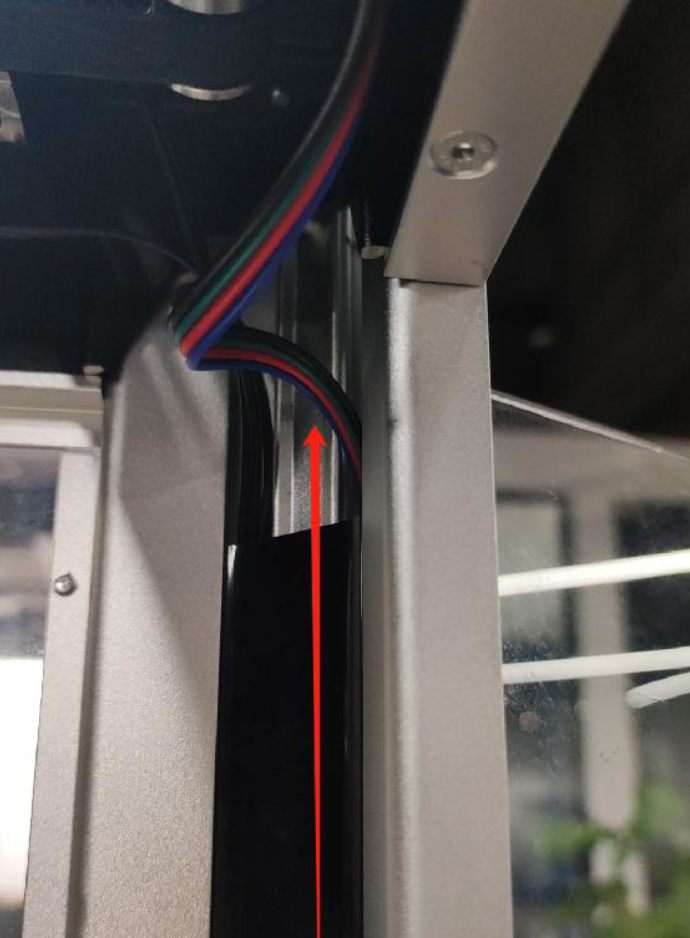
¶ Step 10 Take out the Y-axis motor assembly
Pull the motor cable up along the column, then remove the Y motor assembly along with the bearing bracket.
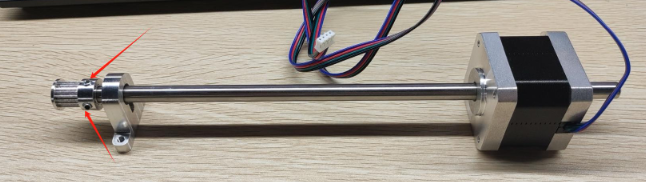
¶ Step 11 Remove the timing pulley
Place the removed Y motor assembly flat on the table, then use an H2.0 screwdriver to loosen the two screws on the timing pulley. After that, remove the timing pulley and the bearing block.
¶ Step 12 Install the new Y motor
¶ Contact Support
If you encounter difficulties during the installation process and wish to seek assistance, kindly submit a support ticket through https://snapmaker.formcrafts.com/support-ticket to contact Snapmaker Support.
Our dedicated support team will be more than willing to assist you in resolving the issue.