After exporting G-code to workspace, you can set the work origin for 3-axis laser machining on Luban.
Make sure that Luban has been connected with the machine.
¶ Procedures
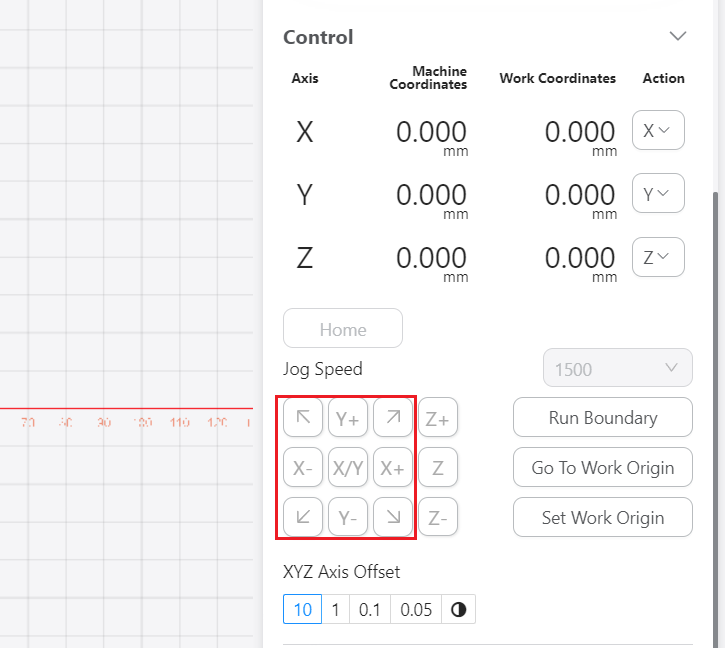
- On the control panel, click X+, Y+ or X-, Y- button or direction arrows to move the laser module to where the work origin of the X and Y axes will be.
-
Tap Run Boundary to check if the work origin of the X and Y axes is set properly. If any part of the boundary trailed by the laser module goes outside of the material, reset the work origin of the X and Y axes, and run the boundary again.
-
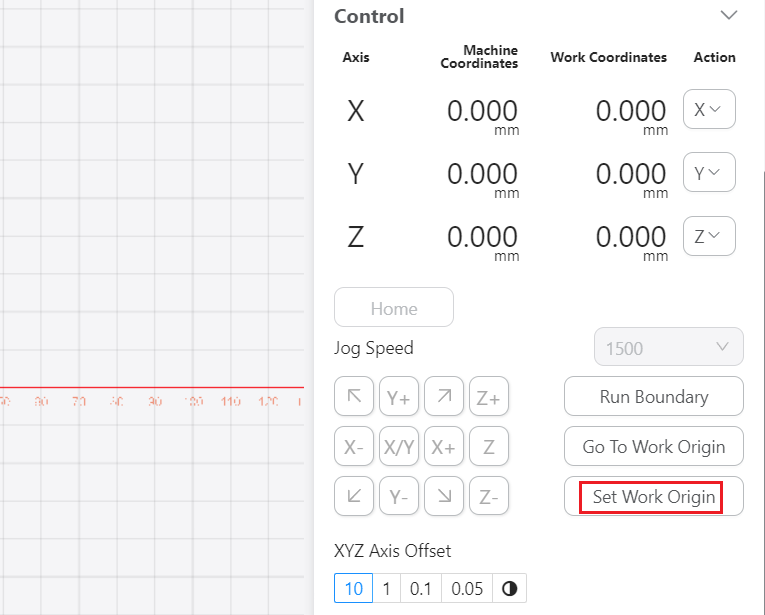
Click Set Work Origin to save the current position of the toolhead as the work origin.
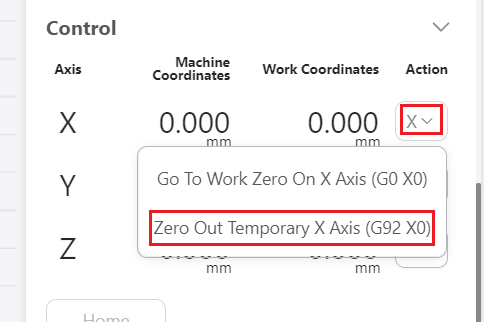
You can also seperately set the work origin for each axis. Take X-axis for example, first tap X+ or X- button or direction arrows to move the laser module to where the work origin of the X-axis will be, then click X > Zero Out Temporary X Axis.
After exporting G-code to workspace, you can set the work origin for 3-axis laser machining on Luban.
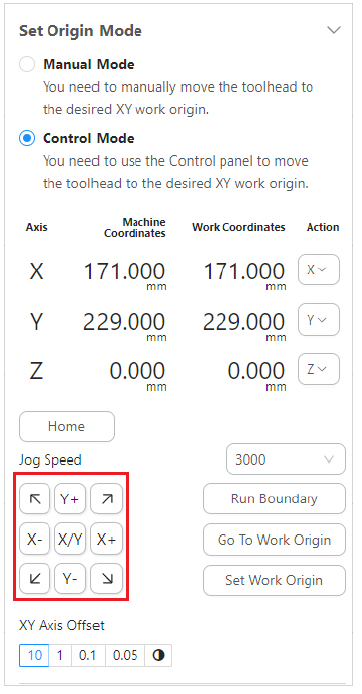
When you want to set the work origin via Luban's Control Mode, make sure that the machine is in Motor Power-on Mode.
¶ Procedures
-
Select Control Mode.
-
On the control panel, click X+, Y+ or X-, Y- button or direction arrows to move the laser module to where the work origin of the X and Y axes will be.
-
Tap Run Boundary to check if the work origin of the X and Y axes is set properly. If any part of the boundary trailed by the laser module goes outside of the material, reset the work origin of the X and Y axes, and run the boundary again.
-
Click Set Work Origin to save the current position of the toolhead as the work origin.
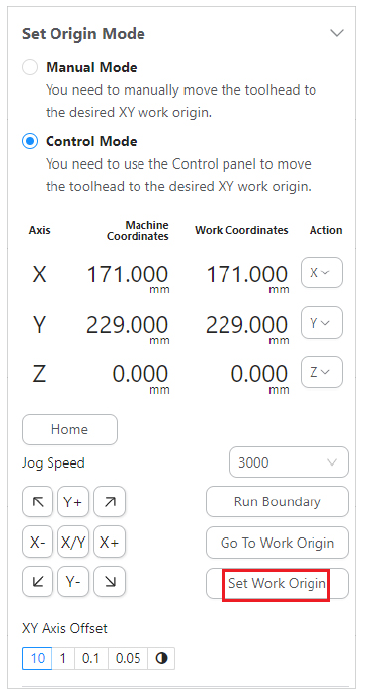
You can also seperately set the work origin for each axis. Take X-axis for example, first tap X+ or X- button or direction arrows to move the laser module to where the work origin of the X-axis will be, then click X > Zero Out Temporary X Axis.