-
If you need to convert a glass printing platform into a PEI sheet printing platform, refer to "Converting into PEI Sheet Printing Platform".
-
If you need to replace the soft magnetic sticker, refer to "Detaching the Soft Magnetic Sticker".
-
If you need to replace the PEI sheet, refer to "Placing the PEI Sheet & Heated Bed Leveling".
-
If you want to learn how to use the PEI sheet, refer to "How to Use the PEI Sheet".
Once converted from a glass printing platform to a PEI sheet printing platform, the process is essentially irreversible. Reverting involves complex disassembly and poses risks of missing parts or potential damage due to different components. If you'd like to revert to the glass printing platform, we recommend contacting our customer service to purchase the required parts. Please note that any issues with the machine caused by this reversal will no longer be covered under warranty.
To complete the installation, you can either watch the video, or follow the online instructions below.
¶ Before You Start
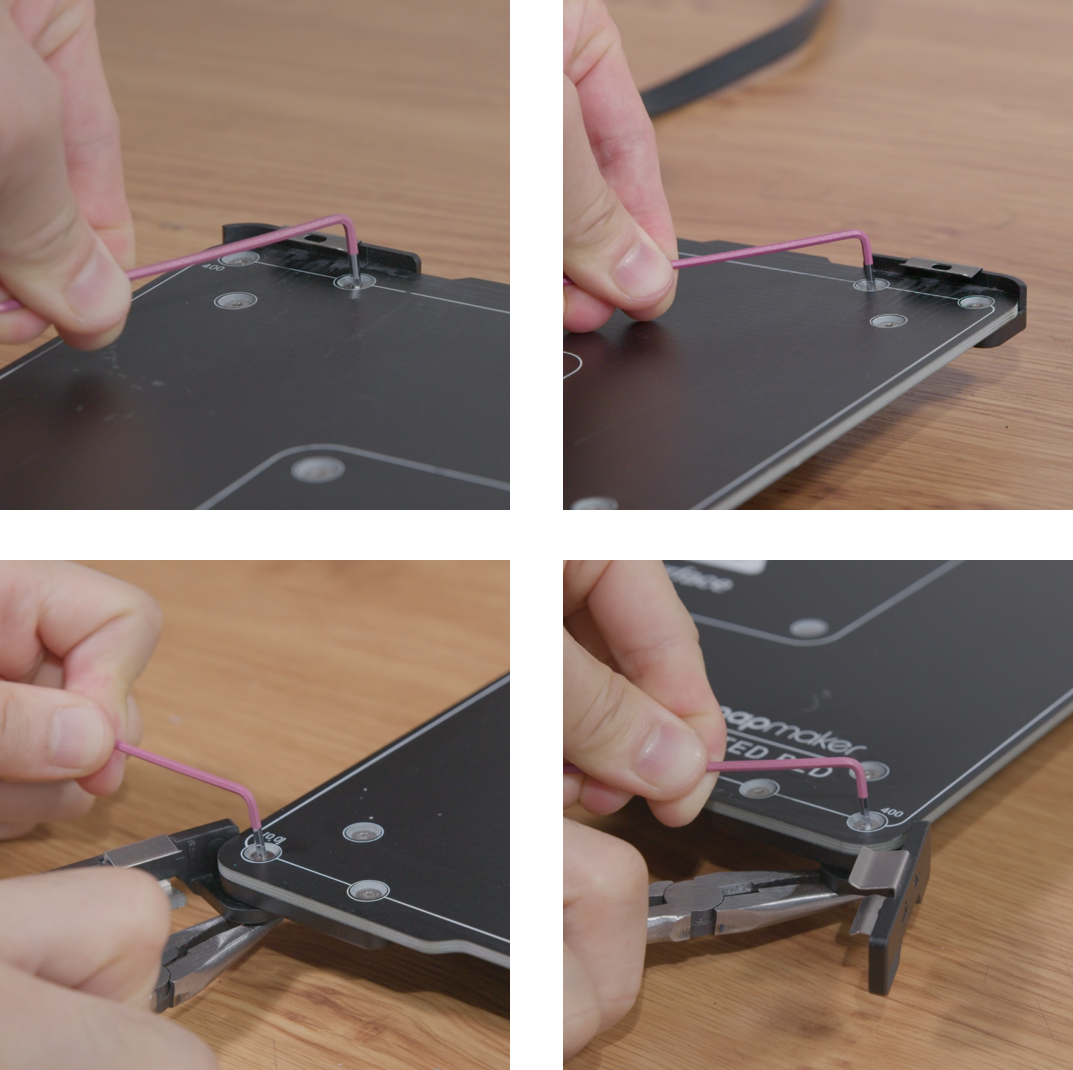
Tools such as a wrench or pliers are required to detach the clamps from the printing platform. If you do not have tools, you can download the 3D model from the Wiki page and print an alternative tool.

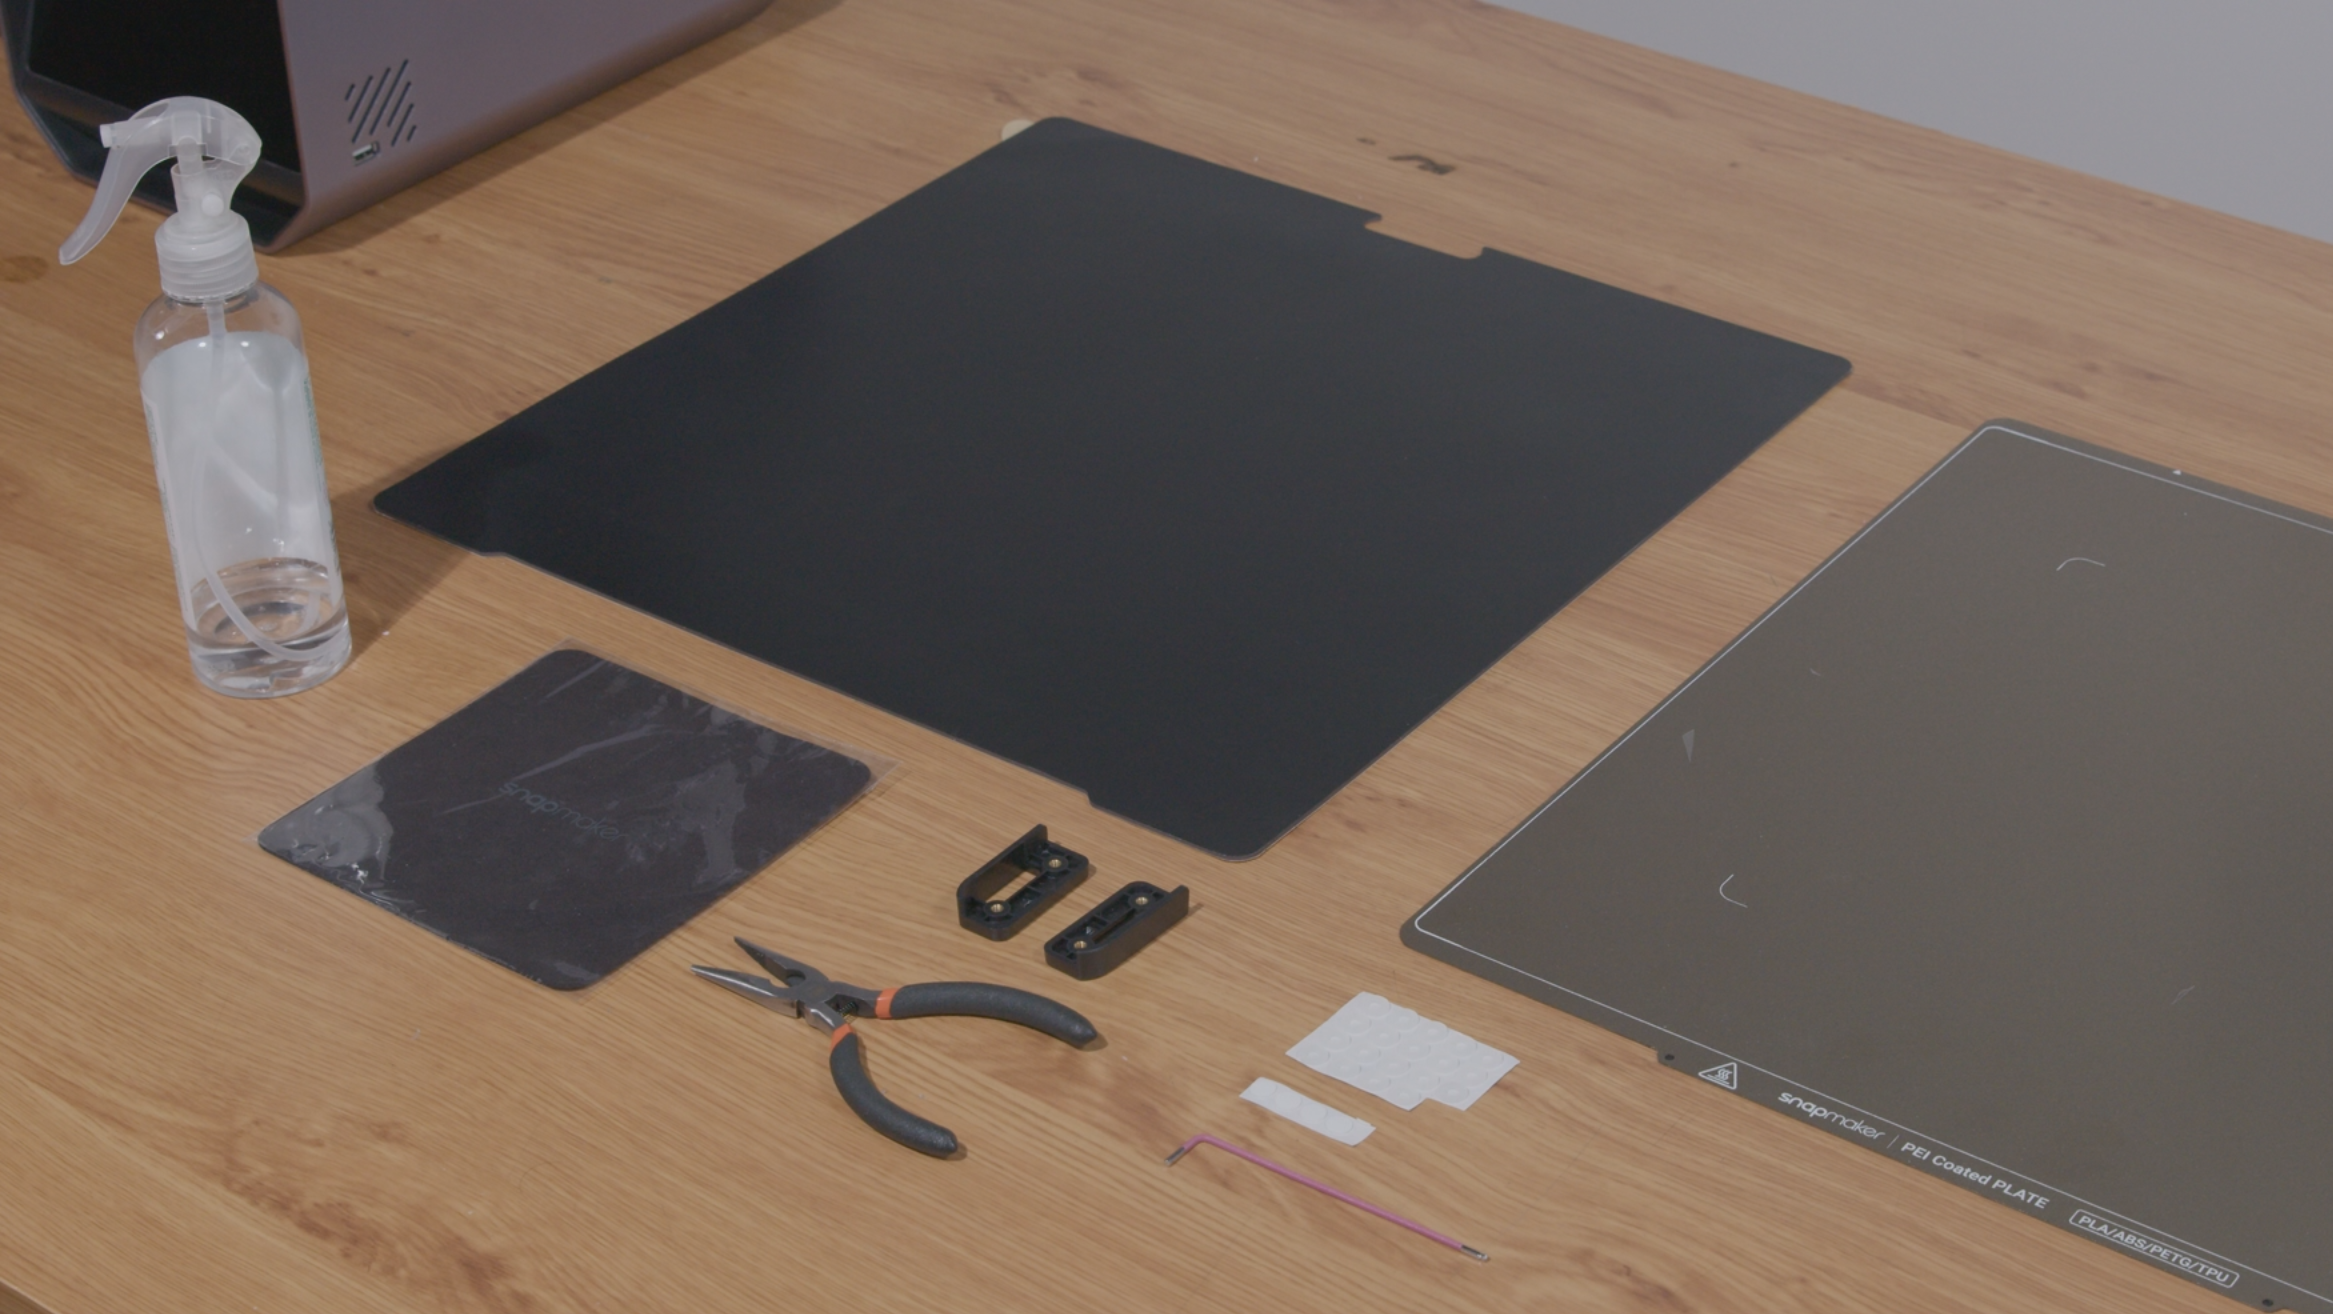
¶ Required Tools and Parts
- Soft Magnetic Sticker × 1
- PEI Sheet × 1
- Left Holder × 1
- Right Holder × 1
- Ethyl Alcohol × 1
- Wiping Cloth × 1
- Perforated Shim × 20
- Non-perforated Shim × 2
- H2.0 Hex Key × 1
- Pliers × 1
¶ Procedures
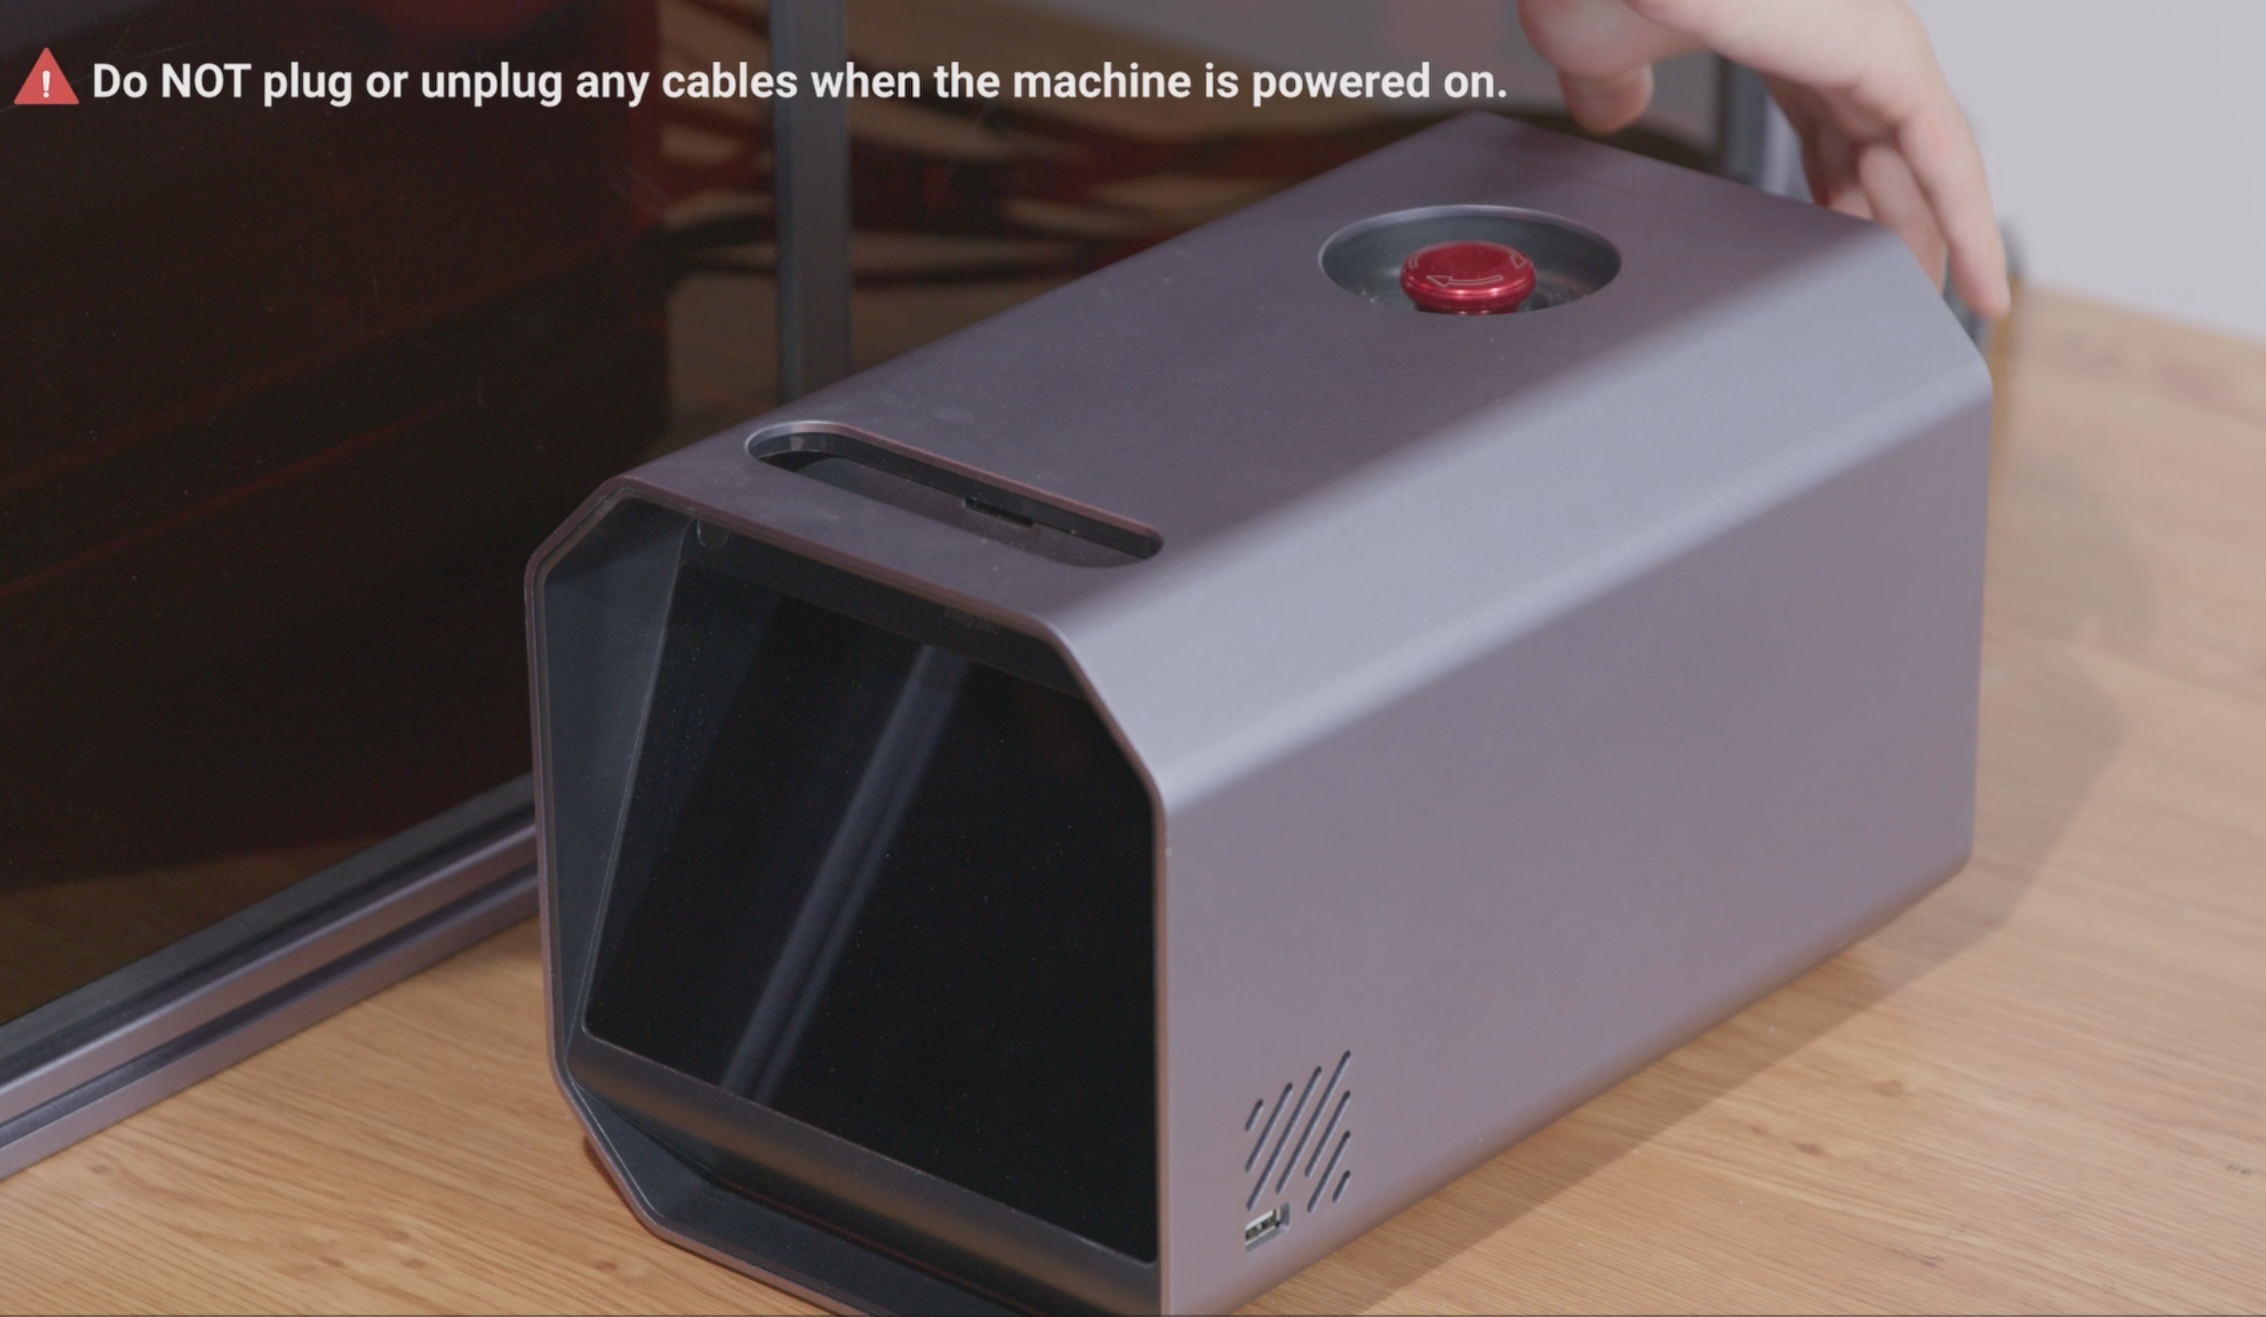
- Power off the machine.
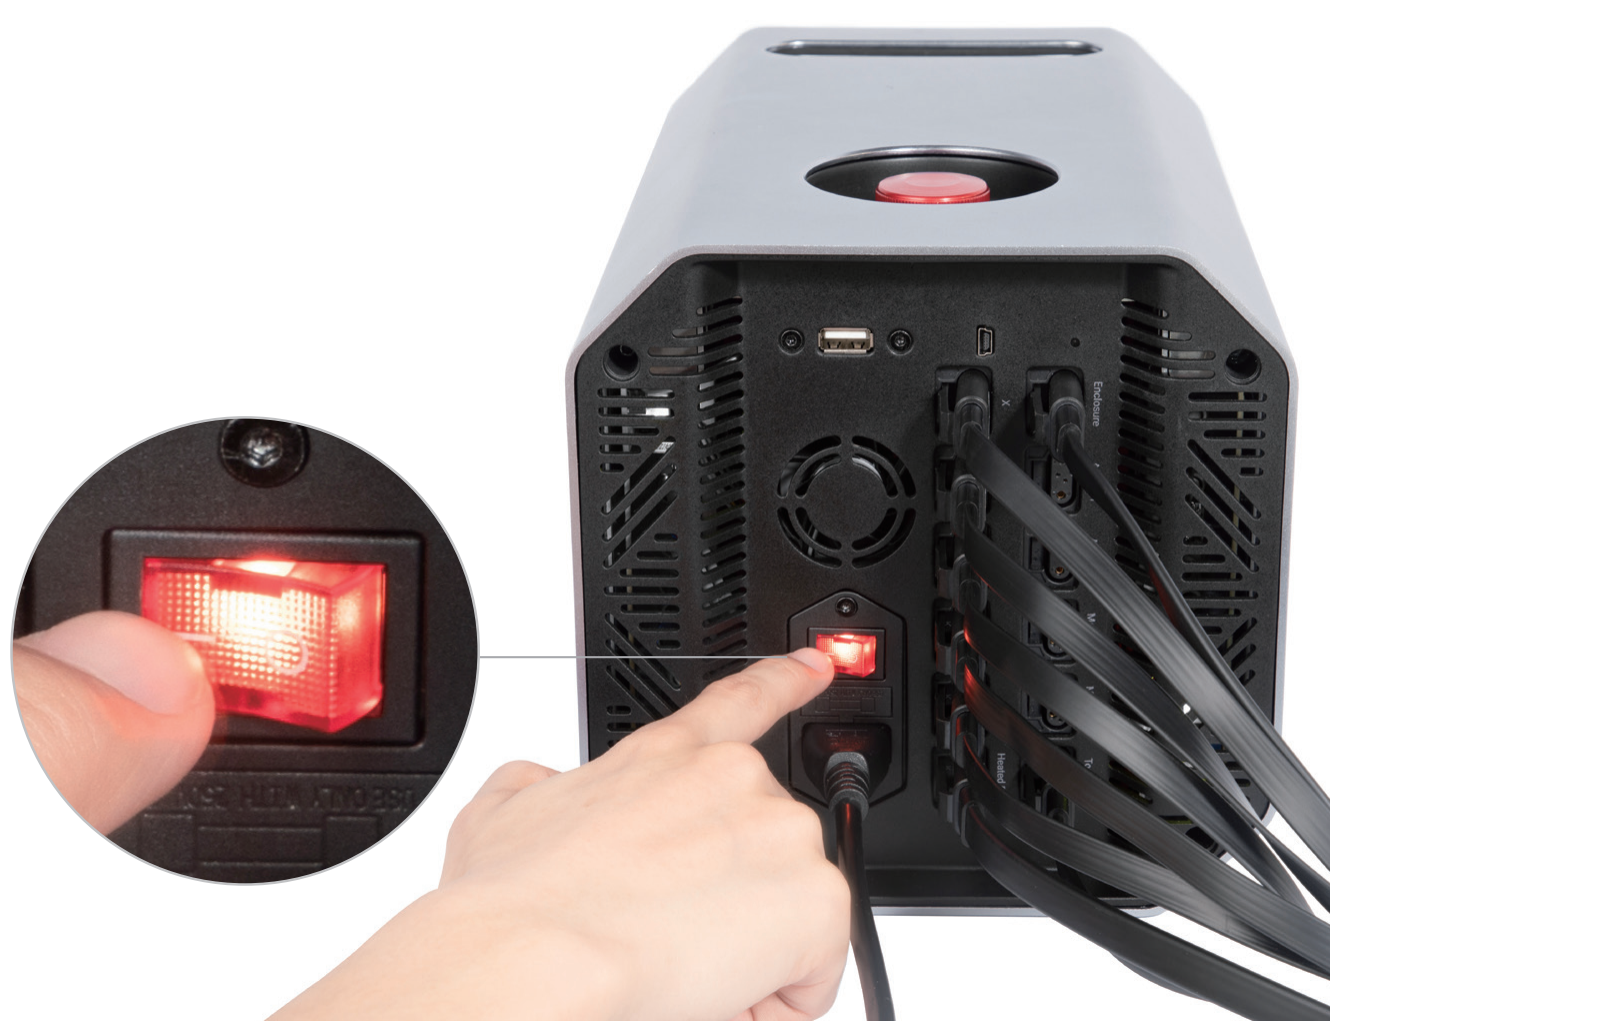
Do NOT plug or unplug any cables when the machine is powered on.
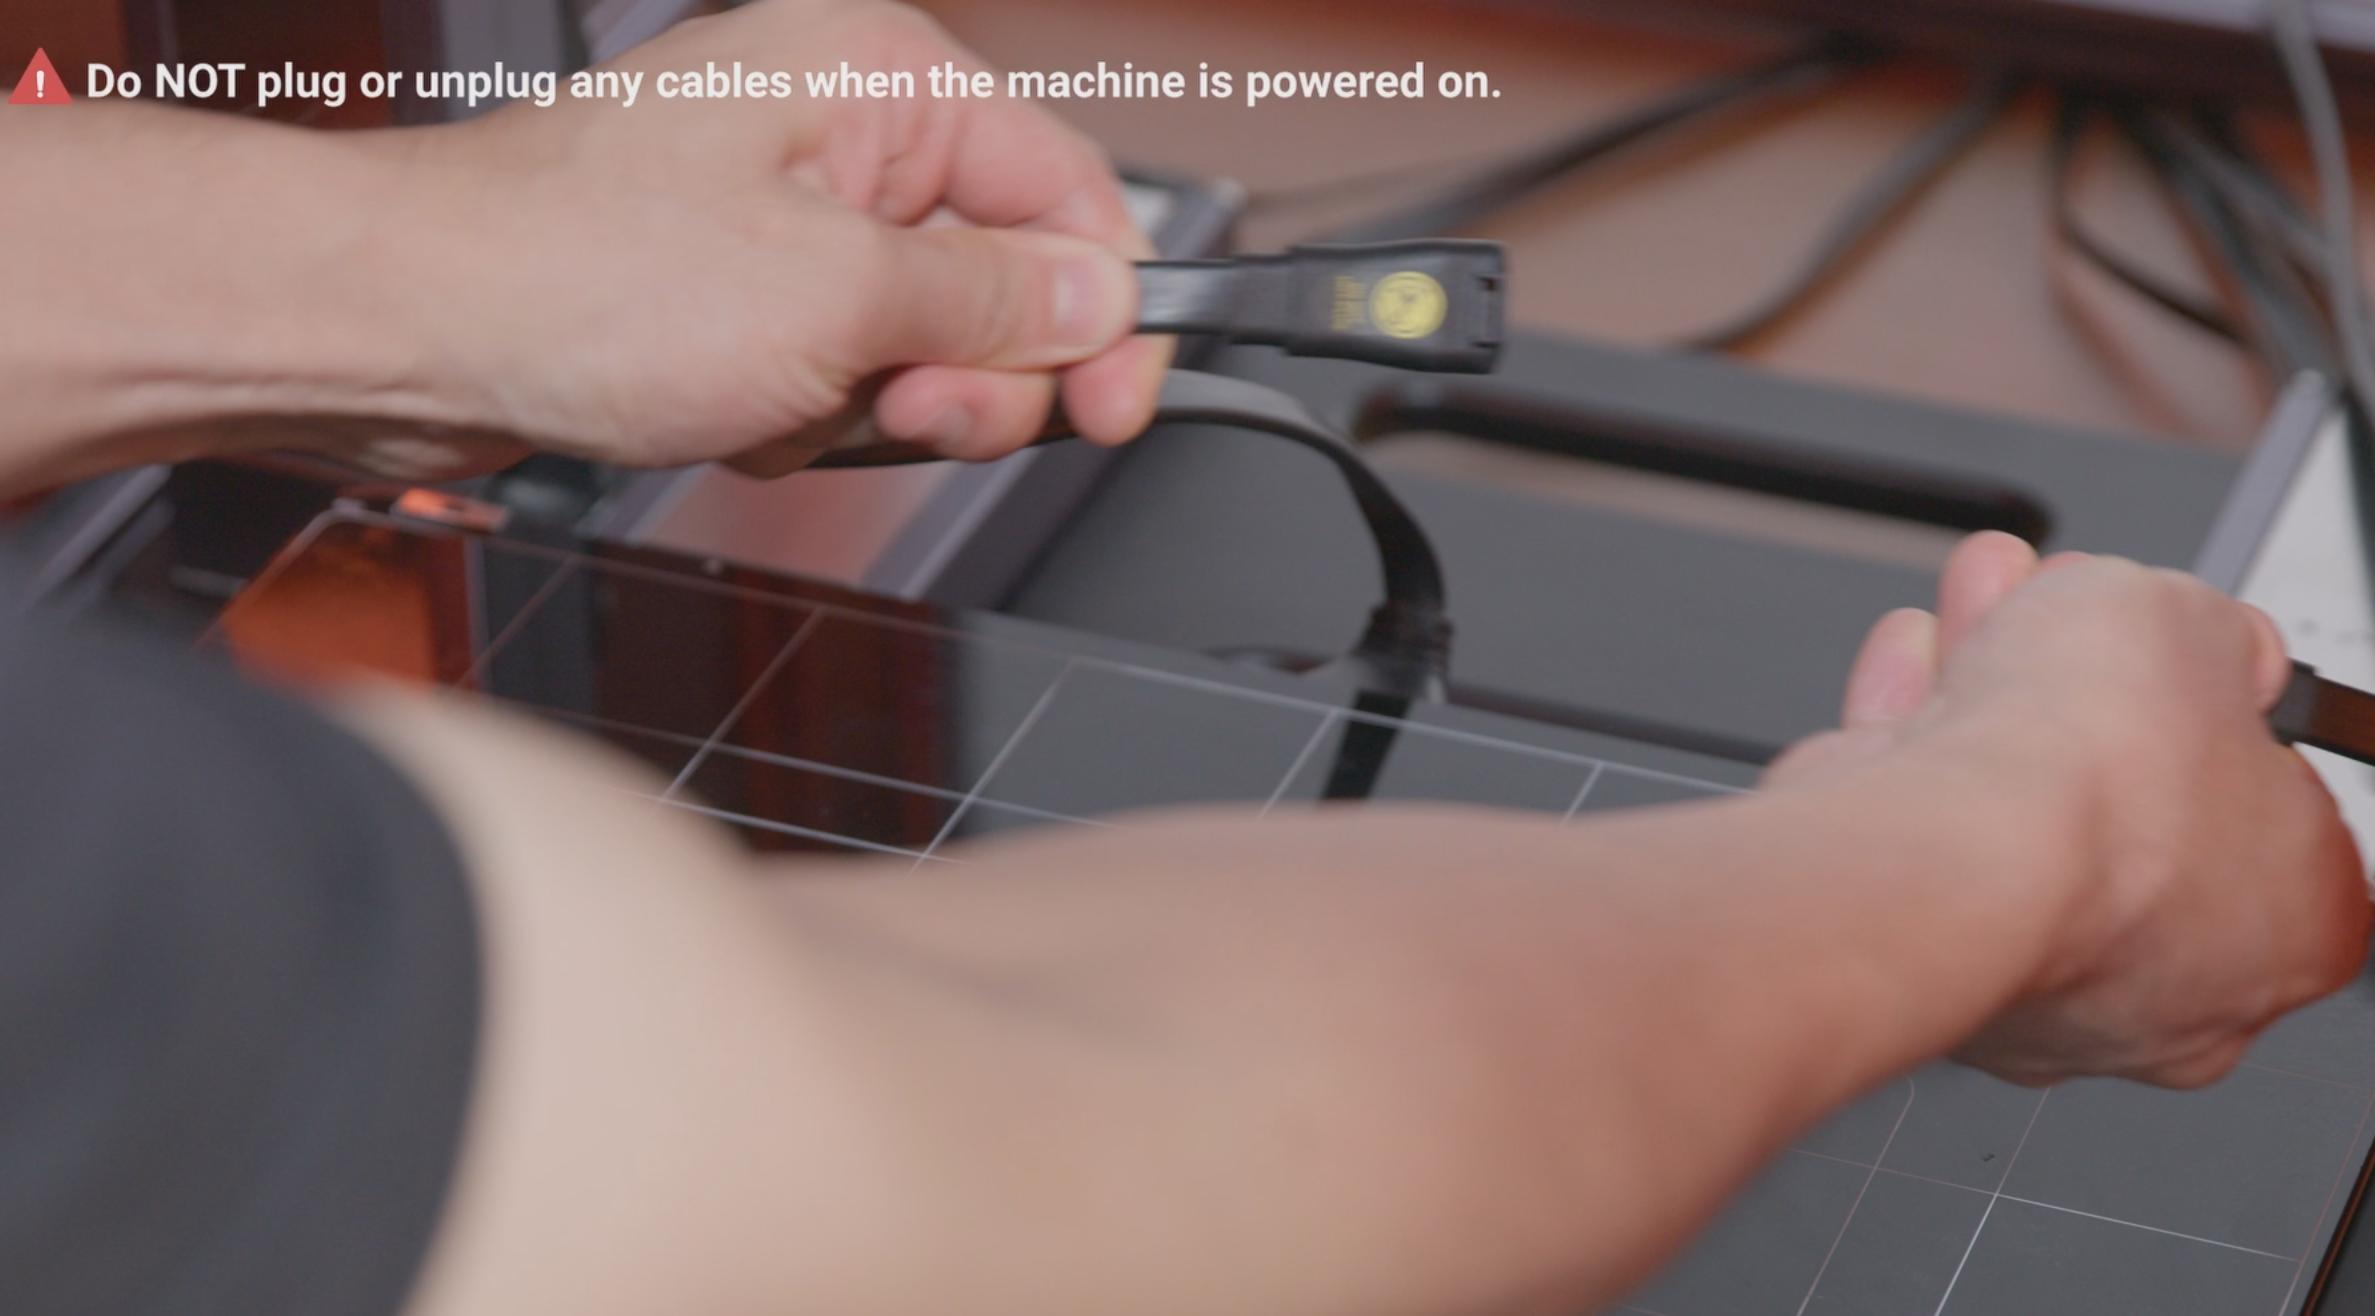
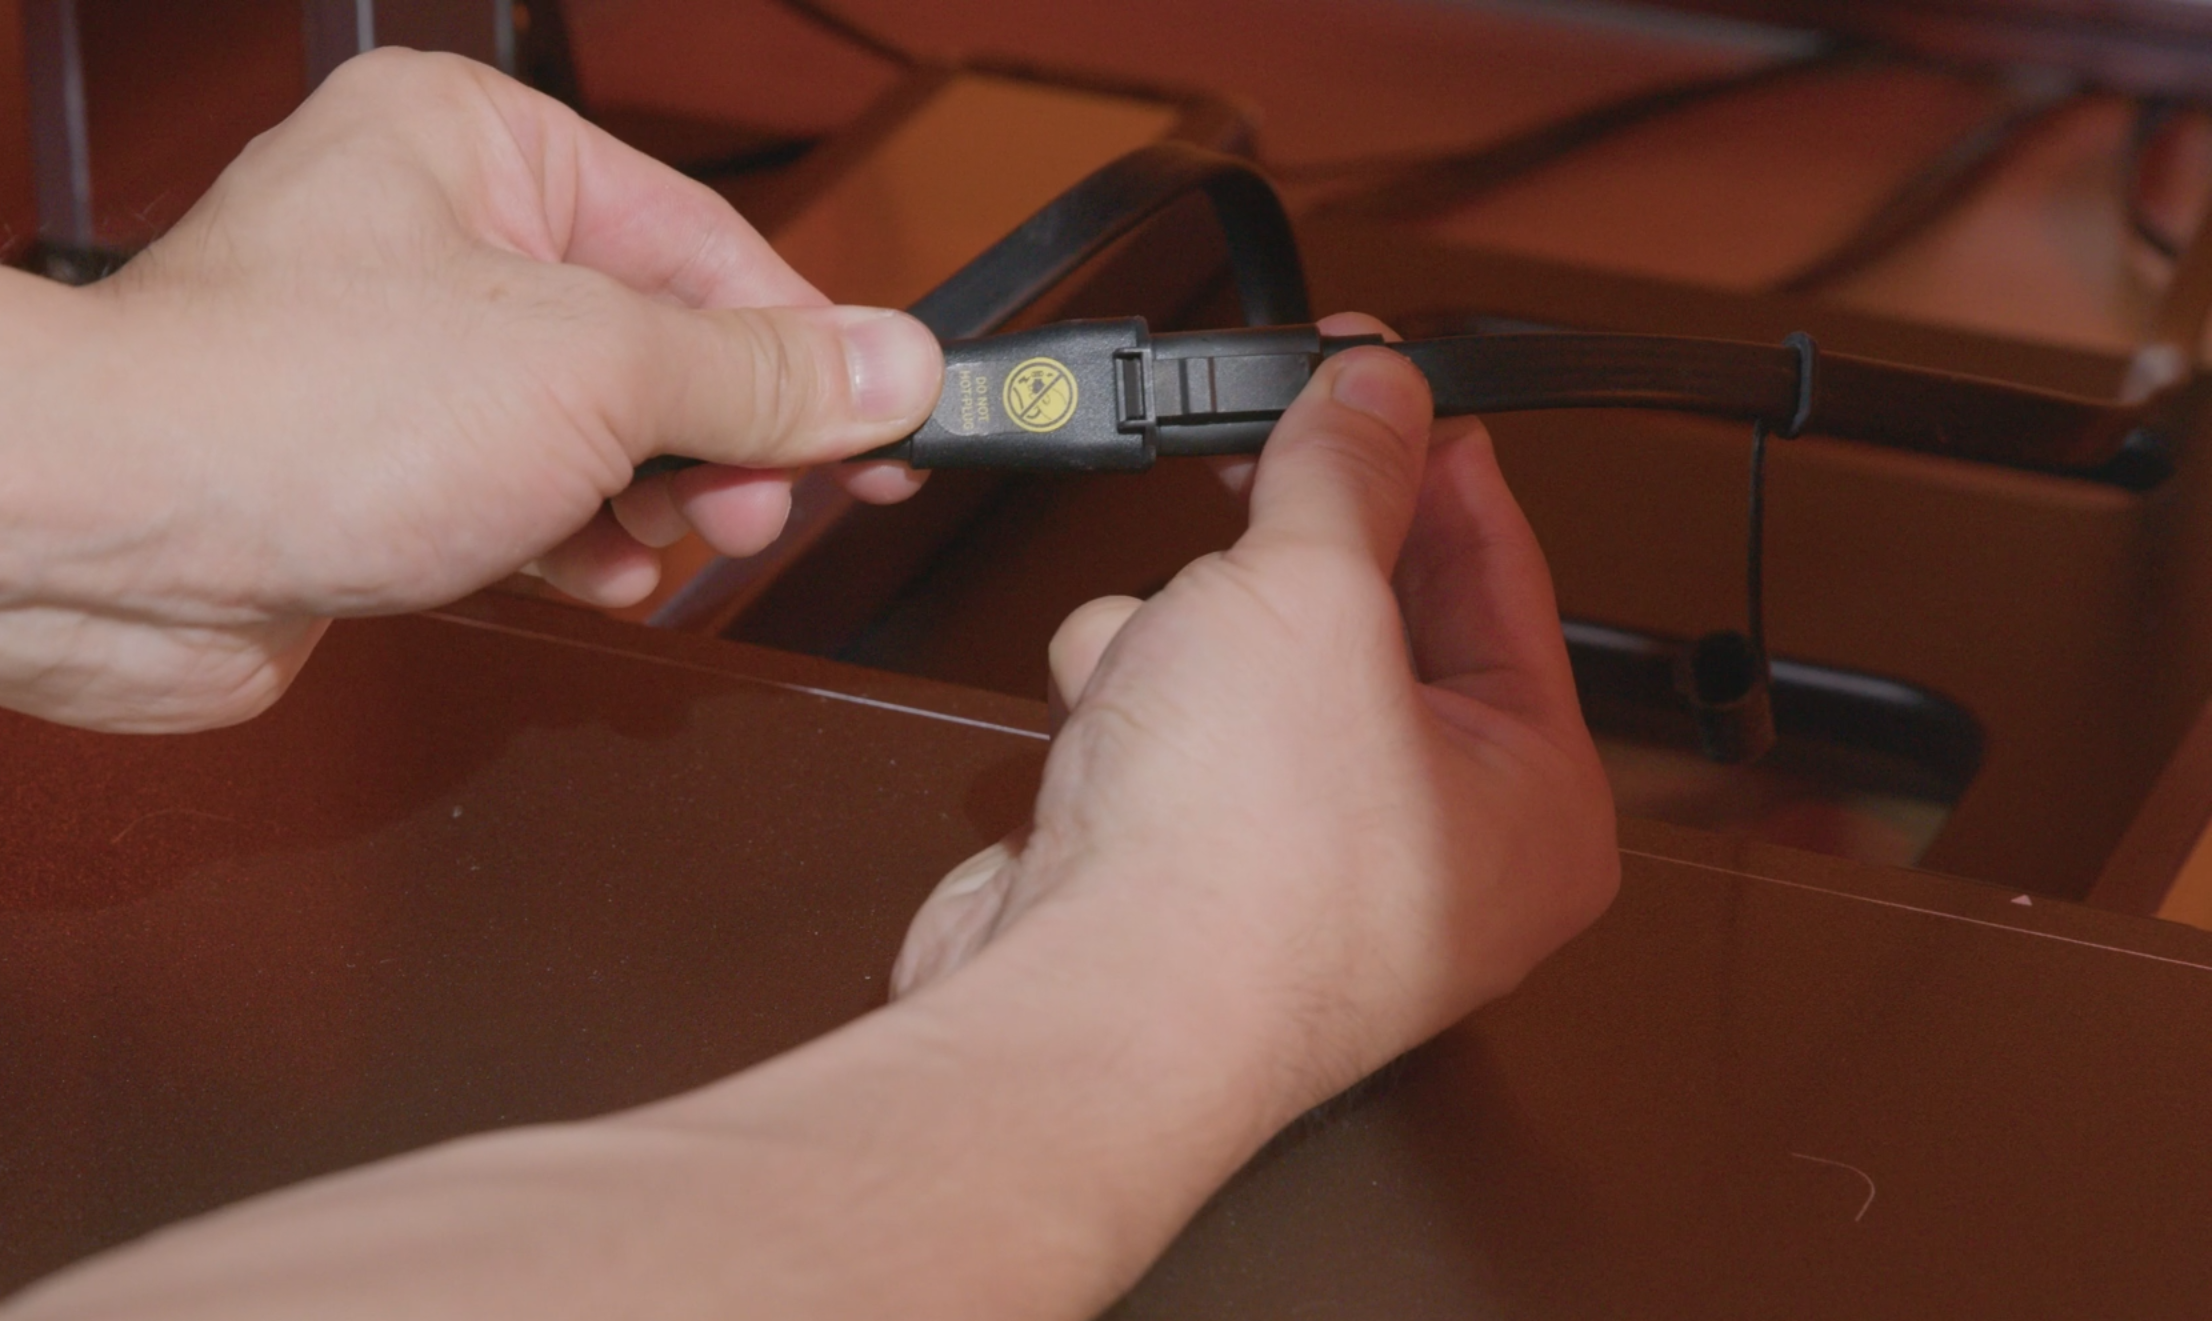
- Disconnect the heated bed cable.
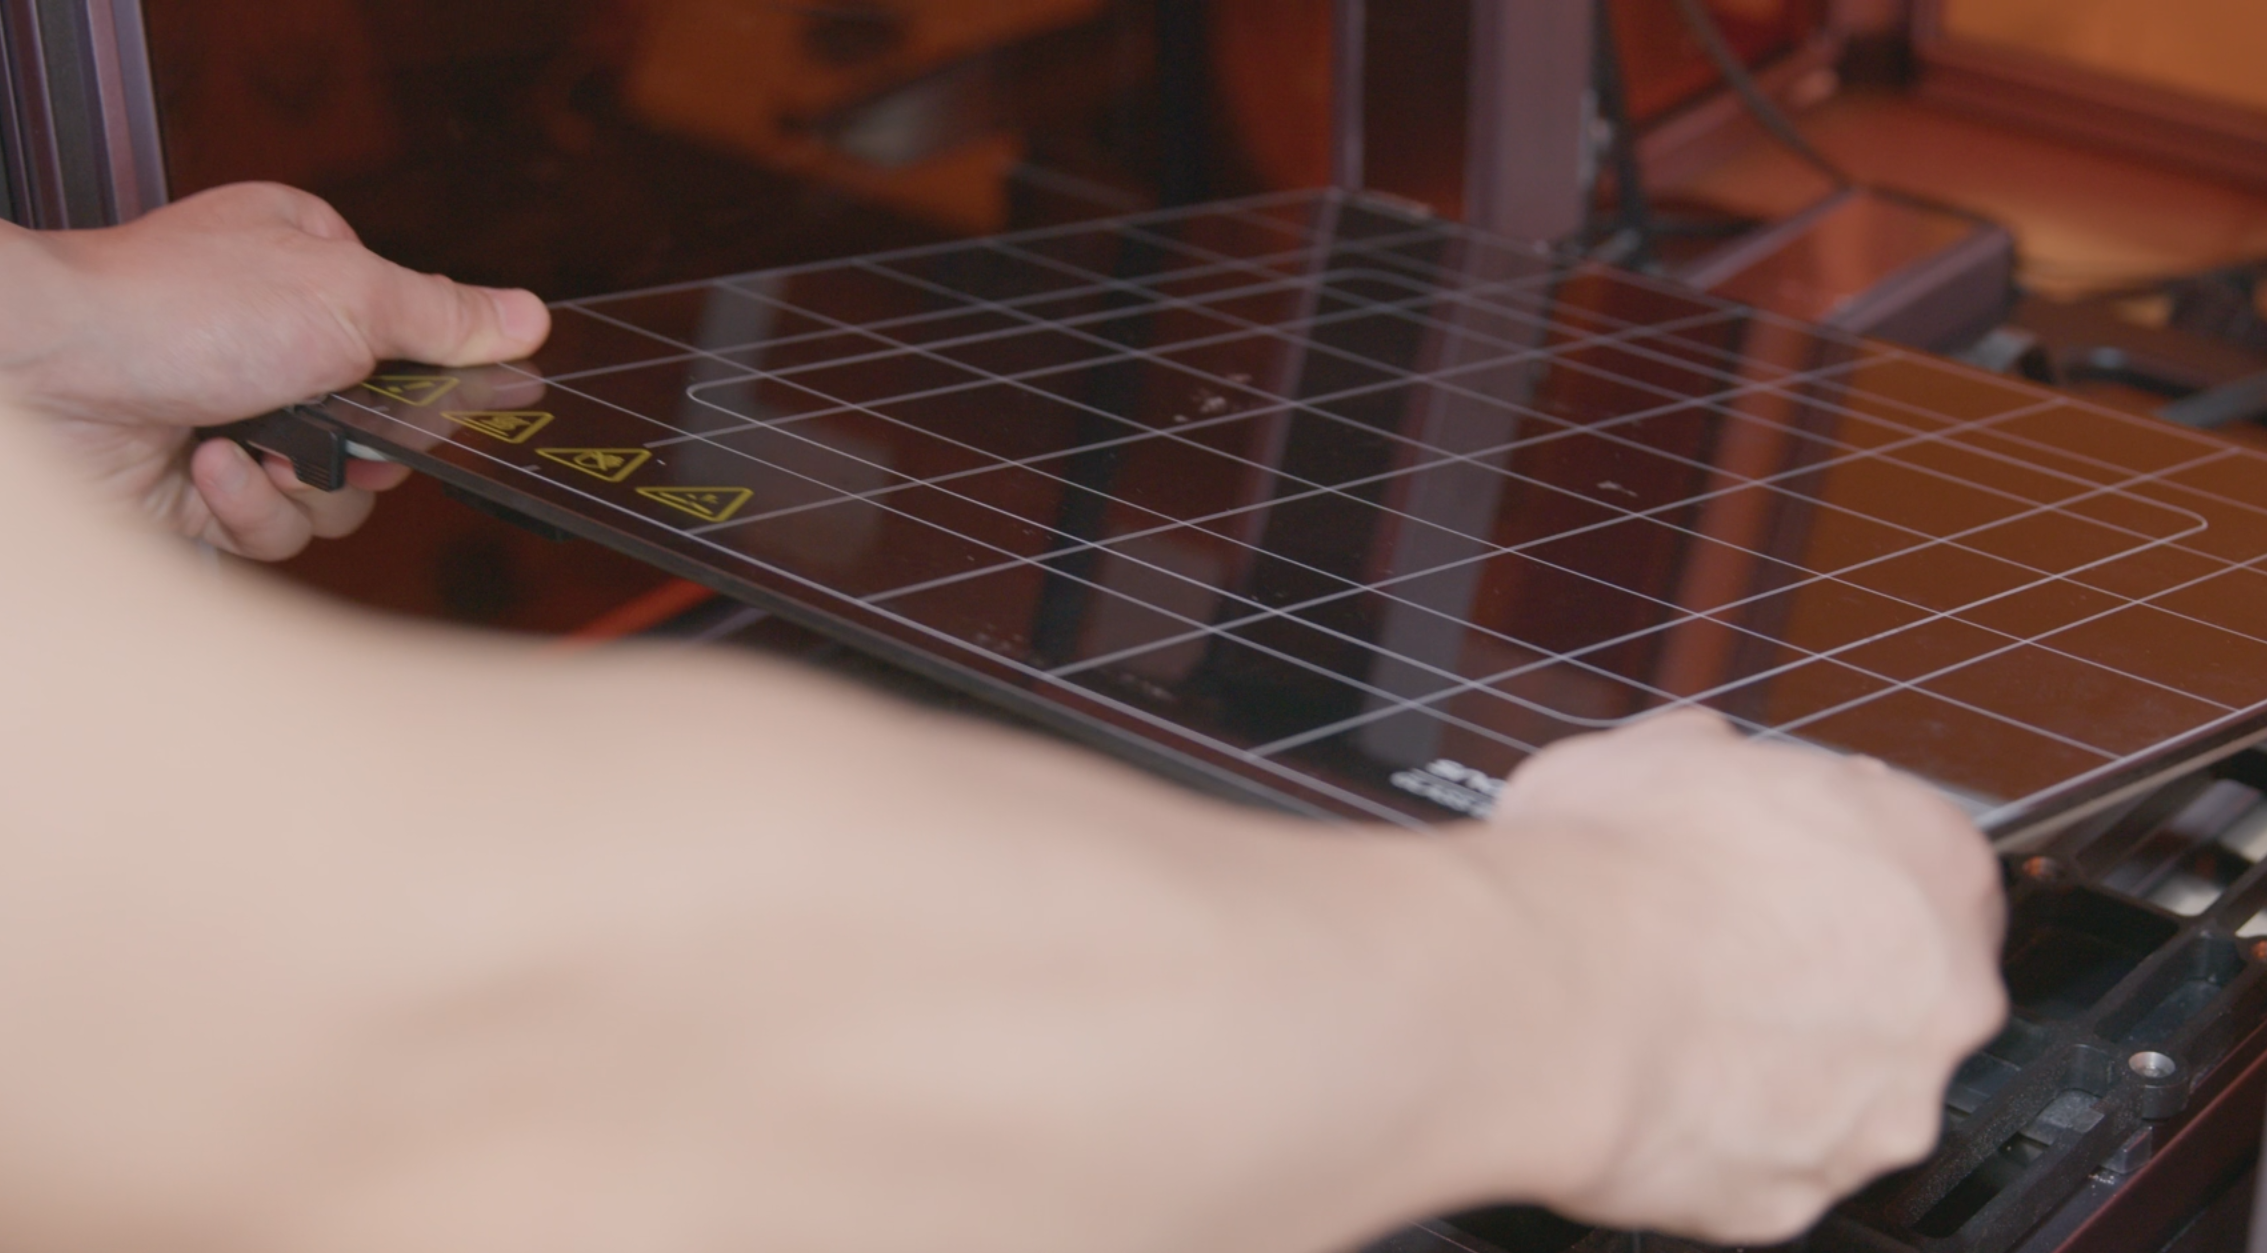
- Loosen the cam handle of the support platform by turning it to the left, and then detach the glass printing platform.
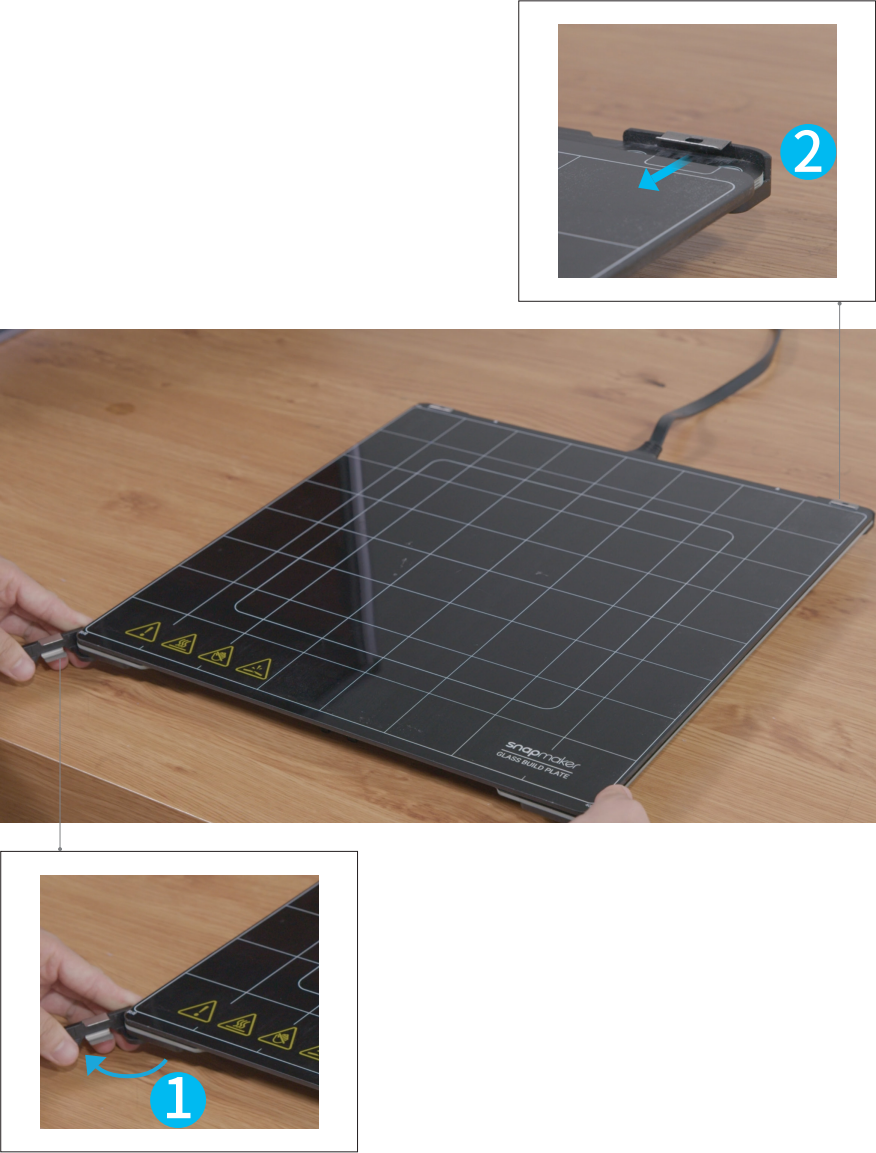
- Place the glass printing platform on a solid horizontal table or workbench, open the clamps, and then detach the glass build plate.
- Detach the four clamps from the printing platform.
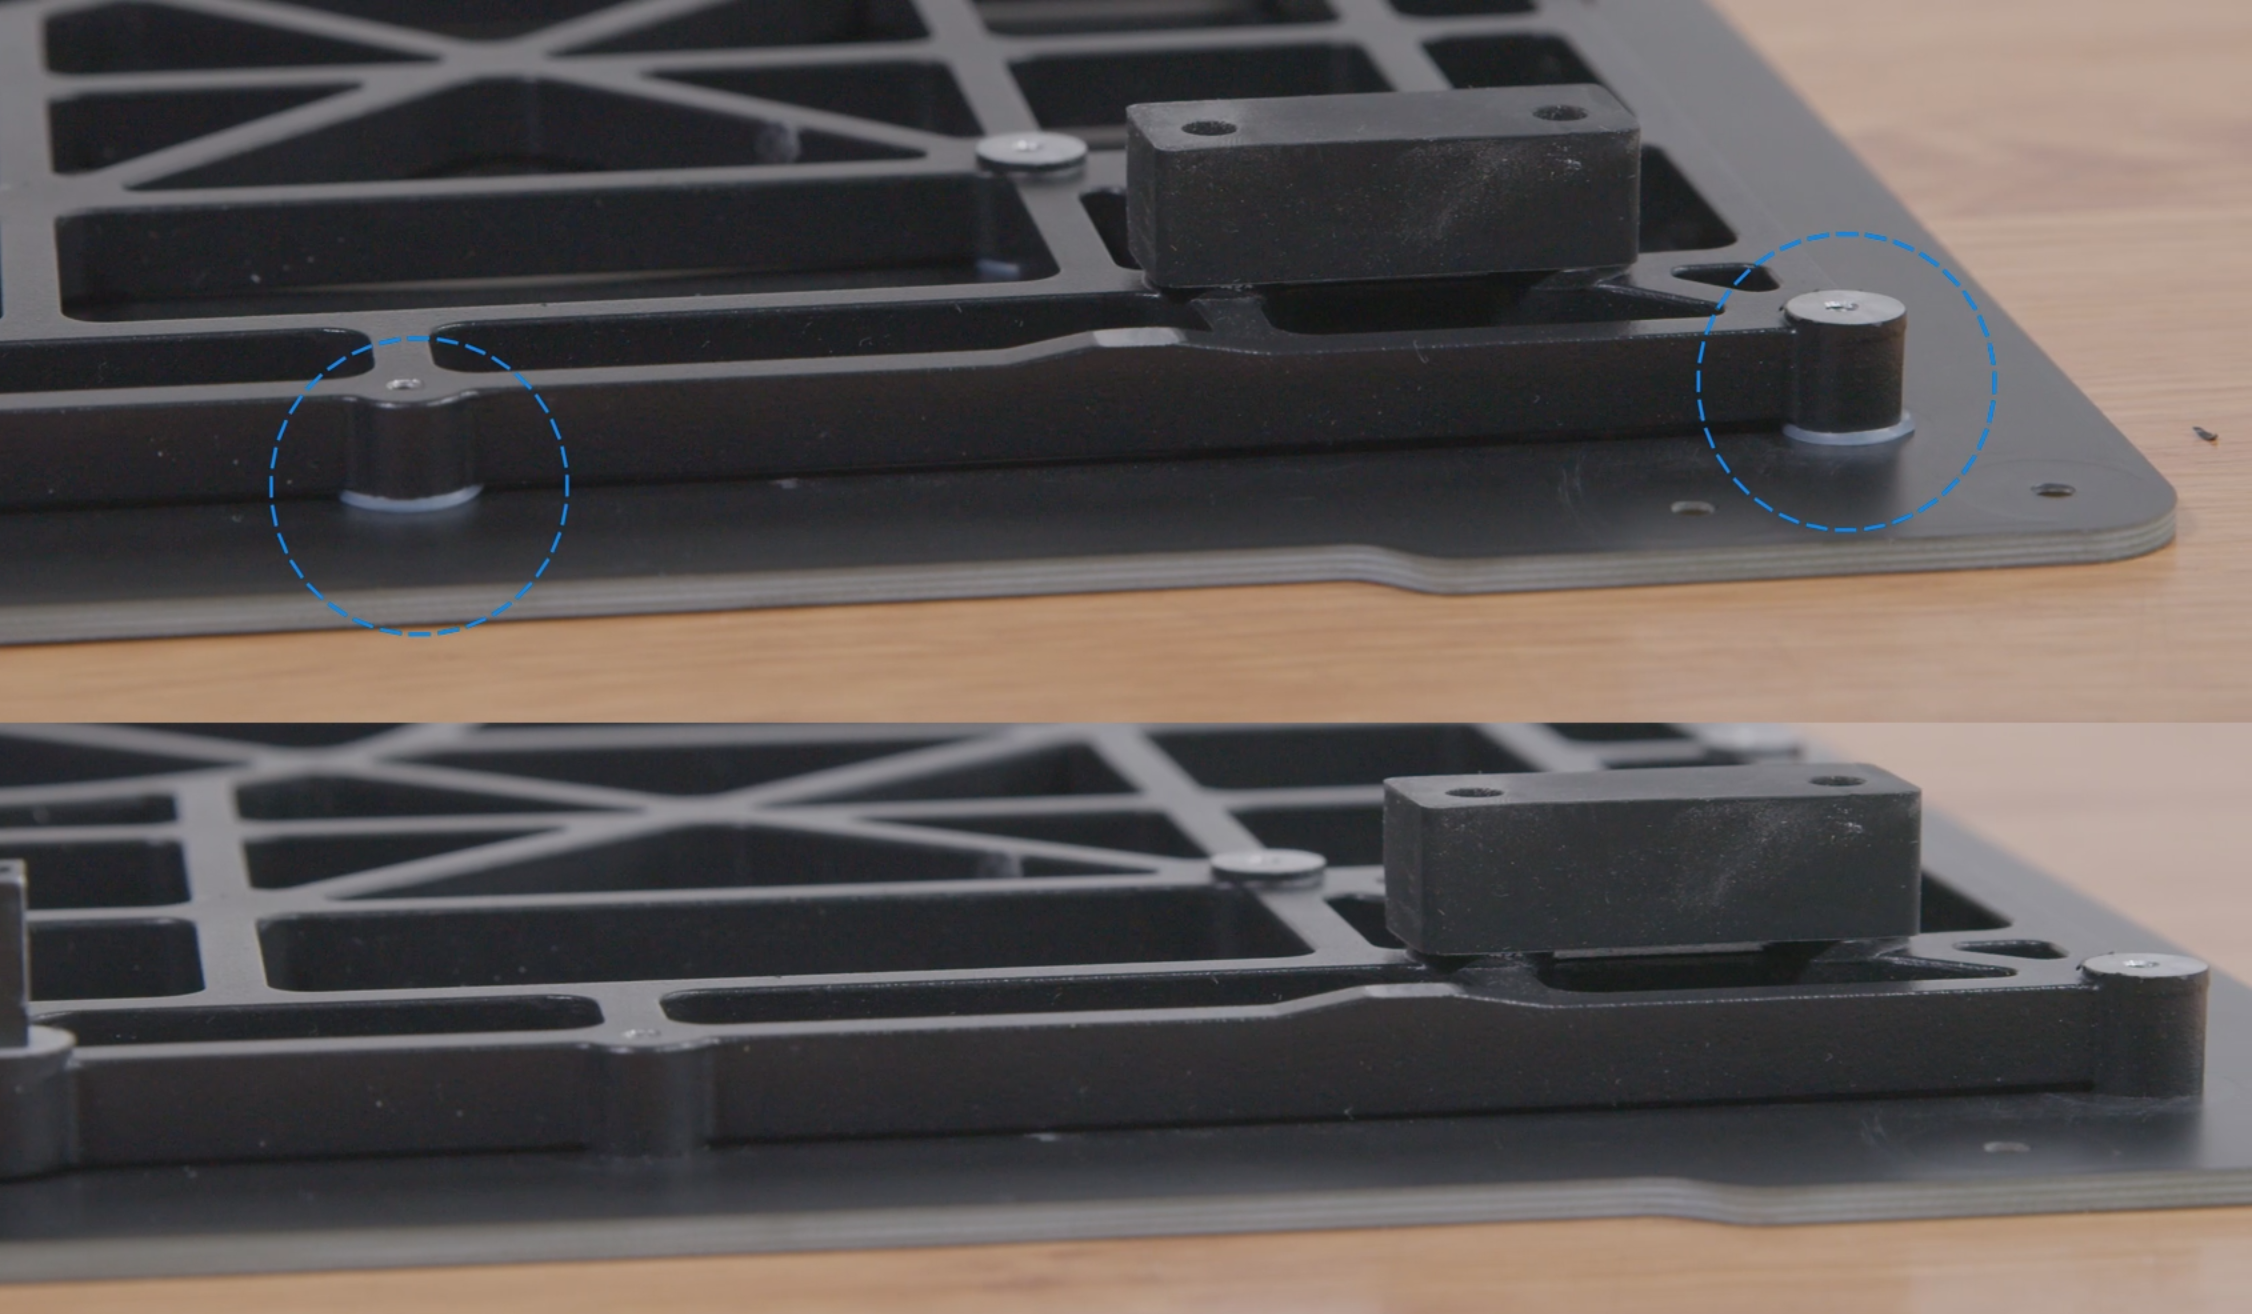
- Install the left holder and the right holder.

Follow the corresponding operation, in accordance with whether the printing platform comes with pre-installed shims or not.
Underneath the Heated Bed × 20
At the Indicated Positions × 2
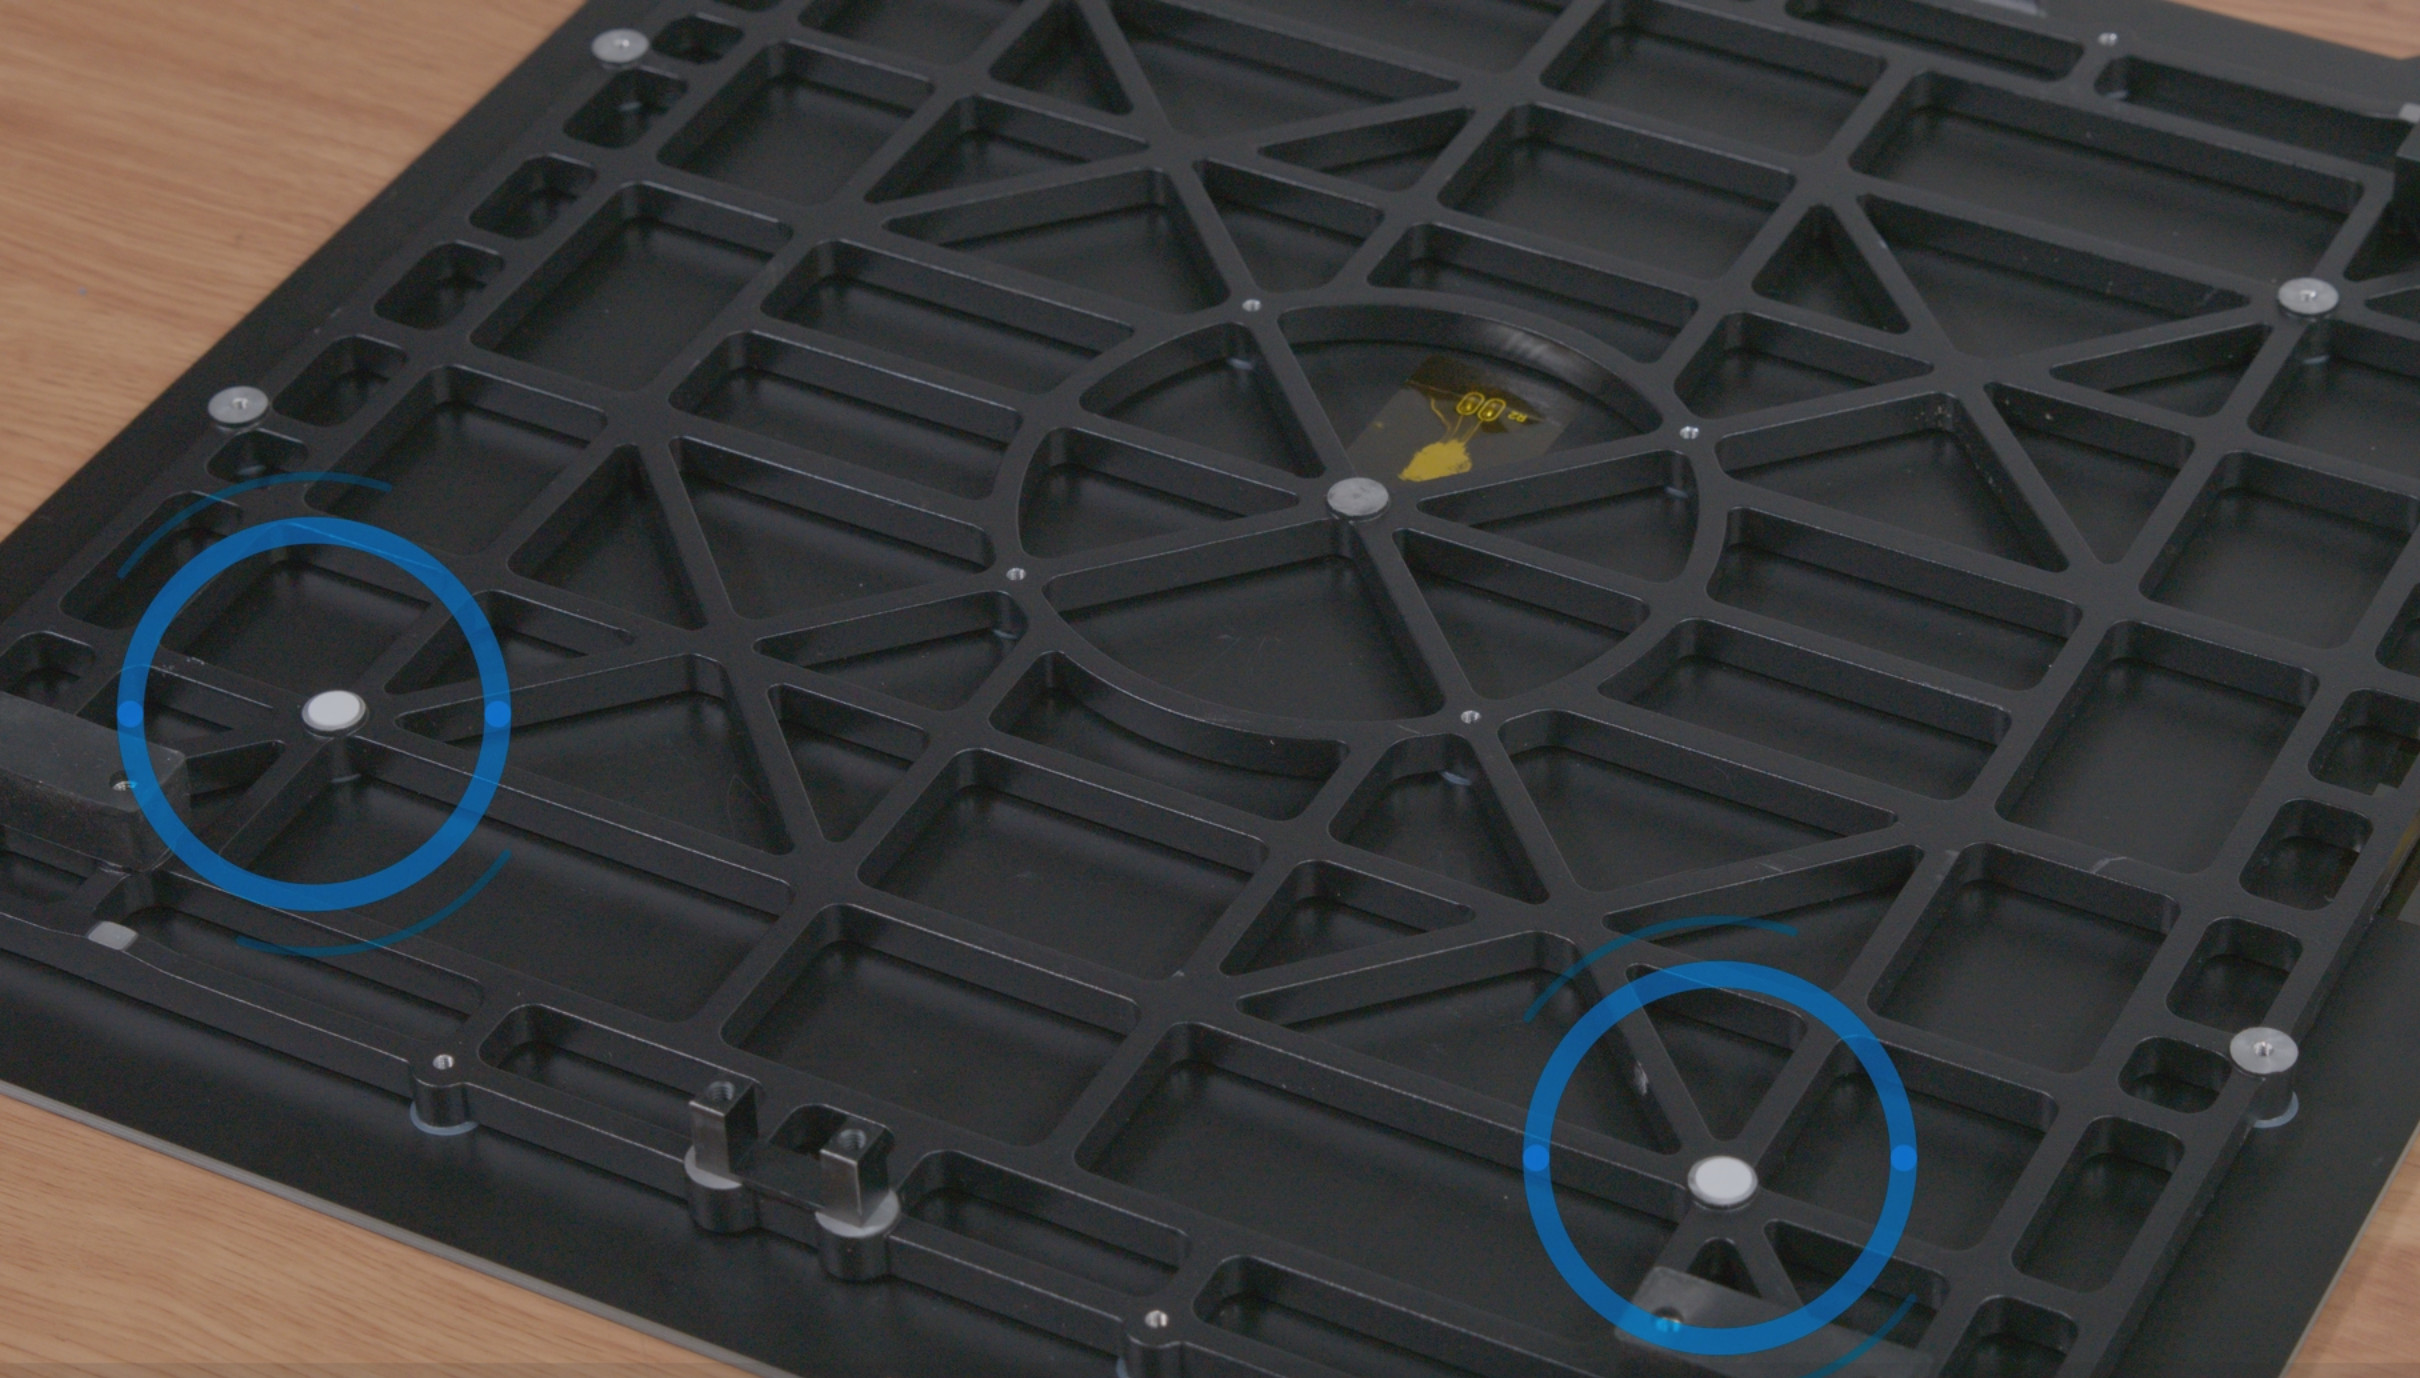
¶ If Shims Are Pre-installed
- Check if any screws on the heated bed are loose. If they are, tighten them.
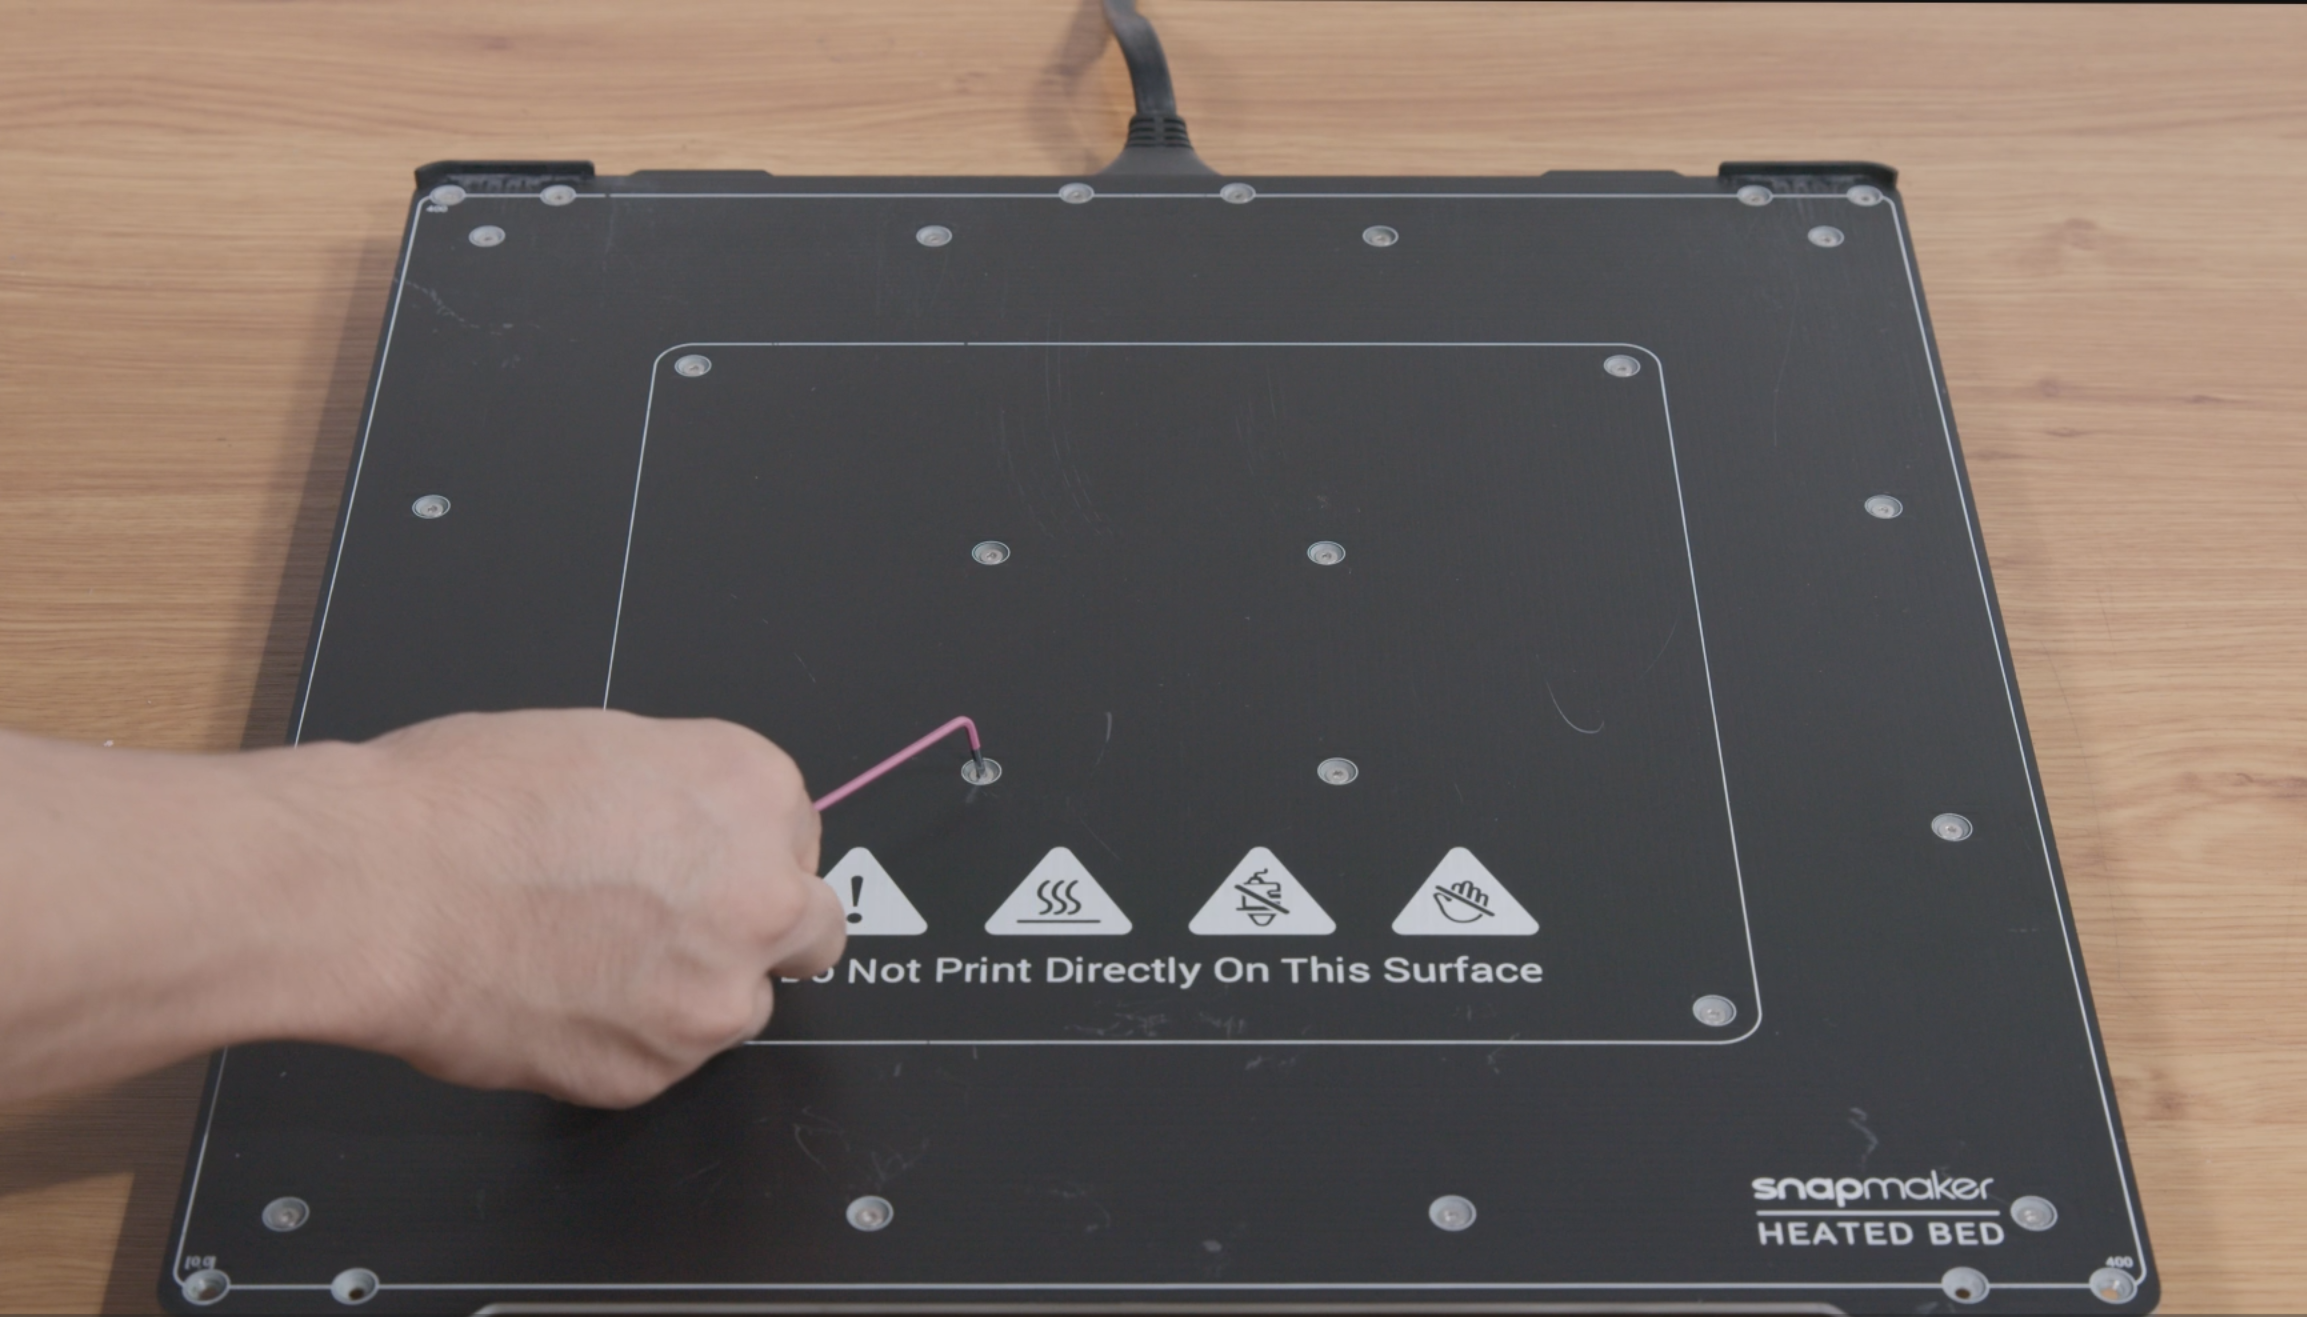
¶ If Shims Are Not Pre-installed
If your machine is not equipped with shims and you experience first layer adhesion issues or print failures due to an uneven heated bed, it is strongly recommended to install the shims. The shims consist of perforated shims and non-perforated shims, differing in appearance. All shims must be installed at their intended positions.
- Remove the screws from the heated bed, and then detach the heated bed.

- Stick the perforated shims onto the screw holes.

- To prevent the shims from shifting or falling off, place the heated bed vertically. After checking that there are no fallen shims on the table, tighten the heated bed screws.
Do not overtighten the screws. The shims must maintain a certain level of flexibility to effectively provide leveling and cushioning.

- Flip the printing platform over, and then stick two non-perforated shims to the intended positions.
Do not stick shims to other positions.

Read Before Installation
- Before installing the soft magnetic sticker, clean the surface of the heated bed using the wiping cloth.
- Initially, peel back a small area of the backing paper at one corner. To allow for subsequent adjustments if necessary, do not peel off a large area.
- To allow for subsequent adjustments if necessary, it is not recommended to apply excessive pressure throughout the sticking process. Apply further pressure only after the soft magnetic sticker is properly aligned.
- If you notice any bubbles and lumps or need adjustment before fully sticking, gently lift the soft magnetic sticker and reapply.
- Clean the surface of the heated bed using the wiping cloth.

- Place the soft magnetic sticker onto the heated bed in correct orientation.

- Peel back a small area of the backing paper at one corner, align the edges of the soft magnetic sticker with the edges of the heated bed, and then gently apply pressure to the soft magnetic sticker.
To allow for subsequent adjustments if necessary, it is not recommended to peel back a large area of the backing paper or apply excessive pressure throughout the process.

- Tilt the soft magnetic sticker to an angle of approximately 60° toward the heated bed, proceed to peel off the remaining backing paper and gently apply pressure to the soft magnetic sticker.
If you notice any bubbles and lumps or need adjustment before fully sticking, gently lift the soft magnetic sticker and reapply.
If, after multiple attempts, there are still bubbles or lumps on the surface of the soft magnetic sticker, or if there is remaining adhesive on the surface, please remove the soft magnetic sticker and purchase a new one for installation.

- Moisten the wiping cloth with ethyl alcohol to clean the surface of the soft magnetic sticker. Apply further pressure simultaneously while cleaning.

- Ensure the textured side of the PEI sheet is facing up. Tilt the PEI sheet to an angle of approximately 60° toward the soft magnetic sticker, align the PEI sheet with the holders, and then place it onto the soft magnetic sticker.
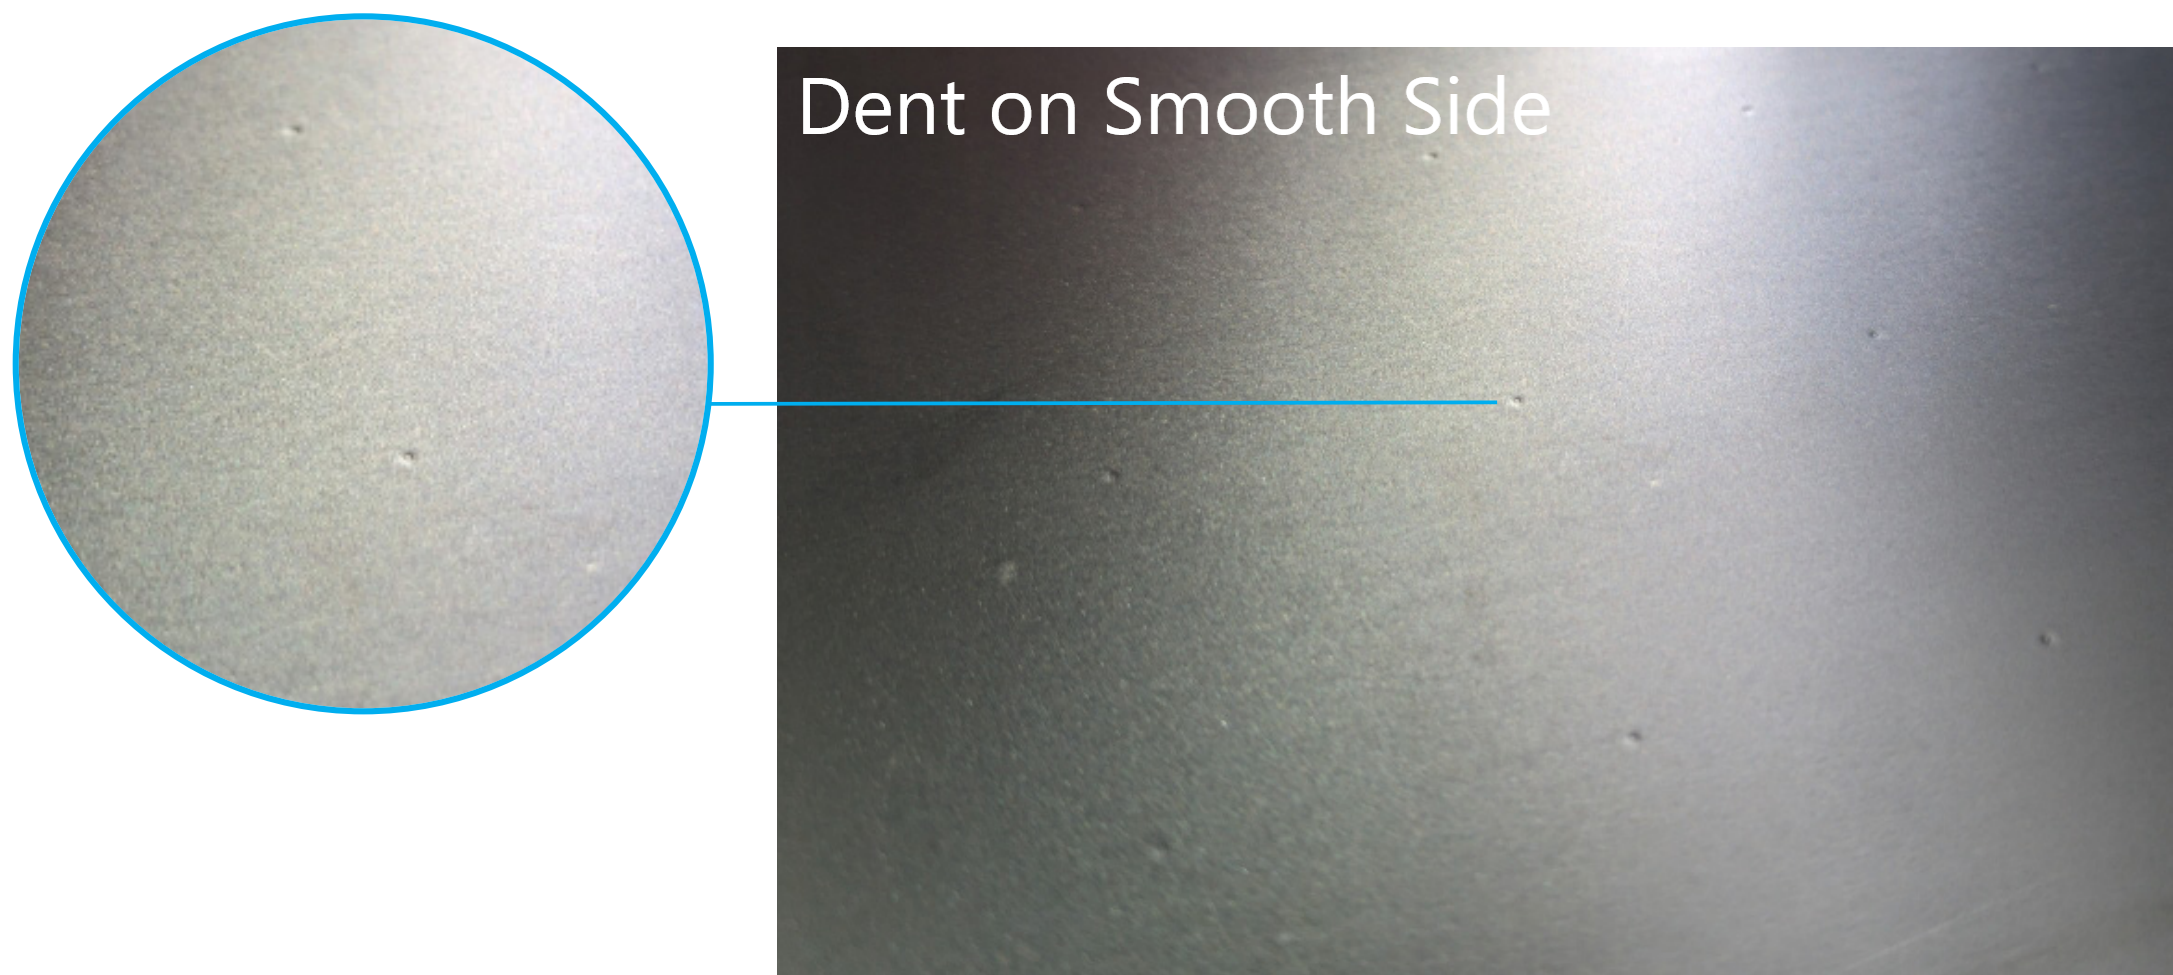
If you are using the Dual Textured and Smooth PEI Sheet, ensure that the textured side is facing up. Otherwise, during the process of leveling the heated bed, the smooth side of the sheet may become dented upon contact with the nozzles.
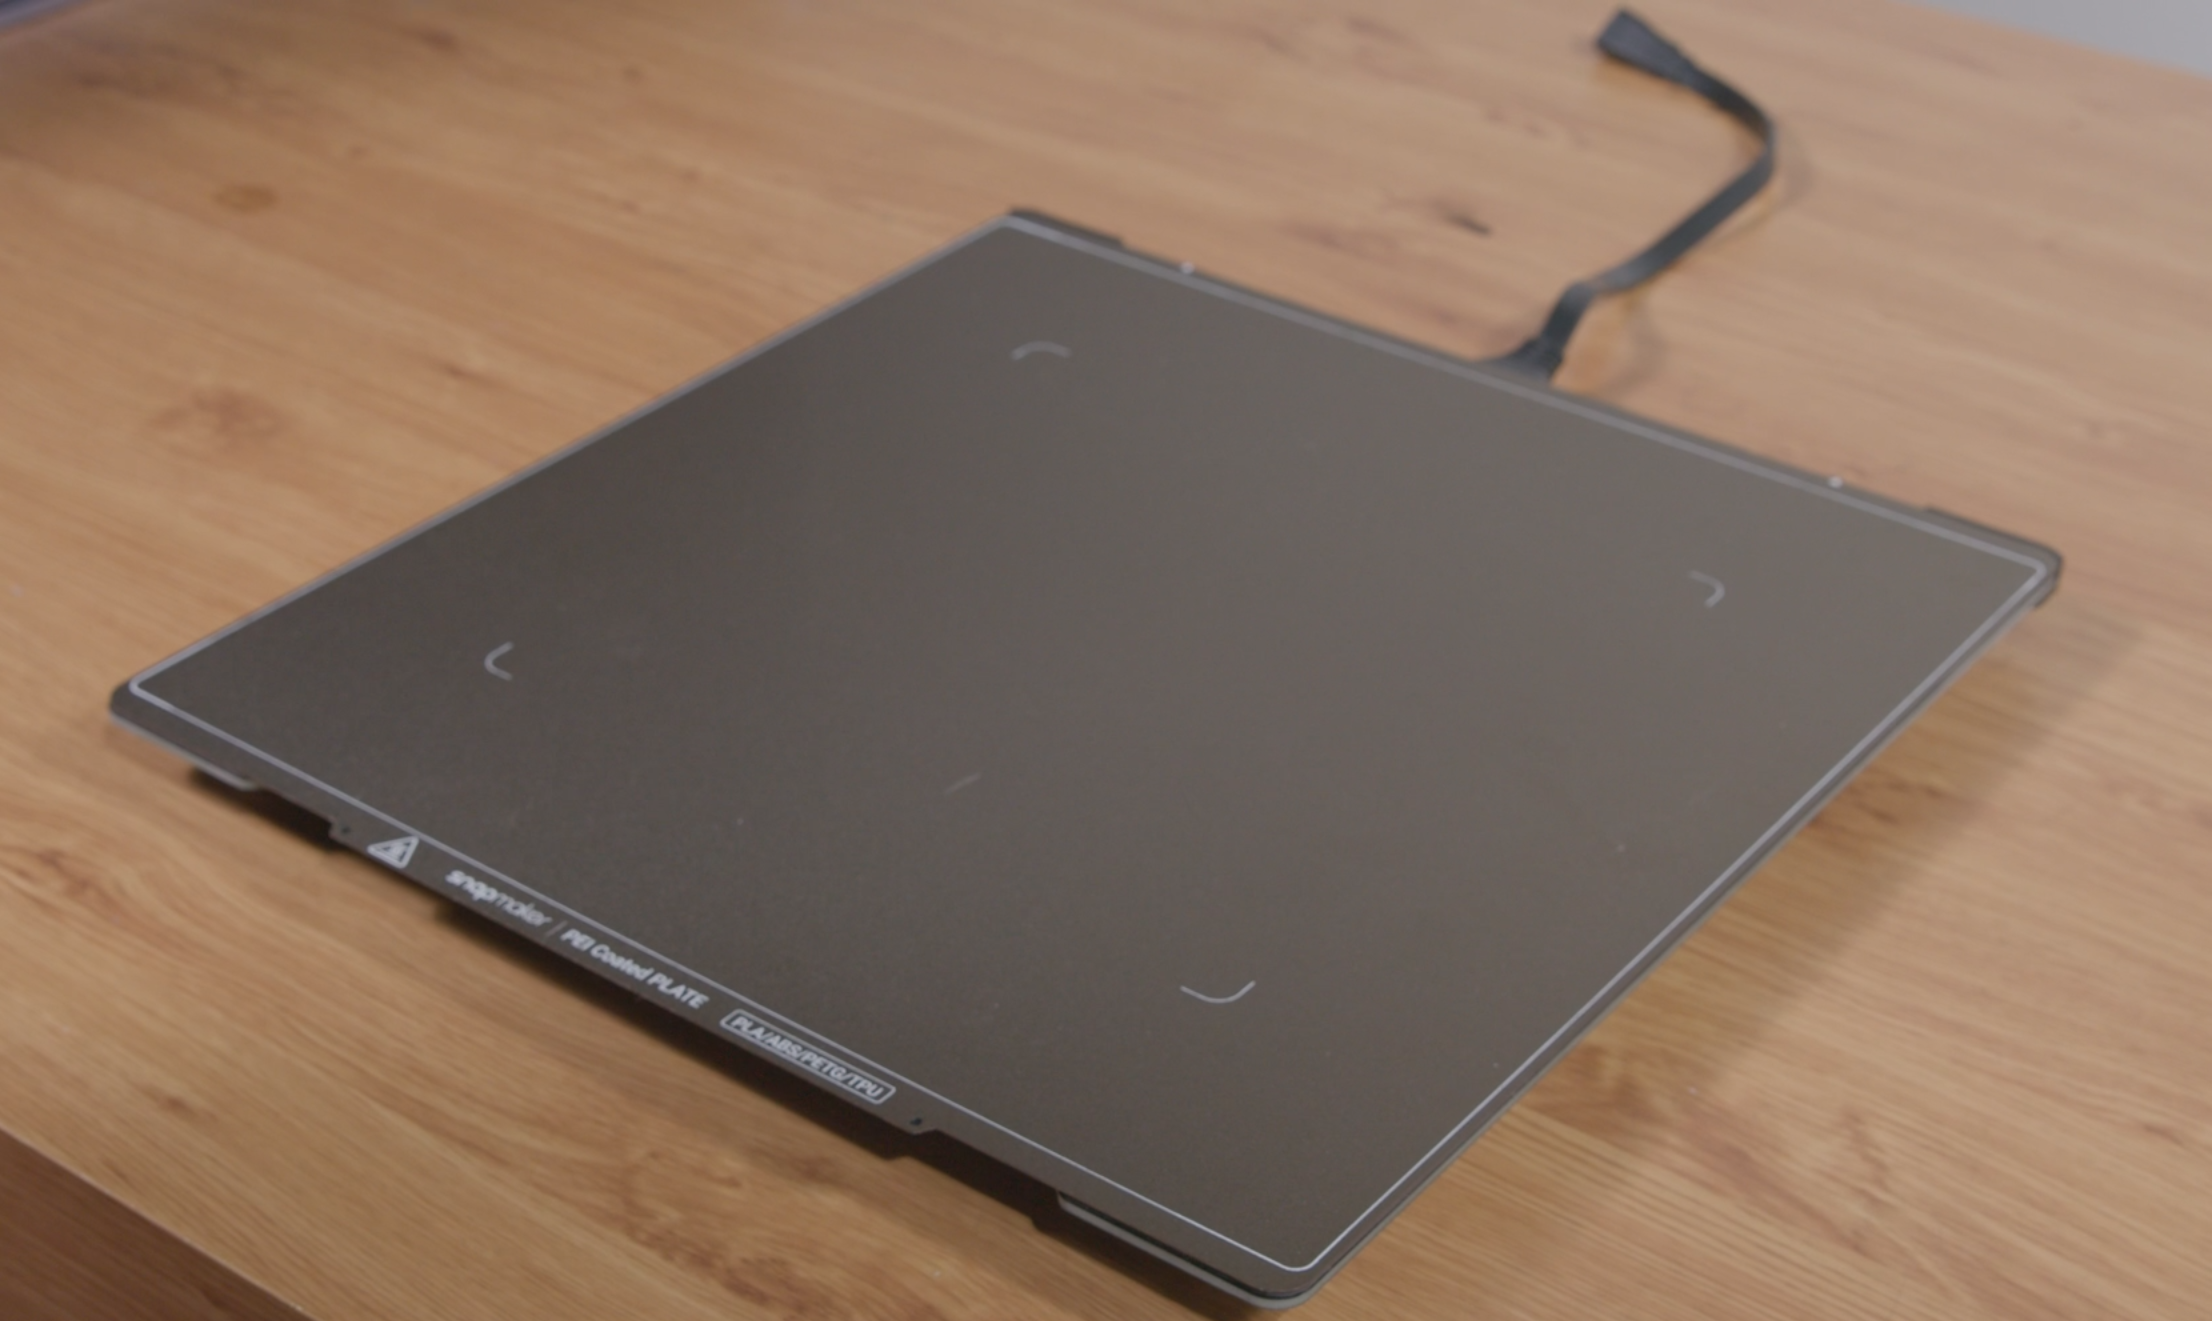
- Install the PEI sheet printing platform onto the support platform, and then tighten the cam handle of the support platform by turning it to the right.
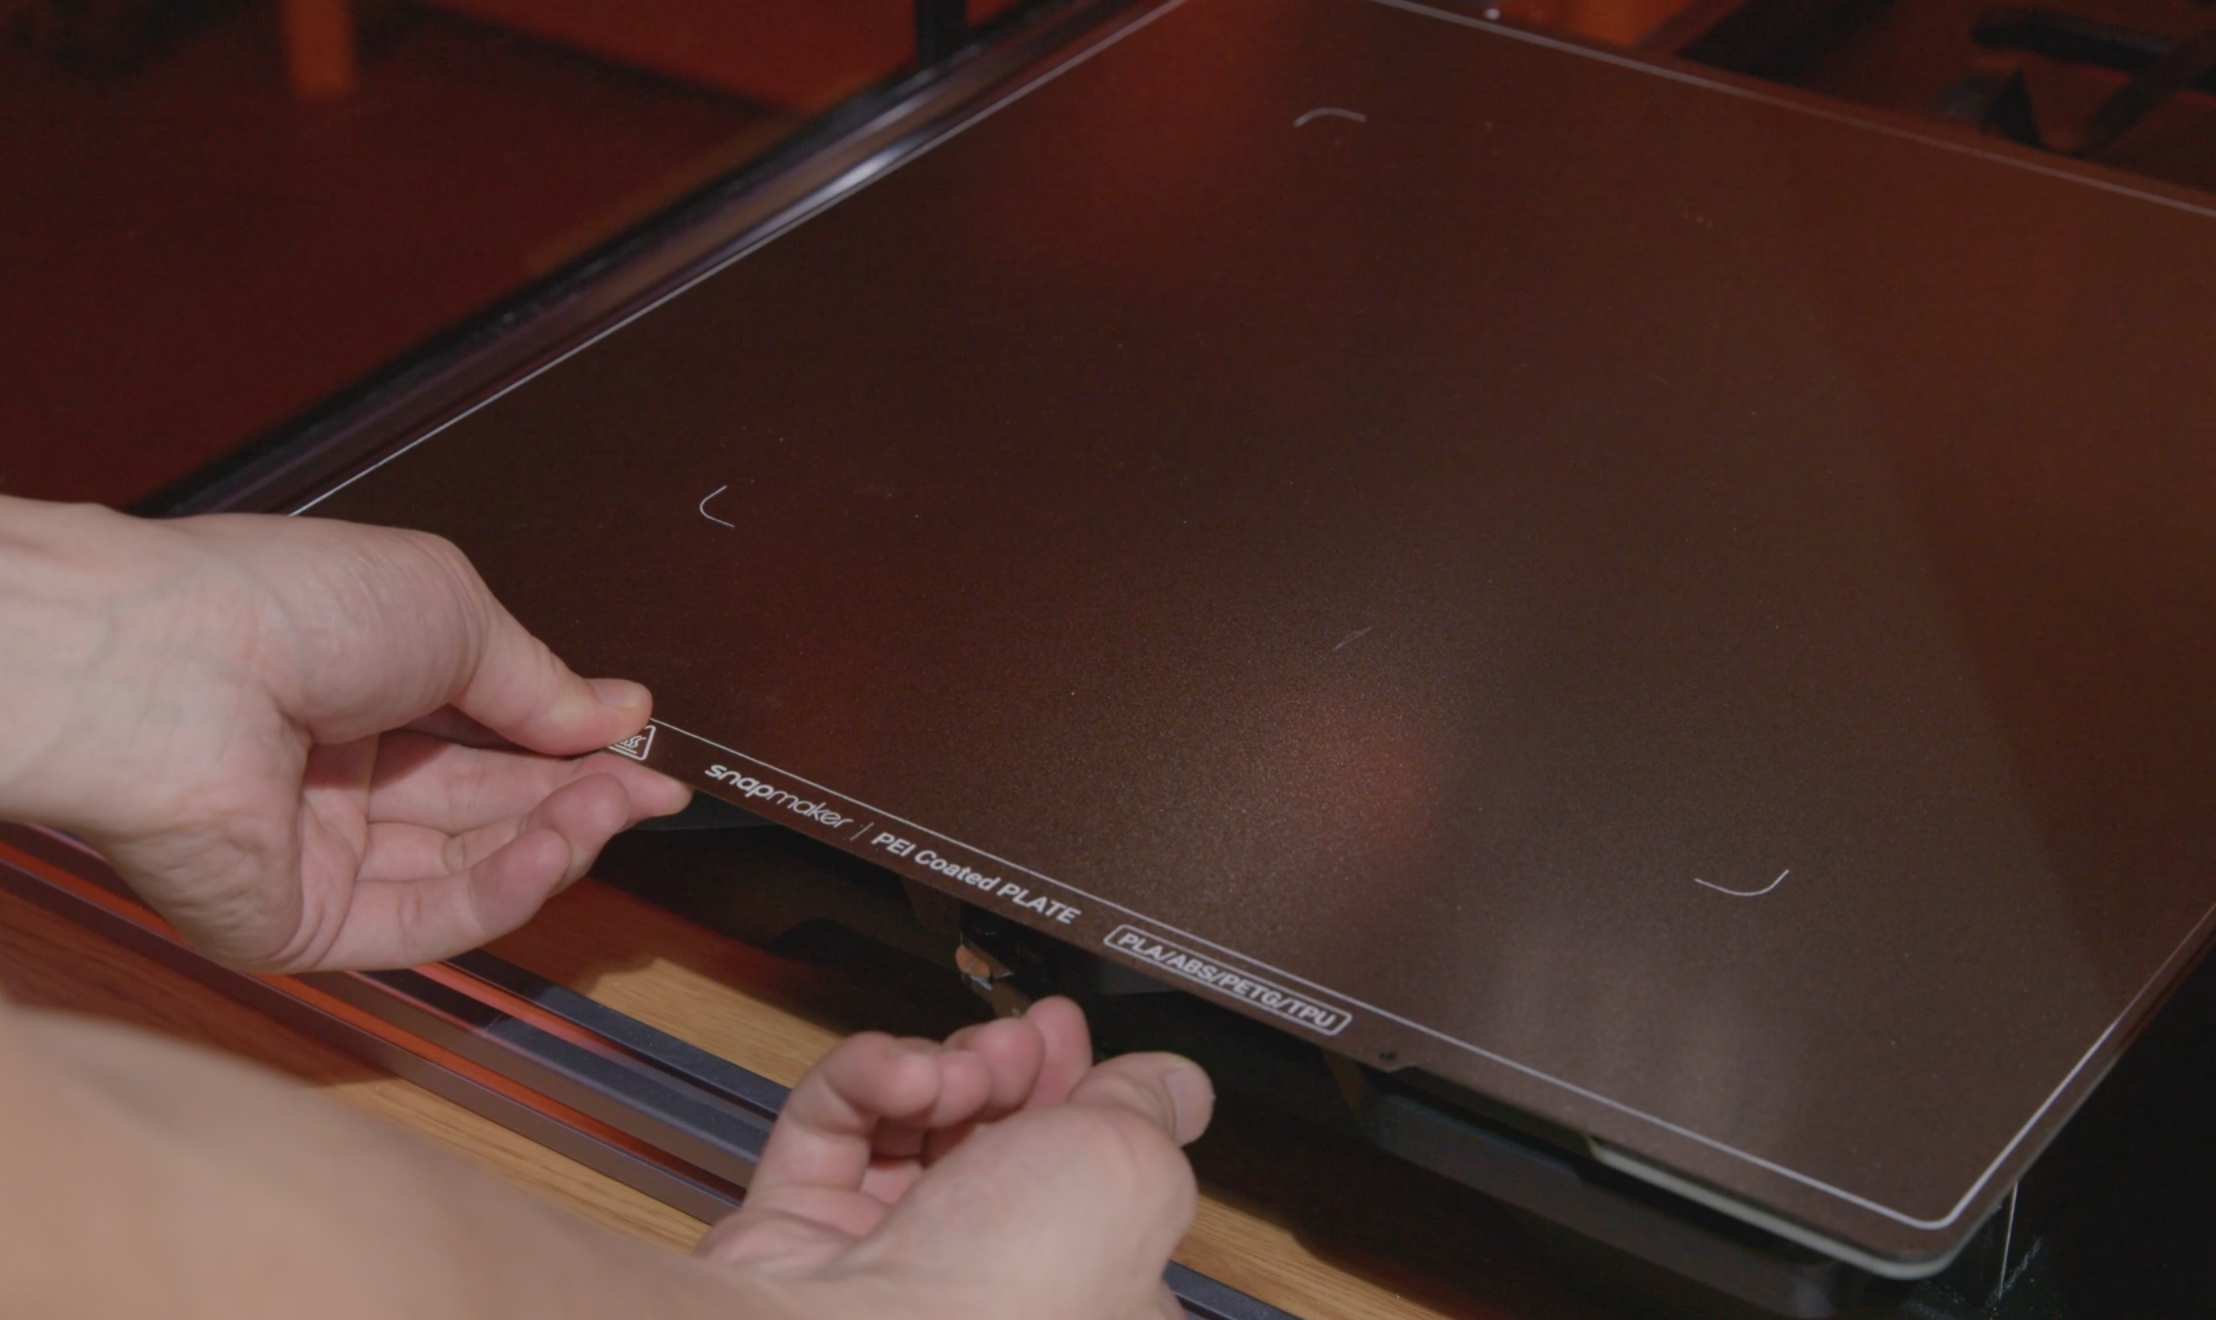
- Plug the heated bed cable into the heated bed.
- Power on the machine.
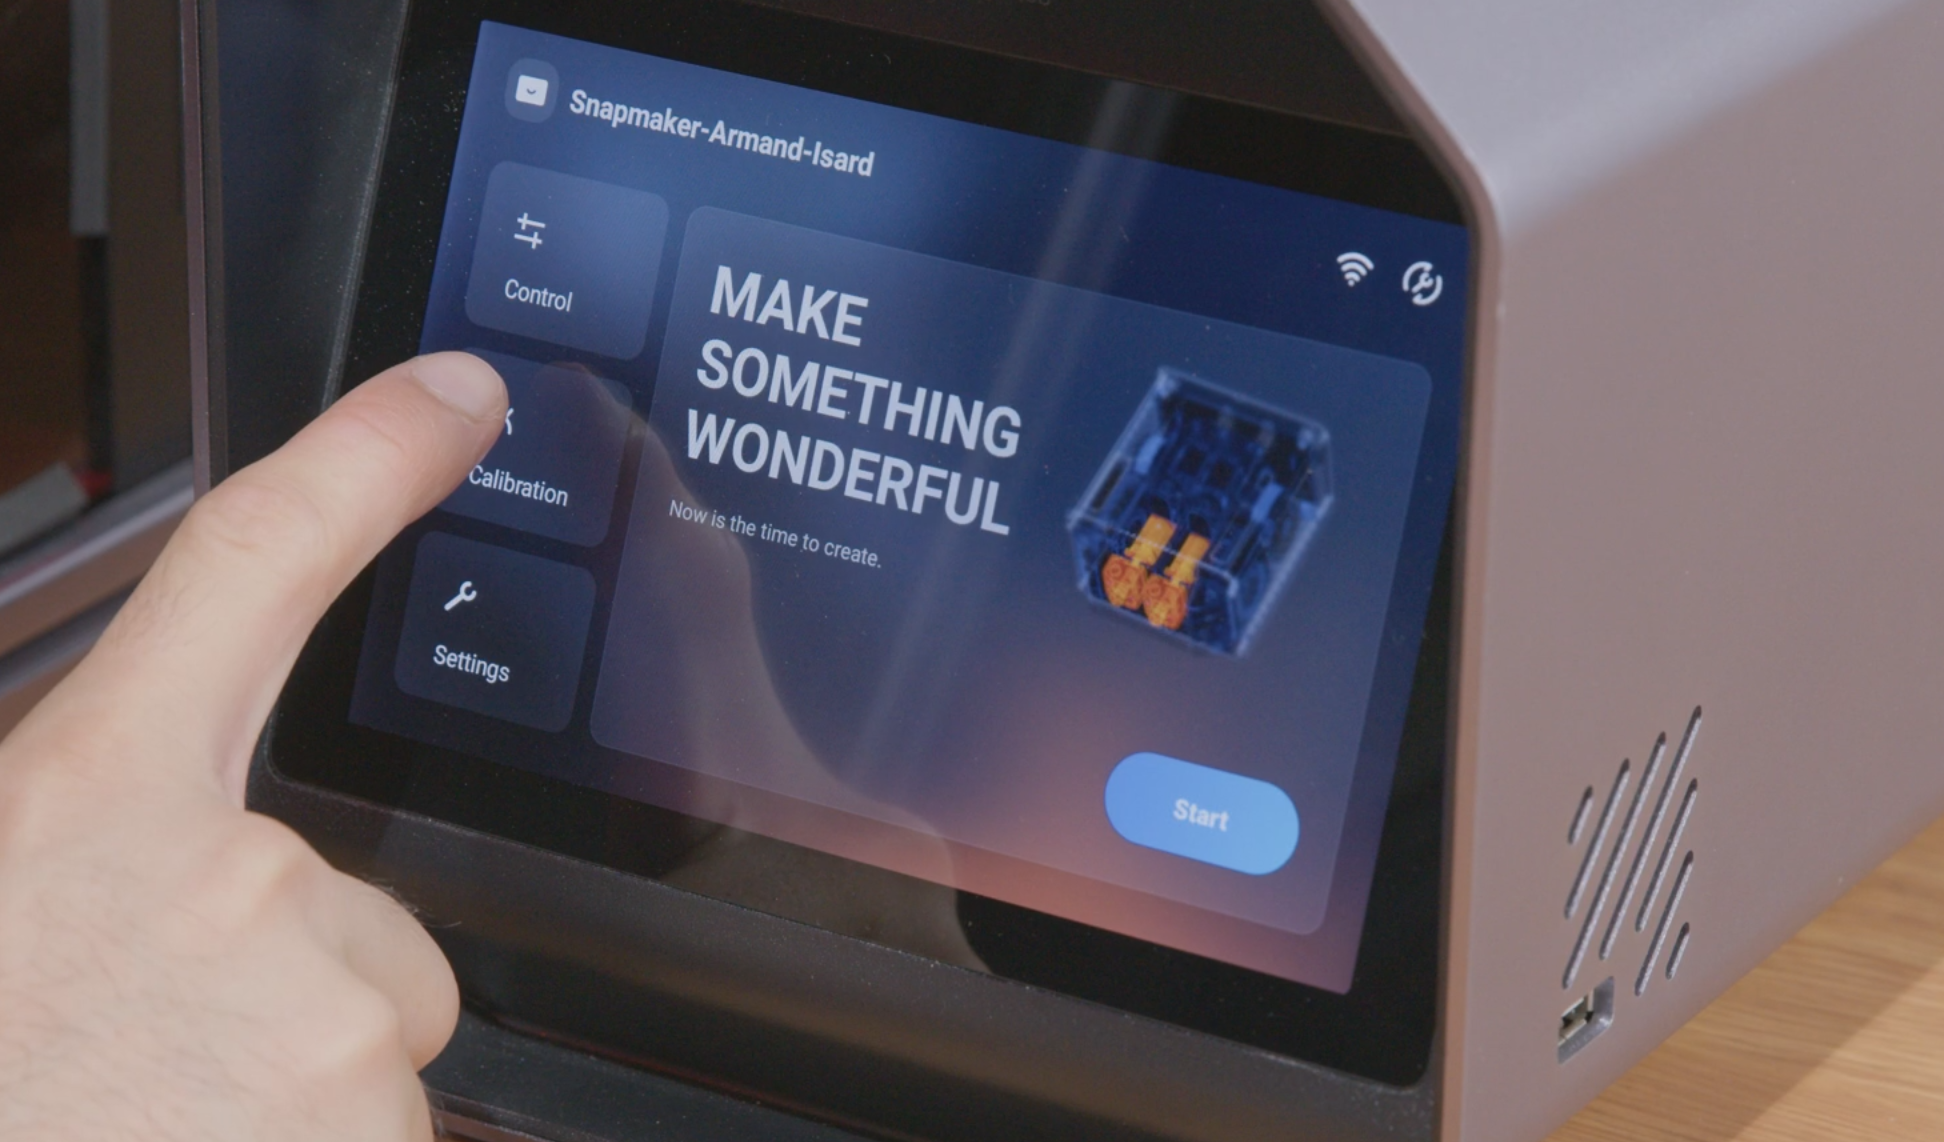
- Tap Calibration on the Home Screen, and then redo Heated Bed Leveling.
When using the Dual Textured and Smooth PEI Sheet, level the heated bed using the textured side. Once leveling is complete, you can choose to use either the smooth or textured side as needed.
The glass printing platform and the PEI sheet printing platform vary in thickness, so you need to redo Heated Bed Leveling.
After prolonged use, the soft magnetic sticker may experience demagnetization. In this case, you will need to remove the old soft magnetic sticker and install a new one.
¶ Required Tools
- Insulated Gloves (optional) × 1
- Ethyl Alcohol × 1
- Wiping Cloth × 1
- Tweezers × 1
- Tape × 1
¶ Procedures
- Power off the machine.
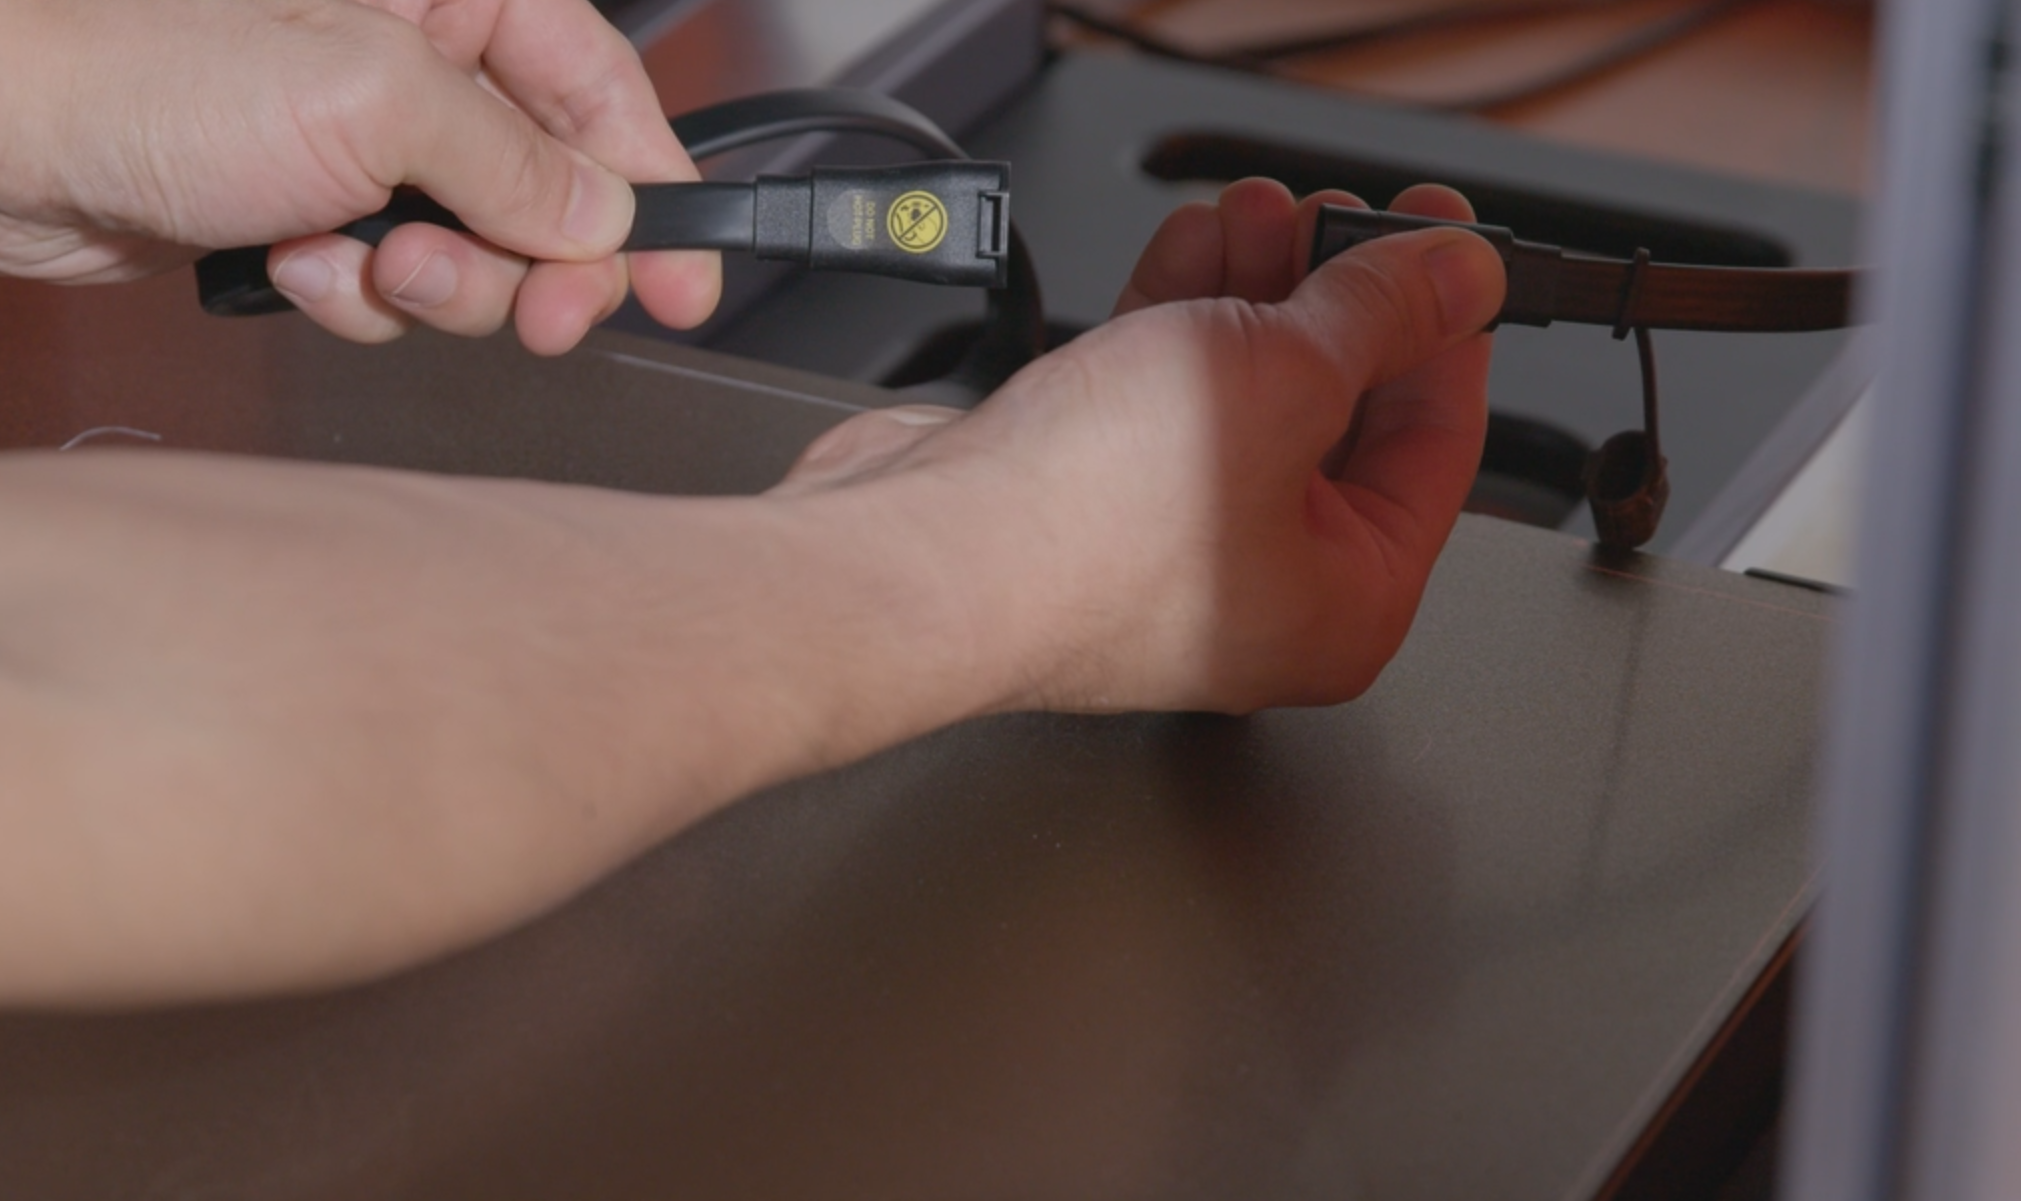
Do NOT plug or unplug any cables when the machine is powered on.

- Disconnect the heated bed cable.
- Loosen the cam handle of the support platform by turning it to the left, and then detach the PEI sheet printing platform.
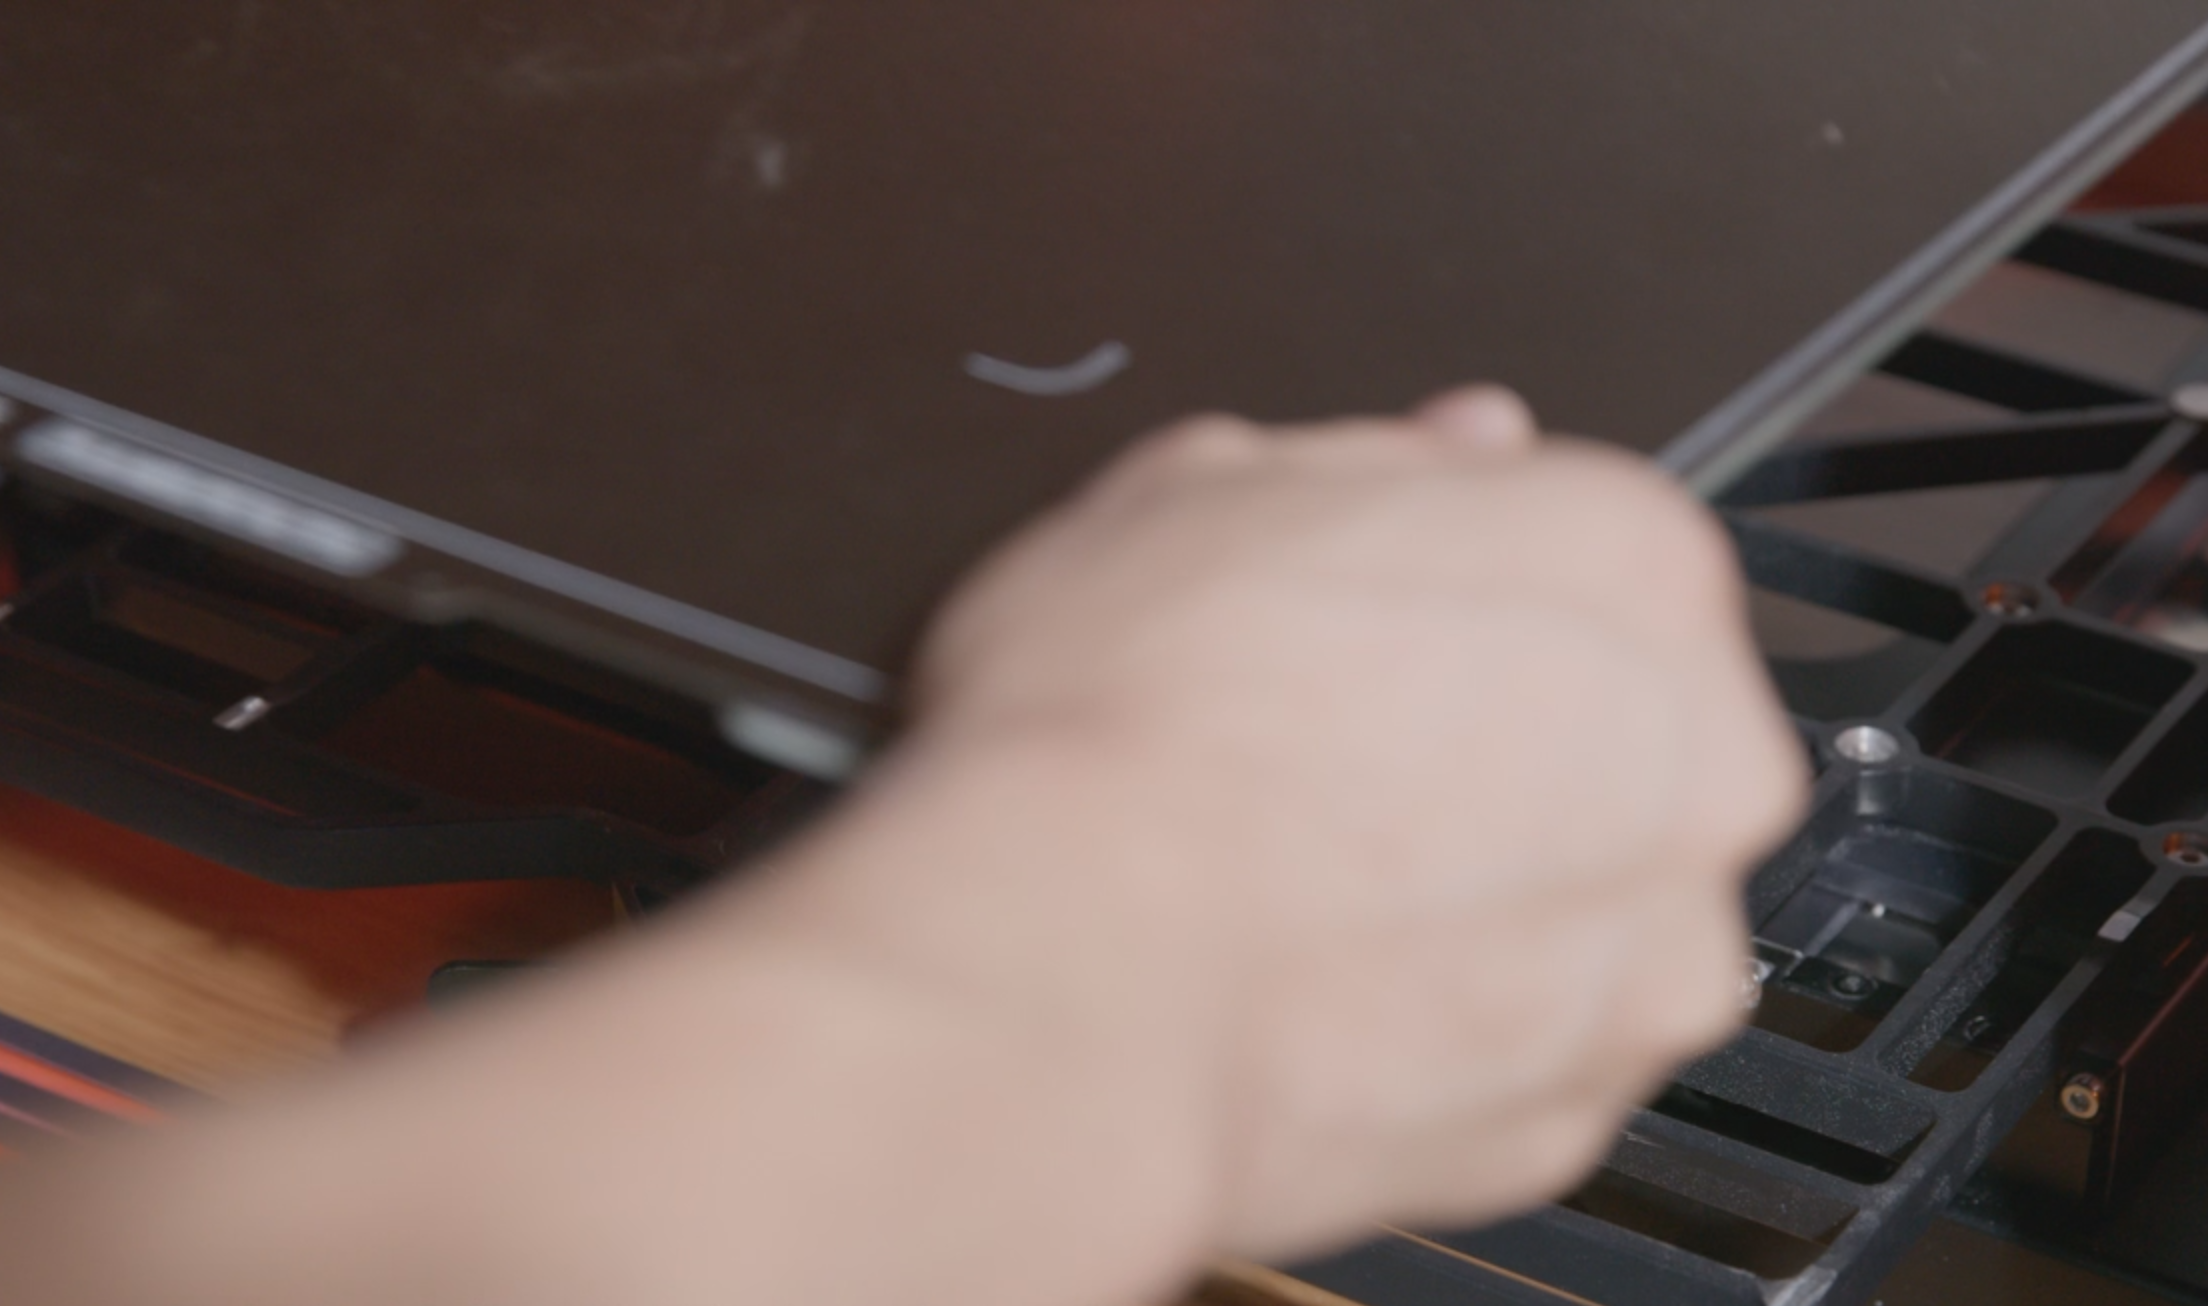
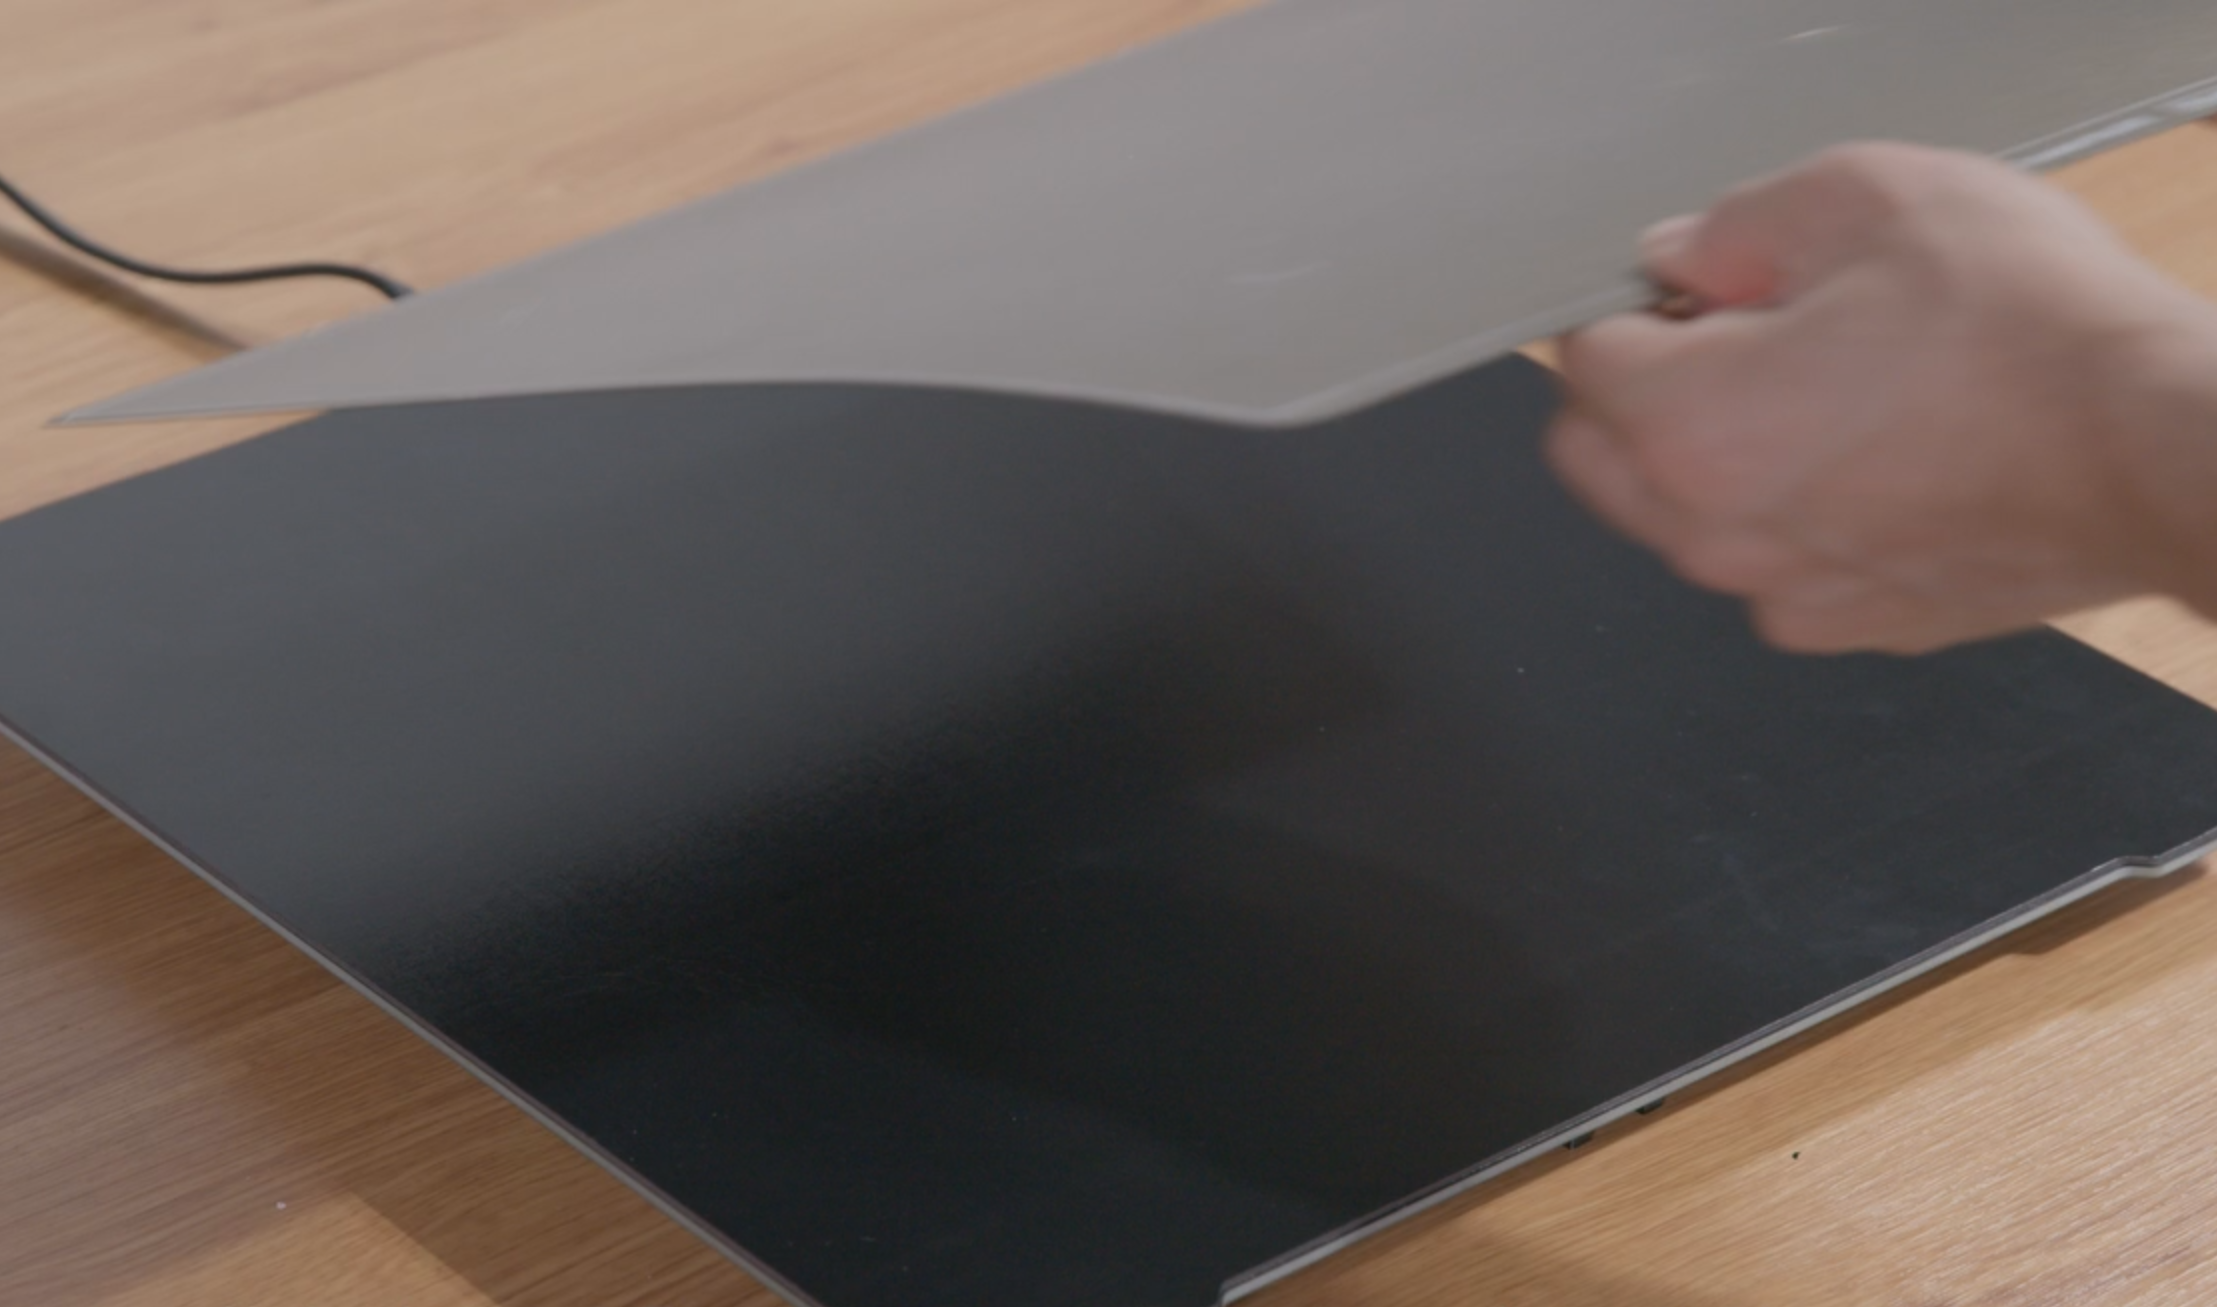
- Place the PEI sheet printing platform on a solid horizontal table or workbench, and then detach the PEI sheet.
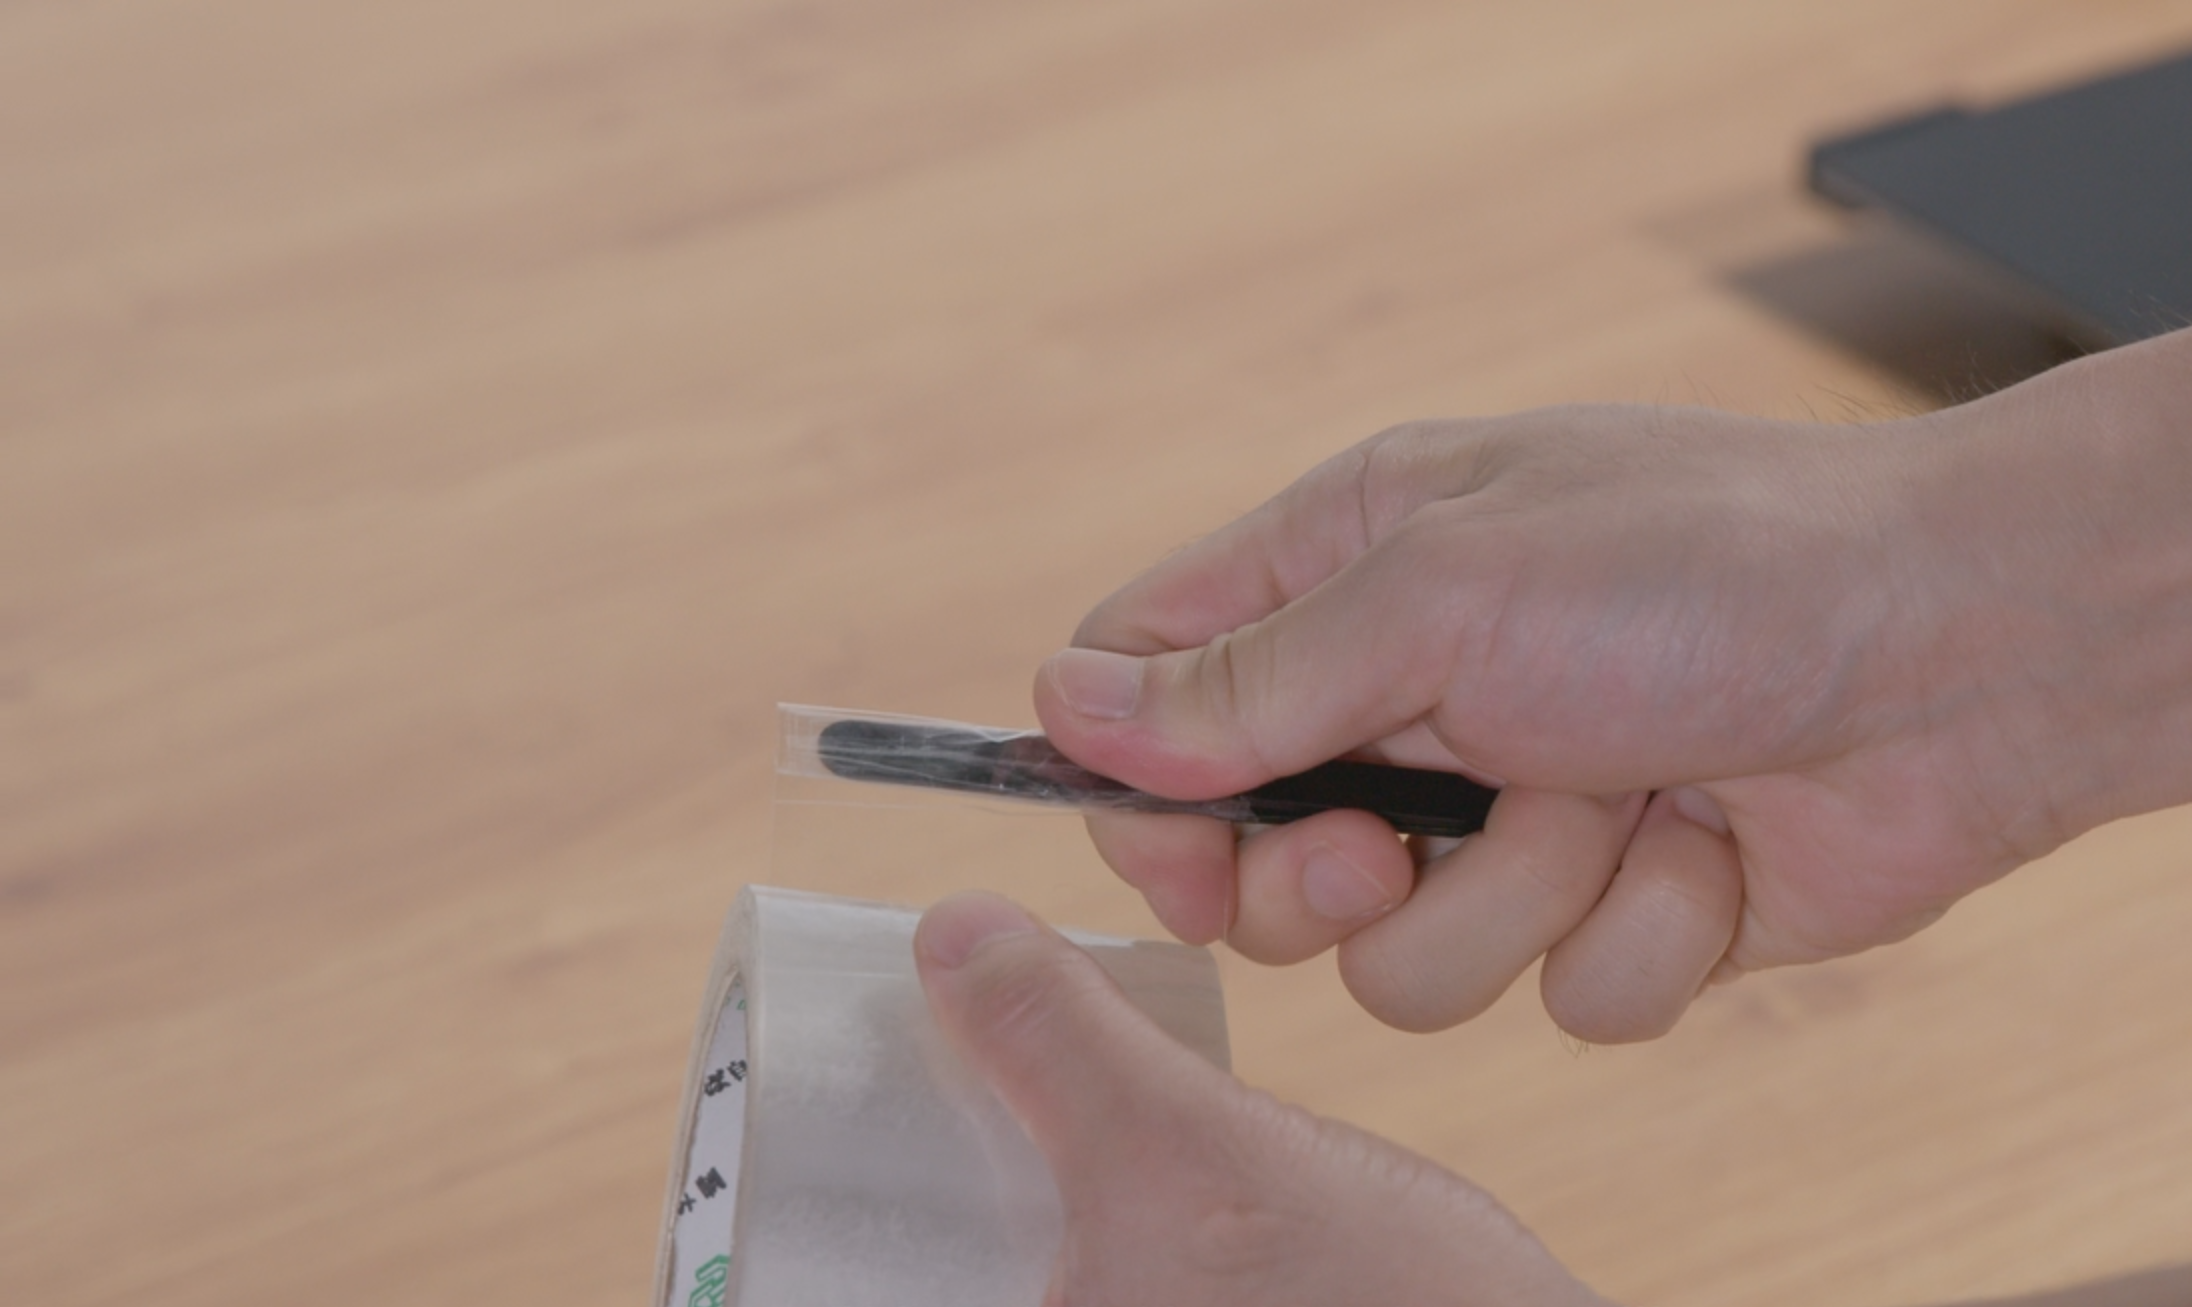
- Wrap a few layers of tape around the grip portion of the tweezers.
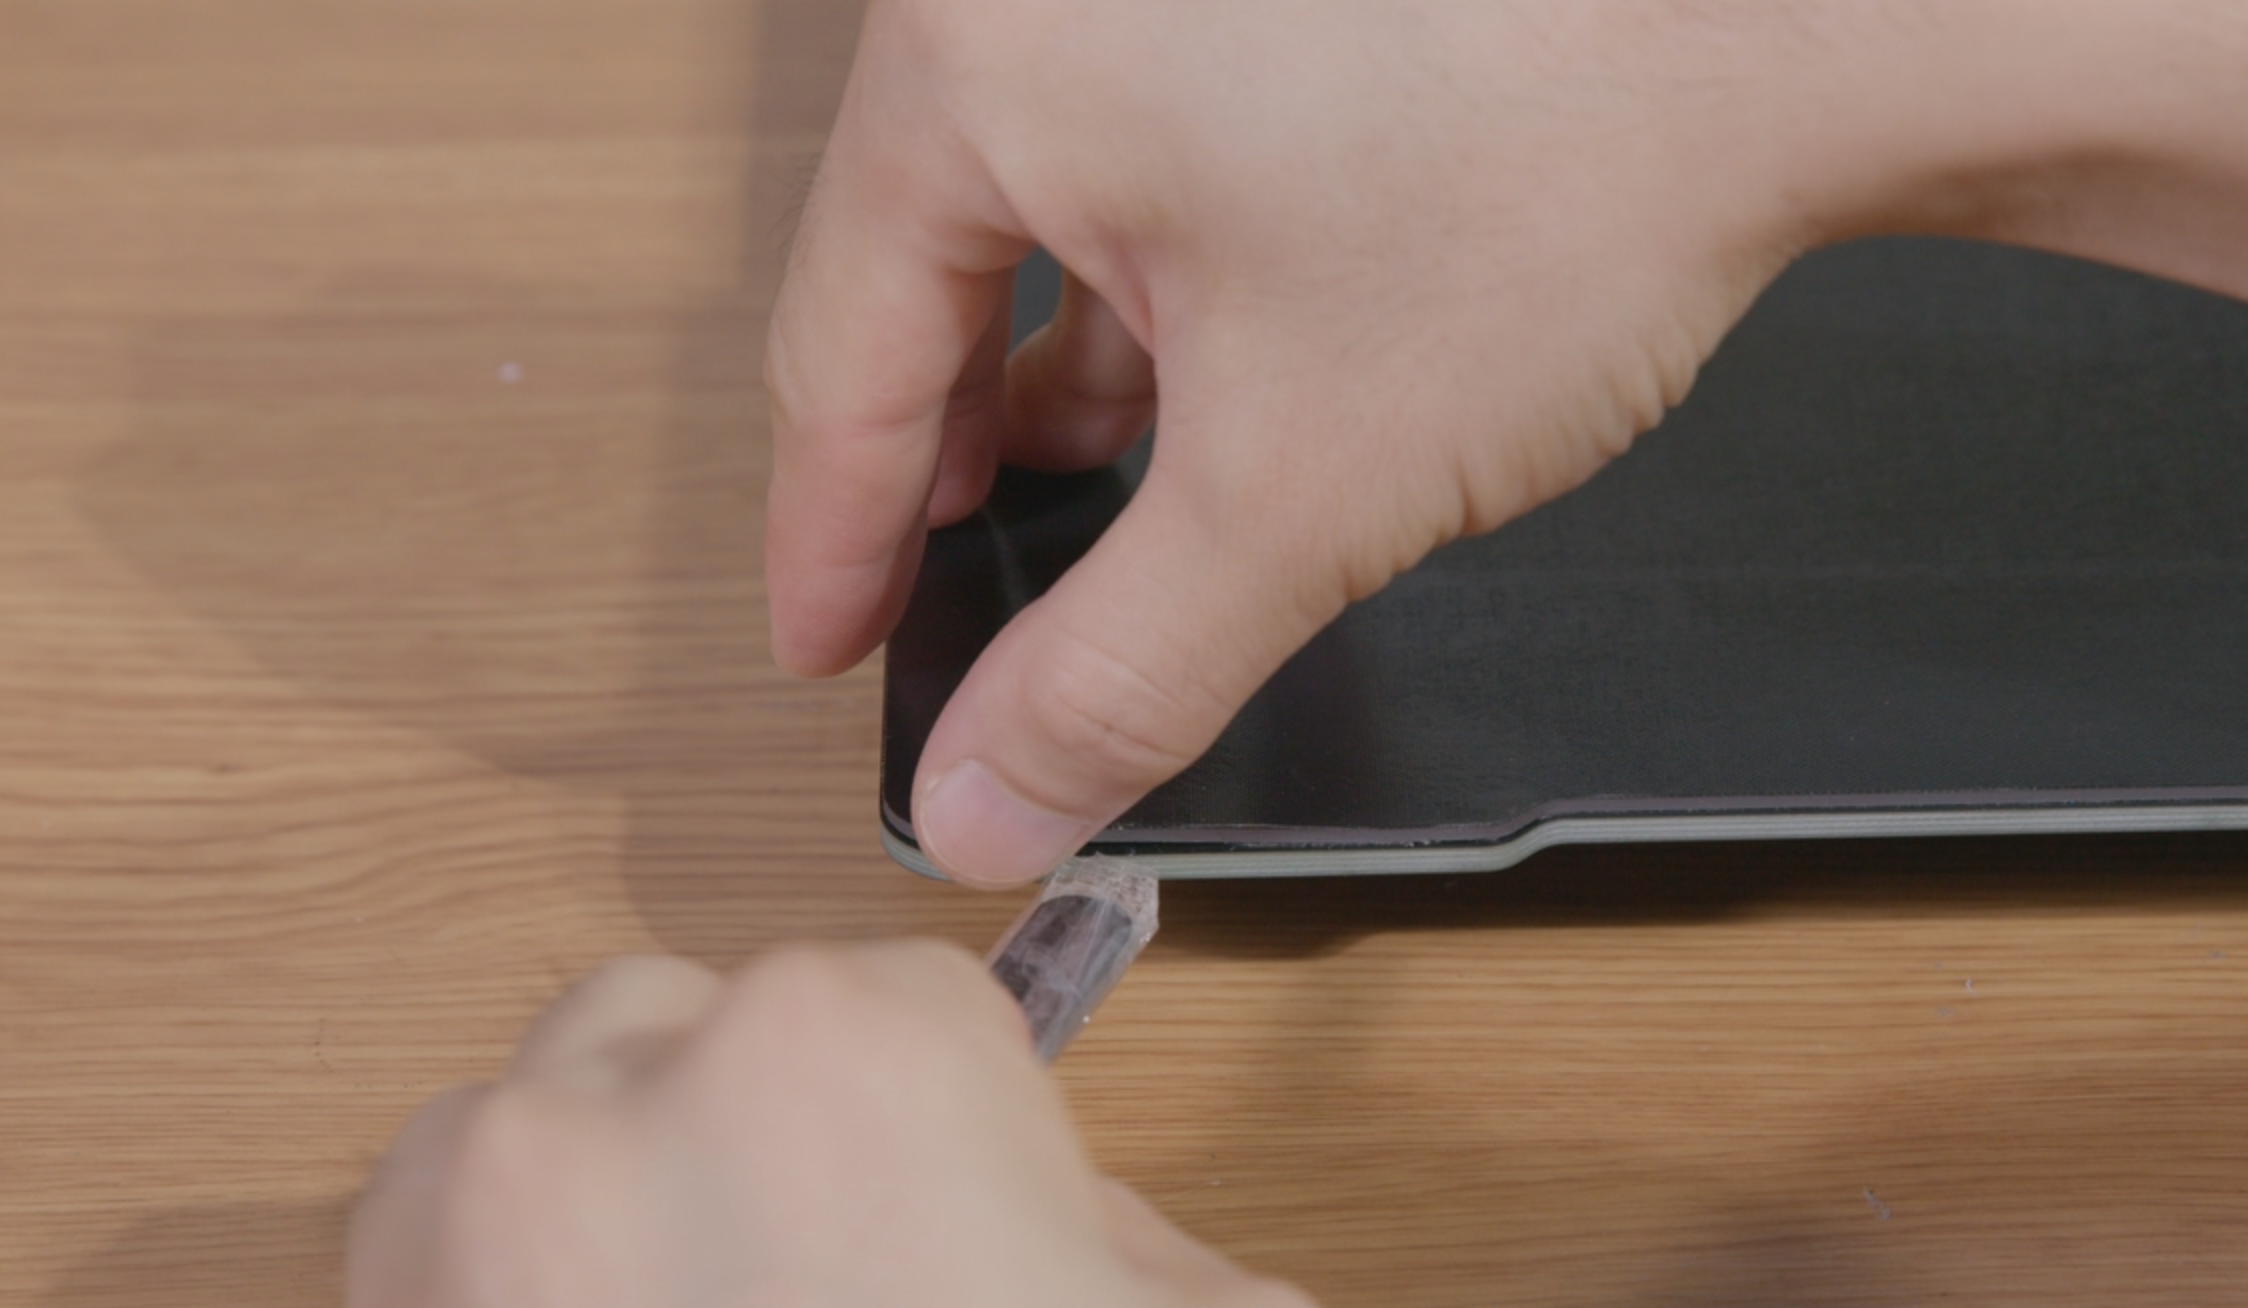
- On both sides of the printing platform, use the tweezers to pry open the soft magnetic sticker.

- Insert the grip portion of the tweezers into the gap to detach the soft magnetic sticker from the heated bed.
- Gradually detach the remaining portion of the soft magnetic sticker from the heated bed.
If the soft magnetic sticker is difficult to detach, try the following: Heat the heated bed to 60°C > Power off the machine > Wear insulated gloves to detach the heated bed > Repeat the above steps to detach the soft magnetic sticker.
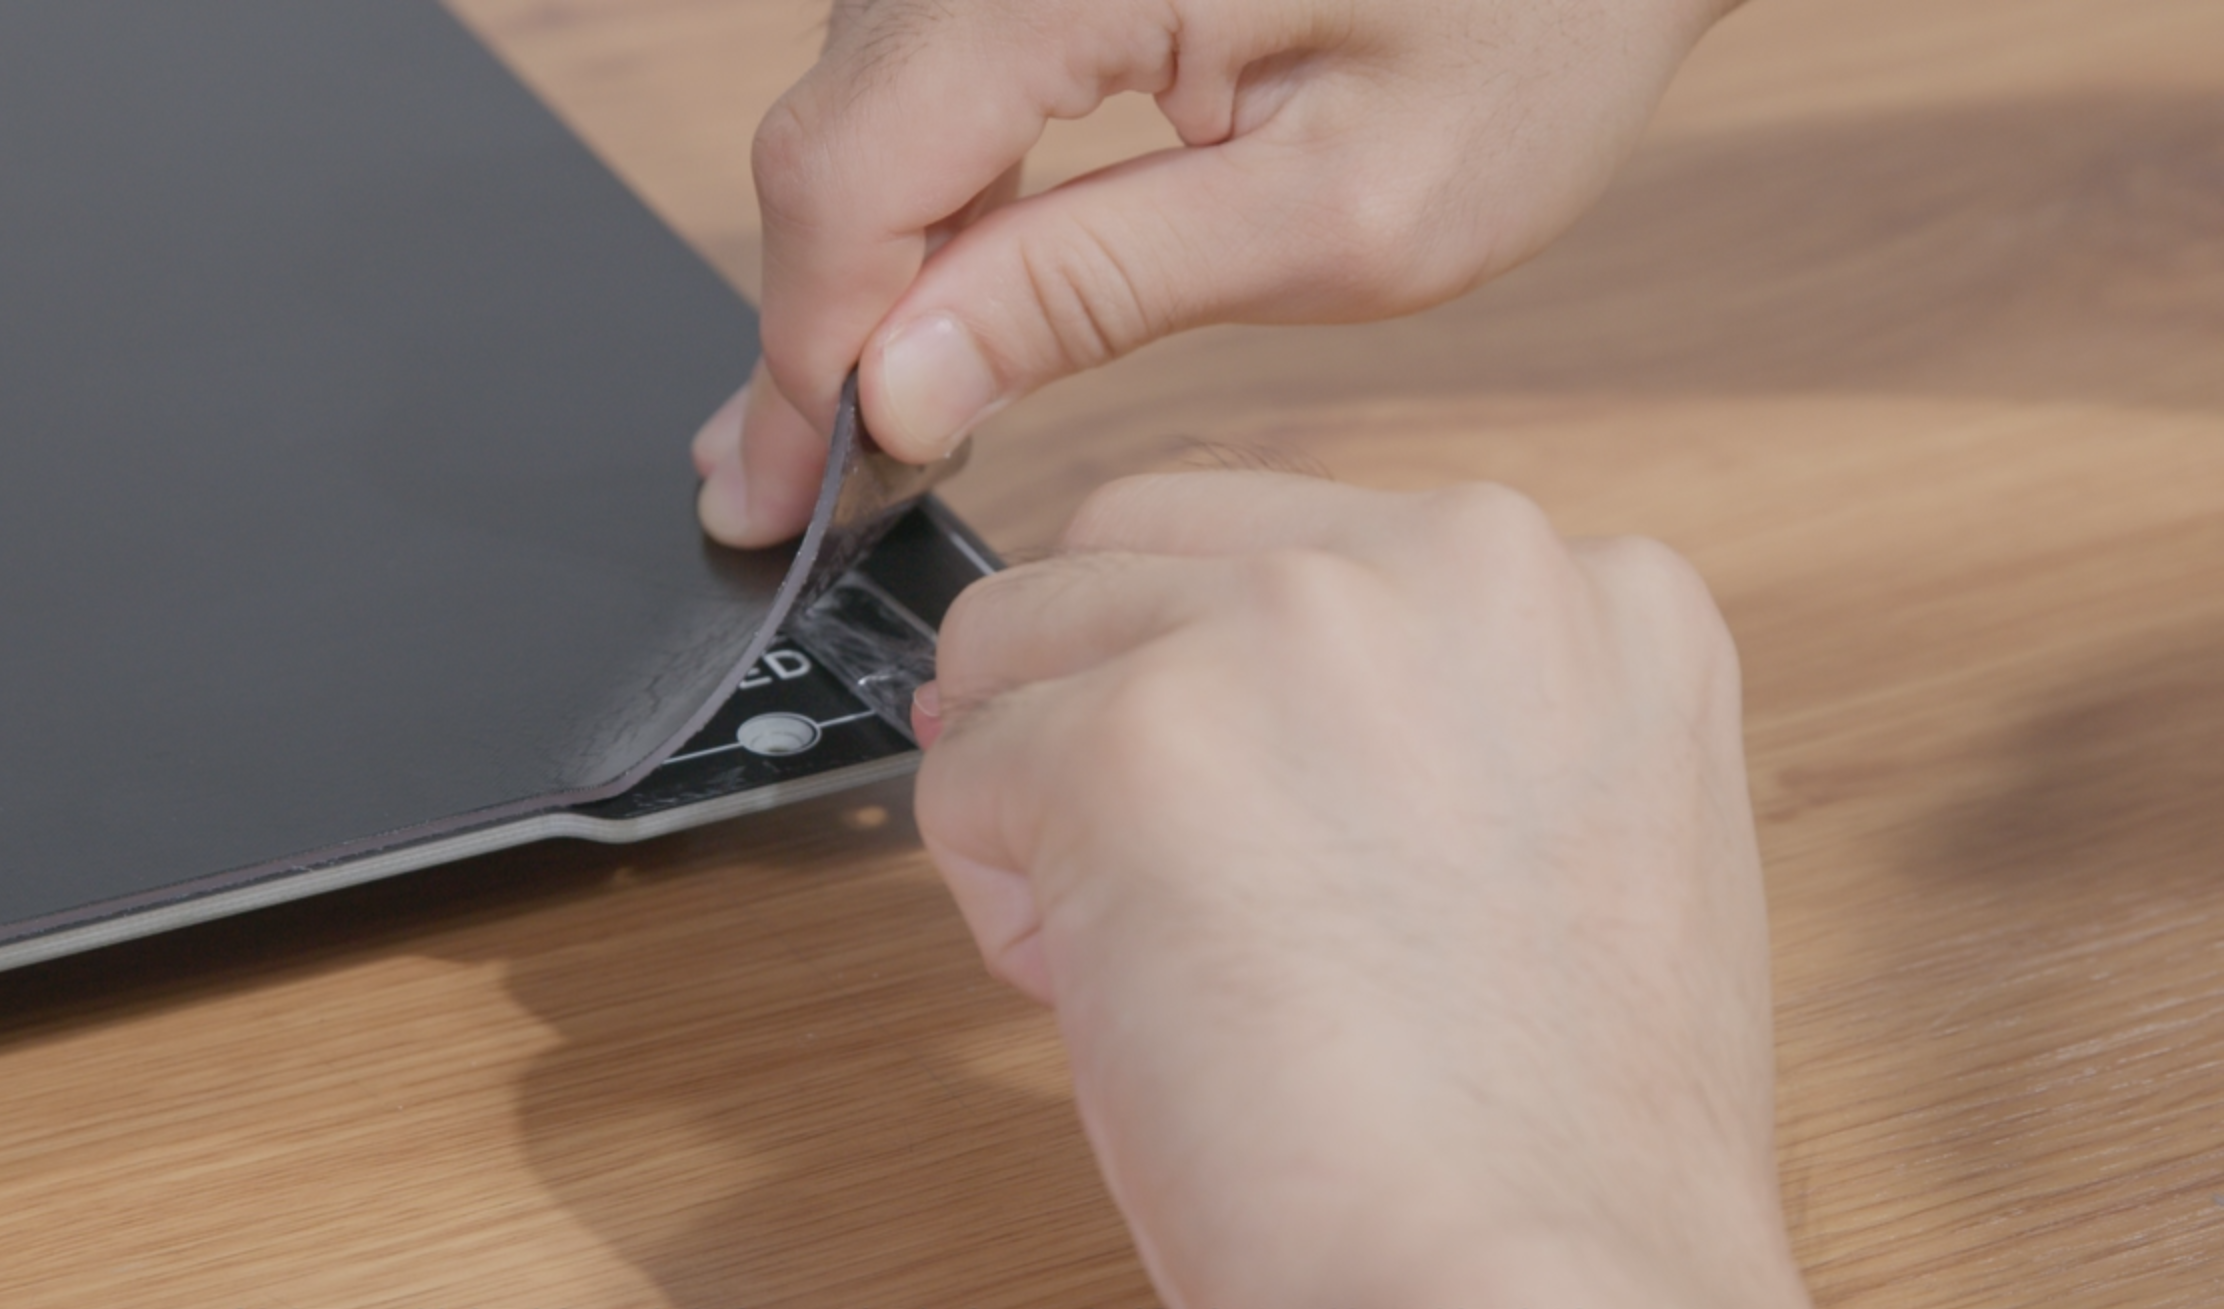
- If there is remaining adhesive on the surface of the heated bed, moisten the wiping cloth with ethyl alcohol to clean the surface.

Read Before Installation
- Before installing the soft magnetic sticker, clean the surface of the heated bed using the wiping cloth.
- Initially, peel back a small area of the backing paper at one corner. To allow for subsequent adjustments if necessary, do not peel off a large area.
- To allow for subsequent adjustments if necessary, it is not recommended to apply excessive pressure throughout the sticking process. Apply further pressure only after the soft magnetic sticker is properly aligned.
- If you notice any bubbles and lumps or need adjustment before fully sticking, gently lift the soft magnetic sticker and reapply.
- Place the soft magnetic sticker onto the heated bed in correct orientation.

- Peel back a small area of the backing paper at one corner, align the edges of the soft magnetic sticker with the edges of the heated bed, and then gently apply pressure to the soft magnetic sticker.
To allow for subsequent adjustments if necessary, it is not recommended to peel back a large area of the backing paper or apply excessive pressure throughout the process.

- Tilt the soft magnetic sticker to an angle of approximately 60° toward the heated bed, proceed to peel off the remaining backing paper and gently apply pressure to the soft magnetic sticker.
If you notice any bubbles and lumps or need adjustment before fully sticking, gently lift the soft magnetic sticker and reapply.
If, after multiple attempts, there are still bubbles or lumps on the surface of the soft magnetic sticker, or if there is remaining adhesive on the surface, please remove the soft magnetic sticker and purchase a new one for installation.

- Moisten the wiping cloth with ethyl alcohol to clean the surface of the soft magnetic sticker. Apply further pressure simultaneously while cleaning.

- Ensure the textured side of the PEI sheet is facing up. Tilt the PEI sheet to an angle of approximately 60° toward the soft magnetic sticker, align the PEI sheet with the holders, and then place it onto the soft magnetic sticker.
If you are using the Dual Textured and Smooth PEI Sheet, ensure that the textured side is facing up. Otherwise, during the process of leveling the heated bed, the smooth side of the sheet may become dented upon contact with the nozzles.

- Install the PEI sheet printing platform onto the support platform, and then tighten the cam handle of the support platform by turning it to the right.

- Plug the heated bed cable into the heated bed.

- Power on the machine.

- Tap Calibration on the Home Screen, and then redo Heated Bed Leveling.
When using the Dual Textured and Smooth PEI Sheet, level the heated bed using the textured side. Once leveling is complete, you can choose to use either the smooth or textured side as needed.
The glass printing platform and the PEI sheet printing platform vary in thickness, so you need to redo Heated Bed Leveling.

- Ensure the textured side of the PEI sheet is facing up. Tilt the PEI sheet to an angle of approximately 60° toward the soft magnetic sticker, align the PEI sheet with the holders, and then place it onto the soft magnetic sticker.
If you are using the Dual Textured and Smooth PEI Sheet, ensure that the textured side is facing up. Otherwise, during the process of leveling the heated bed, the smooth side of the sheet may become dented upon contact with the nozzles.

- Install the PEI sheet printing platform onto the support platform, and then tighten the cam handle of the support platform by turning it to the right.

- Plug the heated bed cable into the heated bed.

- Power on the machine.

- Tap Calibration on the Home Screen, and then redo Heated Bed Leveling.
When using the Dual Textured and Smooth PEI Sheet, level the heated bed using the textured side. Once leveling is complete, you can choose to use either the smooth or textured side as needed.
The glass printing platform and the PEI sheet printing platform vary in thickness, so you need to redo Heated Bed Leveling.

Do not remove the print until both the build plate and the print have cooled down to room temperature; otherwise, the smooth/textured PEI may be damaged.
Pay close attention to the first layer adhesion to detect any problems in time to avoid damaging the smooth/textured PEI. Adjust the Z Offset when necessary.
When removing the print with the provided palette knife, keep the angle between the palette knife and the build plate smaller than 30° to avoid damaging the smooth/textured PEI.
When printing on the smooth PEI plate, it is not recommended to print highly adhesive filaments like PETG and TPU.
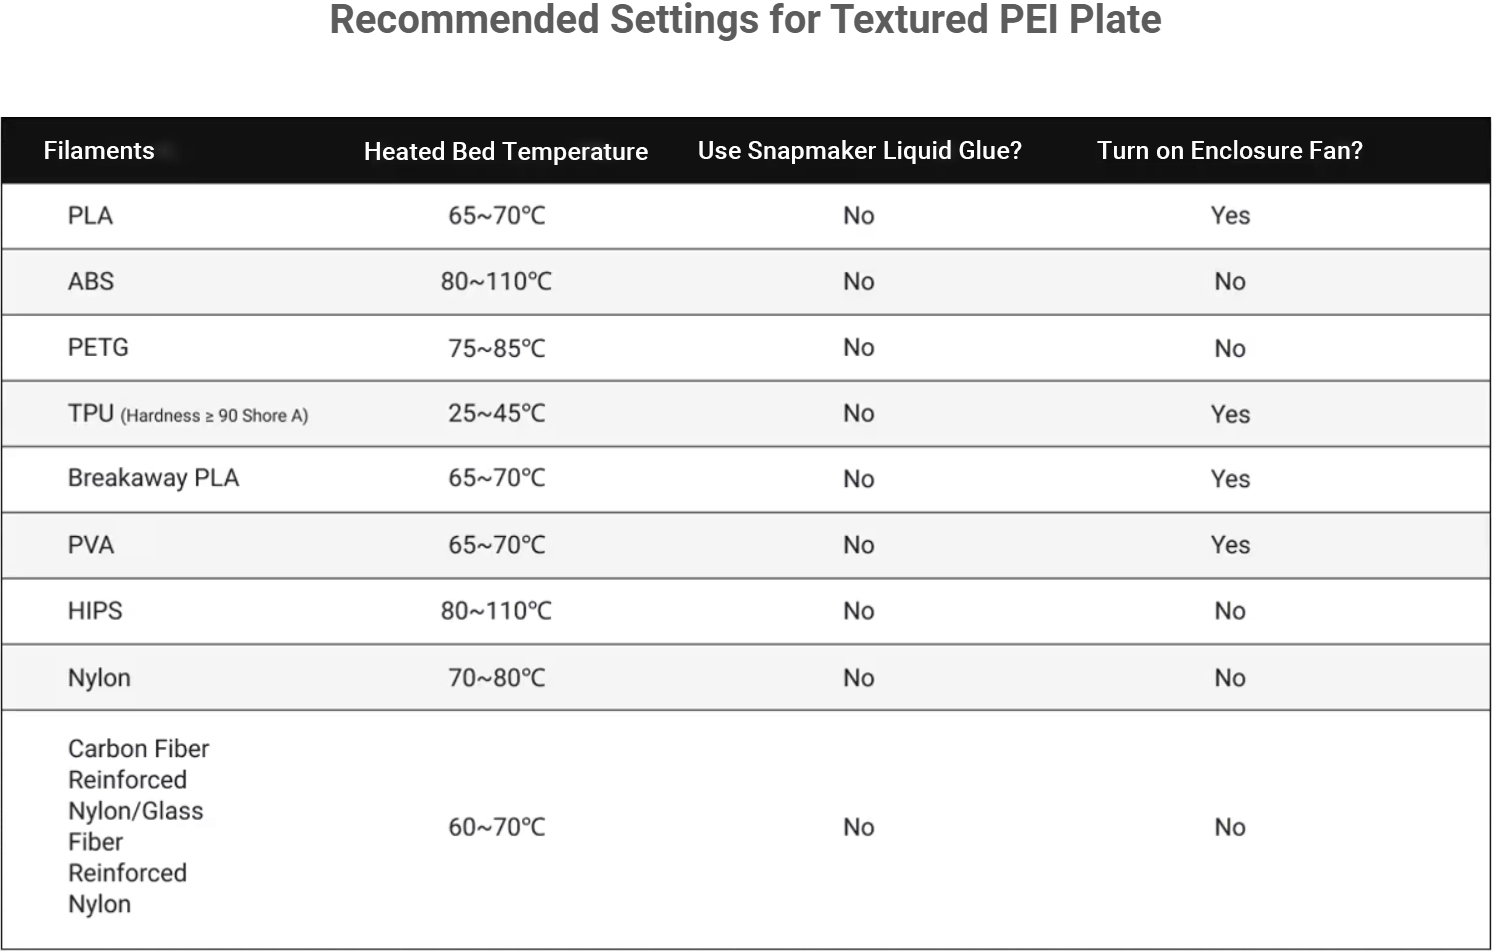
Please note that other slicer settings will need to be adjusted depending on the filament requirements. Supports heating up to 110°C. When exceeding 80°C, use an enclosure to maintain stability and prevent warping due to low ambient temperatures.
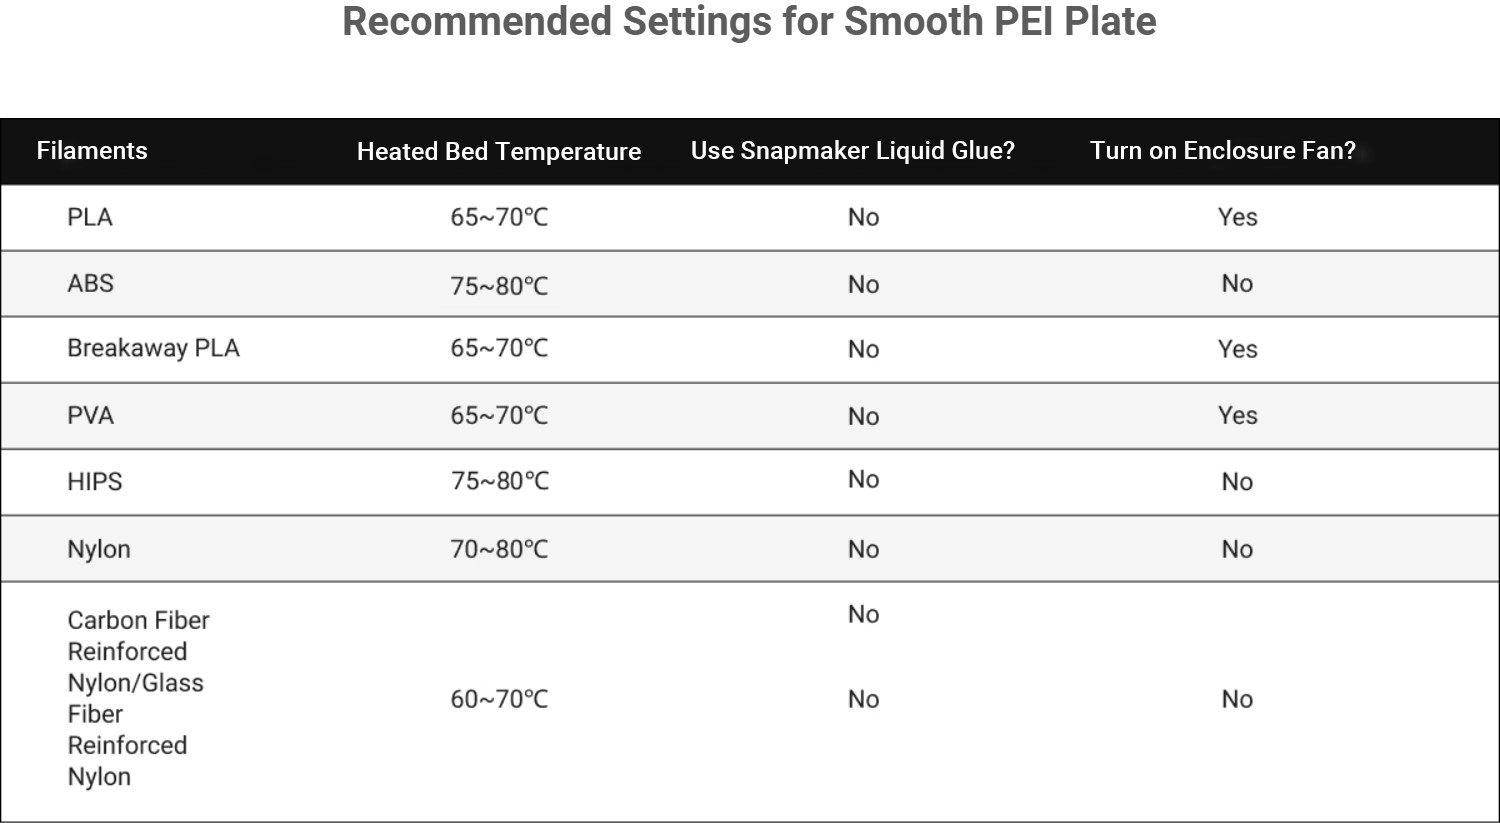
Please note that other slicer settings will need to be adjusted depending on the filament requirements. Supports heating up to 80°C.
