¶ 01 Before You Start
This guide is provided for reference purposes only. We do not warrant the absolute accuracy or completeness of the information provided by this guide. We reserve the right to modify or revise this guide in our sole discretion at any time without notice.
If you purchase the SnapDryer Box, it will not include the Dry Dock. Please refer to the relevant information in this guide.
General Safety Information
- Use only the original power adapter.
- Do not disassemble or repair the product without guidance.
- Always operate the product indoors on a solid horizontal table or workbench.
- Remove the power cable from the socket when the product is not in use.
- Turn off the power when unattended to prevent accidental fire.
- If the product malfunctions, unplug the power adapter from the socket and contact technical support at support@snapmaker.com.
- Ensure electrical safety during operation to prevent electric shock, fire, or damage. Avoid using the product near water, such as in bathrooms, near water heaters, or in highly humid areas.
Drying Safety Information
- Do not place any items in the heating vents to avoid electric shock.
- When filling or replacing the desiccant, detach the desiccant box from the SnapDryer box.
- Do not place loose desiccant at the bottom of the SnapDryer box.
- Do not operate if any debris (including desiccant) has fallen into the dry dock.
- Do not leave the dryer unattended when switched to Continuous Mode.
- Do not touch the heating vent during operation to avoid burns.
- Keep the filament tightly wound to the spool or feed the tip of the filament through the outlet while drying to prevent the loose end blocking the heating vent. Risk of fire or damage.
¶ 02 Assembly & Installation
¶ 2.1 Specifications
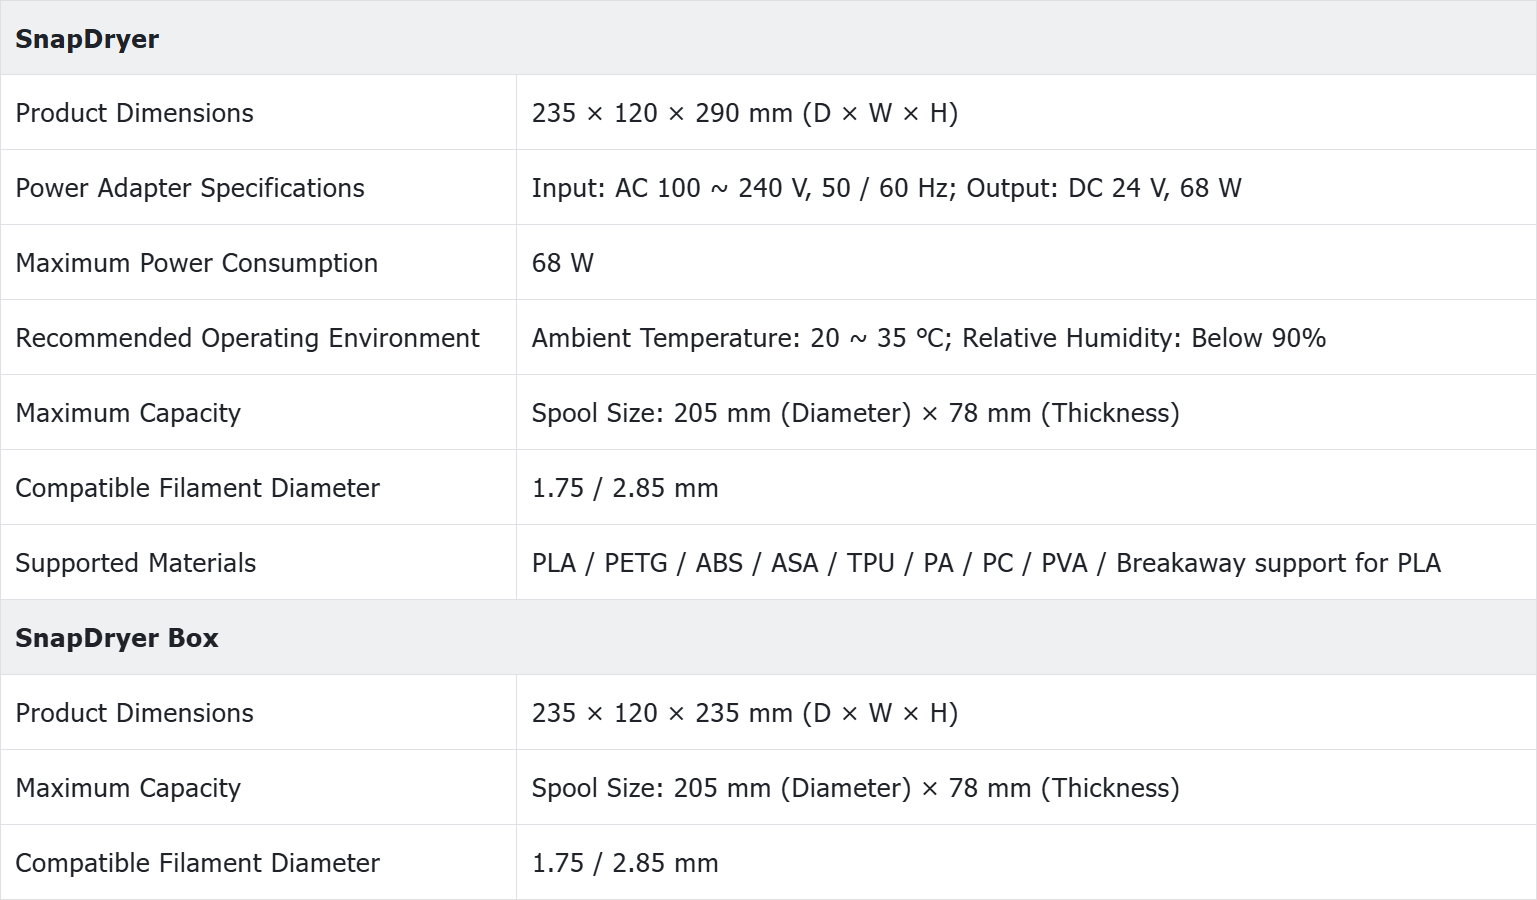
¶ 2.2 Parts List
SnapDryer
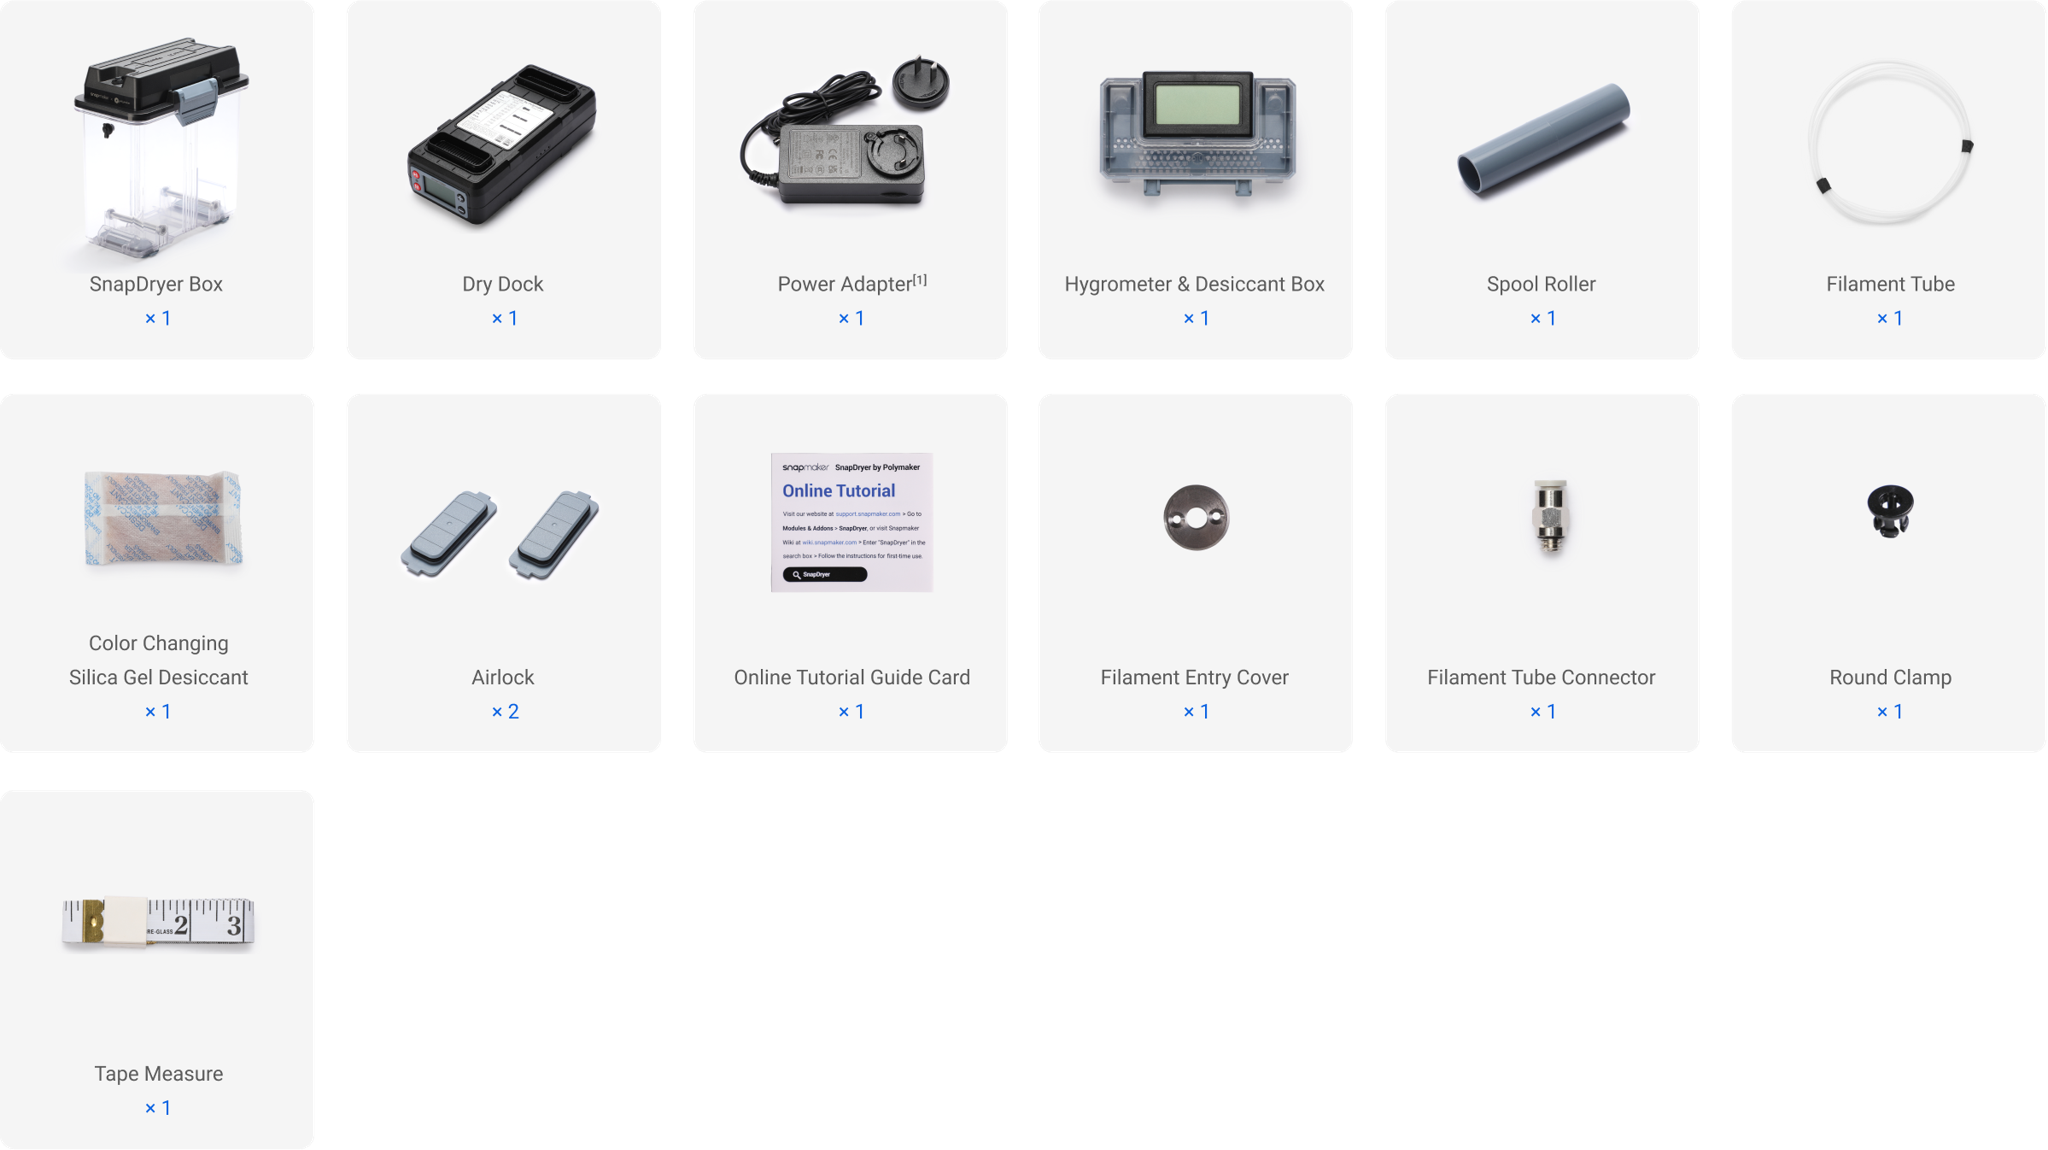
The power adapter consists of a power supply module and an interchangeable head that varies from country to country.
SnapDryer Box
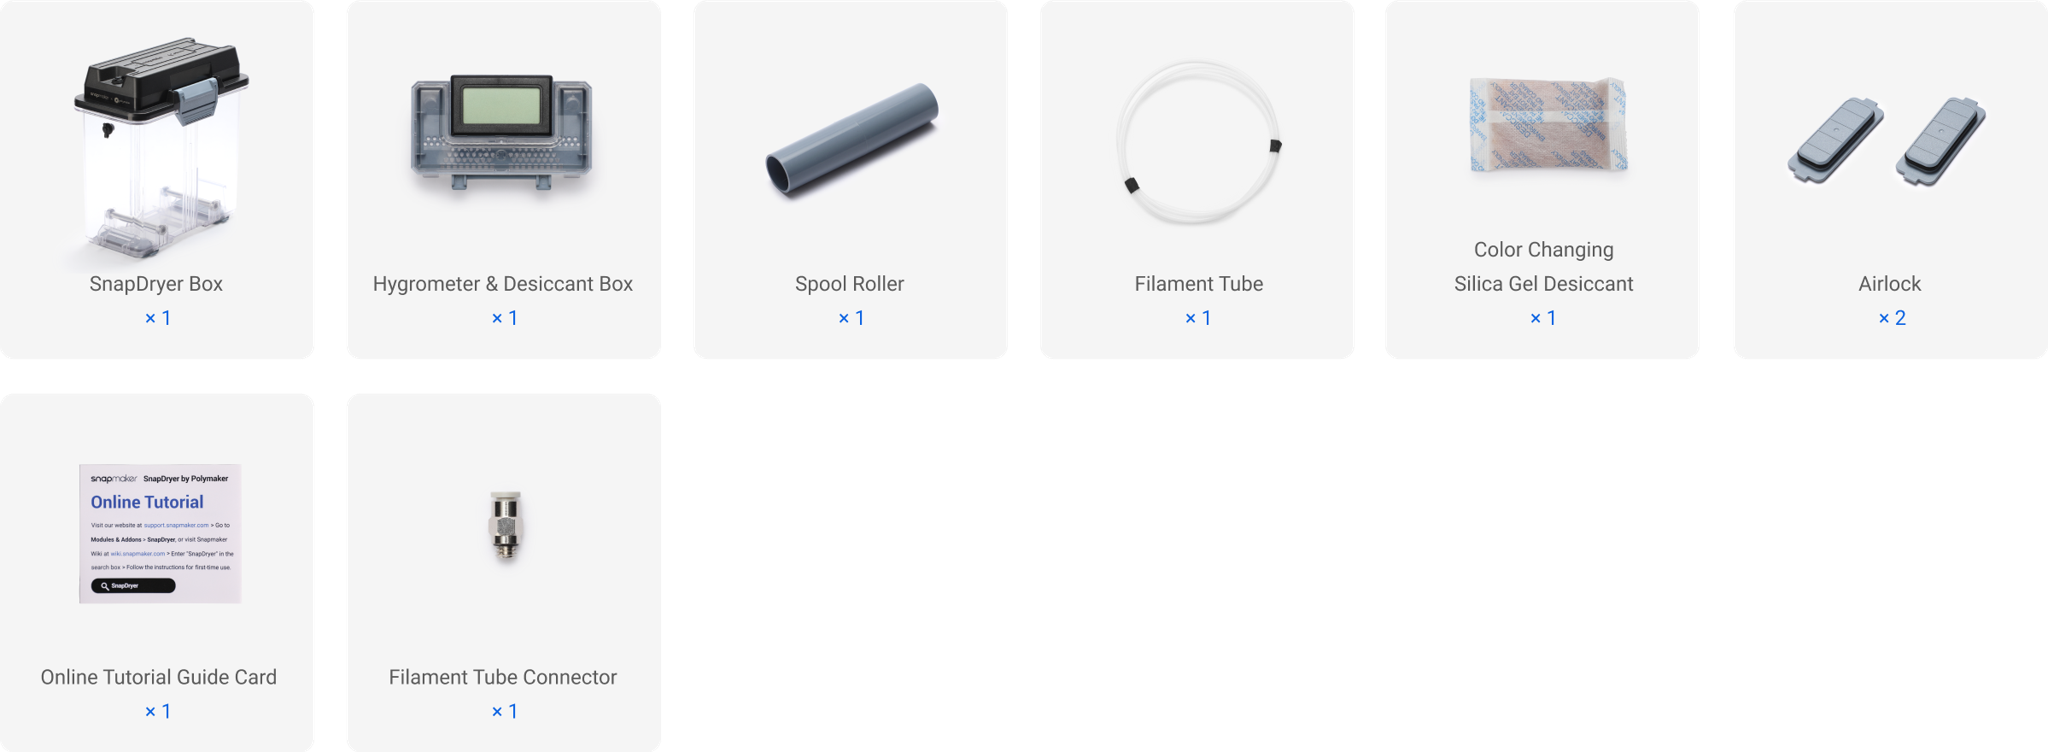
¶ 2.3 Assembling the SnapDryer Box
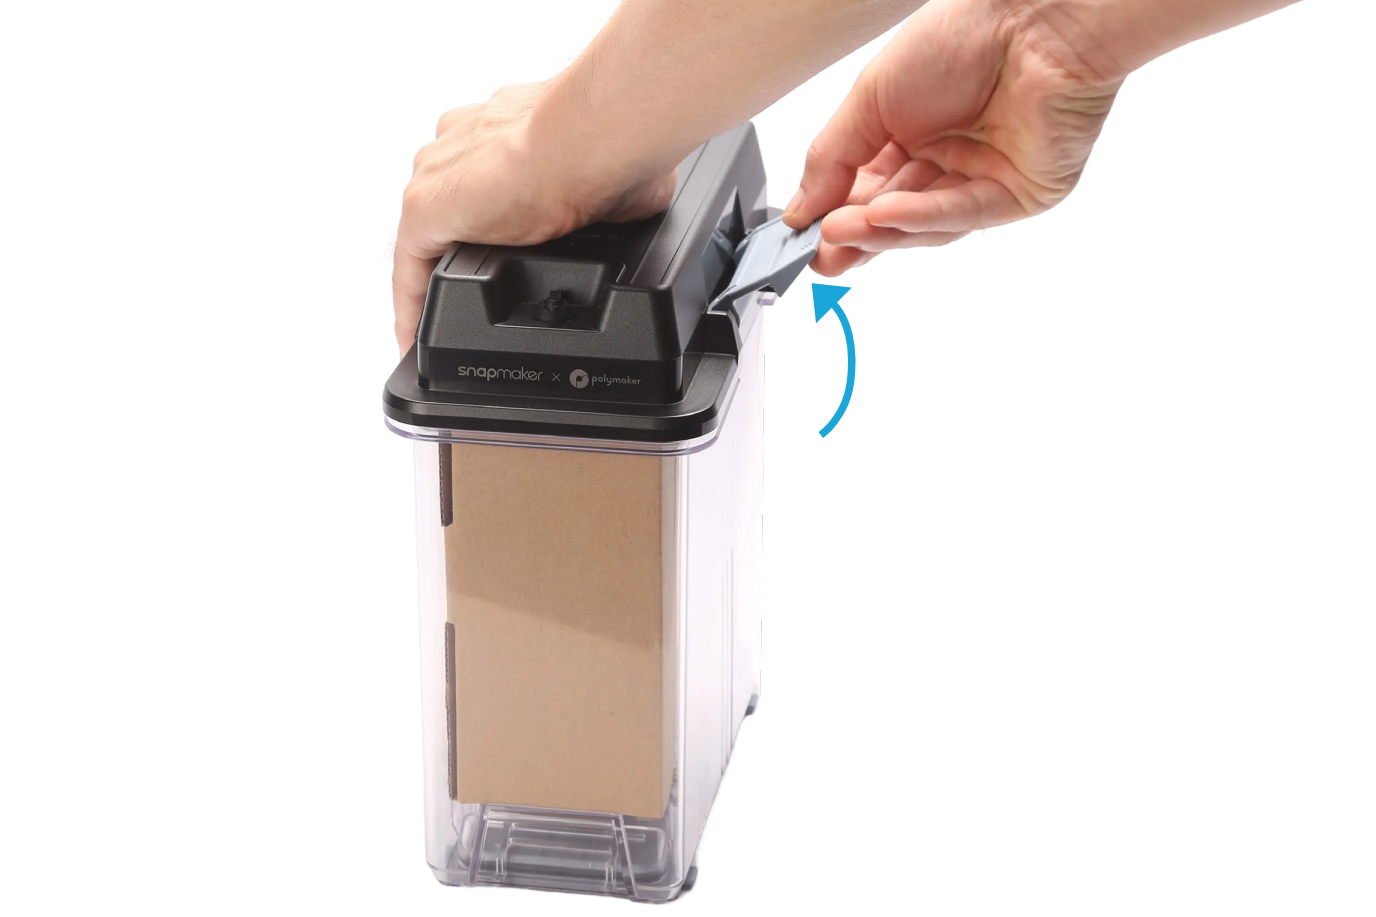
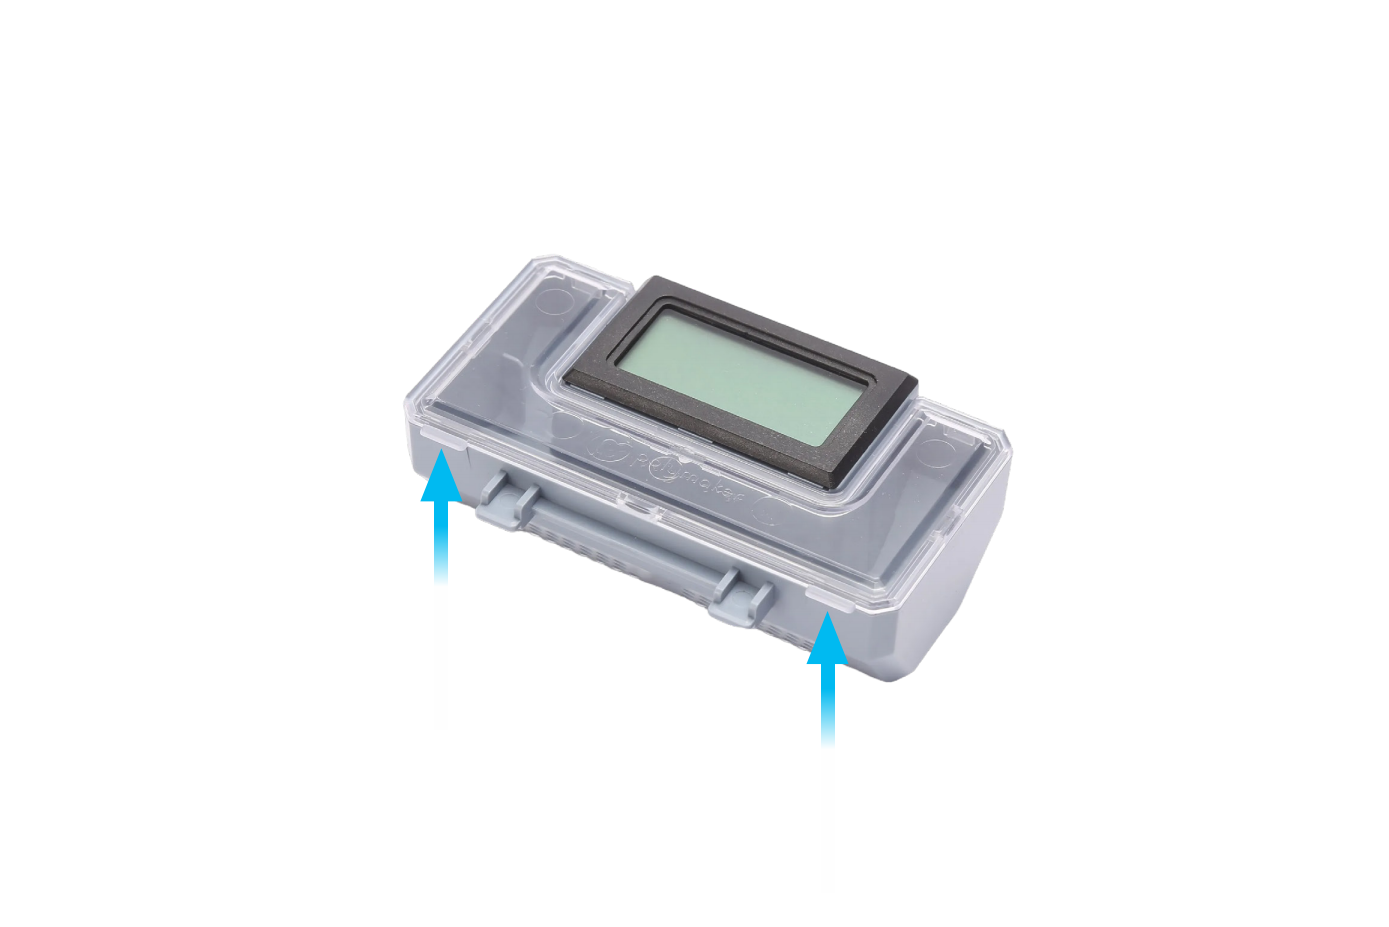
- Press the top cover and open the SnapDryer box, then remove all parts.
- Open the desiccant box, and pour the color changing silica gel desiccant into the desiccant box.
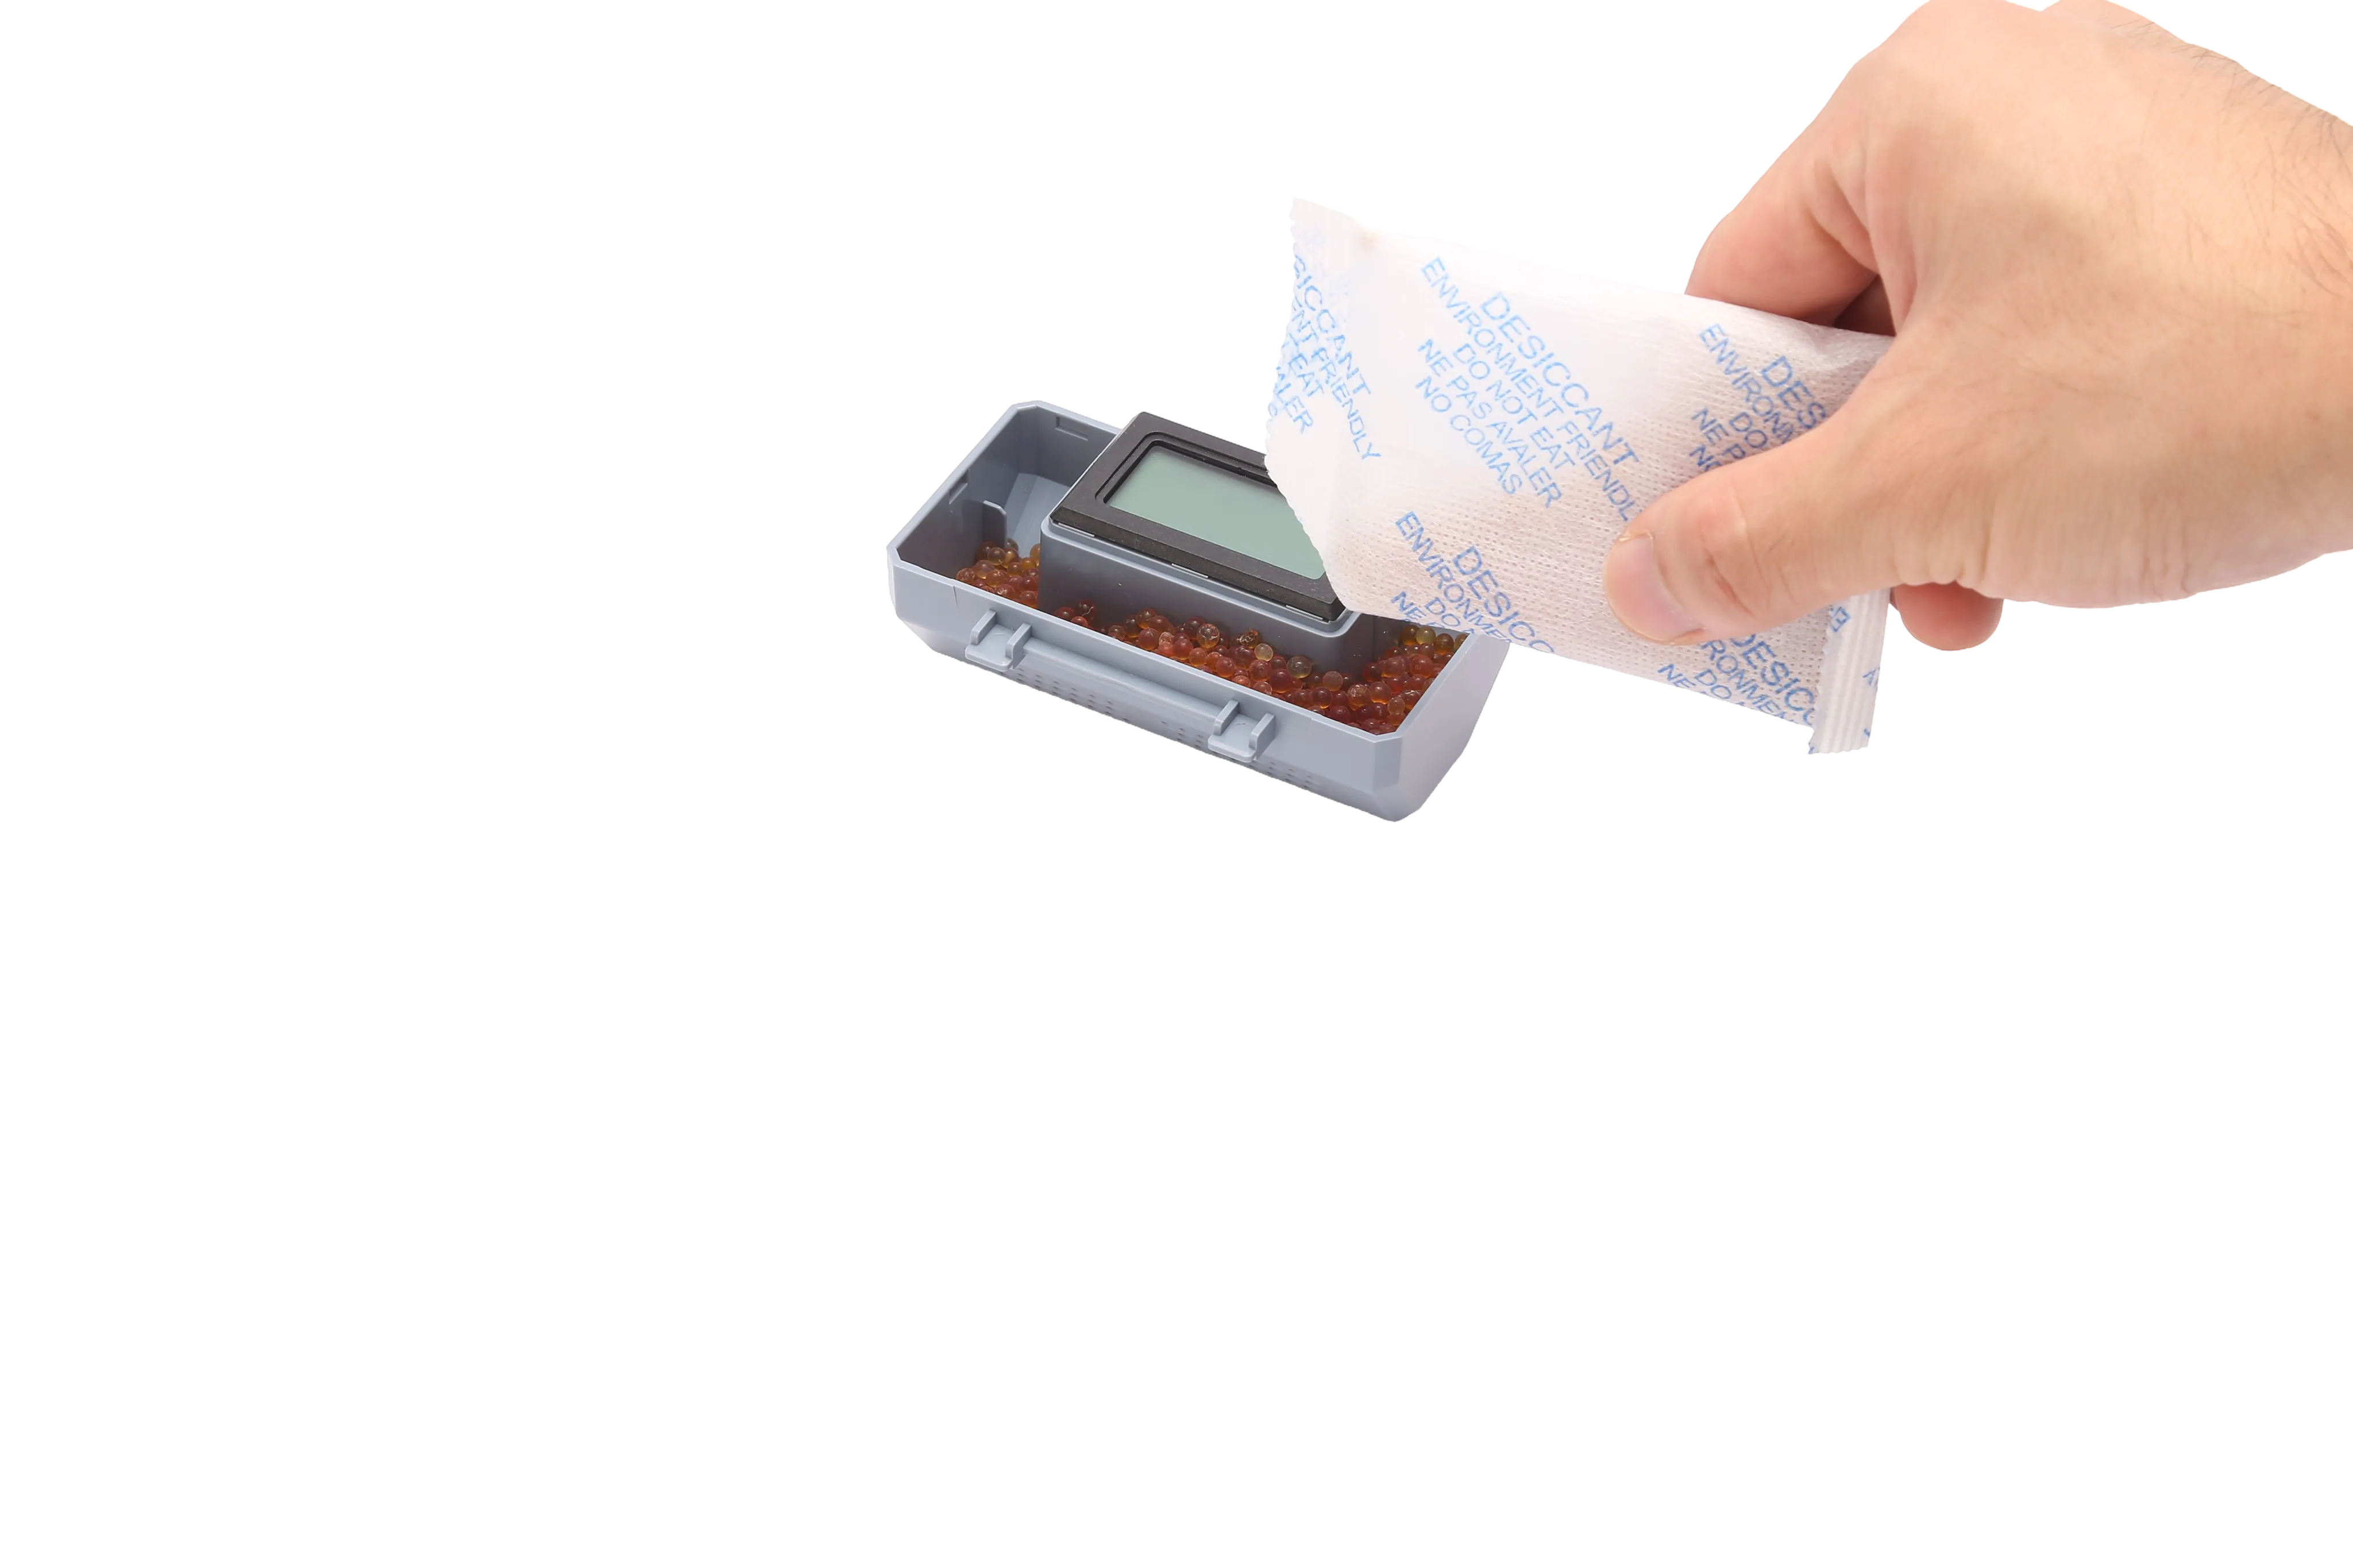
You can open the panel here.
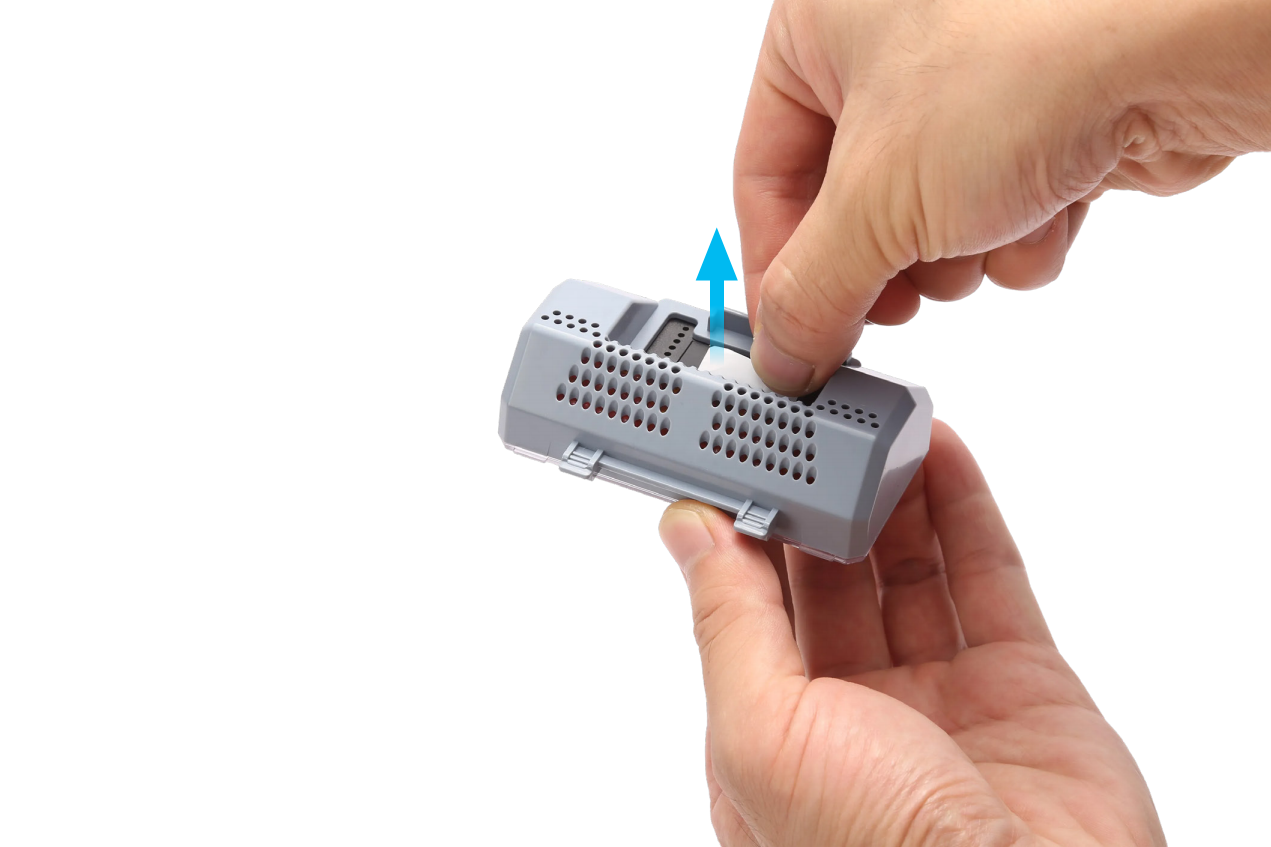
- Remove the paper and place the desiccant box into the SnapDryer box.
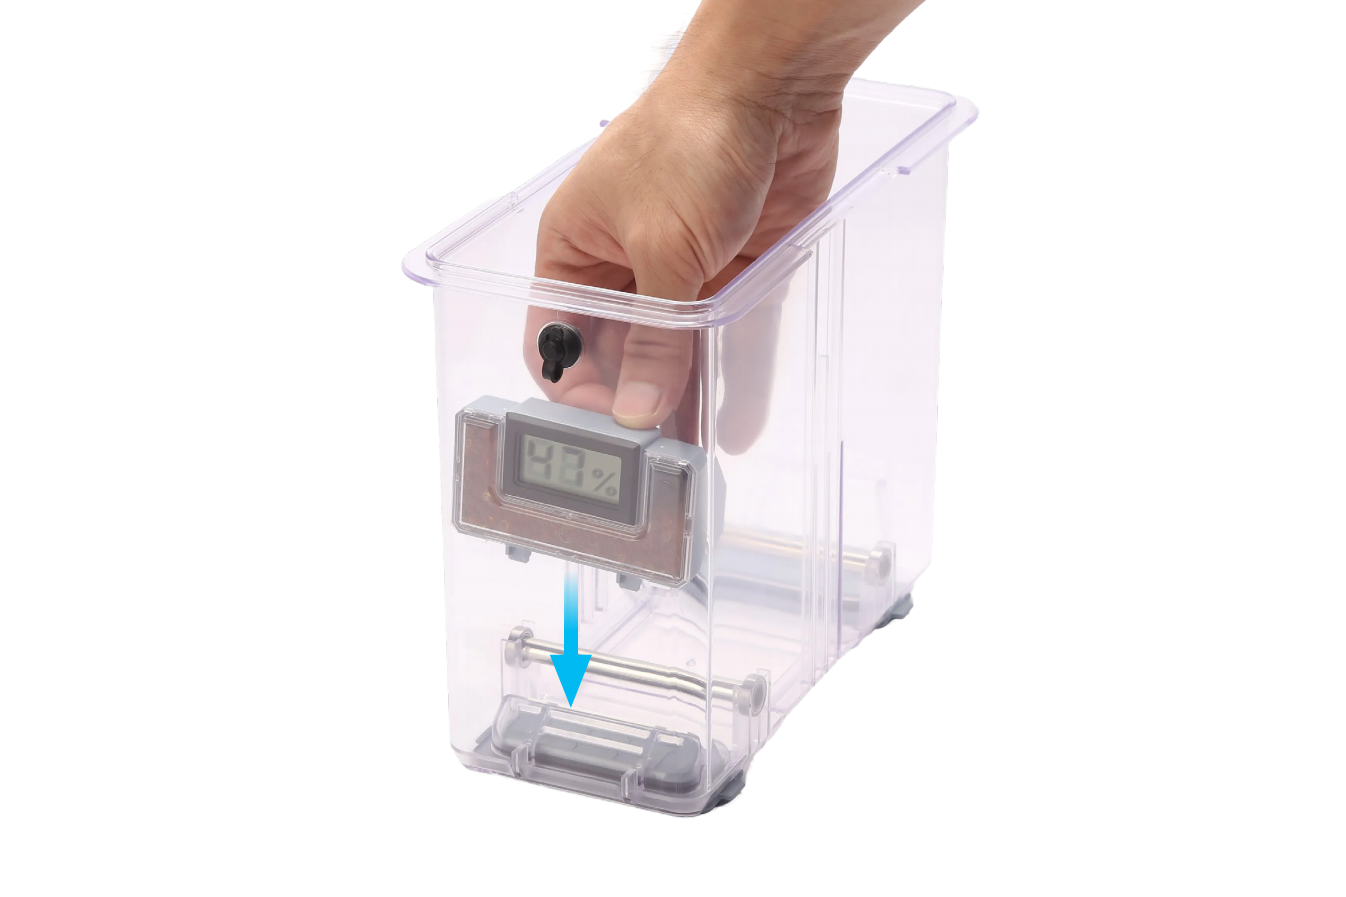
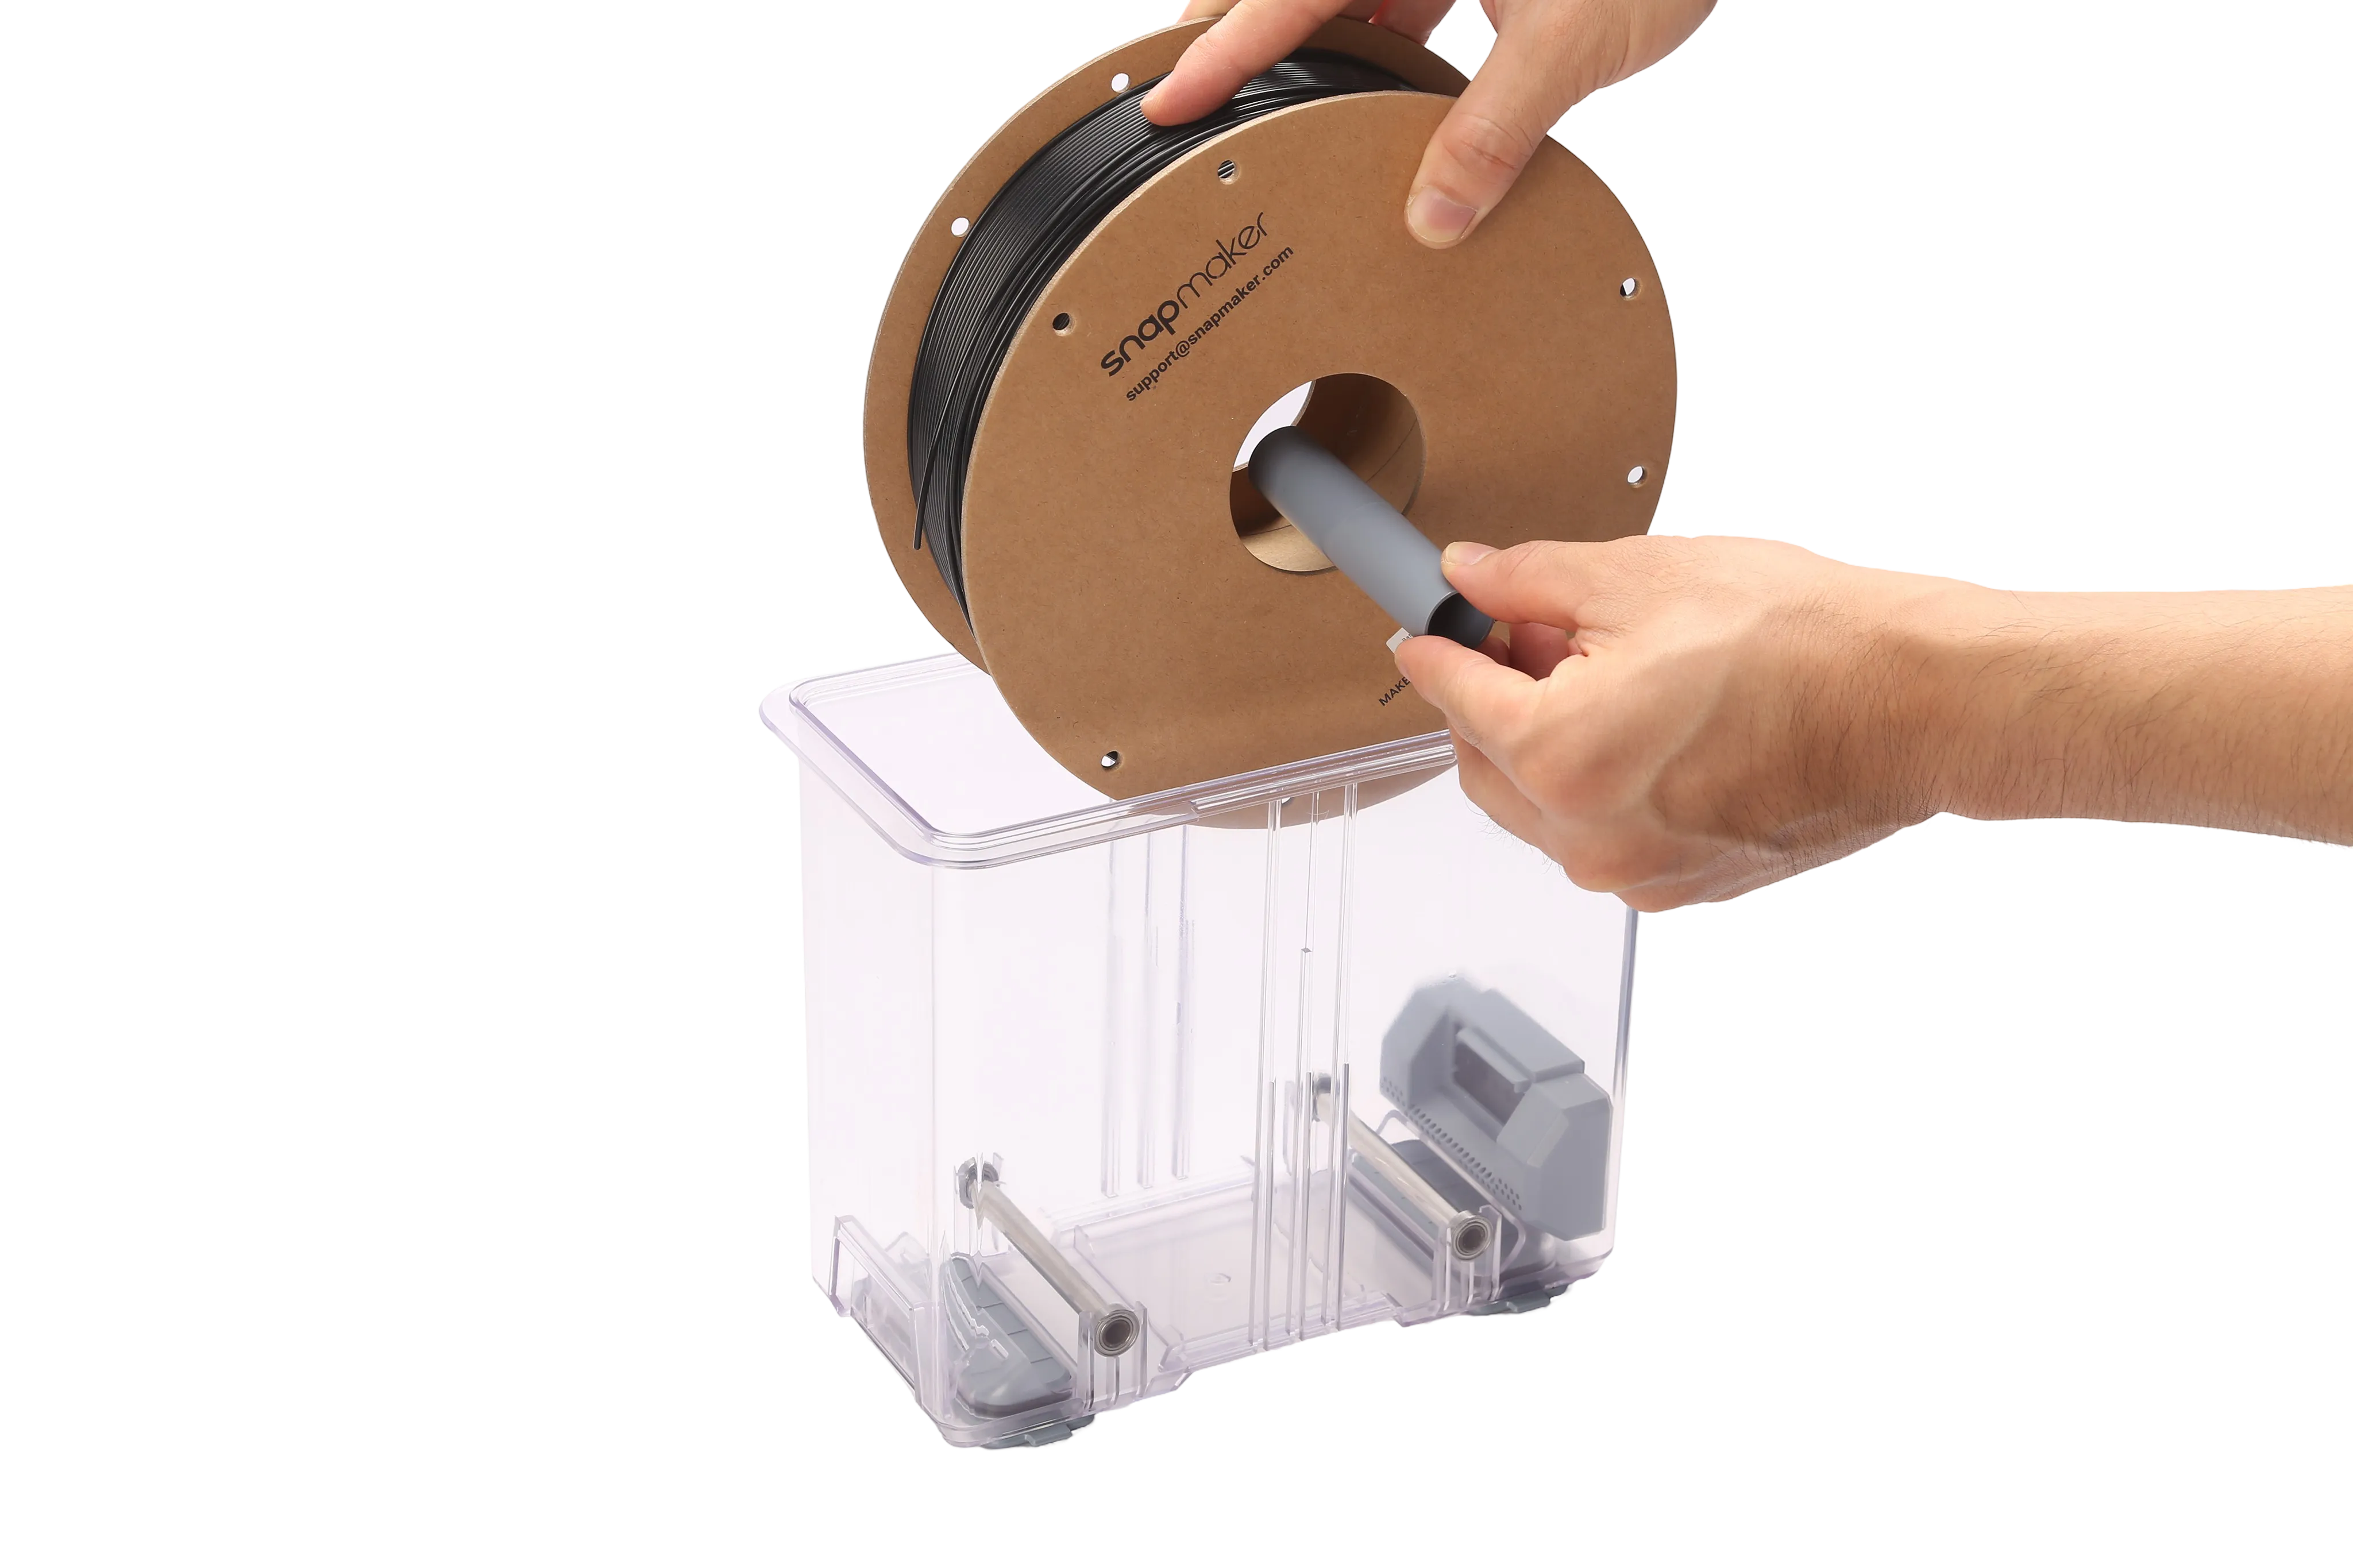
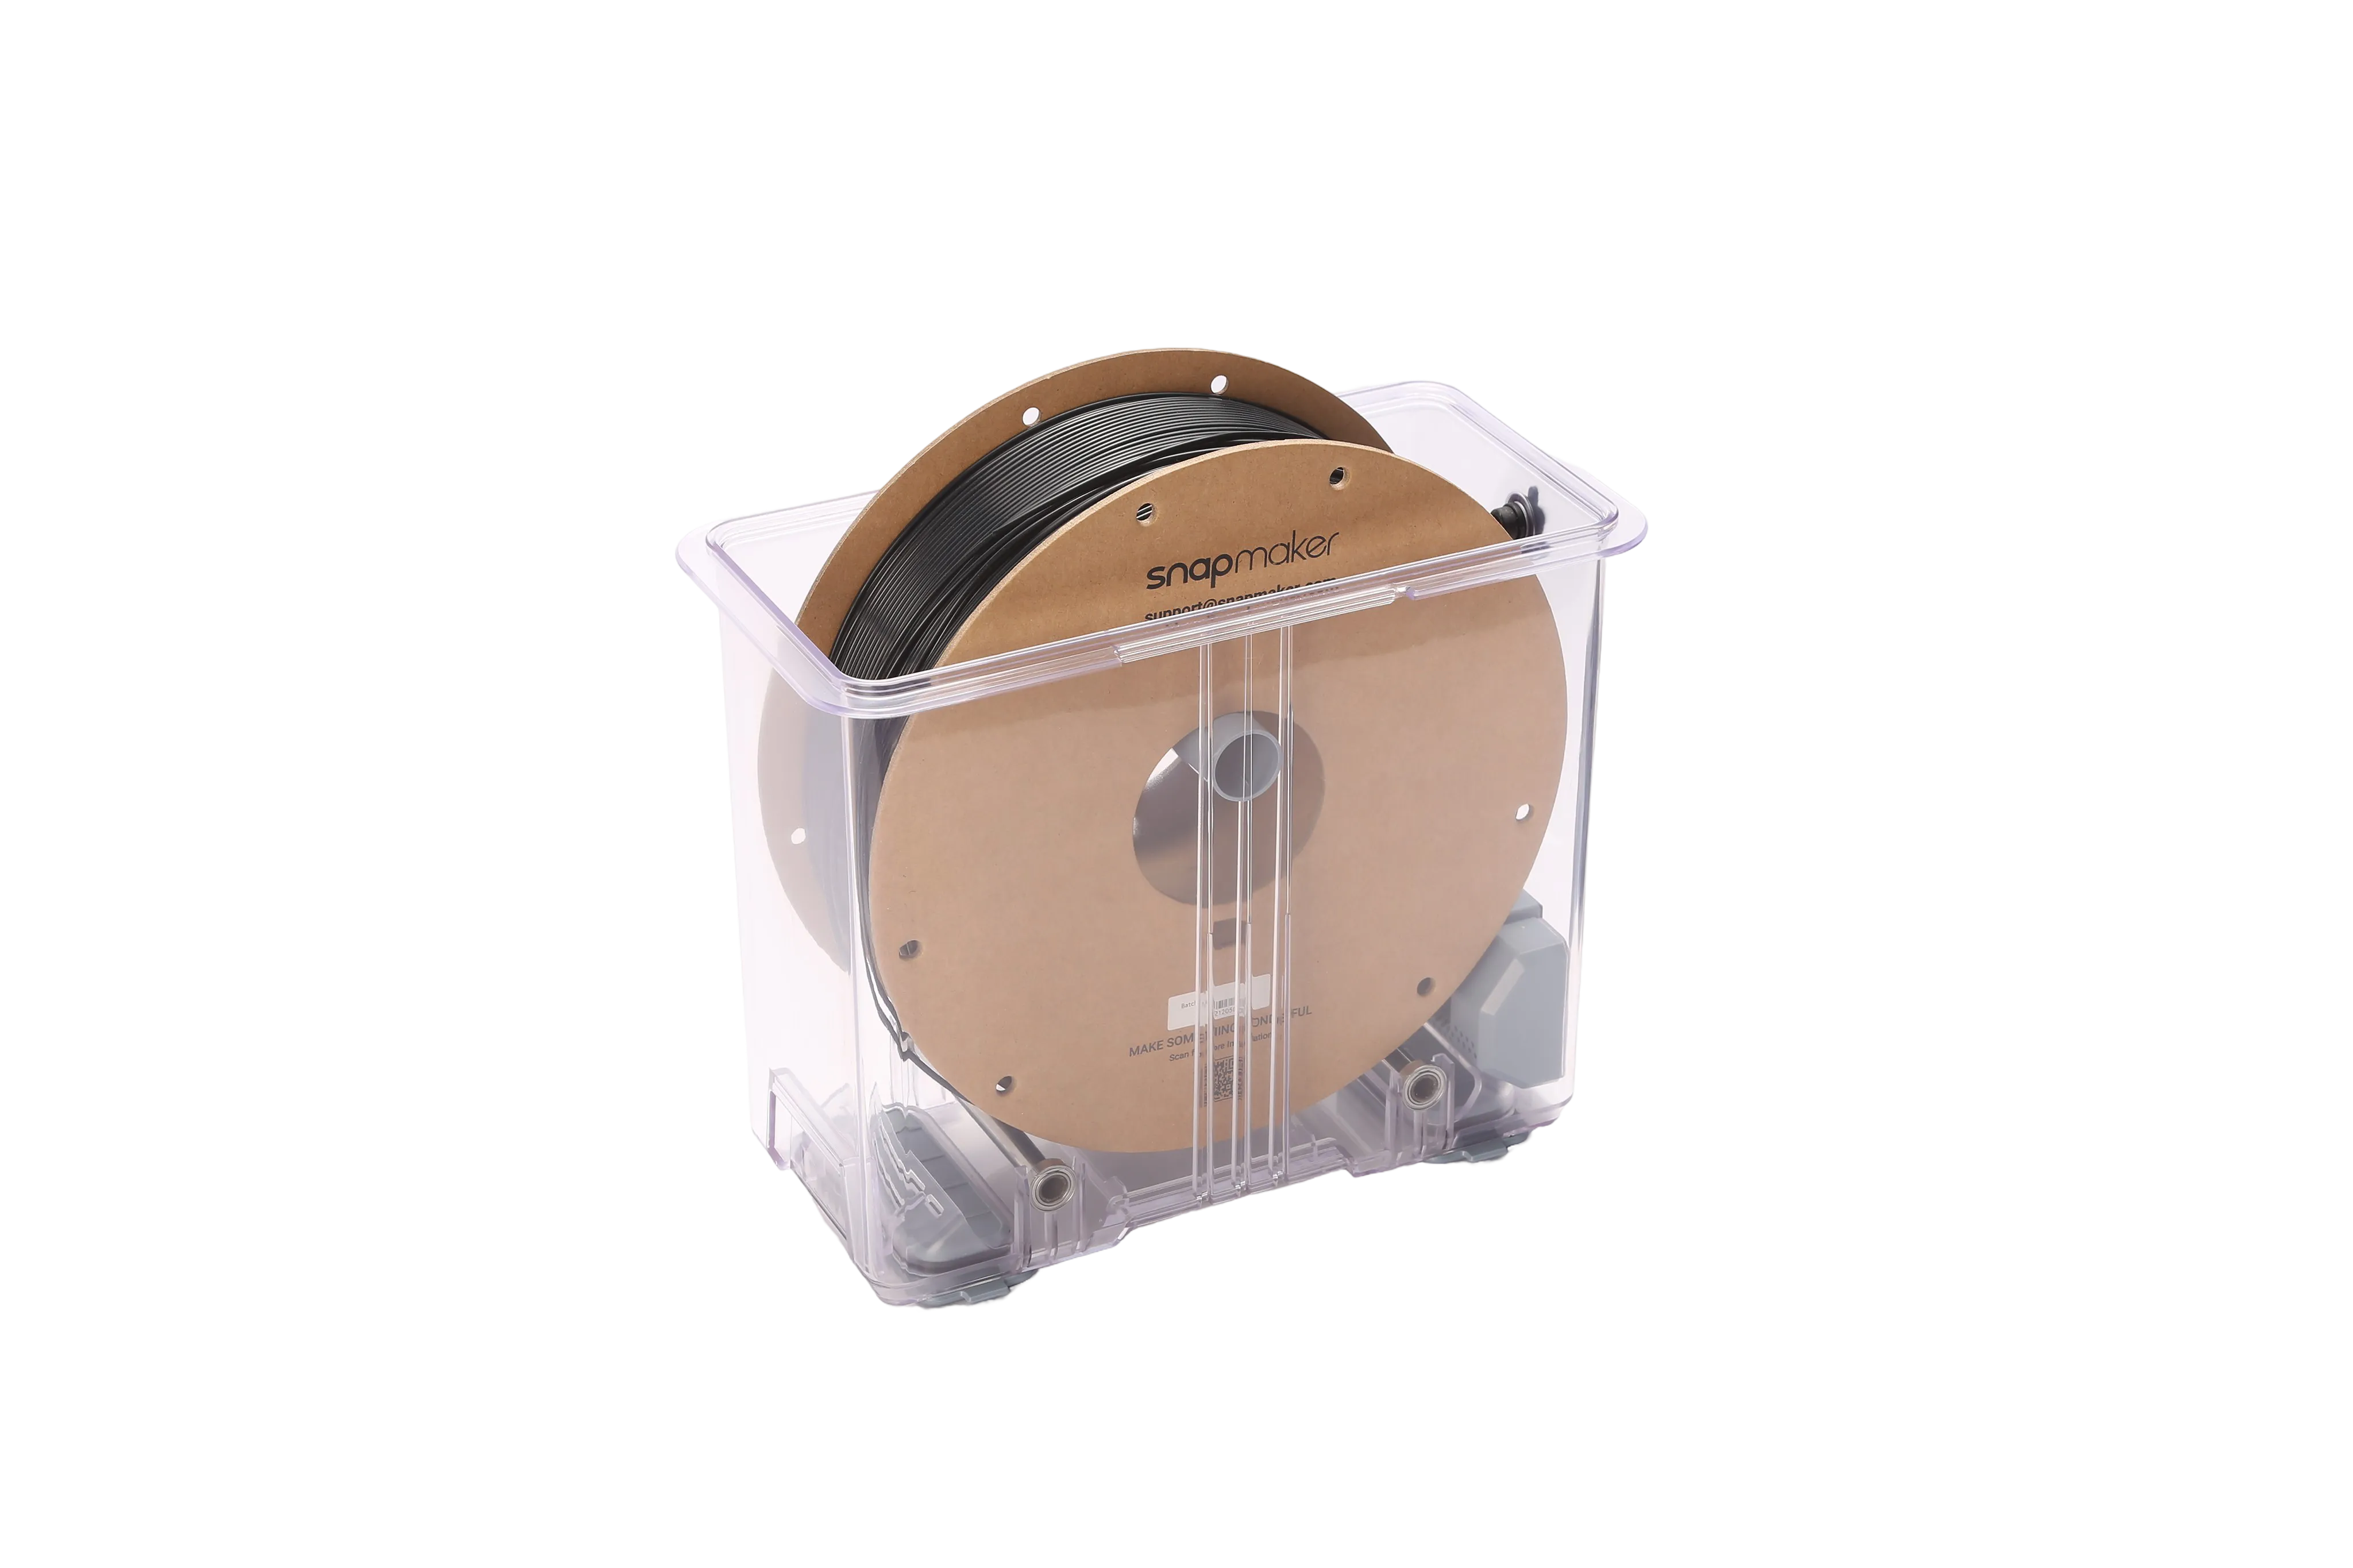
- Feed the filament through the top cover and then place the spool inside.
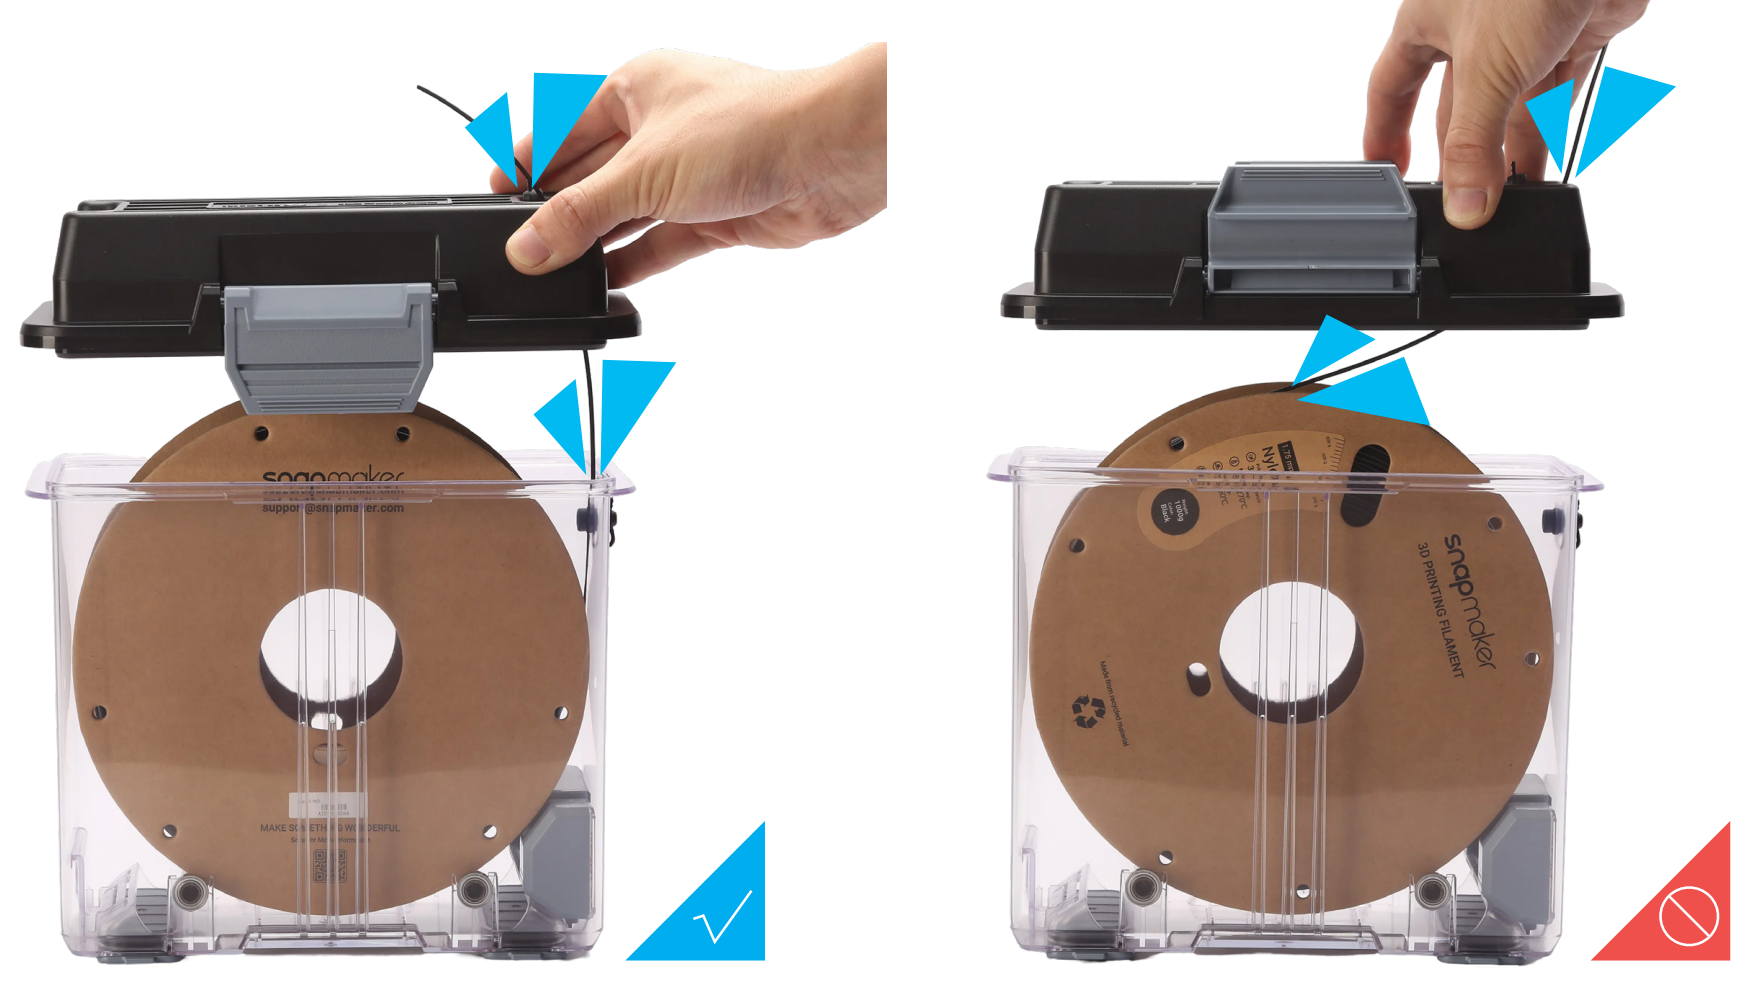
Ensure the feed orientation of the filament aligns with the outlet of the top cover; otherwise, it may encounter resistance during feeding.
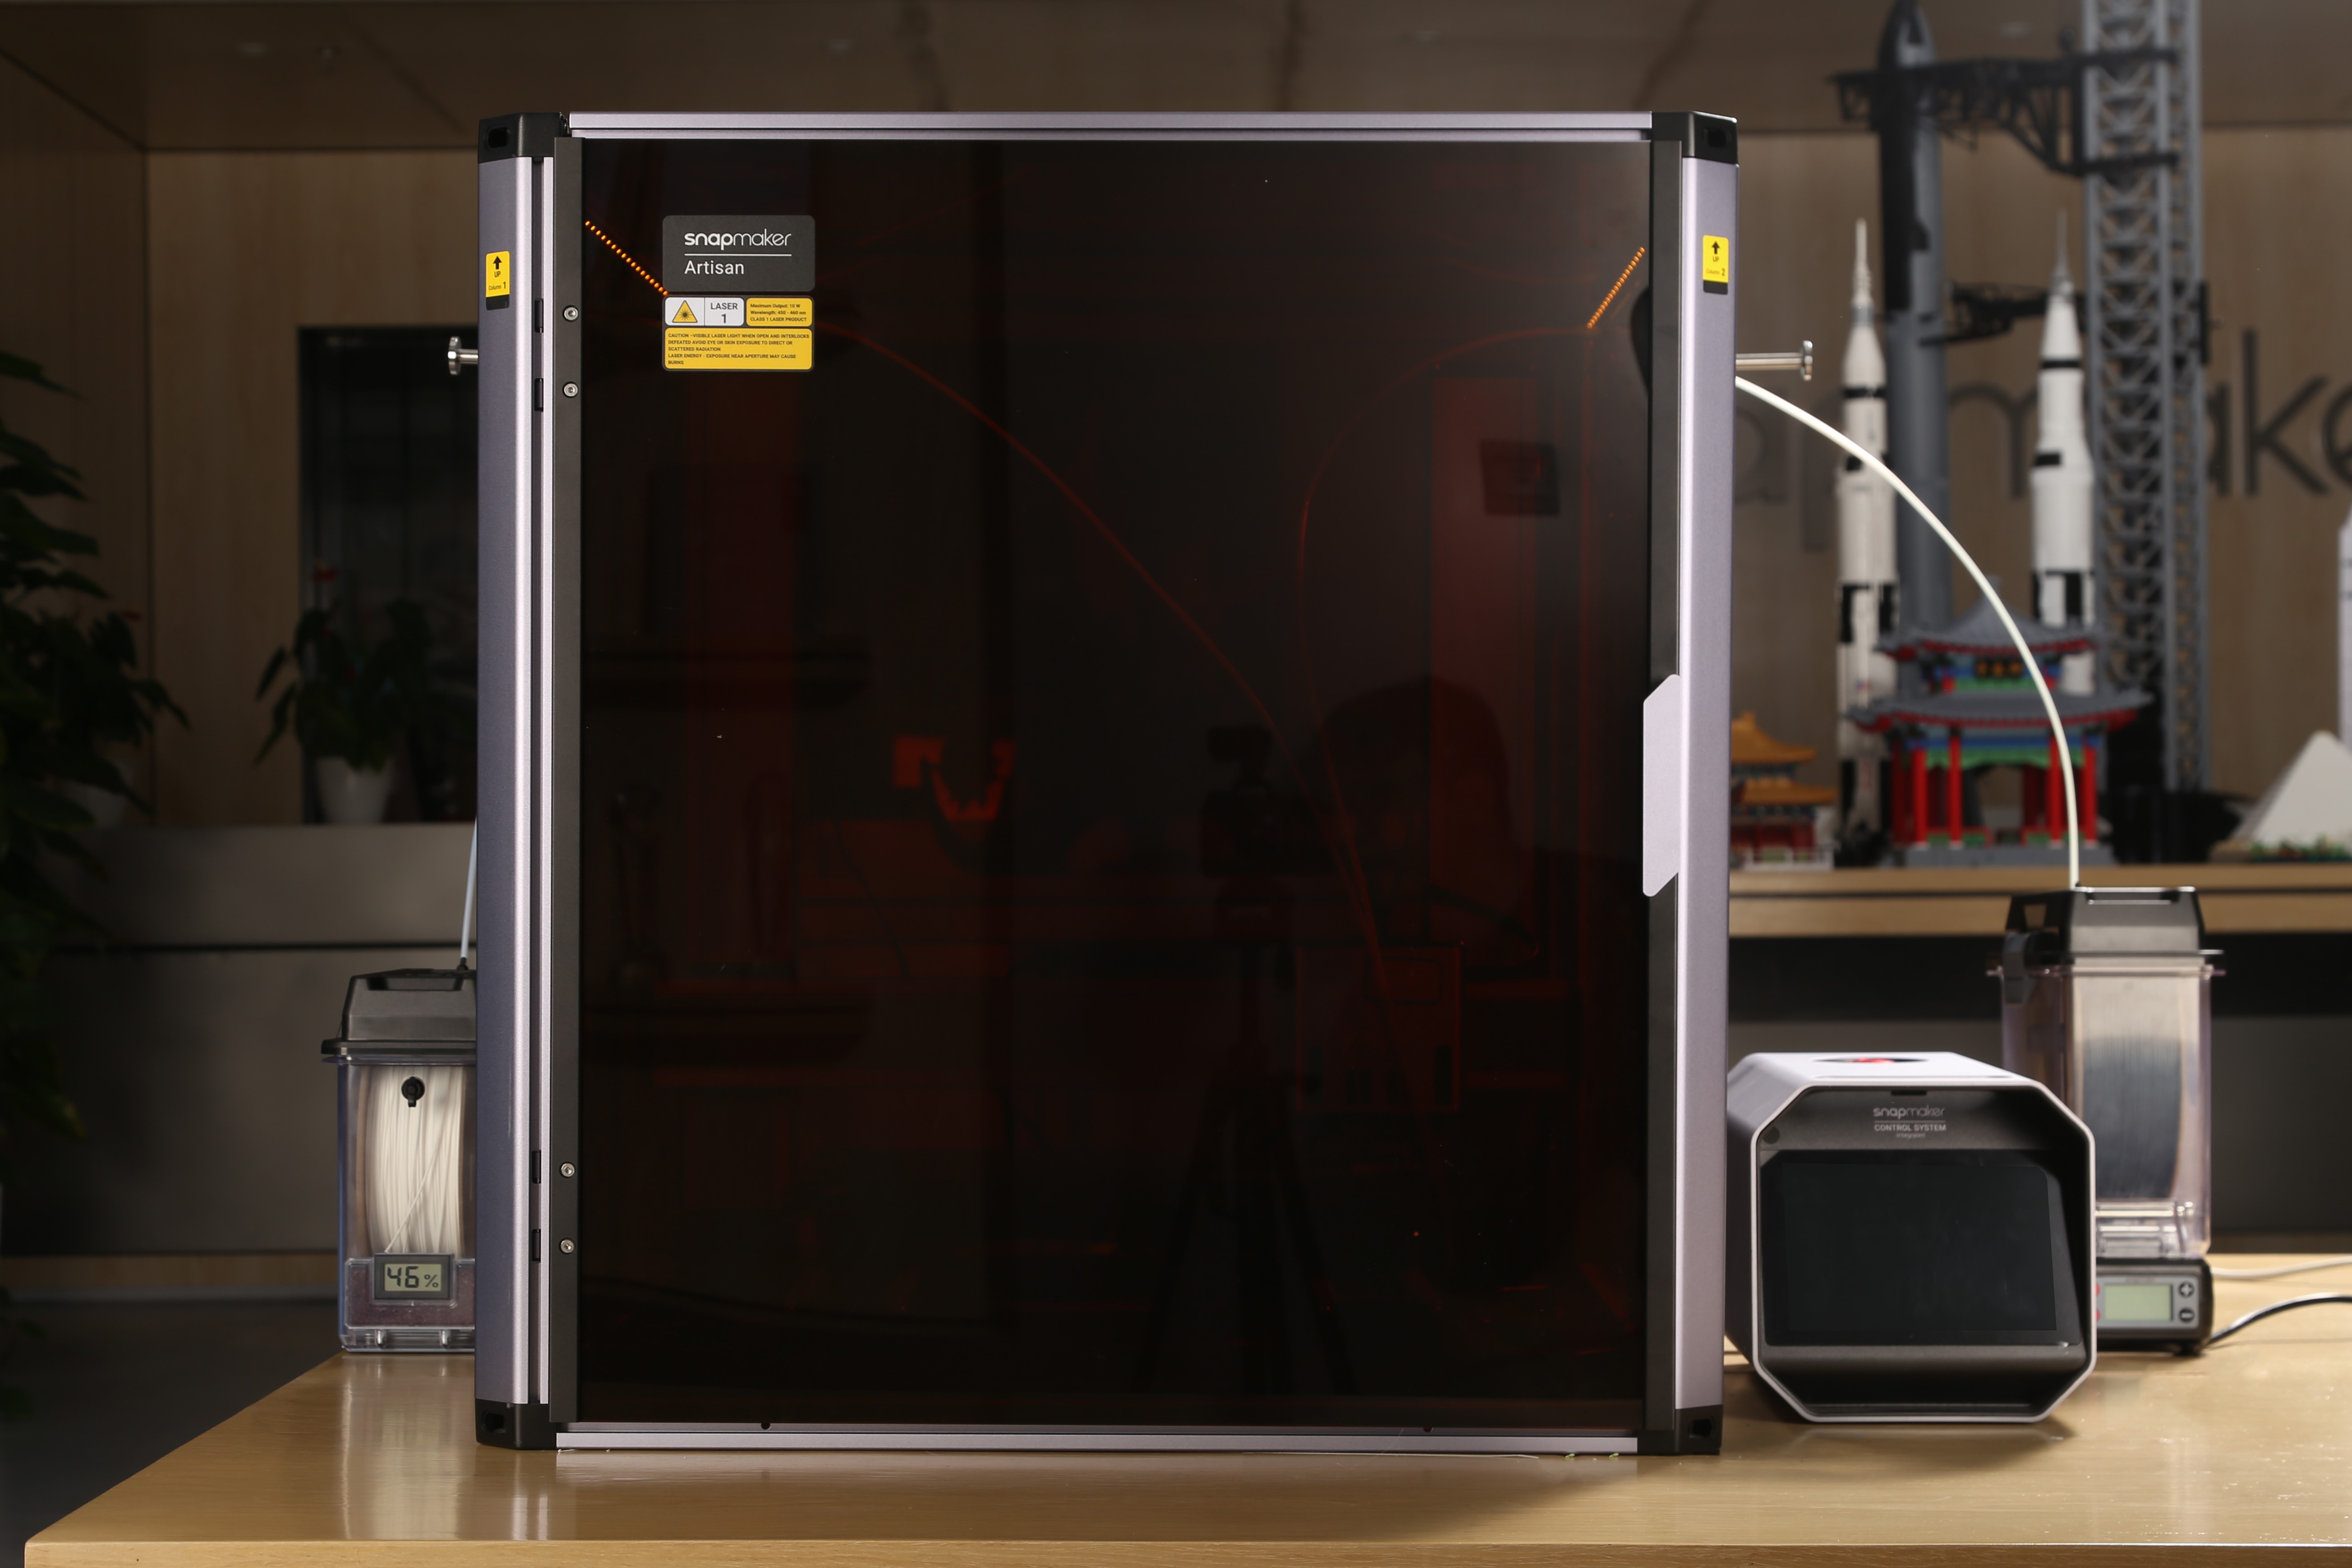
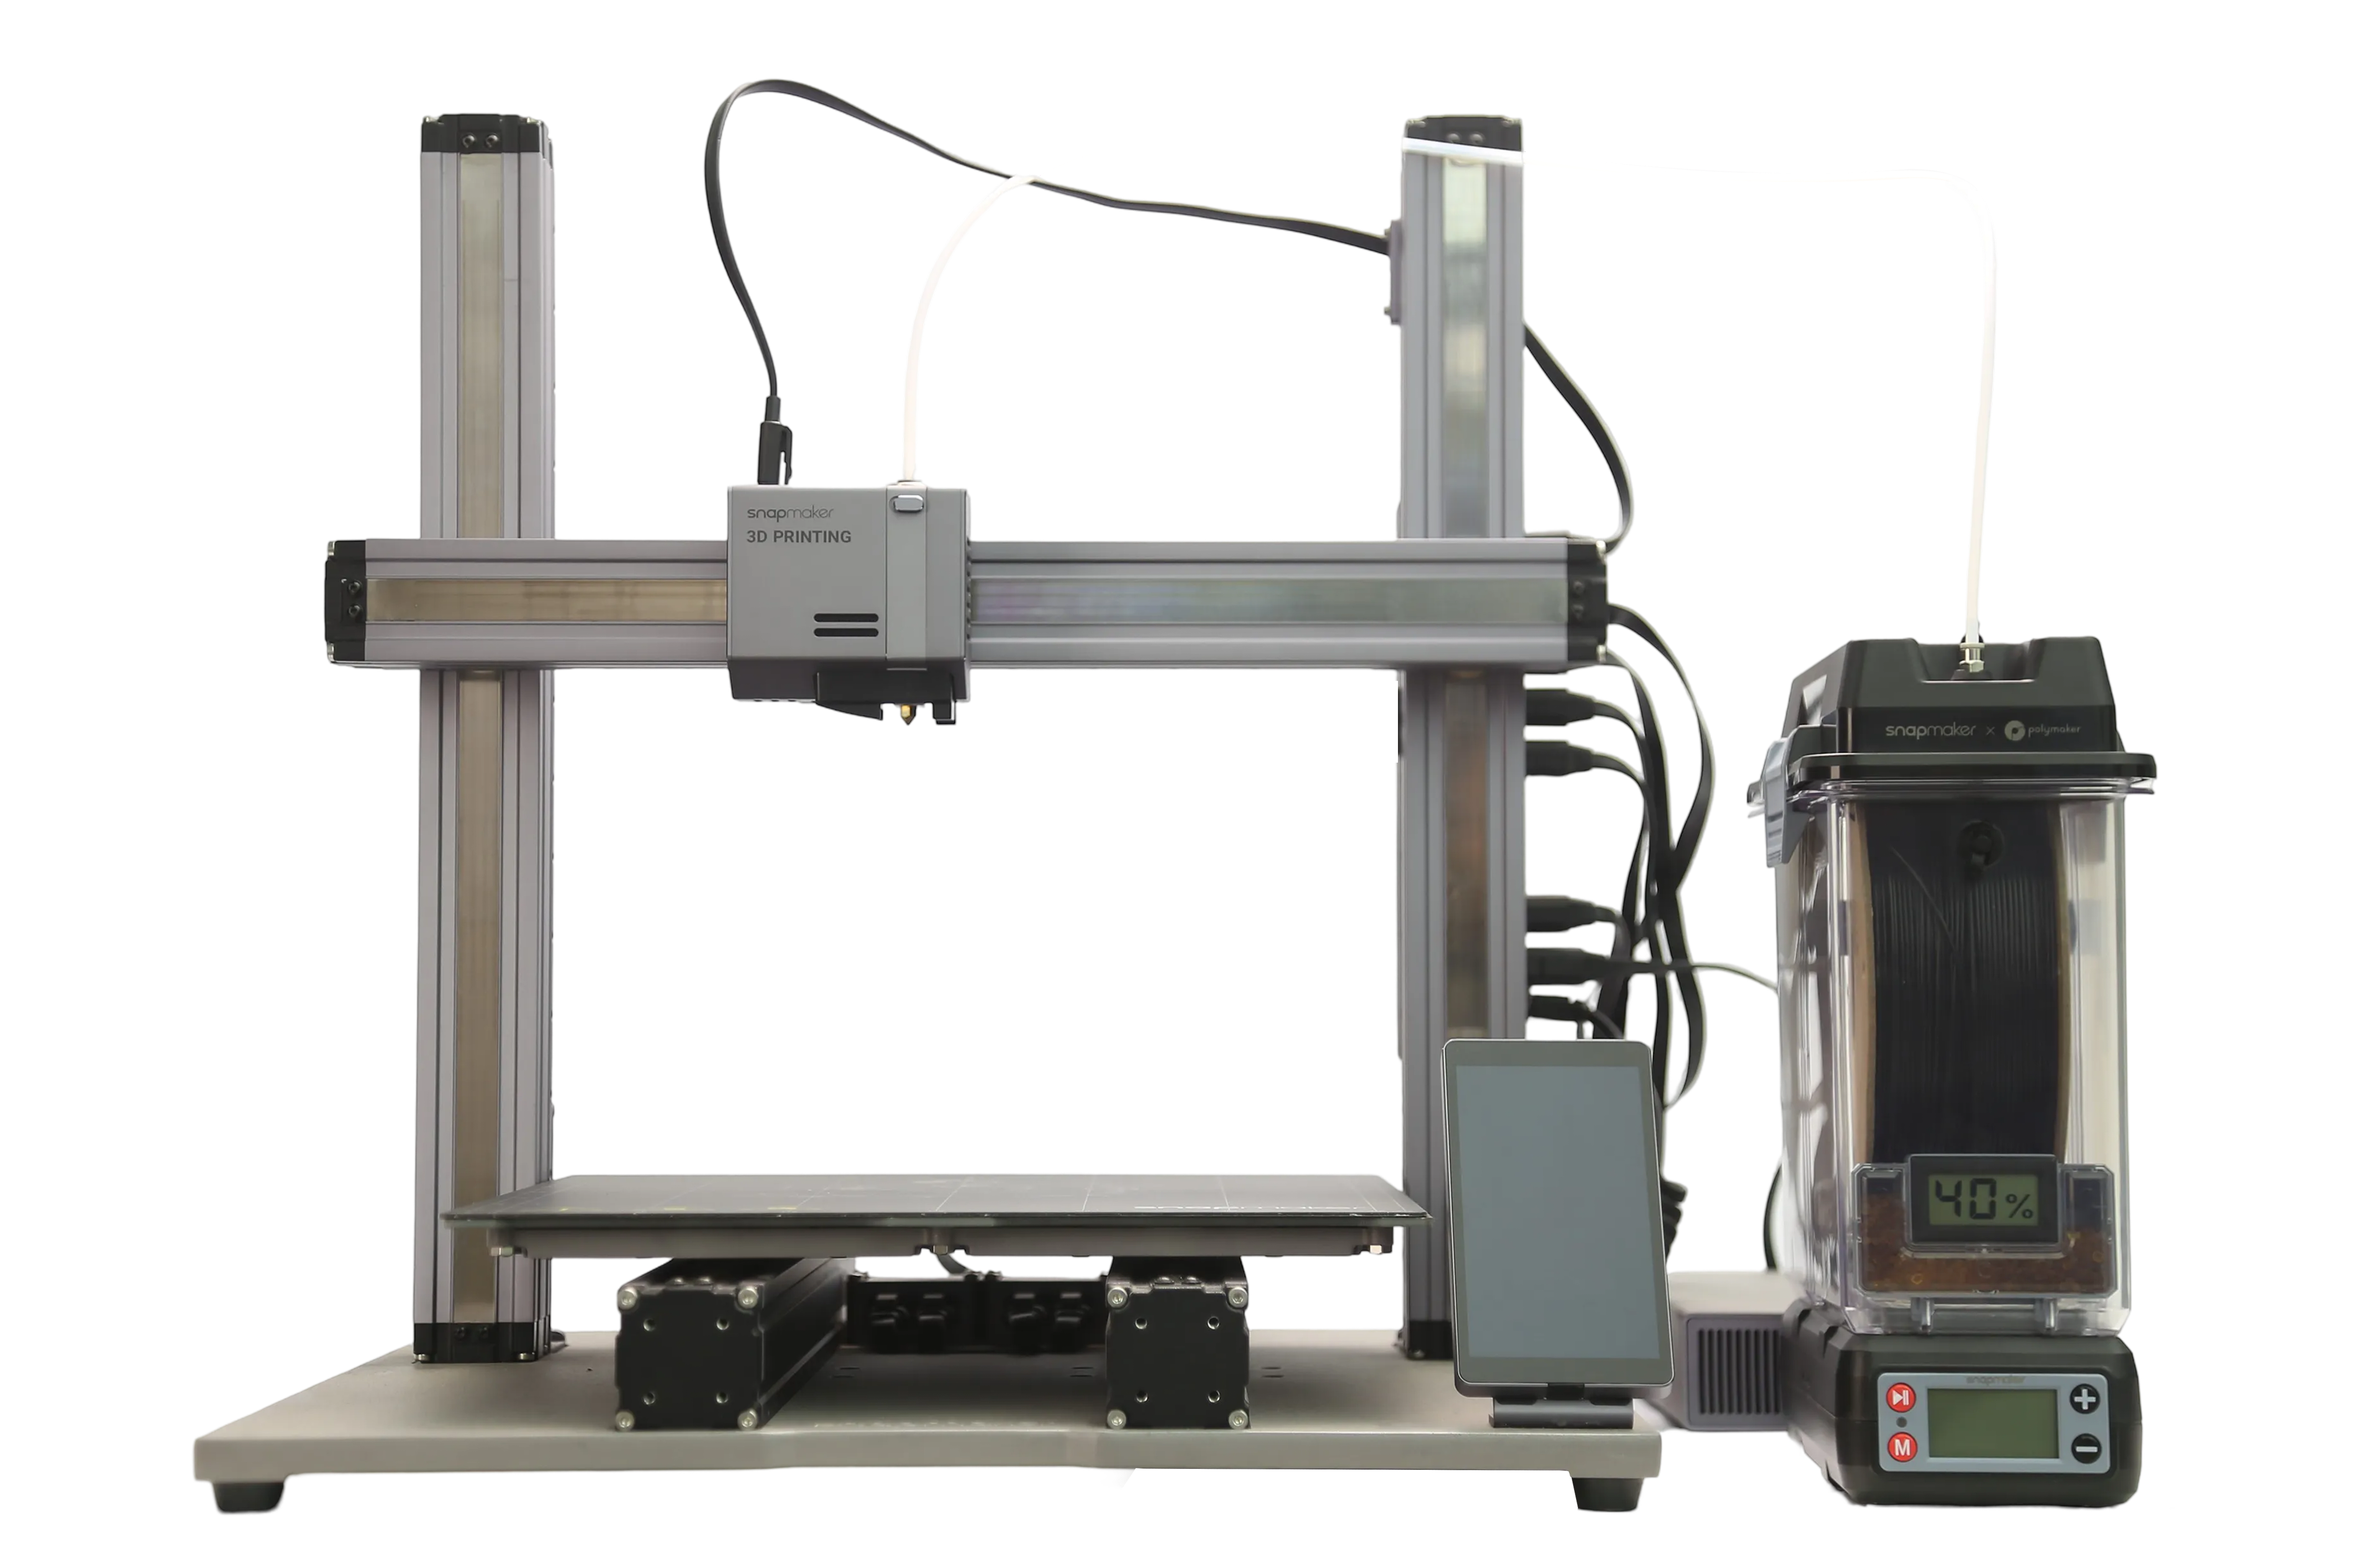
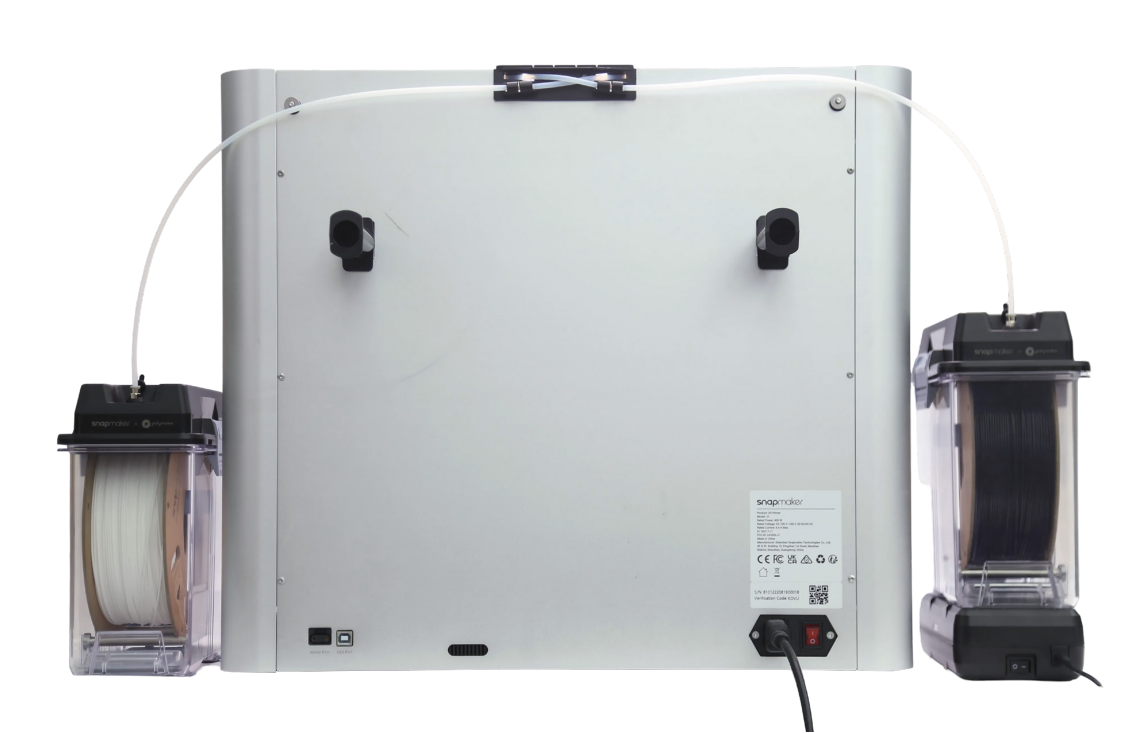
To minimize bend of the filament tube and reduce feeding resistance, it is recommended to feed from the top cover when the SnapDryer box and machine are on the same horizontal. If the SnapDryer box is placed significantly higher than the machine, feed from the side.
To avoid inconvenience from frequently opening and closing the top cover, it is recommended to follow the steps in section 2.6 to eventually close the top cover.
Use spool roller to internally mount the spool, when the edge of spool damaged.
¶ 2.4 Confirming the Length of the Filament Tube
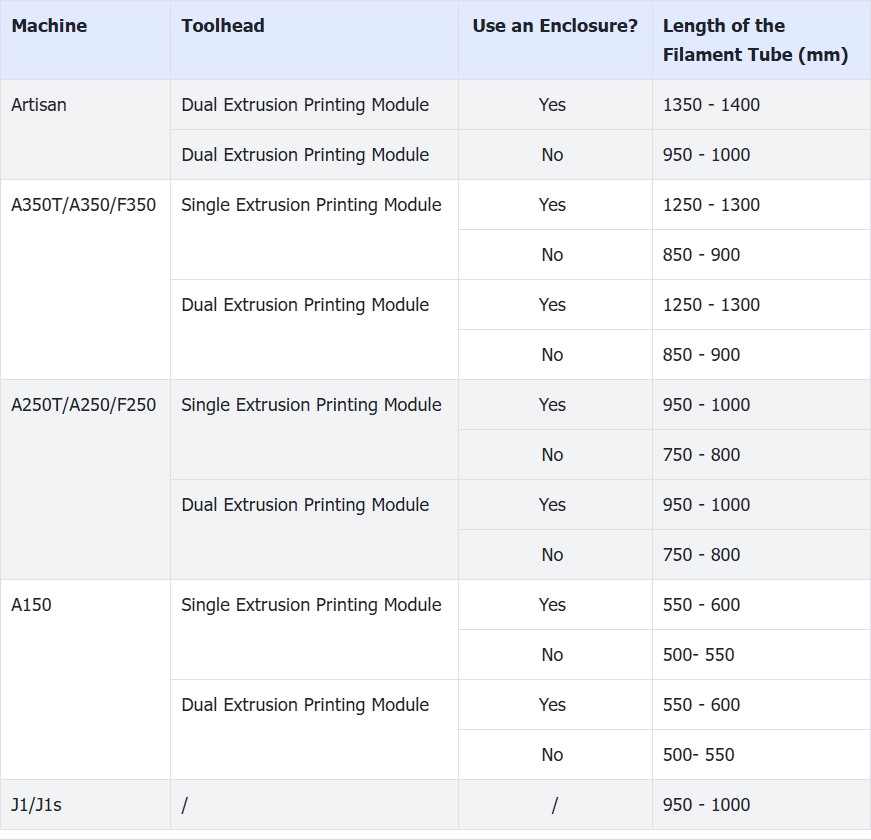
The provided filament tube is 1500 mm long. The actual required length depends on the machine model, the installed printing module, whether an enclosure is installed, and the placement of the dryer. You can refer to the methods below to determine the actual length needed for cutting the filament tube.
If you plan to reuse the filament tube for other machines or anticipate future changes in the dryer’s placement, you may choose not to cut the filament tube at this time.
Method 1
-
After completing the filament tube installation in section 2.5, turn on the machine and use the touchscreen to move the toolhead to the farthest position. Confirm the length of the filament tube required within the enclosure (if installed).
-
Place the dryer where desired and bring the other end of the filament tube close to the outlet of the dryer’s top cover to assess the required filament tube length.
Method 2
You can refer to the table below to confirm the required length of the filament tube.
¶ 2.5 Installing the Filament Tube
Please select the relevant content to read based on your machine model, installed printing module, and whether an enclosure is installed.
-
On the home screen of the touchscreen, tap Control > Filament.
-
Select the target nozzle, set the temperature, and tap Heat.
-
When the heating completes, tap Unload and pull the filament out of the nozzle.
-
Remove the tube fixture first, press tight the round clamp, and pull out the filament tube.

- Press tight the round clamp at the outer hole, and then pull out the filament tube.
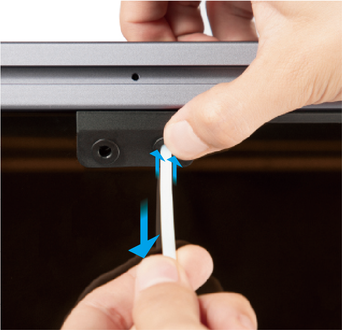
- Insert the new filament tube through the tube holder from the outside in, then insert the filament tube into the module, and finally attach the tube fixture back.

-
On the home screen of the touchscreen, tap Control > Filament.
-
Select the target nozzle, set the temperature, and tap Heat.
-
When the heating completes, tap Unload and pull the filament out of the nozzle.
-
Remove the tube fixture from the filament entry, insert the filament tube into the module, and finally attach the tube fixture back.

To pull out the filament tube from the module, remove the tube fixture first and press tight the round clamp at the filament entry while pulling.

¶ With Enclosure Installed
-
On the touchscreen, tap Controls and Nozzle. When the heating completes, tap Unload and pull the filament out of the nozzle.
-
Turn off the machine.
-
Use an H1.5 screwdriver head to detach the filament entry cover.
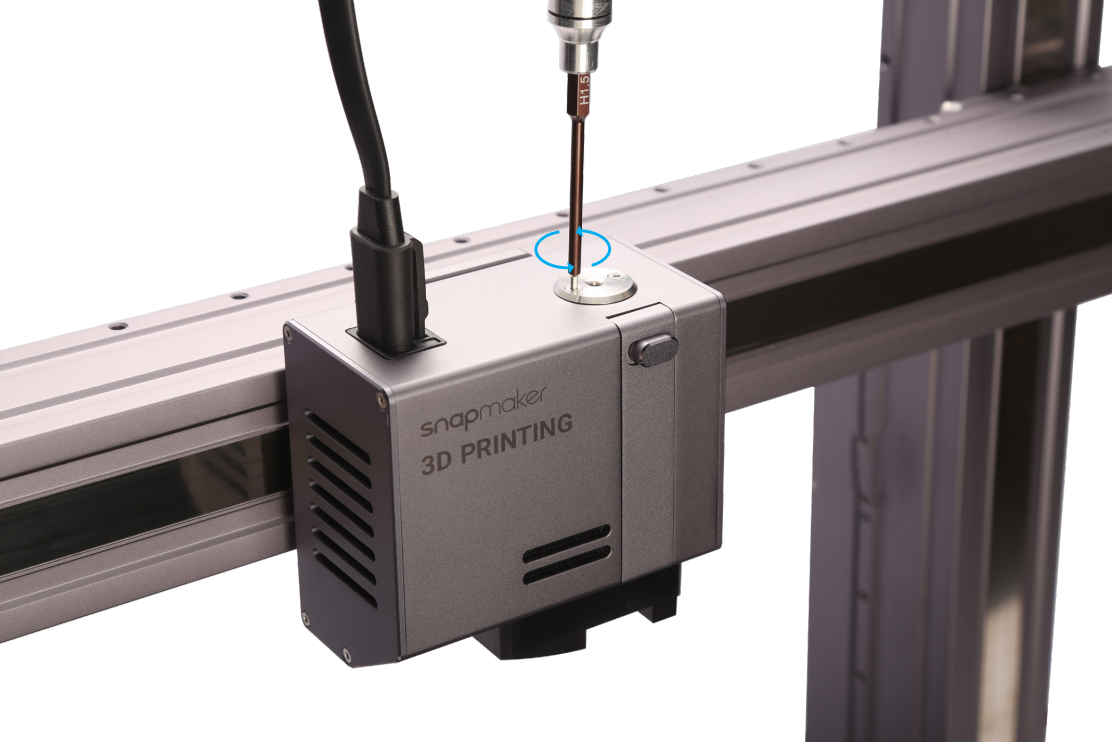
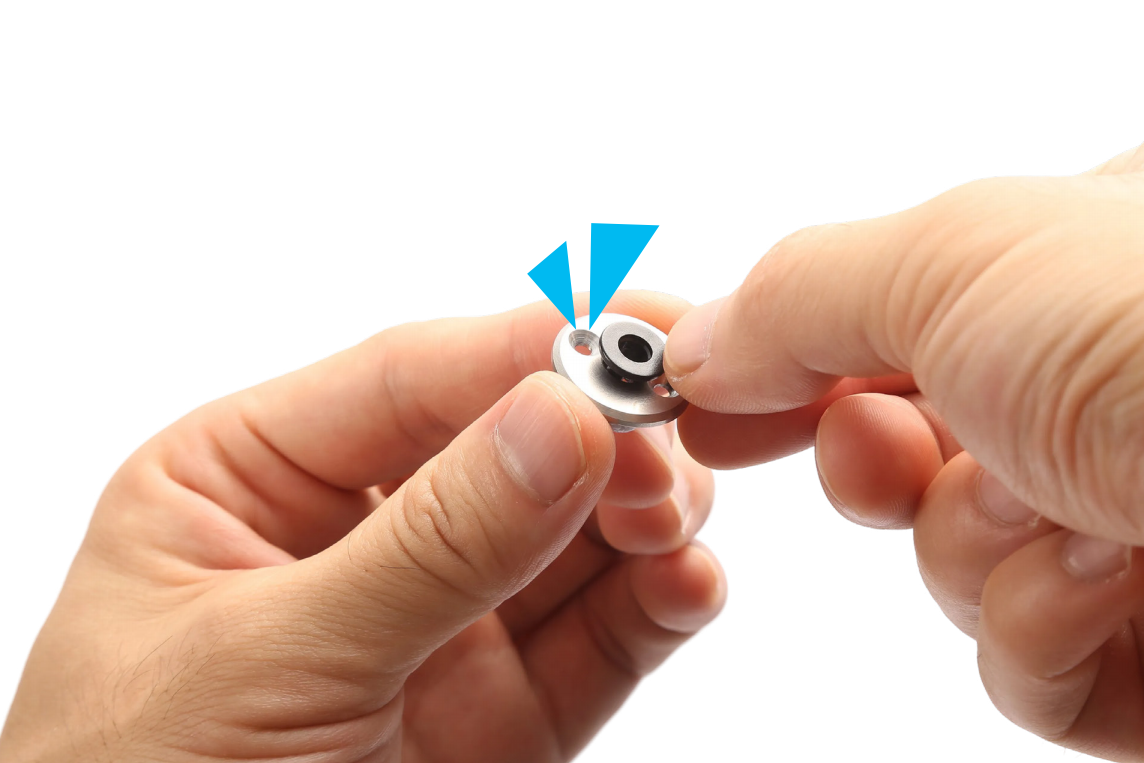
- Insert the round clamp into the filament entry cover provided with the dryer.
Pay attention to the orientation of both the round clamp and the filament entry cover.
- Install the filament entry cover.
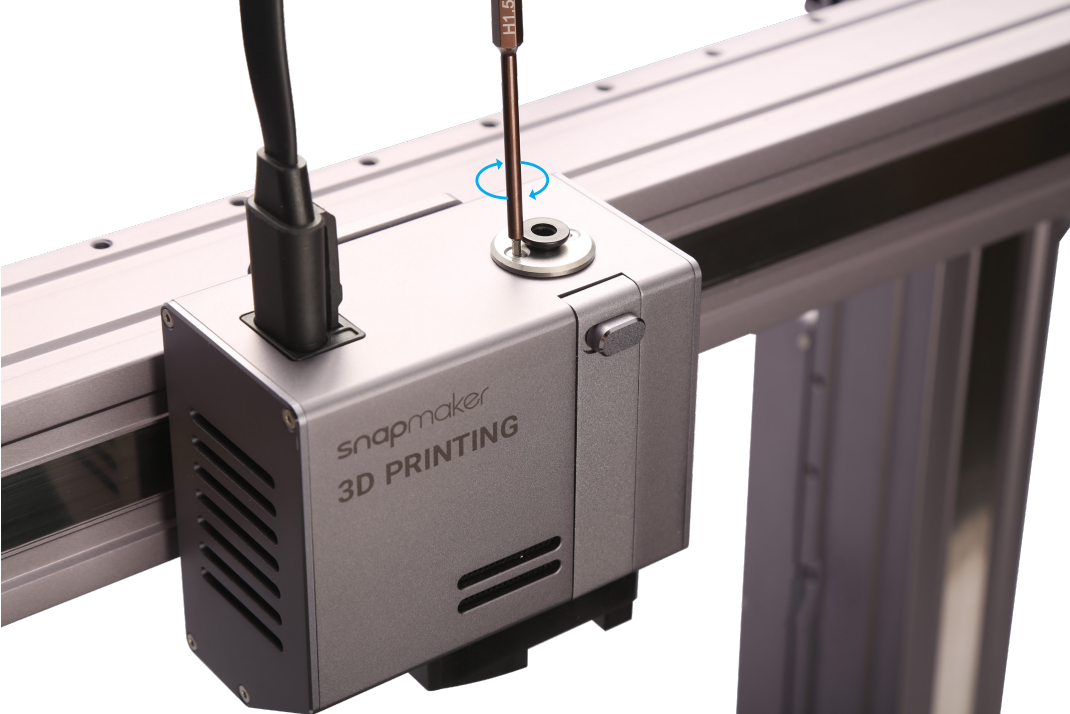
- Insert the filament tube through the enclosure from the outside in, then insert the filament tube into the module.
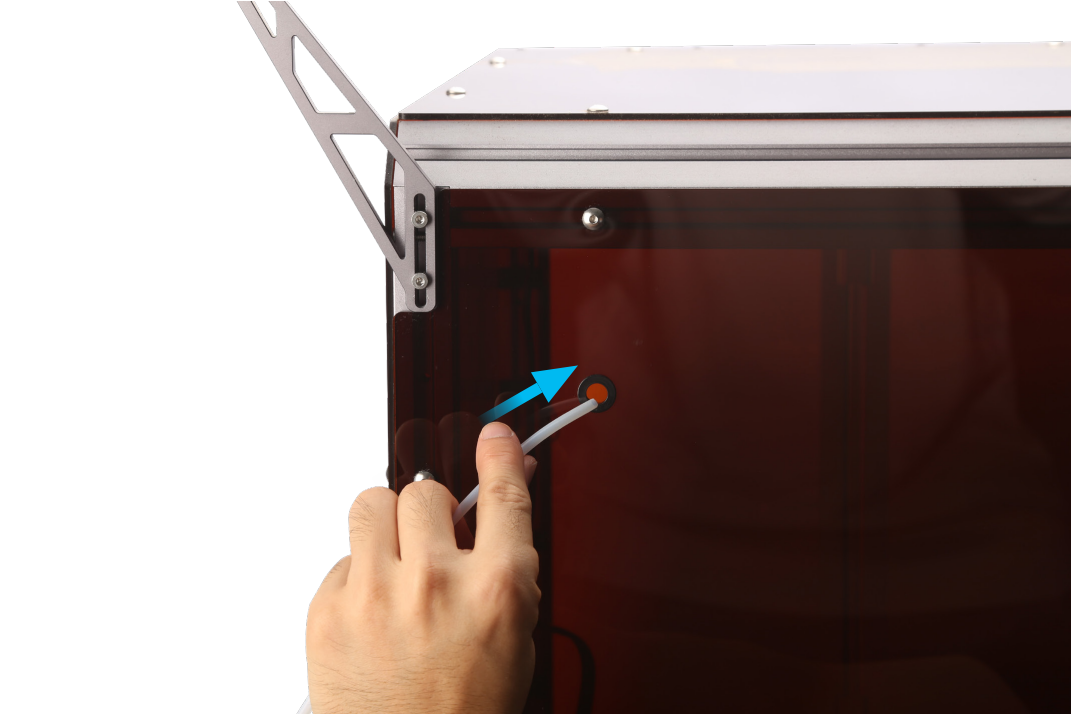
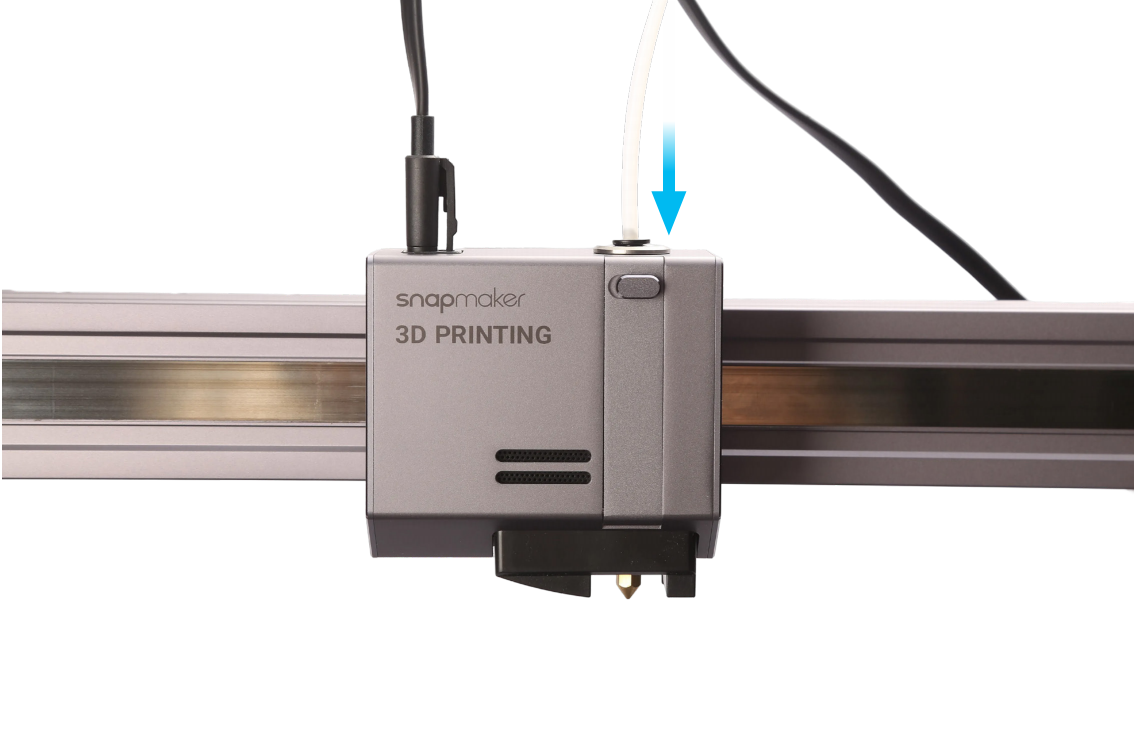
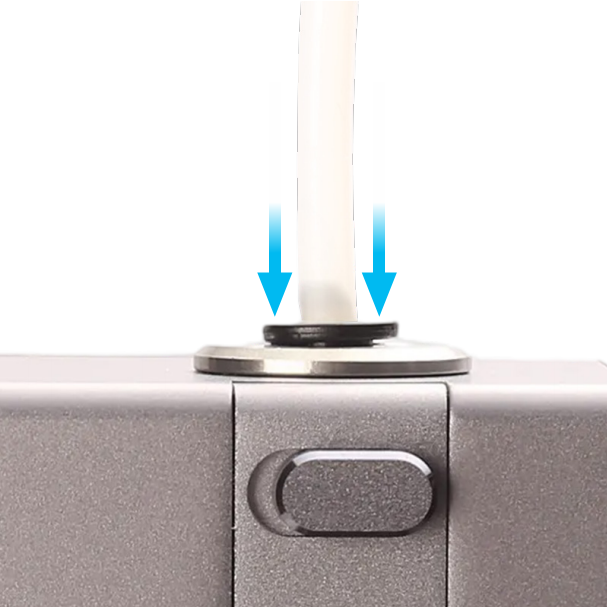
To pull out the filament tube from the module, press tight the round clamp at the filament entry while pulling.
¶ Without Enclosure Installed
-
On the touchscreen, tap Controls and Nozzle. When the heating completes, tap Unload and pull the filament out of the nozzle.
-
Turn off the machine.
-
Use an H1.5 screwdriver head to detach the filament entry cover.

- Insert the round clamp into the filament entry cover provided with the dryer.
Pay attention to the orientation of both the round clamp and the filament entry cover.

- Install the filament entry cover.

- Insert the filament tube into the module.

To pull out the filament tube from the module, press tight the round clamp at the filament entry while pulling.

¶ With Enclosure Installed
-
On the touchscreen, tap Controls and Nozzle.
-
Select the target nozzle, set the temperature, and tap Heat.
-
When the heating completes, tap Unload and pull the filament out of the nozzle.
-
Remove the tube fixture first, press tight the round clamp, and pull out the filament tube.

- Pull the filament tube out of the filament tube holder.
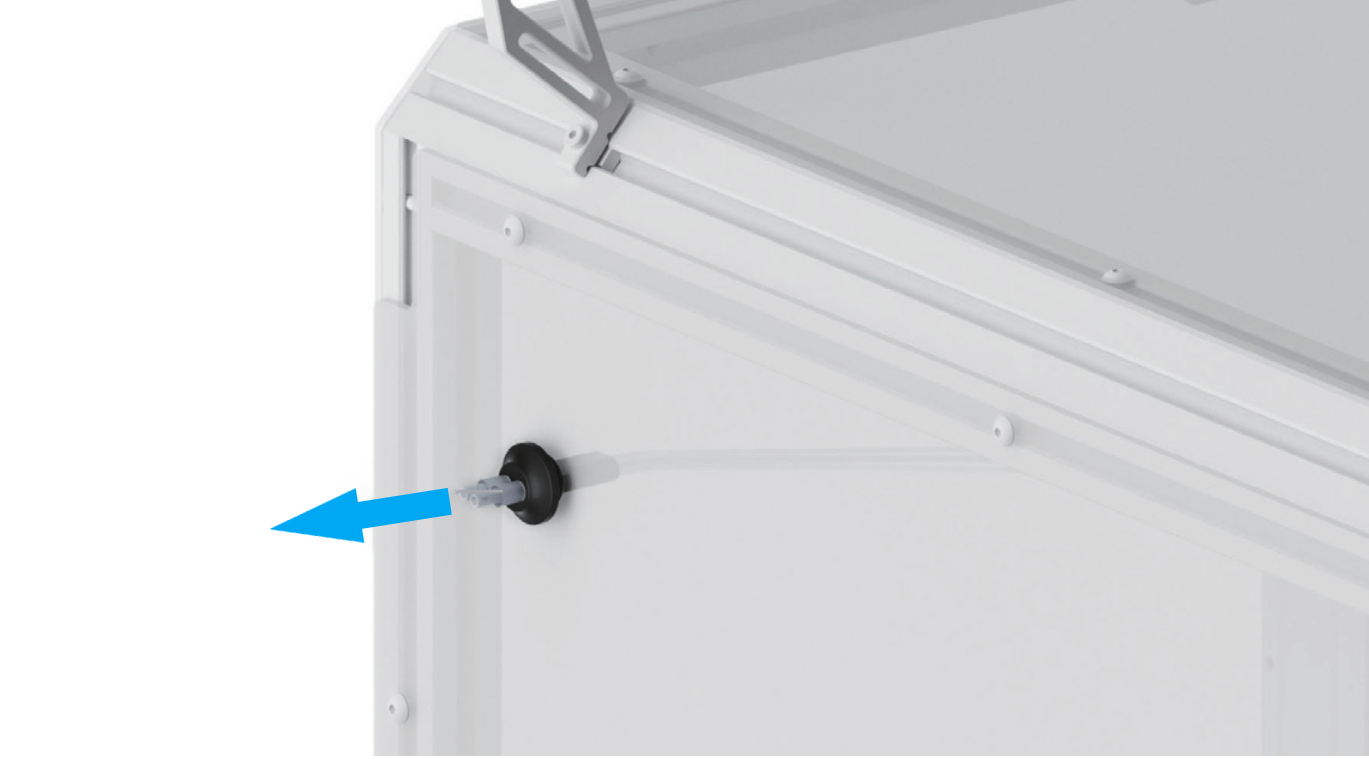
- Insert the new filament tube through the tube holder from the outside in, then insert the filament tube into the module, and finally attach the tube fixture back.
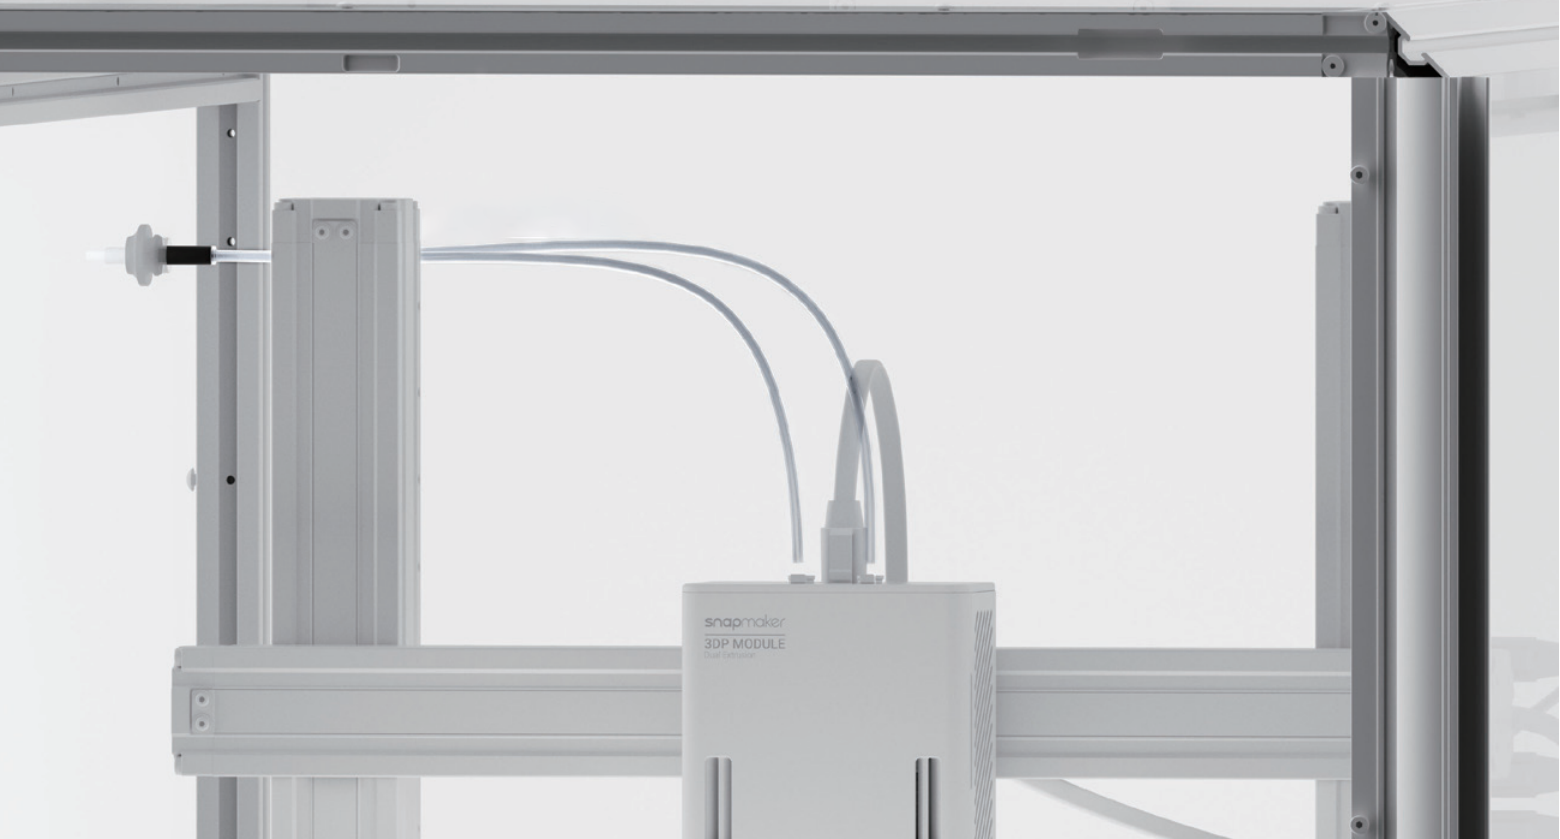
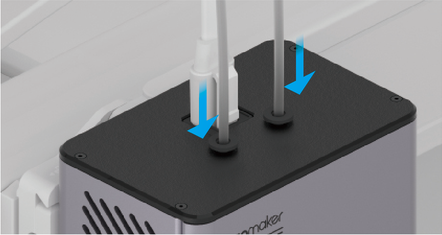
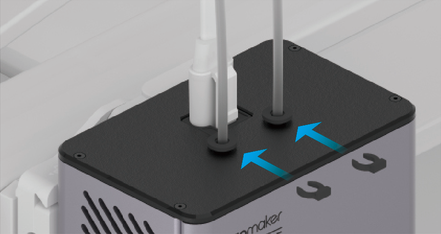
¶ Without Enclosure Installed
-
On the touchscreen, tap Controls and Nozzle.
-
Select the target nozzle, set the temperature, and tap Heat.
-
When the heating completes, tap Unload and pull the filament out of the nozzle.
-
Remove the tube fixture from the filament entry, insert the filament tube into the module, and finally attach the tube fixture back.

To pull out the filament tube from the module, remove the tube fixture first and press tight the round clamp at the filament entry while pulling.

-
On the Touchscreen, tap Control > Extruder, slide to set the target temperature for the left or right extruder, and then tap Heat.
-
When the extruder reaches the target temperature, tap Unload. Wait for about 20 seconds, and then tap Stop Unloading.
-
Pull the filament out of the filament entry.

- Remove the tube fixture and detach the original filament tube.
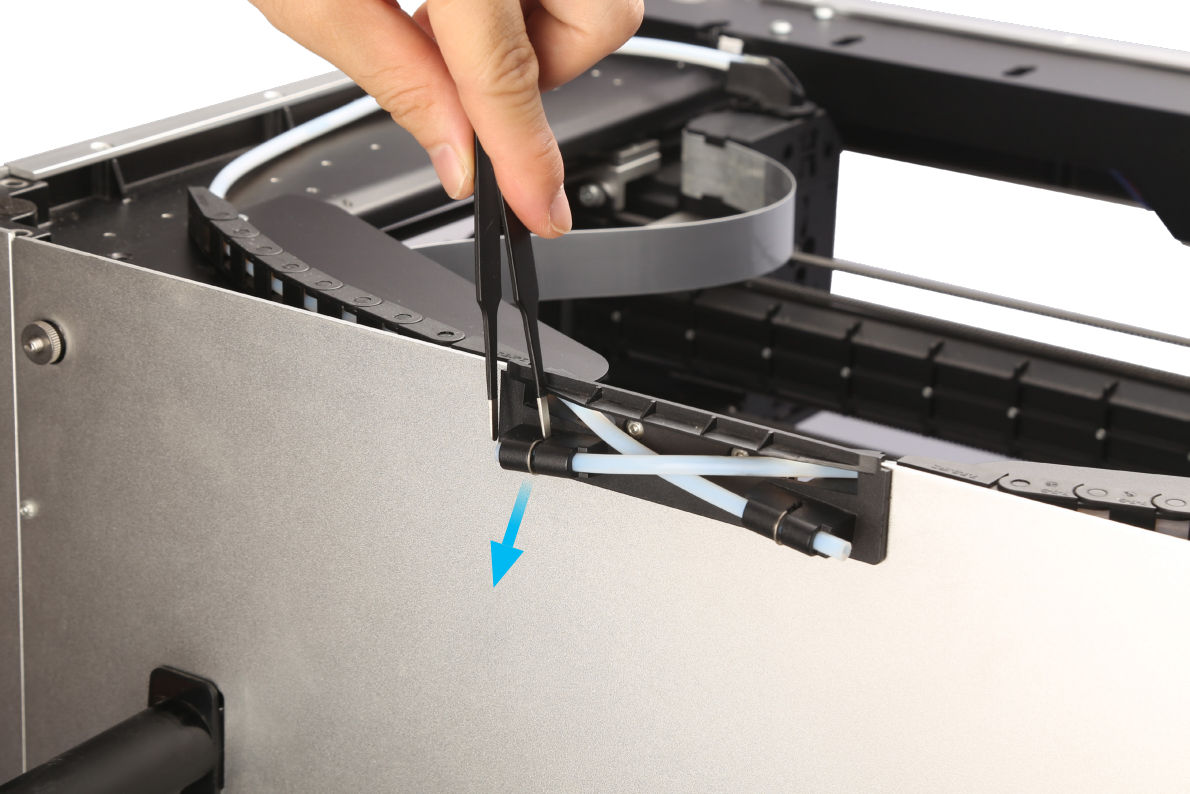
- Pass the new filament tube through the drag chain and the designated holes.
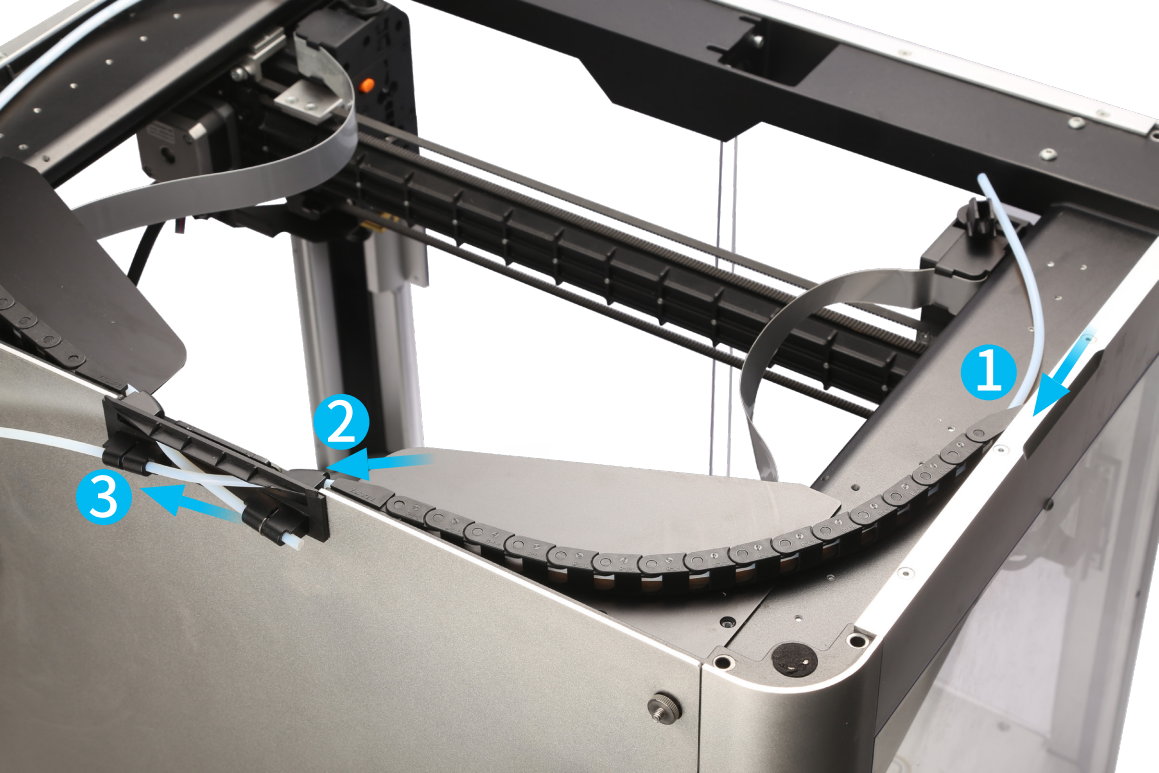
- Reinsert the tube fixture into its original position.
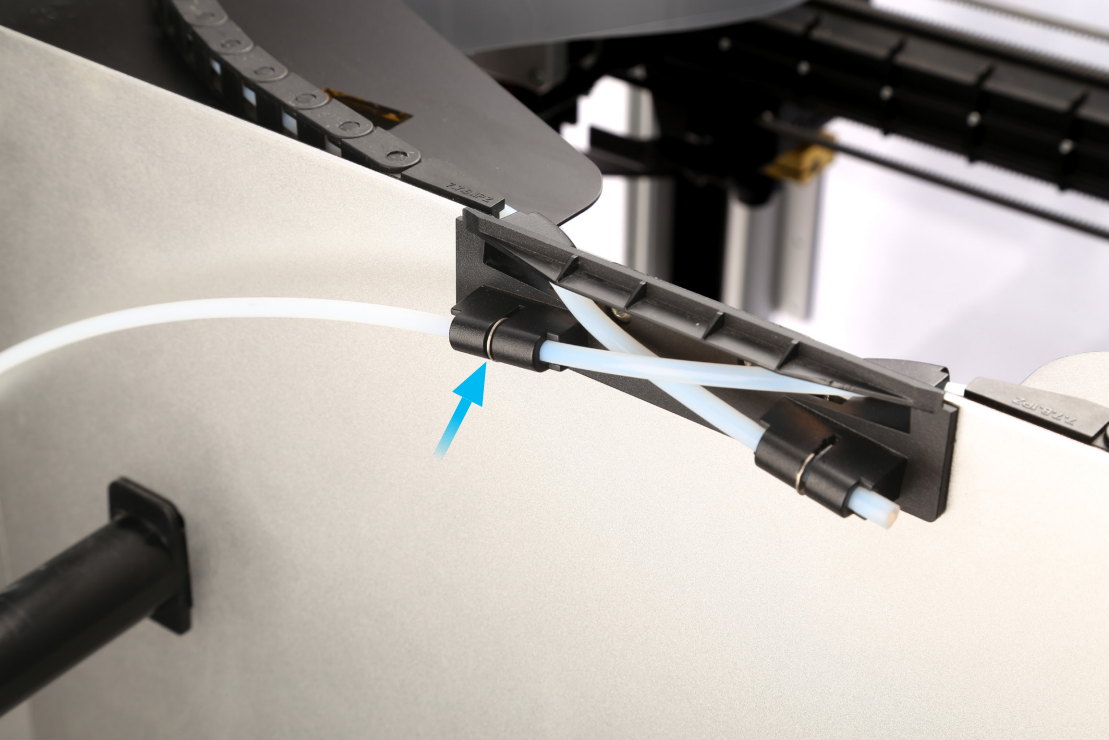
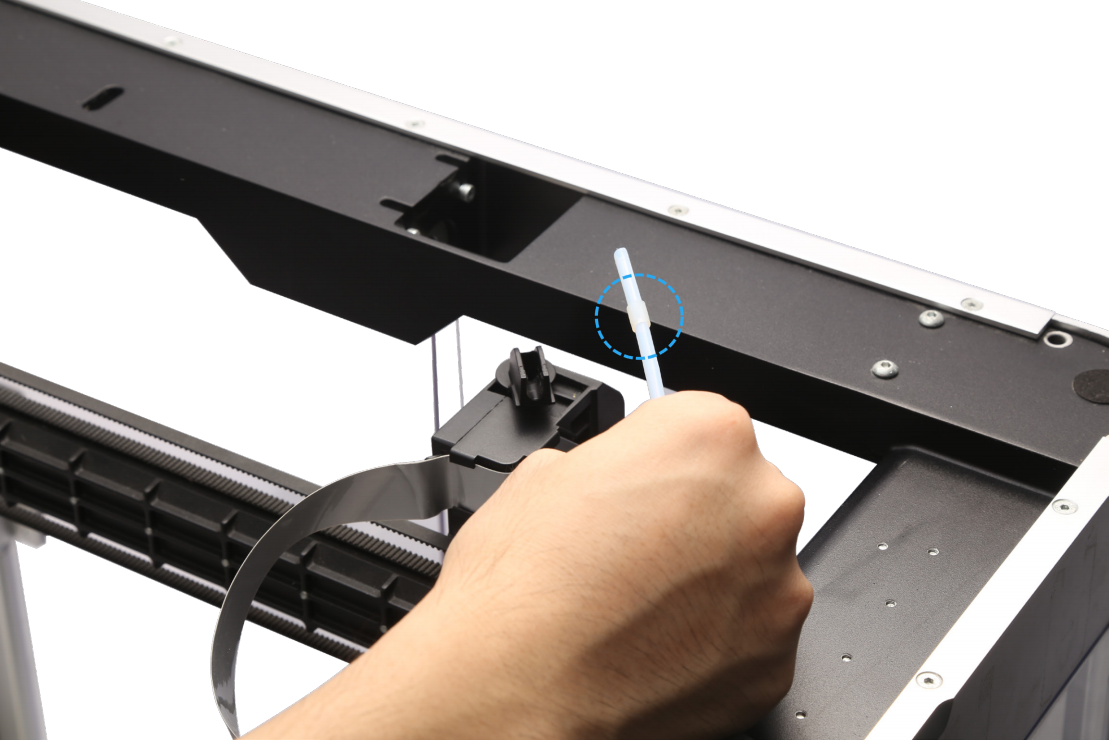
If needed, you can install the rubber sleeve from the original filament tube onto the new filament tube.
¶ 2.6 Loading Filament
- Insert the other end of the filament tube into the filament tube connector.
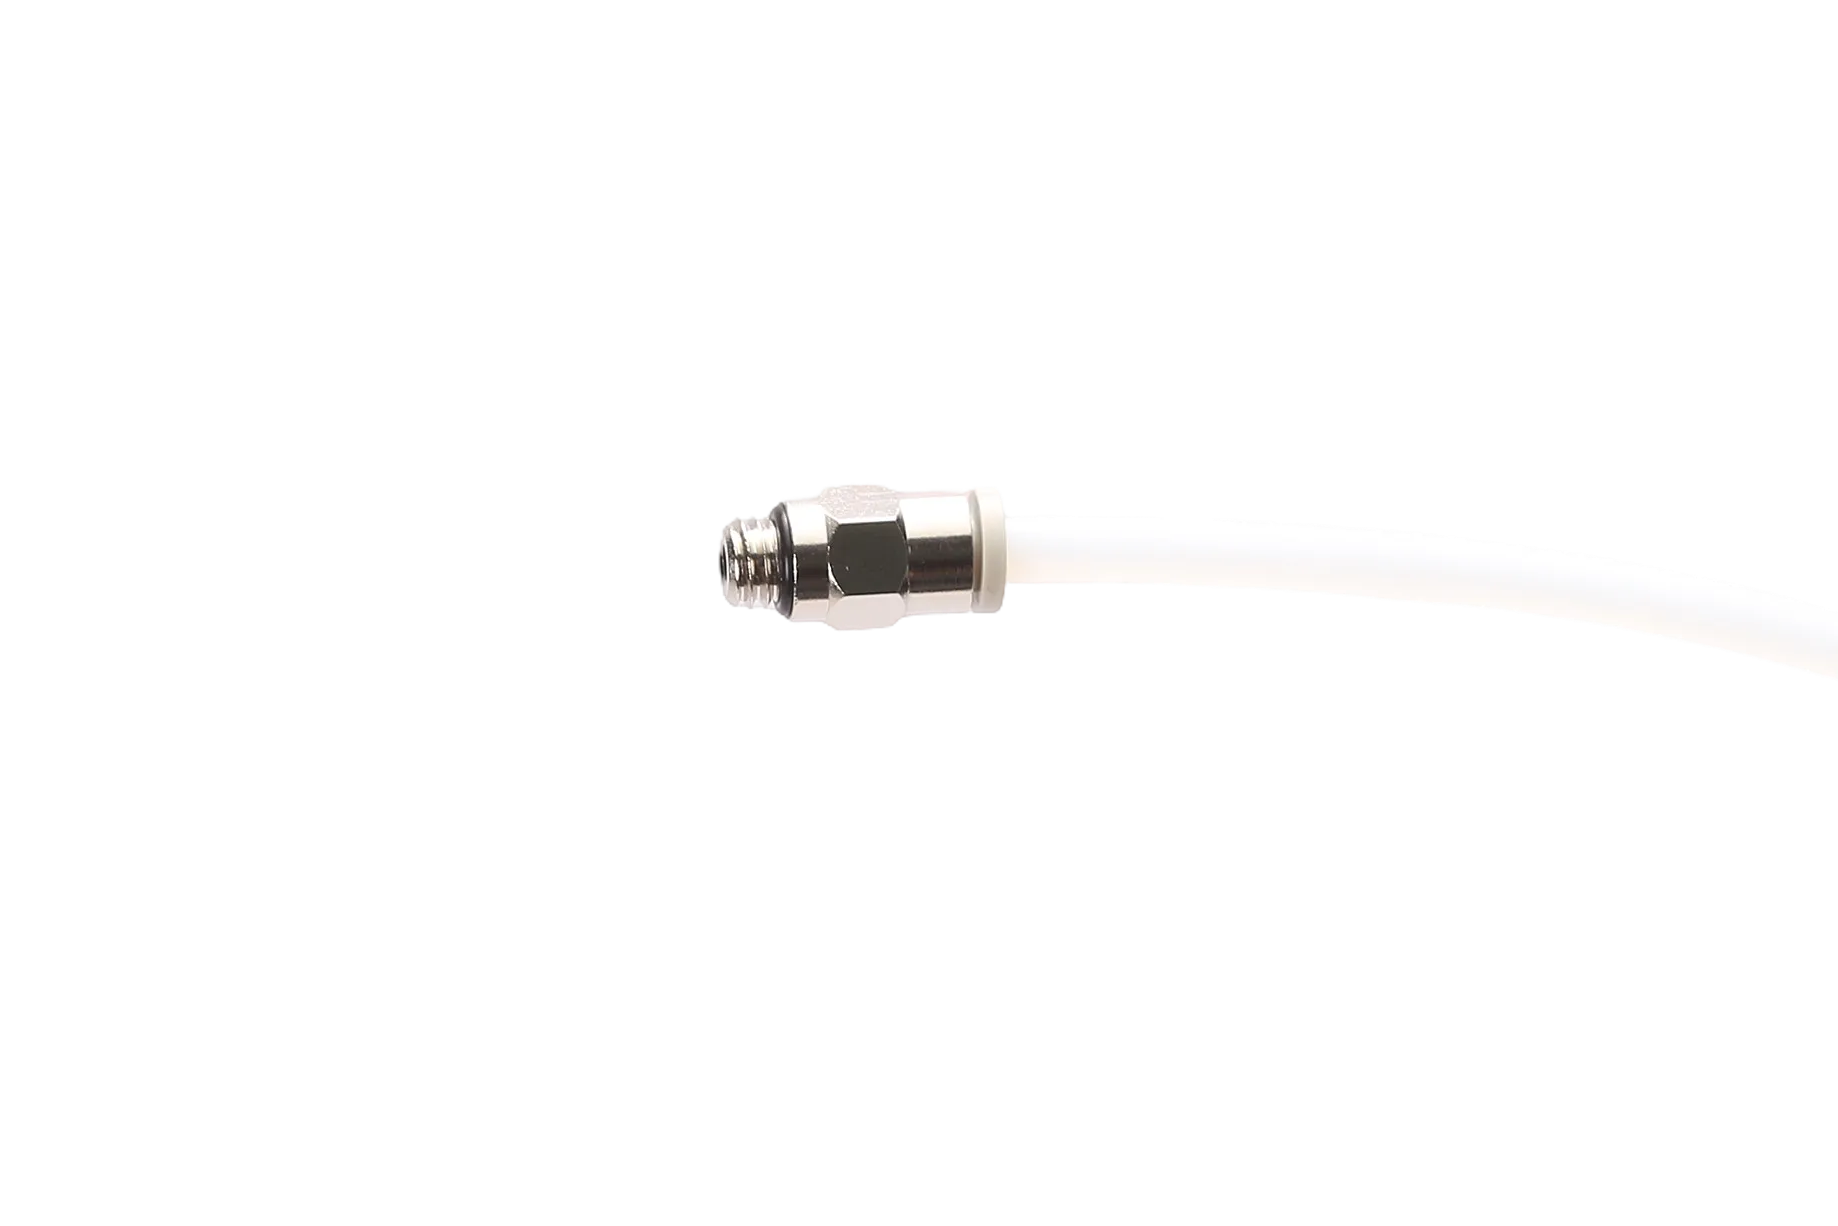
To pull out the filament tube from the filament tube connector, press tight the round clamp at the filament tube connector first.
The diameter of the filament tube connector is less than 2.85 mm. If you are using 2.85 mm filament, there is no need to install the filament tube connector.
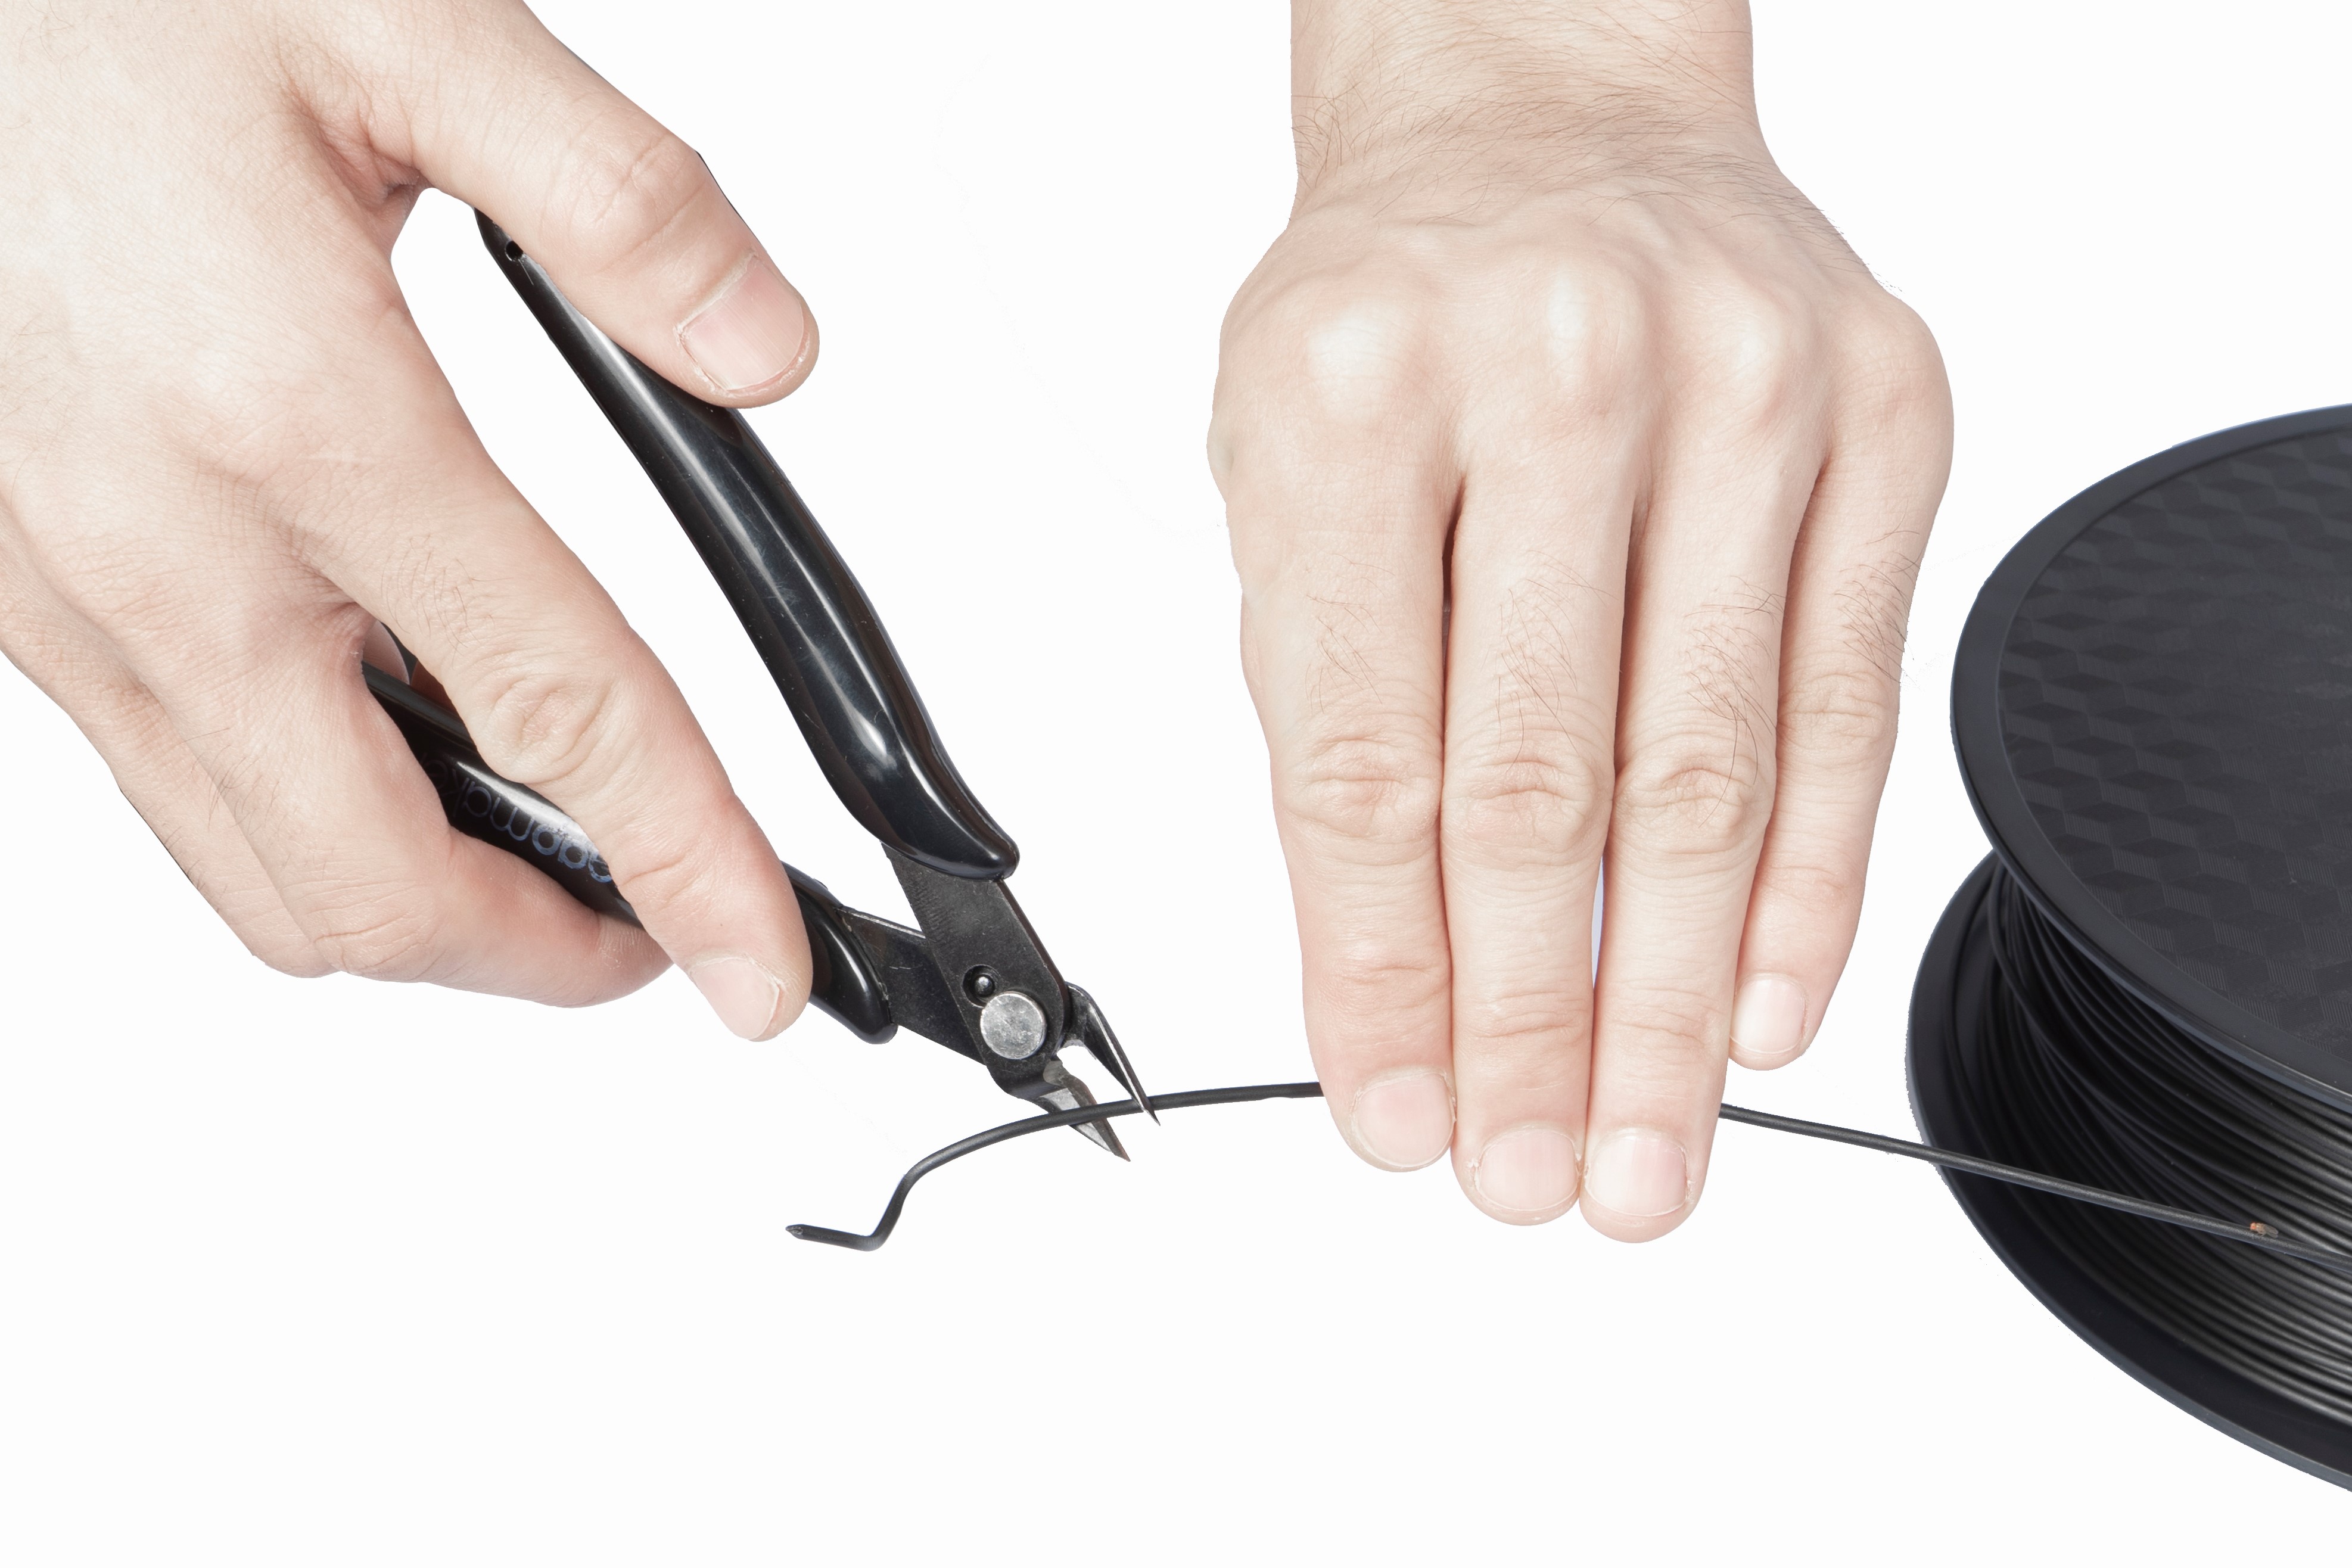
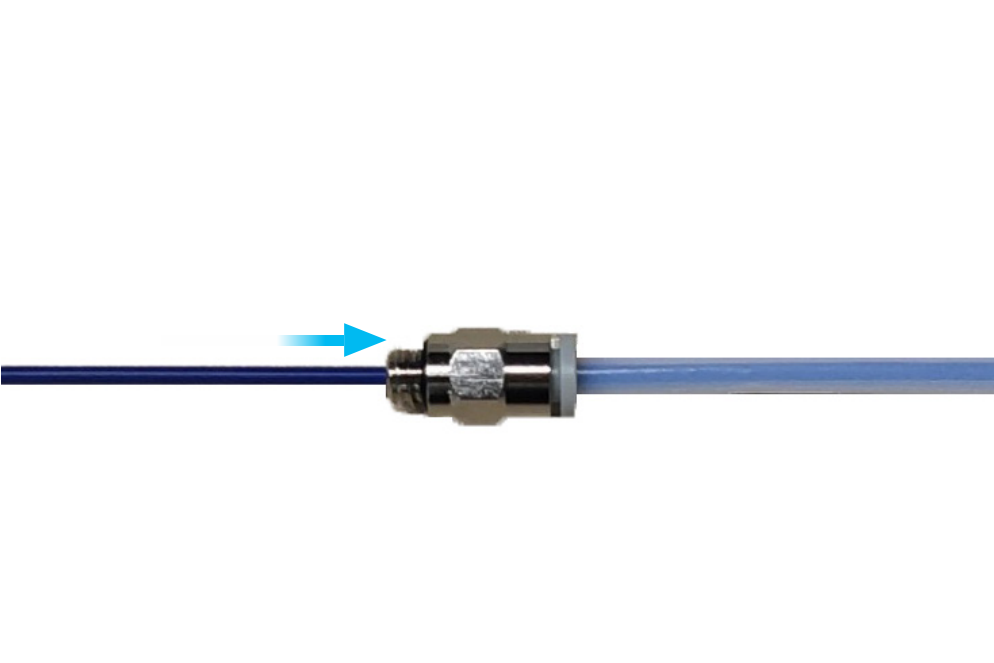
- Cut the bending end of the filament using the diagonal pliers. Insert the filaments into the filament tube, and push the filament close to the filament entry.
- Depending on your machine model and installed printing module, refer to the unloading procedure in the previous section to load the filament using the Load button.
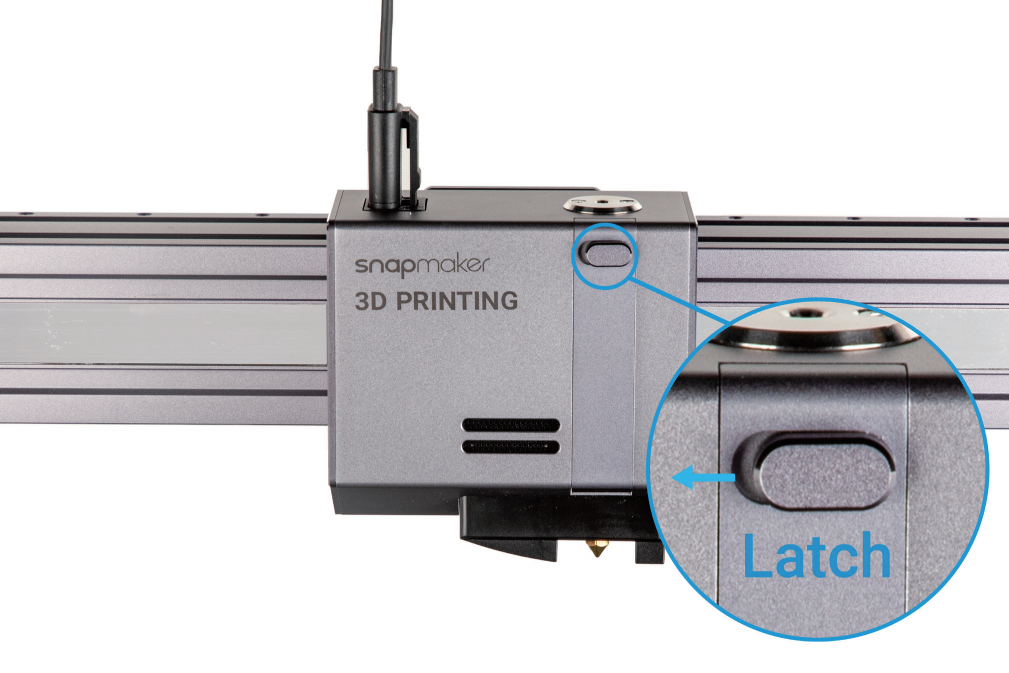
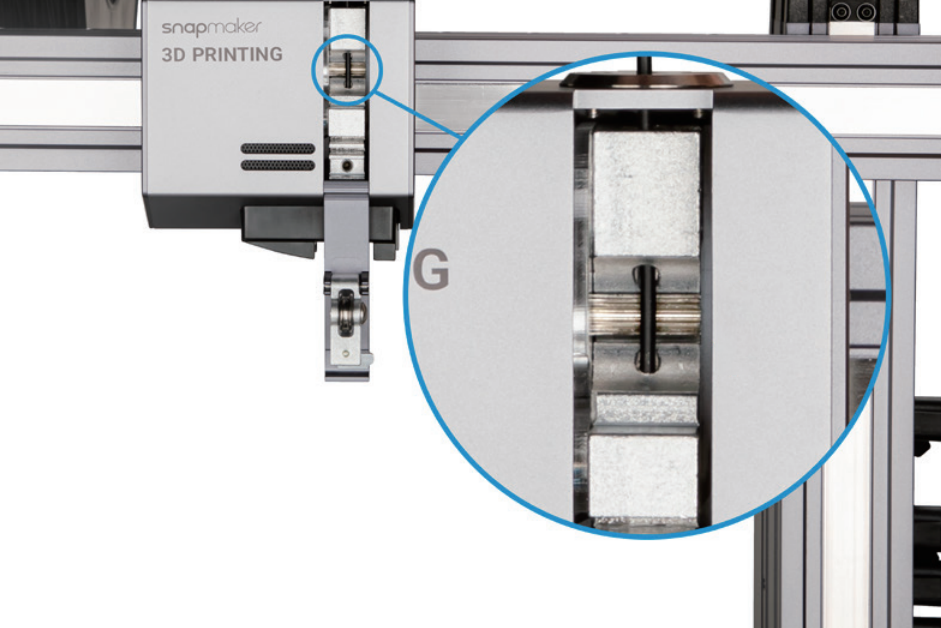
If you are using a single extrusion 3D printing module and need to check whether the filament has entered the feed hole, you can press the latch inward and then push left to open the printing module.
- Close the SnapDryer box and insert the filament tube connector into the outlet.
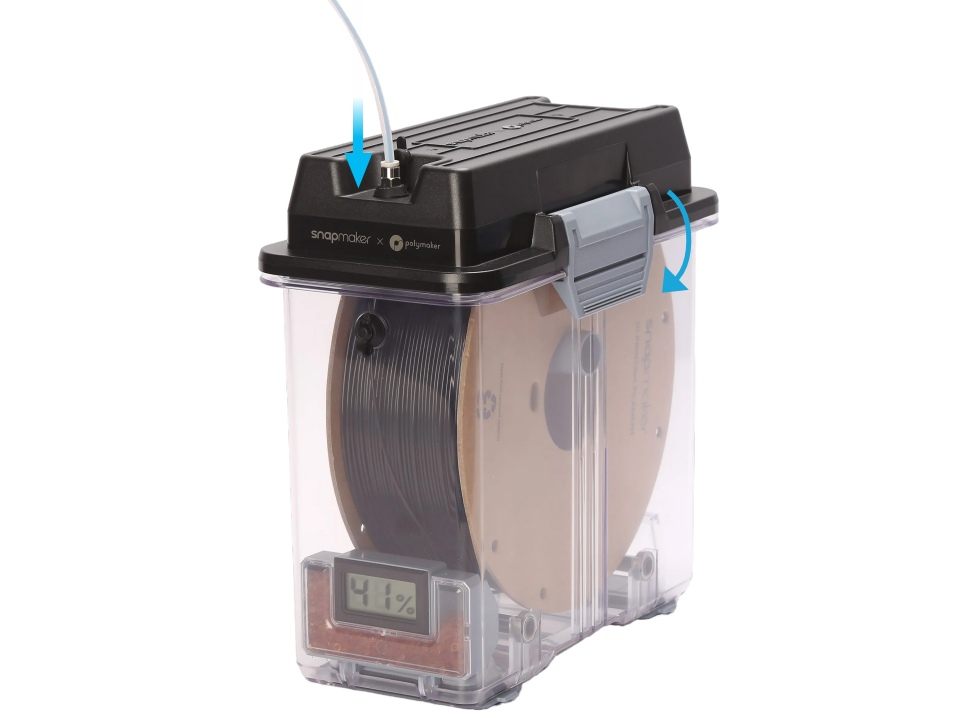
- Place the SnapDryer box appropriately based on your machine model and installed printing module.
¶ 03 Recommended Power Level and Drying Time
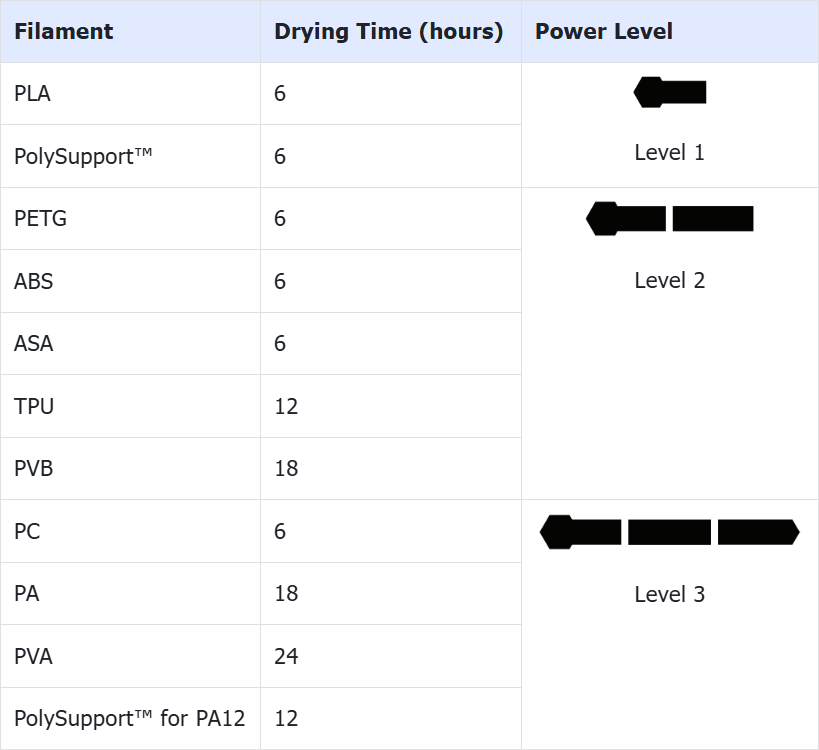
When factors, such as environmental temperature, humidity and storage time are different, the drying times and power level can be adjusted accordingly. The drying time recommendation is based on the condition of the testing samples which were exposed to an environment of 25°C and 70% RH for 5 days.
¶ 04 Start Drying
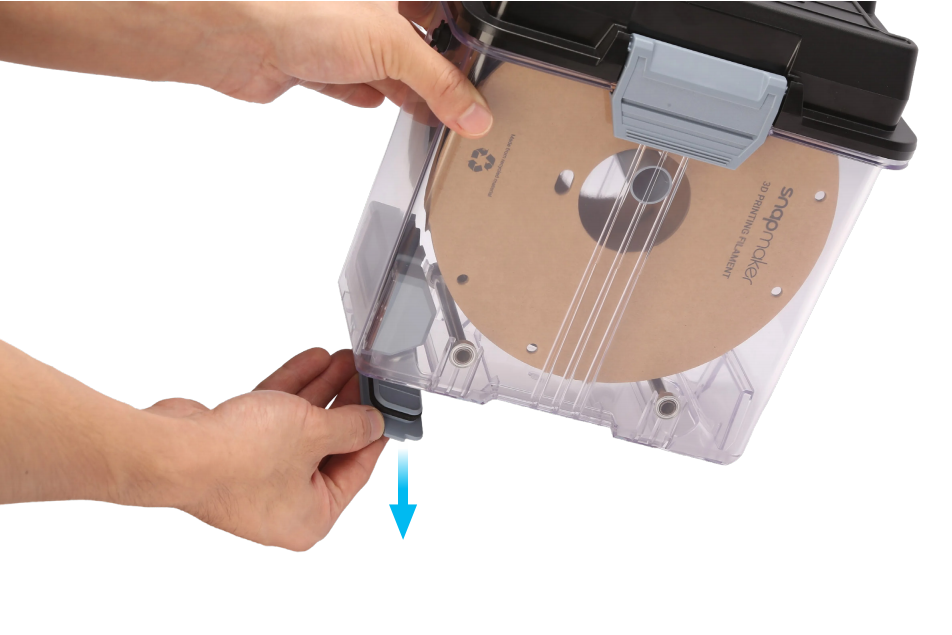
- Remove the airlocks.
- Mount the SnapDryer box on the dry dock.
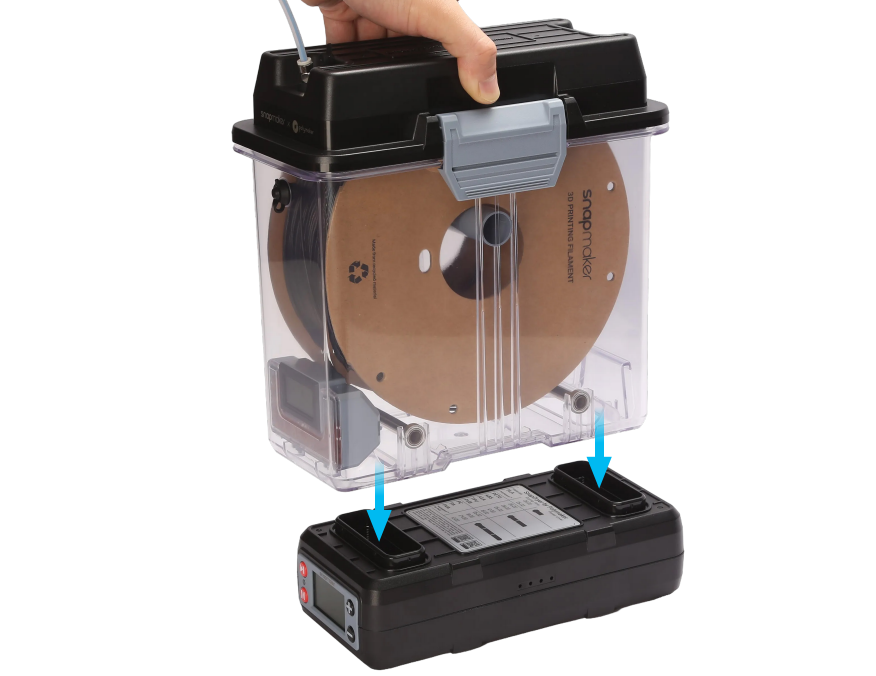
It is recommended to place the desiccant box on the same side as the screen on the dry dock to prevent the hygrometer from being affected by the airflow near the outlet.
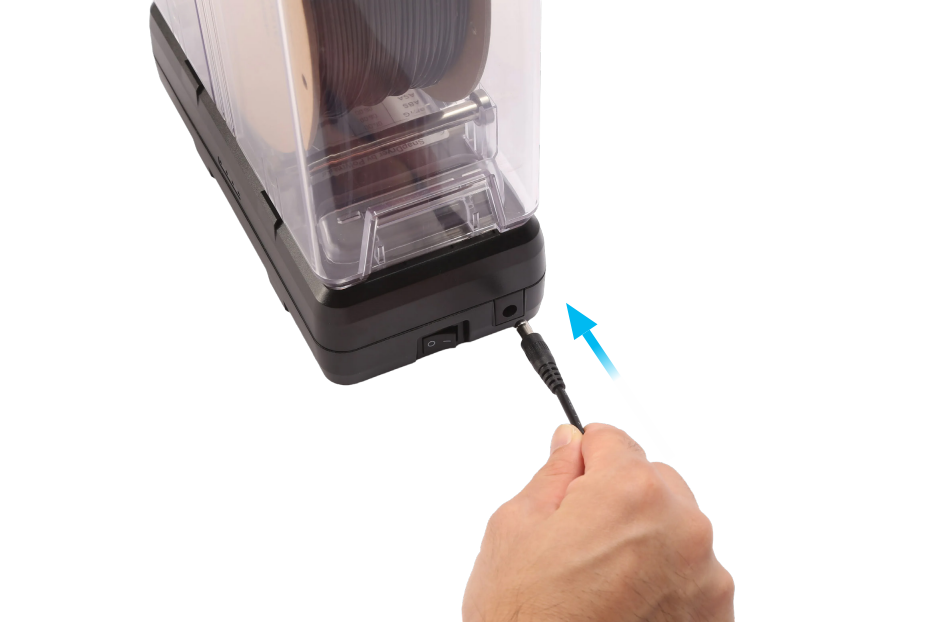
- Connect power supply and switch on the dry dock.
- Setup drying time and power level based on filament material, then press the button to start drying.
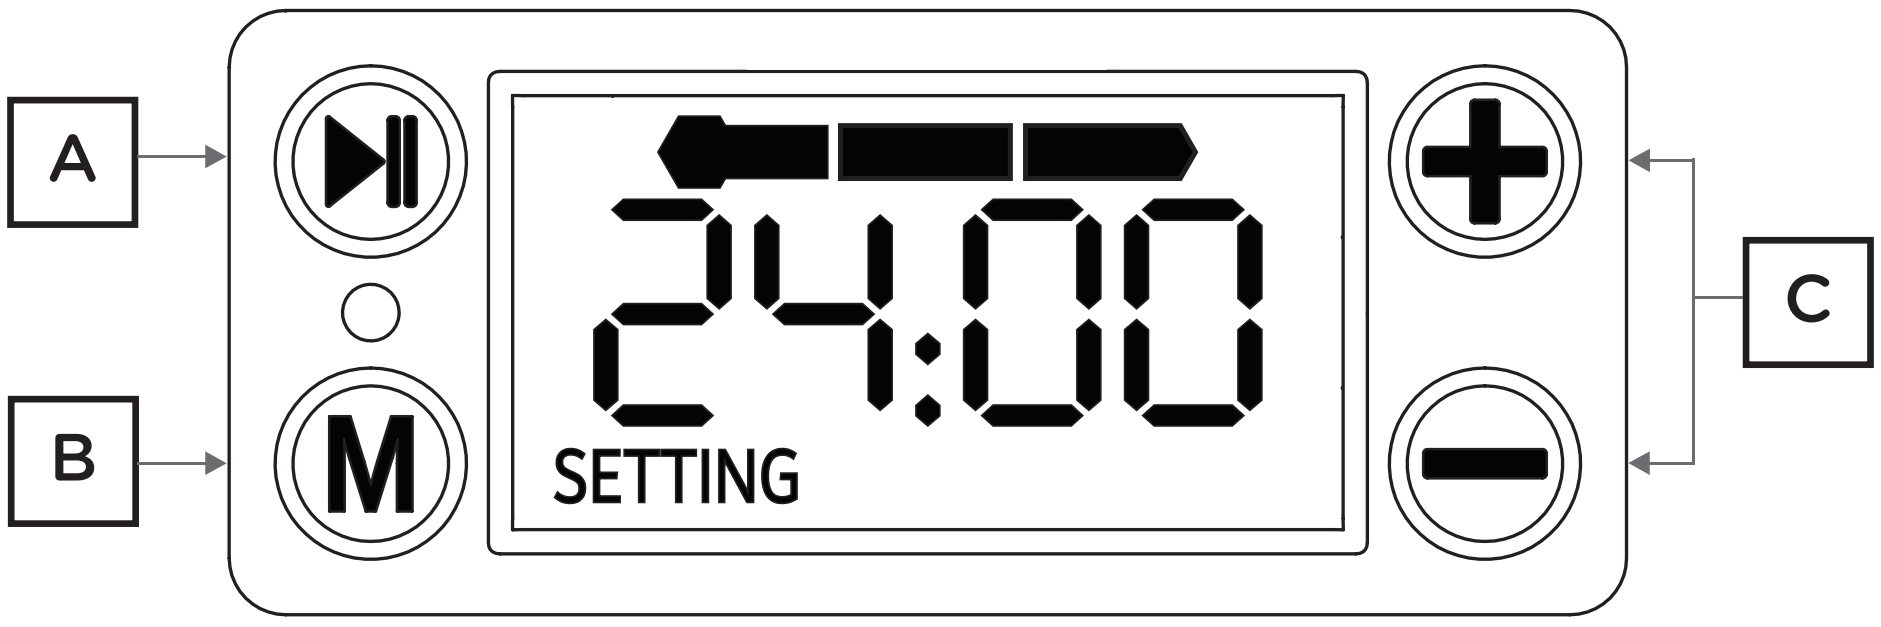
A:Start drying / Pause Drying
B:Adjust drying power
- Please review Recommended Power level before start drying
- Long press to access Continuous Mode
C:Adjust drying time (+ -)
- Press + and – buttons together to reset the drying time
- Max. 24 hours in Regular Mode
- To enhance printing quality, please dry the filament completely in reference to the settings in Recommended Power level.
- In Continuous Mode, the drying time is unlimited until the user stops the drying process.
- When you notice that the hygrometer display has faded, please replace the battery with 1.5V LR44.
- technical support at support@snapmaker.com.
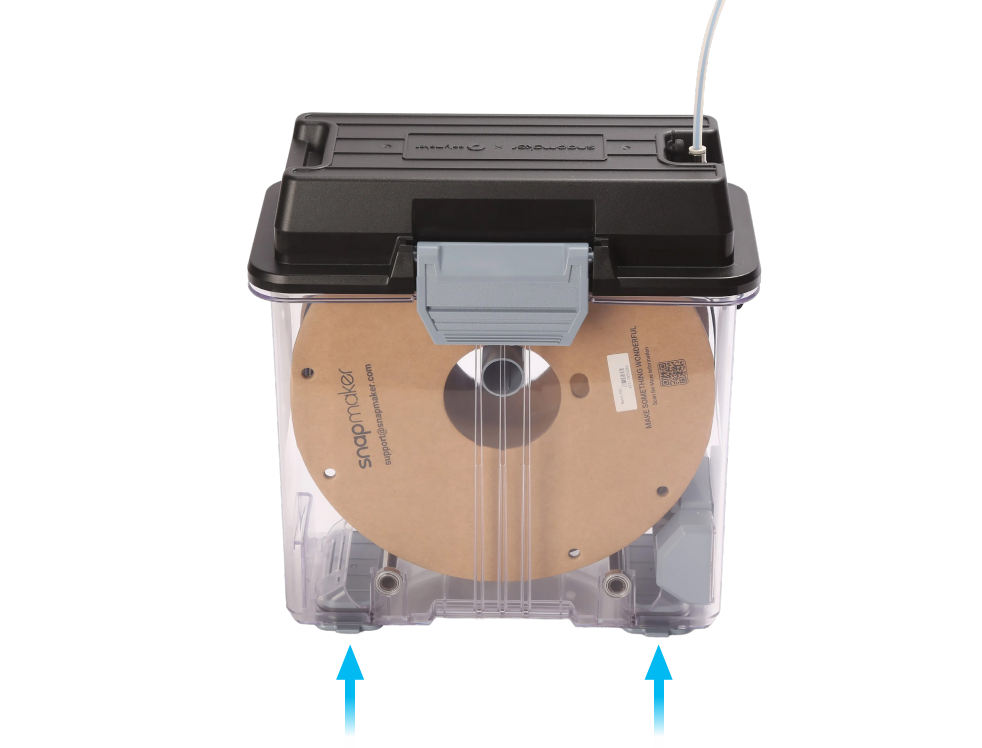
- After the drying process is complete, remove the SnapDryer box from the dry dock and replace the airlocks.
Replace the airlocks tightly to ensure the best seal.
¶ 05 Drying the Desiccant
When you notice the most of desiccant has changed color from orange to dark green, then the desiccant has absorbed enough moisture and must be dried. The recommended procedure is as follows:
- Place the SnapDryer box without the filament on the dry dock, use power level 3 and dry for approximately 8 hours until the desiccant turns orange. The desiccant should be placed in the same orientation as the screen on the dry dock, which facilitates the hot air blowing onto the desiccant and improves drying efficiency.
- Remove the silica gel desiccant from the Hygrometer & Desiccant Box (without including any other parts) and place it in a heat-resistant container. Use an oven to heat at 100-120°C for 1-2 hours until the desiccant turns orange.
- Remove the silica gel desiccant from the Hygrometer & Desiccant Box (without including any other parts) and place it in a heat-resistant container. Use a microwave, select a low power level, heat for 30 seconds, then flip the desiccant, and heat for another 30 seconds until the desiccant turns orange.
¶ 06 Resources
You can download and print some accessories for SnapDryer if you want.
Designed by @Polymaker.