The instructions of this page apply equally to all models that are compatible with the Rotary Module.
¶ Before You Start
In order to avoid collision of the CNC bit and the tailstock during machining processes, be sure to set the work origin before installing the taikstock.
¶ Tools and Accessories Required
- An H2.0 screw driver
- Two M4 × 10 hex socket head screws
¶ Procedures
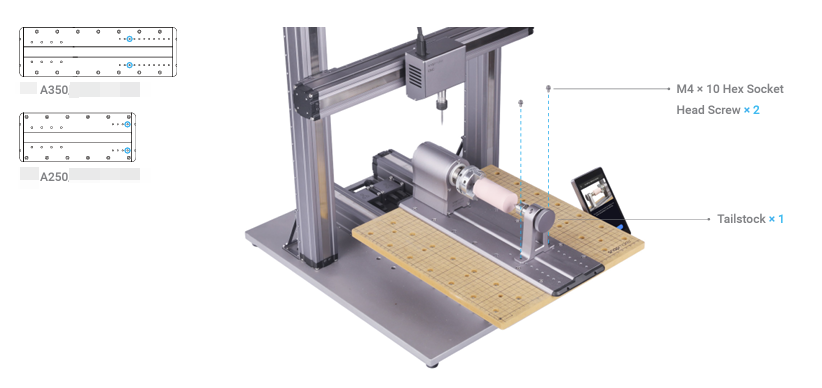
¶ Step 1 Attach the tailstock to the base.
Select two holes on the base to attach the tailstock.
| Screw | Number |
|---|---|
| M4 × 10 | 2 |

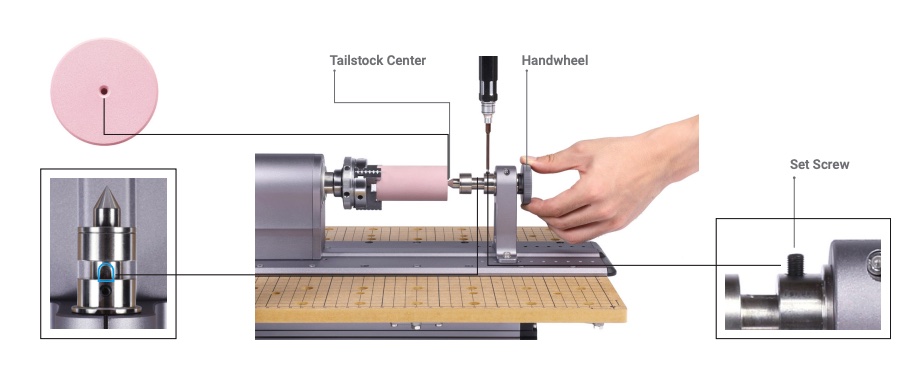
¶ Step 2 Fix the tailstock to the material.
When fixing the tailstock, make sure that it will not interfer with the machining path of the CNC bit. Otherwise, a collision could occur, which might cause product damages or even personal injuries.
-
Use the H2.0 hex key to loosen the set screw and screw the handwheel forward until the tailstock center presses against the central point of the bottom surface of the material.
-
Align the groove on the tailstock center with the set screw, and tighten the set screw.
