¶ When & Why
- Every two weeks.
- After a period of laser machining, tar may accumulate on the steel strip of the linear module. Tar is a flammable substance and will affect the lubrication of the surface of the steel strip.
¶ Before You Start
Turn off the power, and then detach the linear module from the machine.
¶ Tools Required
- Dust-free cloth
- Dashboard wax
- H2.0 screwdriver
- Gloves (recommended)
- Tweezers (or other tools to pry up the slider cover of the linear module)
¶ Procedures
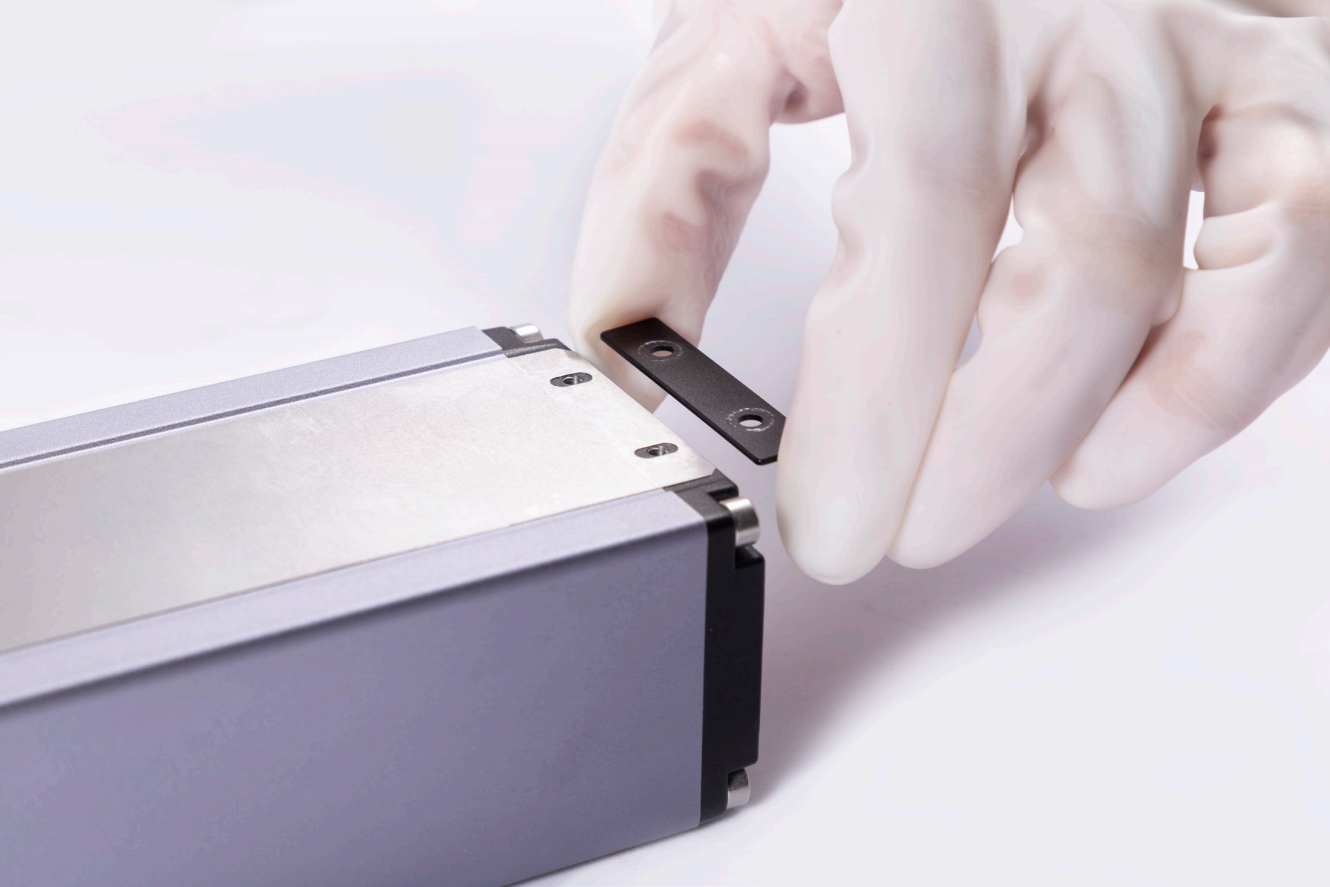
- Insert the tweezers into the edge of the cover, pry up and remove the cover.
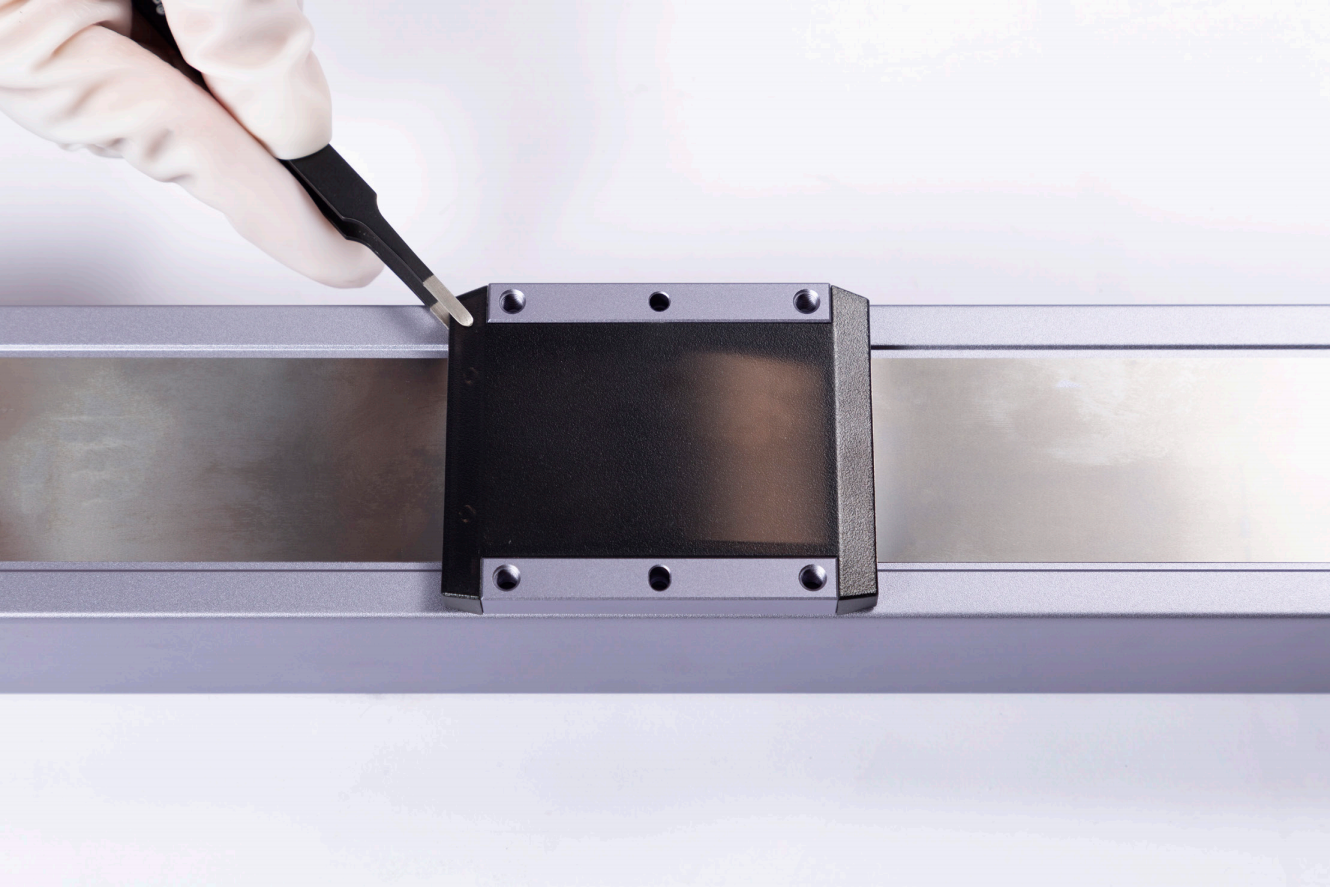
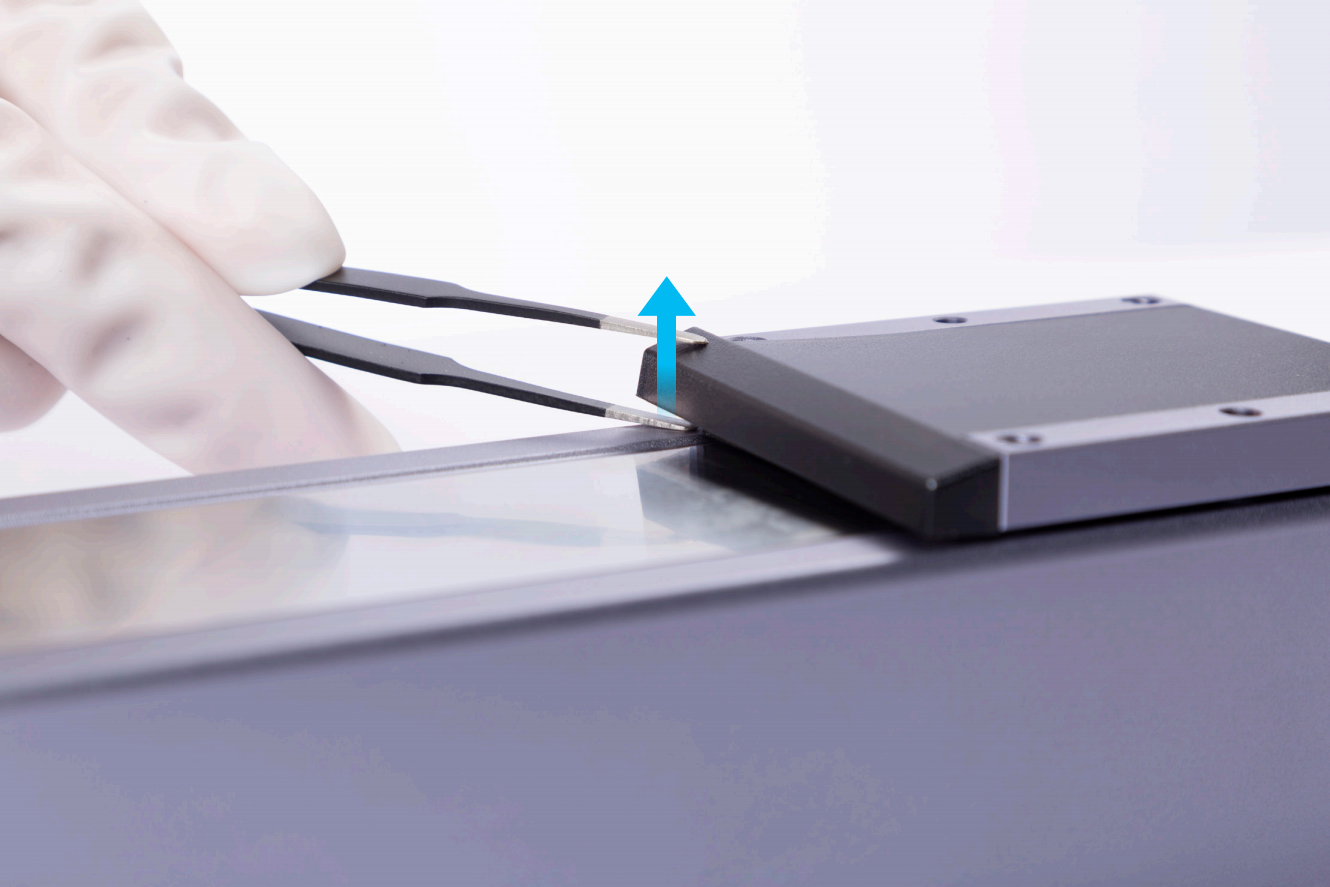
Do not insert the tweezers beneath the steel strip.
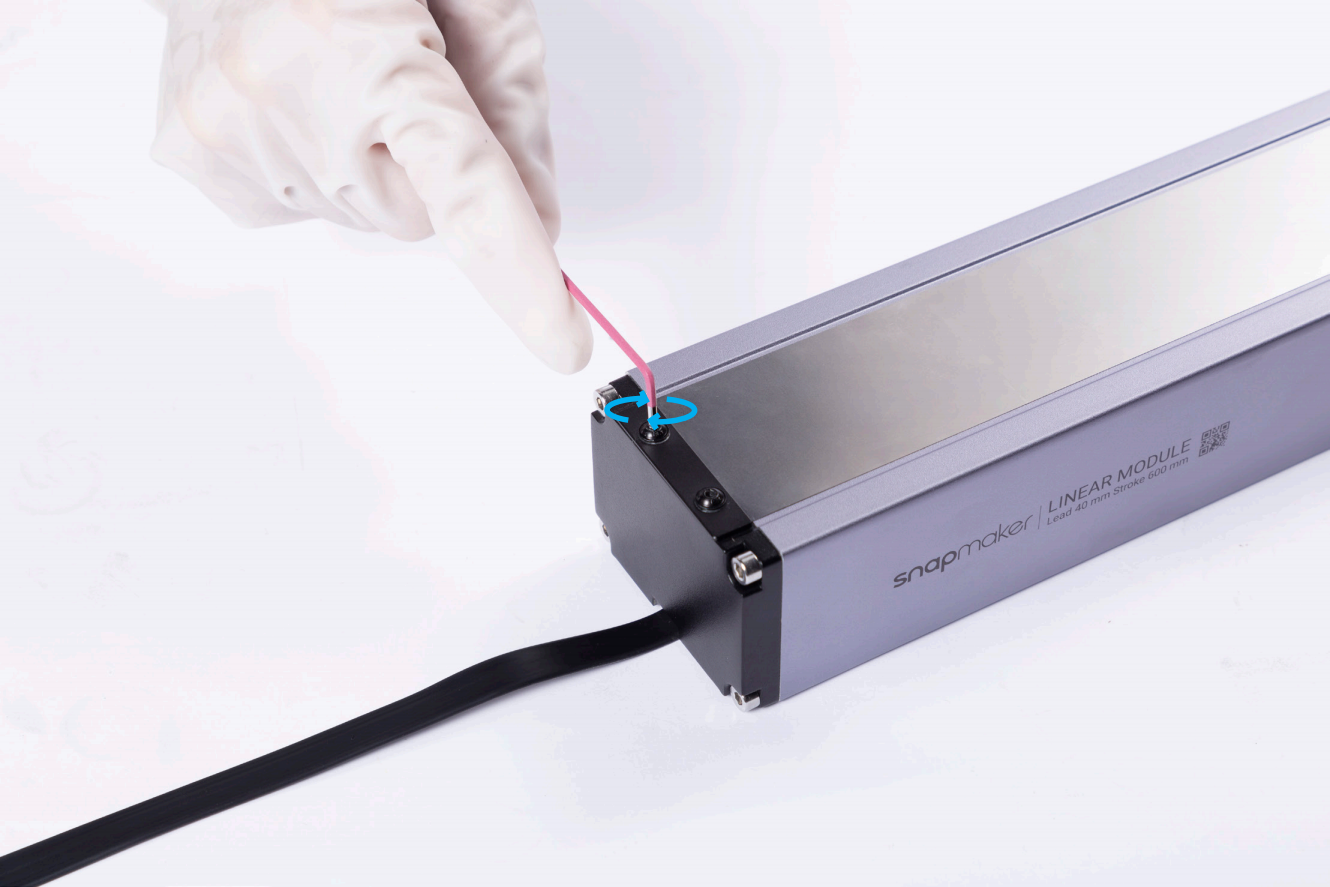
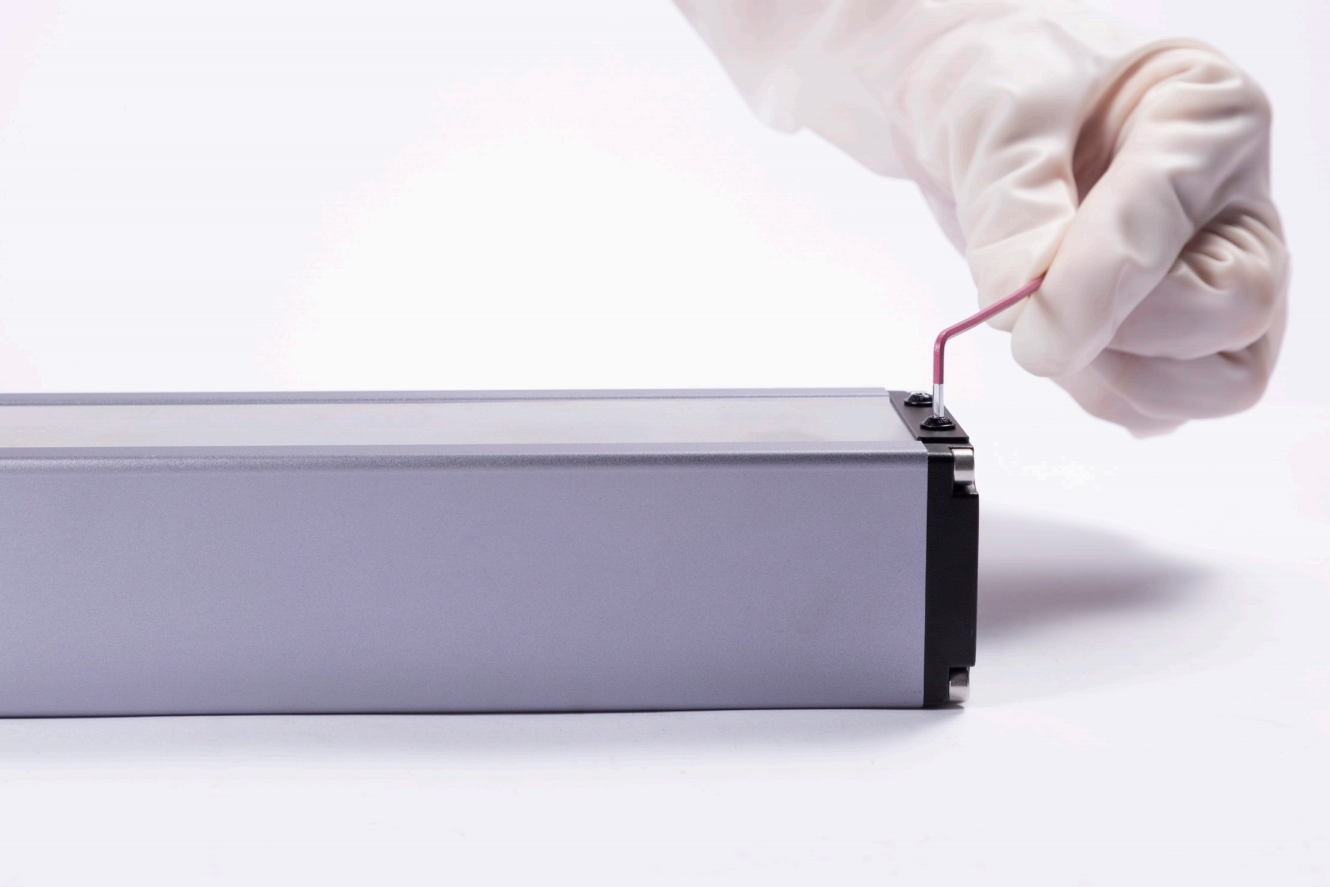
- Remove the screws and washers.
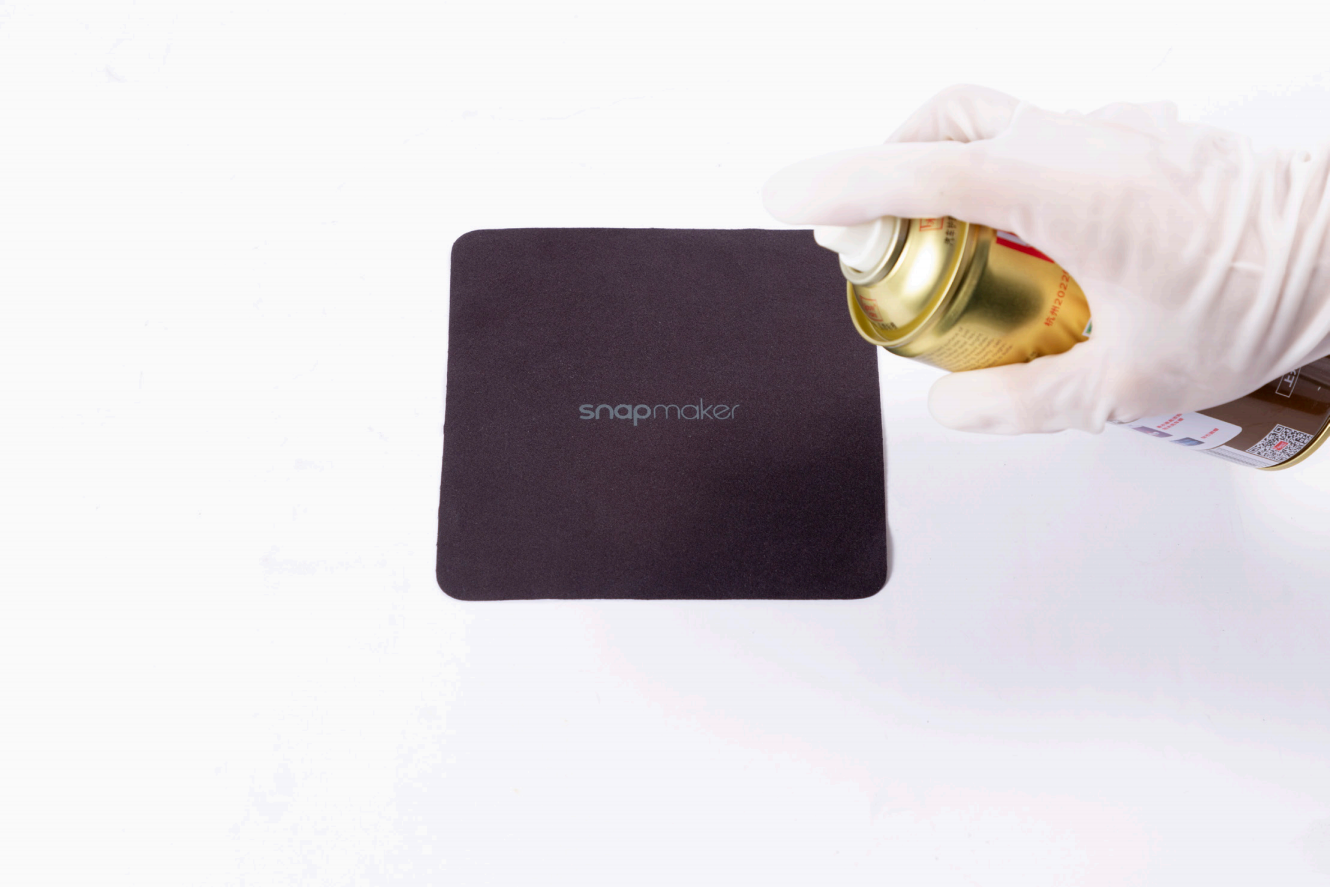
- Remove the steel strip. Spray an appropriate amount of dashboard wax onto the dust-free cloth, and clean every surface of the steel strip.
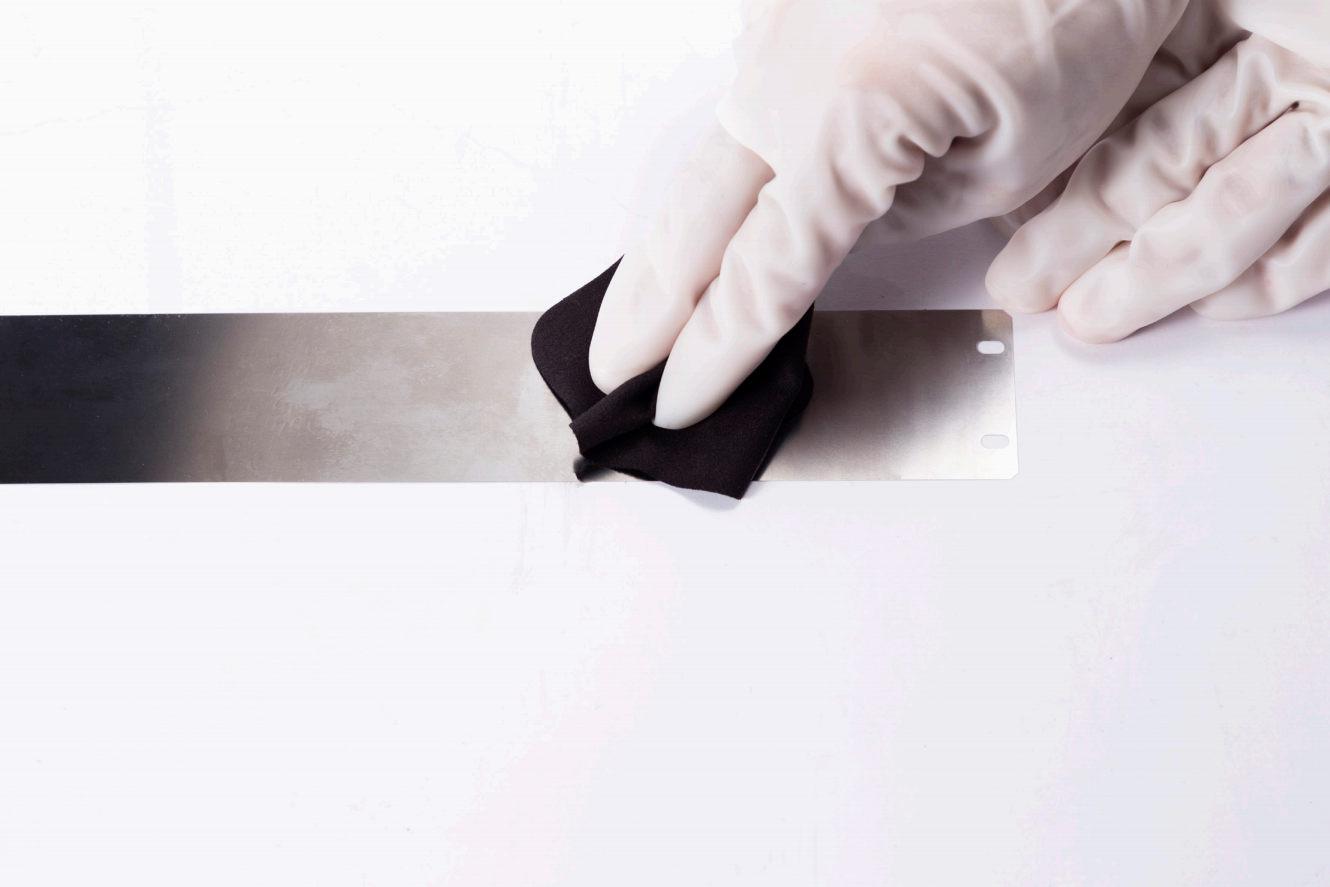
The steel strip edges are sharp, it is recommended to wear gloves throughout the operation.
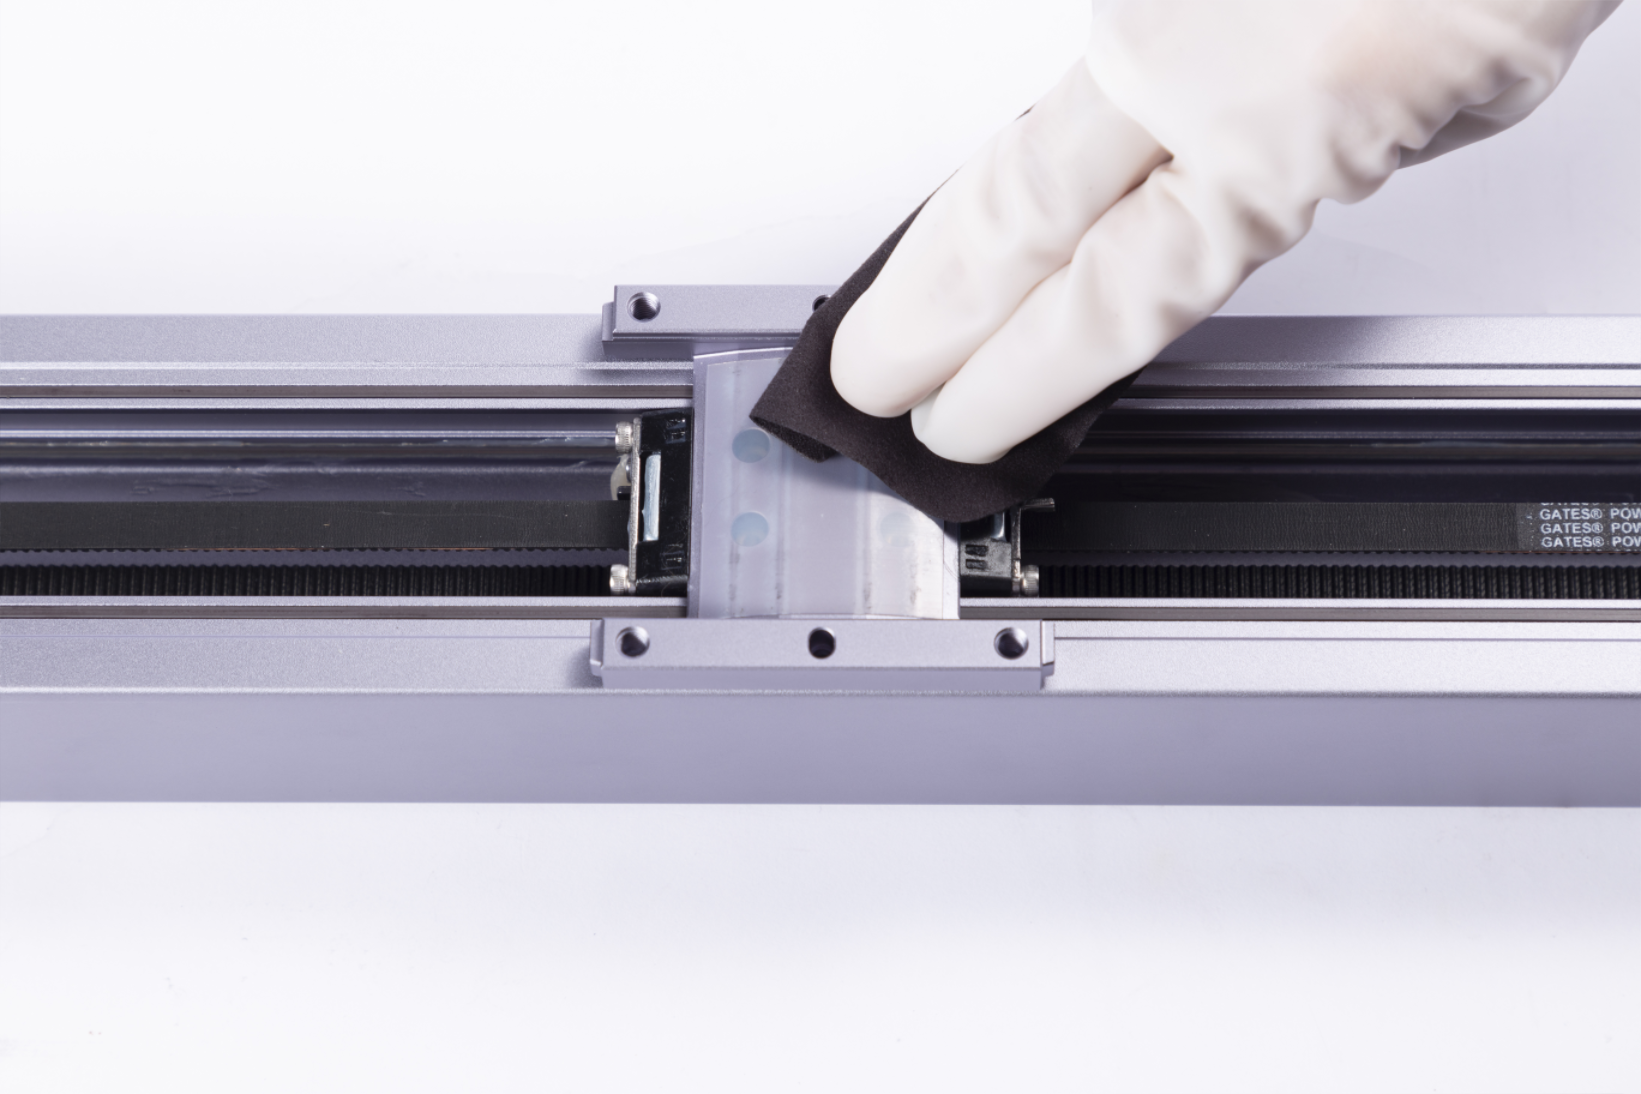
- Spray an appropriate amount of dashboard wax onto the dust-free cloth and clean the slider.
- Replace the steel strip and the washers.
- Pre-tighten the screws. Do not fully tighten the screws until Step 9.
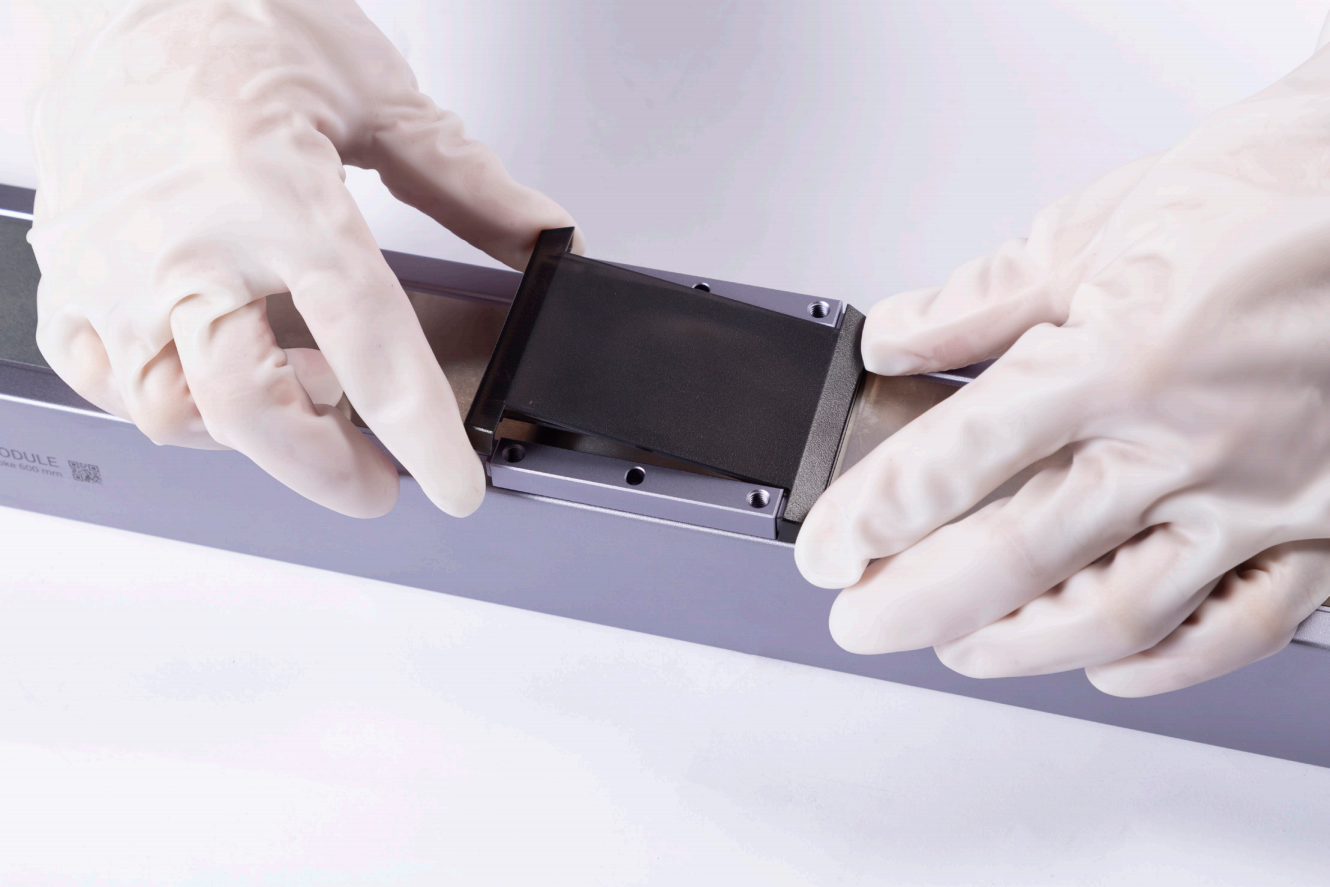
- Reinstall the cover.
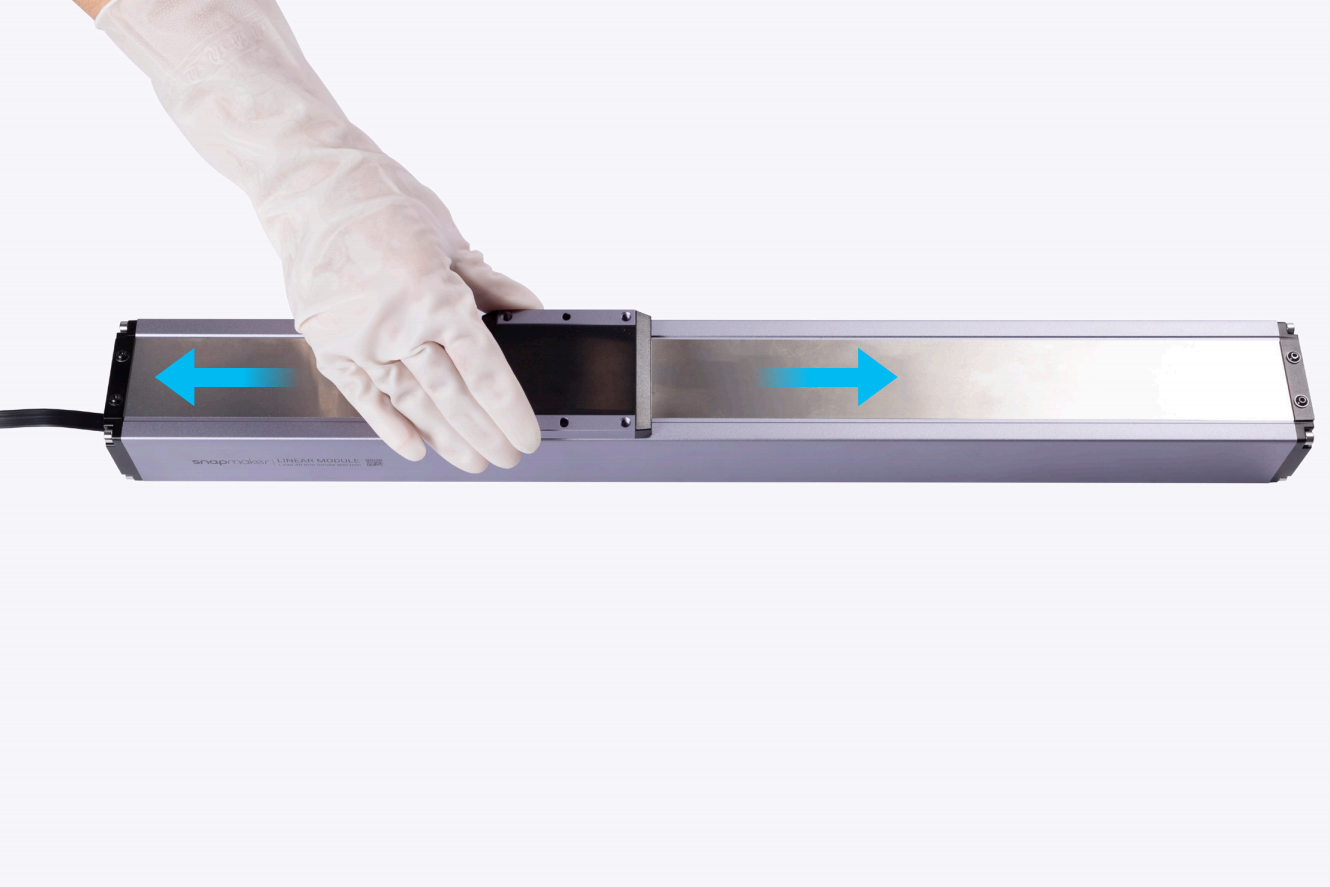
- Slide the slider side to side to balance the steel strip.
- Fully tighten the screws.
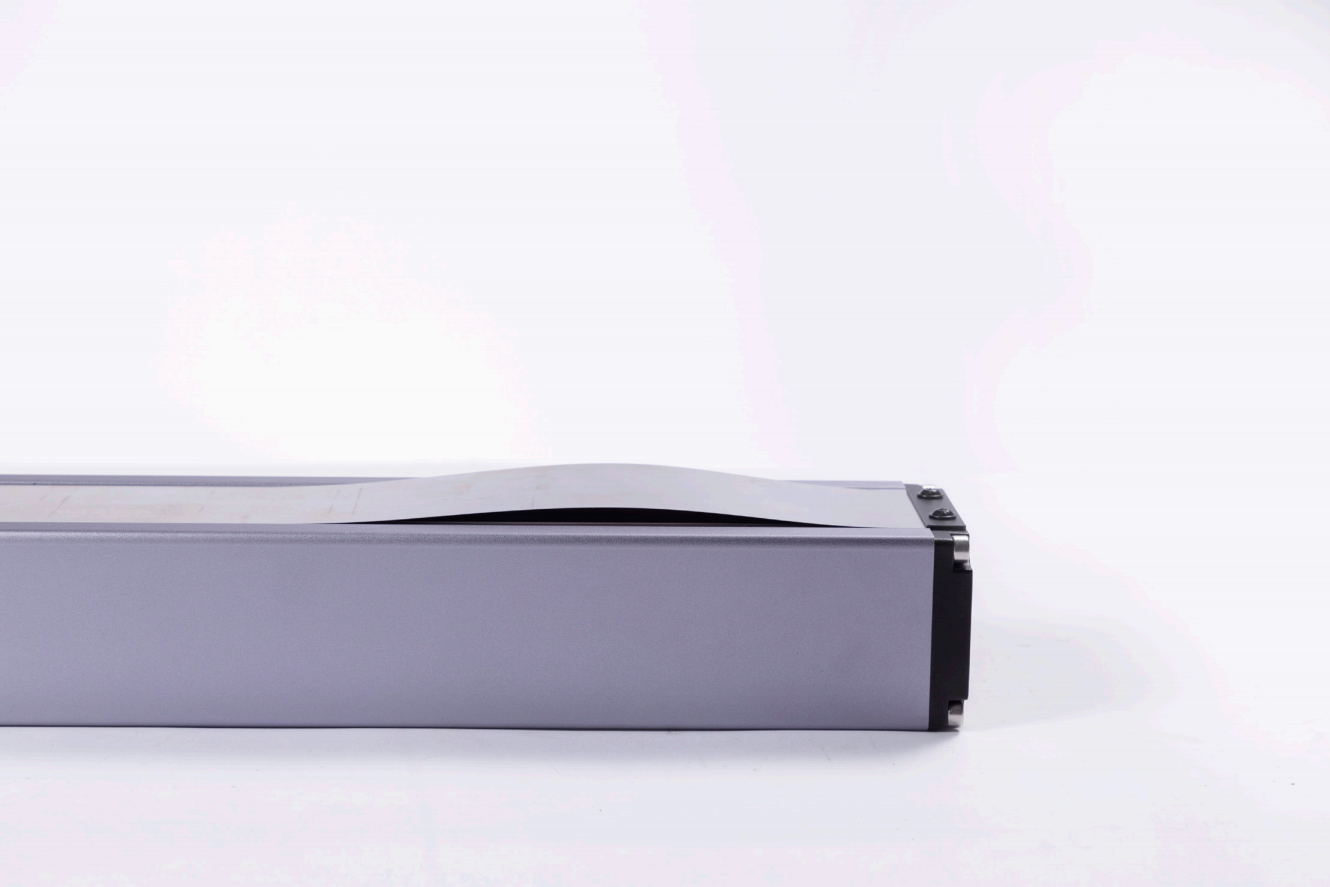
- Slide the slider side to side again to check if the steel strip is warping.
- If one end of the steel strip is warping, loosen the screws on that end, retighten until the steel strip no longer warps.
- Slide the slider side to side. If the steel strip is still warping, repeat Step 11. If the steel strip is no longer warping, the operation is complete.