¶ 💡Before You Start
¶ 1. Compatibility
This guide applies to the U1 printer. Please verify your device model before following the instructions.
¶ 2. Version Upgrade
Snapmaker Orca V2.3.0 or above supports built-in models. Please refer to the Snapmaker Orca Release Notes and upgrade to the corresponding version to access the latest features.
¶ 3. Initial Setup
To complete software installation, registration or login, and basic configuration, please refer to the Snapmaker Orca Quick Start Guide for U1.
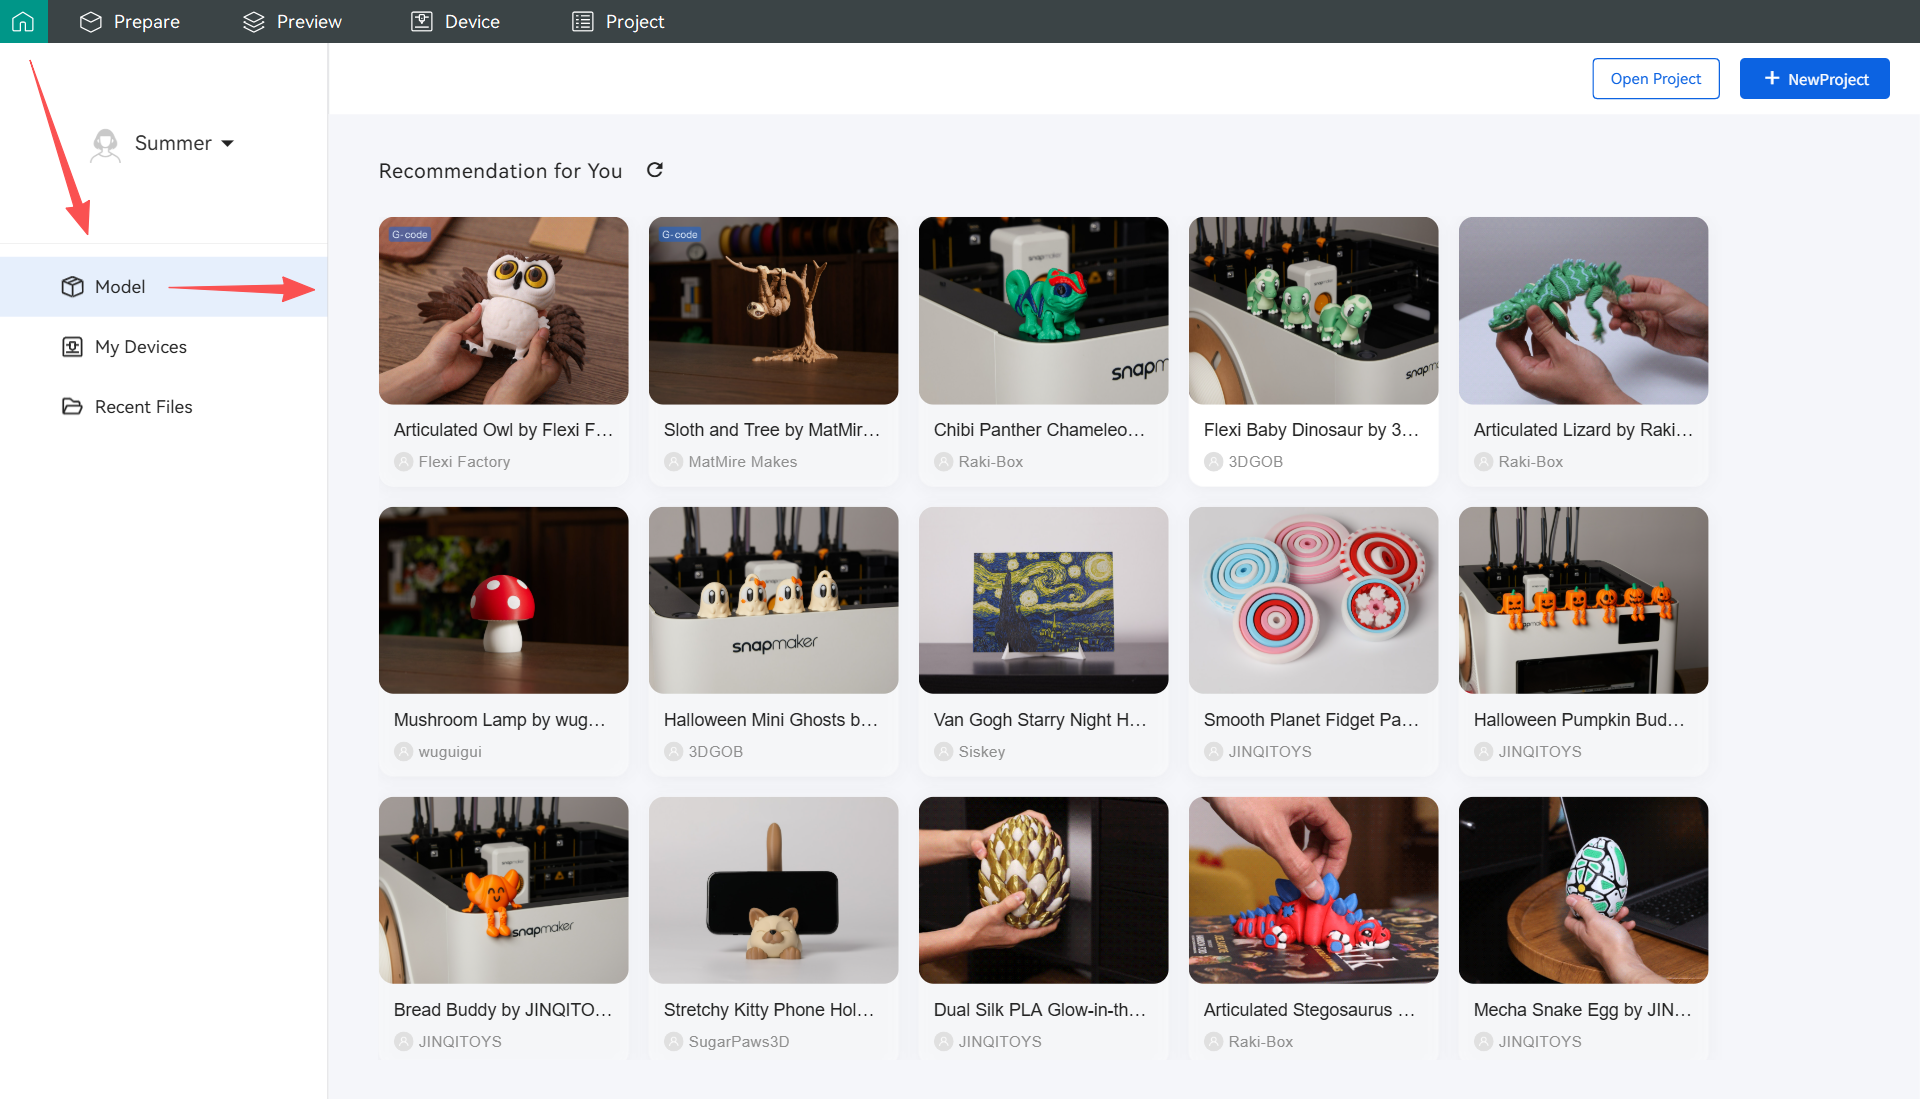
¶ 📍How to Use
- Launch Snapmaker Orca, and click
Modelon the left navigation bar on the home page to view the list of models recommendeded by Snapmaker.
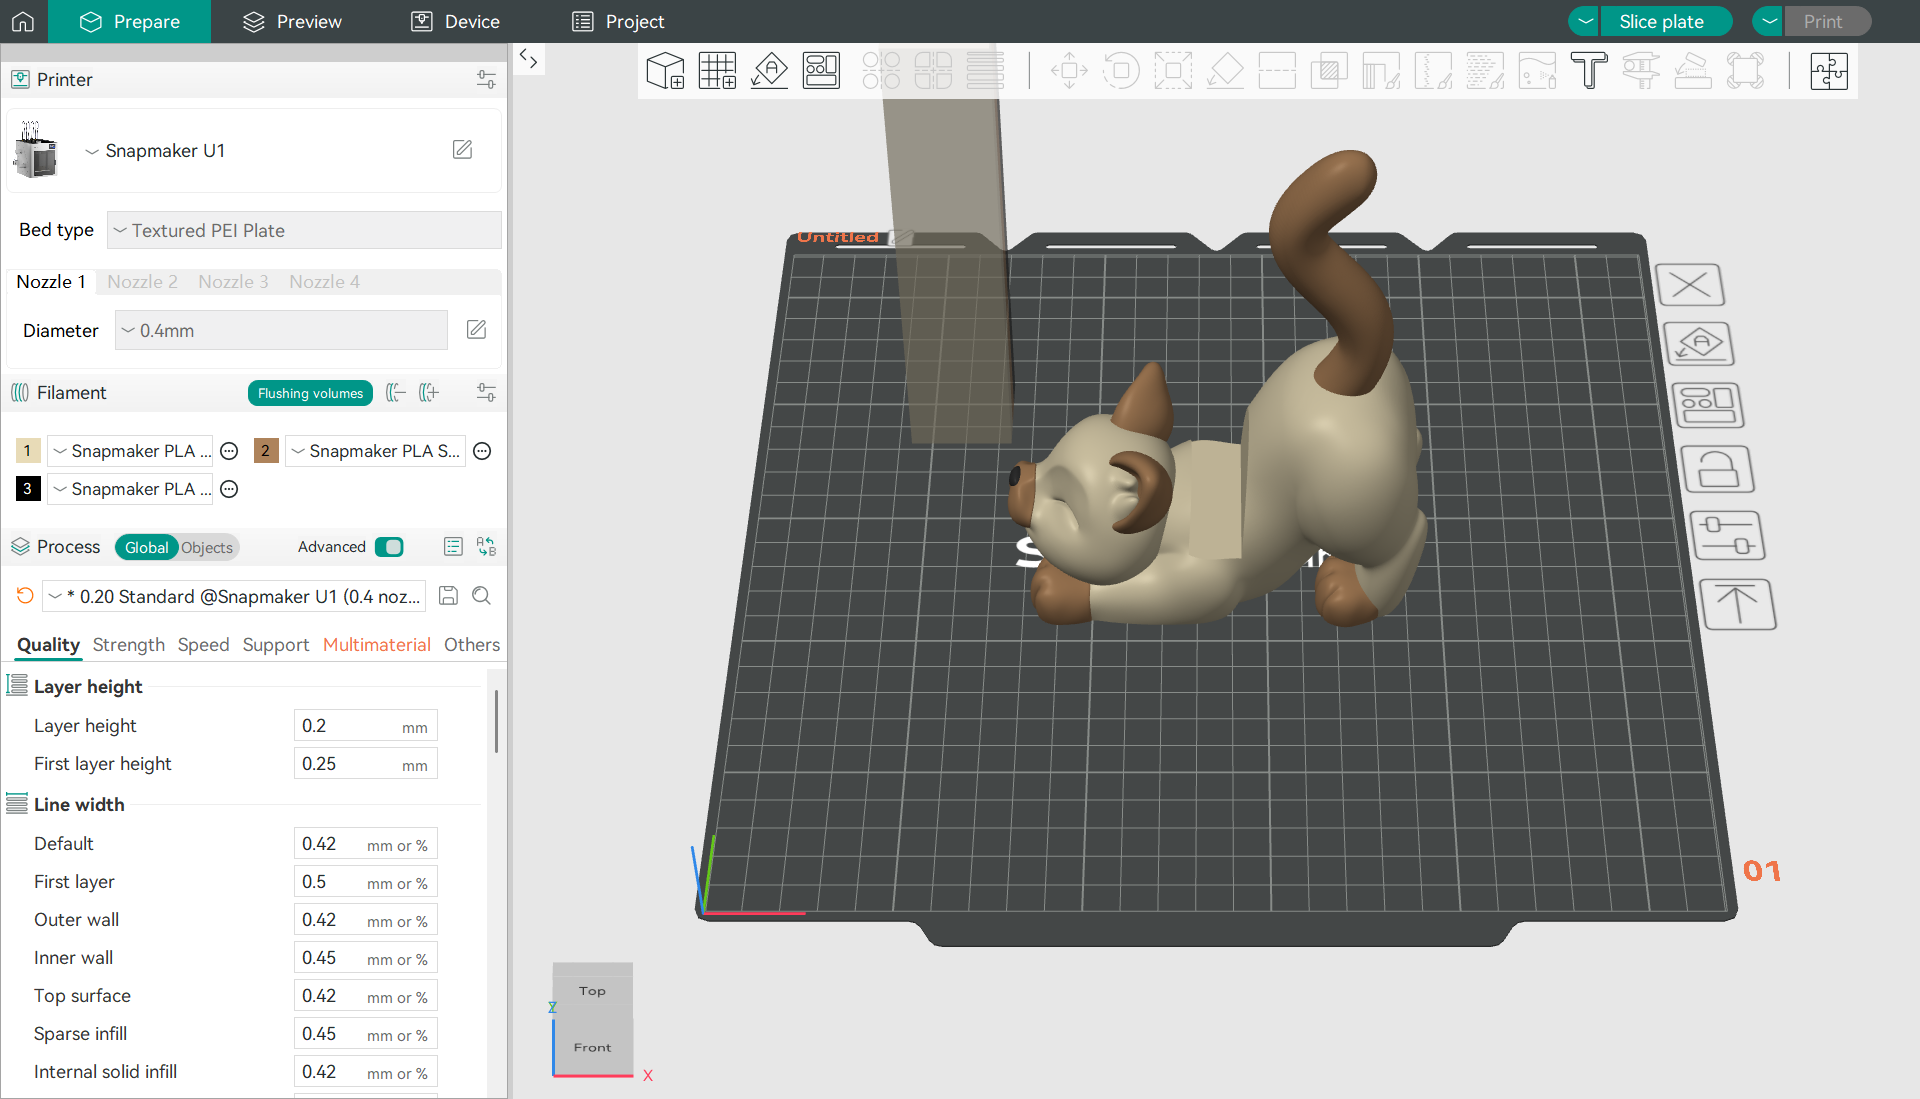
- Select a 3D model you like and tap to access more details. This page mainly consists of three sections: ① Model Display ② Print Profile ③ Model Description.
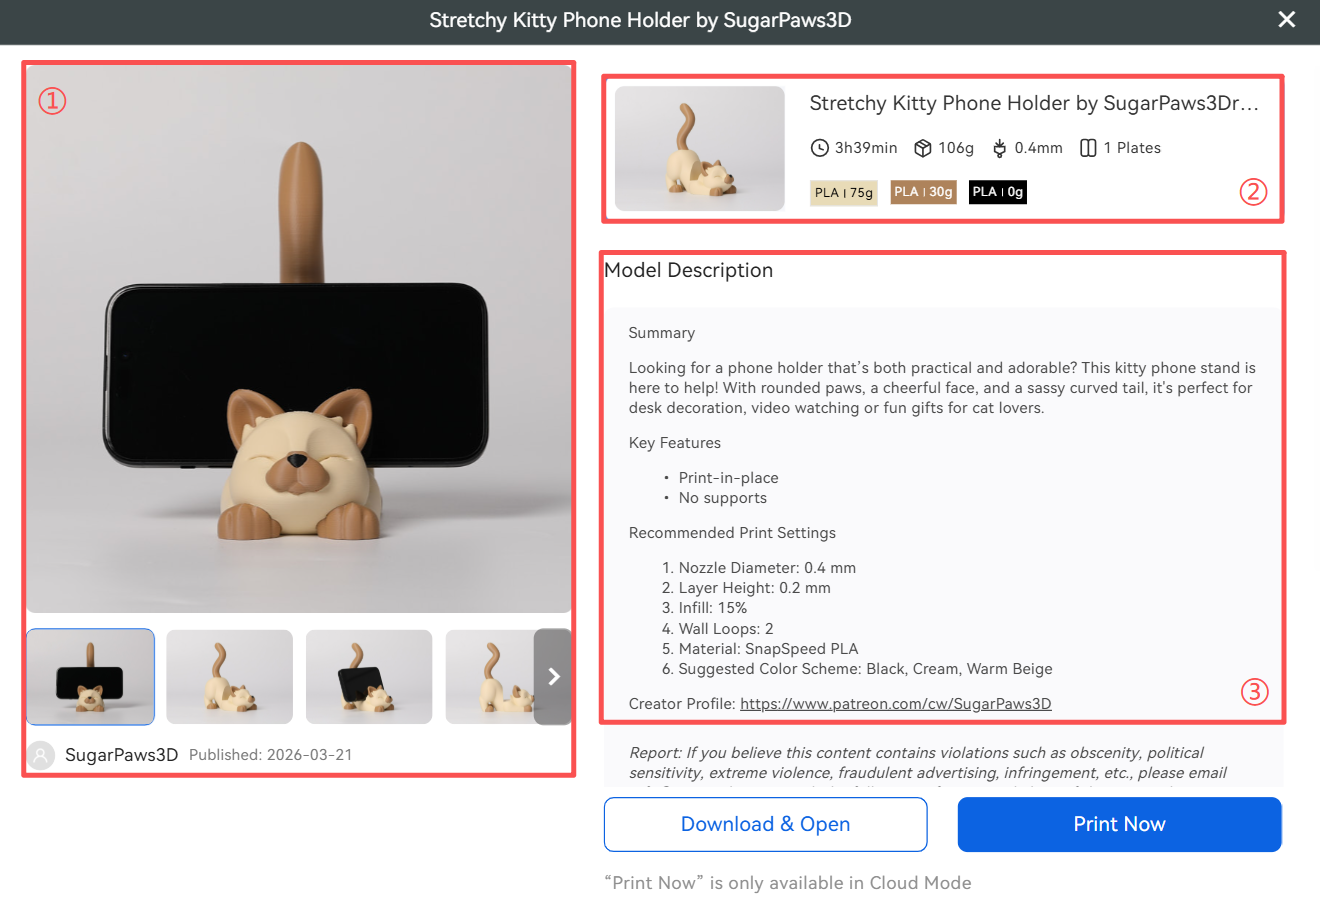
- Model Display: You can click to view the printed results in this section.
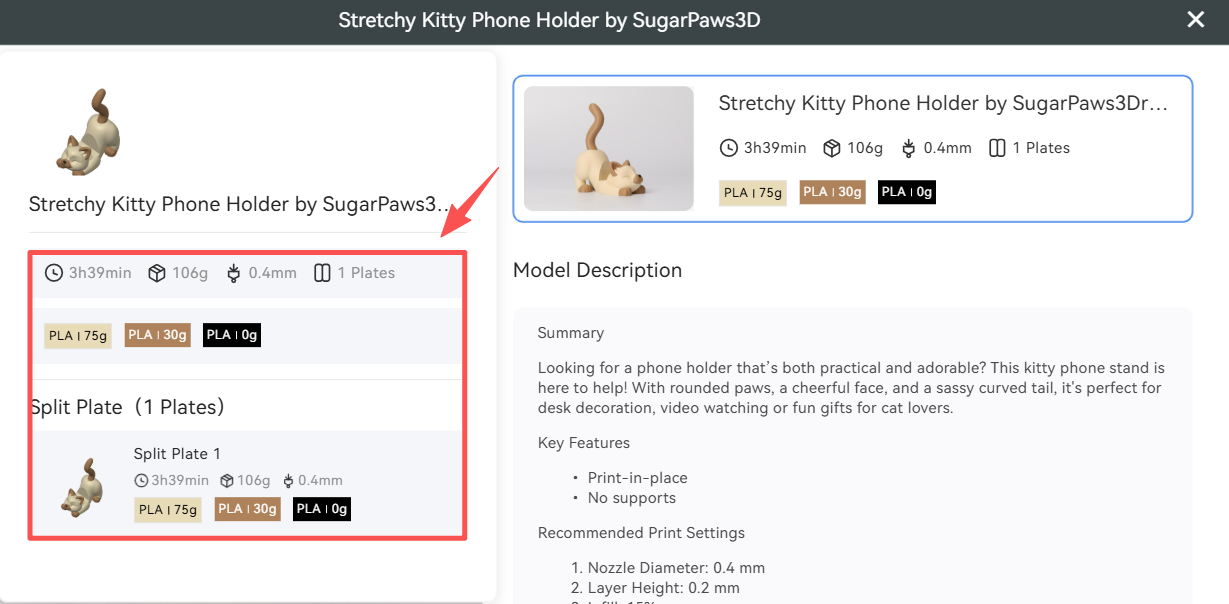
- Print Profile: When hovering over or clicking on this area, information such as the model's print time, nozzle diameter, recommended filaments, and plate assignment details will be displayed.
- Model Description: This includes a summary and key features, helping you quickly understand its functional highlights, usage scenarios and design inspiration.
- Snapmaker Orca offers two operation modes, each corresponding to the two buttons in the bottom right corner of the page:
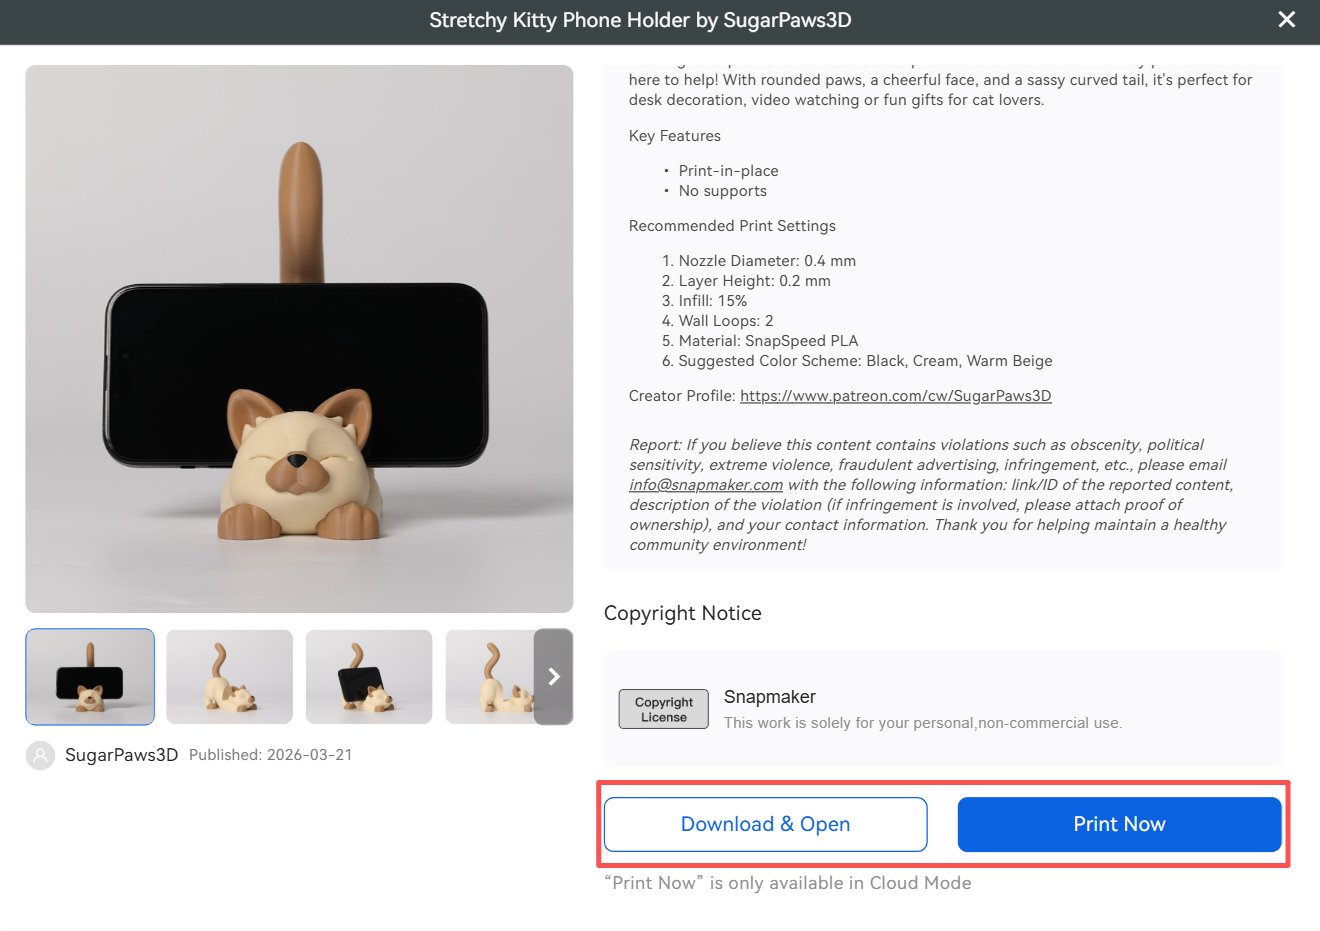
Download & Open: After clicking this button, the model’s 3MF file will be downloaded and automatically opened in the software. You can modify the print settings on the Prepare page according to your actual needs or preferences.
If this button is grayed out, it means that the original model author has only authorized the sharing of the uploaded G-code file. In this case, please select Print Now.
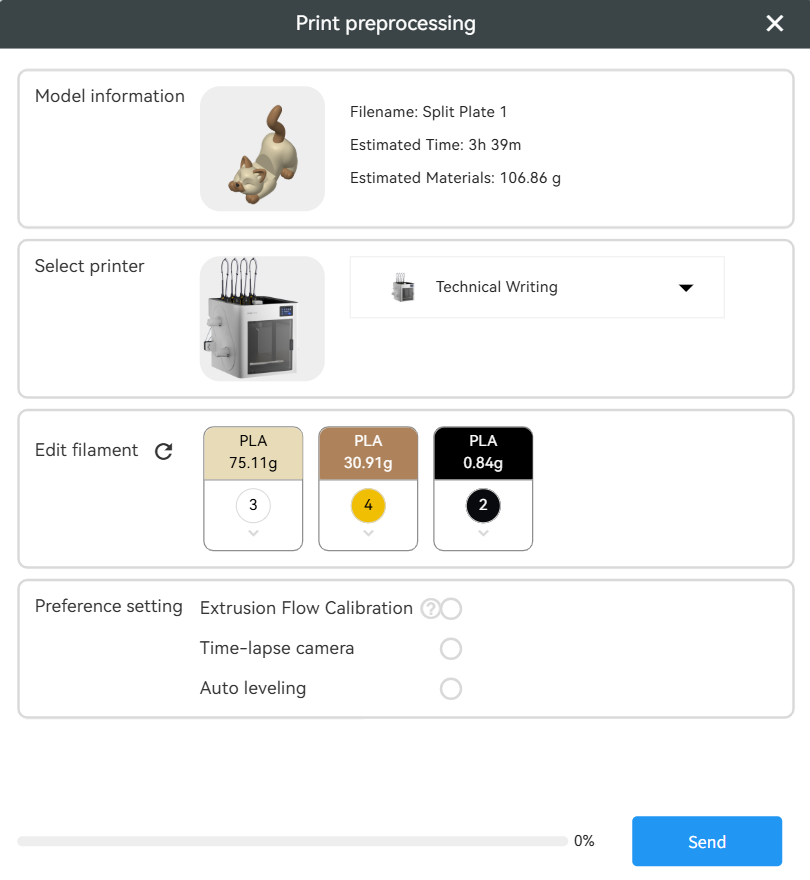
Print Now: Use the default G-code to start printing; custom print settings are not supported. Clicking this will take you to the Print Preprocessing page. Complete the steps of selecting the printer > editing material information > checking print preferences, then clickSendto start printing.
Print Now only supports Cloud mode, and you can bind the printer to the slicing software by either using a PIN code or searching for nearby devices.
¶ 📚 Related Resources
¶ 💬 Reach out to Snapmaker Support
After following the troubleshooting steps, if you find it difficult to resolve your issue, kindly submit a support ticket through https://snapmaker.formcrafts.com/u1-troubleshooting-request and share your troubleshooting results with pictures or videos. Our dedicated support team will be more than willing to assist you in resolving the issue.