This feature only takes effect for IDEX or Dual Extrusion Module.
For IDEX or Dual Extrusion Module, Luban allows you to assign submodels to different extruders, assign shell/infill to different extruders and assign adhesion/support to different extruders, which enables you to apply multiple materials and colors in a single print. This tool greatly overcomes the limitations of single-extruder 3D printing and expands the creative and functional possibilities available to users.
For detailed slicing guide, please refer to - Print with dual color/material.
¶ Assign models to different extruders
With this feature, you can now print different submodels with different colors/materials.
¶ Procedures
- Assign the expected materials to the left and right extruders, respectively.
For details, please refer to Assign materials to the extruder.
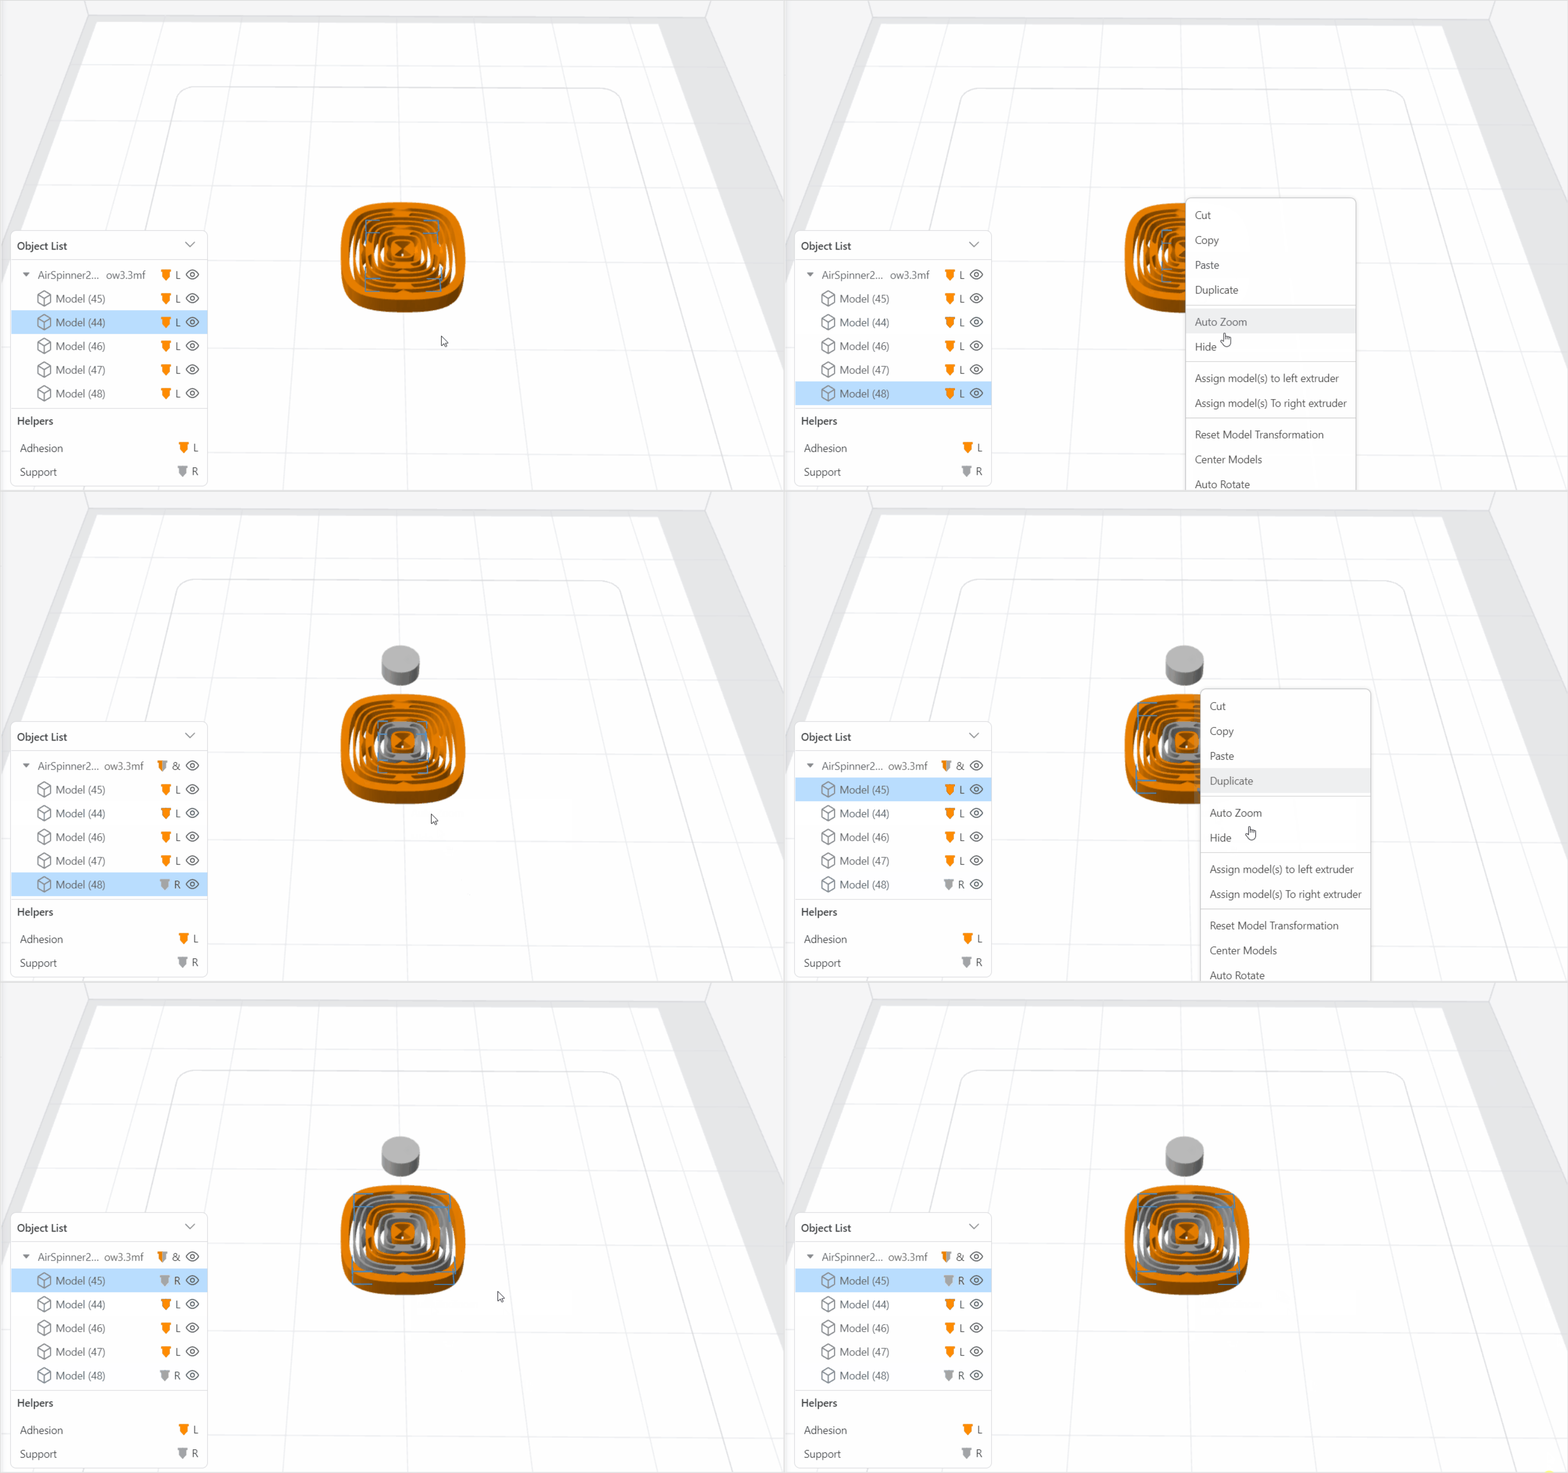
- Select the model that you want to assign a different color/material on, right click and select Assign model(s) to the left/right extruder.
In grouped objects, if you want to select a specific model, please do either of the following:
(1) In the printing area, select a single model, you can select the whole group; once the group is selected, you can click a single model to select it.
(2) In object list, you can click the model file name and select that model.
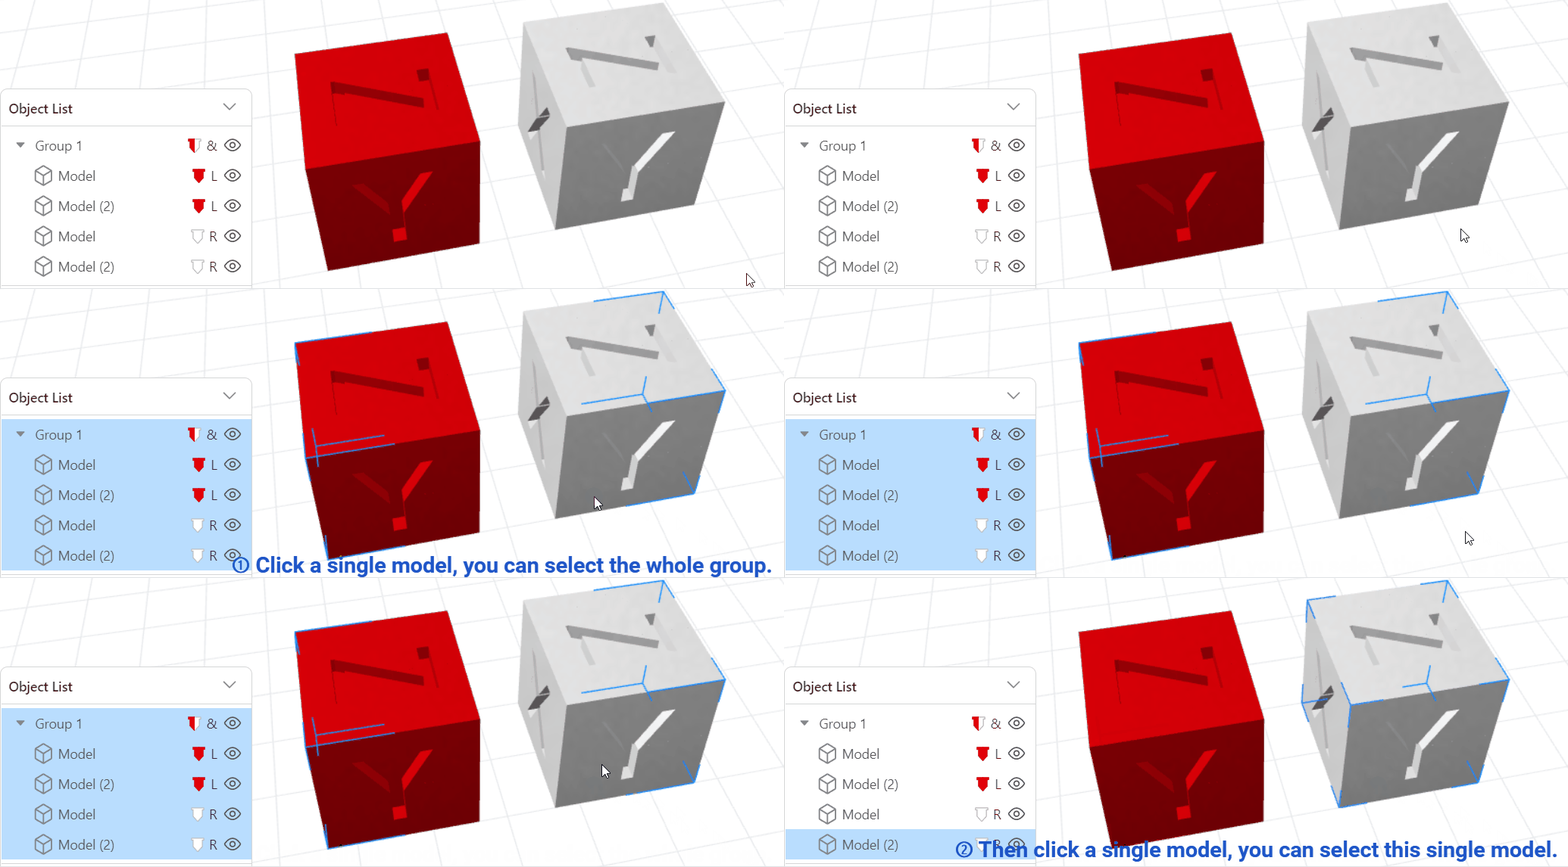
in printing area
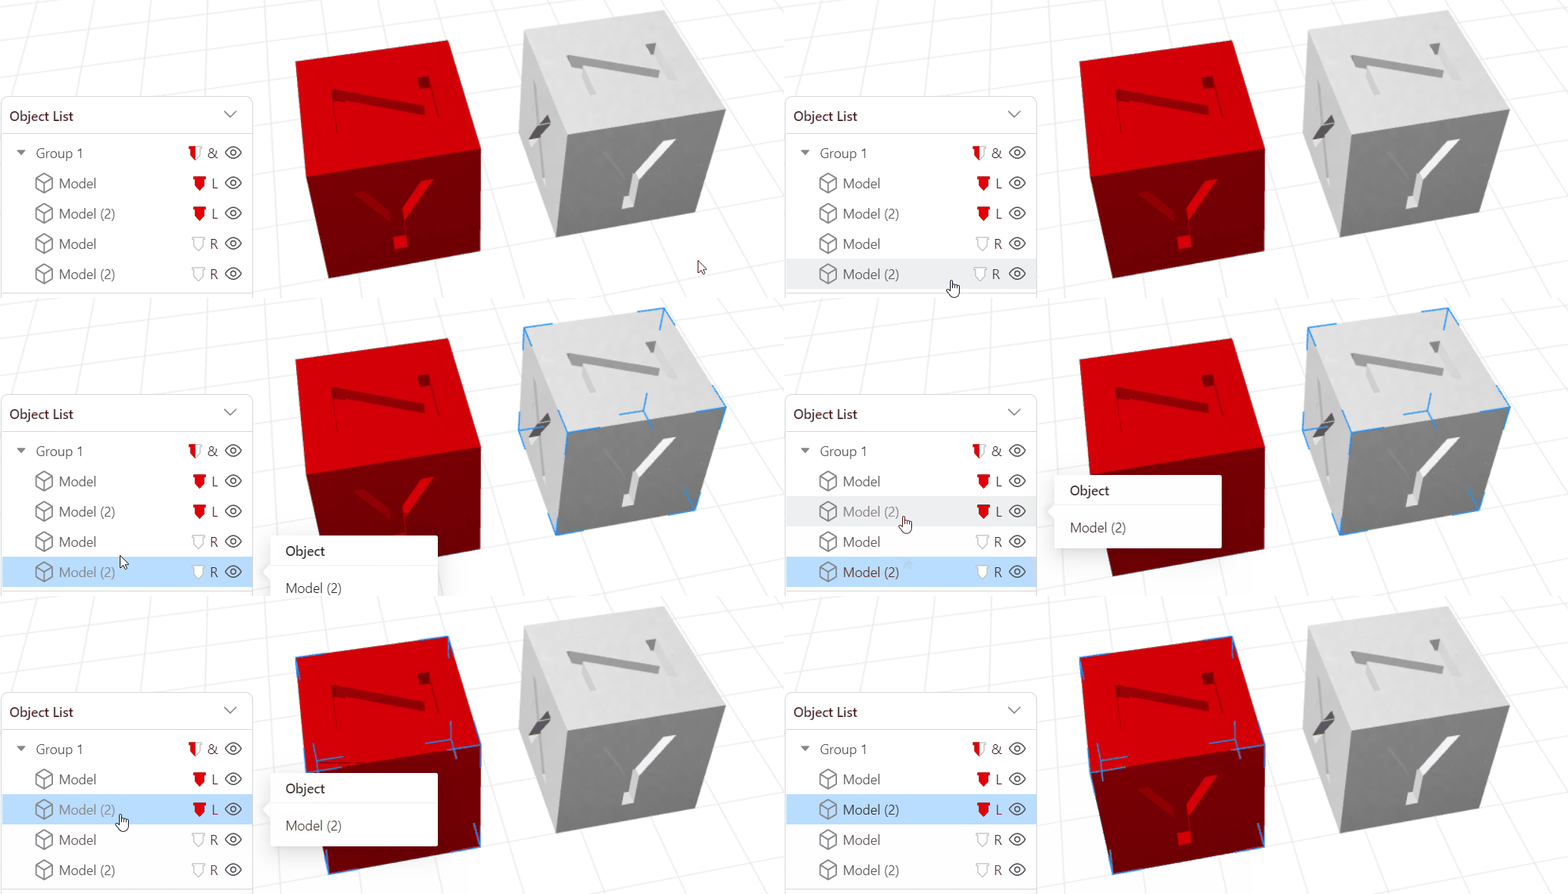
in object list
If you need to select multiple models, press Shift at the same time.
- Assign the expected materials to the left and right extruders, respectively.
For details, please refer to Assign materials to the extruder.
- Click to select the model that you want to assign a specific color/material on. Then in the Object List, click the nozzle icon
 , select Extruder L or Extruder R so as to assign the selected model to the left or the right extruder.
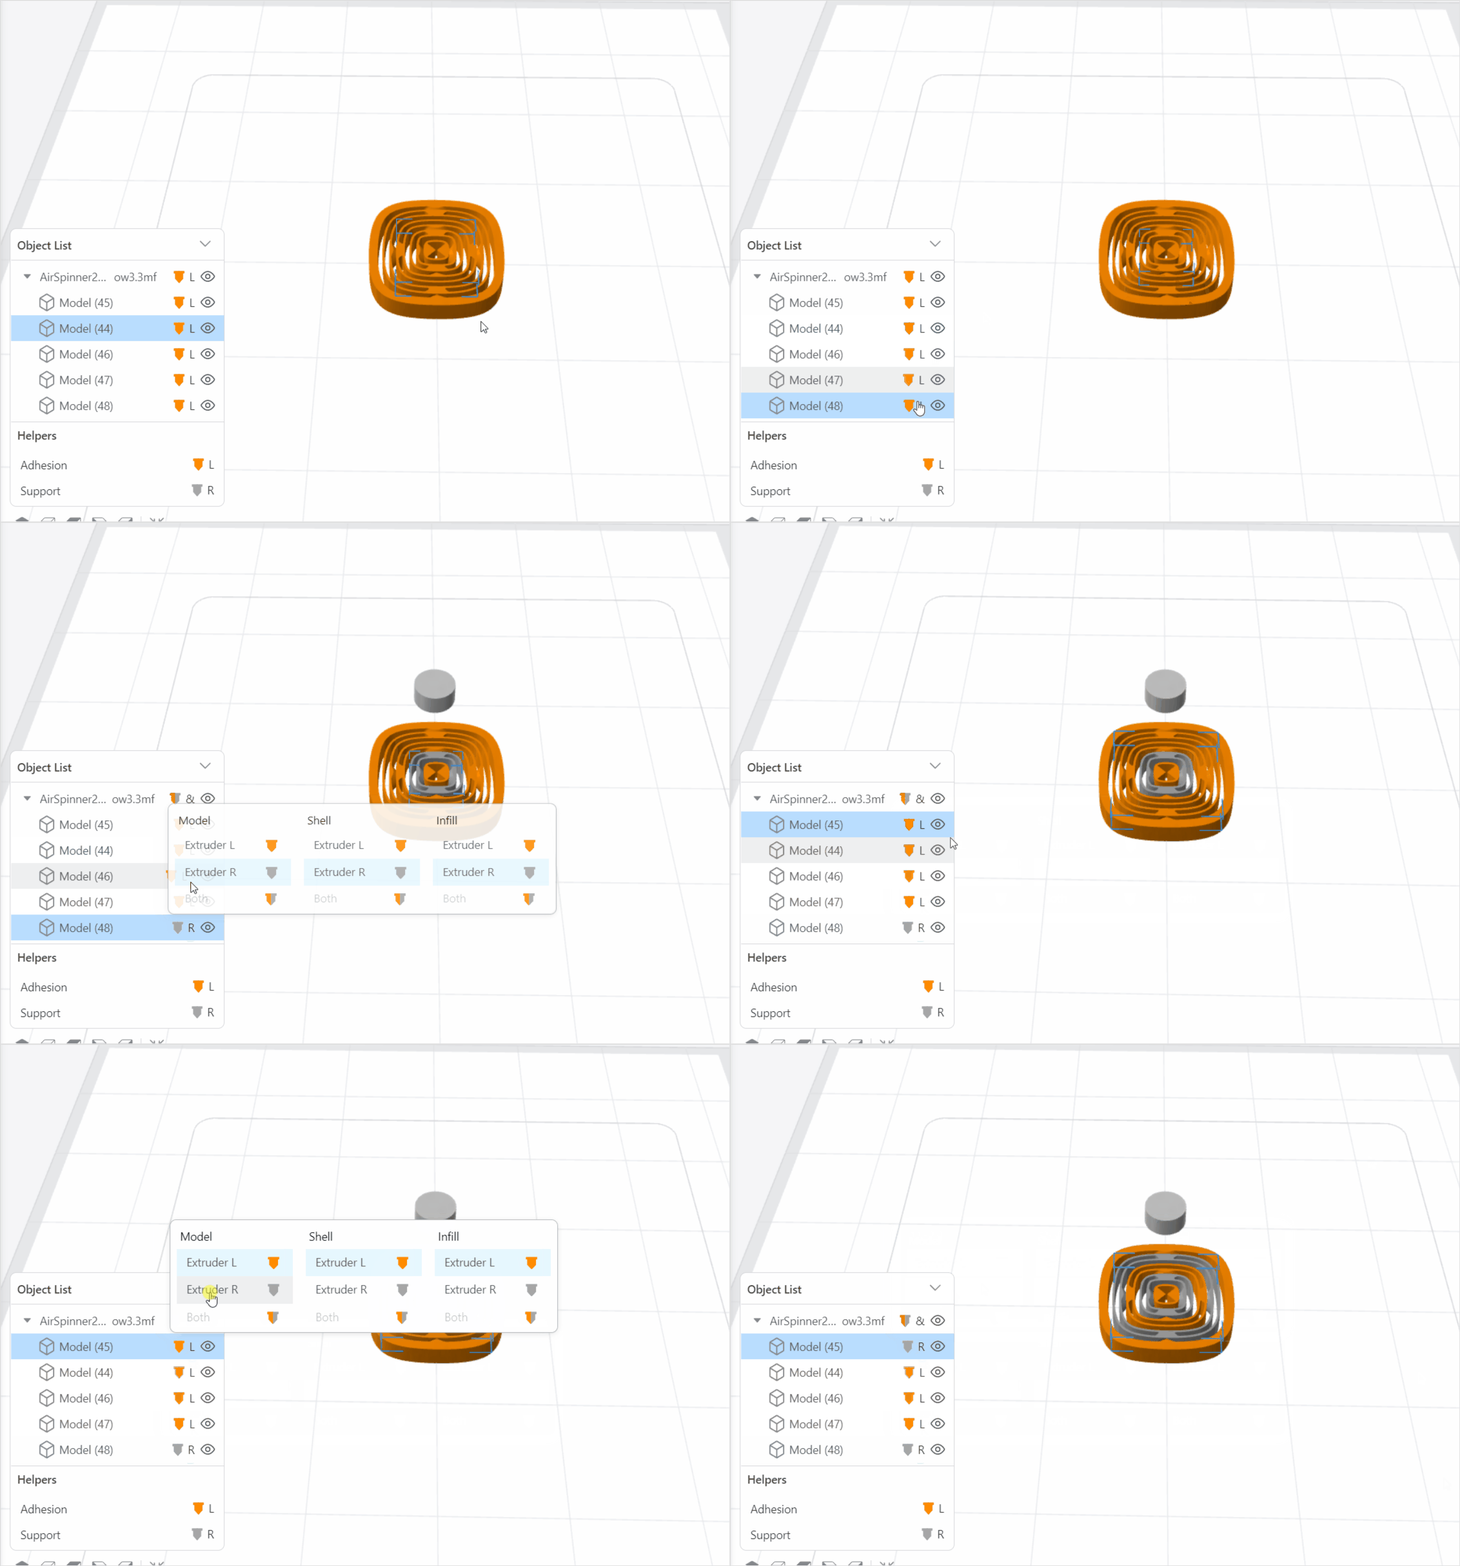
¶ Assign shell/infill to different extruders
Using different extruders for the shell and infill allows you to choose materials that are best suited for each part of the print. For example, you can use a more durable material for the outer shell for strength and a less expensive or lighter material for the infill to save on costs and weight. Similarly, you can use higher resolution or smoother finishes on the exterior shell, while using faster-printing materials for the infill.
¶ Procedures
- Assign the expected materials to the left and right extruders, respectively.
For details, please refer to Assign materials to the extruder.
-
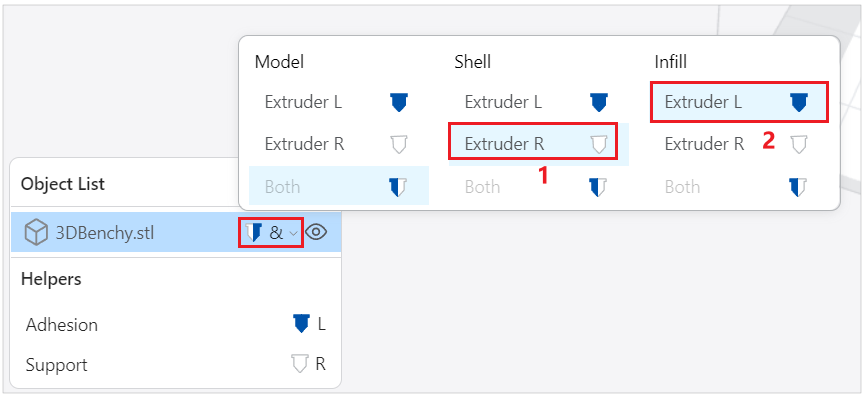
Select the model first. Then in the Object List, click the nozzle icon
 , select Extruder R for Shell and Extruder L for Infill.
-
Generate G-code and preview the effect.

You can see that shell is printed with grey: the color of Right Extruder; while infill is printed with blue: the color of Left Extruder.
¶ Assign adhesion/support to different extruders
Using a dedicated extruder for adhesion layers can employ specialized materials that enhance adhesion or are easier to remove, reducing the risk of print failures due to poor bed adhesion.
Using a dedicated extruder for support allows you to print support with specific materials that can be easily dissolved or removed, ensuring a cleaner finish on the main model without damaging delicate features.
¶ Procedures
- Assign the expected materials to the left and right extruders, respectively.
For details, please refer to Assign materials to the extruder.
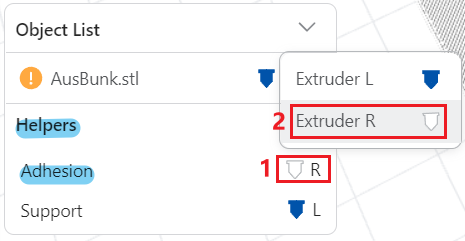
- Select the model. In the Object List, locate Helpers > Adhesion, click the nozzle icon
 , then select Extruder R to assign the right extruder to adhesion.
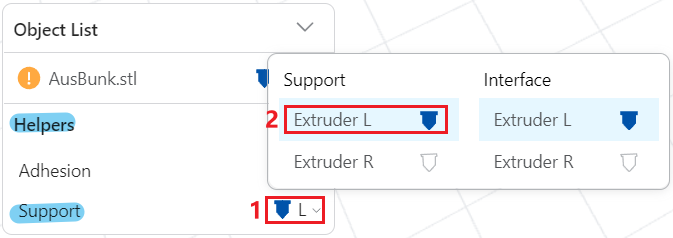
- Locate Support, click the nozzle icon
 , then select Extruder L to assign the left extruder to support.
- Generate G-code and preview the effects.
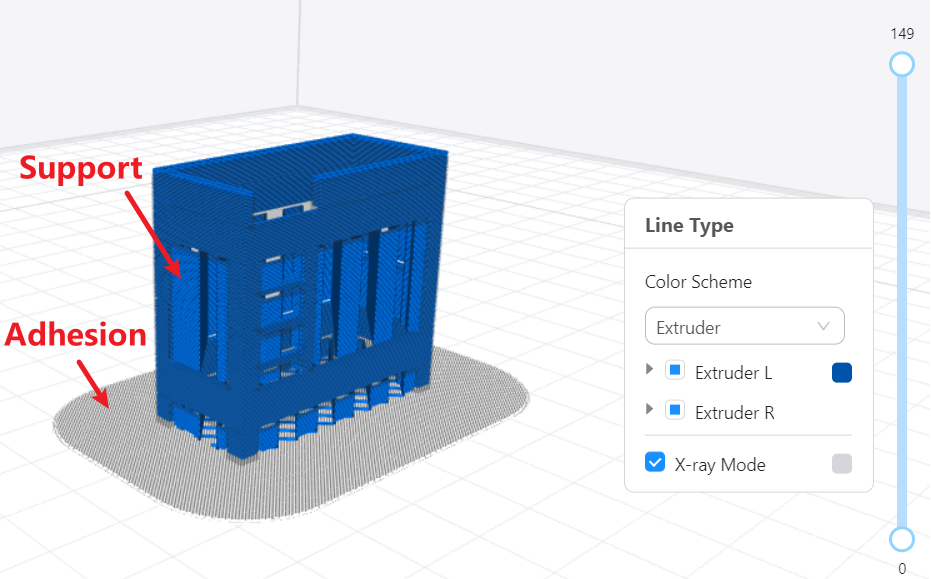
You can see that adhesion is printed with grey: the color of Right Extruder; while support is printed with blue: the color of Left Extruder.
Similarly, you can also assign the support itself and the support interface to different extruders. First assign support to Extruder L and assign interface to Extruder R, then generate G-code and preview the effects.
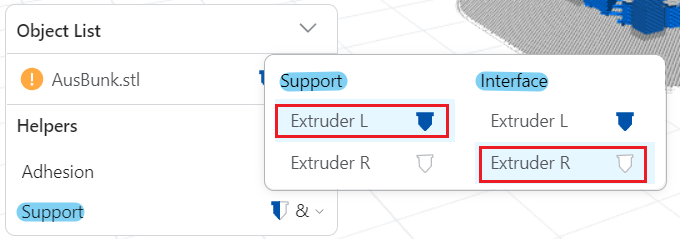
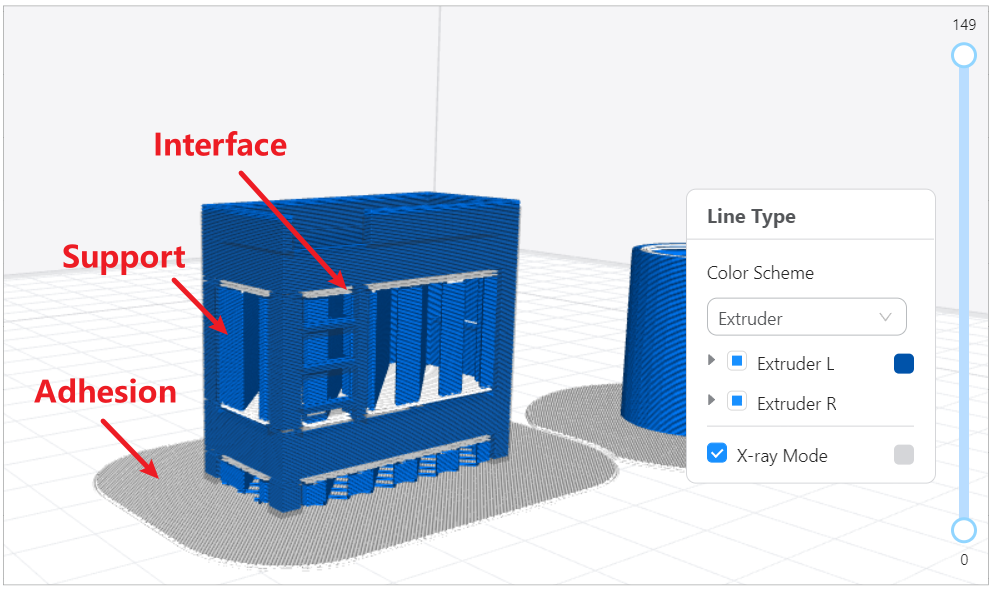
The use of specialized materials for the interface ensures a smoother surface on the finished model, reducing the need for post-processing.