When you load a model into Luban, it is automatically placed at the center of the build plate. However, you can use the move tool ![]() to adjust the model position and make basic arrangements.
to adjust the model position and make basic arrangements.
¶ Model Position
You can use one of the following options to adjust the model position:
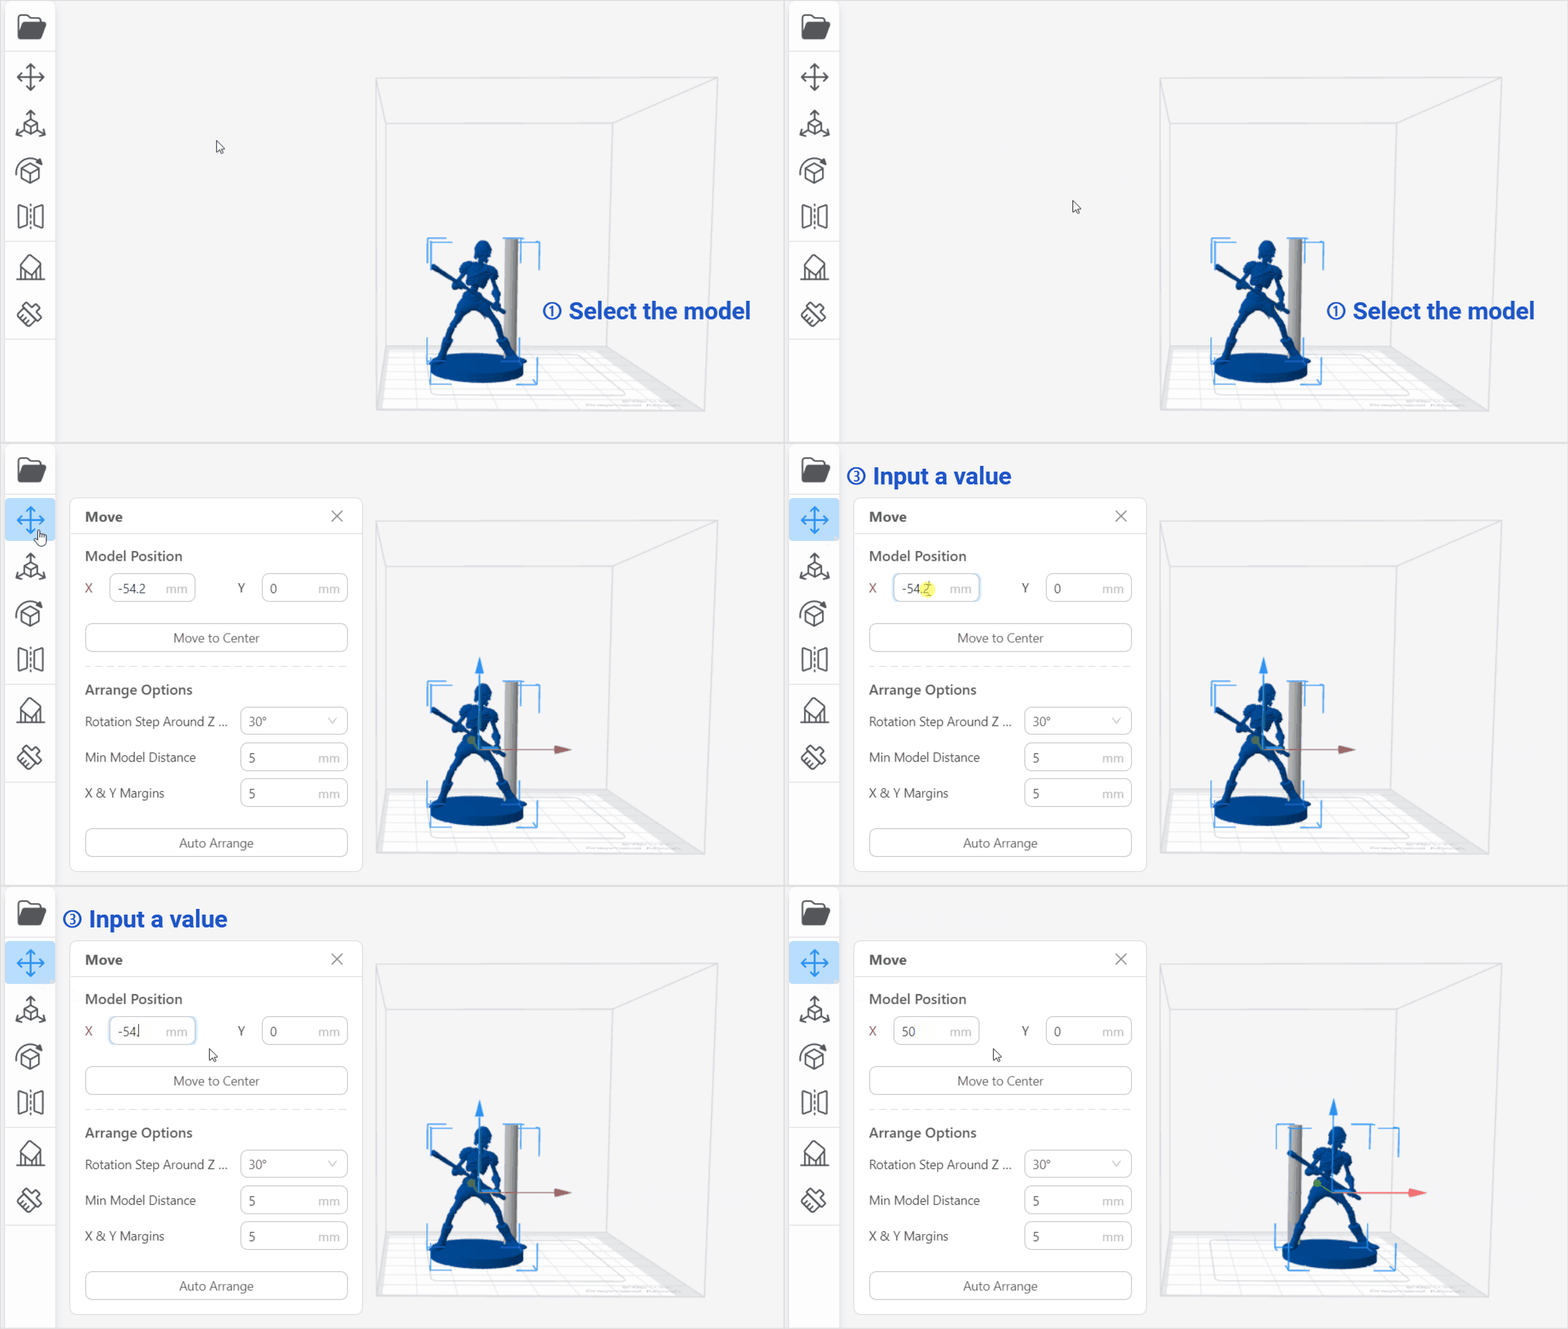
¶ Option 1: Input a value
- Procedures:
- Select the model;
- Click the Move tool;
- Input a value;
- Press Enter.
¶ Option 2: Drag the axis arrow
- Procedures:
- Select the model;
- Click the Move tool;
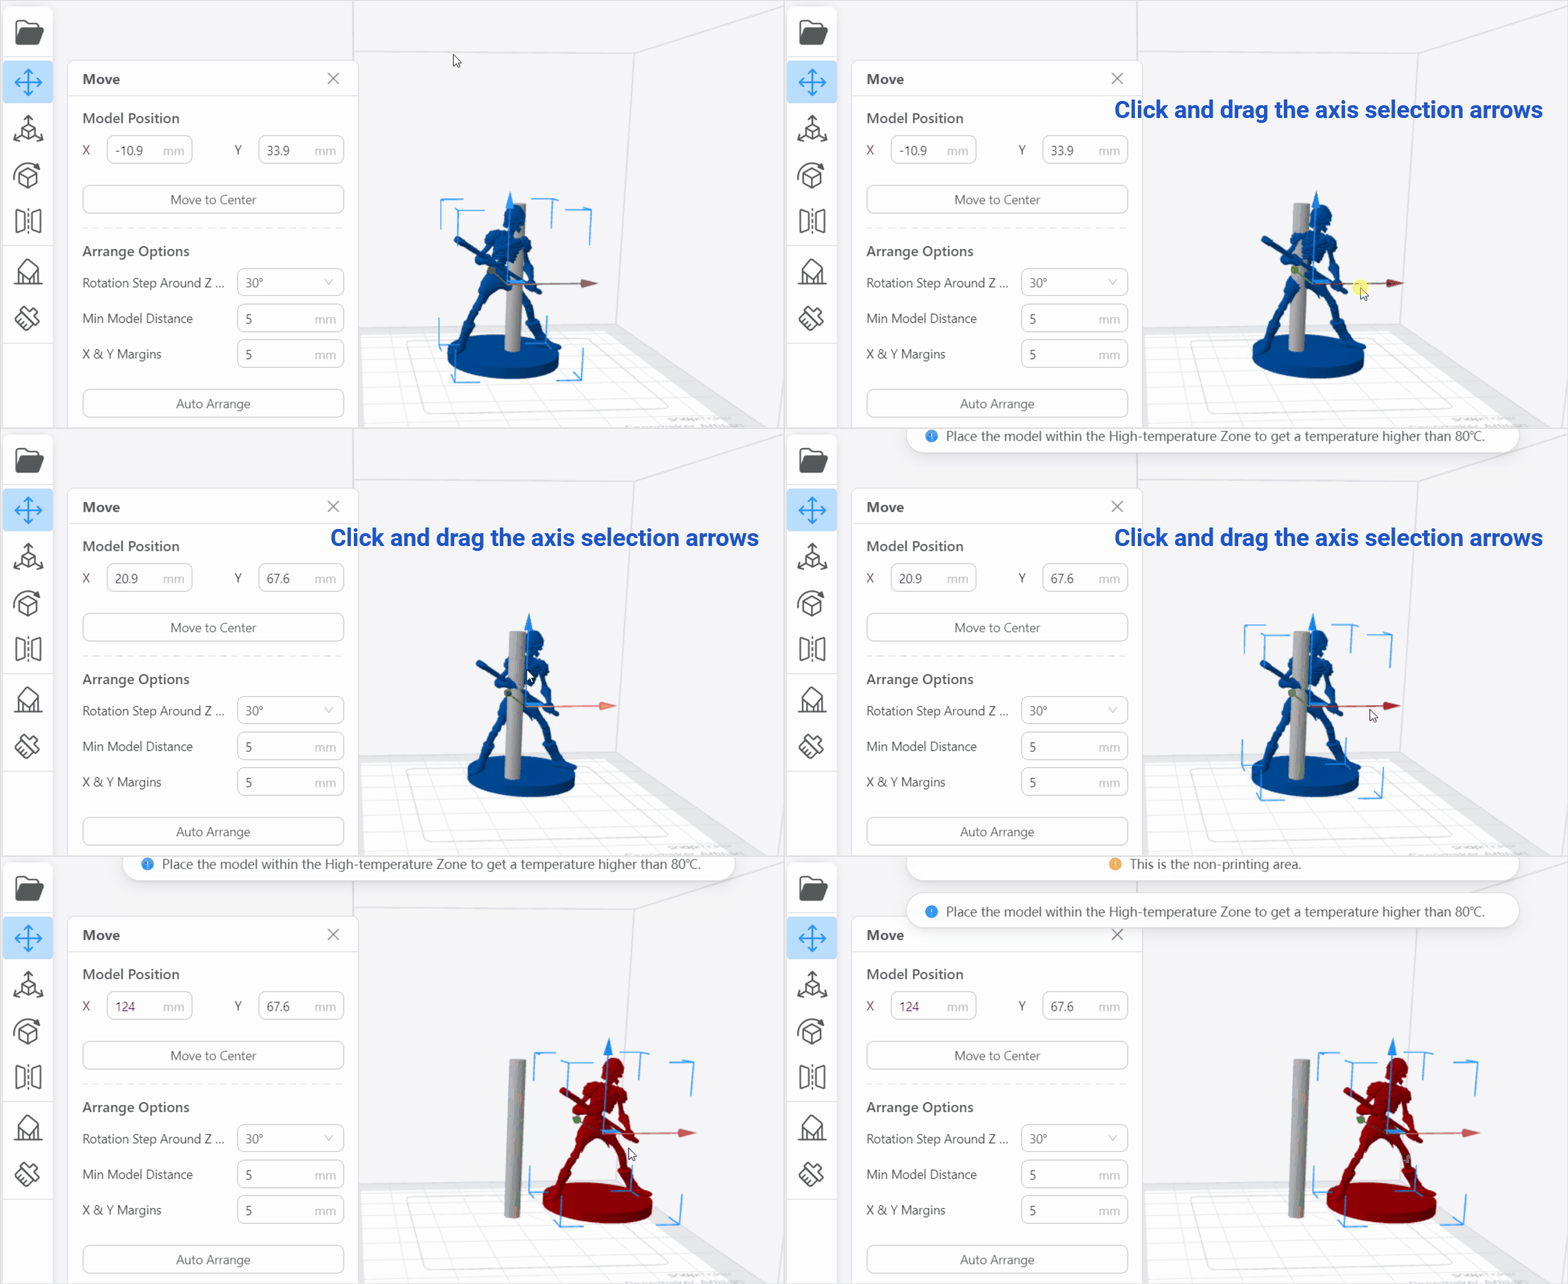
- Click and drag the axis selection arrows marked in red, green, or blue, the model will be moved.
When you hover the selection arrow over one axis, the color of the hovered axis will appear darker.
The objects, even moved along the Z axis, will jump back to touch the bottom of the printing area. This prevents the model from floating in mid-air.
If the object extends beyond the printing area, it becomes red to alert you.
¶ Option 3: Drag the blue square
- Procedures:
- Select the model;
- Click the Move tool;
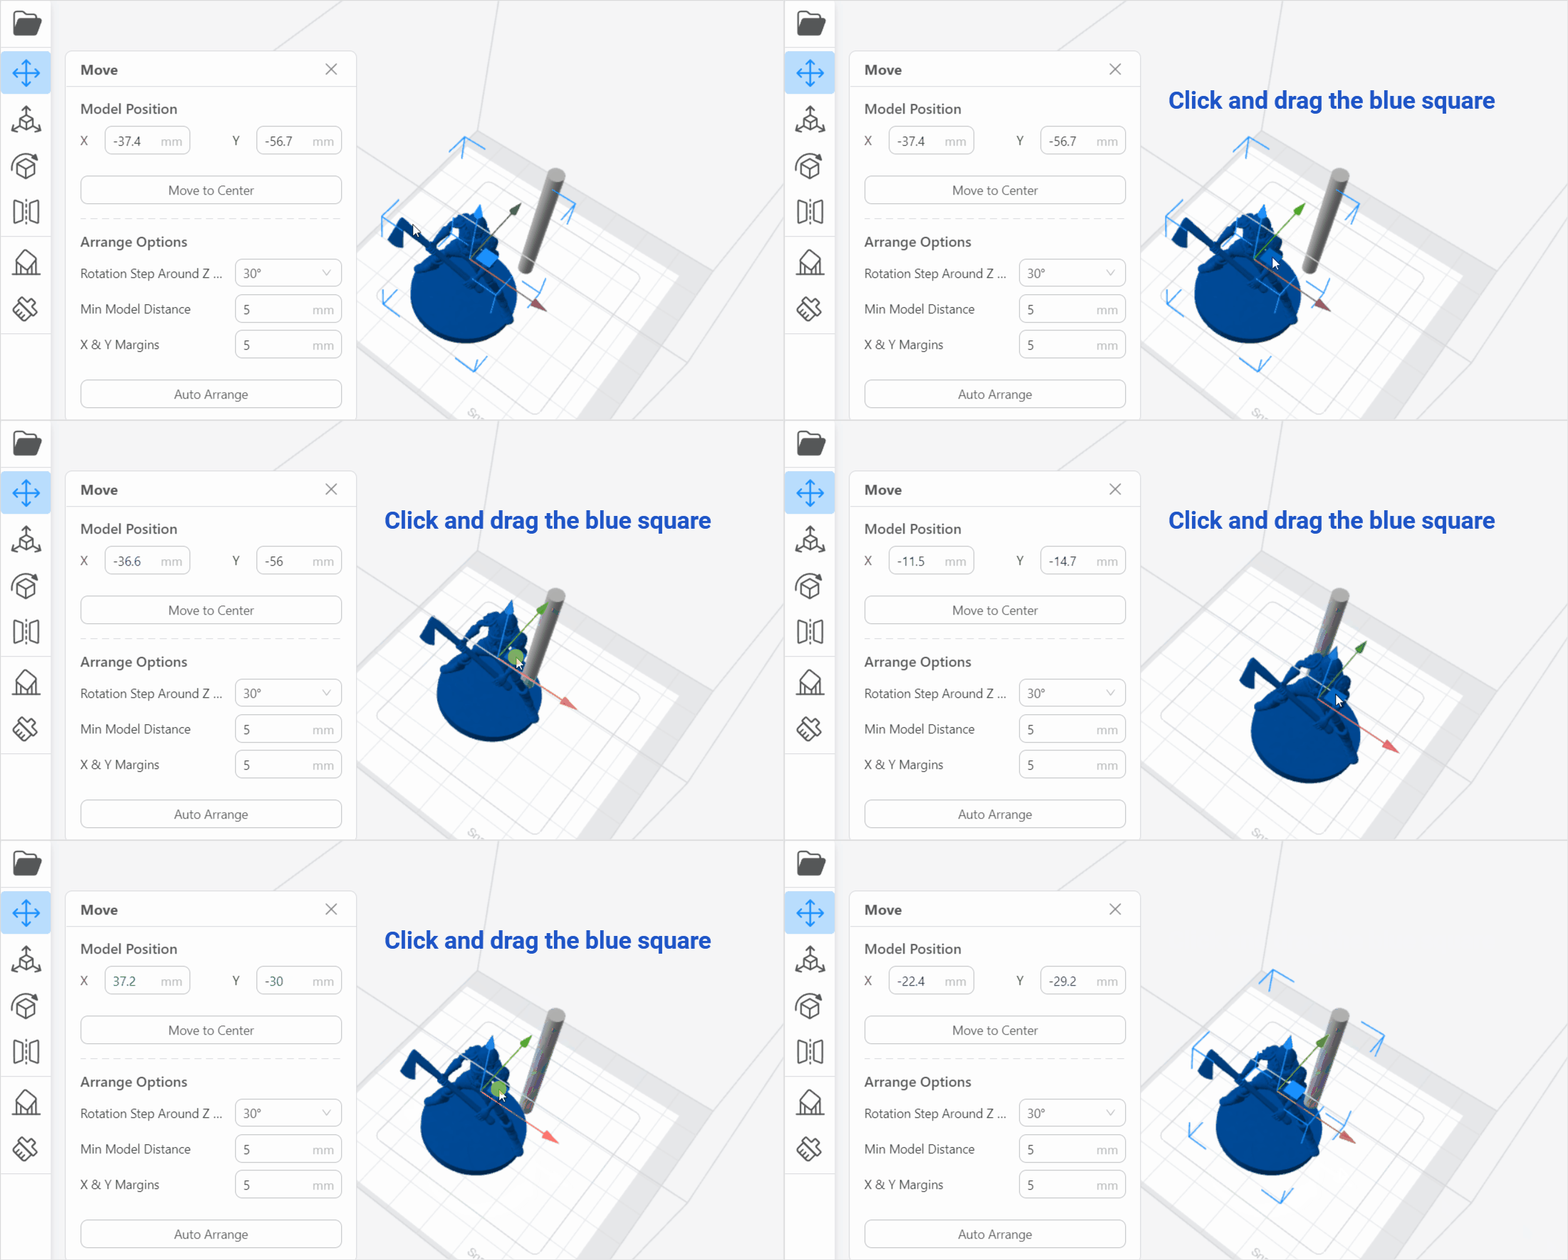
- Click and drag the blue square, the model will be moved.
When you hover the selection arrow over the blue square, the color of the hovered square will appear darker.
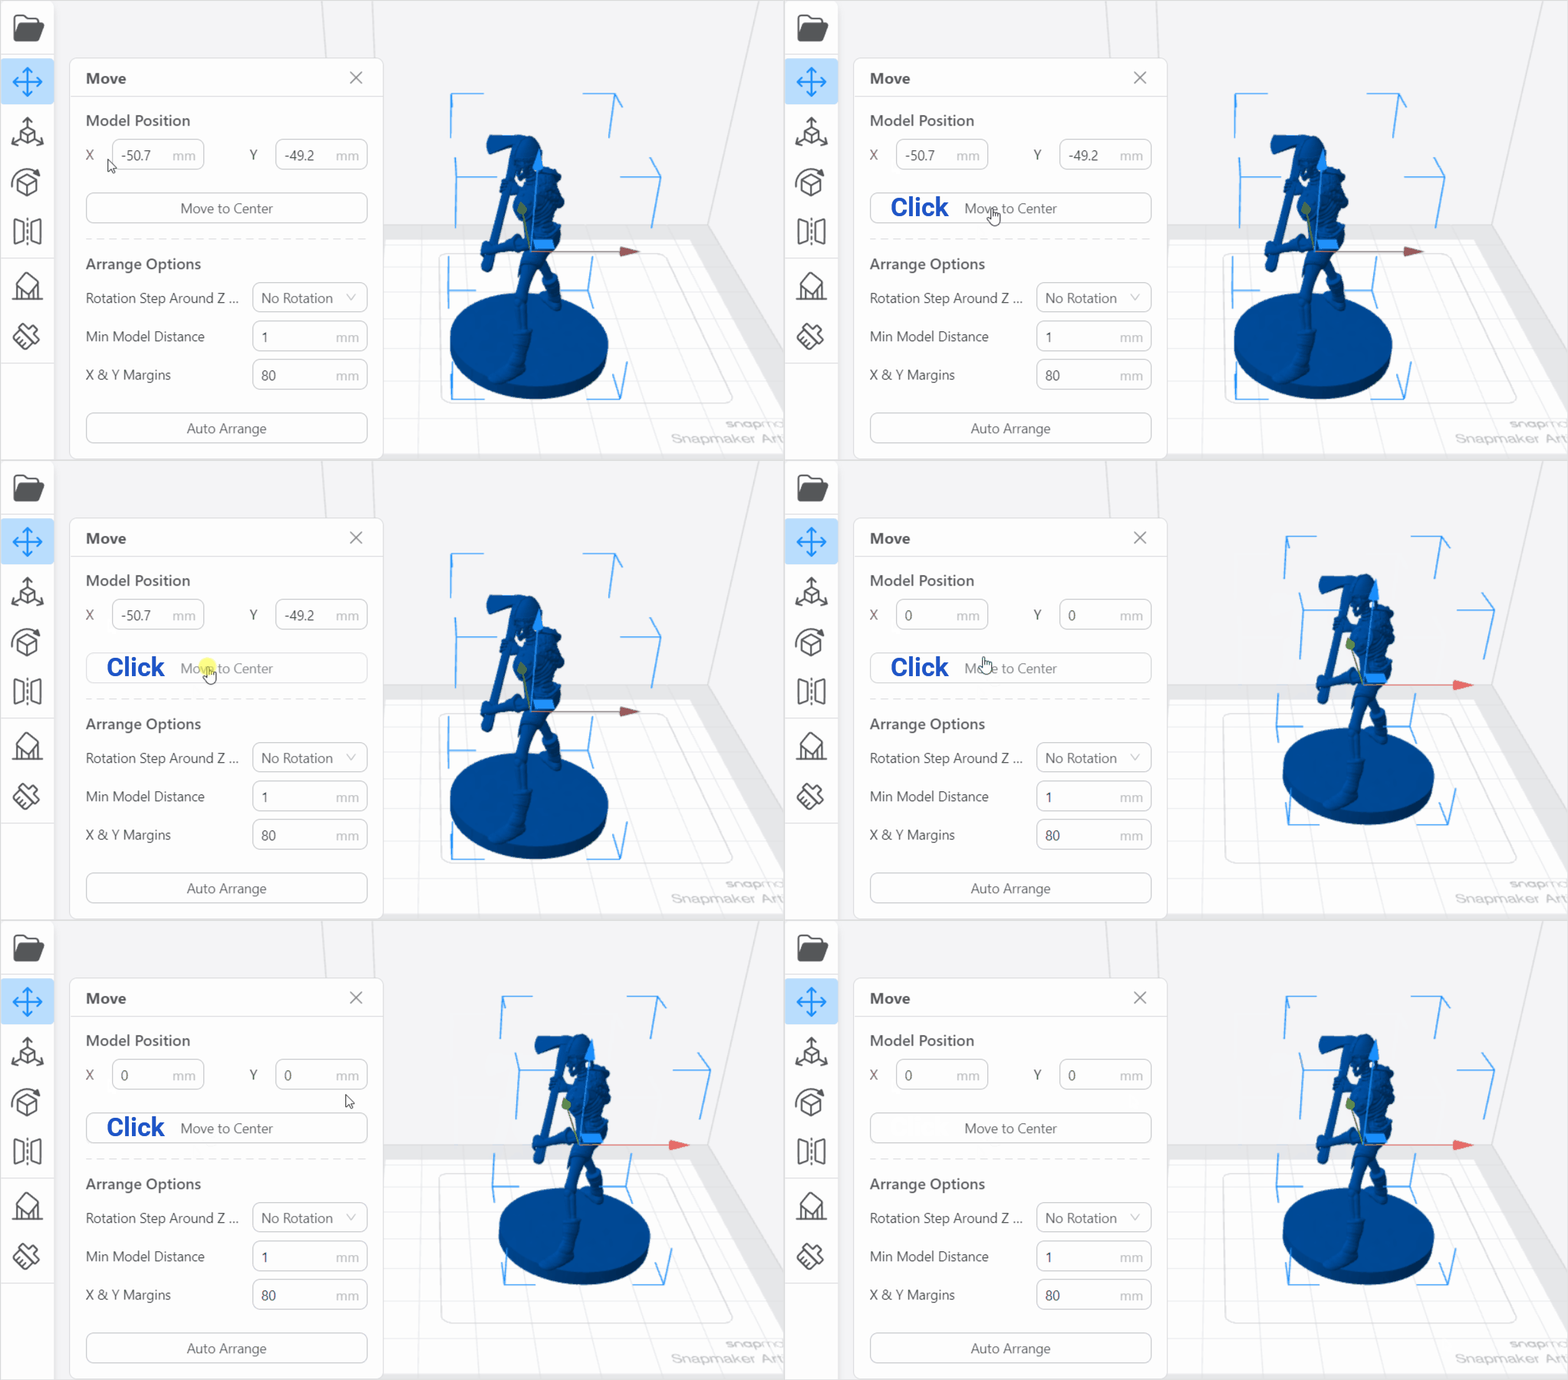
Besides the above three options, you can also click Move to Center to palce the model in the center of the build plate.
¶ Arrange Options
In addtion, the move tool also supports some basic arrange options, including Rotation Step Around Z Axis, Mini Model Distance and X & Y Margins.
¶ Rotation Step Around Z Axis
It refers to the unit angle at which the models rotate around the Z axis. You are allowed to choose from several rotation options: No Rotation, 20°,30°,36°,45°,60°,90° or 180°.
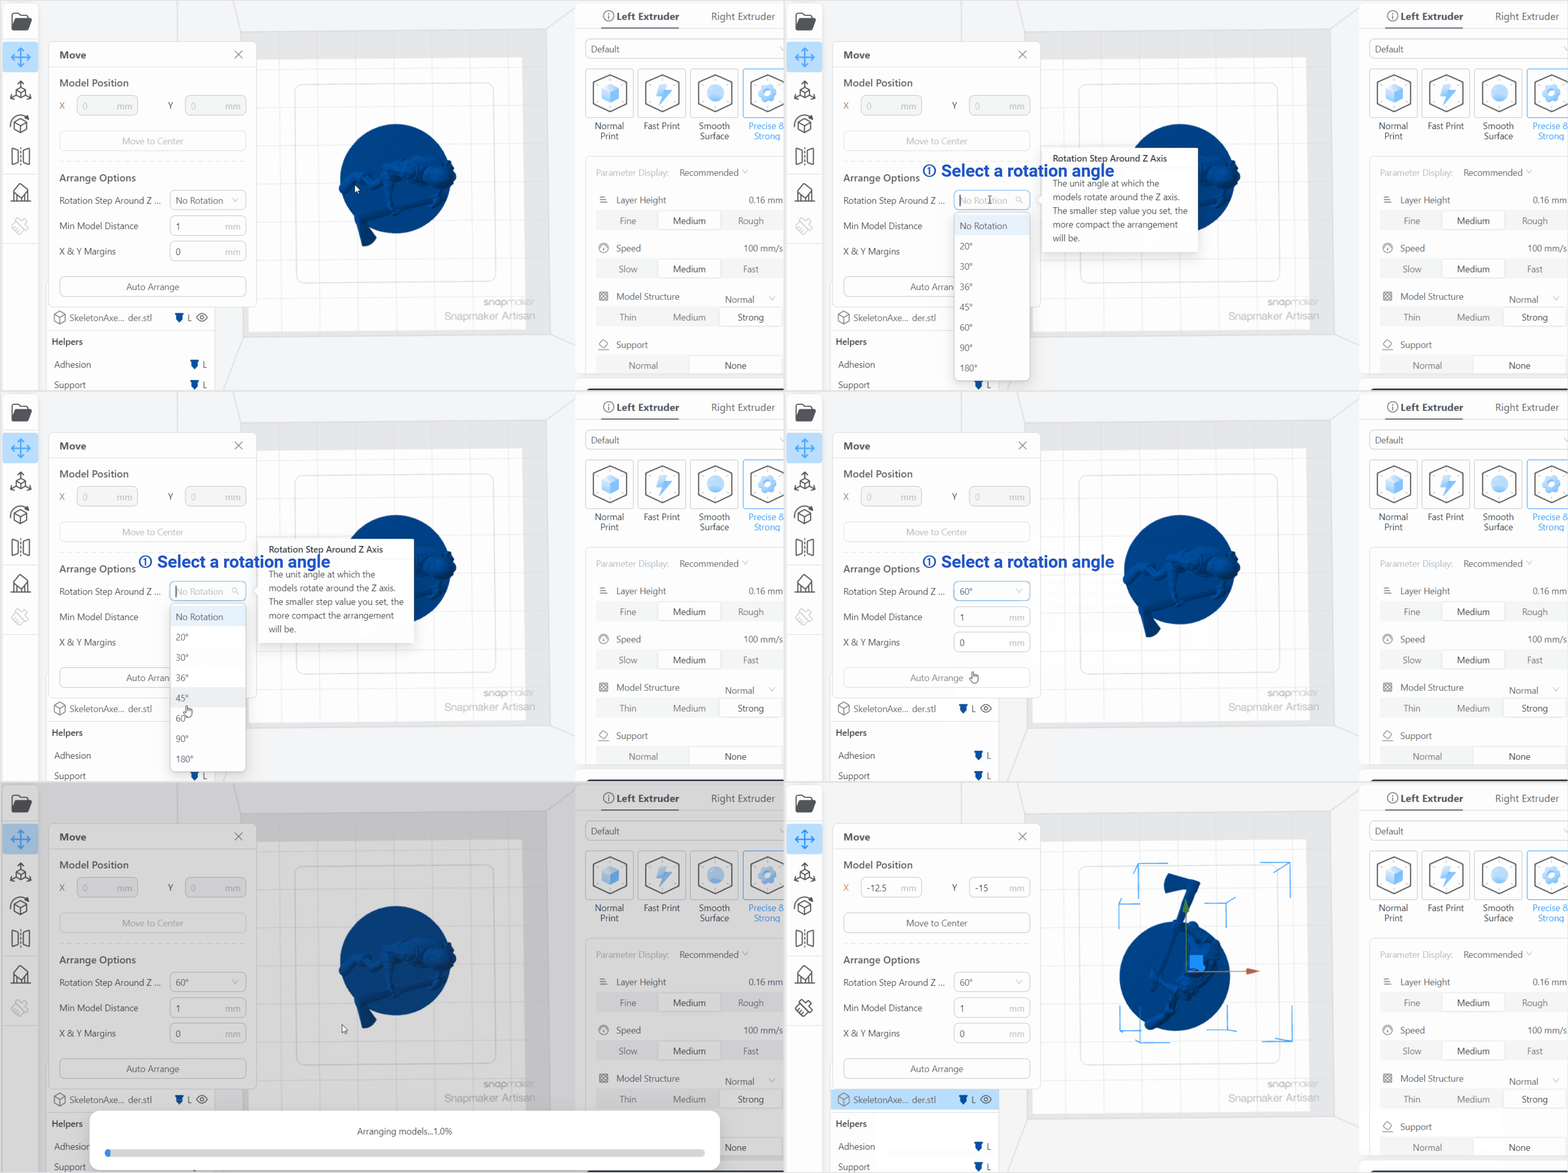
The smaller step value you set, the more compact the arrangement will be.
You can also right-click the mouse, then click Auto Arrange to apply the changes.
¶ Mini Model Distance
You can set the minimum distance between models.
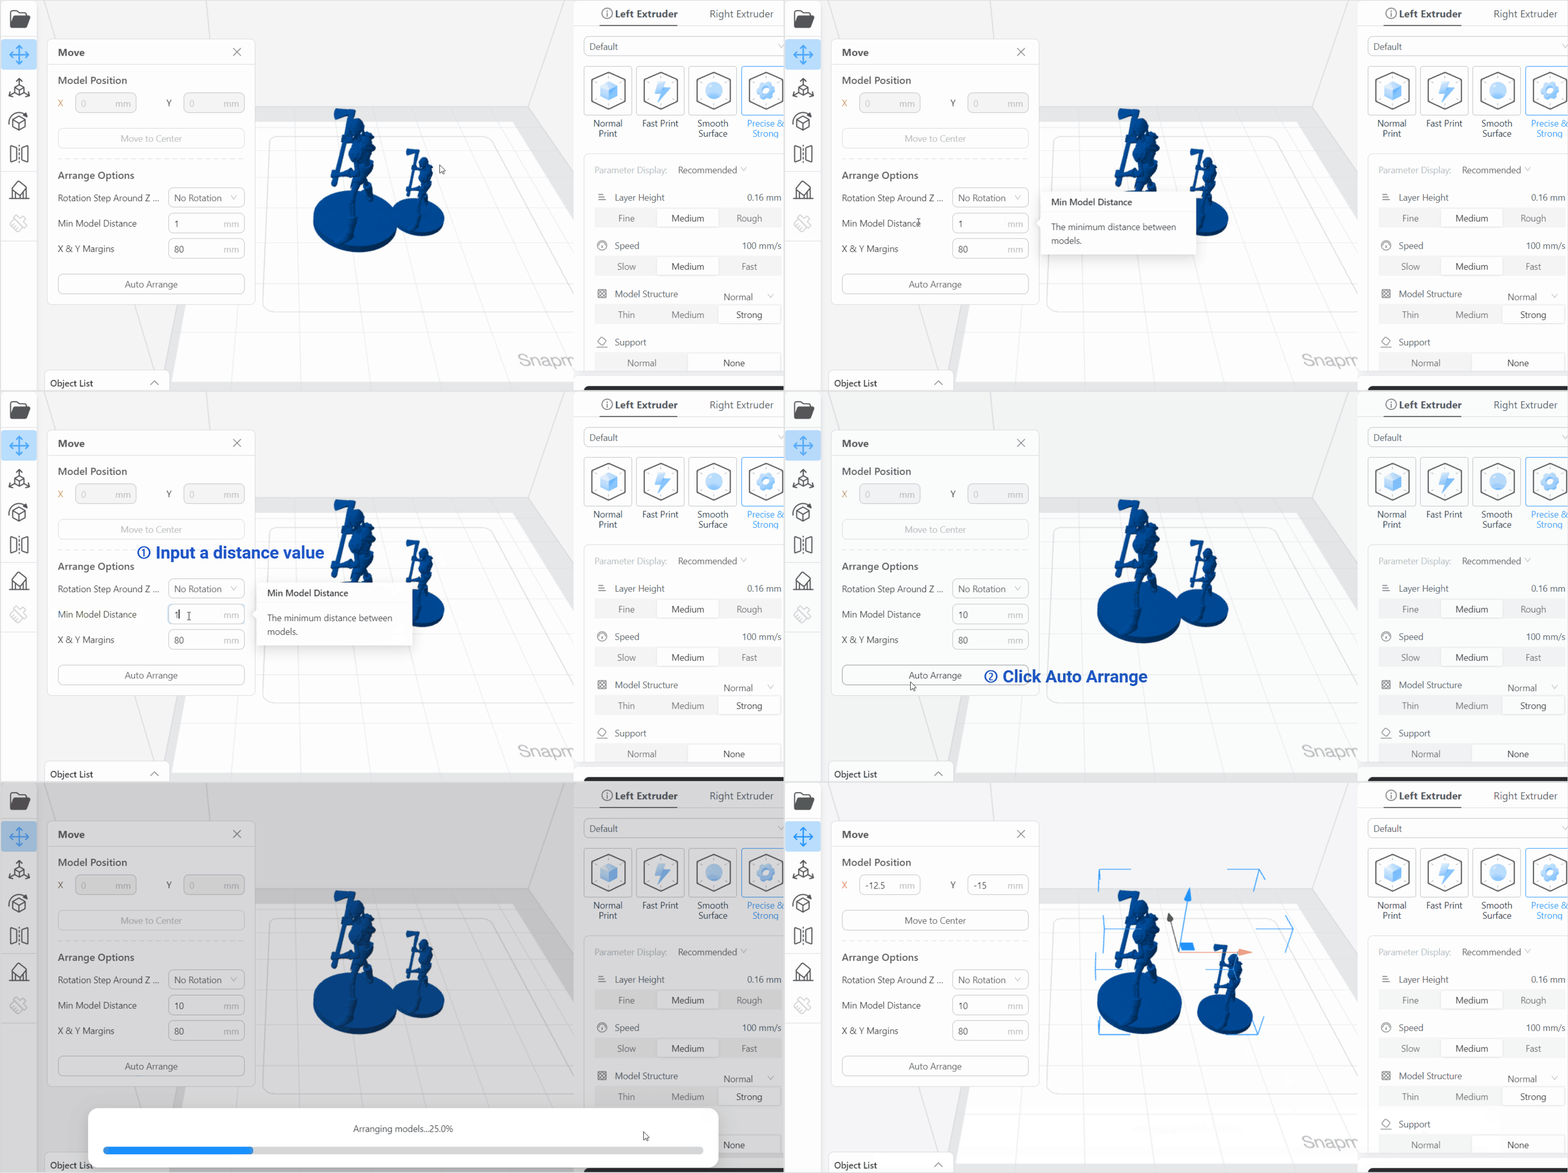
The minimum distance between two models should be at least 1mm.
¶ X & Y Margins
It refers to the blank spaces left between the print area and the edges in the X and Y coordinates.
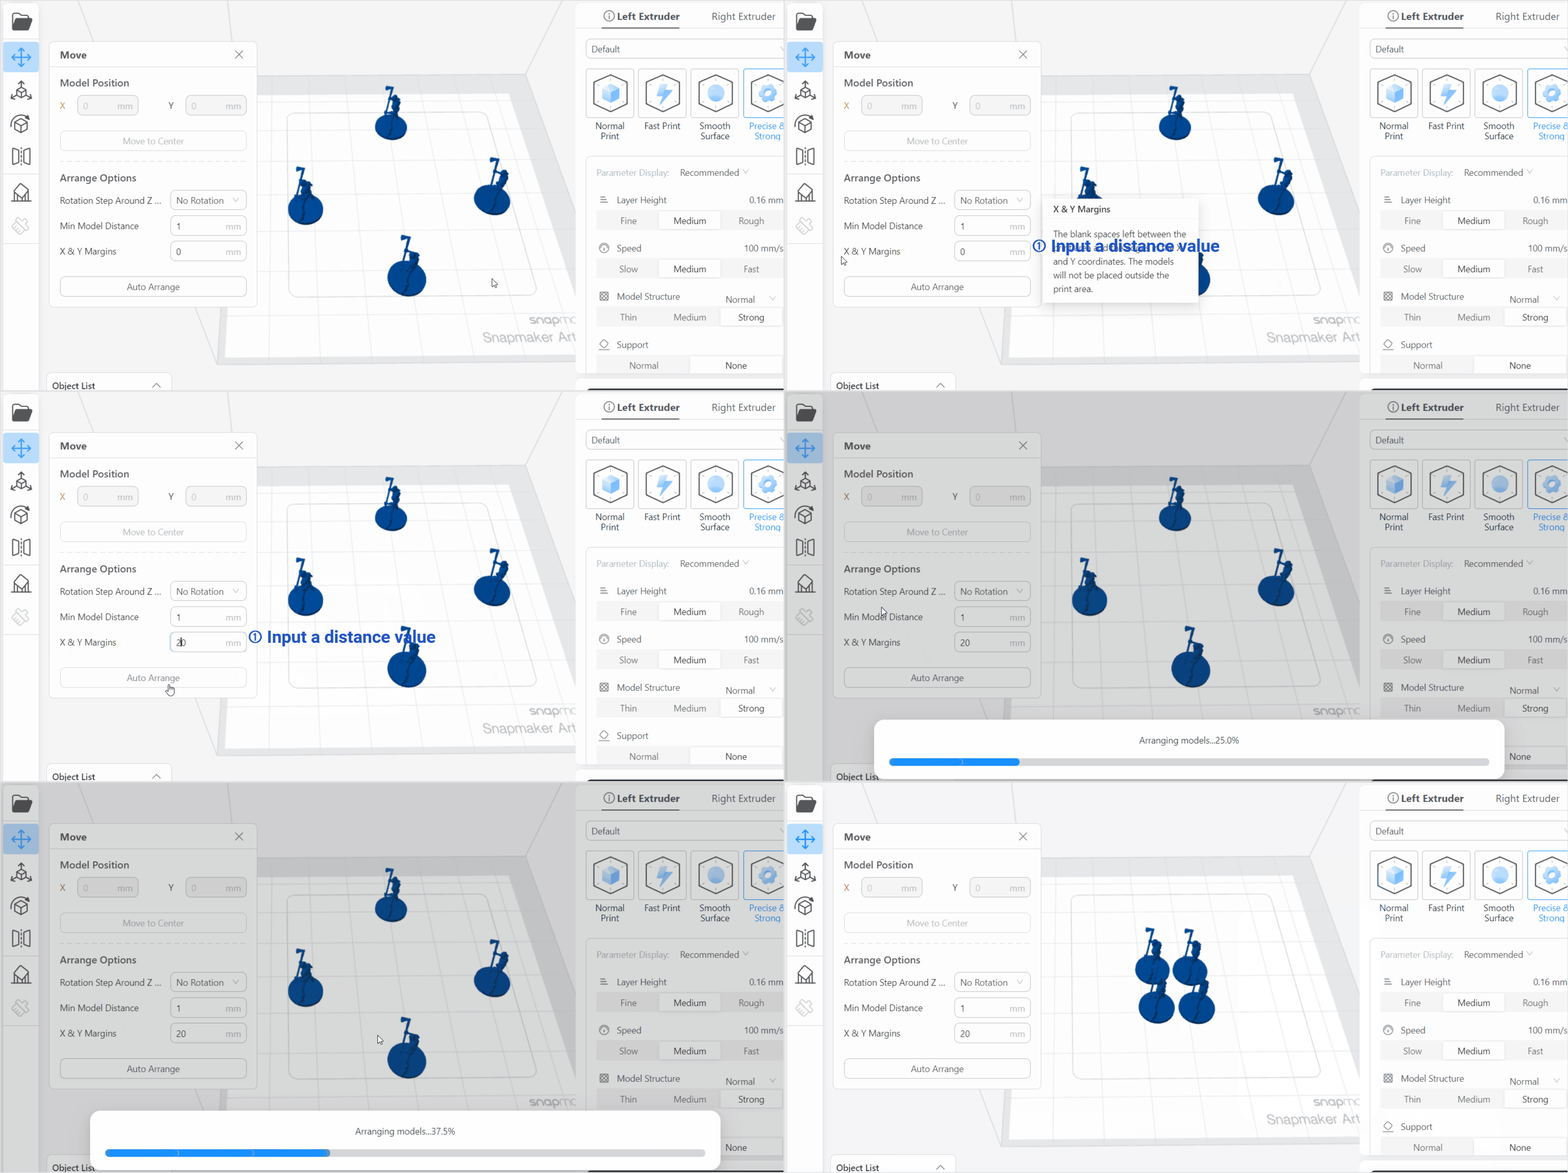
The models will not be placed outside the print area.