¶ Problem Description
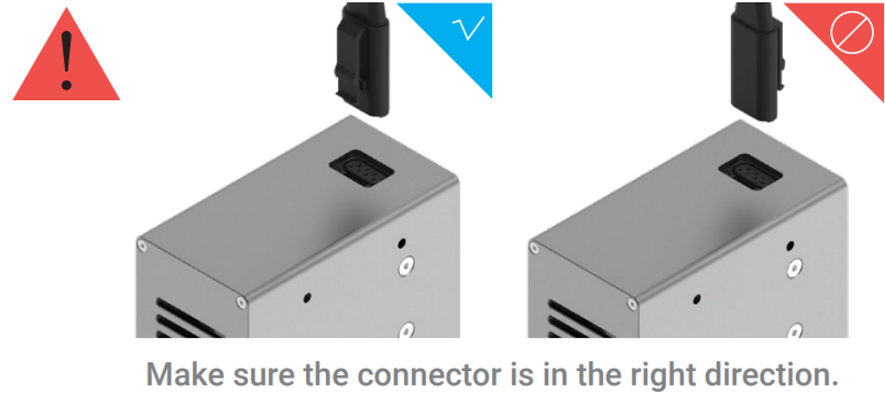
- Reverse insertion of the tool head cable causes the tool head to not recognize or work.
- The toolhead suddenly started smoking and subsequently, the machine stopped working.
¶ Possible Causes
- The toolhead cable was plugged in reversely.
- Plugging and unplugging the toolhead cable while the machine is powered on.
¶ Components that may be affected
- Toolhead: The inner PCB board is damaged.
- Controller: The controller's interface level conversion chip or communication chip is damaged.
- Proximity sensor: It could be damaged. (in the case of hot swapping)
¶ Troubleshooting Steps
-
Plug in the toolhead to see if it can be detected. If not, try plugging in another toolhead to see if it can be detected. If other toolheads can be detected and only the smoked/malfunctioning toolhead can't be detected, that means the inner PCB of the toolhead has been damaged due to the incident.
-
Check the controller.
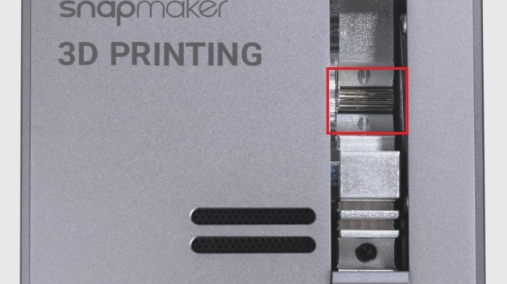
2.1 Heat up the nozzle and tap "Load" and "Unload" on the touchscreen to see if the gear of the printing module rotates correctly (clockwise when loading and counterclockwise when unloading). If the gear is unable to rotate or rotates in the wrong direction, that indicates the controller is damaged.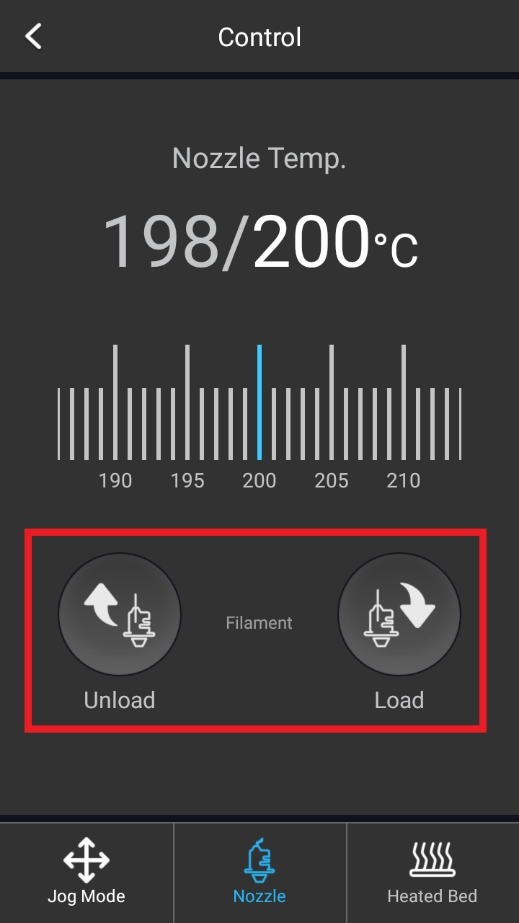
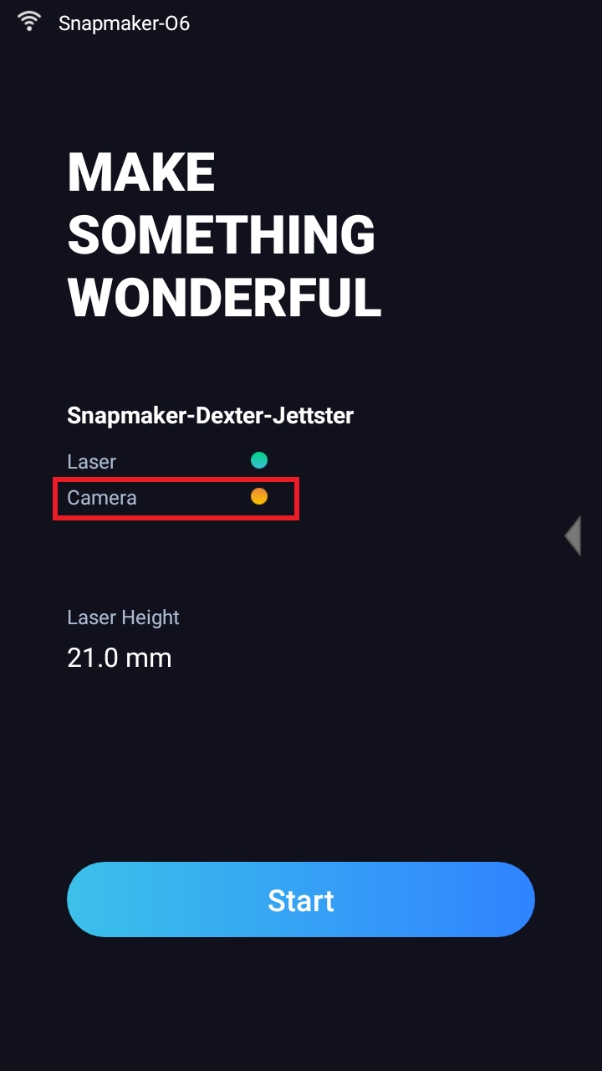
2.2 If the printing module can't be detected and you can't perform the above test, you can plug in the laser module to perform troubleshooting. First, check if the camera icon is yellow; a yellow icon means that the camera is disconnected, which indicates the controller is damaged.
Second, navigate to the Control menu and select Laser Power. Toggle the Laser Status option to ON and observe if the blue laser light emits. Then toggle Laser Status to OFF and check if the blue laser light turns off accordingly. If the light doesn't turn on and off according to the operation, it indicates that the controller is damaged.
-
If you have the F series machine with only the printing module, and it's not detected due to the incident, there's a way to temporarily enable the Addon 1 port as the toolhead port for troubleshooting:
-
3.1 Connect your machine to Luban via the serial port using a USB cable.
-
3.2 Then, enter these two commands separately. The M1029 E2 command is used to remap the Toolhead port to the Addon-1 port, and the M500 command is used to save the setting.
M1029 E2
M500
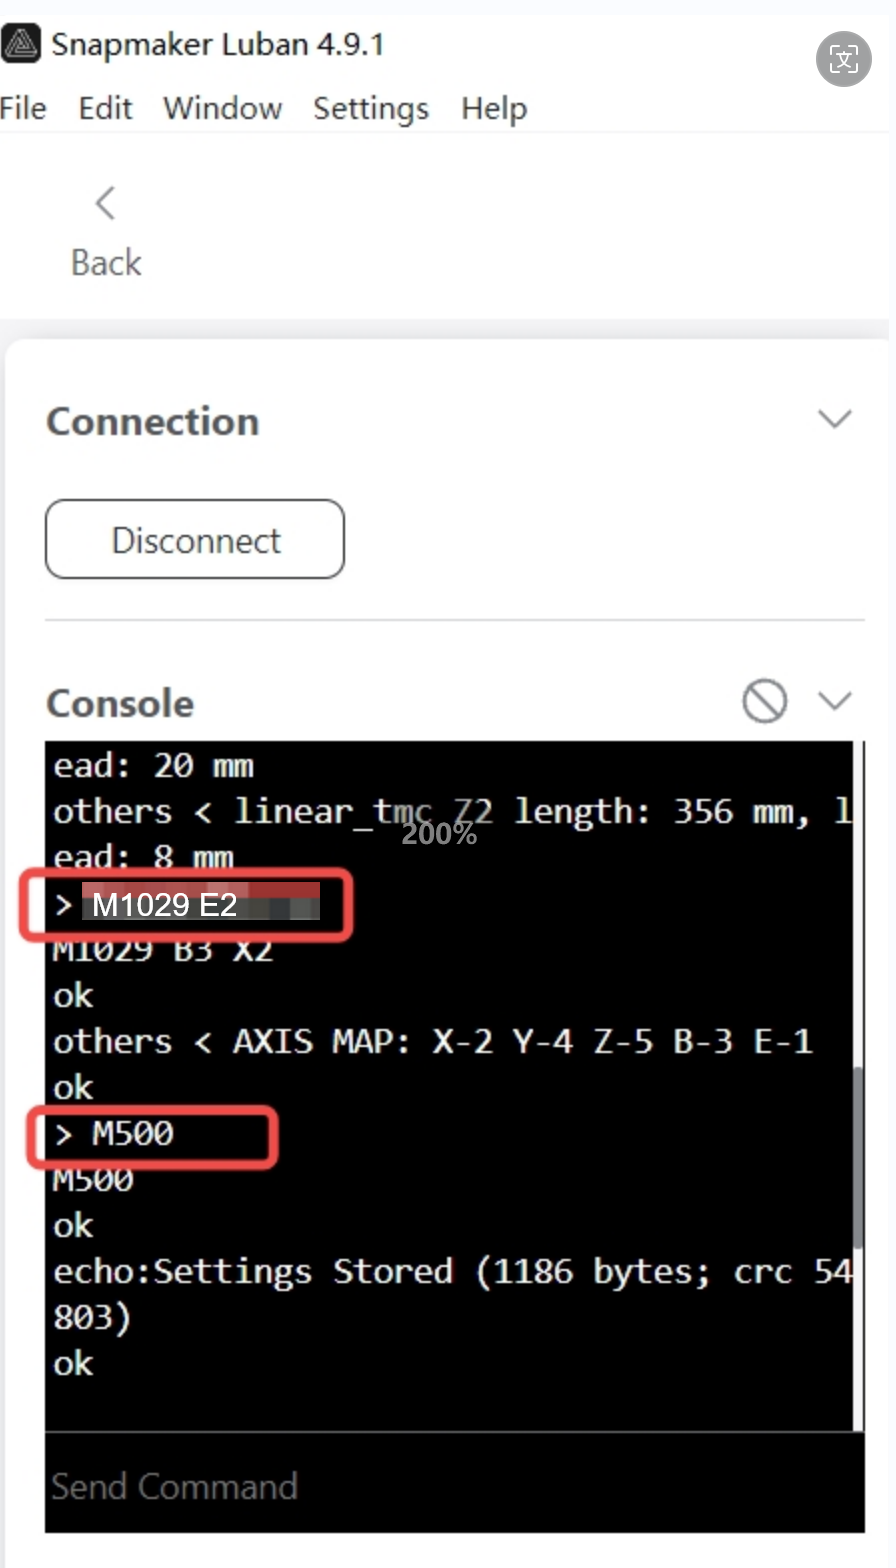
- 3.3 After the settings are saved, please turn off the machine, plug the tool head cable into the Addon-1 port, and see if three modules can work properly.
¶ Reach out to Snapmaker Support
After following the troubleshooting steps, if you find it difficult to resolve your issue, kindly submit a support ticket through https://snapmaker.formcrafts.com/support-ticket and share your troubleshooting results with some pictures/videos.
Our dedicated support team will be more than willing to assist you in resolving the issue.