¶ Problem Description
There is no Enclosure icon on the Touchscreen when the Enclosure is plugged in.
![]()
¶ Possible Causes
- The firmware is outdated.
- The expansion cable for the enclosure is damaged.
- The enclosure port of the controller is damaged.
¶ Solutions
¶ 1. Make sure the firmware version is up-to-date
Download and install the latest firmware from here: Snapmaker 2.0 Firmware Updates and Downloads
¶ 2. Measure the output of the controller
If the problem persists, use a multimeter to measure the output of the controller.
Here're the steps:
-
2.1 Unplug the Expansion Cable from the Enclosure and leave the other end plugged into the Enclosure Port of the Controller.
-
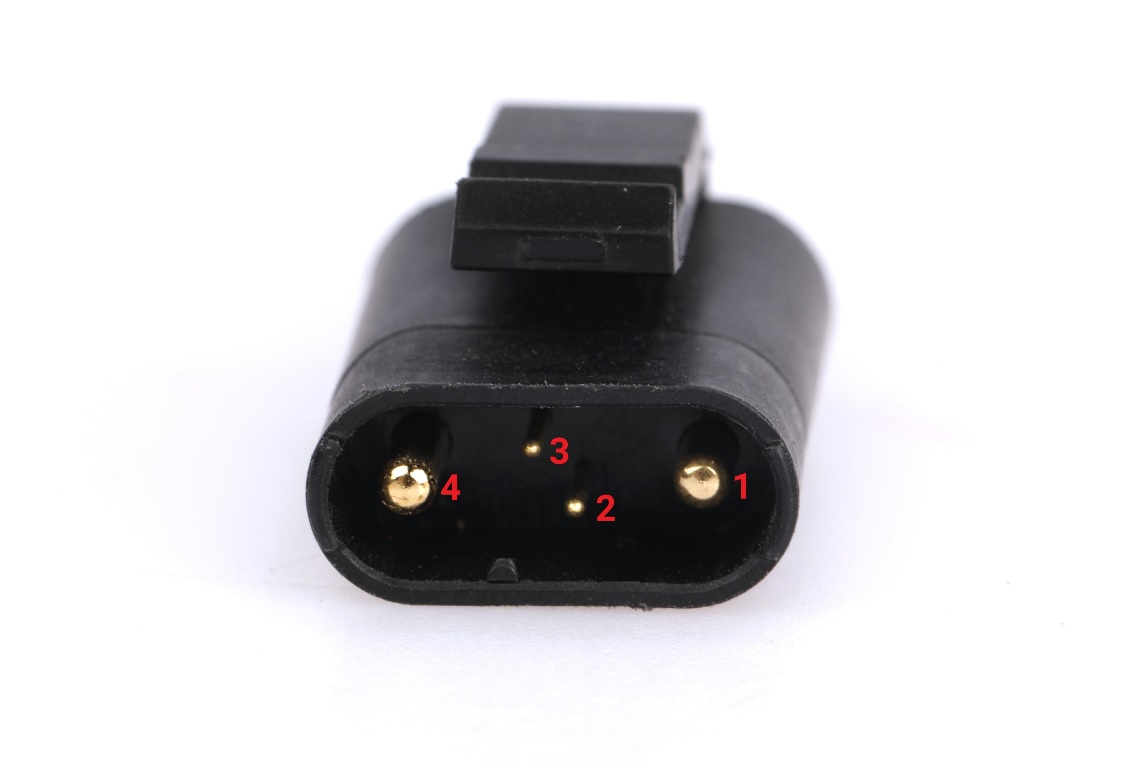
2.2 Turn on the machine. Measure the voltage of the pins shown below with a multimeter.

The voltage between Pin 1 and Pin 4 should be around 24V.
The voltage between Pin 1 and Pin 2 should be around 2.2V.
The voltage between Pin 1 and Pin 3 should be around 2.2V.
Pay attention to avoid connecting Pin 4 and Pin 2 (or Pin 3). Otherwise, the Controller will be damaged due to a short circuit.
¶ 3. If the measured voltages are normal
If the measured voltages are normal, the issue lies with the enclosure PCB board, which will need to be replaced.
¶ 4. If the 24V output is normal but the 2.2V output is abnormal
If 2.2V output is abnormal, the CAN chip on the controller’s enclosure port is faulty, and the controller needs to be replaced.
¶ 5. If the 24V output is abnormal but the 2.2V output is normal
If the 24V output is abnormal, disconnect the enclosure cable and directly measure the output from the controller’s enclosure port.
- If the voltage remains abnormal, the controller needs to be replaced.
- If the output from the controller is normal, the enclosure cable is faulty and will need to be replaced.
¶ Contact Support
After following the troubleshooting steps, if you find it difficult to resolve your issue, kindly submit a support ticket through https://snapmaker.formcrafts.com/support-ticket and share your troubleshooting results with some pictures/videos. Our dedicated support team will be more than willing to assist you in resolving the issue.