¶ Problem Description
The 3D Printing Module clashes against the Print Sheet during calibration or printing.
¶ Possible Causes
- The firmware is outdated.
- The Y-axis Linear Modules are assembled inappropriately.
- The cables of the Y-axis and the Z-axis Linear Modules are plugged into the wrong port on the Controller.
- The Platform is assembled upsidedown.
- The probe sensor is malfunctioning.
- The probe sensor or the nozzle is not installed properly.
¶ Solution
- Download and install the latest version of the firmware.https://forum.snapmaker.com/t/snapmaker-2-0-firmware-updates-and-downloads/5443
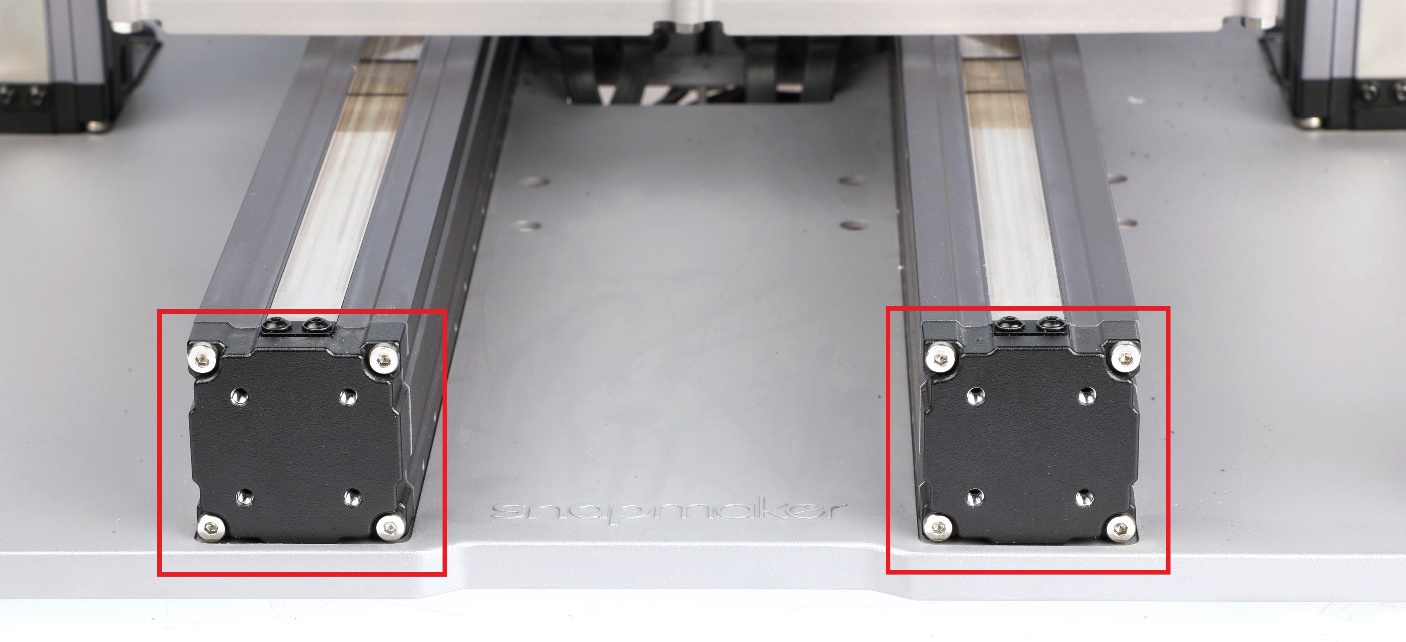
- Check whether the Y-axis Linear Modules are securely fitted into the grooves on the Base Plate as illustrated.
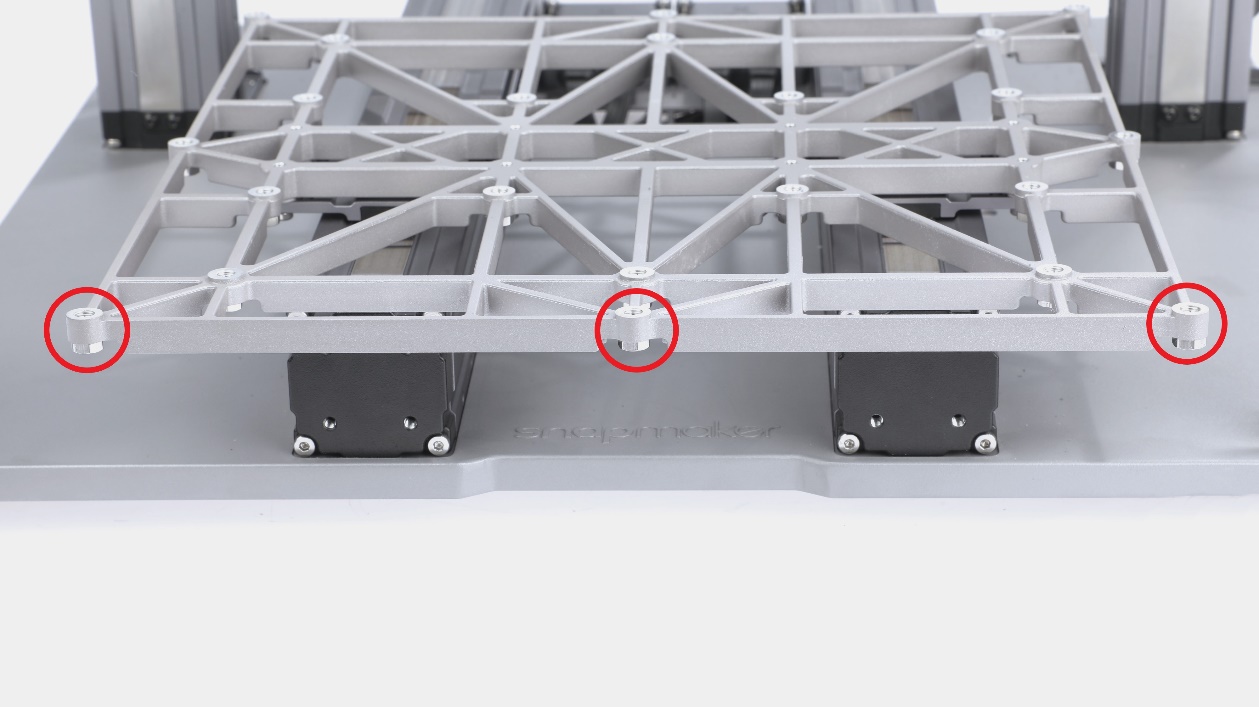
- Check whether the screws on the Support Platform face downward as illustrated. If not, reinstall all the screws on the Support Platform.
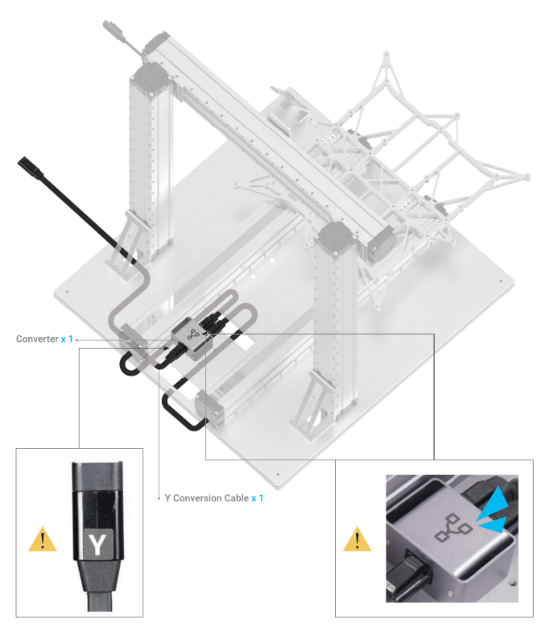
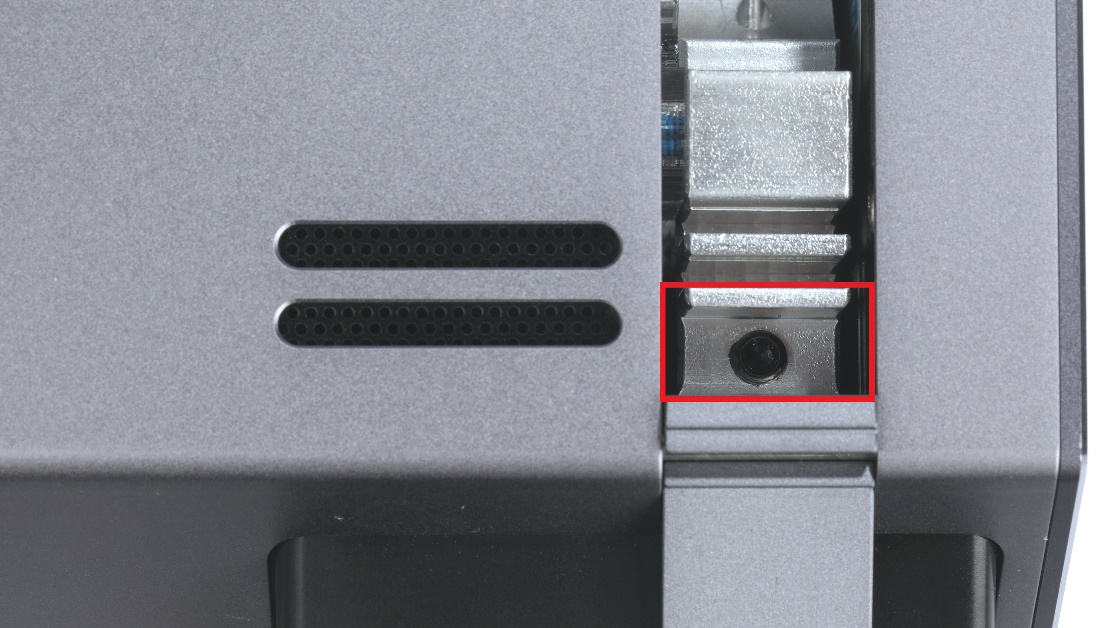
- Check the cable connection of the Y- and the Z-axis Linear Modules, make sure they are plugged into the right port of the Controller as illustrated.
- If the problem persists, do the following to check whether the probe sensor is working properly:
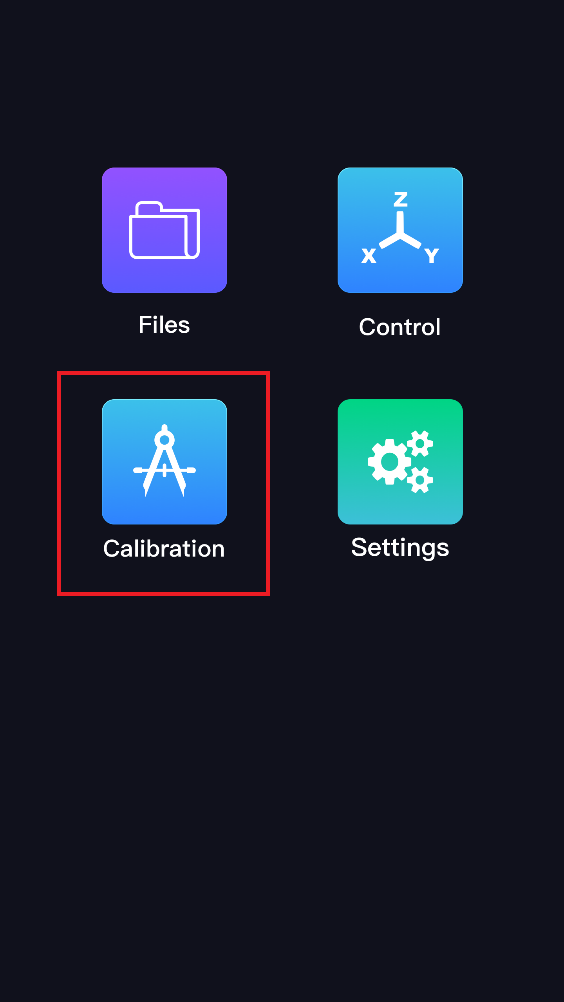
- Put a palette knife beneath the 3D Printing Module as shown in this video. Or, on the Touchscreen, swipe left to tap Calibration and tap Start to run Auto Leveling; the 3D Printing Module is expected to go back to its home position and then move down towards the Print Sheet.
- See if the LED is on when the toolhead approaches the palette knife or the Print Sheet.
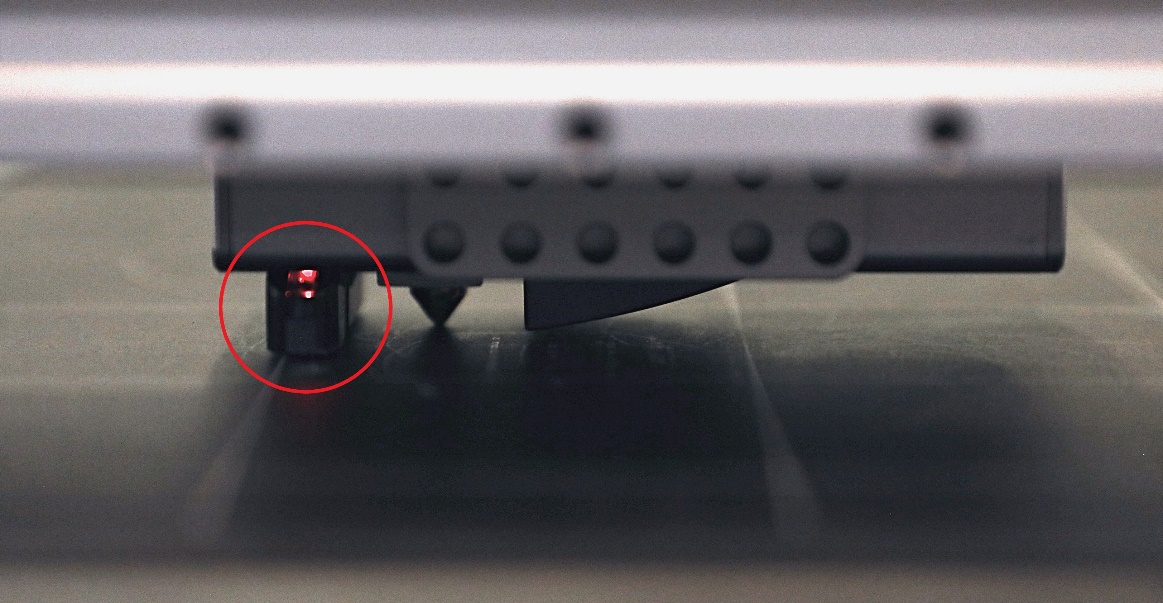
2.1 If not, then the probe sensor itself is malfunctioning. Please contact us at support@snapmaker.com for replacement.
2.2 If yes, go to step 6.
- Do the following to check whether the nozzle and the probe sensor are seated right:
- Loosen the adjusting screw of the nozzle (circled in the picture below), make sure the nozzle is inserted all the way in.
- Move the 3D Printing Module down until the nozzle tip touches the Print Sheet.
- Loosen the screw of the probe sensor so that it can be adjusted.
- Find a credit card (or anything with a height of about 1 mm) and put it under the probe sensor on the Print Sheet.
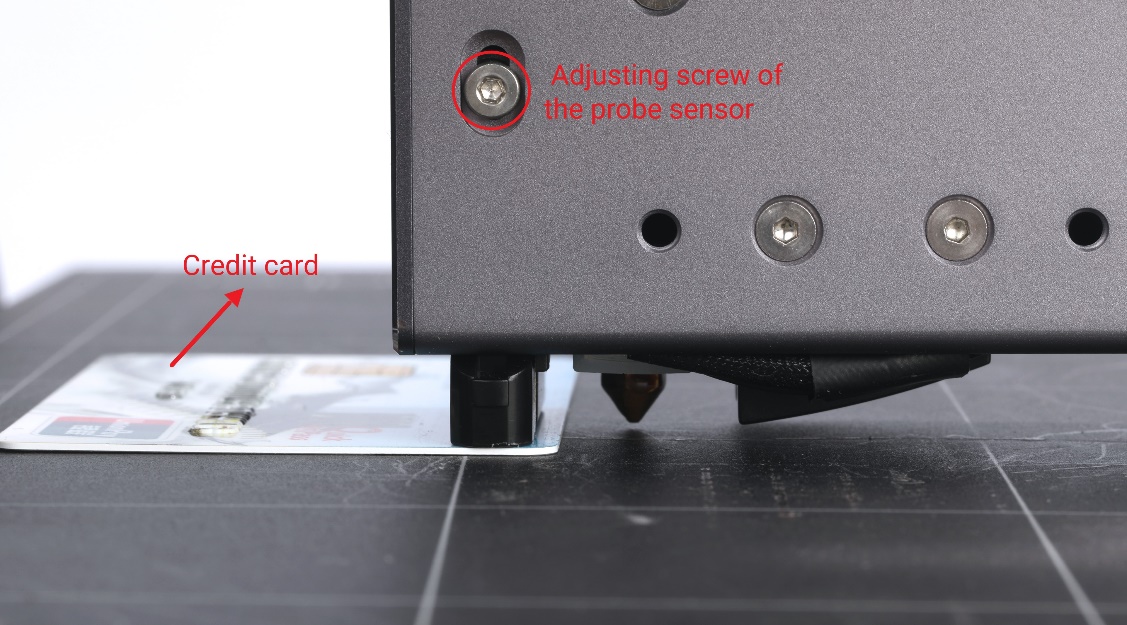
- Make sure the probe sensor touches the credit card so that the nozzle is about 1 mm lower than the sensor.
- Tighten the screw of the probe sensor.
- Redo calibration and see if the problem is solved.
After following the troubleshooting steps, if you find it difficult to resolve your issue, kindly submit a support ticket through https://snapmaker.formcrafts.com/support-ticket and share your troubleshooting results with some pictures/videos.
Our dedicated support team will be more than willing to assist you in resolving the issue.