There are four leveling modes to calibrate the Heated Bed—Auto Leveling, Manual Leveling, Heated Auto Leveling, and Heated Manual Leveling. The 3D Printing Module has a built-in distance sensor measuring the distance between the nozzle and Print Sheet at specific points. If the Print Sheet is not flat, the 3D Printing Module will automatically adjust its movement to keep the nozzle and Print Sheet at an optimum distance during printing.
Normally, Auto Leveling or Manual Leveling is your go-to choice. If the first layer cannot stick to the Heated Bed, try Heated Auto Leveling or Heated Manual Leveling to improve the first layer adhesion.
Do not the touch the Heated Bed with bare hands while using the Heated Leveling mode.
To switch the mode on the Touchscreen, tap Settings > 3D Printing > Auto Leveling or Heated Leveling.
¶ Tools Required
- Calibration card × 1 (or a piece of paper)
¶ Procedures
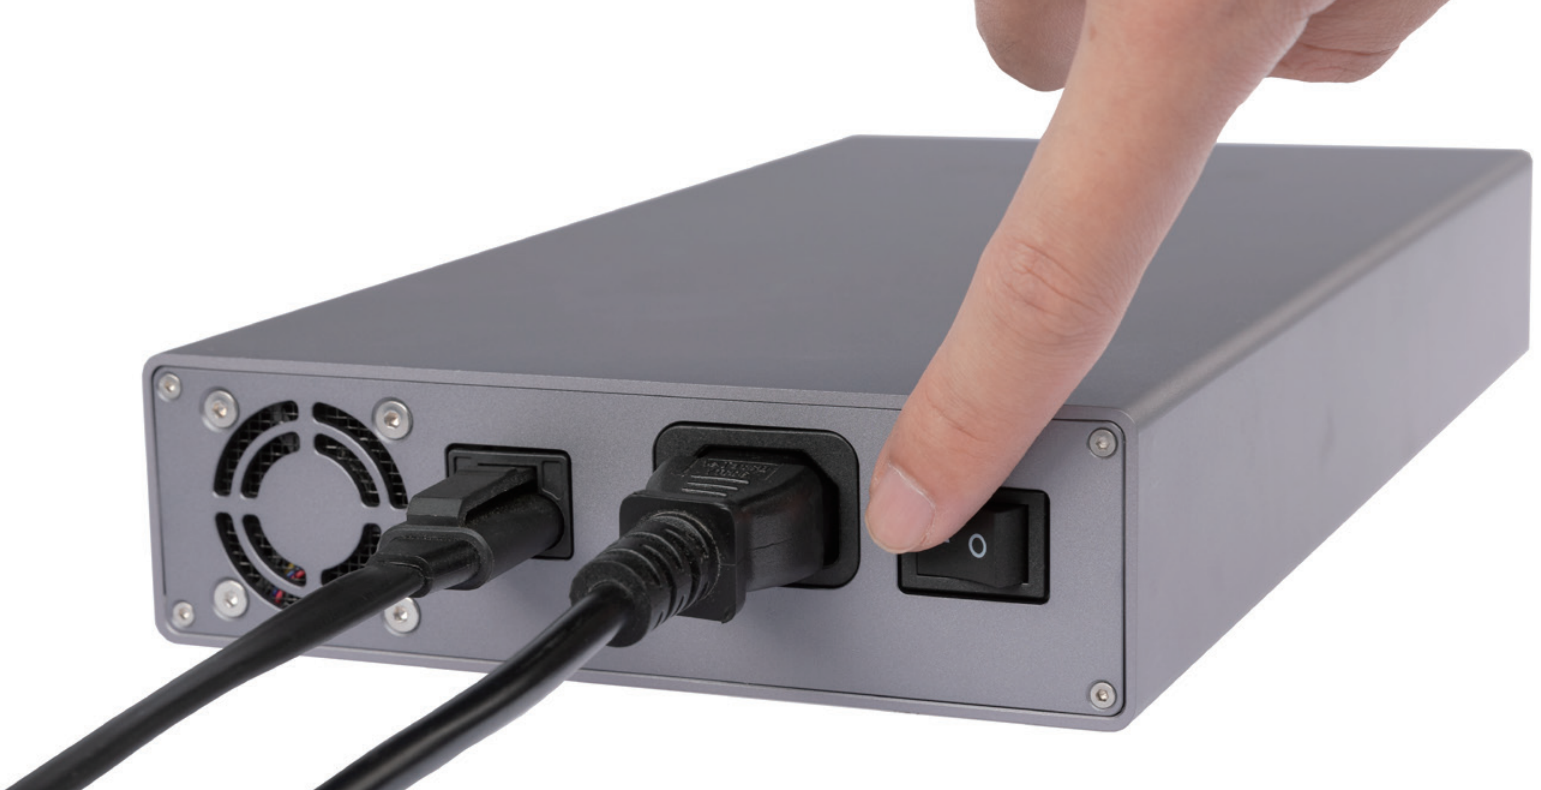
- Turn on the 3D printer.
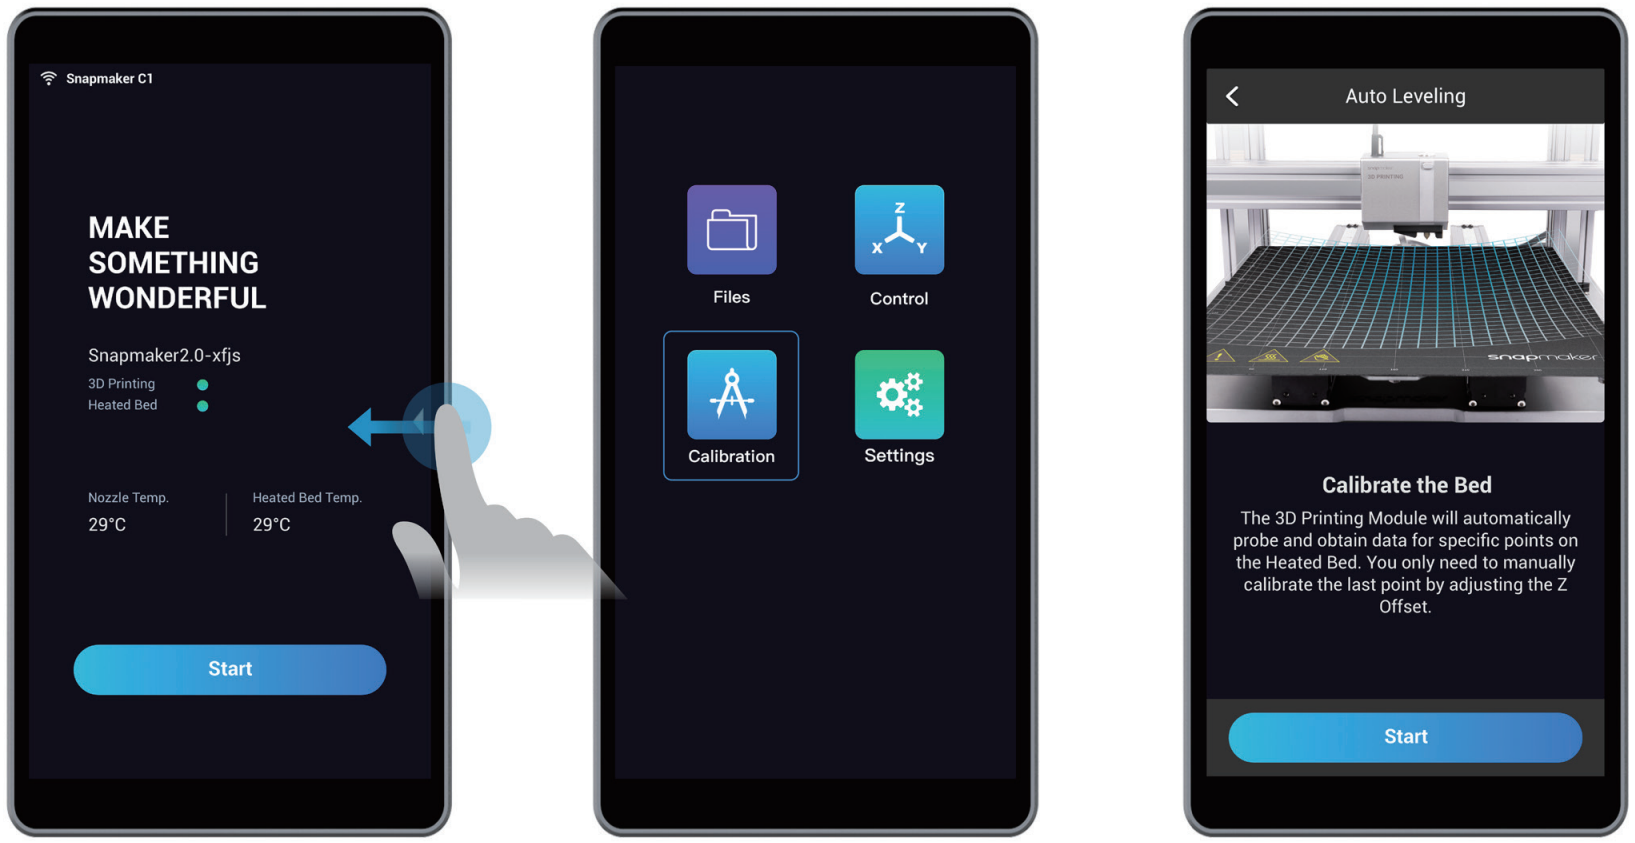
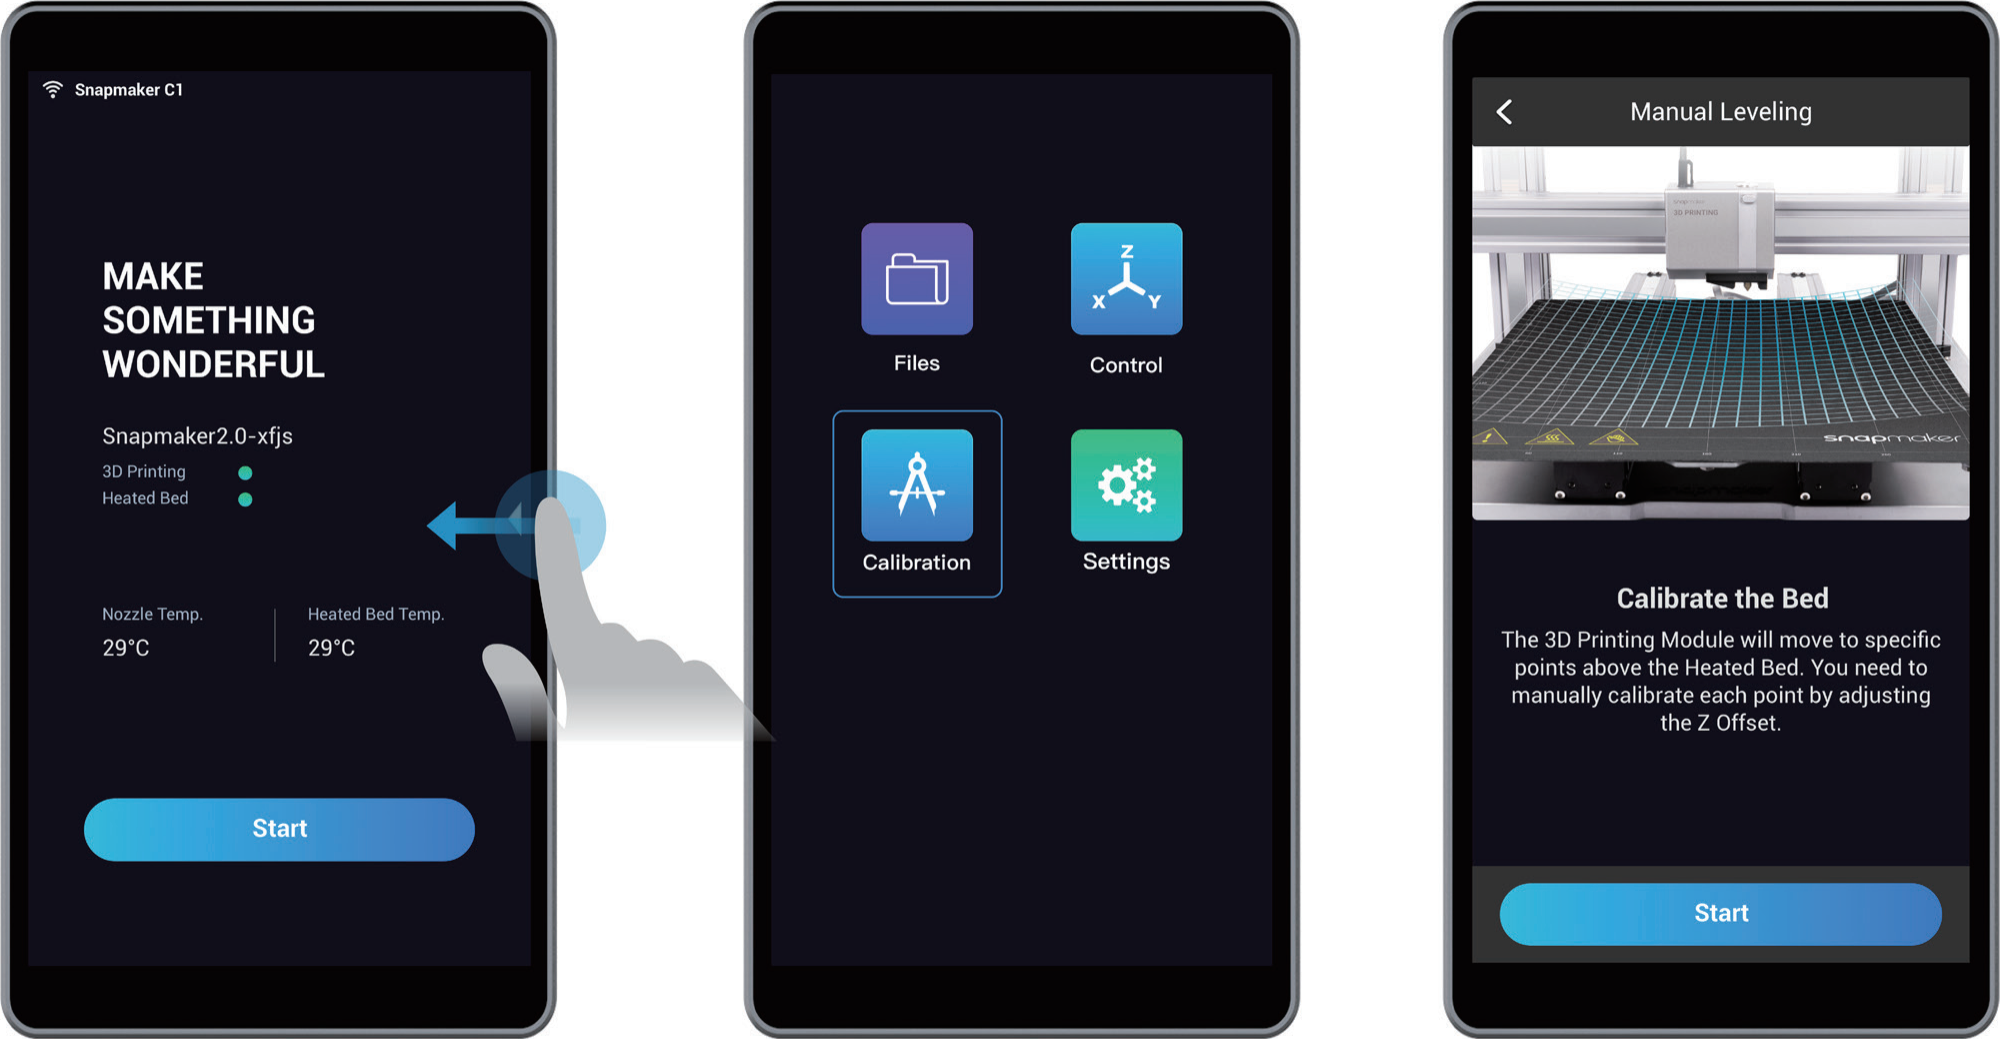
- On the Touchscreen, swipe left to tap Calibration. Read on-screen instructions on how to level the bed and tap Start to run Auto Leveling.
- Place the Calibration Card or a piece of A4 paper between the nozzle and the Heated Bed, and manually calibrate the Z Offset for the last point.
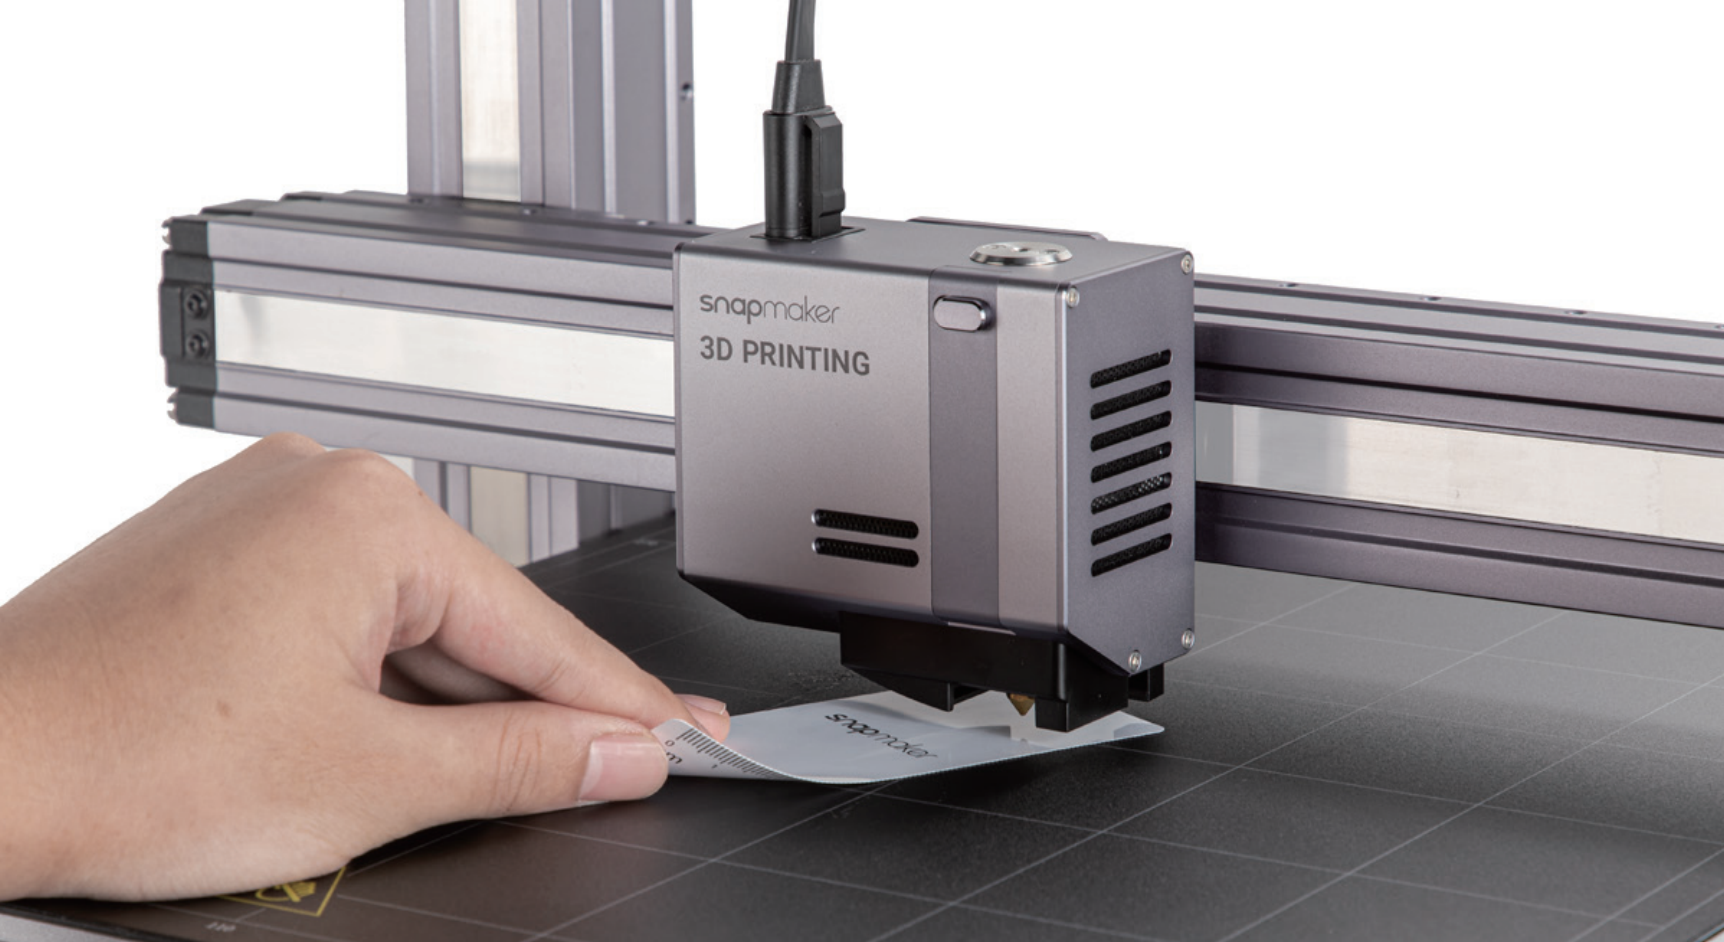
- Fine-tune the last point. Select the offset per travel (0.05 mm, 0.1 mm, or 0.5 mm). Keep adjusting the height of the nozzle tapping Up and Down, until you feel slight resistance when you pull out the Calibration Card and it should be wrinkled when you push it forward. Tap Save to save the calibration settings.

¶ Related Reading
¶ Tools Required
- Calibration card × 1 (or a piece of paper)
¶ Procedures
- Turn on the 3D printer.
- On the Touchscreen, swipe left to tap Calibration. Read on-screen instructions on how to level the bed and tap Start to run Manual Leveling.
- Calibrate the first point. Place the Calibration Card or a piece of paper between the nozzle and Print Sheet.

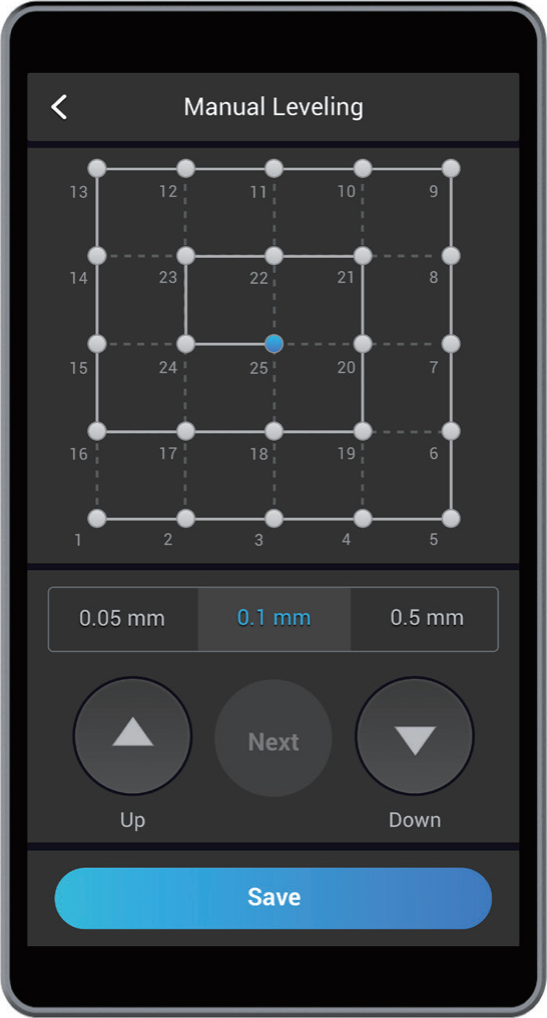
- Fine-tune the first point. Select the offset per travel (0.05 mm, 0.1 mm, or 0.5 mm). Keep adjusting the height of the nozzle tapping Up and Down, until you feel slight resistance when you pull out the Calibration Card and it should be wrinkled when you push it forward. Tap Next to calibrate the next point.
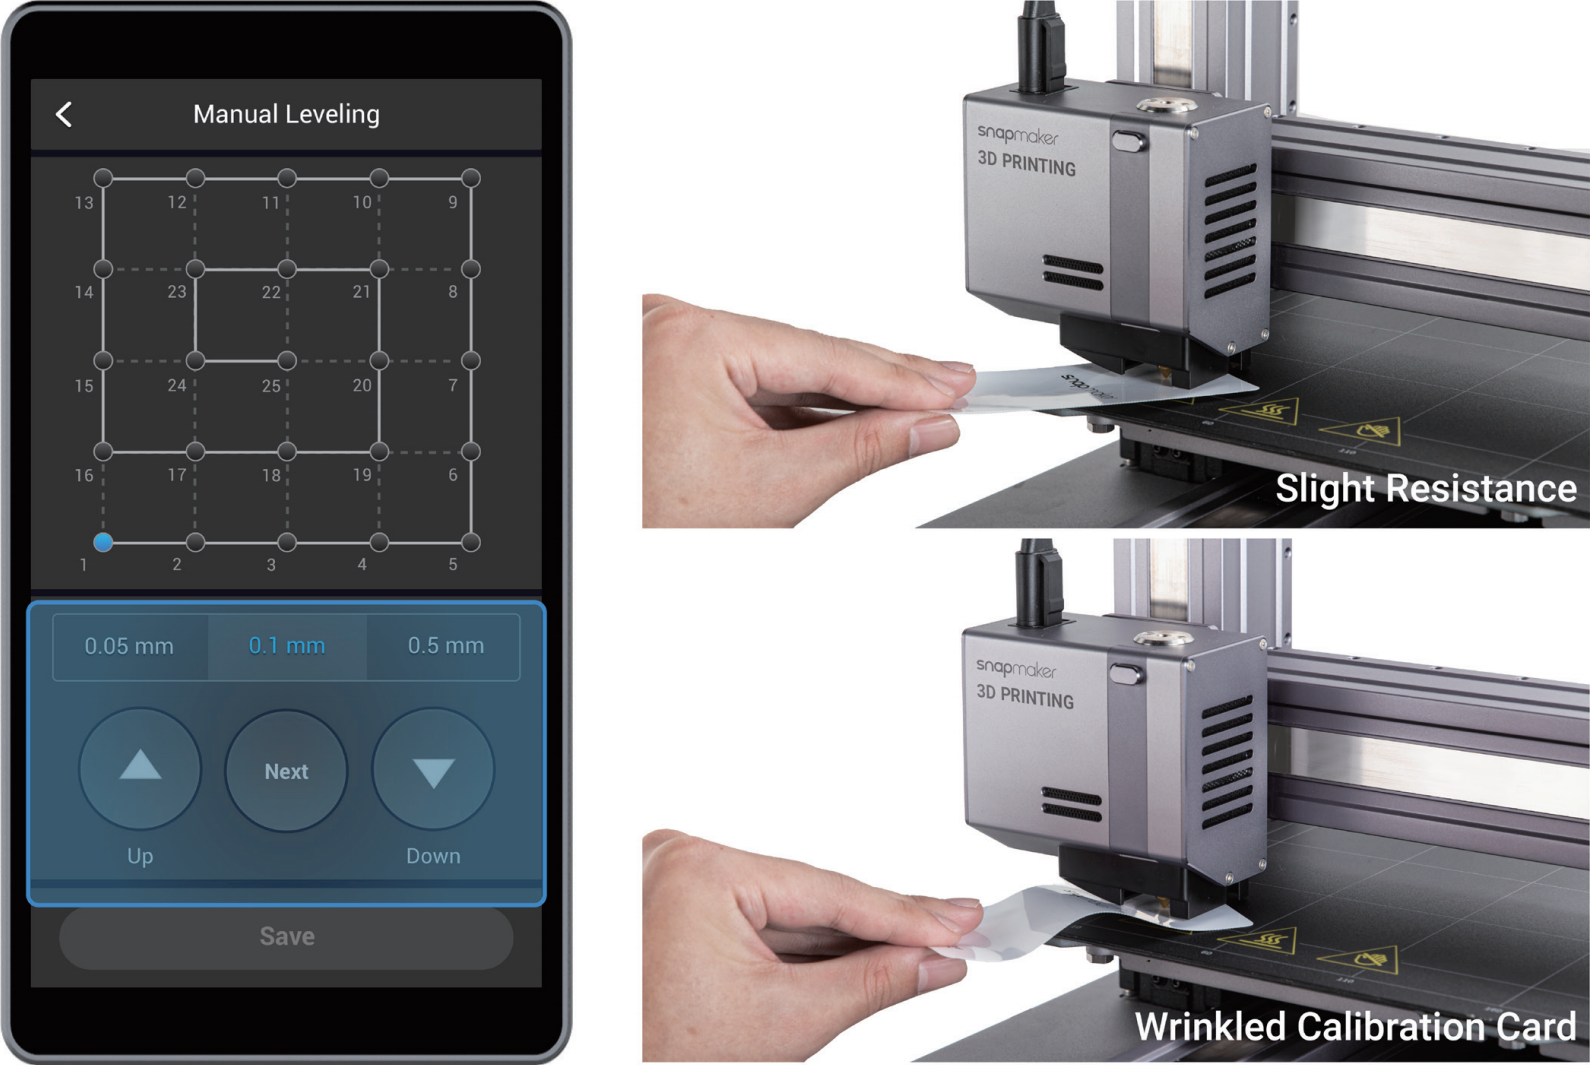
- Calibrate the rest of the points. One by one, repeat the previous two steps till the last point. Tap Save to save the calibration settings.