¶ Check the Cables
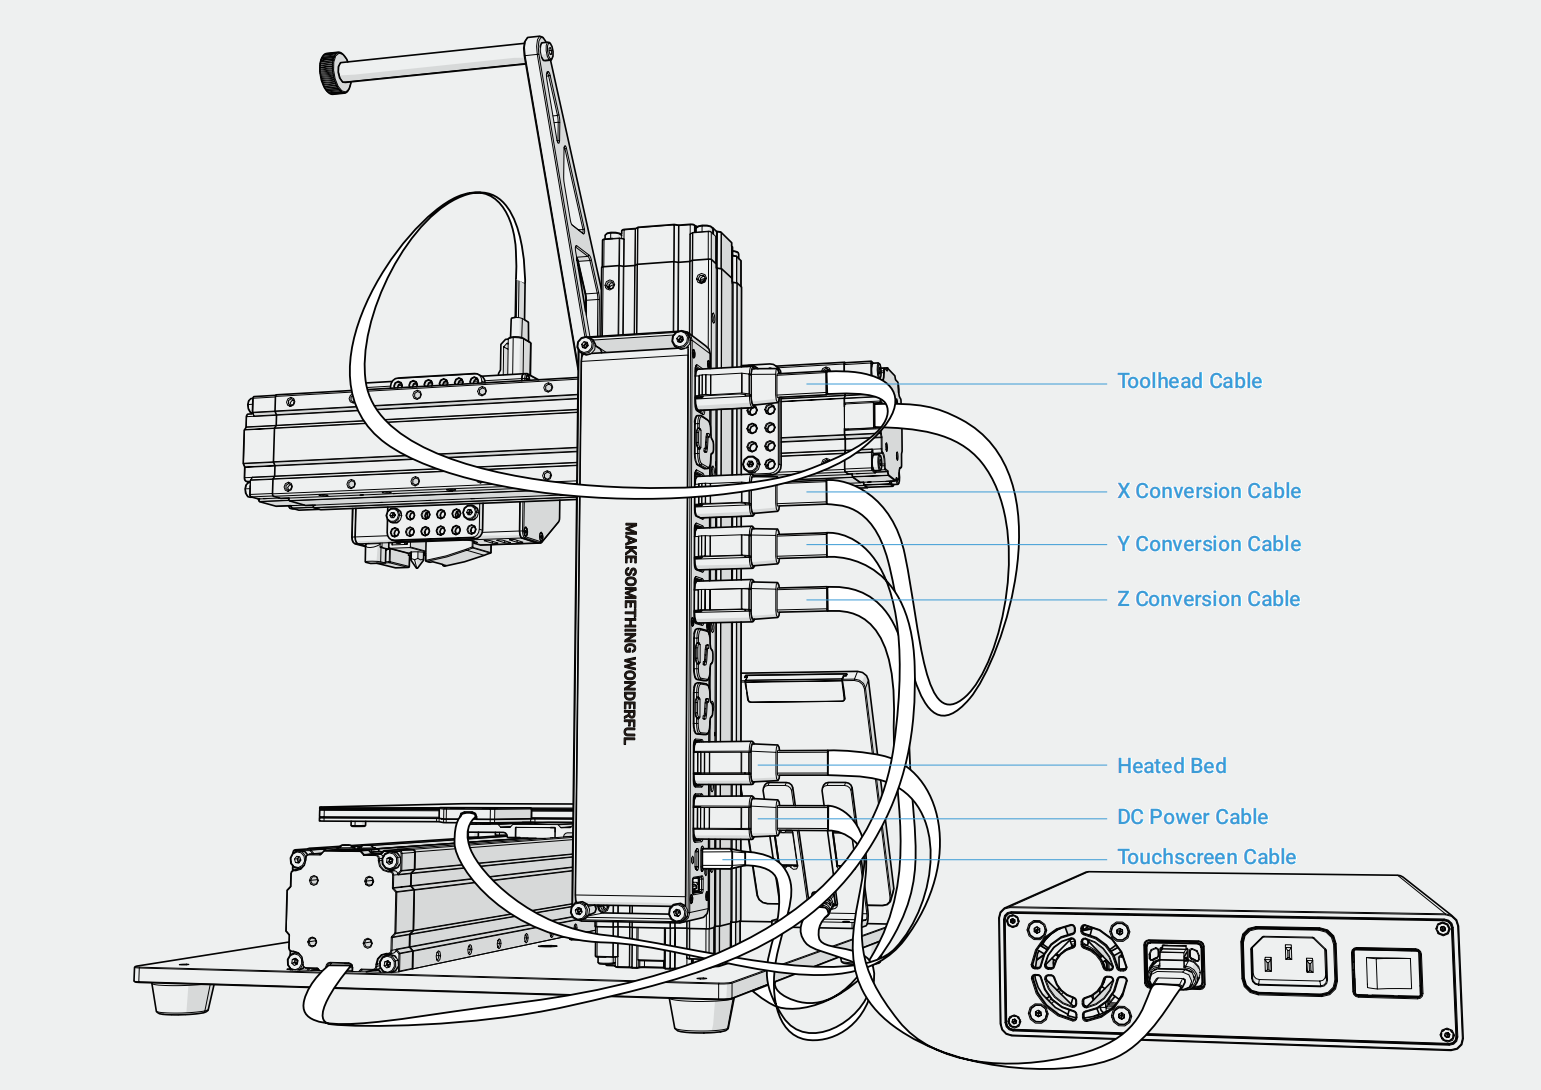
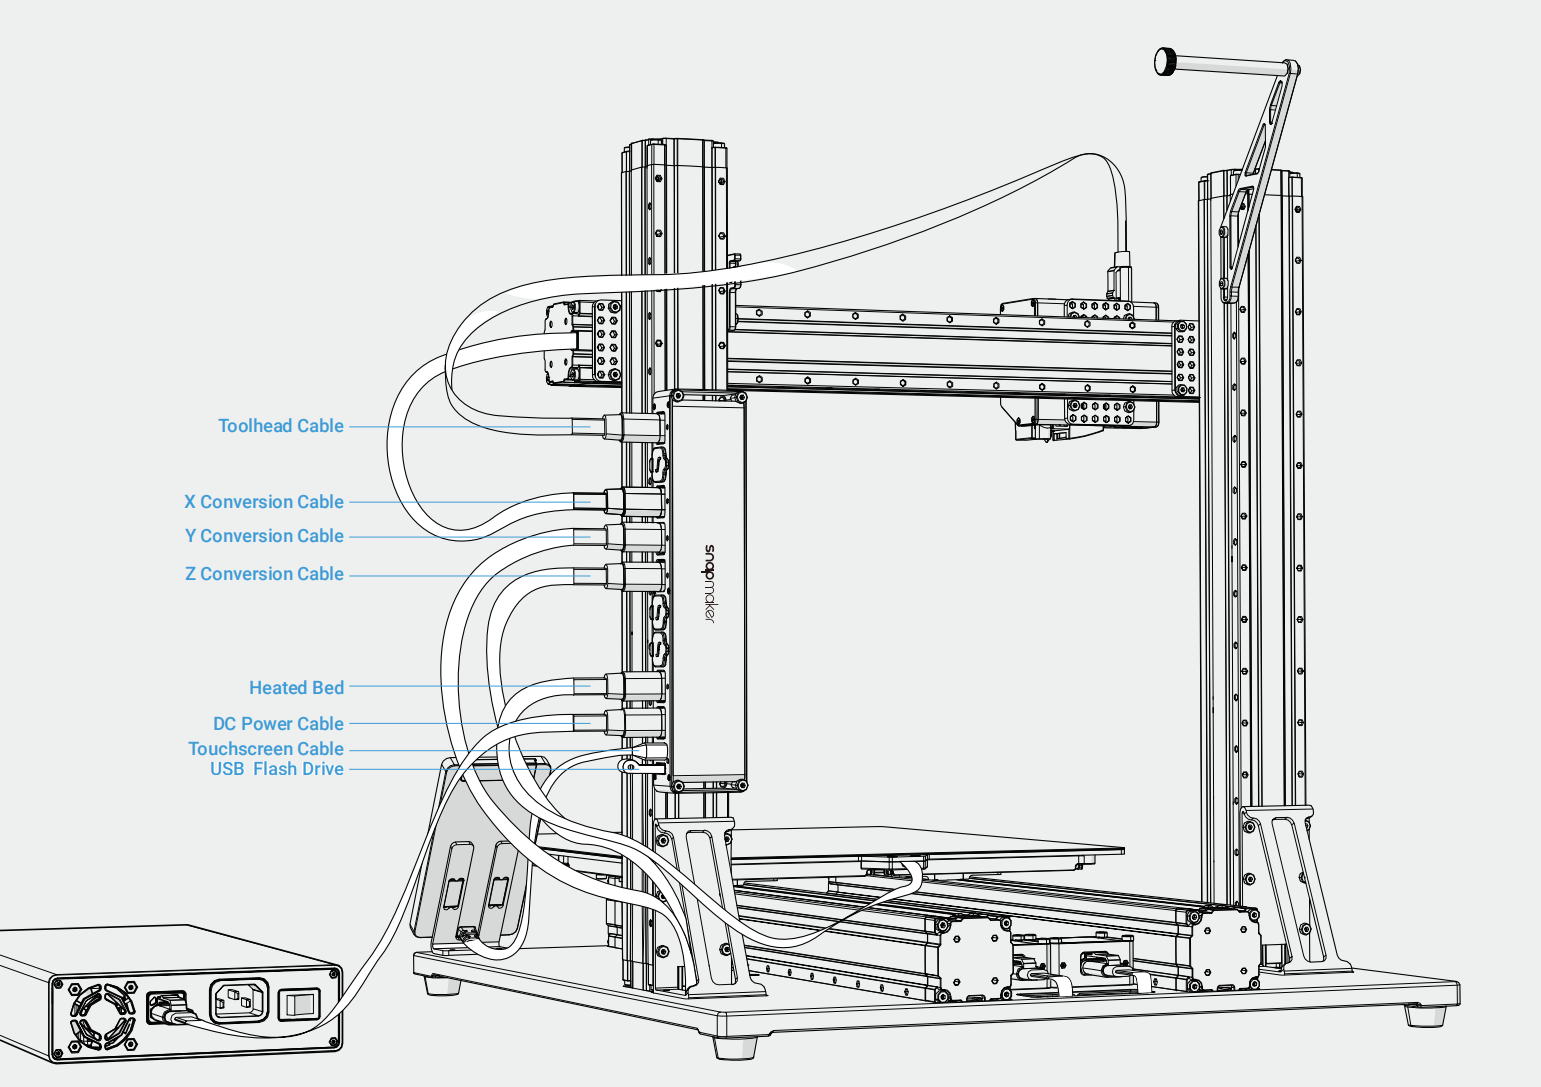
Check if every cable is plugged into the right socket in the right direction.
Into the Controller (A150)
Into the Controller (A250/A250T/A350/A350T)
Into the Converters
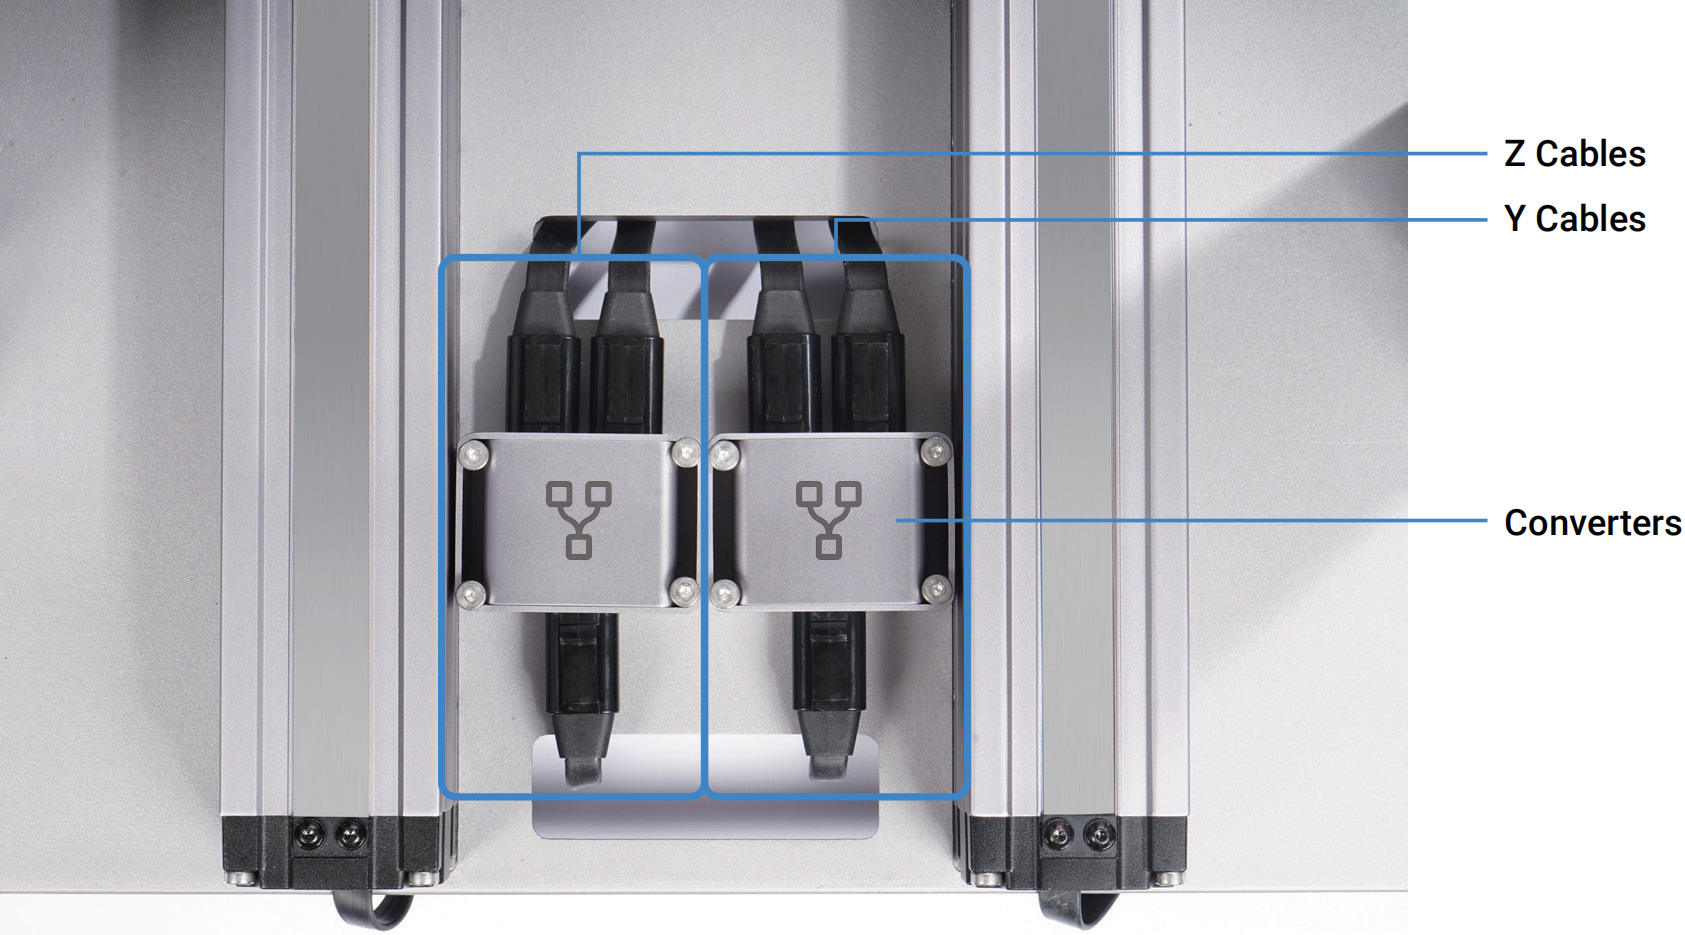
Snapmaker 2.0 A150 has no Converters.
On the 3D Printing Module

¶ Check the Support Platform
Check if the Support Platform is assembled in the correct direction. The front without screws should face up, and the rear with some screws faces down. If you install the platform upside down, it will be higher than the one when it is correctly installed, and this is likely to cause the 3D Printing Module to bump into the Print Sheet.

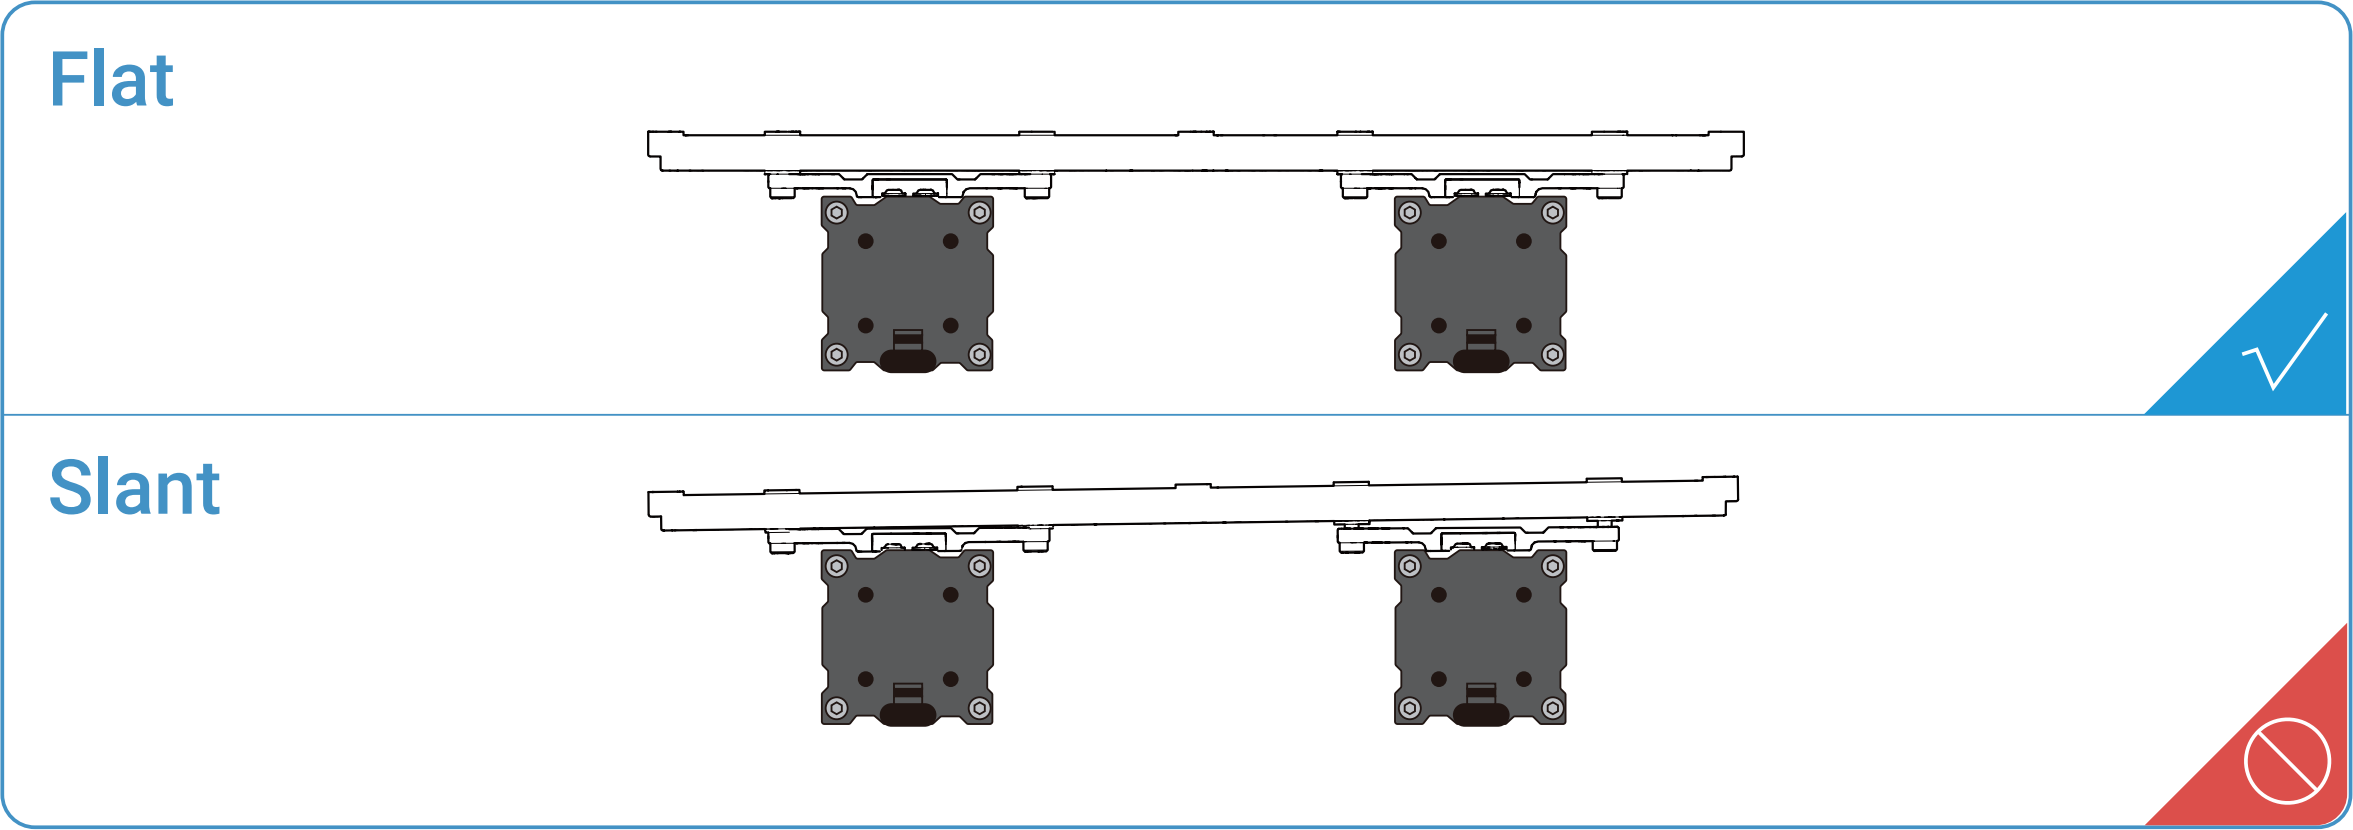
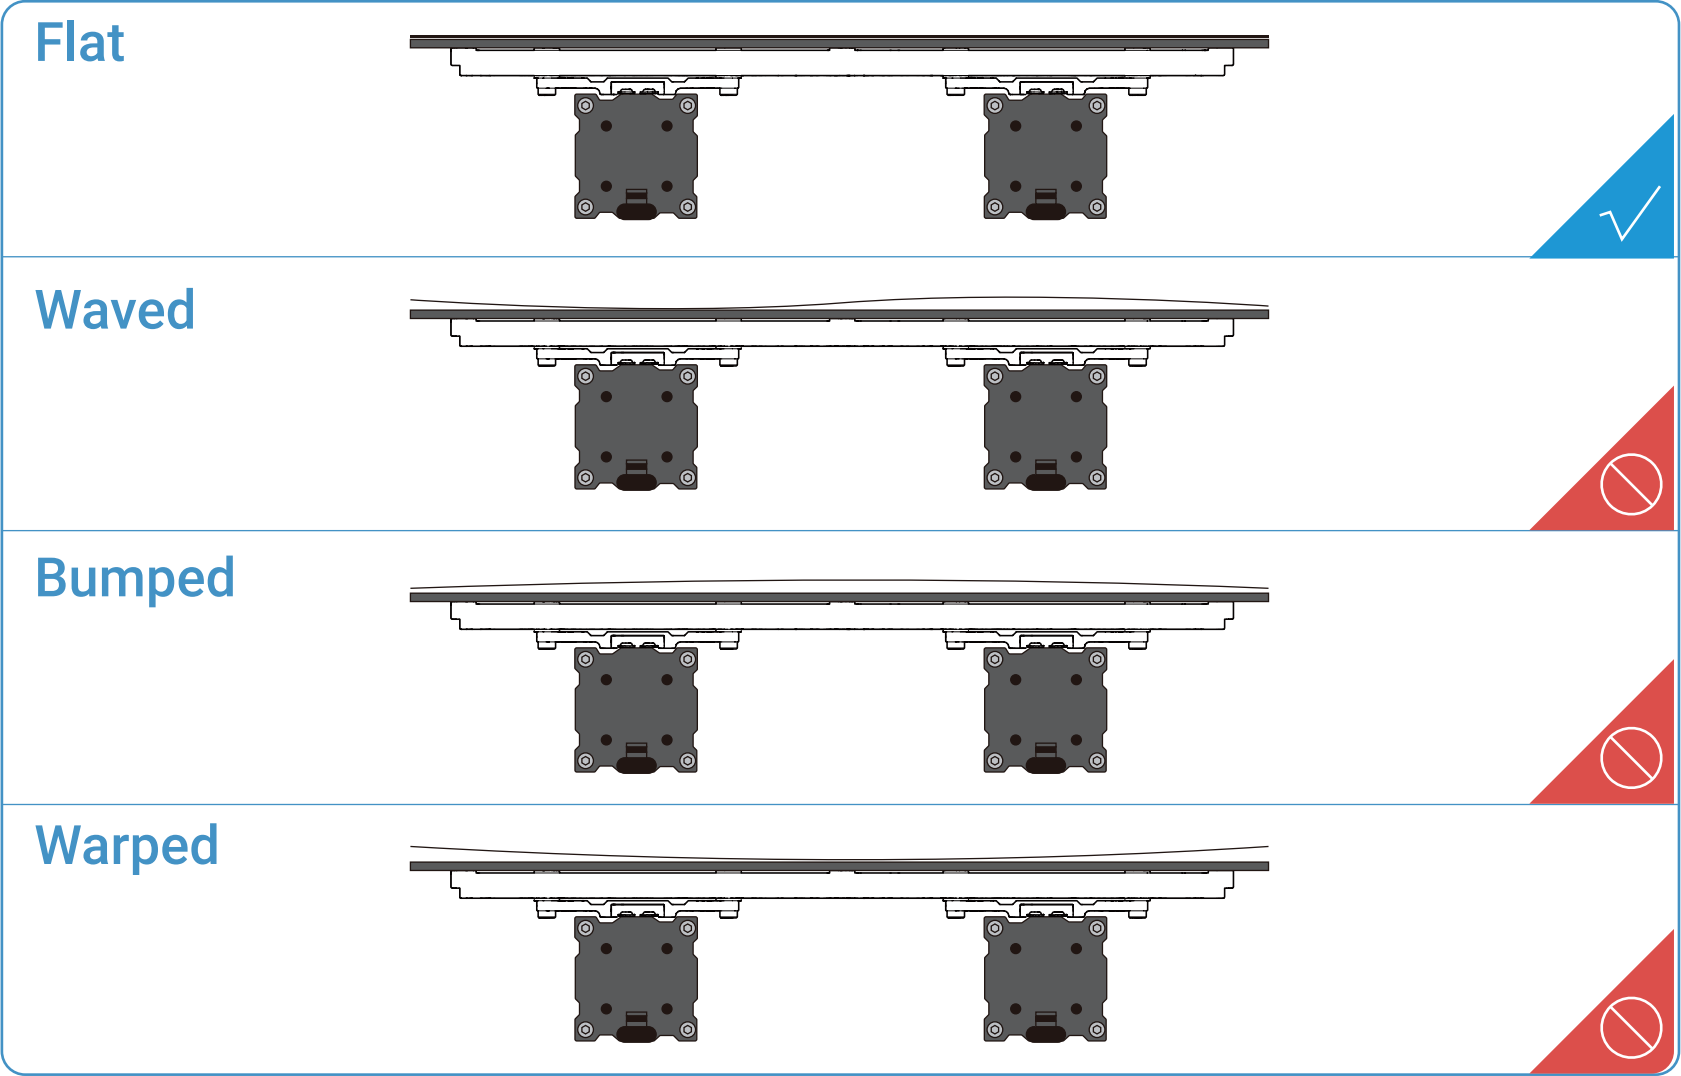
Check if the Support Platform is flat and stable, fully tightened with screws. If not, loosen all screws and reassemble the Platform.
¶ Check the Heated Bed
Check if the Heated Bed is flat and stable, fully tightened with screws. If not, reassemble the Heated Bed.
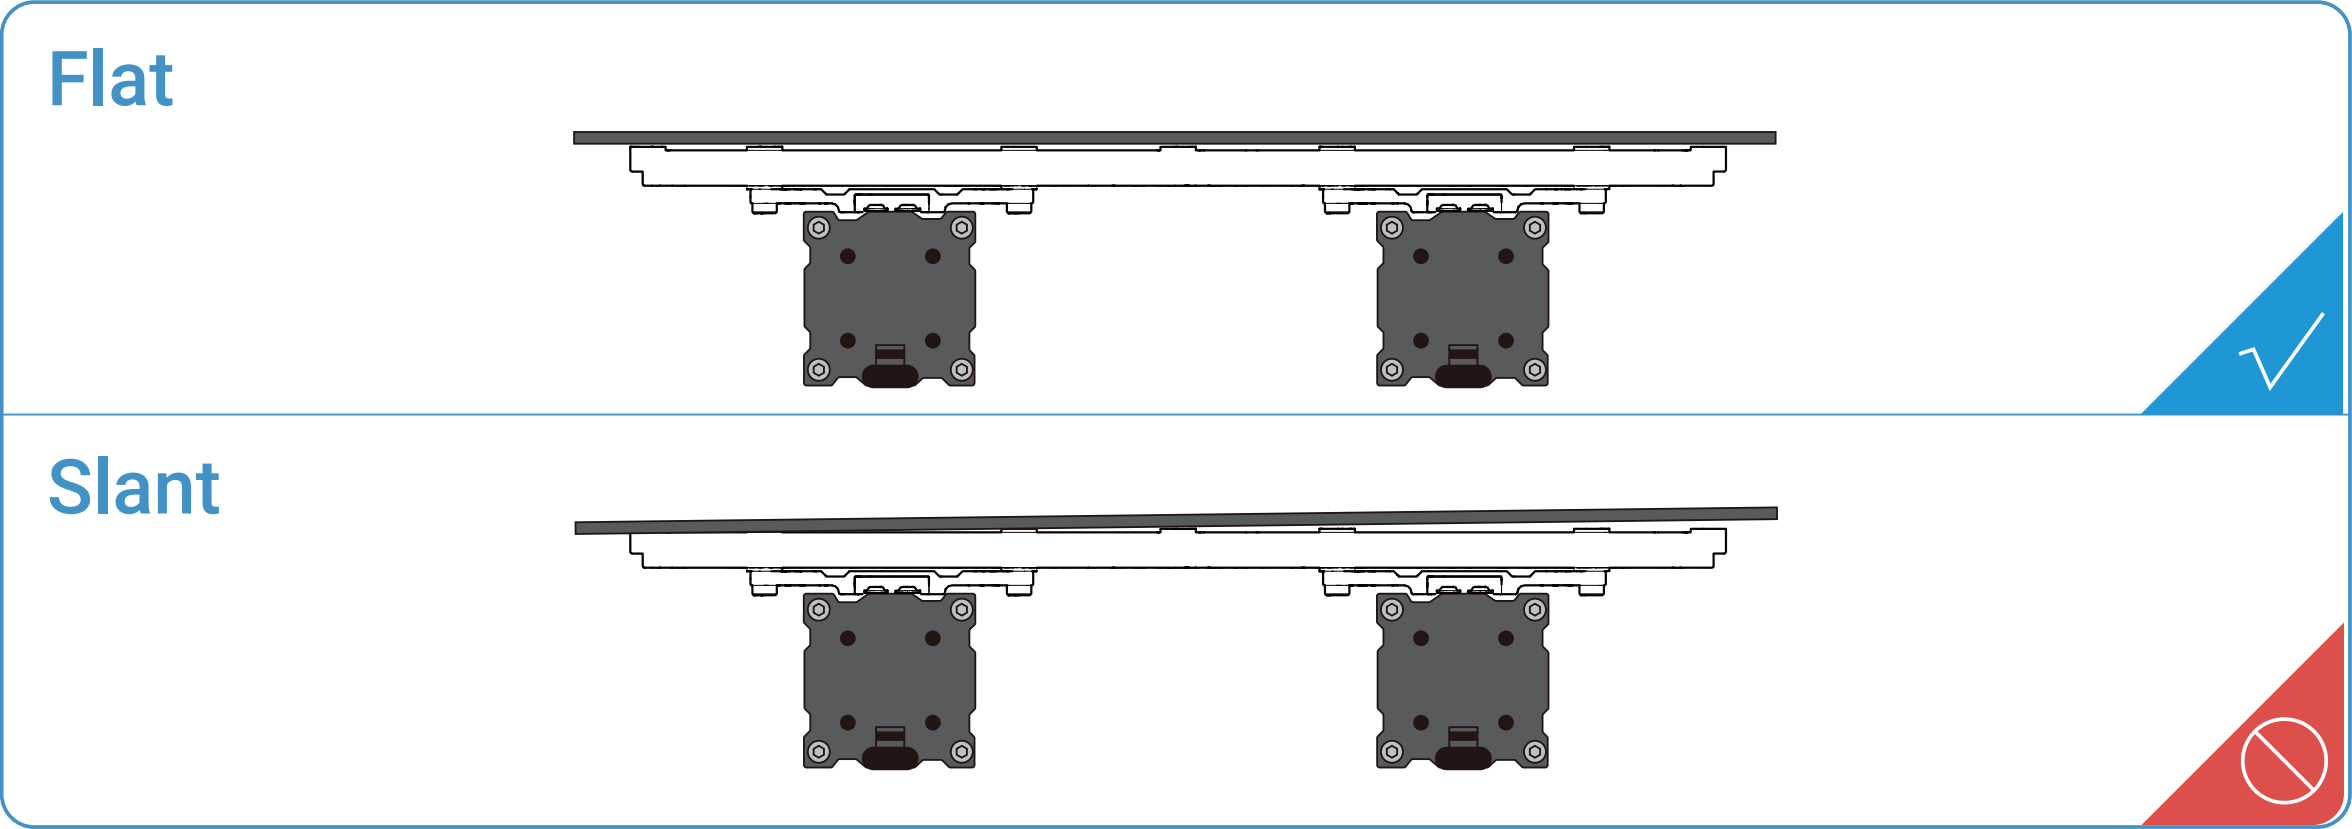
Check if the Print Sheet is correctly placed on the Heated Bed as illustrated. If not, reassemble the Print Sheet.
¶ Check the Cables
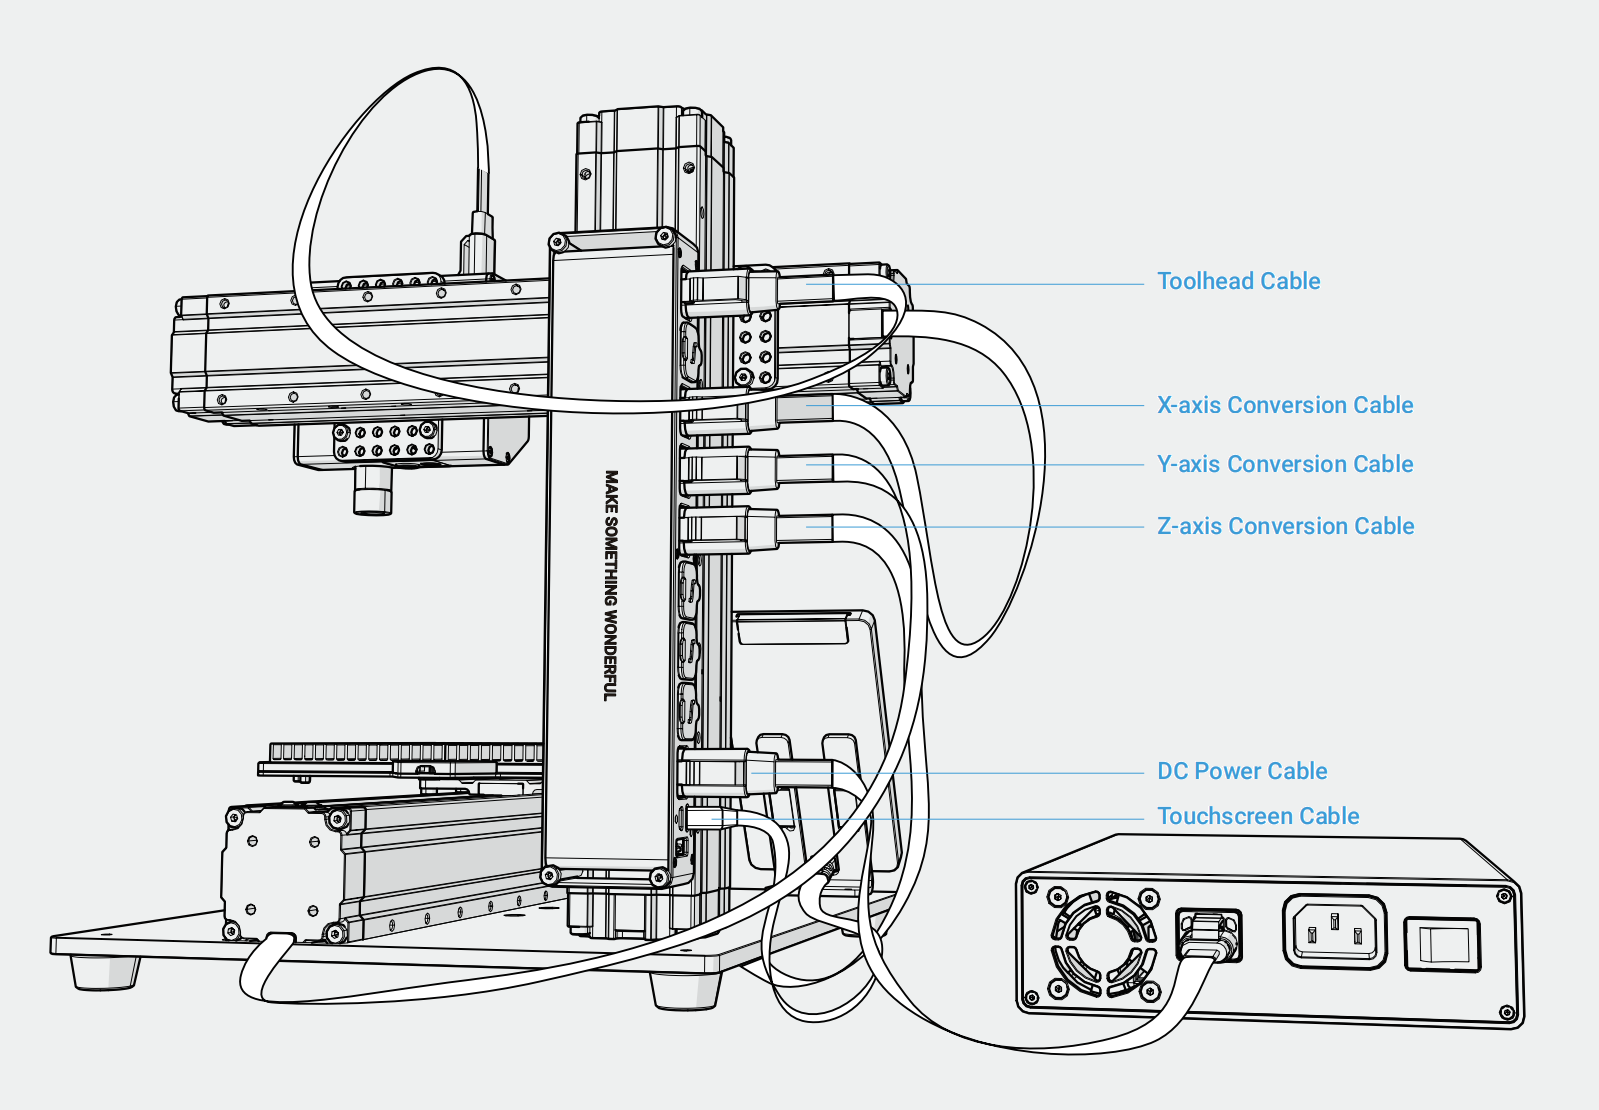
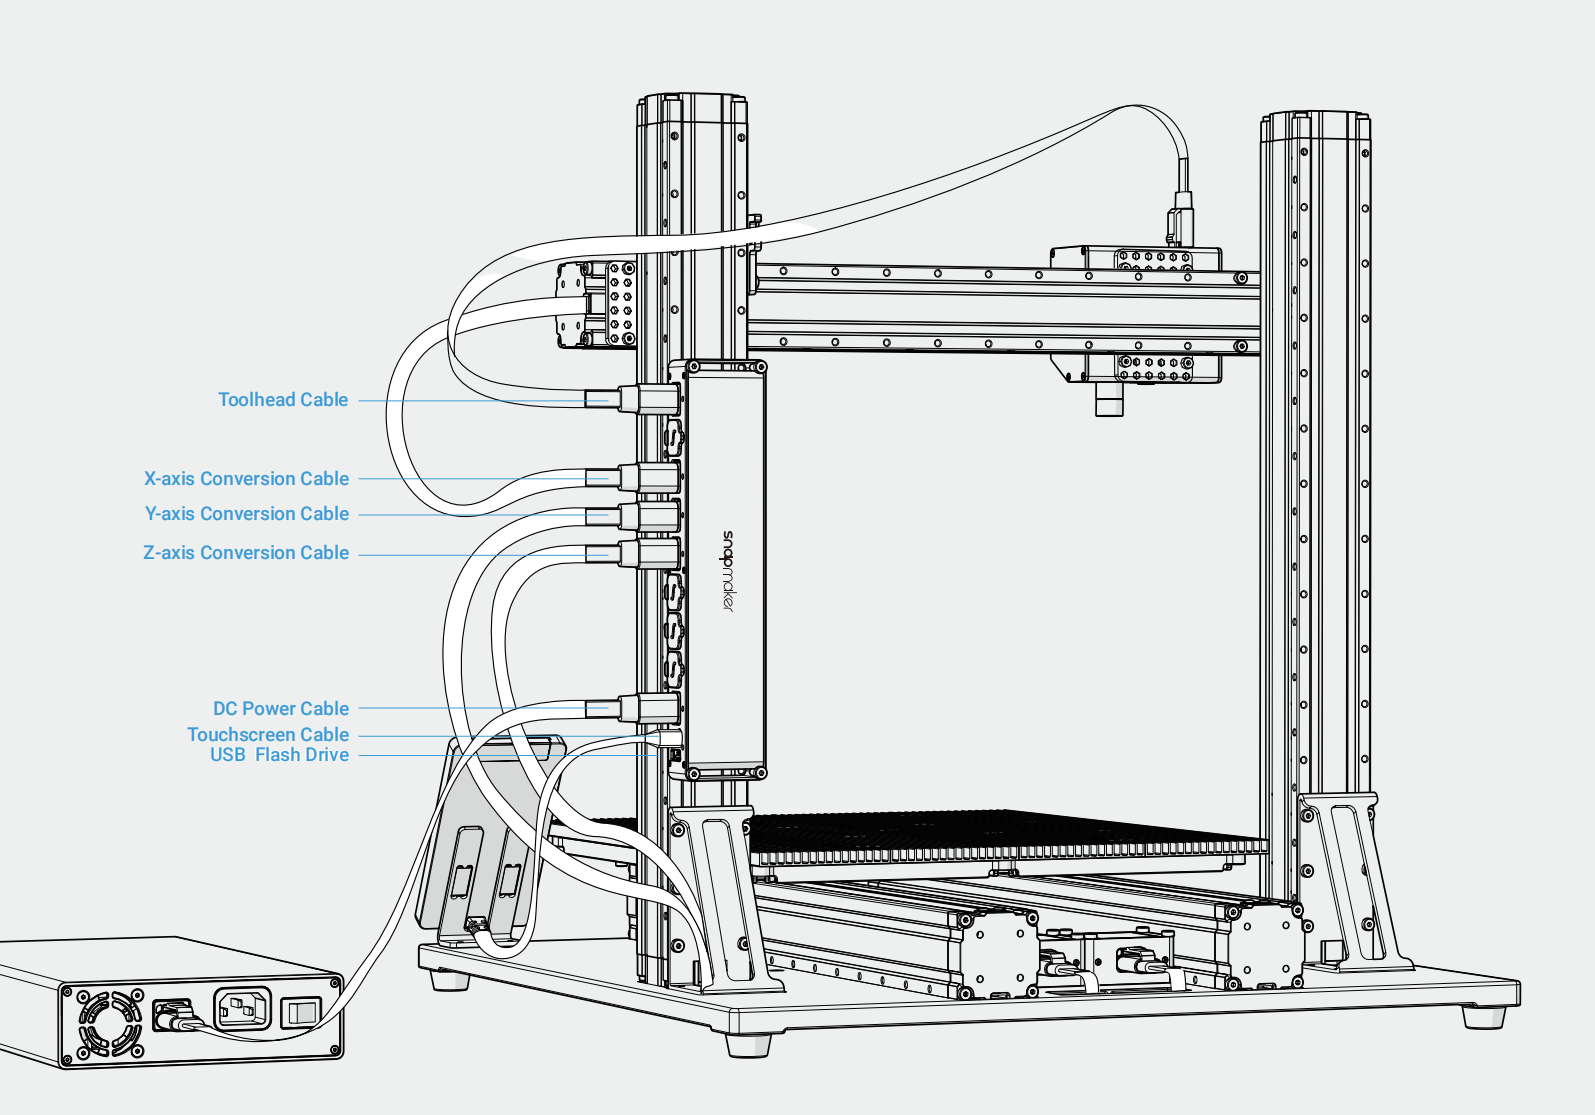
Check if every cable is plugged into the right socket in the right direction.
Into the Controller (A150)
Into the Controller (A250/A250T/A350/A350T)
Into the Converters

Snapmaker 2.0 A150 has no Converters.
On the Laser Module

¶ Check the Support Platform
Check if the Support Platform is assembled in the correct direction. The front without screws should face up, and the rear with some screws faces down. The reversely installed platform will be higher than the correctly installed one.

Check if the Support Platform is flat and stable, fully tightened with screws. If not, loosen all screws and reassemble the platform.

¶ Check the Laser Engraving and Cutting Platform
Check if the Laser Engraving and Cutting Platform is flat and stable, and fully tightened with screws. If not, reassemble the Laser Engraving and Cutting Platform.
¶ Check the Cables
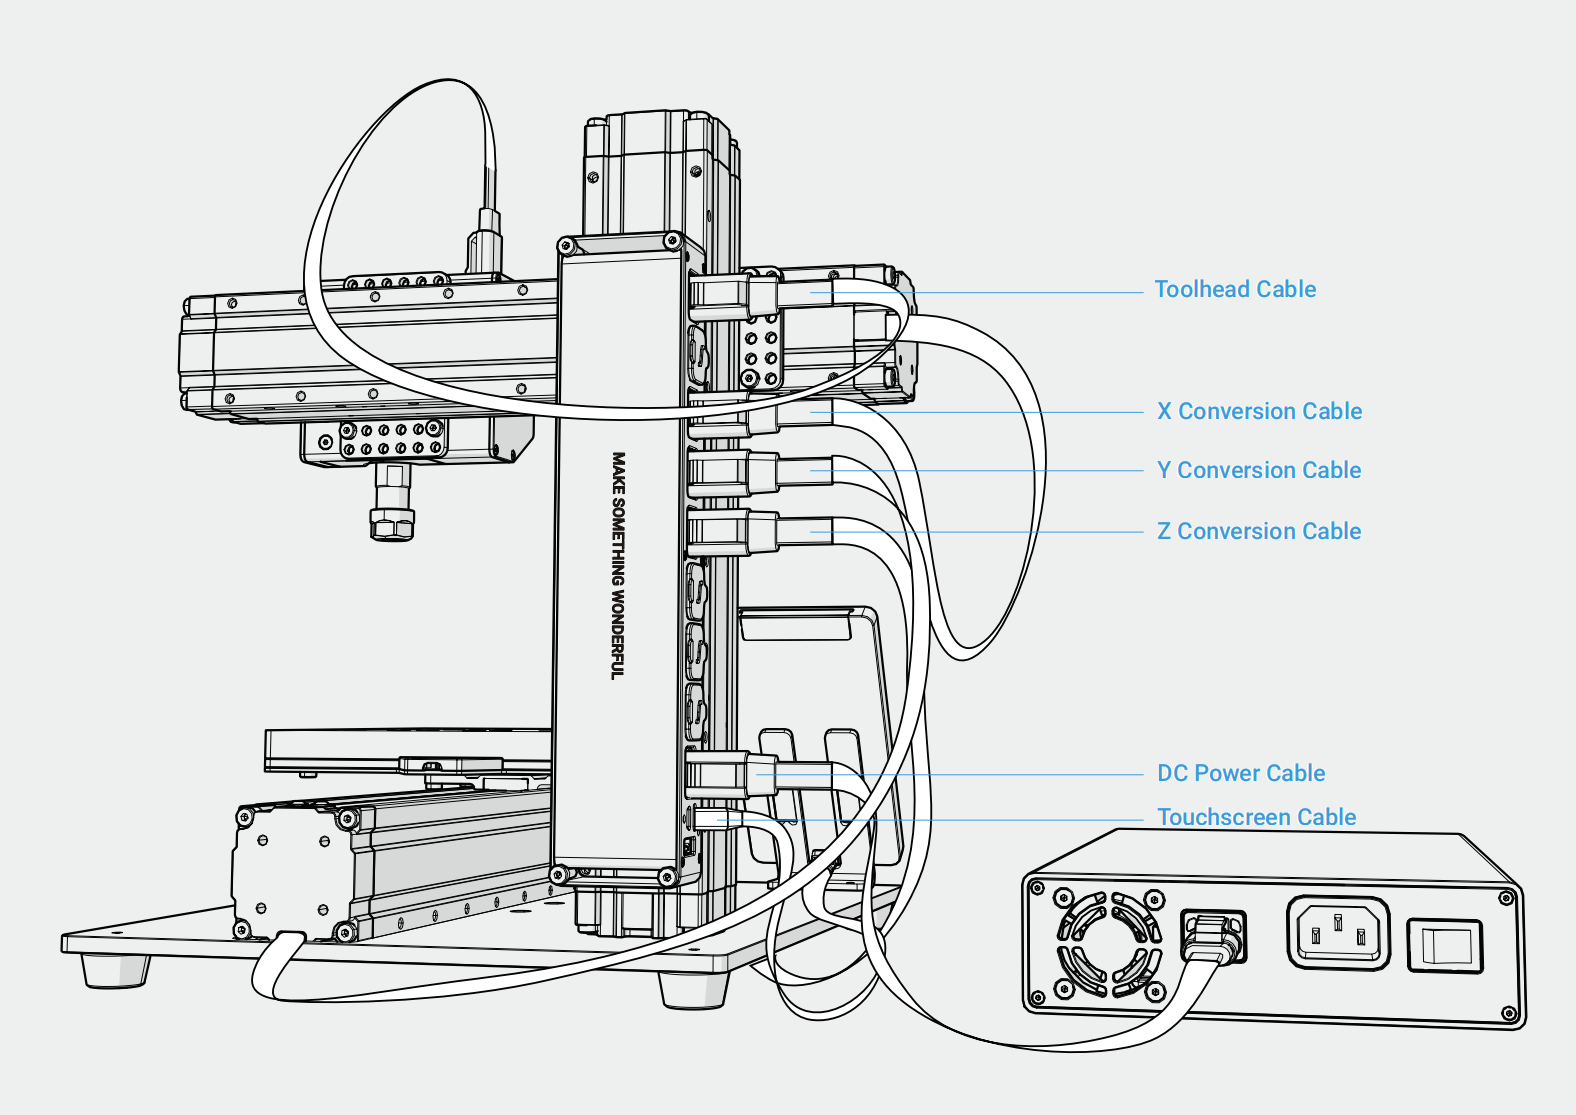
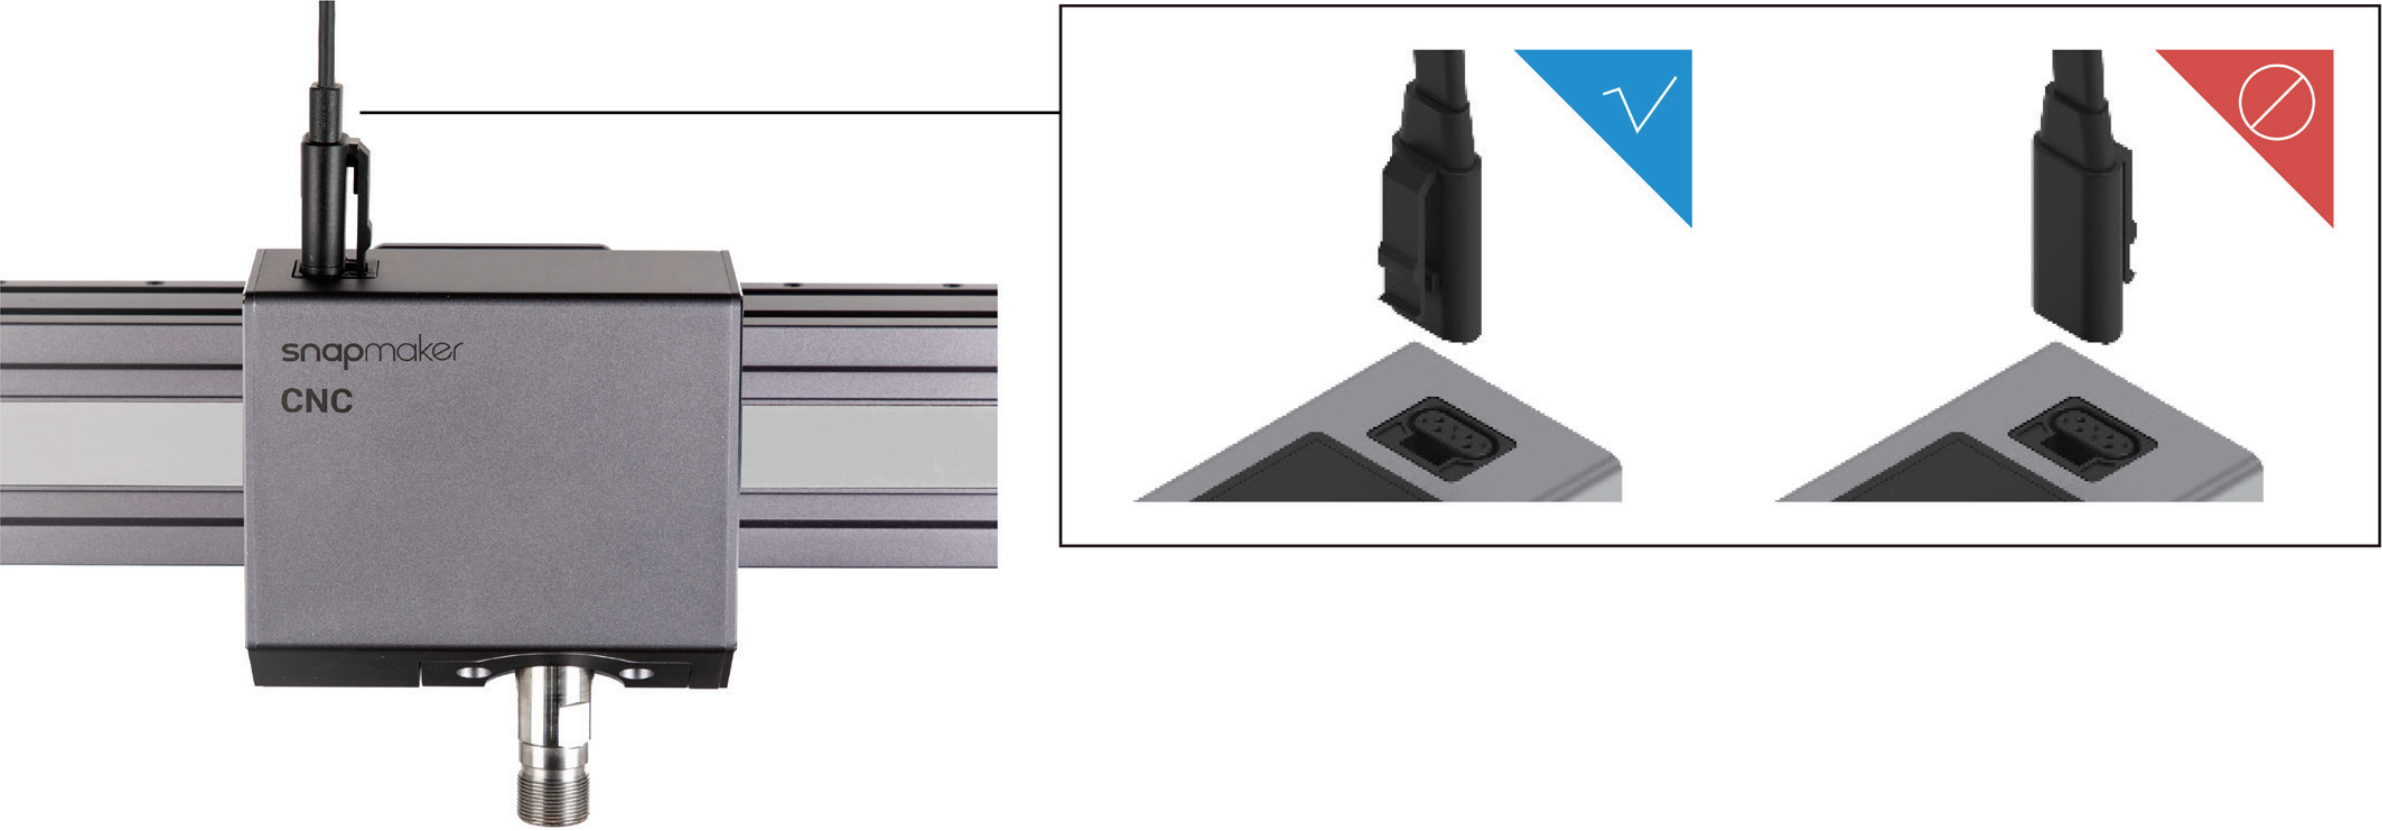
Check if every cable is plugged into the right socket in the right direction.
Into the Controller (A150)
Into the Controller (A250/A250T/A350/A350T)
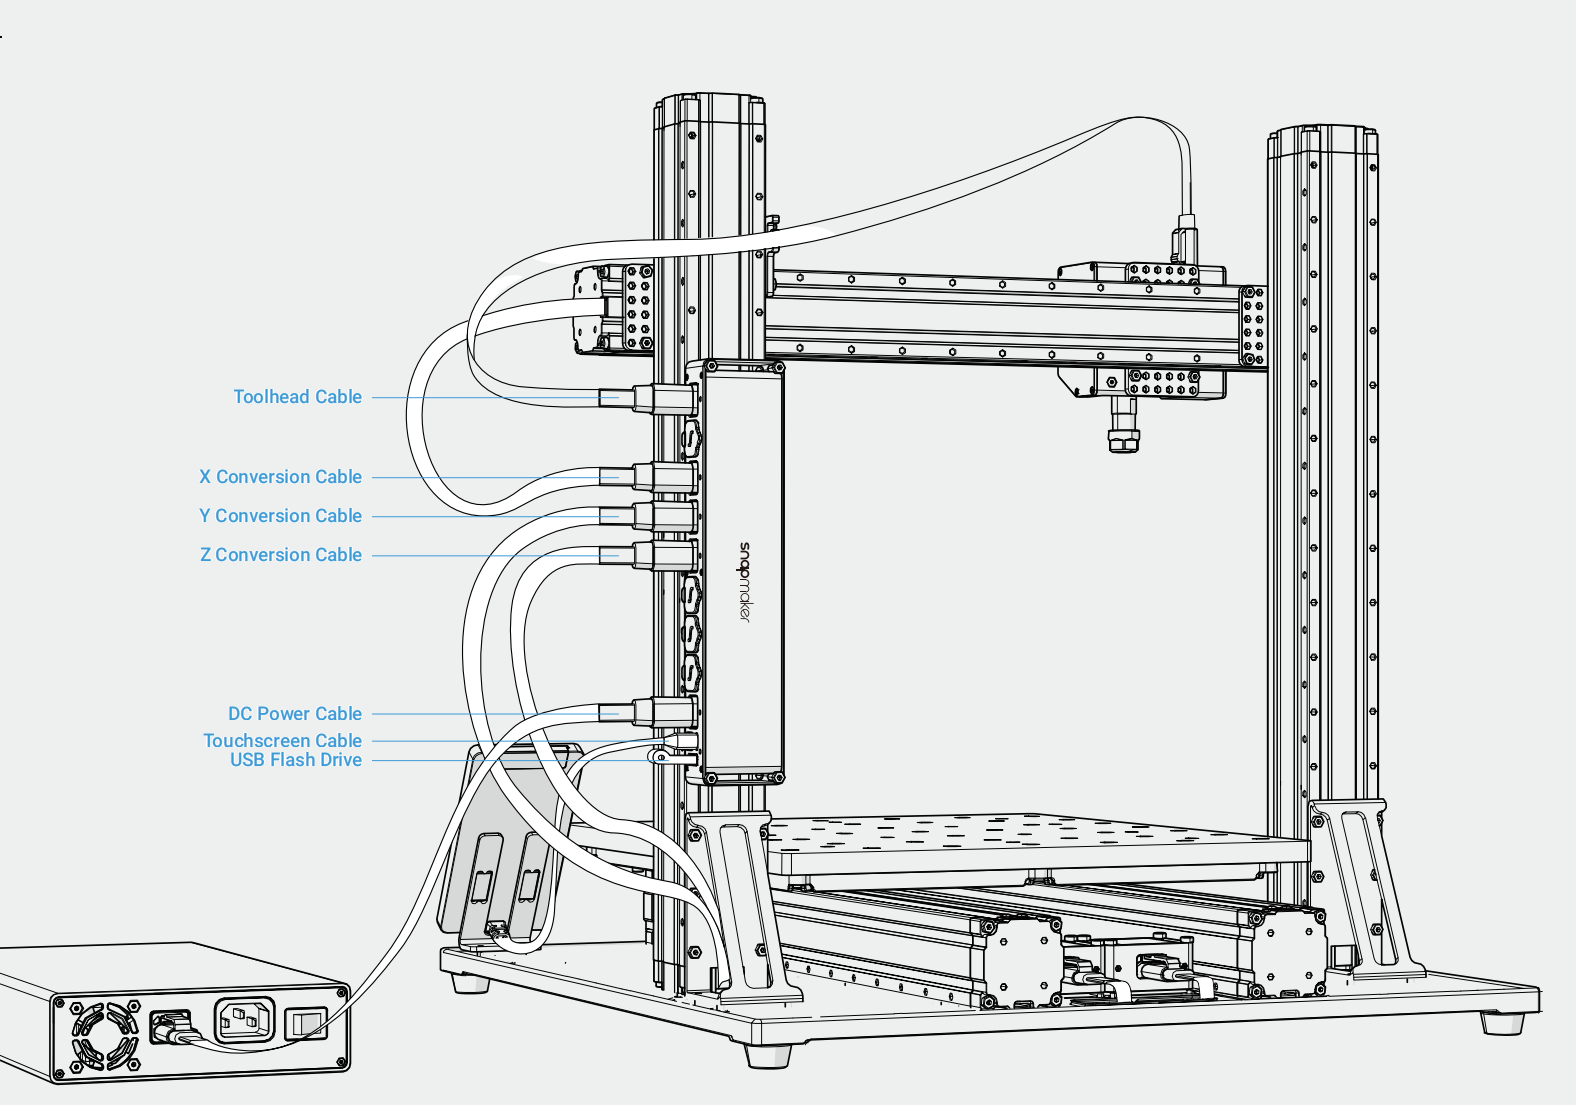
Into the Converters

Snapmaker 2.0 A150 has no Converters.
On the CNC Carving Module
¶ Check the Support Platform
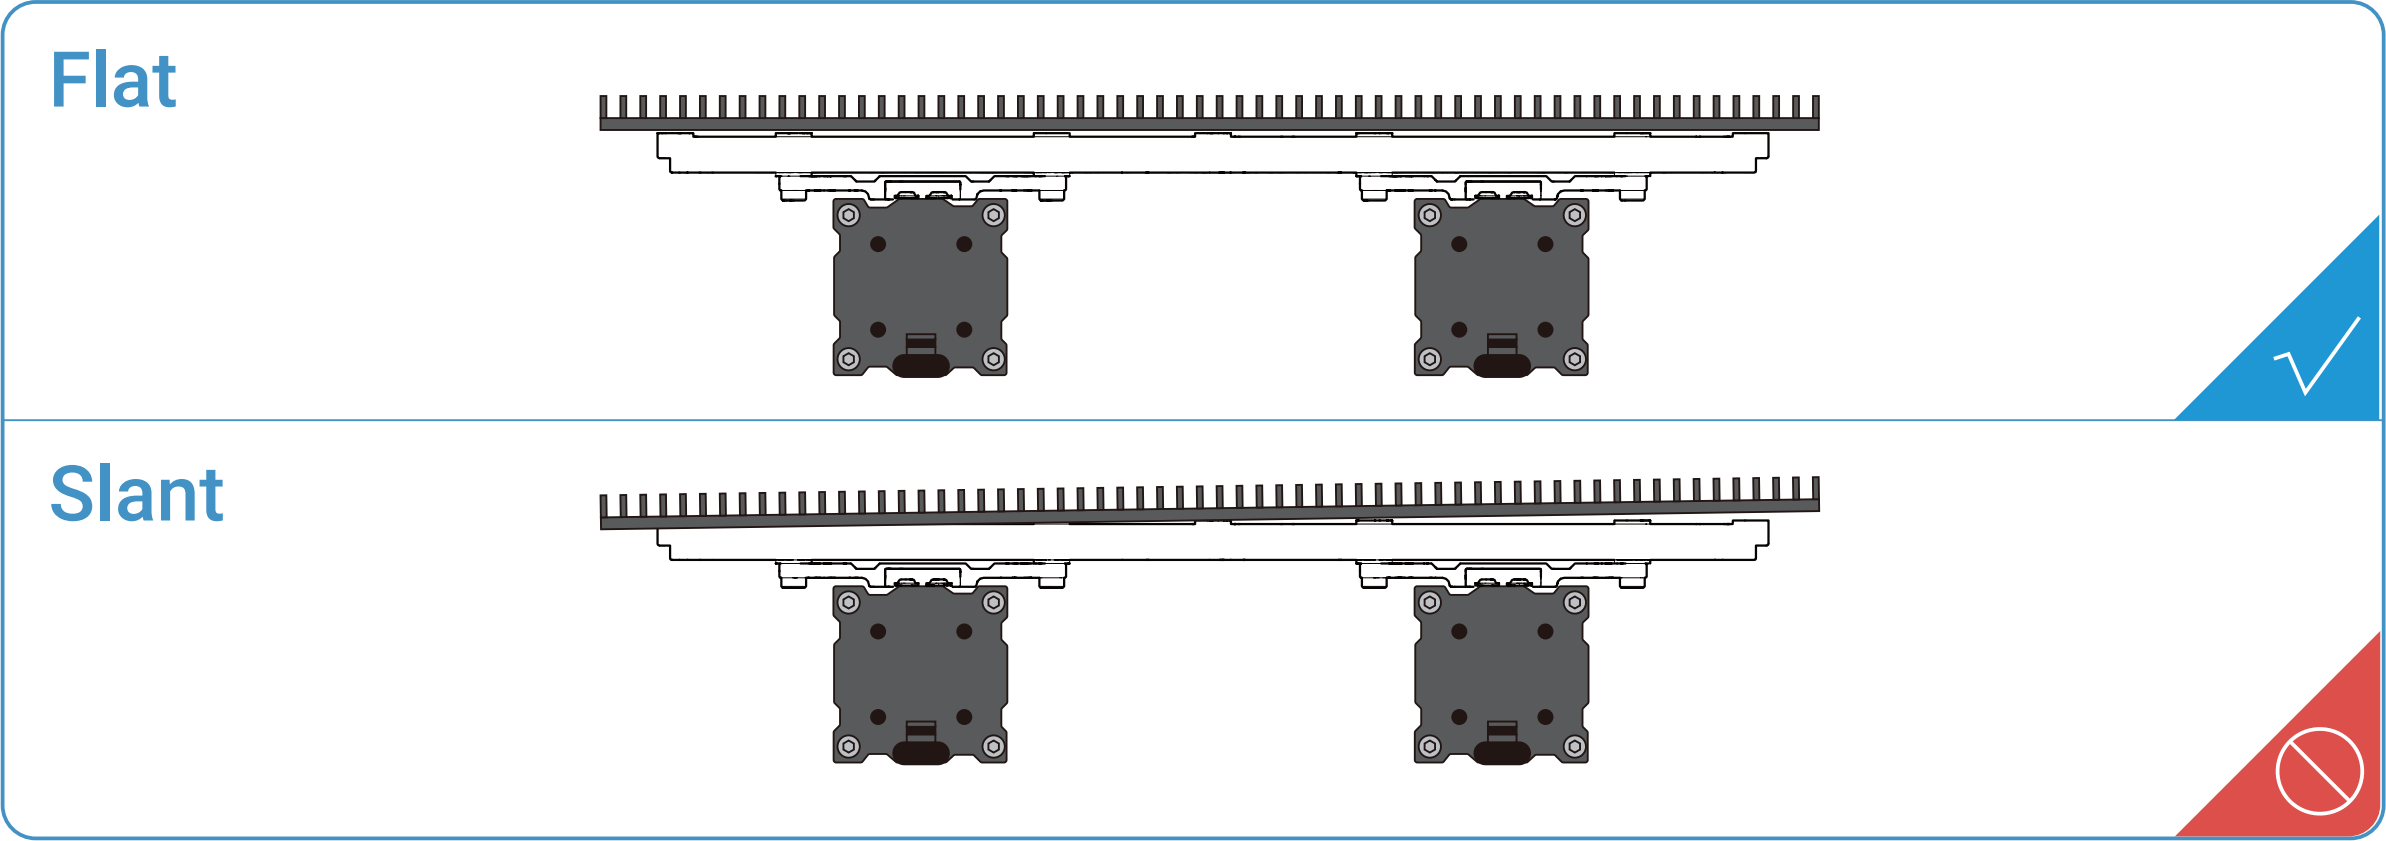
Check if the Support Platform is assembled in the correct direction. The front without screws should face up, and the rear with some screws faces down.

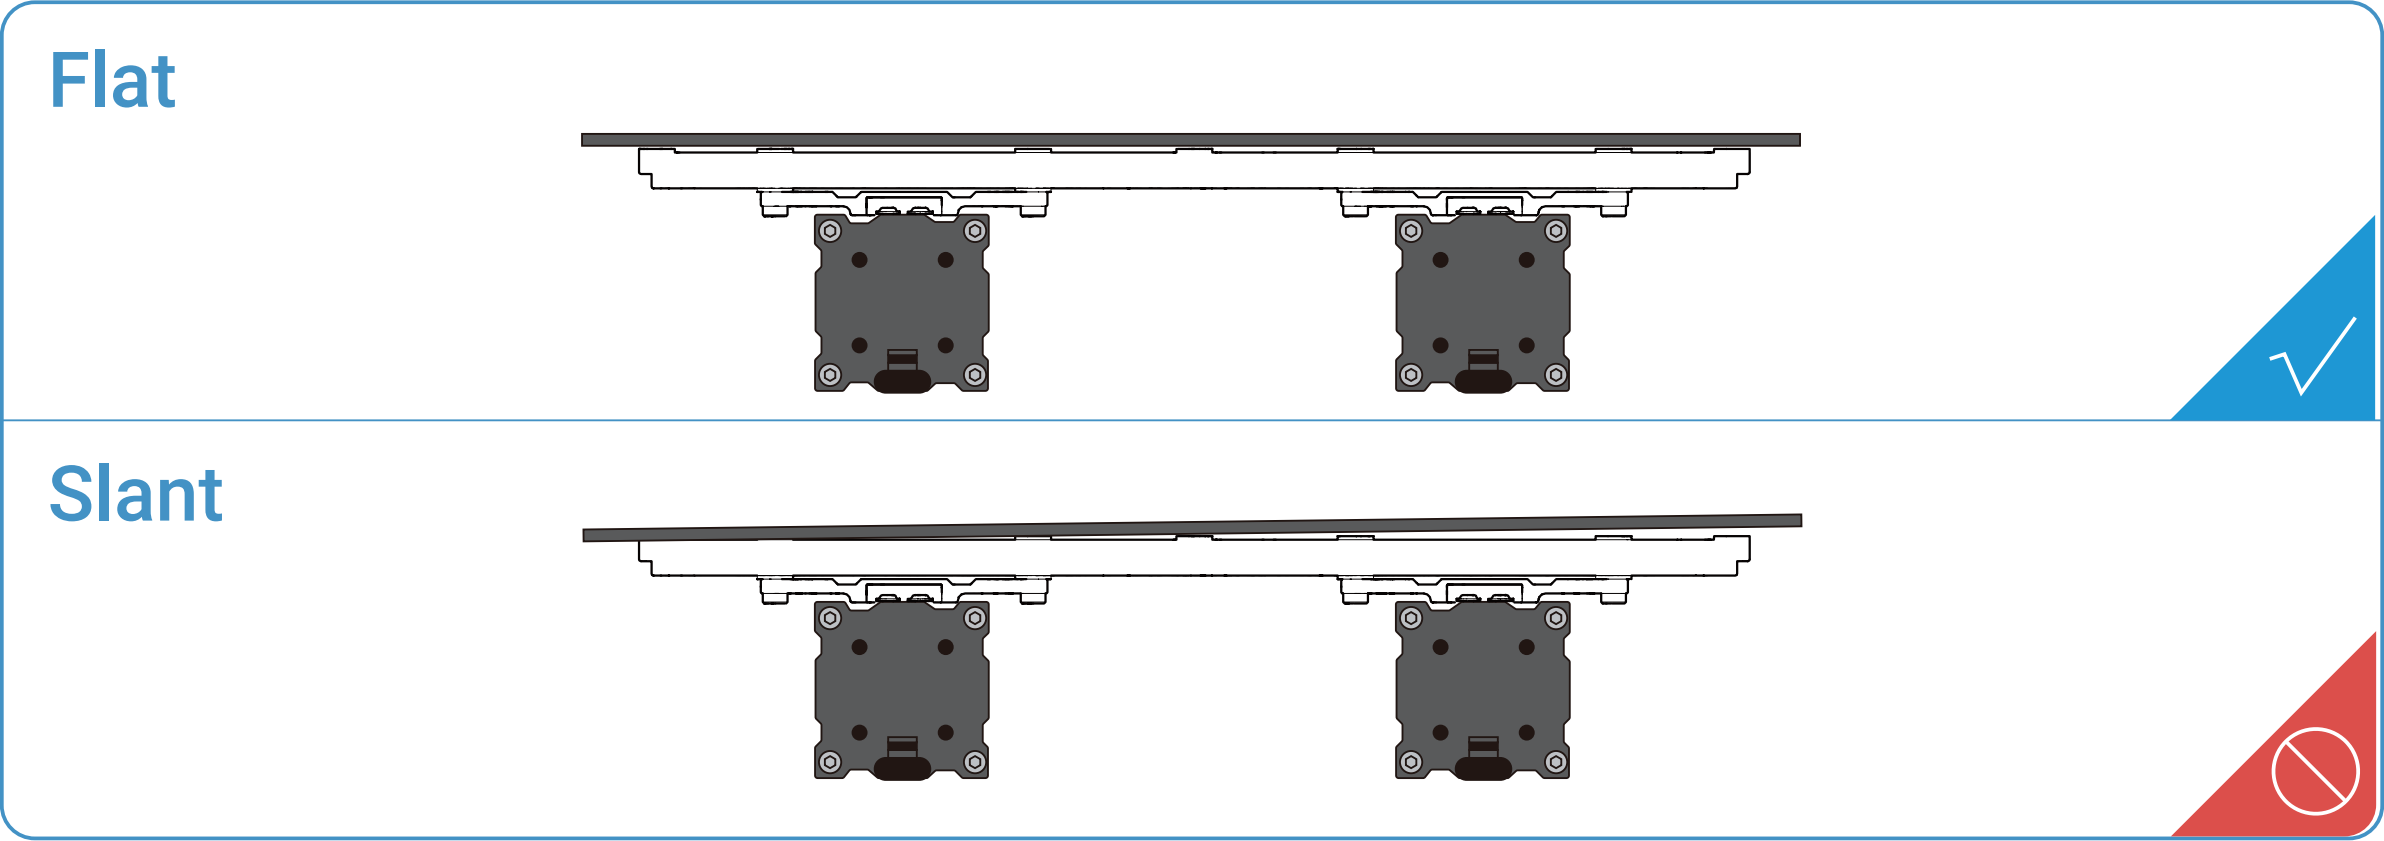
Check if the Support Platform is flat and stable, fully tightened with screws. If not, loosen all screws and reassemble the platform.

¶ Check the CNC Carving Platform
Check if the CNC Carving Platform is flat and stable, fully tightened with screws. If not, reassemble the CNC Carving Platform.
¶ Check the ER11 Nut and CNC Bit
Check if the ER11 collet securely clamps the CNC bit.
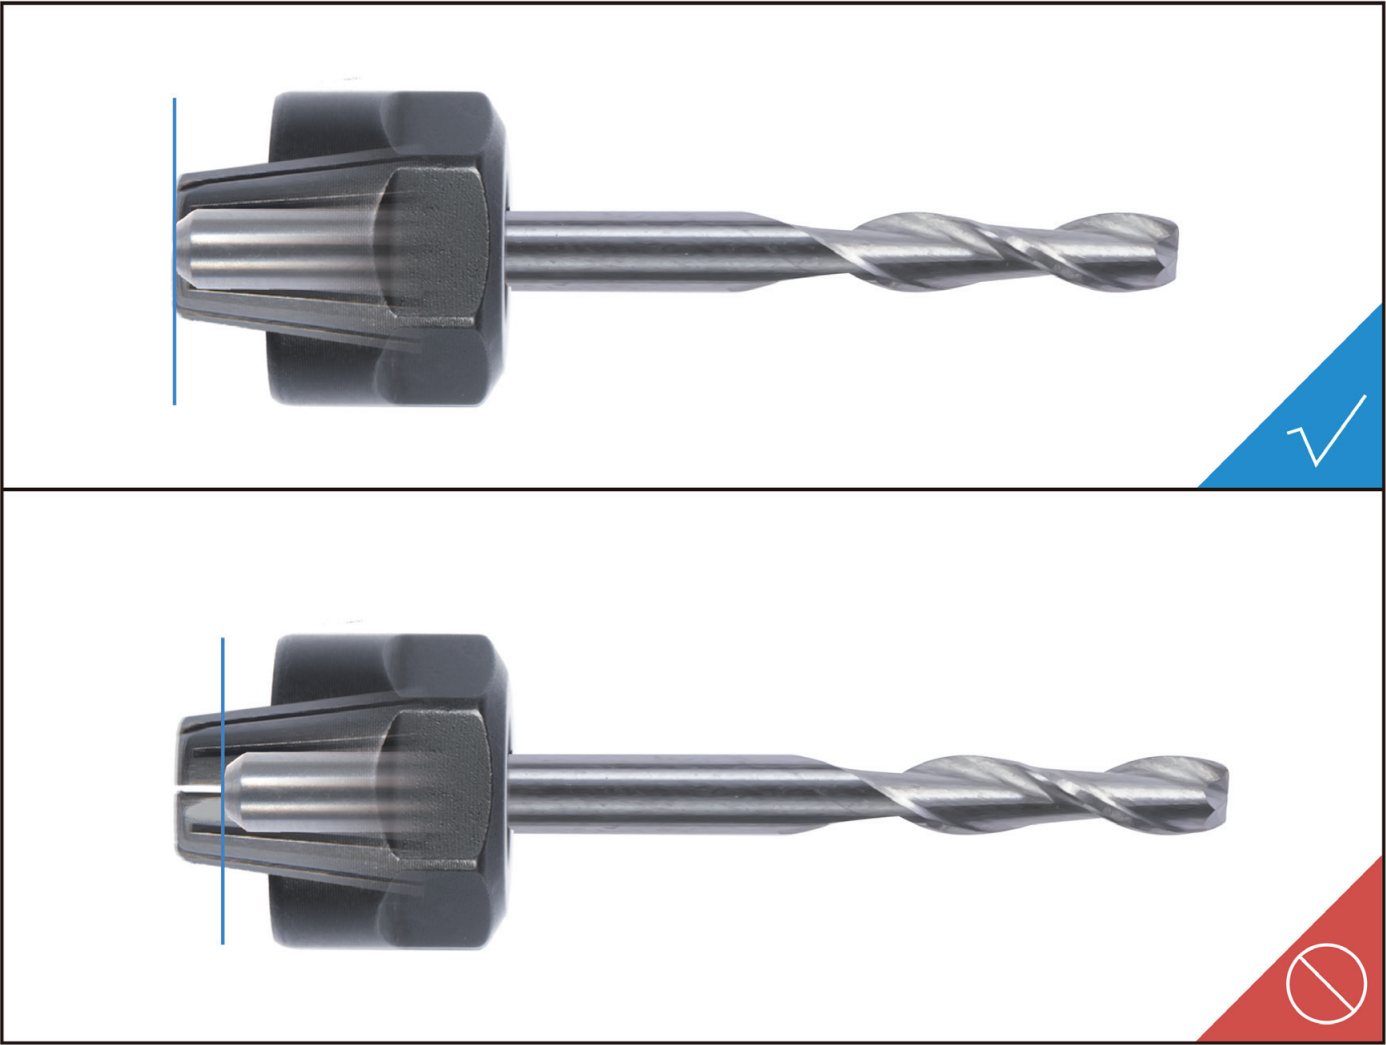
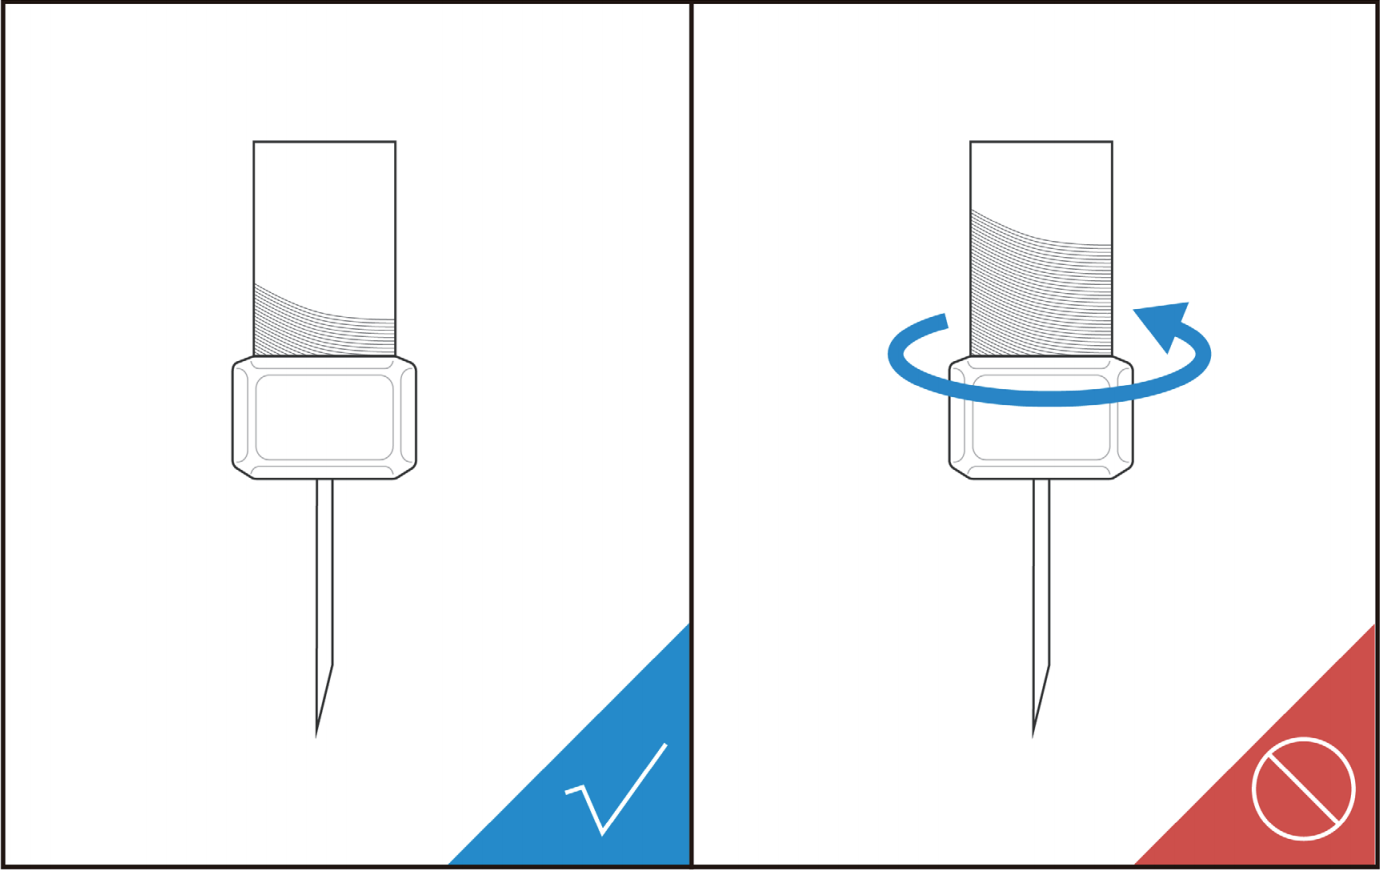
Check if the ER11 nut is tightened onto the CNC Module using open-end wrenches.
Check if the CNC bit is broken or worn out. If it is, replace the old CNC bit with a new one.