¶ Tools Required
-
H2.5 screwdriver
-
M4 × 8 screw
-
M4 × 14 screws (The illustration is highlighted in yellow.)
¶ Procedures
This guide takes 3D printing of 350 models as a demonstration, all steps demonstrated apply to 250 models.
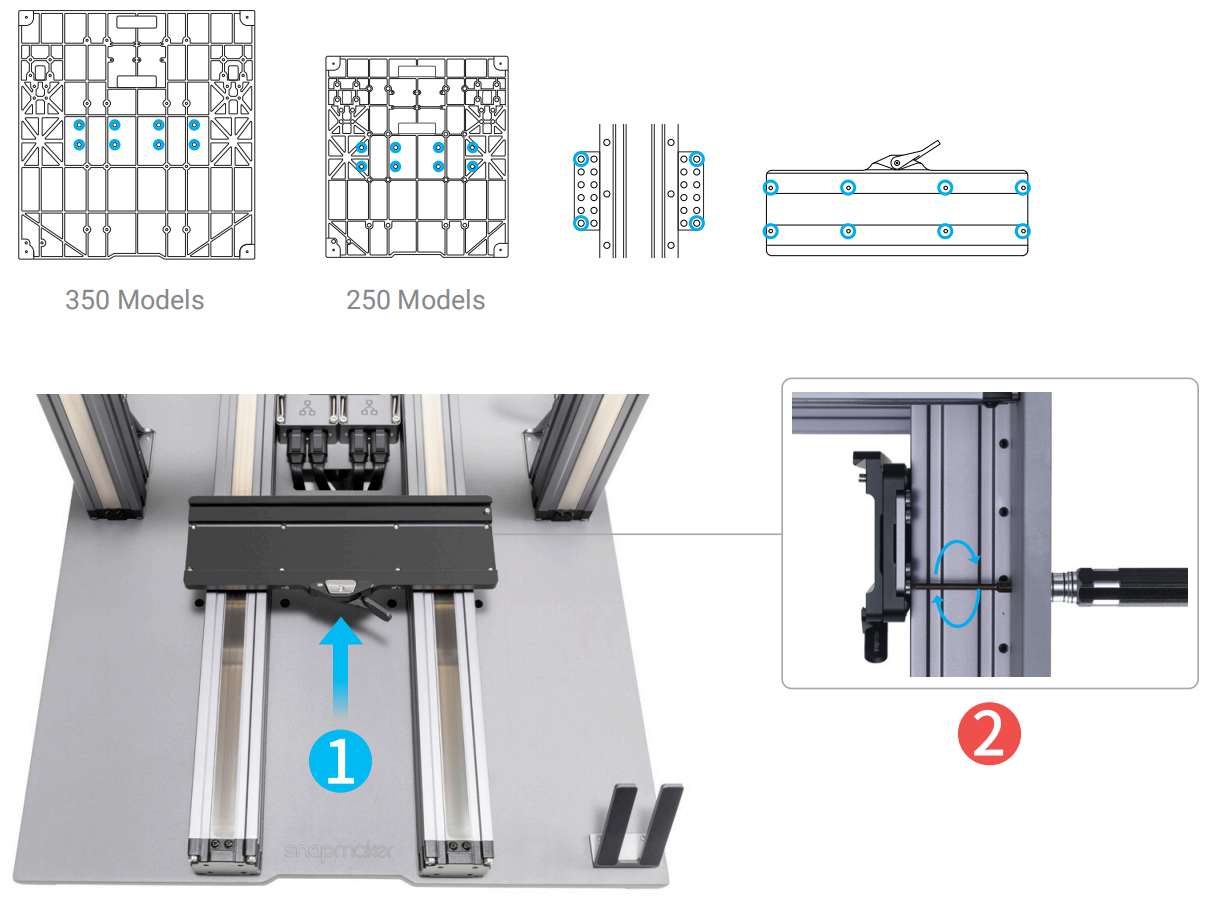
- Align the sliders with the screw holes on the base plate, then attach the bracing plates to the Y axes.
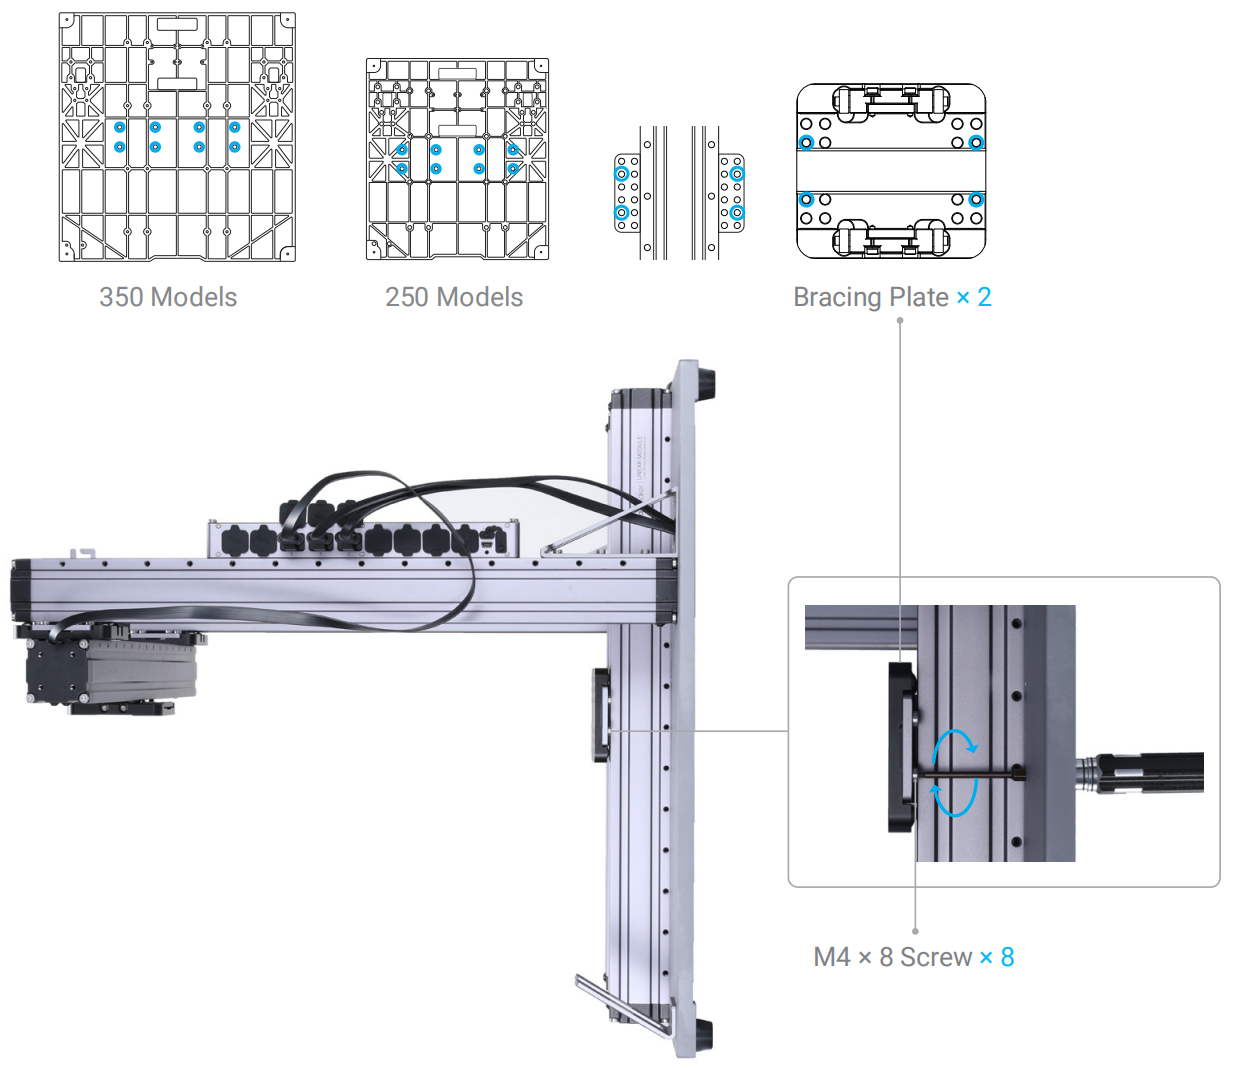
Use the original M4 × 8 screws that came with the machine.
To continue attaching the support platform, select to read the corresponding content in accordance with whether the quick swap kit will be installed or not.
- Attach the platform bracket to the bracing plates. Do not fully tighten the screws until Step 4.
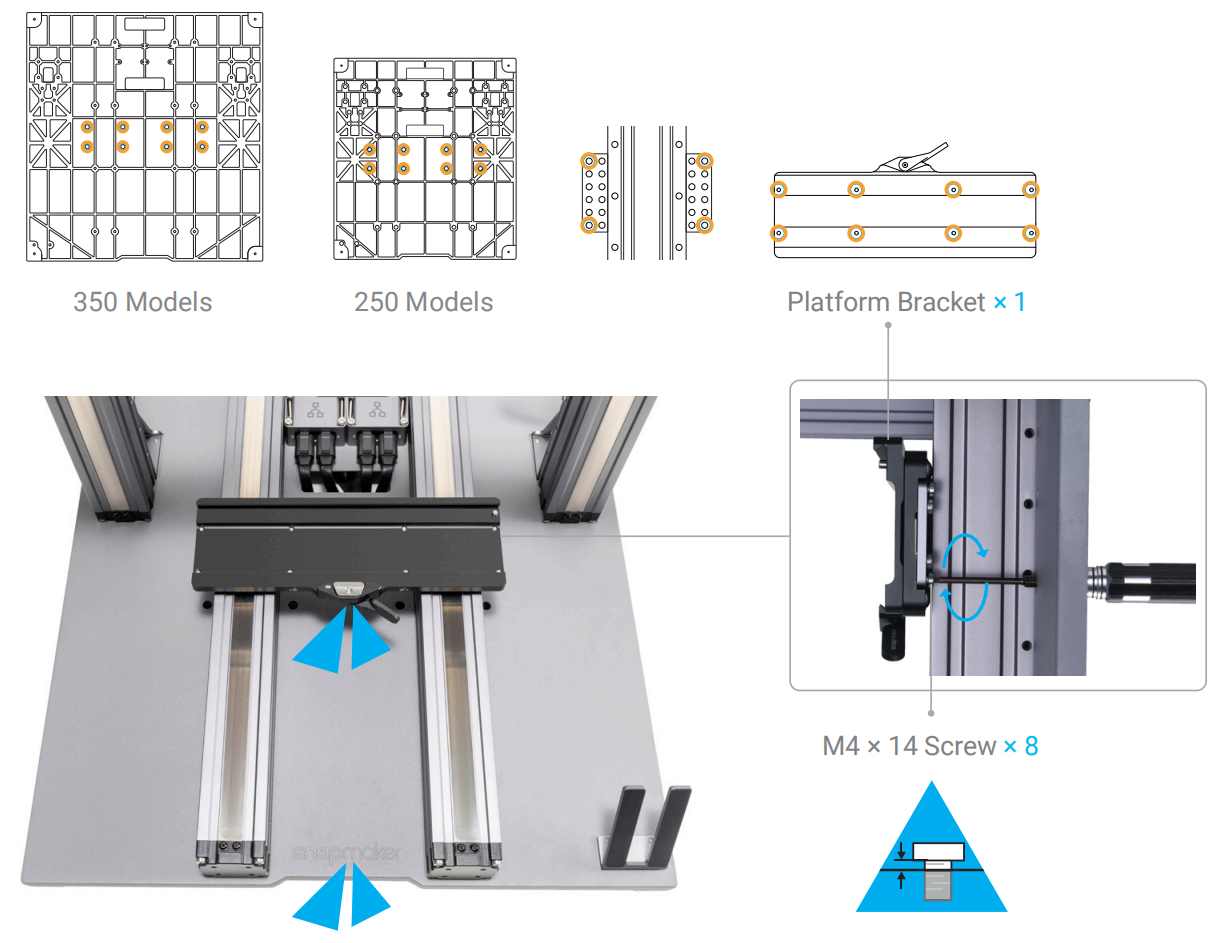
- To ensure that the Y-axis sliders are aligning with each other, move the platform bracket to the farthest end from the middle.
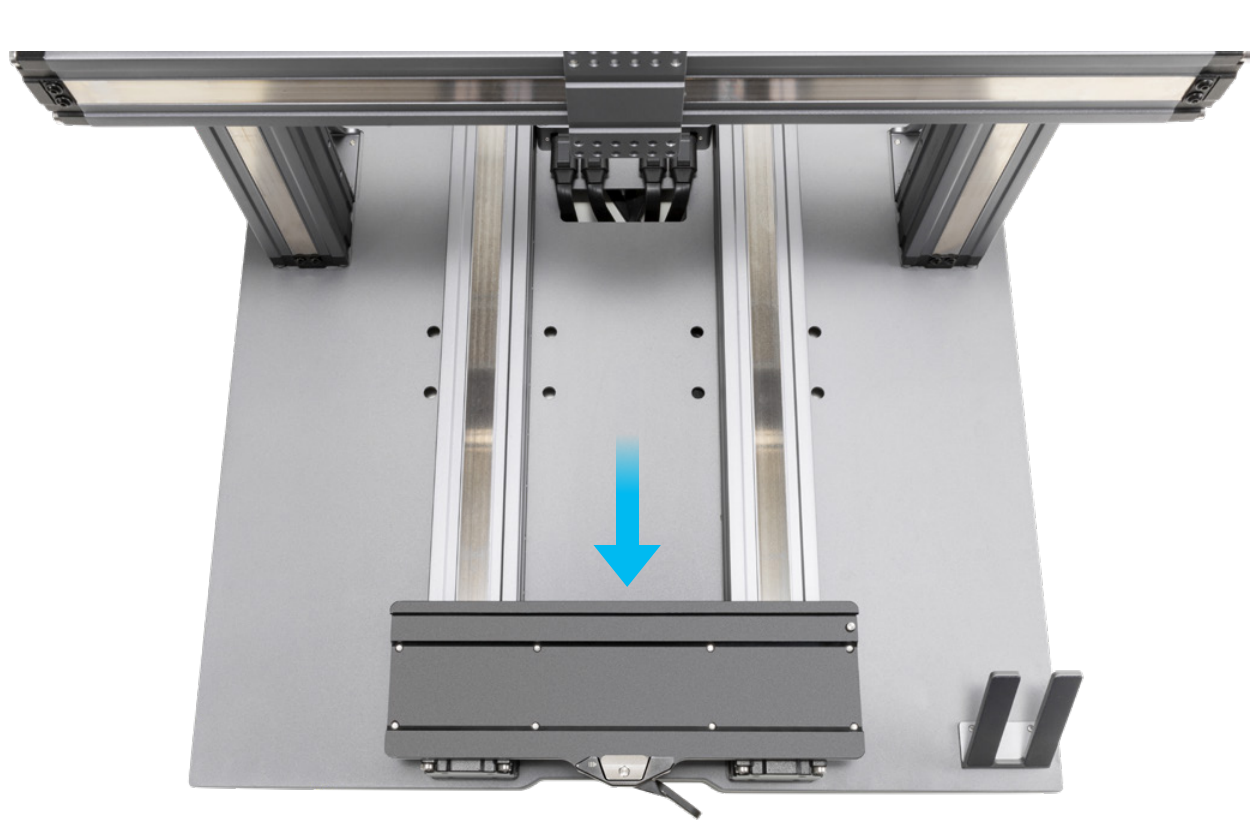
- From the middle, align the platform bracket with the screw holes on the base plate, then fully tighten the screws.
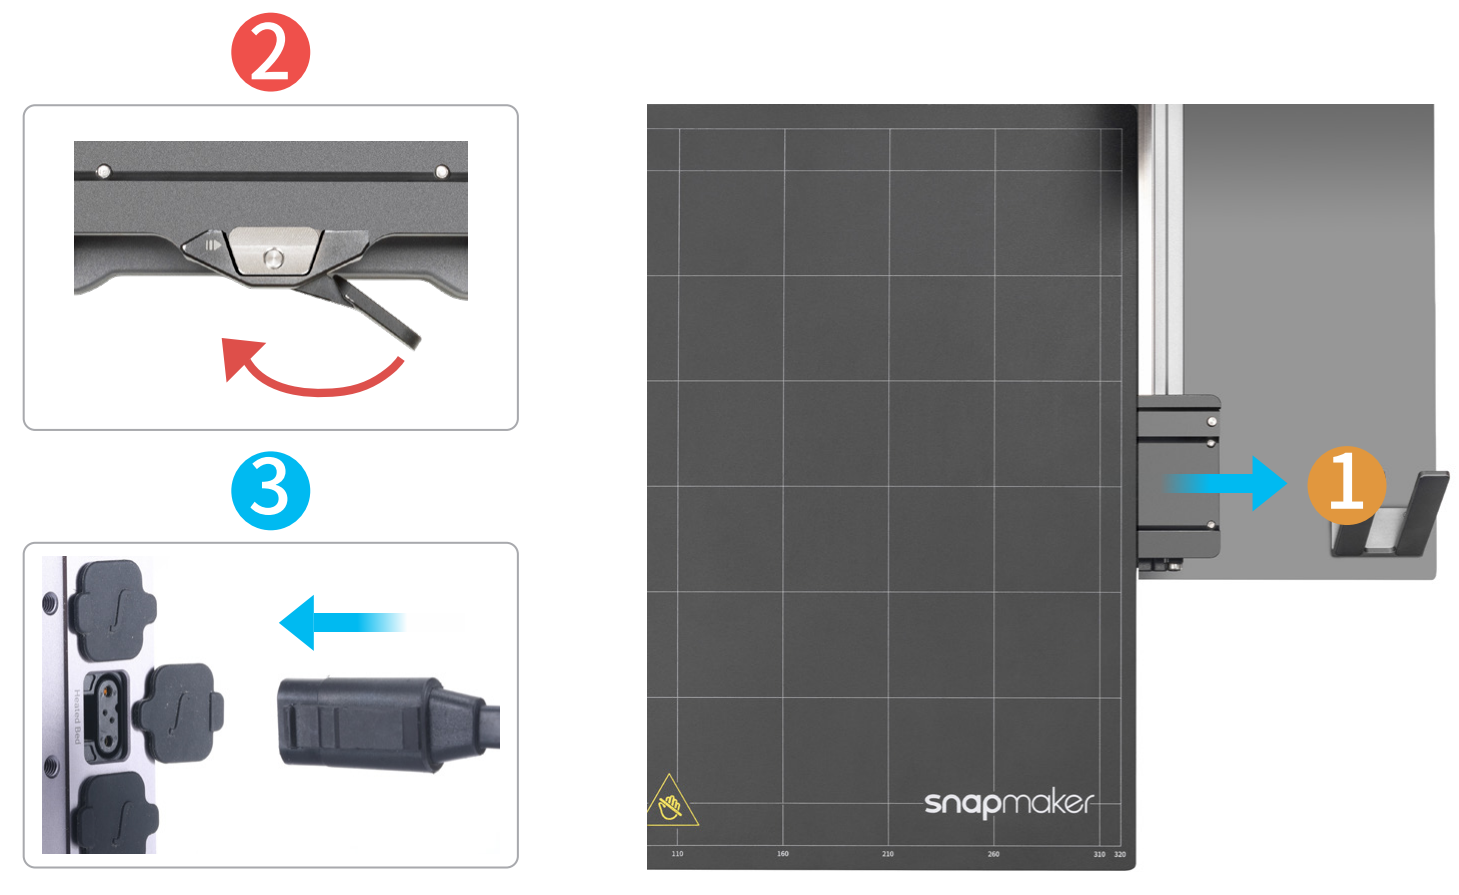
- From the middle, move the platform bracket to the illustrated position.

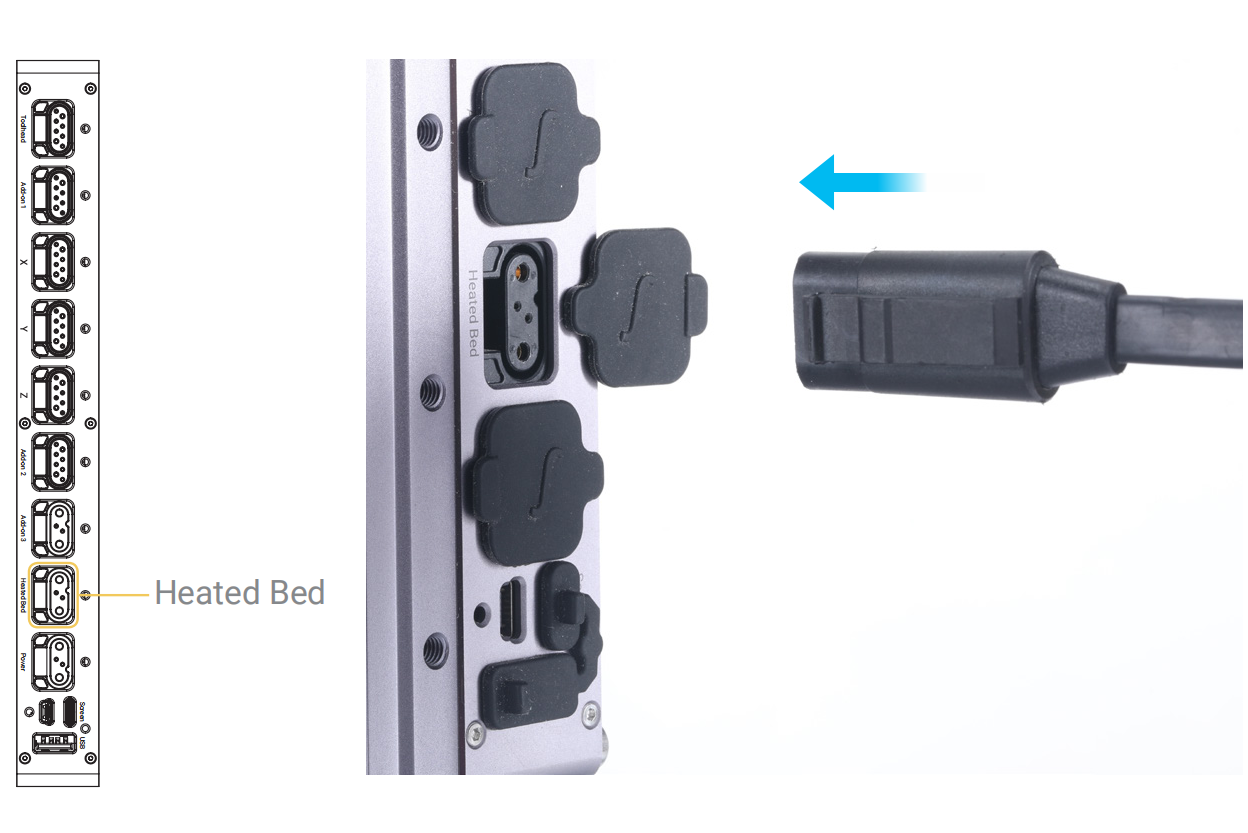
- Slide the support platform into the platform bracket, tighten the handle of the bracket, and then connect the heated bed with the controller.
- Attach the support platform to the bracing plates. Do not fully tighten the screws until Step 4.
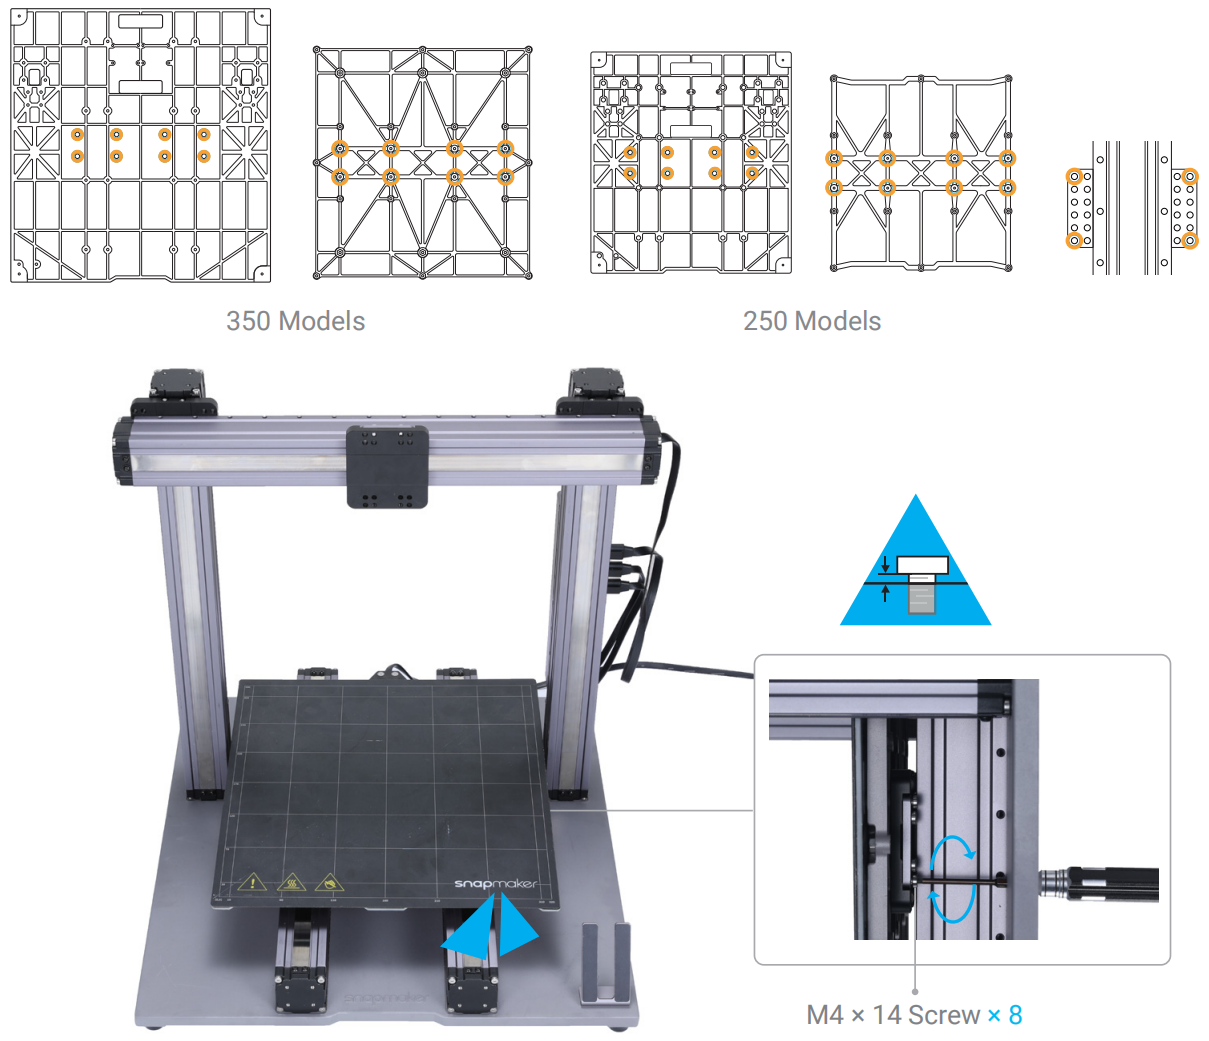
- To ensure that the Y-axis sliders are aligning with each other, move the support platform to the farthest end from the middle.
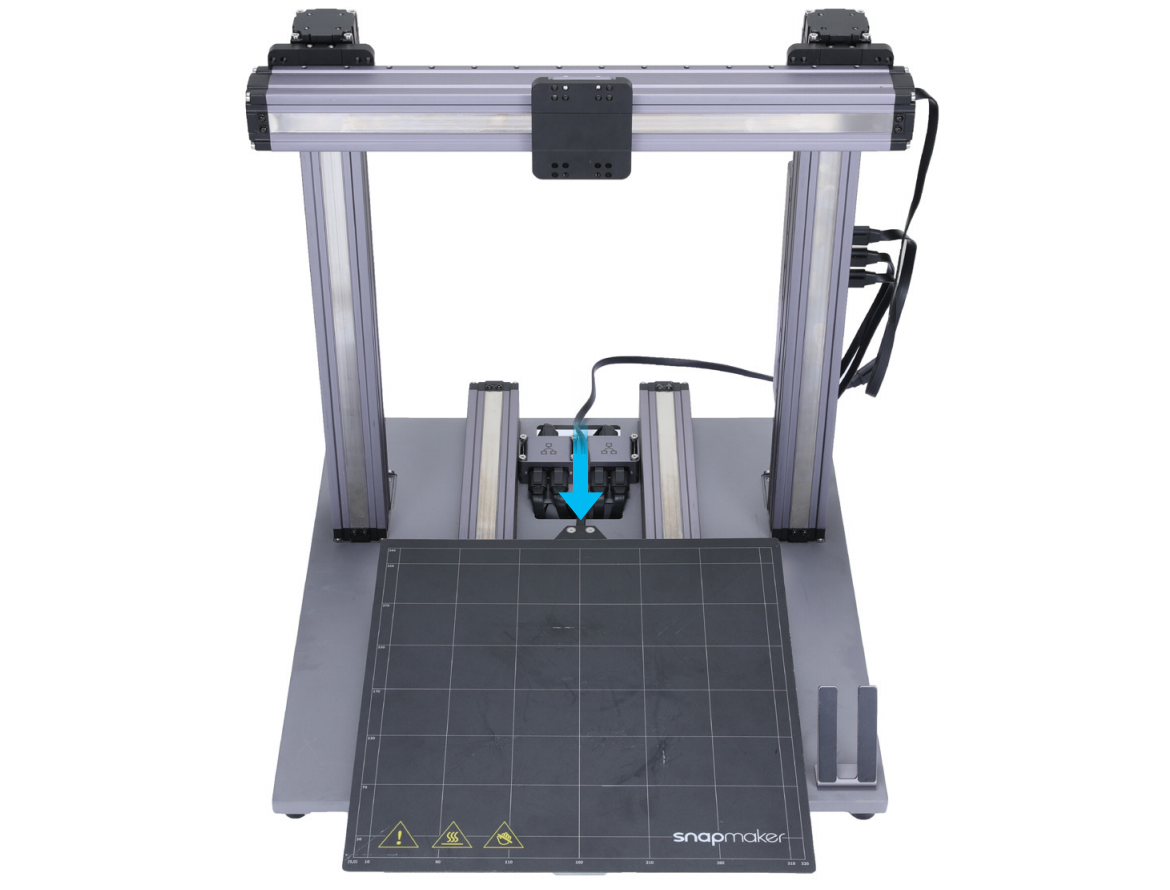
- From the middle, align the support platform with the screw holes on the base plate, then fully tighten the screws.
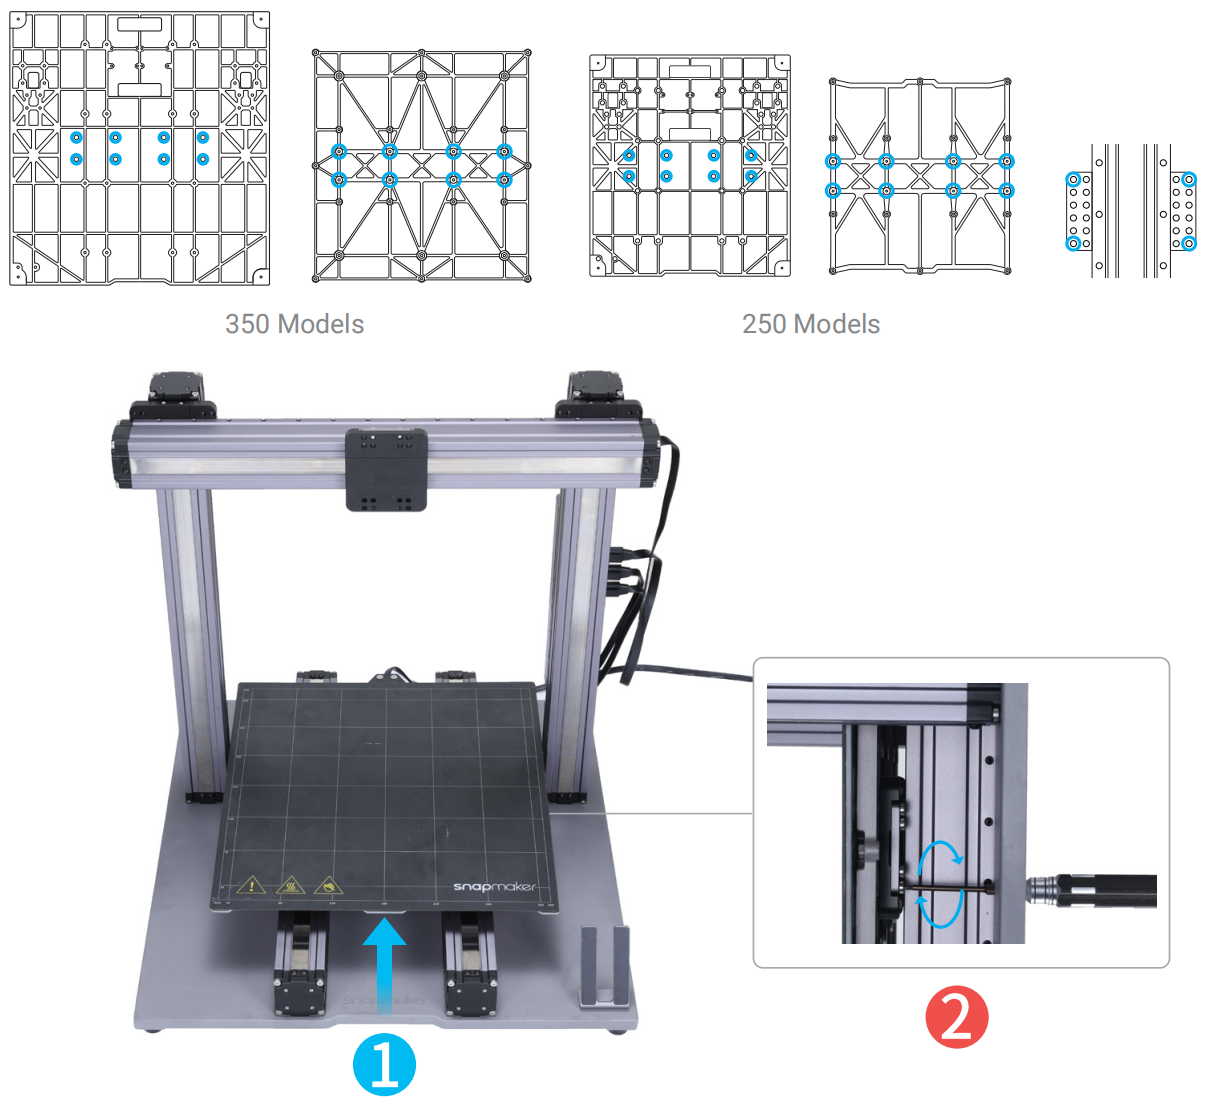
- Connect the heated bed with the controller.
