During the laser engraving and cutting process, if you feel that the lens hood is too far from the surface of the material to produce the best light-blocking effect, you can follow the steps below to adjust the settings for the lens hood.
¶ Tools Required
- A piece of blank paper
¶ Procedures
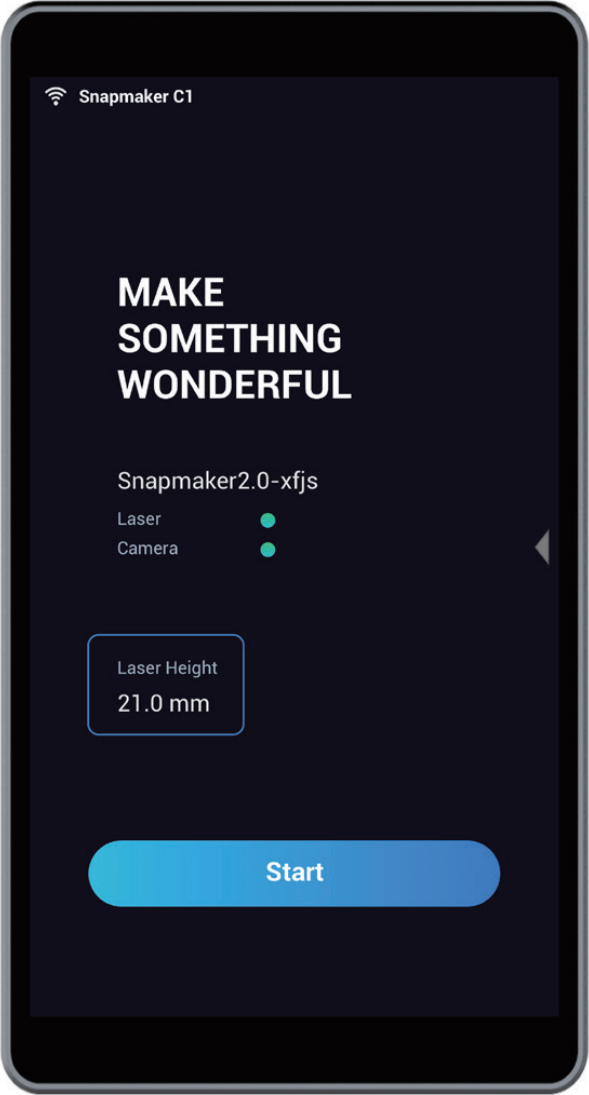
- Read the current value of the Laser Height displayed on the Home Screen of the Touchscreen. Here we use 21.0 mm as an example.
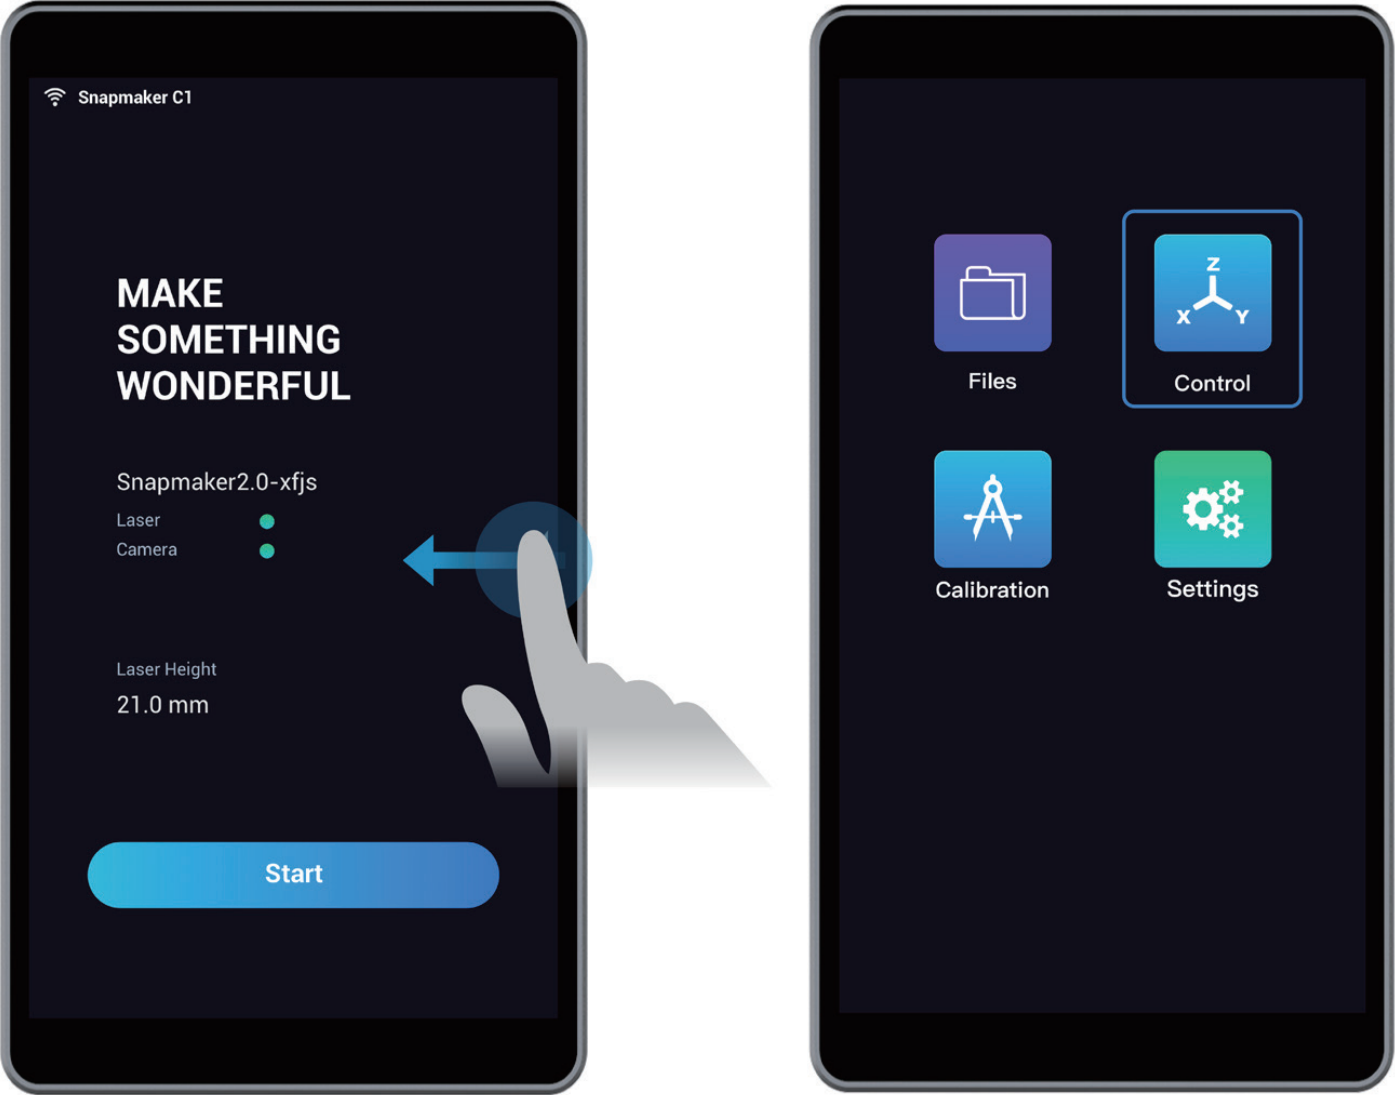
- Swipe left and select Control.
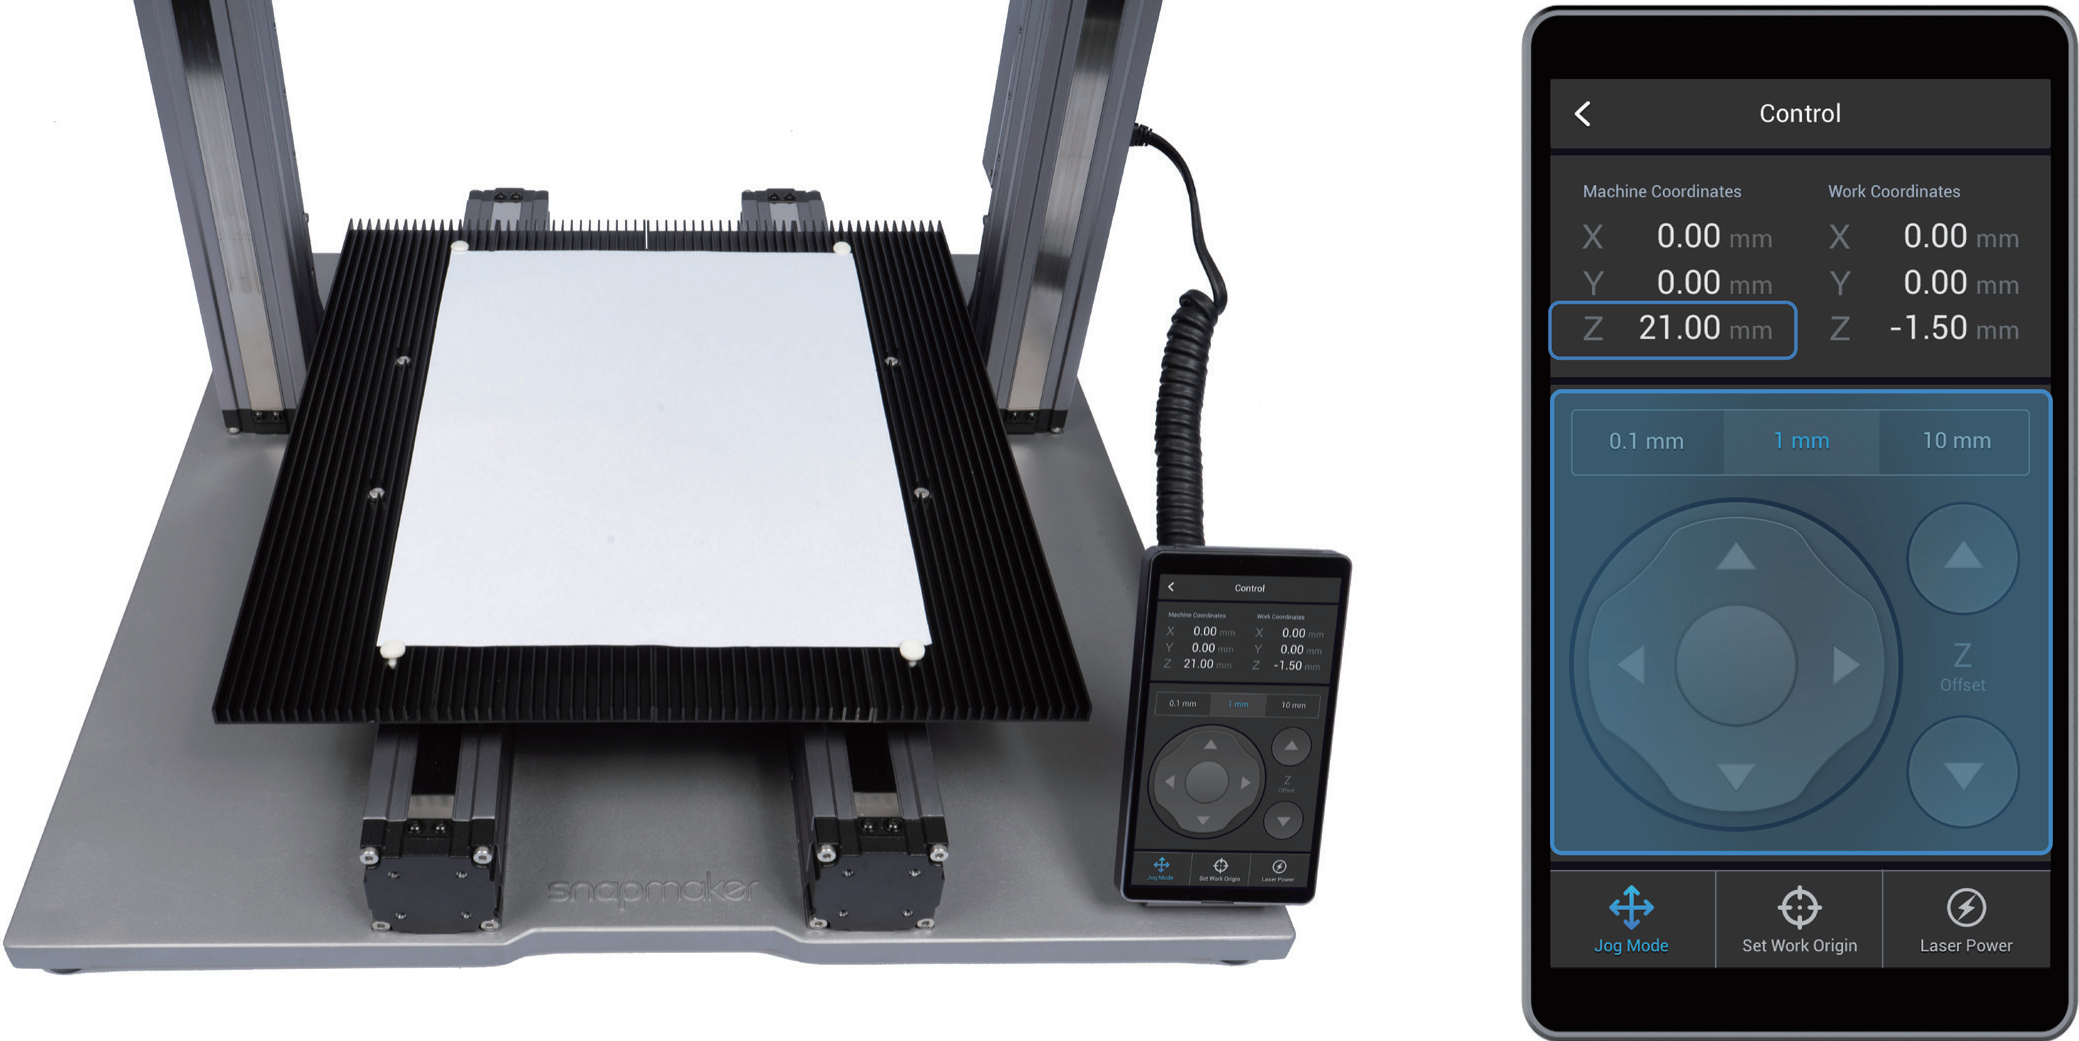
- Use a blank piece of paper, and use X-, X+, Y-, Y+, Z-, or Z+ to move the Laser Module to the top of the paper. The machine coordinate of the Z Axis should match the value of the laser height, which is 21.0 mm.
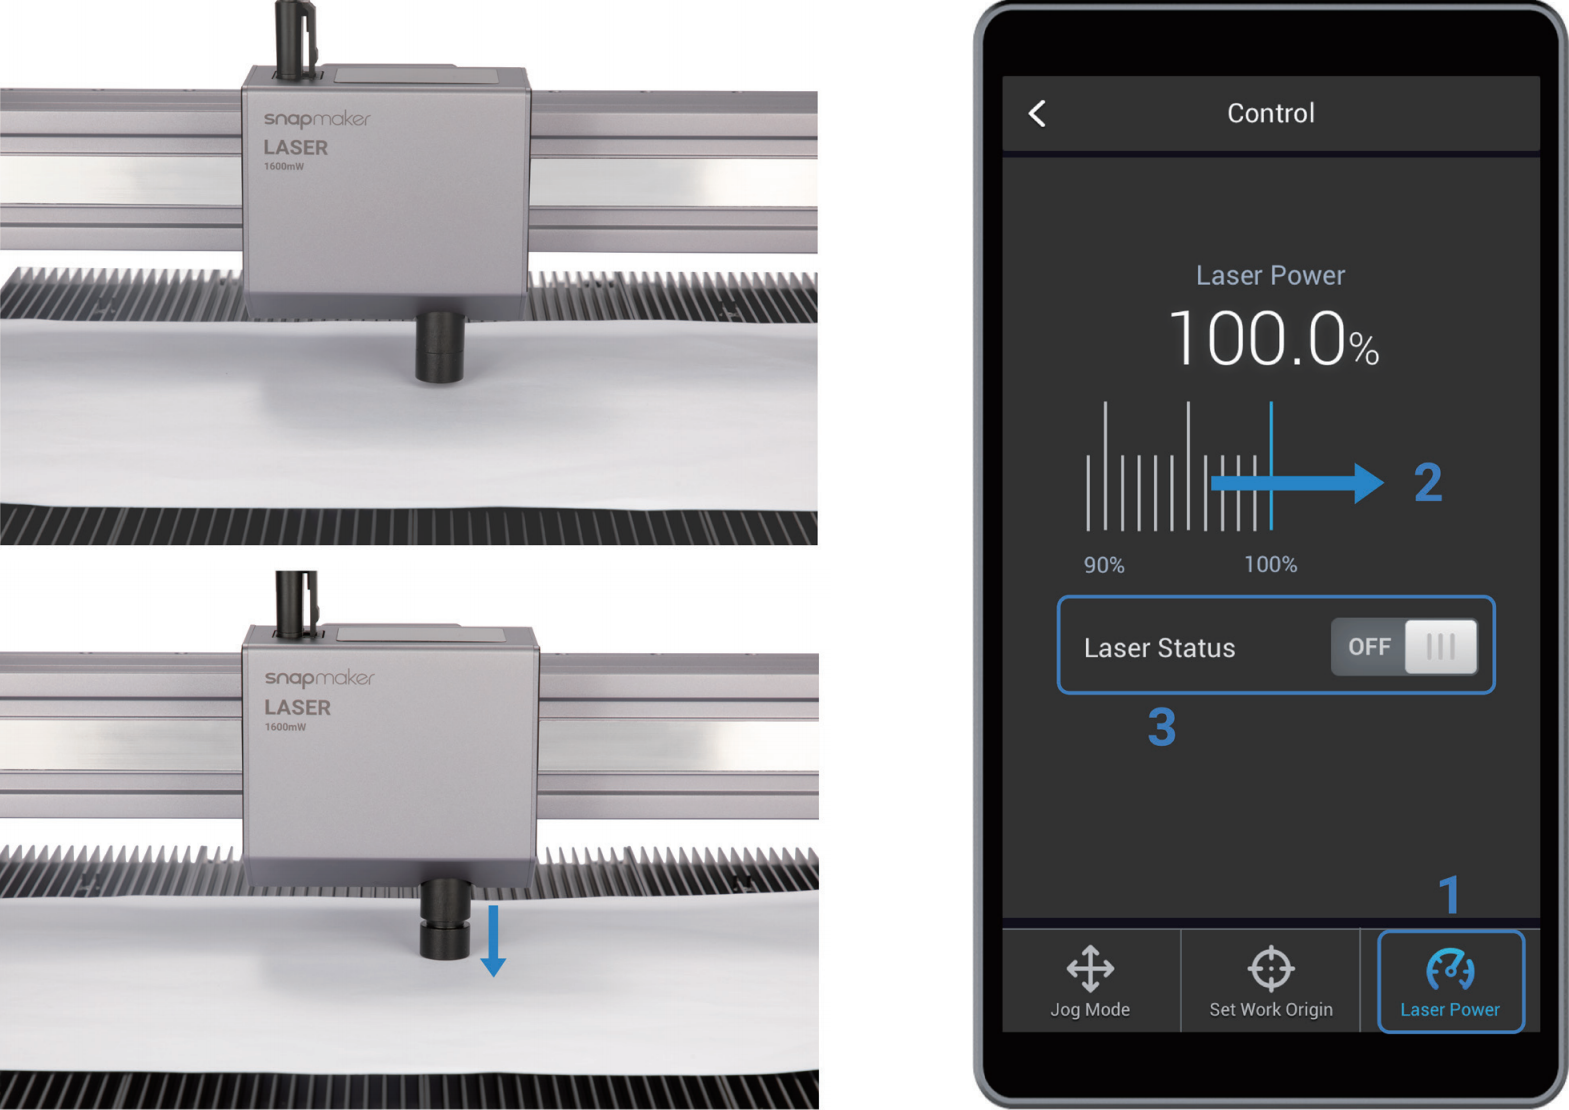
- Turn the lens hood until it is 1 mm away from the paper. If you want to check the light-blocking effect, please do so after you put on your Laser Safety Goggles and tap Laser Power. Set a relatively small value (e.g. 1%) for Laser Power and turn on the laser.