¶ Used Symbols
¶ Before You Start
Make sure the machine is powered off.
Do NOT plug or unplug any cables when the machine is powered on.
¶ Procedures
¶ 3D Printing
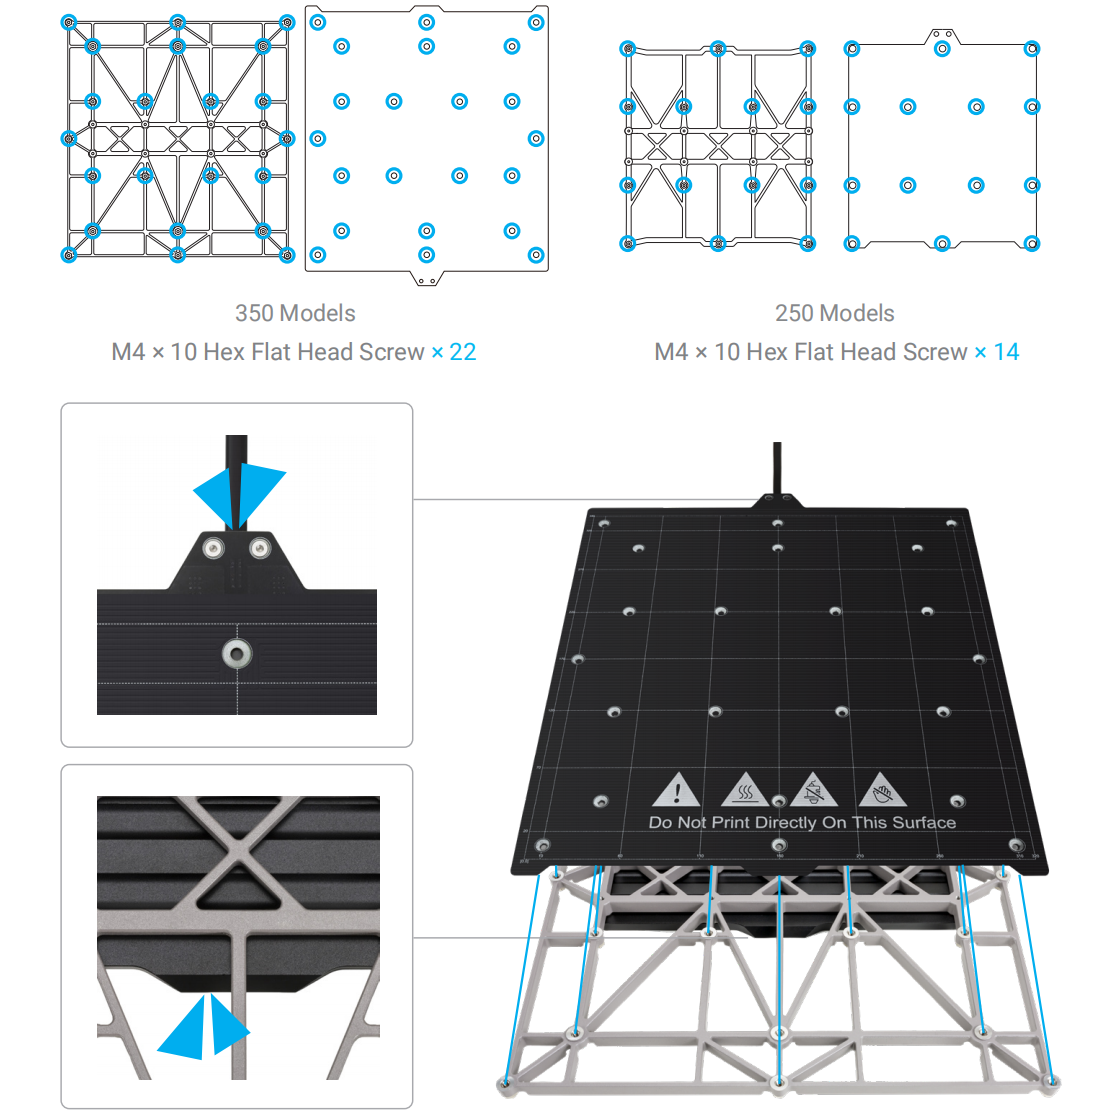
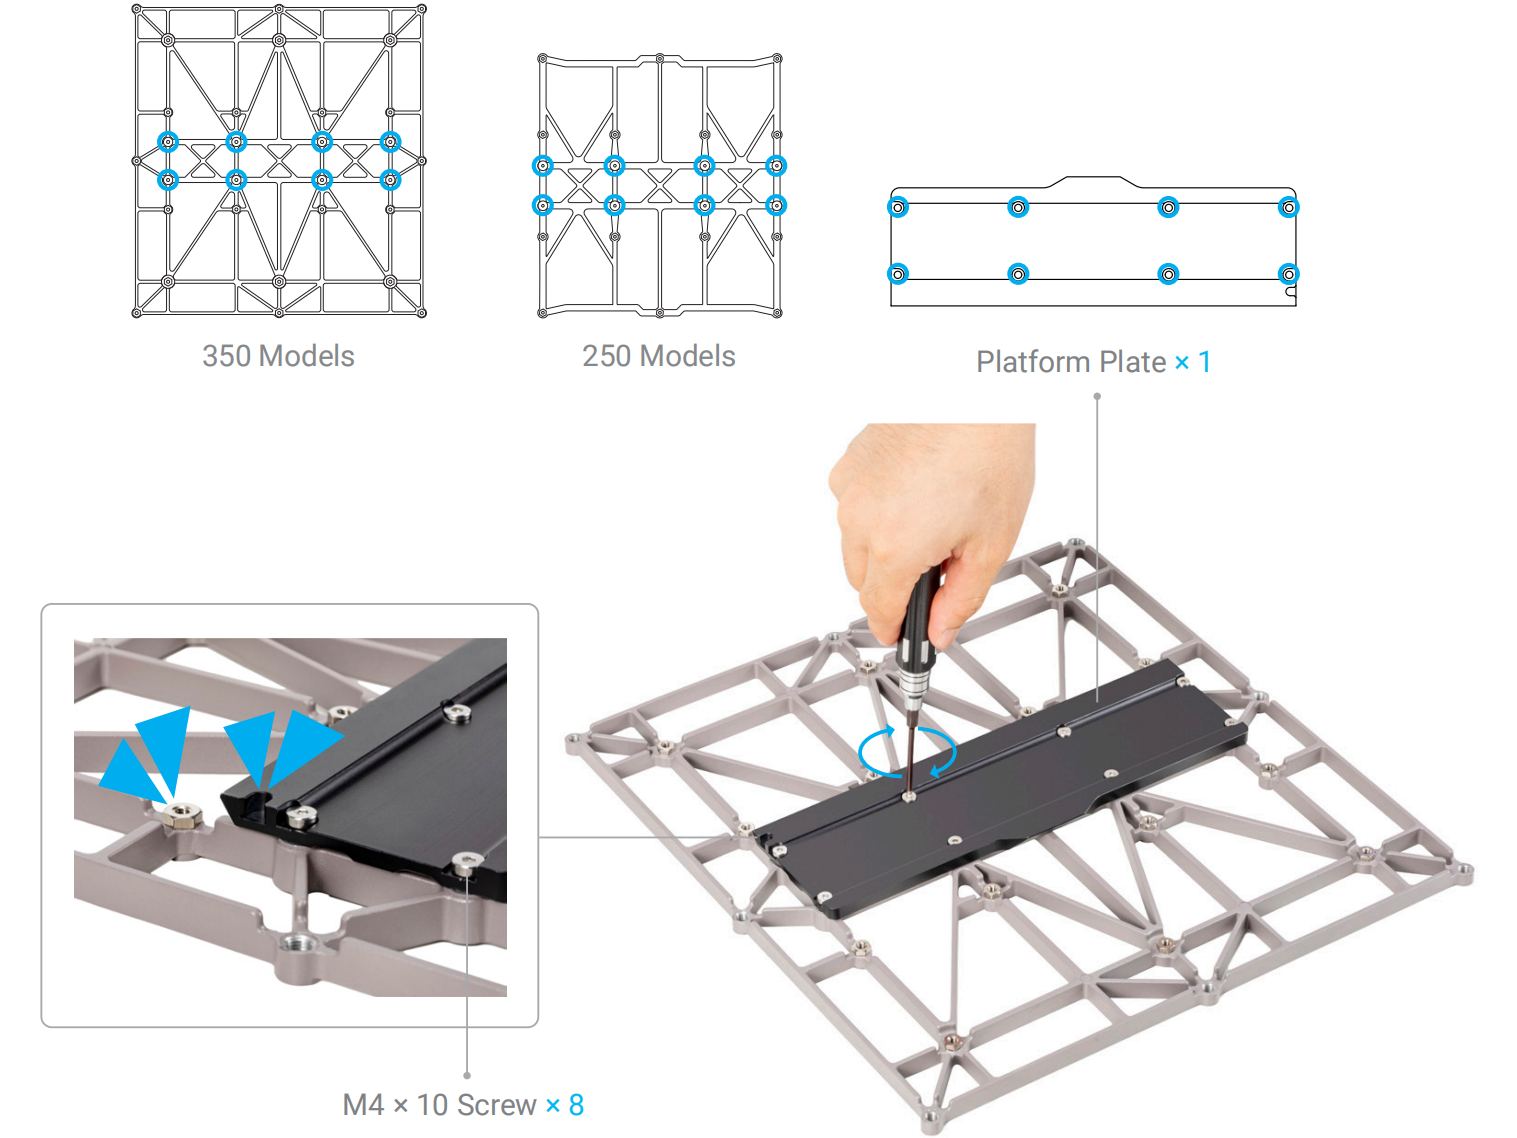
- Attach the platform plate to the original support platform that came with the machine.
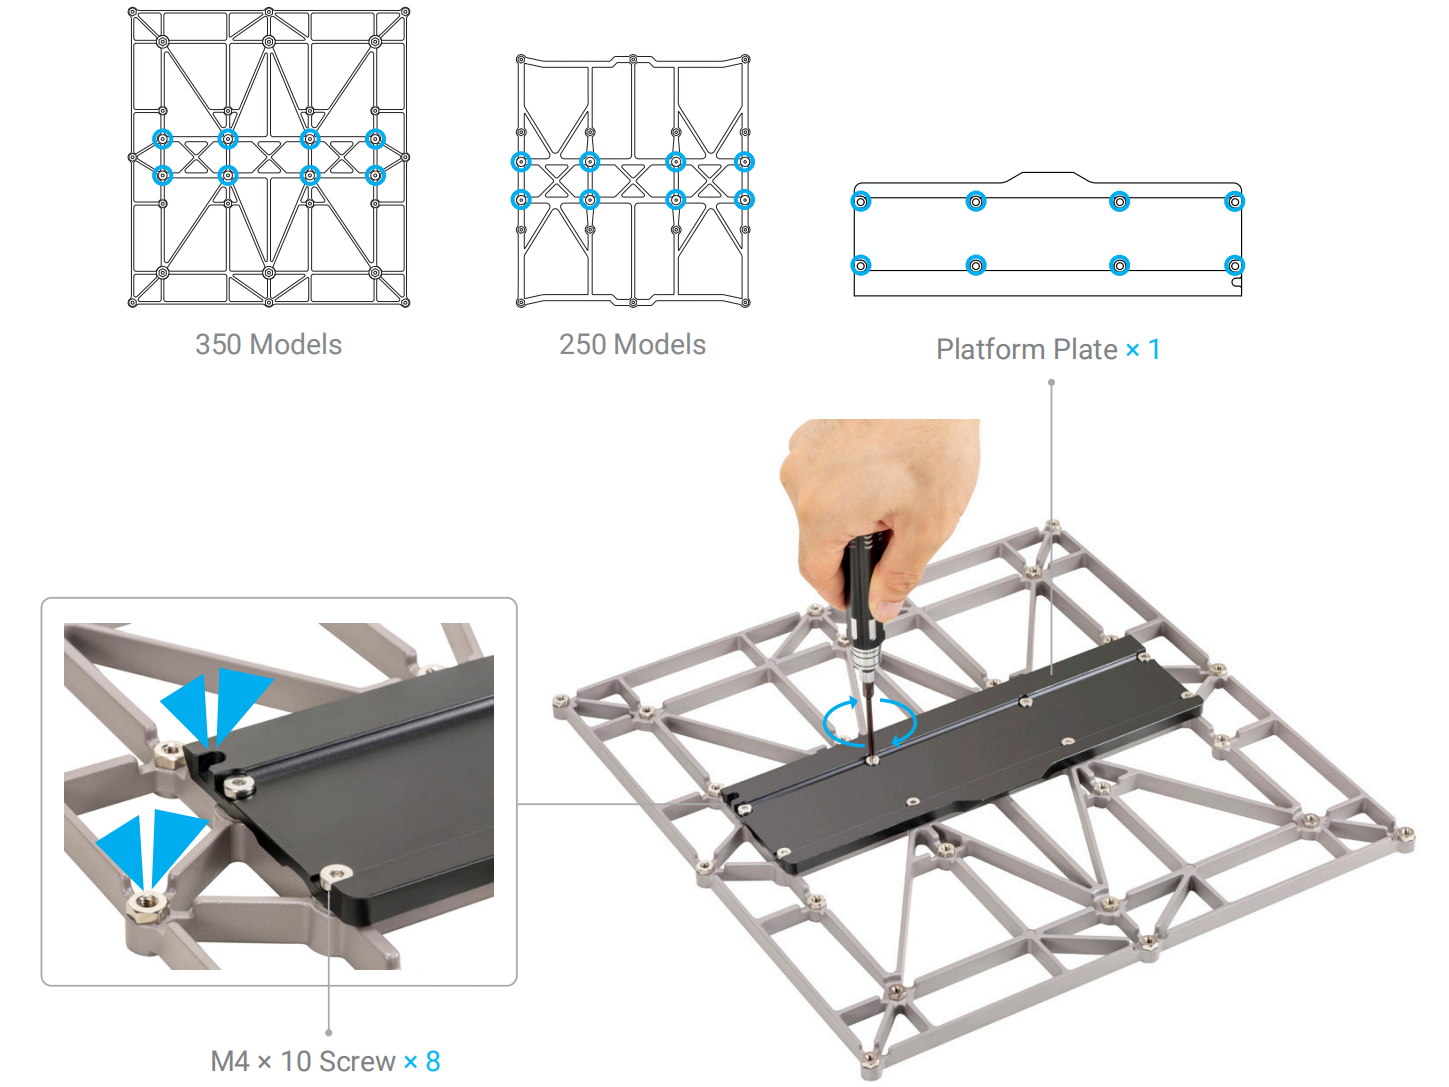
The original support platform that came with the machine should be used with the 3D printing function.
If you already have the 3D printer installed on your machine, there is no need to detach the heated bed.
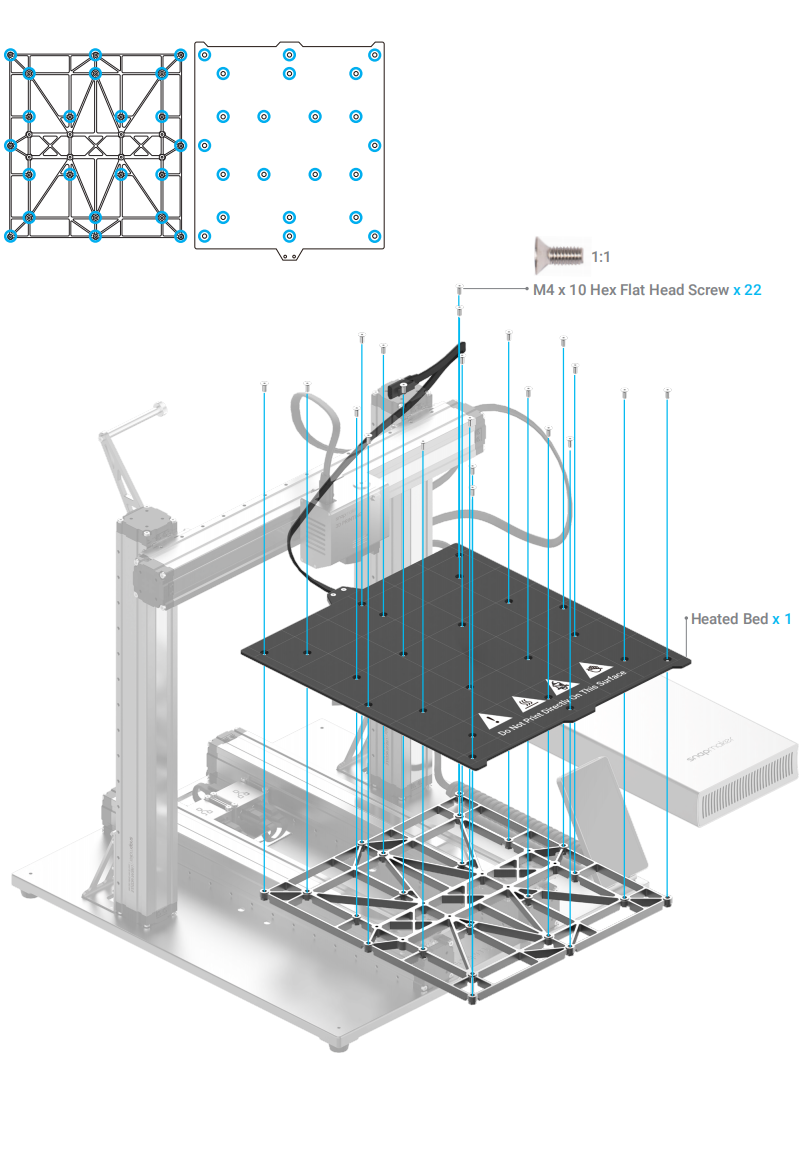
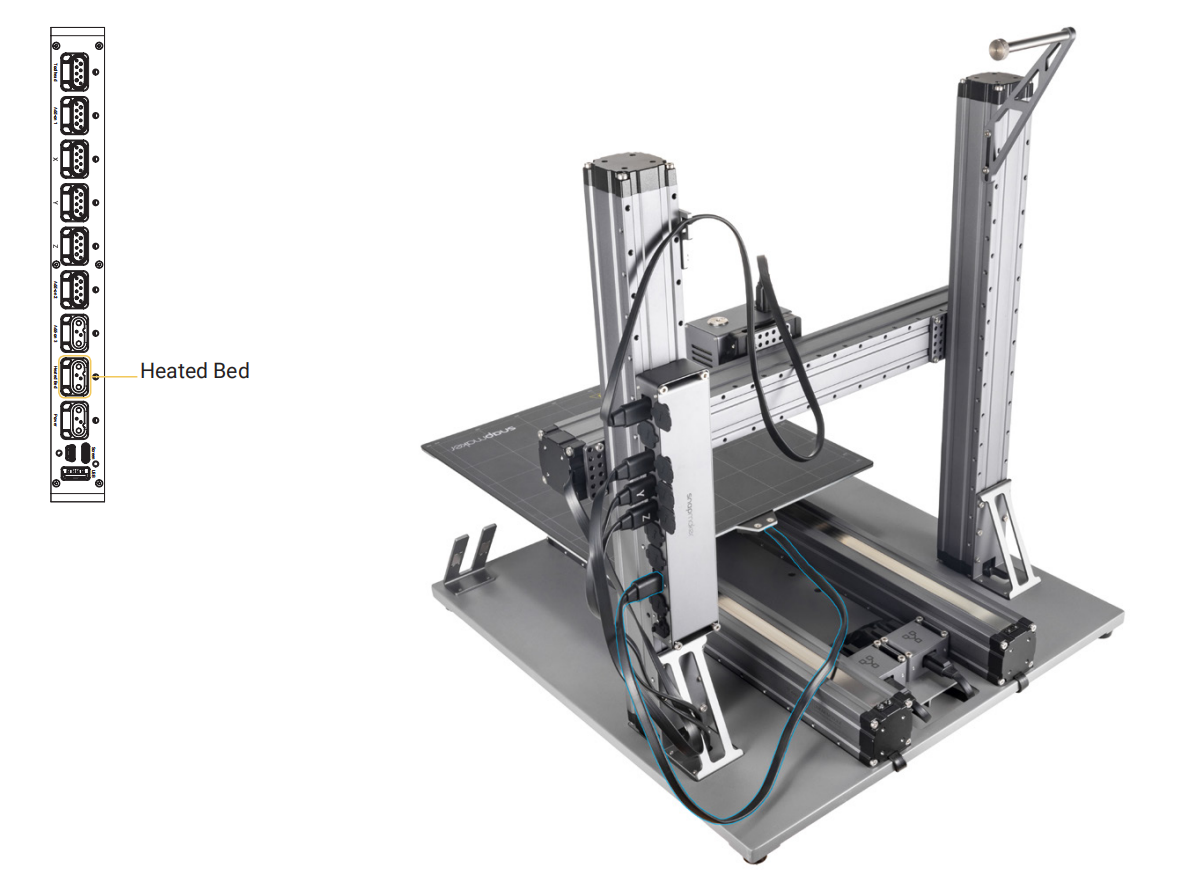
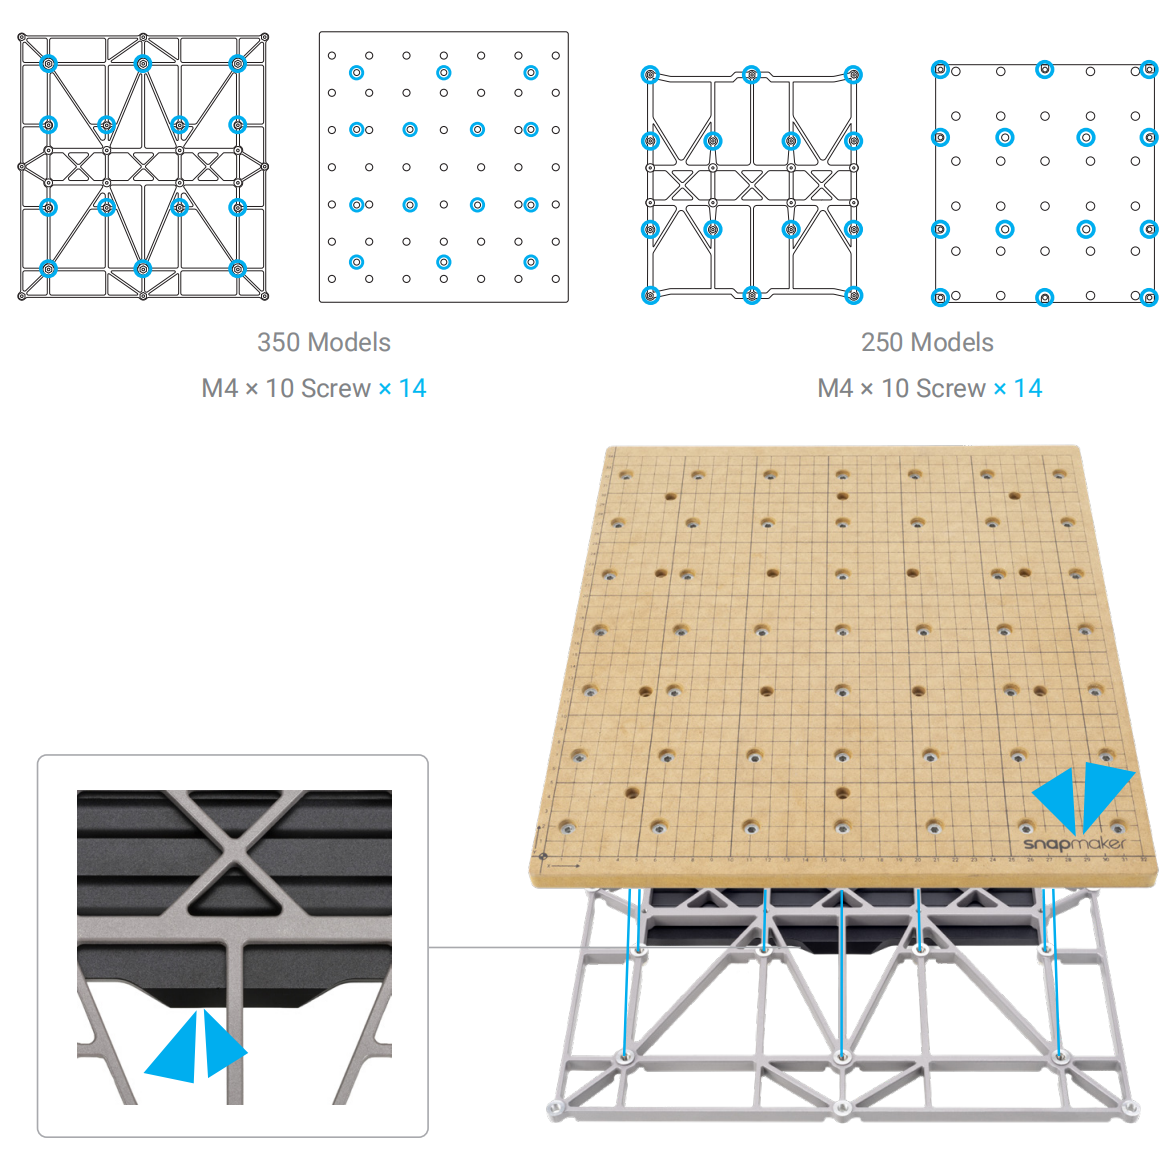
- Attach the heated bed to the support platform.
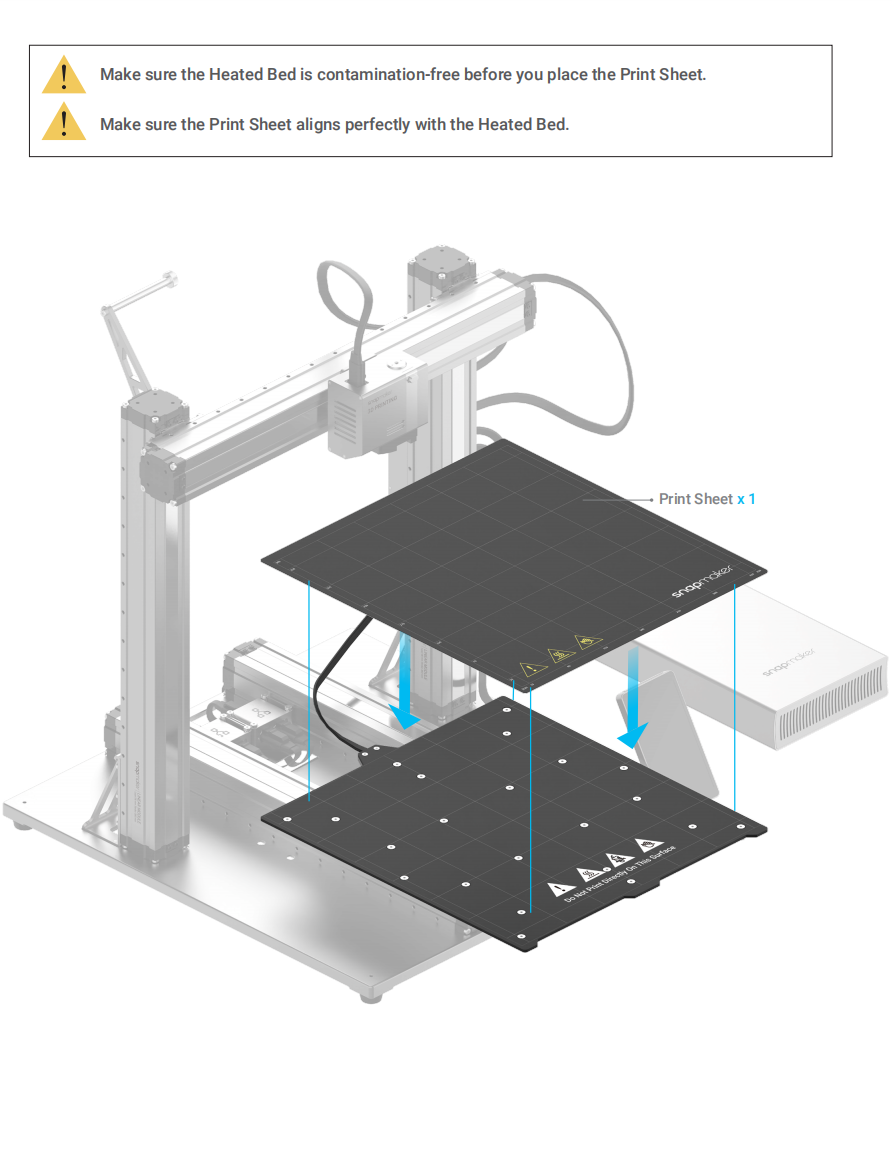
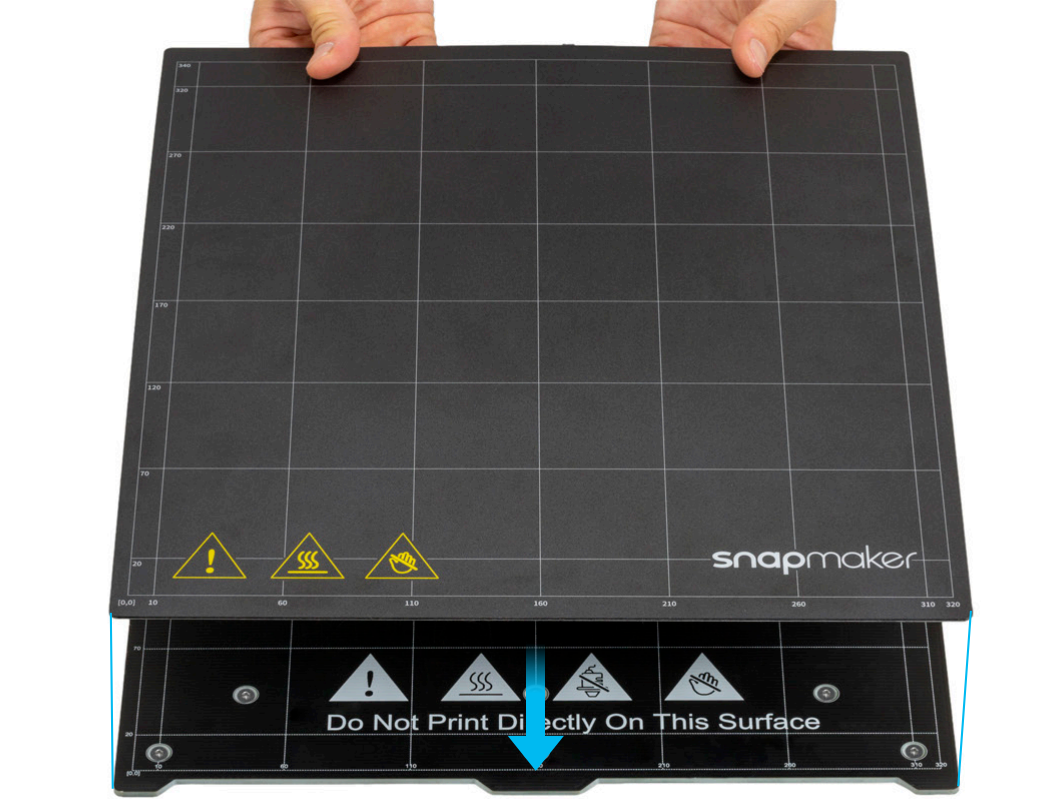
- Place the print sheet.
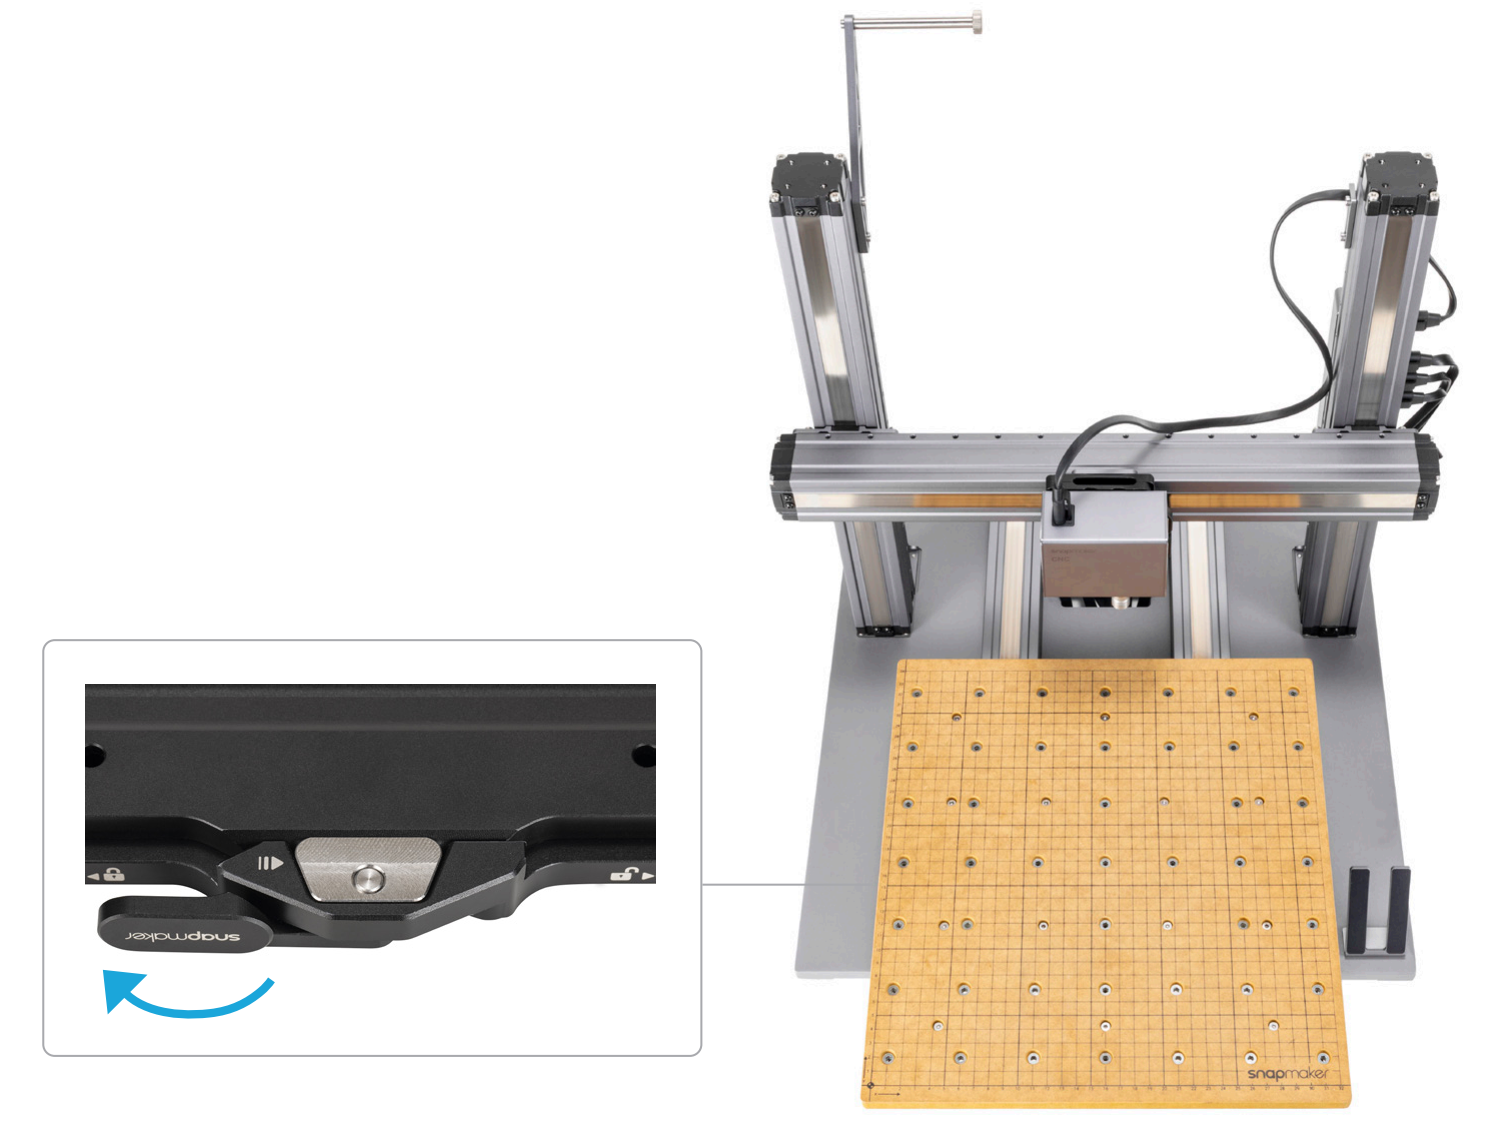
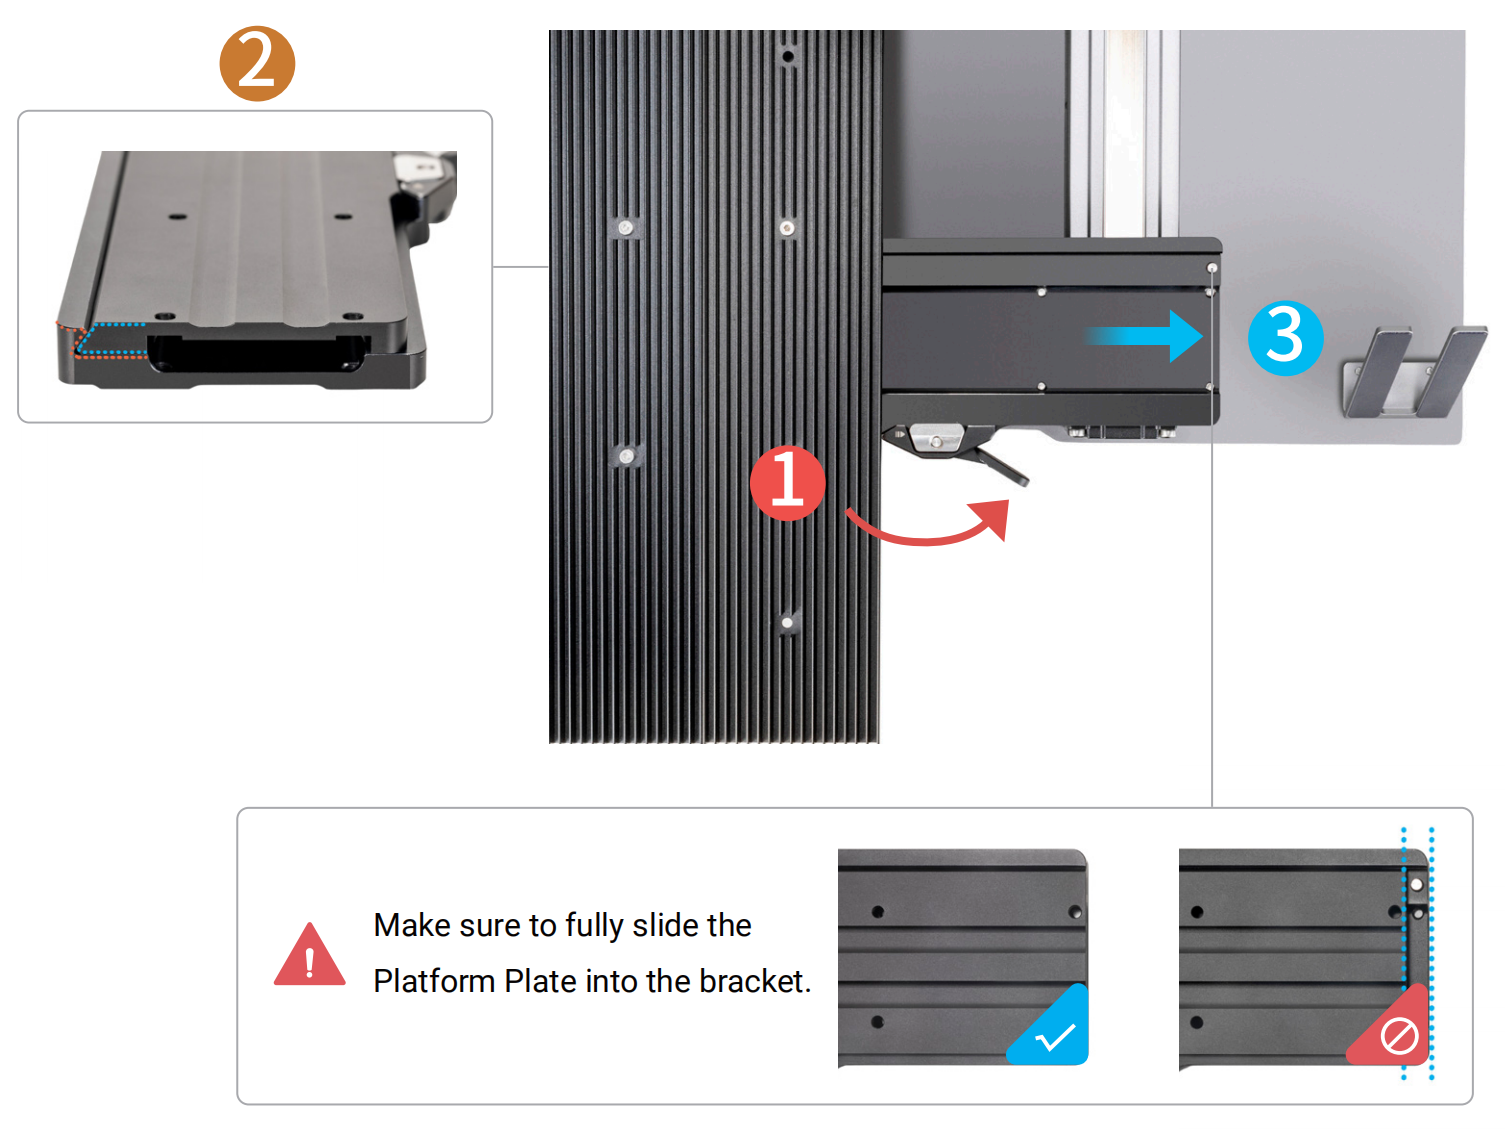
- Loosen the handle of the platform bracket. Fit the platform plate into the platform bracket, and then slide the plate into the bracket.
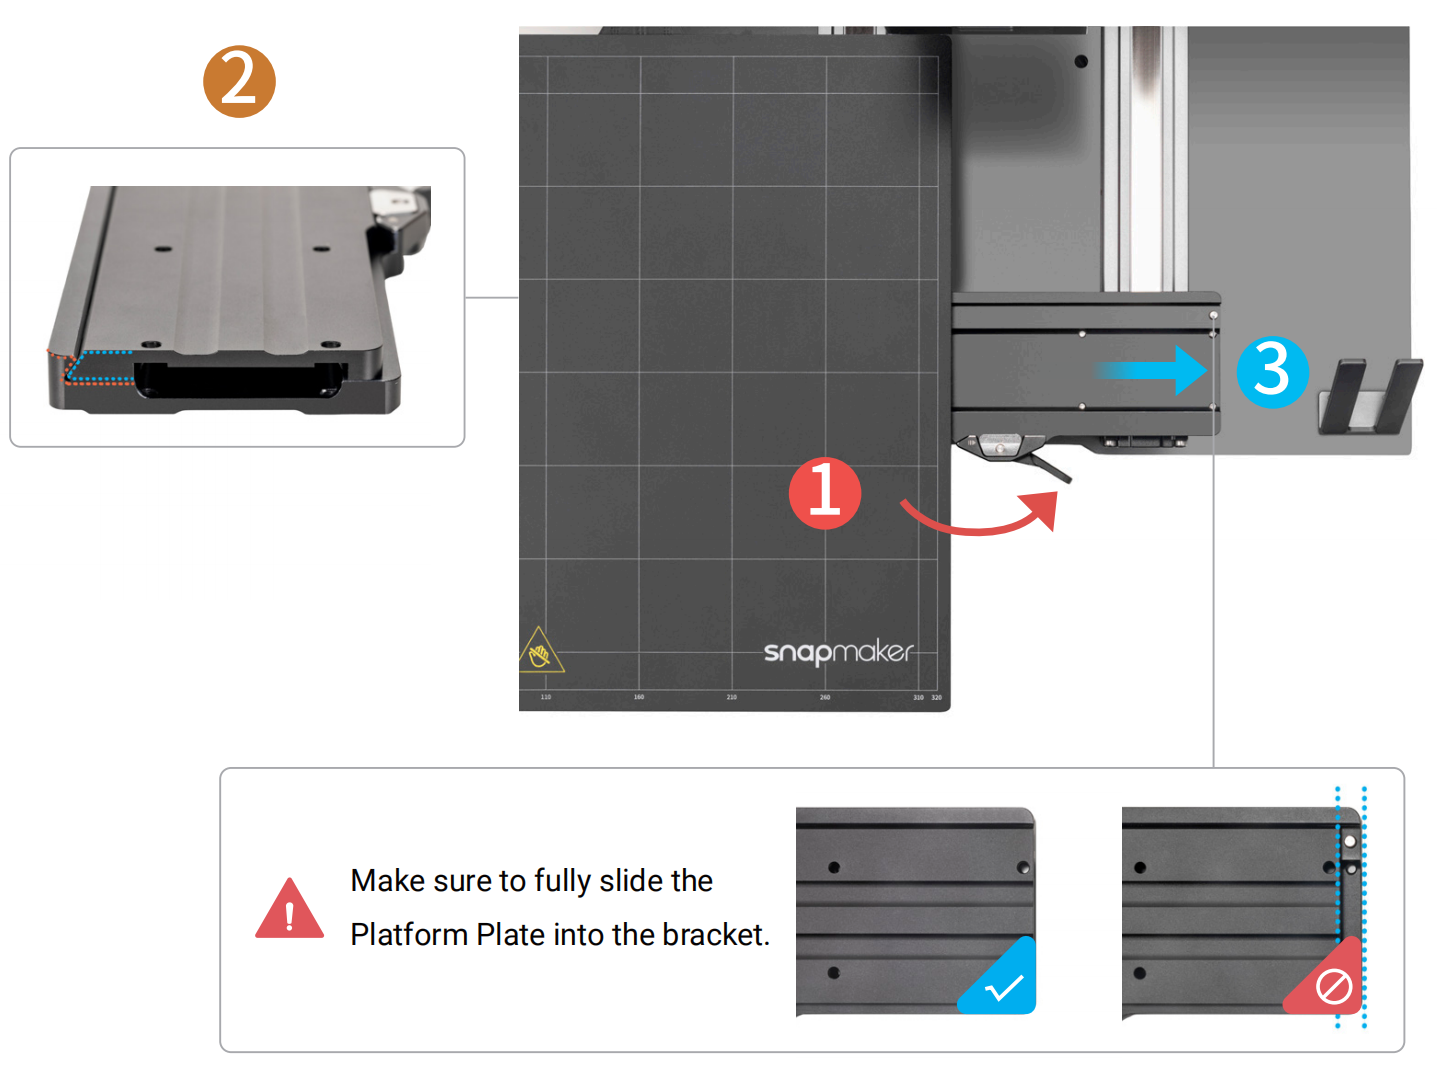
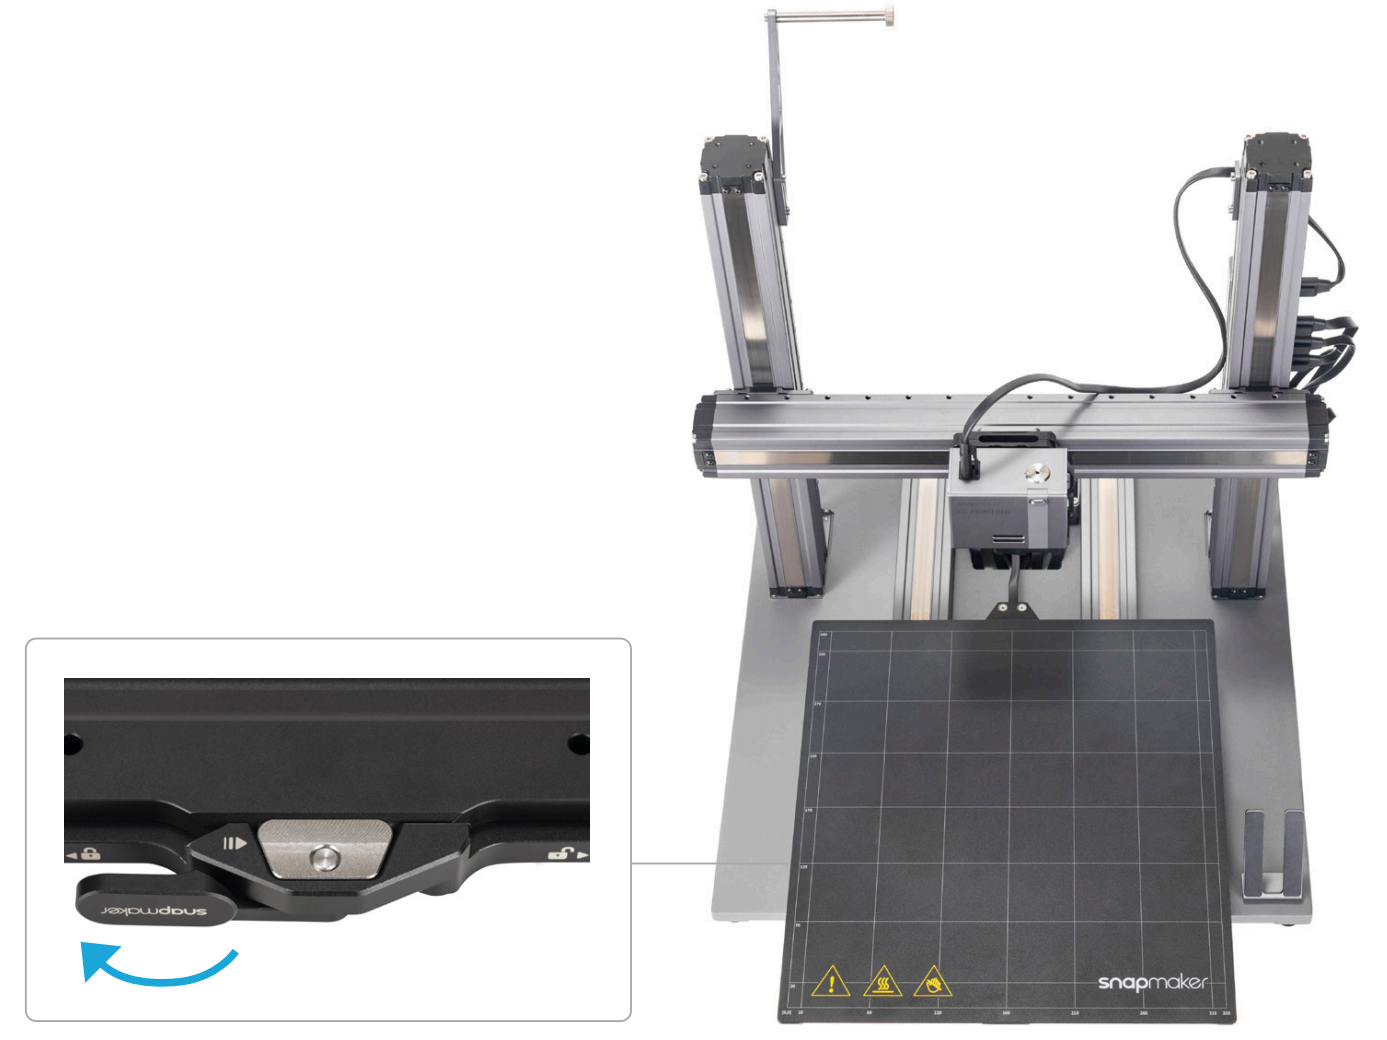
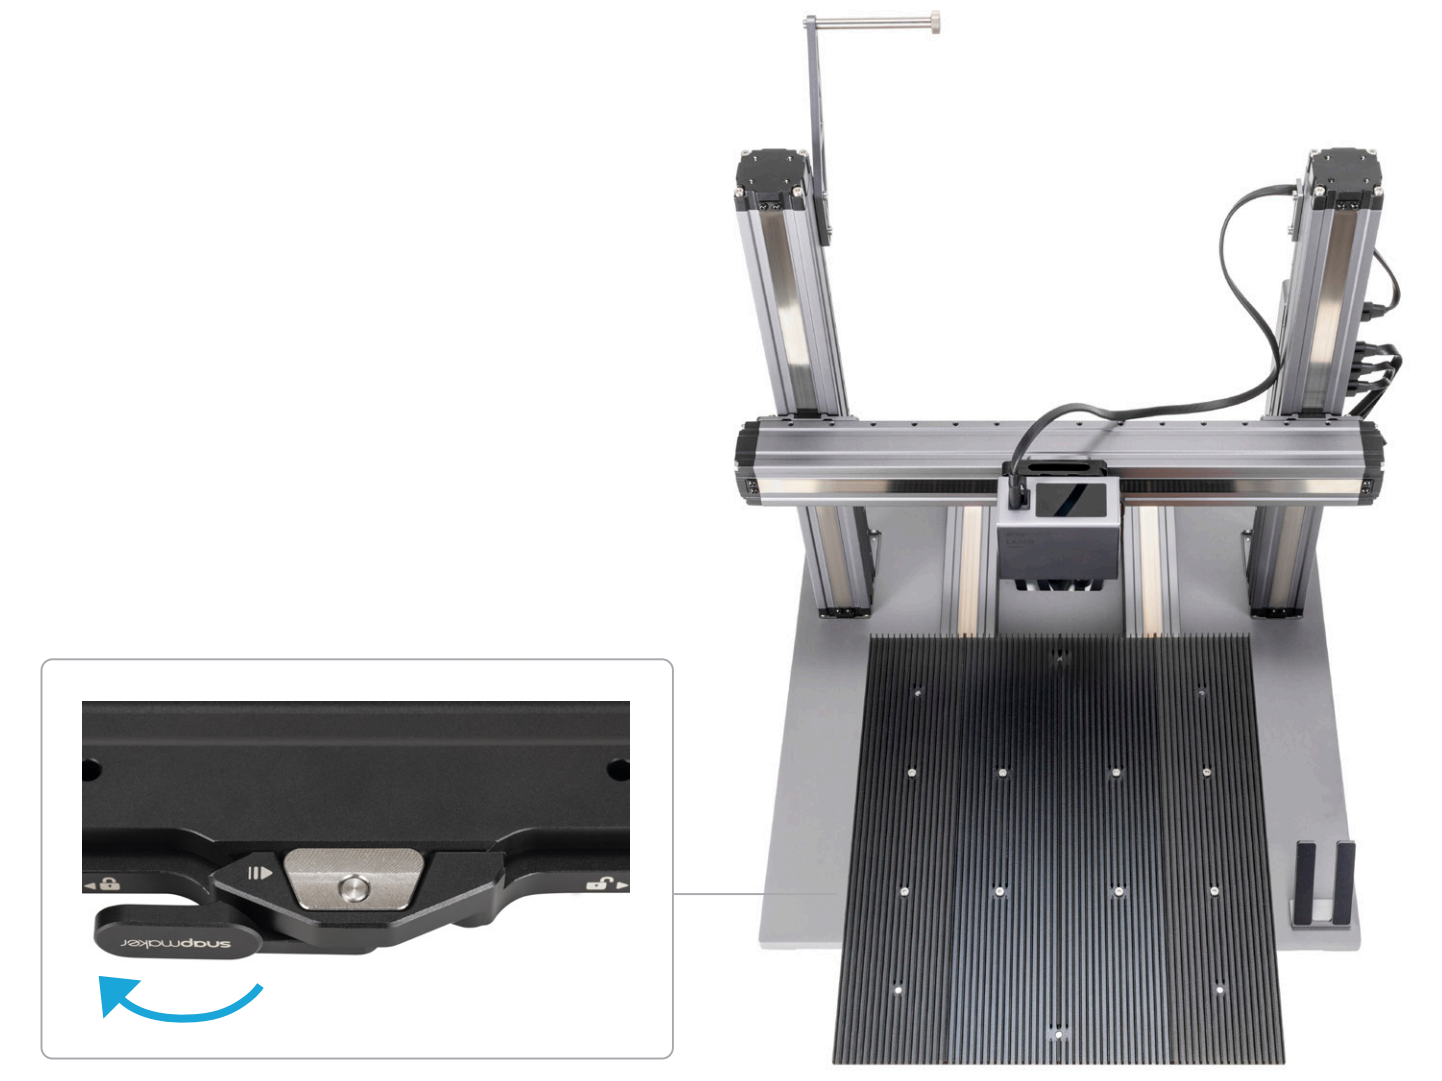
- Tighten the handle of the platform bracket.
- Connect the heated bed with the controller.
¶ Laser Engraving and Cutting
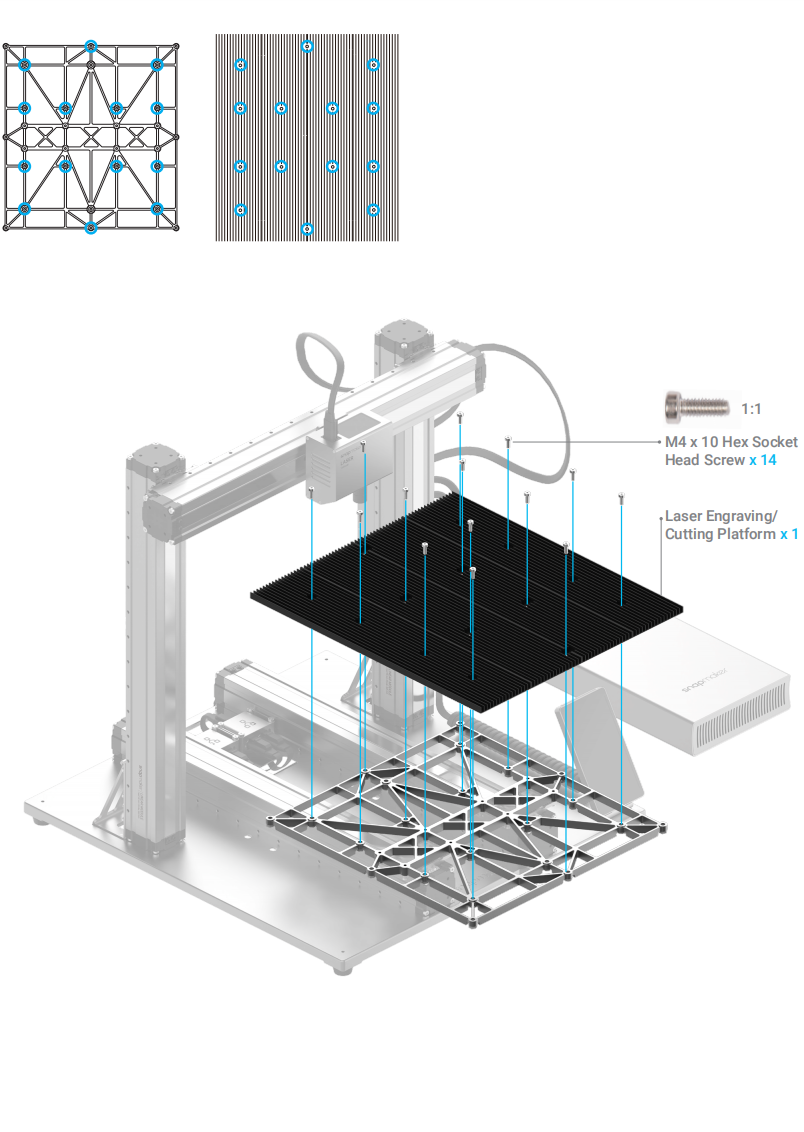
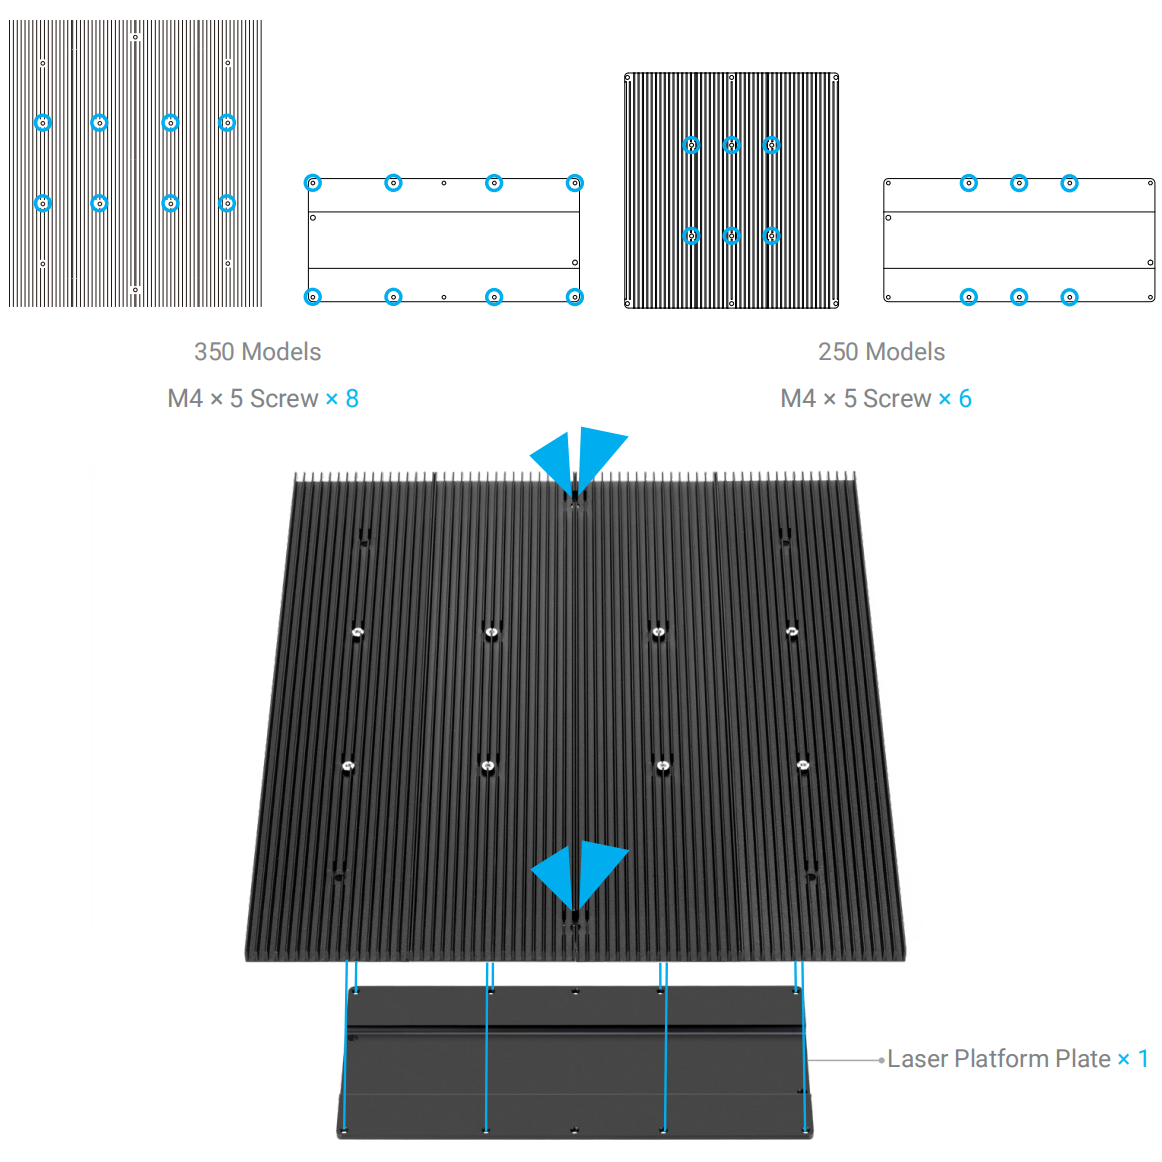
- Attach the laser platform plate to the laser engraving/cutting platform.
- Loosen the handle of the platform bracket. Fit the laser platform plate into the platform bracket, and then slide the plate into the bracket.
- Tighten the handle of the platform bracket.
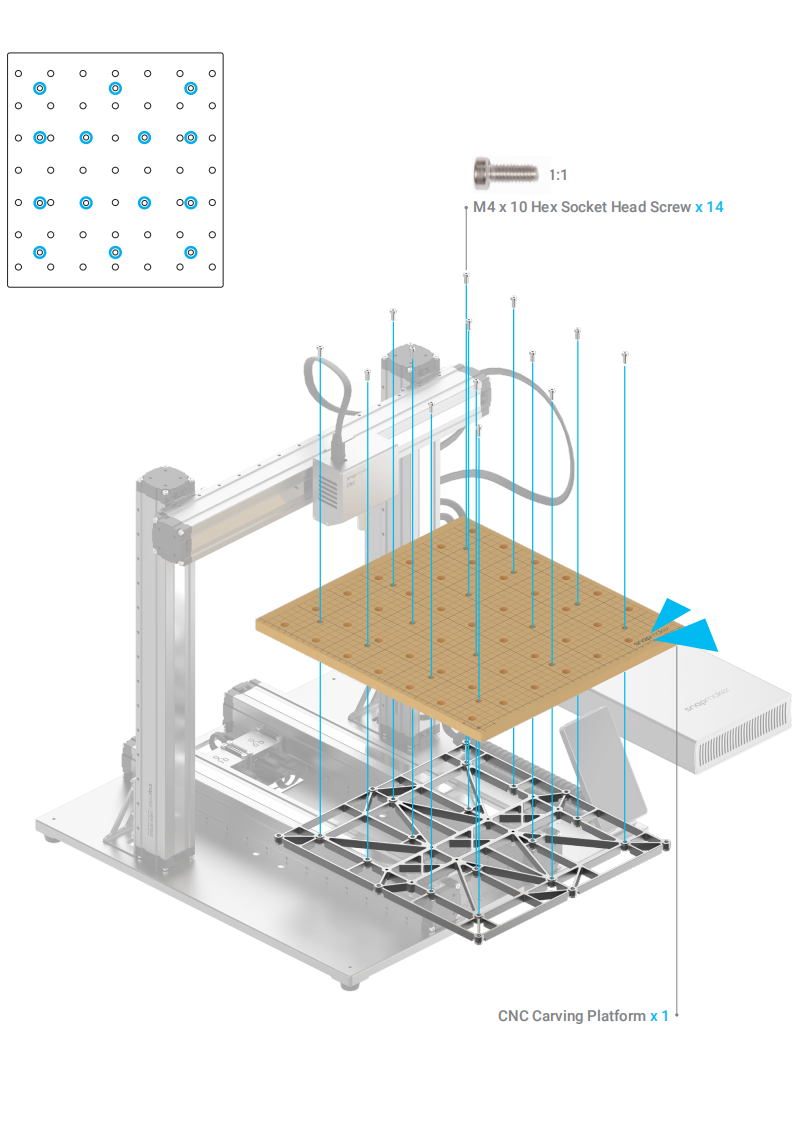
¶ CNC Carving
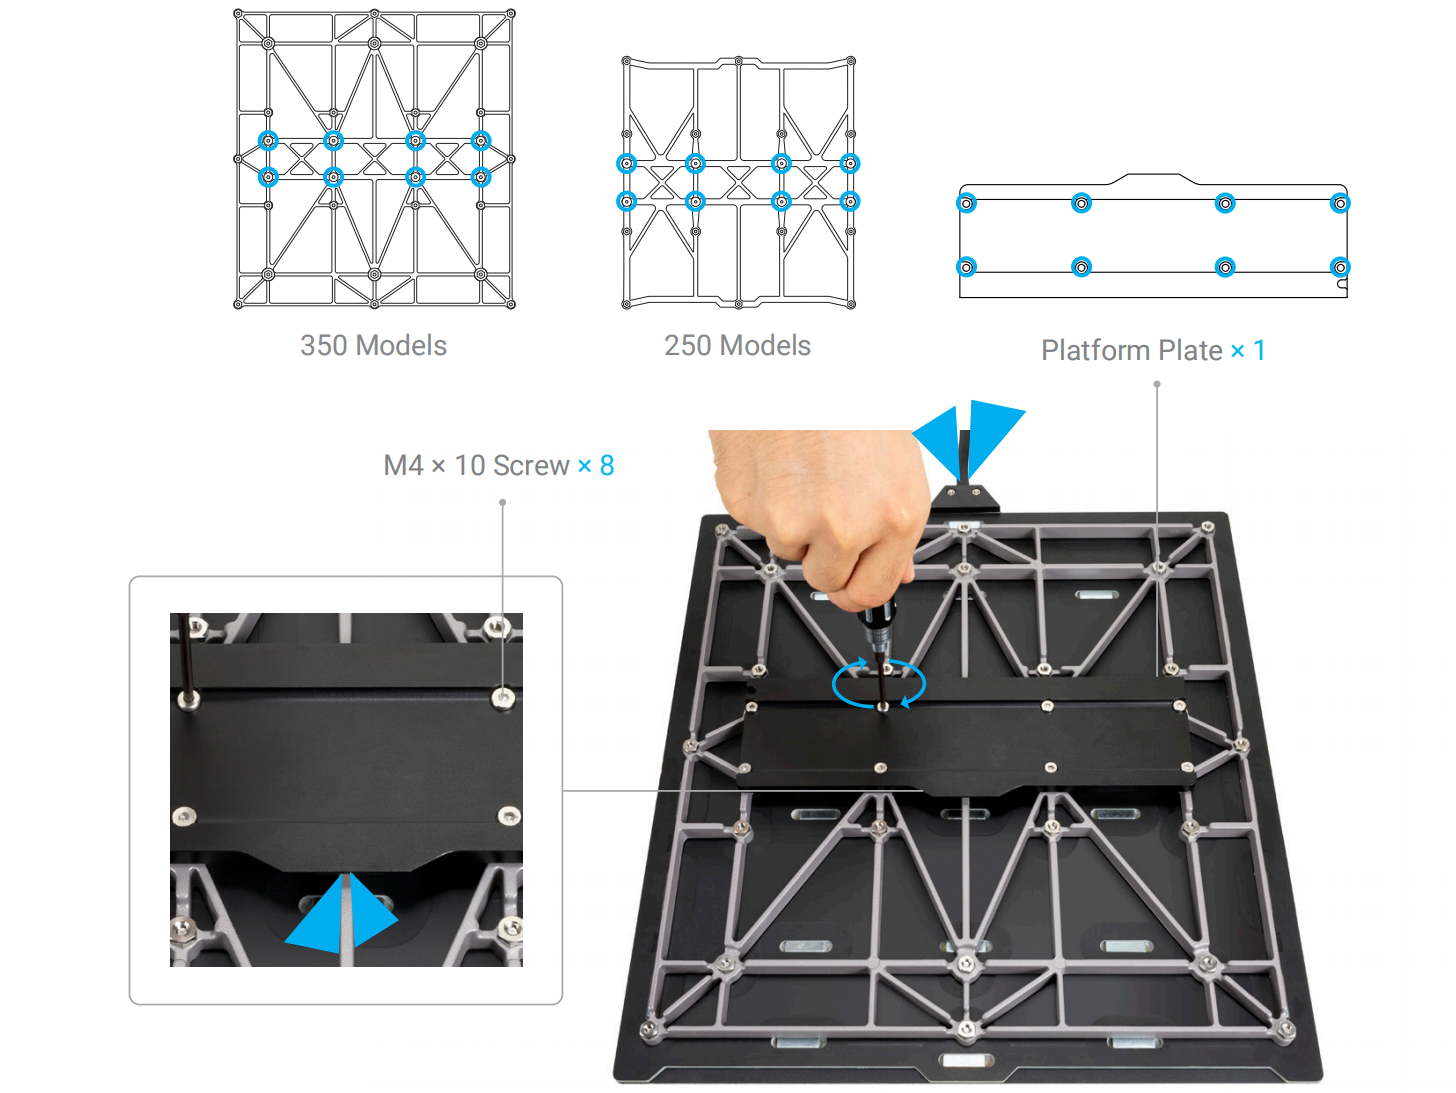
- Attach the platform plate to the support platform.
The new support platform is only compatible with the CNC function, as it is not compatible with 3D printing function.
- Attach the CNC carving platform to the support platform.
- Loosen the handle of the platform bracket. Fit the platform plate into the platform bracket, and then slide the plate into the bracket.

- Tighten the handle of the platform bracket.